


Managing employee or student leave requests can get messy if handled through emails or paper forms. A leave request form in WordPress simplifies this process, allowing HR teams, managers, or school administrators to collect and organize requests digitally.
If your website runs on WordPress, you don’t need advanced coding skills to build such a form. With the help of form builder plugins, you can create a professional and functional leave request form in just a few steps.
Quick Overview
This guide walks you through two simple methods to create a leave request form in WordPress:
Tools Used: MetForm and Elementor
You’ll learn how to:
✅ Create a leave request form in 2 methods (using a pre-made template and building from blank form)
✅ Add and edit form fields (e.g., leave dates, reason, manager details).
✅ Design and style your form with Elementor.
✅ Preview and publish your form for live use.
Why the Online Leave Request Form is Important
Using a leave request form in WordPress offers several benefits:
- Efficiency: Automates the process, reducing back-and-forth communication.
- Organization: Keeps all requests in one place, making tracking easier.
- Tillgänglighet: Employees or students can access the form anytime, anywhere.
- Professionalism: Creates a structured system that looks more credible than ad-hoc emails.
Now, the question is, what is the best way to create an online leave request form in WordPress?
The answer is so simple. You can create a leave request in WordPress with the use of a plugin, and our recommendation is MetForm. Here’s why:
1. MetForm is built as an add-on for Elementor, which means you can visually design your form fields and layout without needing to code.
2. For a leave request form, you can include start and end date of leave, a dropdown for types of leaves, a text area for reasons, etc. Each section can be rearranged as you wish.
3. You can build a multi-step form. For example, step 1: basic info; step 2: leave details; step 3: submission or villkorlig logik (if more than X days, show additional justification).
4. The forms are mobile/tablet/desktop friendly. This is very helpful when a mobile or tablet is the user’s option.
How to Create a Leave Request Form in WordPress
There are two main approaches to creating a leave request form in WordPress. One is using a ready-made template, and the other method is starting with a blank form. Both methods are highly customizable with a straightforward process using MetForm.
Now, let’s begin with the first method:
Method 1: Using a Ready-made Template
The easiest way to build a leave request form is by using a pre-designed template provided by popular WordPress form builder plugins like MetForm.
Step 1: Create a New Form With Elementor:
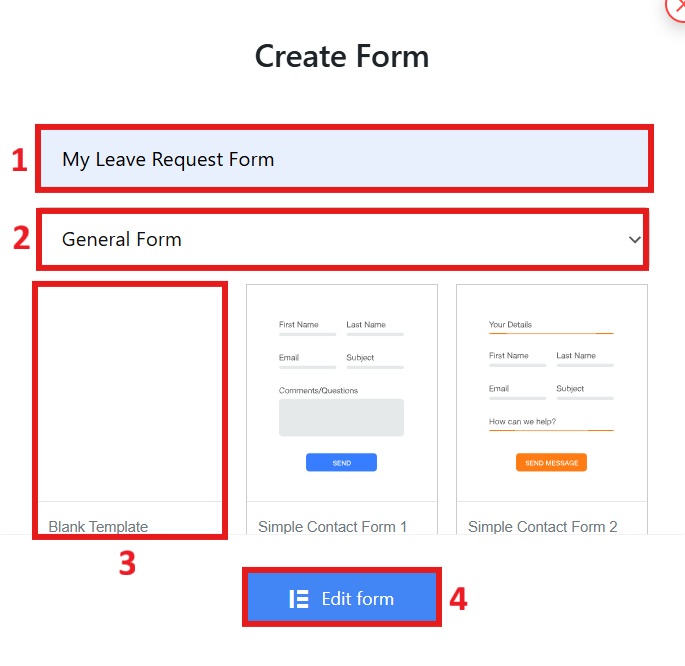
From your WordPress dashboard, proceed to MetForm och klicka Lägg till ny.
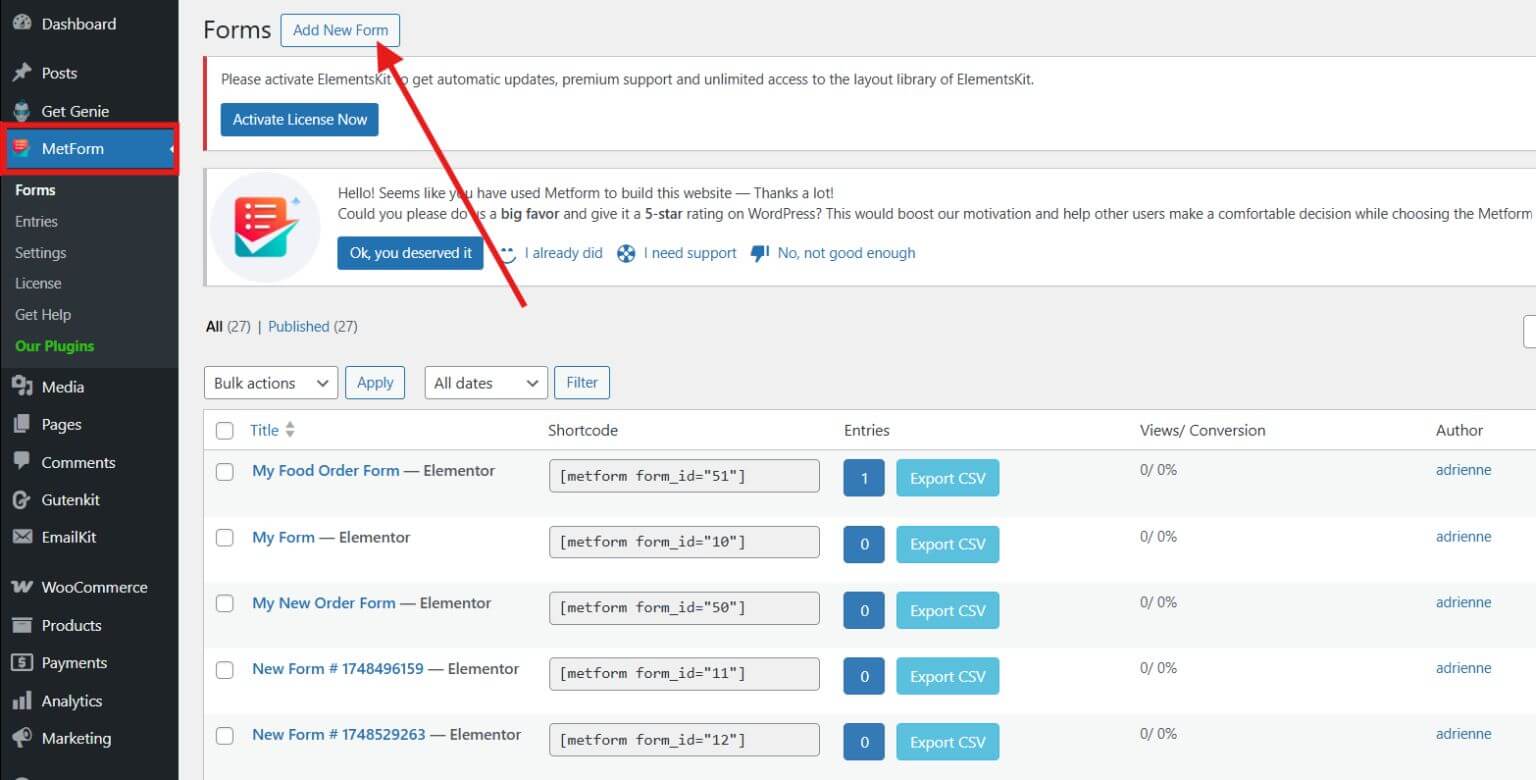
A pop-up will show up. Just enter a name for your form, then select Allmän form. Scroll down until you find the Request for Leave Form. Click on it and click Redigera formulär.
Step 2: Add New Fields:
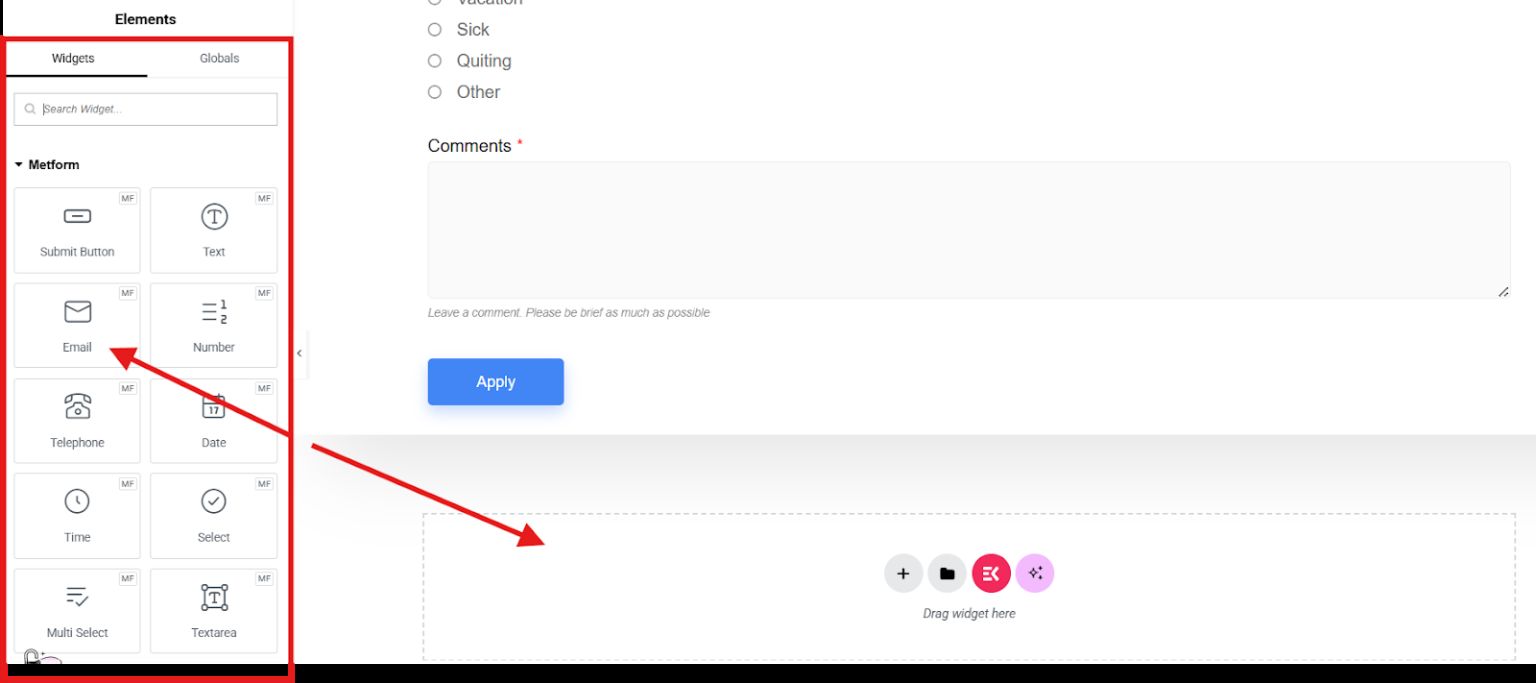
Though the template consists of all the information needed, you can still customize the form and even add additional fields that you think are necessary to complete your form. At the left-hand corner of your Elementor editor page, you can find the widgets. If you want to add additional fields, just drag them to the center.
Step 3: Design your Leave Request Form:
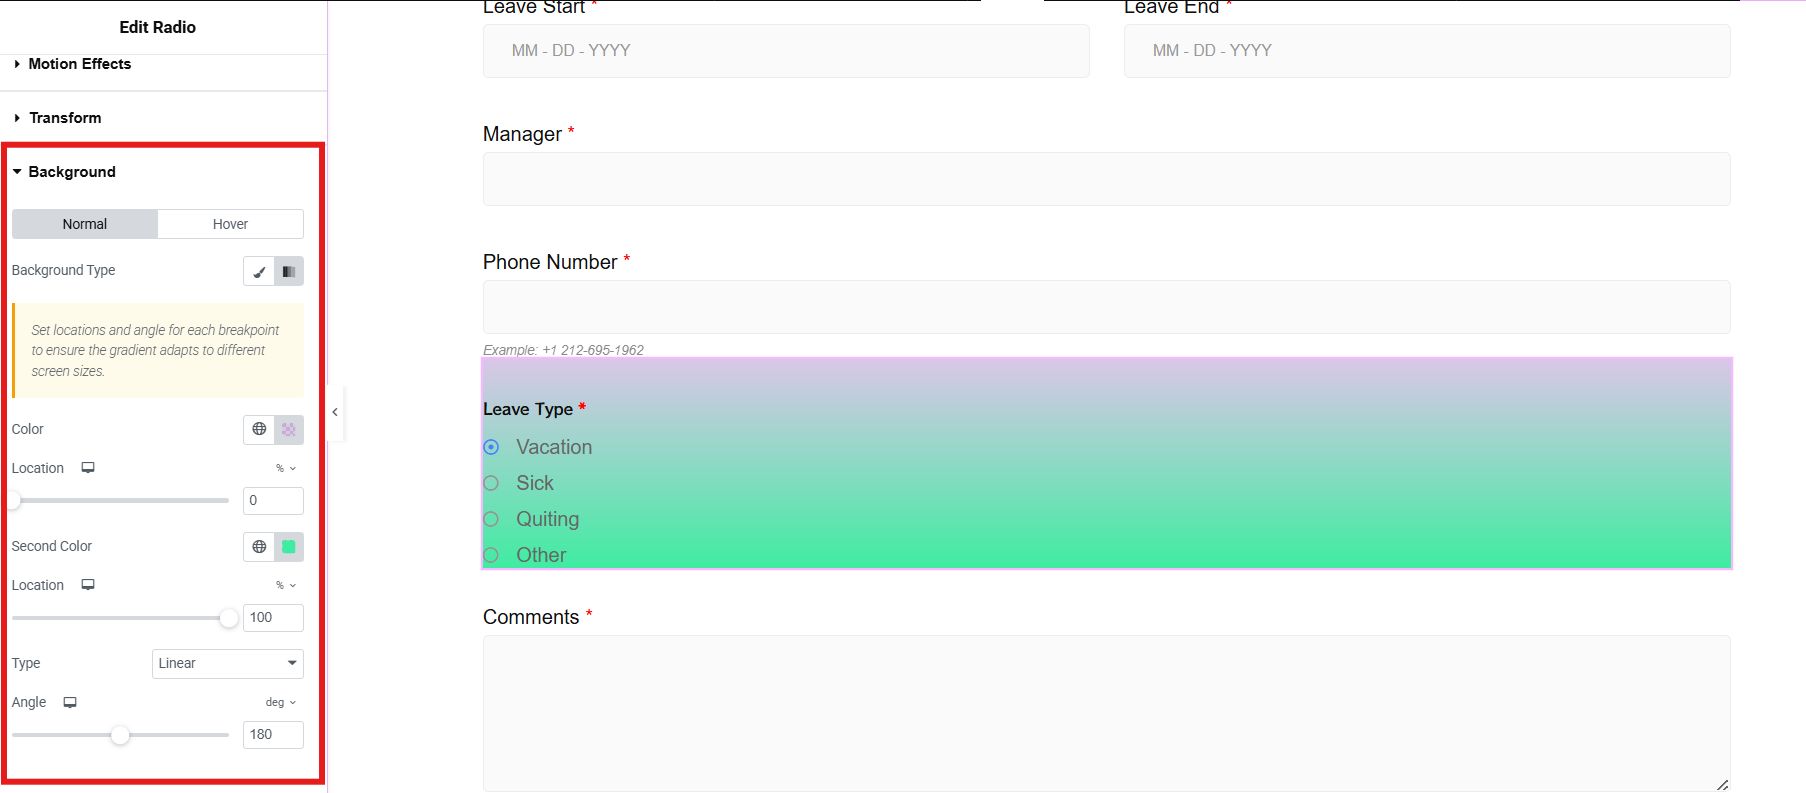
In the content, style, and advanced settings sections, you can enhance the appearance of your leave request form.
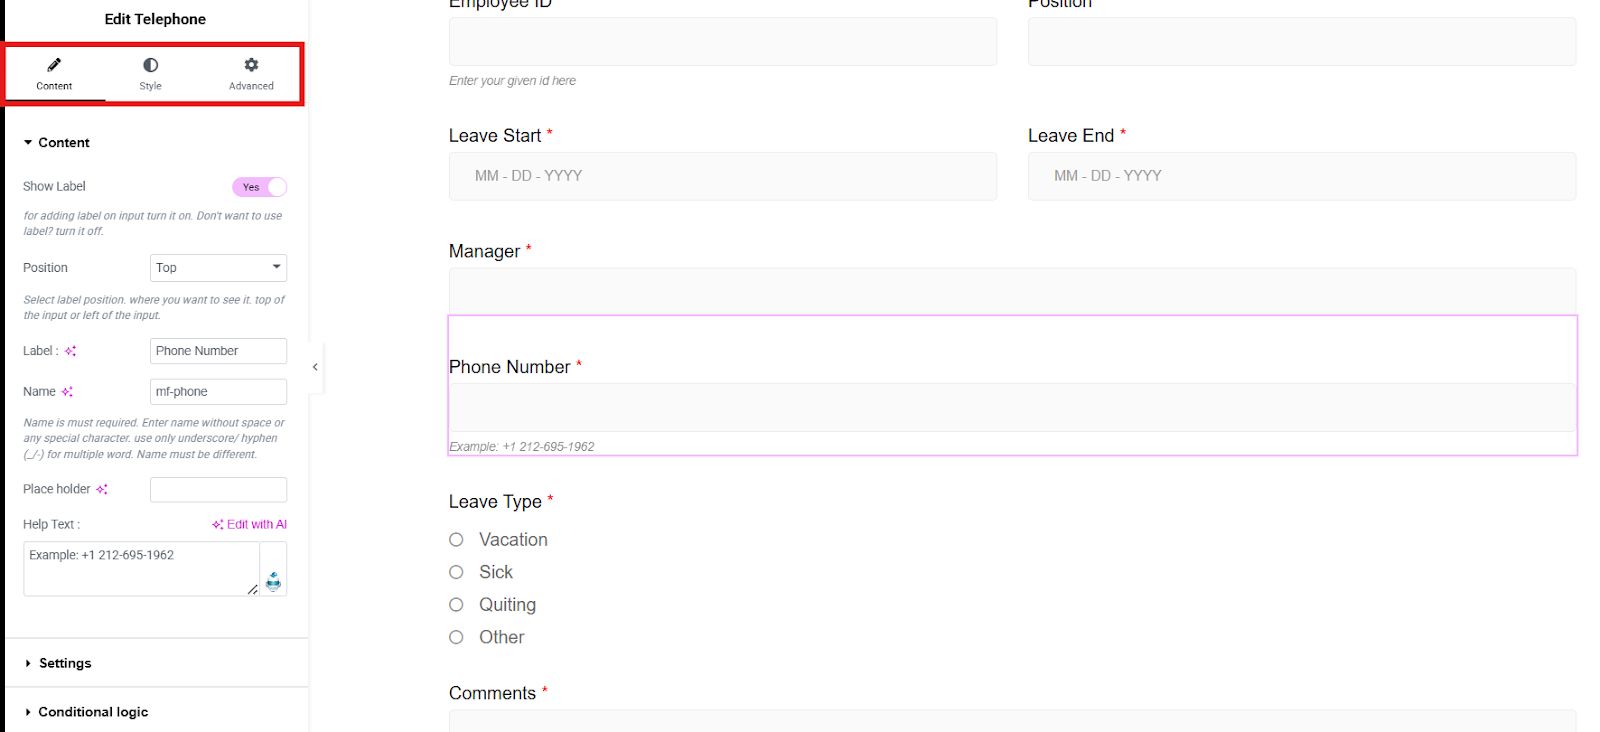
For instance, in the advanced settings, you can add a background to any section of your leave request form.
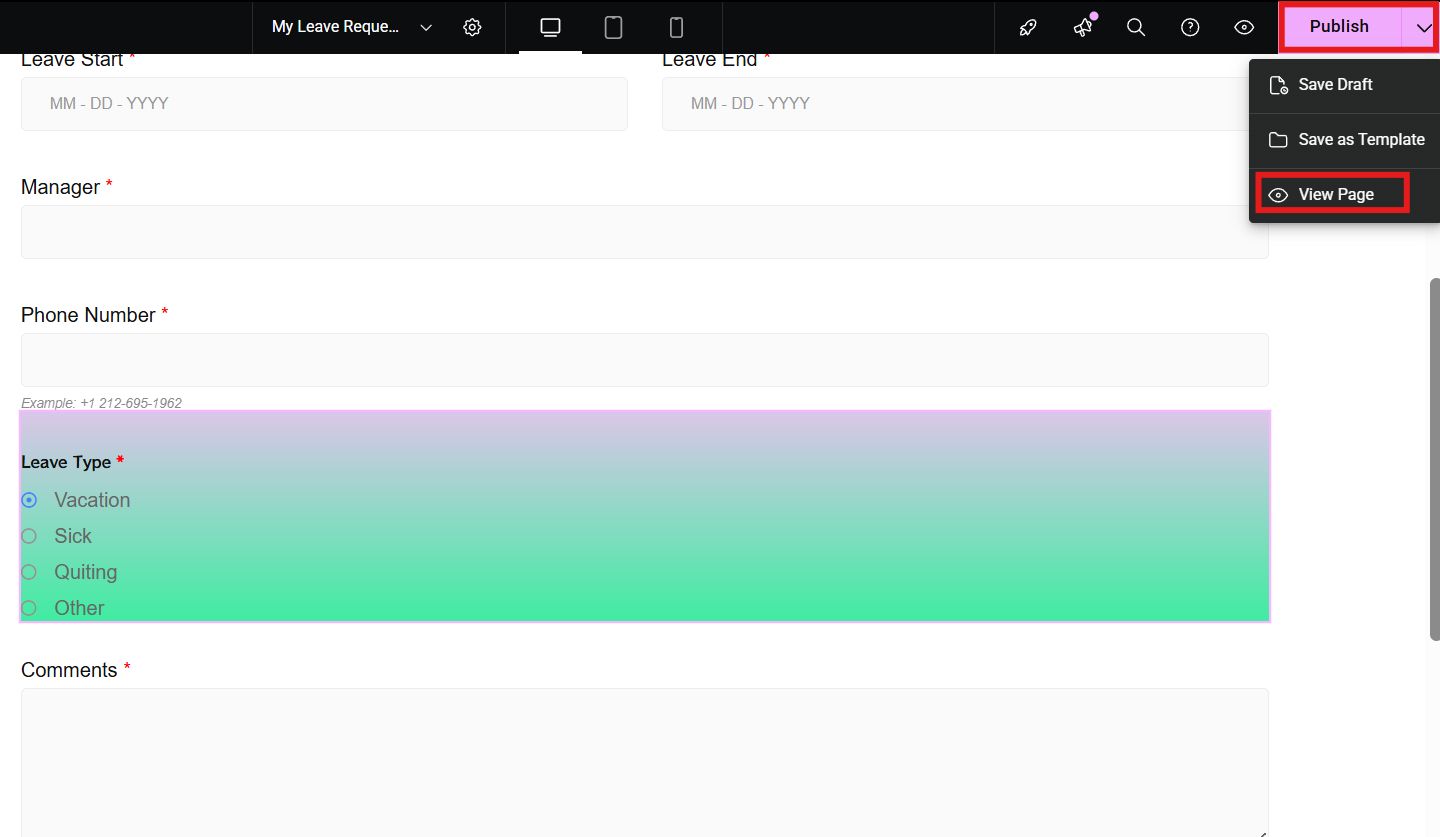
Step 4: Preview and Publish the Form:
Don’t forget to publish your form. But if you want to see what your leave request form look like, you can preview it so that you’ll know what adjustment should be done.
Why use this method?
This method saves time since most of the work is already done. The template is designed carefully and stunningly.
Method 2: Using a Blank Template
If you prefer to tailor every detail of your leave request form, start with a blank form to have full control over the design.
Step 1: Create a New Form With Elementor:
In the WordPress dashboard, go to MetForm och välj Lägg till ny.
A pop-up window will appear. Enter a name for your form and select General form. Choose a blank template and click Edit form.
A pop-up window will appear. Enter a name for your form and select Blank Template. Then click Edit form.
Step 2: Add Form Fields:
Once in the Elementor editor, add each necessary field to create your leave request form. These basic fields are:
- Titel
- Complete name
- Employee ID and position
- Leave start and end dates
- Manager
- Telefonnummer
- Kommentarer
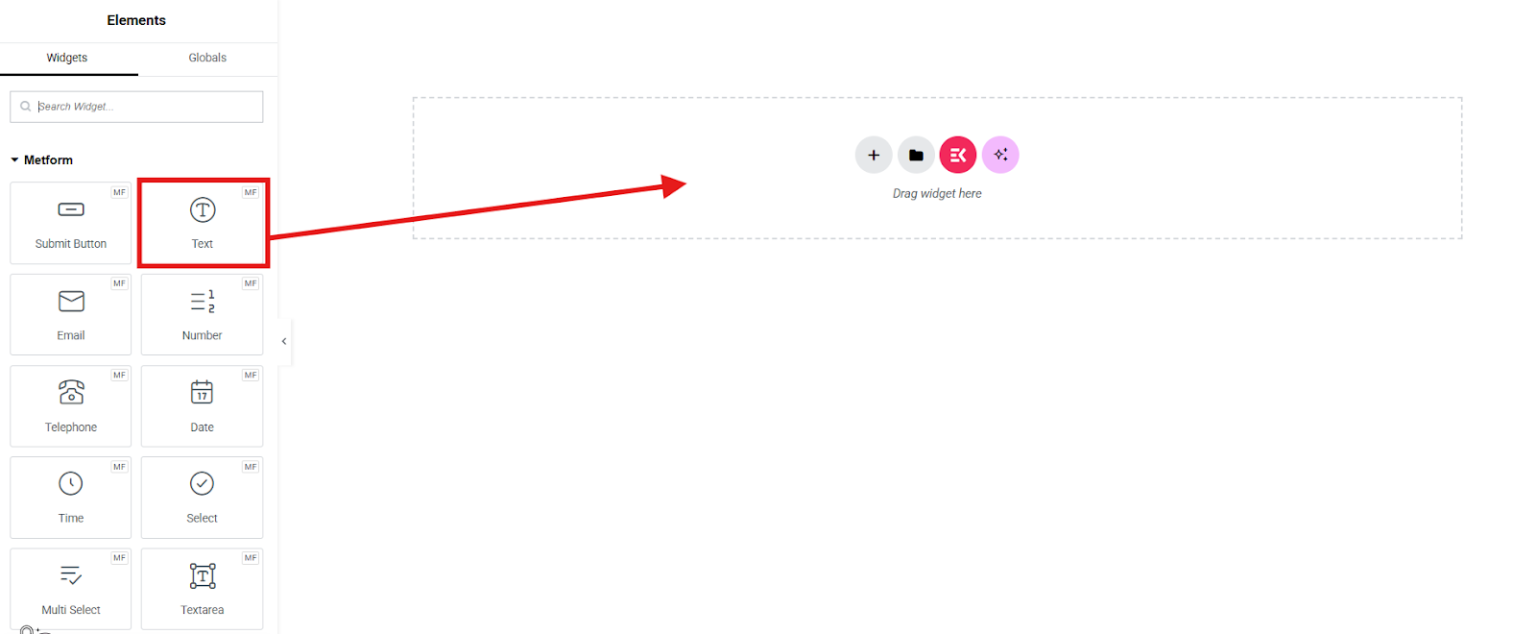
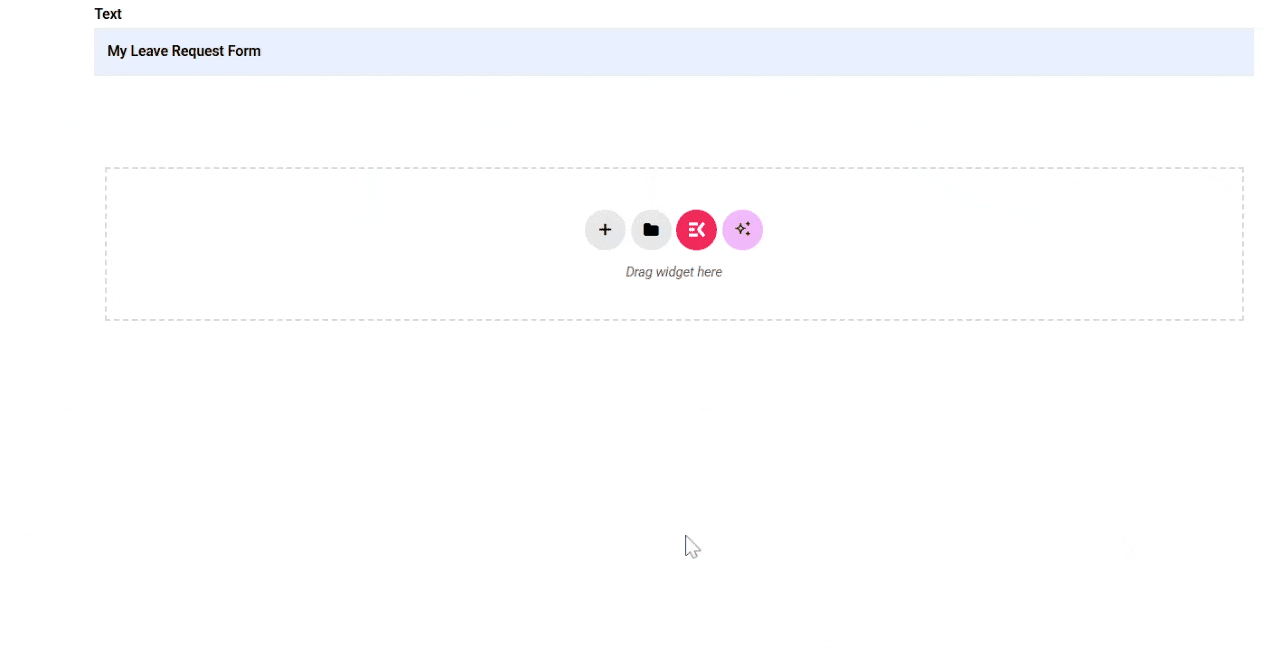
To add the title like “My Leave Request Form”, simply search for the Title widget in the left-hand corner of your screen. Then drag and drop it to the center and enter the title.
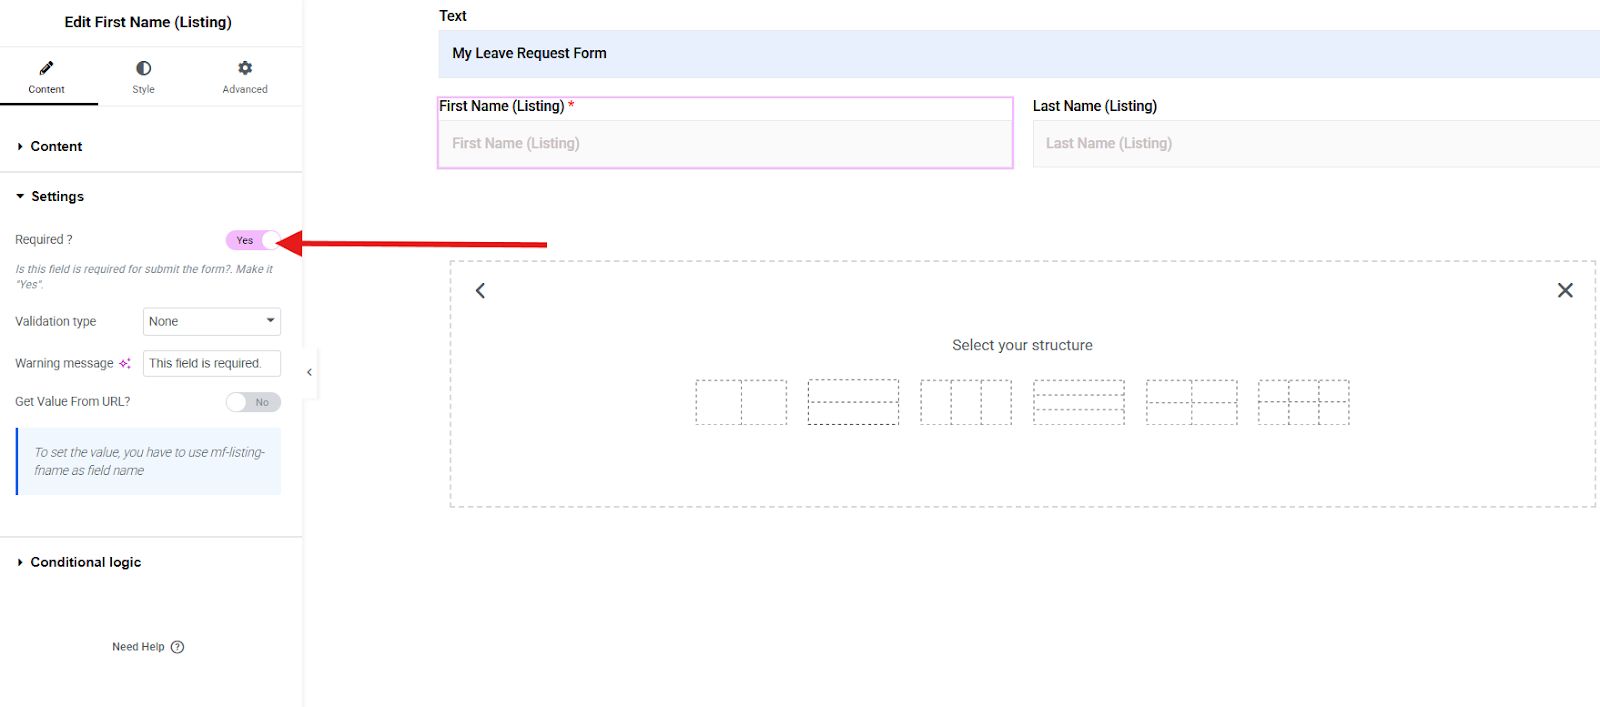
Next, add the complete name section to your form. Since it includes the first and last name, you will need 2 containers. Simply click on the plus icon, select grid, and select 2 columns.
Search for first name and last name widgets. Drag each widget and drop it into each column. To make them required fields, simply go to the settings and enable the required button.
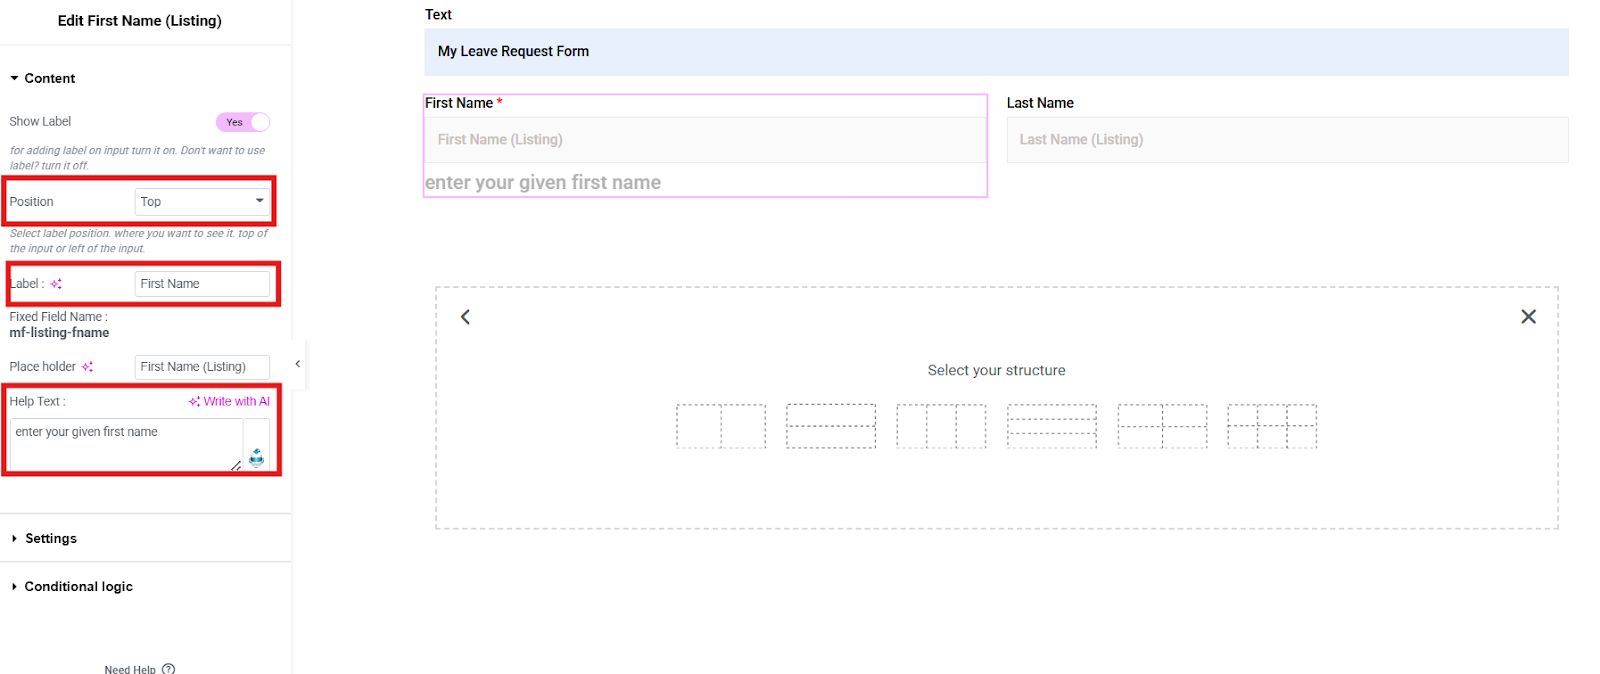
You can also replace the label of each field and even the help text. For example, under the First name field, you can include a text like “enter your given first name” to guide the employee. Also, you can change the position of your label to top or left.
But if you can’t find a widget for your necessary field, just like employee ID, position, etc., simply drag the Text widget to the column.
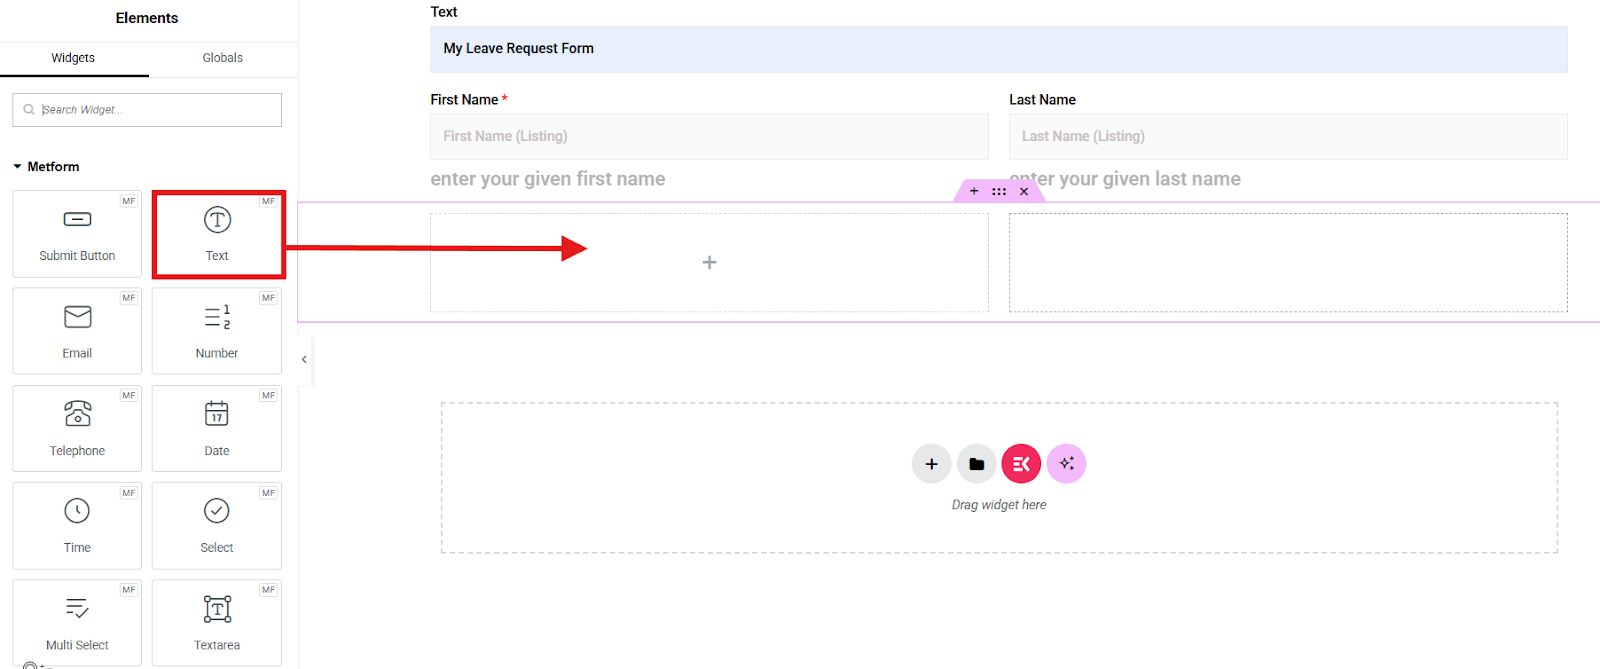
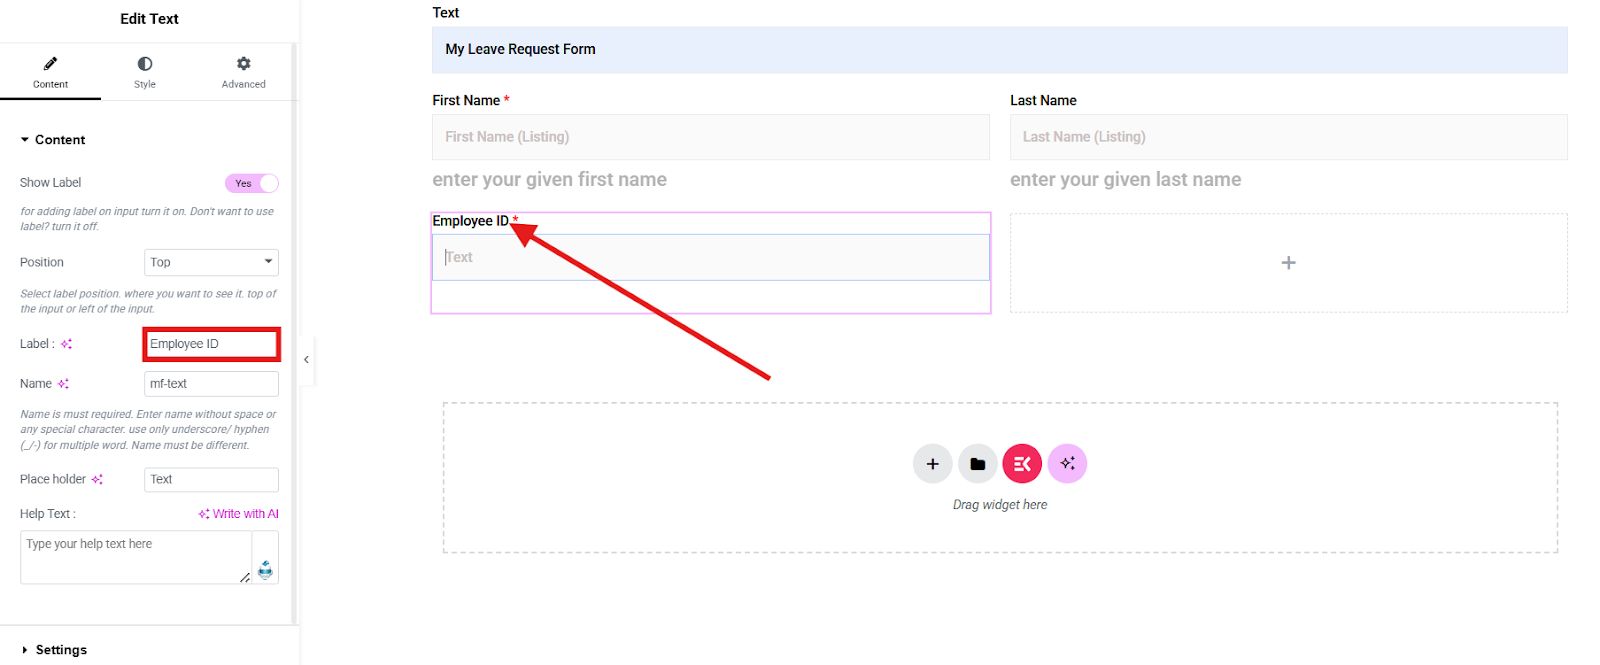
Change the label and replace it with Employee ID.
Step 3: Design your Leave Request Form
You can improve the look of your leave request form by adjusting the content, style, and advanced settings sections. For example, the advanced settings allow you to add a background to any section of your leave request form.
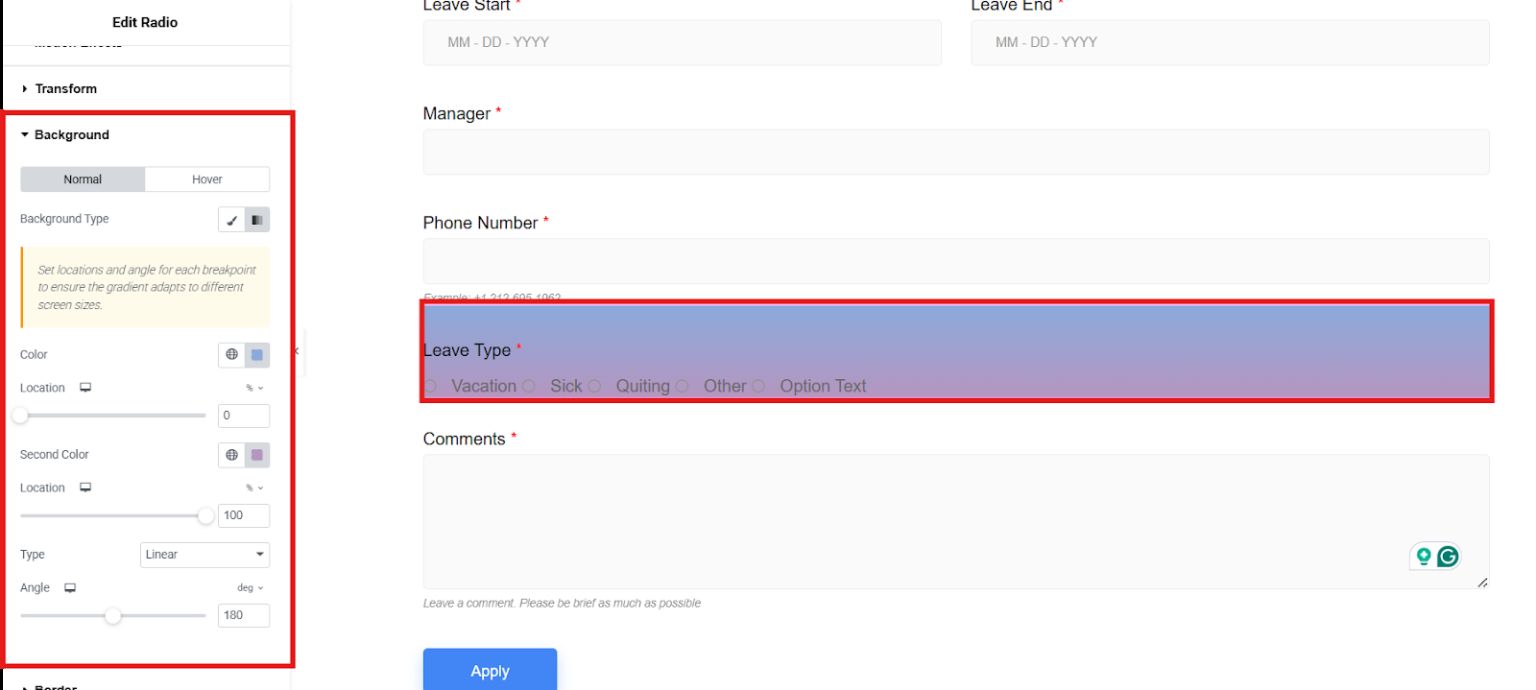
Simply adjust the style and advanced settings to achieve the preferred appearance for your form.
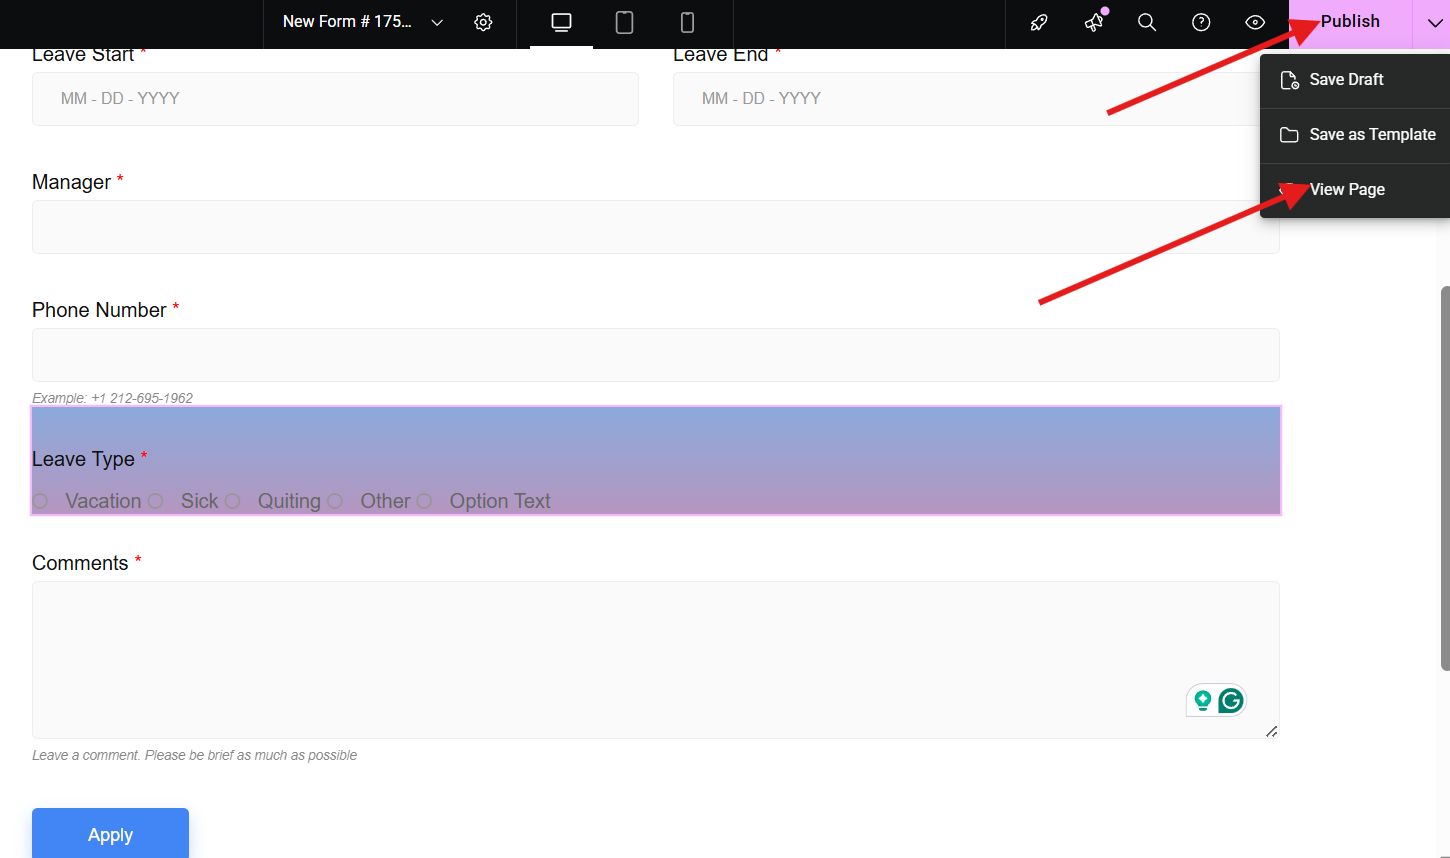
Step 4: Preview and Publish
Remember to publish your form. If you’d like to check how your leave request form looks beforehand, you can preview it to see whether any adjustments are needed.
Why use this method?
This method offers maximum flexibility and is useful if your organization has unique leave policies. It allows you to design a form that perfectly matches your workflow.
Vanliga frågor
1. Do you need coding knowledge to create a leave request form in WordPress?
No, most form builder plugins provide drag-and-drop interfaces that make form creation beginner-friendly.
2. Can you automatically approve or reject leave requests?
Yes, some advanced plugins allow workflow automation. However, most basic setups will send notifications to HR or managers for manual approval.
3. Can you integrate the form with other tools?
Yes. Many plugins integrate with email marketing tools like Zoho, CRMs, och project management software. You can also connect to Google Kalkylark eller Slack using automation tools like Zapier.
4. Is it possible to track leave history?
Absolutely. Form submissions are stored in your WordPress database, and many plugins provide export options to CSV or Excel for record-keeping.

Slutlig tanke
Creating a leave request form in WordPress using Elementor is a simple yet powerful way to simplify organizational processes. Whether you use a ready-made template for quick setup or build one from scratch for full customization, the result is a more professional and efficient system.
A digitized leave request workflow saves time, reduces confusion, and ensures that each submitted form is neatly stored for future reference.
Make leave management hassle-free for everyone and start designing your branded leave request form with Metform!

Lämna ett svar