


A masonry gallery adds a modern, Pinterest-like aesthetic to your website, perfect for showcasing portfolios, visual stories, or image collections.
If you are using WordPress CMS, it is easier than you think. With a few clicks, you can showcase images in different gallery styles.
All you need is—GutenKit block plugin for Gutenberg.
GutenKit Advanced Masonry Block makes this process easier for WordPress block editor users.

Do I need a plugin to create a masonry gallery in WordPress?
Yes, you should use a plugin to create a variety of masonry gallery styles in WordPress. As mentioned earlier, plugins make it easy.
And you can try custom coding as well if you are good at coding. The problem is, if you are trying custom code, you might come up with a particular style.
But what if you need different masonry gallery styles for individual pages? That will be difficult as you need custom code for each of the pages.
Plugins like Gutenkit make it easy with ready templates and ready blocks.
➡️ Learn how to create creative button in WordPress.
Create the masonry gallery in WordPress
Here’s a step-by-step guide to creating a stunning masonry gallery using GutenKit.
Step 1: Install and activate GutenKit
Before you start, ensure GutenKit is installed and activated on your Site WordPress.
Go to Plugins > Add New in your WordPress dashboard.
Then search for GutenKit. You will see “GutenKit – Page Builder Blocks, Patterns, and Templates for Gutenberg Block Editor”
Install and activate the plugin to enjoy all the features.
Step 2: Add the GutenKit advanced masonry block
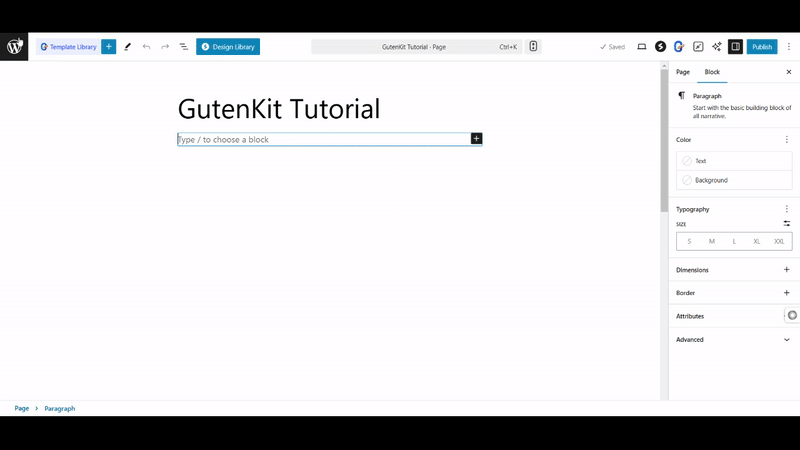
Open the Page Editor or Post Editor in WordPress.
Click the + Add Block button and search for Advanced Masonry.
Select the GutenKit Advanced Masonry Block, which will load with three masonry items by default.
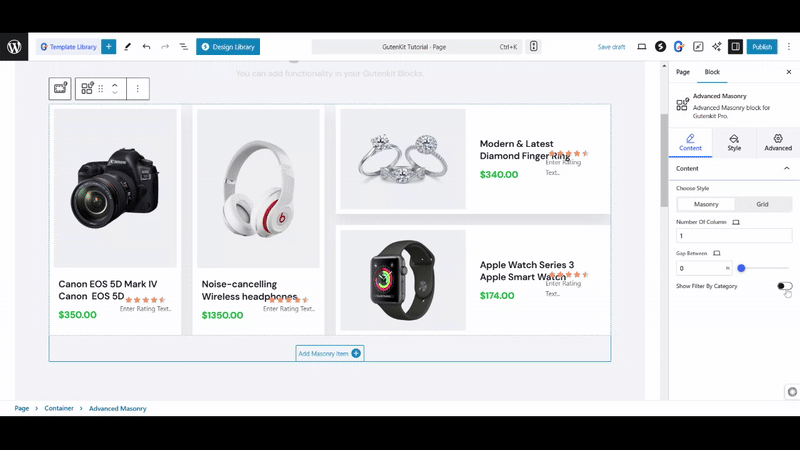
Step 3: Add Masonry Items
To customize your gallery-
Add More Items: Click the Add Masonry Items button to increase the number of blocks in your masonry layout.
Insert Content: Each masonry item can contain any type of block, such as images, text, or videos. Add and arrange your desired content.
Step 4: Configure the Masonry Layout
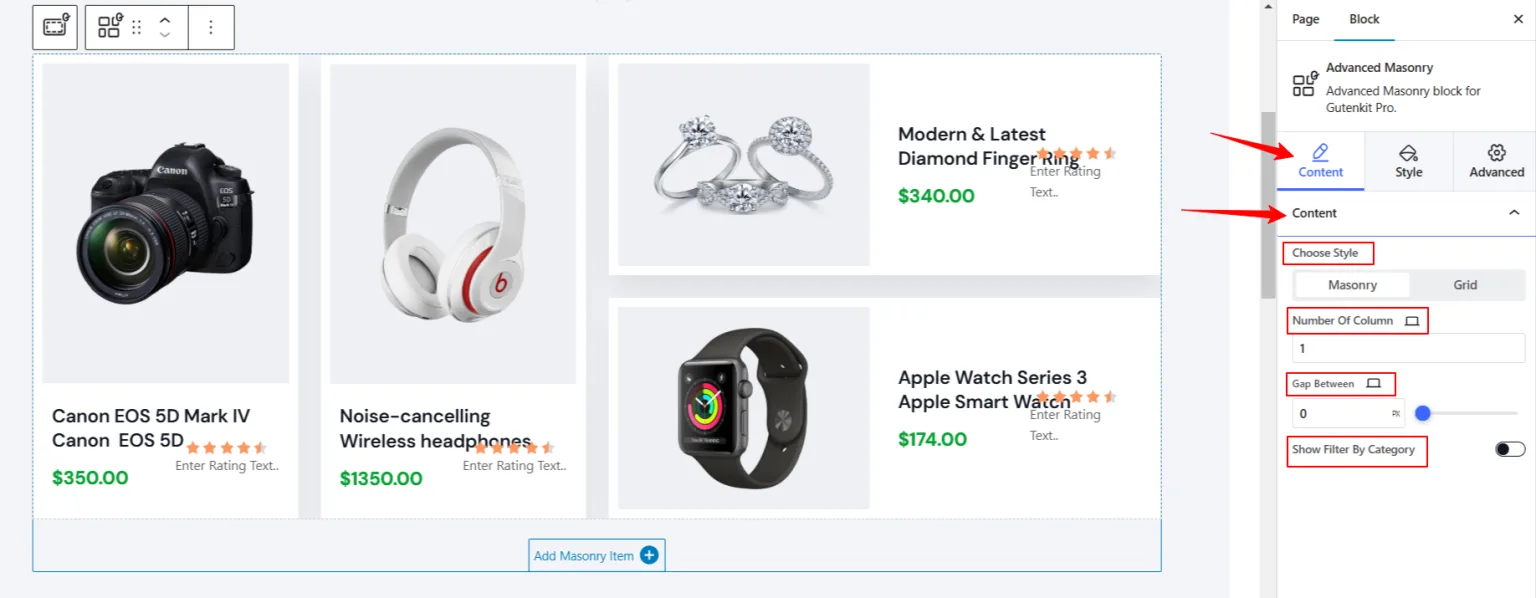
Fine-tune the design by adjusting settings in the Content Tab.
Escolha o estilo: Select between Masonry (staggered layout) or Grid (uniform rows and columns).
Number of Columns: Define how many columns your masonry will have.
Gap Between Items: Adjust the spacing between masonry items.
Enable Filtering: Toggle Show Filter by Category to group items into categories and allow users to sort them.
Tab Name (All): Set a custom name for the entire masonry tab.
Tab Direction: Choose the side for the tab: left, right, top, or bottom.
Espaço entre: Change the gap between the tab and the masonry items.
Step 5: Style the Masonry Design
Customize the appearance using the Style Tab:
For Masonry Items:
Preenchimento: Add space inside the items for better visuals.
Raio da borda: Adjust the roundness of item edges.
Tipo de plano de fundo: Choose between solid color and gradient.
Borders and Box Shadow: Define border color, style, thickness, and shadow effects for both normal and hover states.
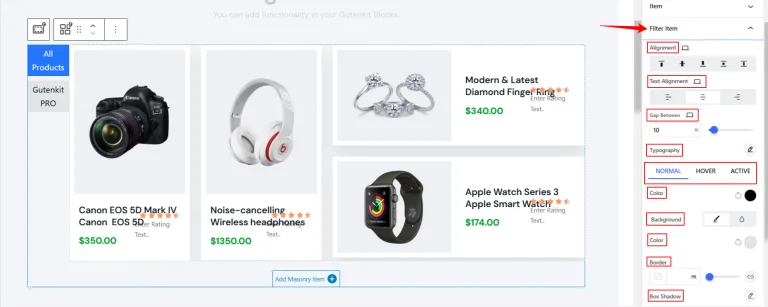
If you activate the filter item in the content tab, you can filter the elements of the masonry gallery. For Filter Items-
Alinhamento: Align filter buttons (left, center, or right).
Gap Between Items: Control the spacing between filters.
Tipografia: Customize the font style, size, and weight for filter category names.
Normal, Hover, and Active States: Adjust font colors, background styles, borders, and box shadows for each state.
If you don’t enable the Show Filter By Category option in the Content Tab, your customization for masonry items will be limited to this point. However, turning on the Show Filter By Category option unlocks additional customization settings.
Once activated, you’ll find two styling options in the Style Tab—Filter Item and Filter Wrappers, allowing you to fine-tune the appearance of your filter items conveniently.

Spacing Bottom: Add space below the filters.
Tipo de plano de fundo: Apply a solid or gradient background to the filter section.
Padding and Border Radius: Create space around filter categories and round their edges.
Step 6: Preview and Publish
Once satisfied with your design, preview your gallery to ensure it looks great across devices.
Click Publish to make it live on your website.
Tips for Optimizing Your Masonry Gallery
High-Quality Images: Always use high-resolution images for a professional look.
Category Filters: Use meaningful categories to enhance user experience.
Mobile Optimization: Test your masonry gallery on smartphones and tablets to ensure responsiveness.
SEO-Friendly Settings: Add descriptive ALT text and filenames to your images for better visibility in search engines.
Perguntas frequentes
Do you have more queries regarding styling a masonry gallery? Here are some additional information that will help you to understand it better.
How do I ensure my masonry gallery is mobile-friendly?
If you want to ensure a responsive masonry gallery, use the GutenKit plugin. It ensures that the design fits to any device regardless of the display size.
Can I add captions to images in a masonry gallery?
Yes, you can add images captions in the masonry gallery. It will depend on the plugin you are using to do that.
Is there a limit to the number of images I can add to a masonry gallery?
There are no limits to the number of images for a masonry gallery. However, if you are thinking about hundreds of images, that could be a bit tricky but not impossible.
Can I use videos in a masonry gallery?
Yes, if you want to add videos instead of images, you can do that in GutenKit. Just make sure to choose the right style to make it user-friendly.
⭐️ Guia de bônus: How to add custom icons in Elementor.
Empacotando
Creating a masonry gallery with GutenKit is straightforward, thanks to its advanced design and styling features. Whether you’re showcasing a portfolio, blog posts, or a photo collection, this plugin equips you with all the tools needed to create a visually compelling and responsive layout.
Deixe um comentário