


Browsing thousands of products to find the right one is one of the biggest challenges for online shoppers. Customers might get lost and confused, which can lead to cart abandonment.
In such cases, WooCommerce product filters are extremely helpful in narrowing down the item list for better and faster navigation. No matter what product you are selling, adding a product filter can make your eCommerce store much more user-friendly.
So, in this tutorial, we’ll show how to add product filter in WooCommerce using the best product filter plugin for WooCommerce. The method doesn’t require coding expertise to follow.
Quick Overview
Here are the steps you have to follow to add a product filter in WooCommerce using a no-code approach with ShopEngine:
Step 1: Install prerequisite plugins
- Instalar e ativar WooCommerce, Elementor, ShopEngine (Free), e ShopEngine Pro.
Step 2: Create a shop page template
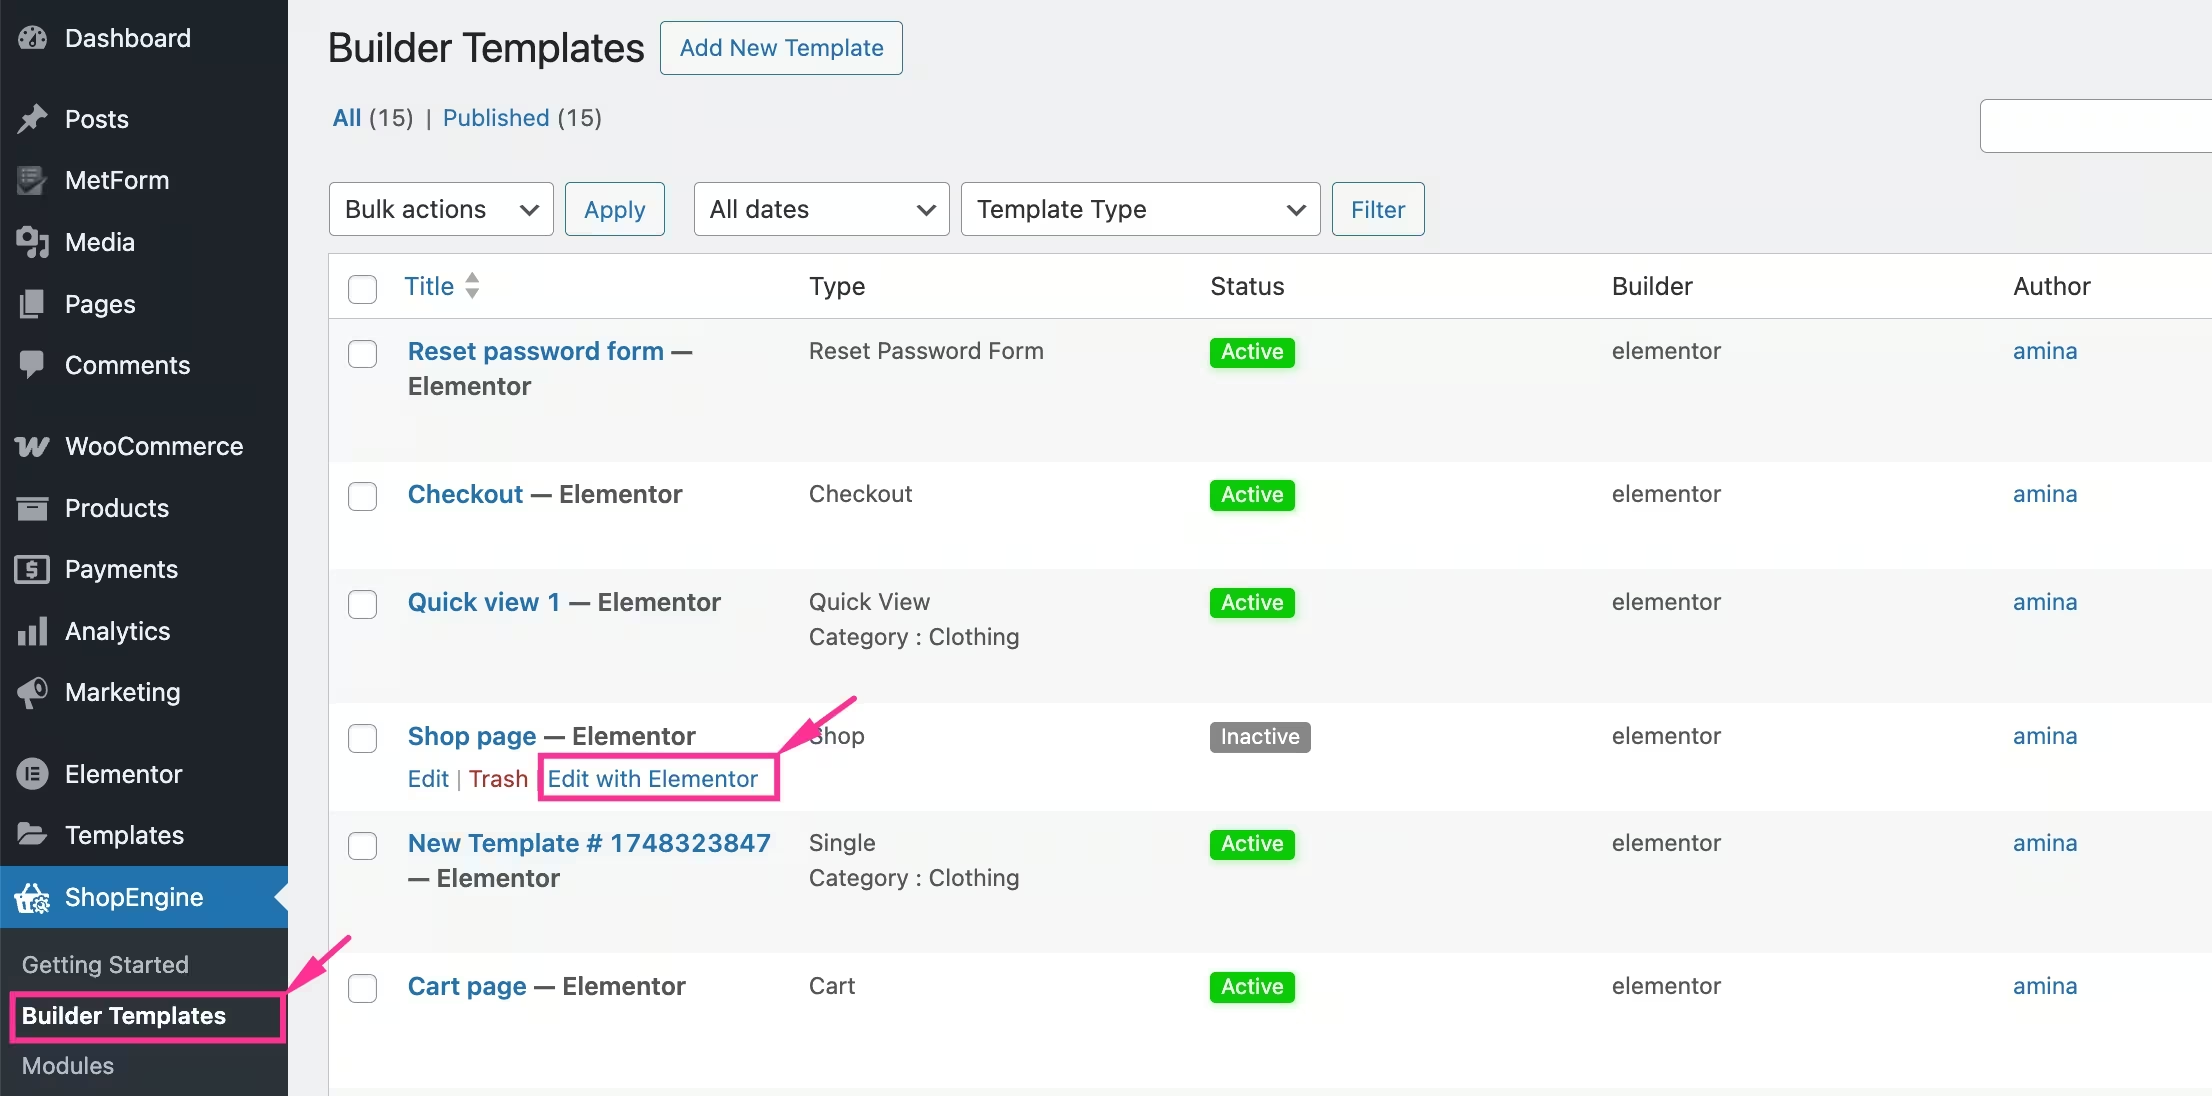
- Go to ShopEngine → Builder Templates and click Add New.
- Select Shop as the template type, choose a sample design (or start from scratch), and save changes.
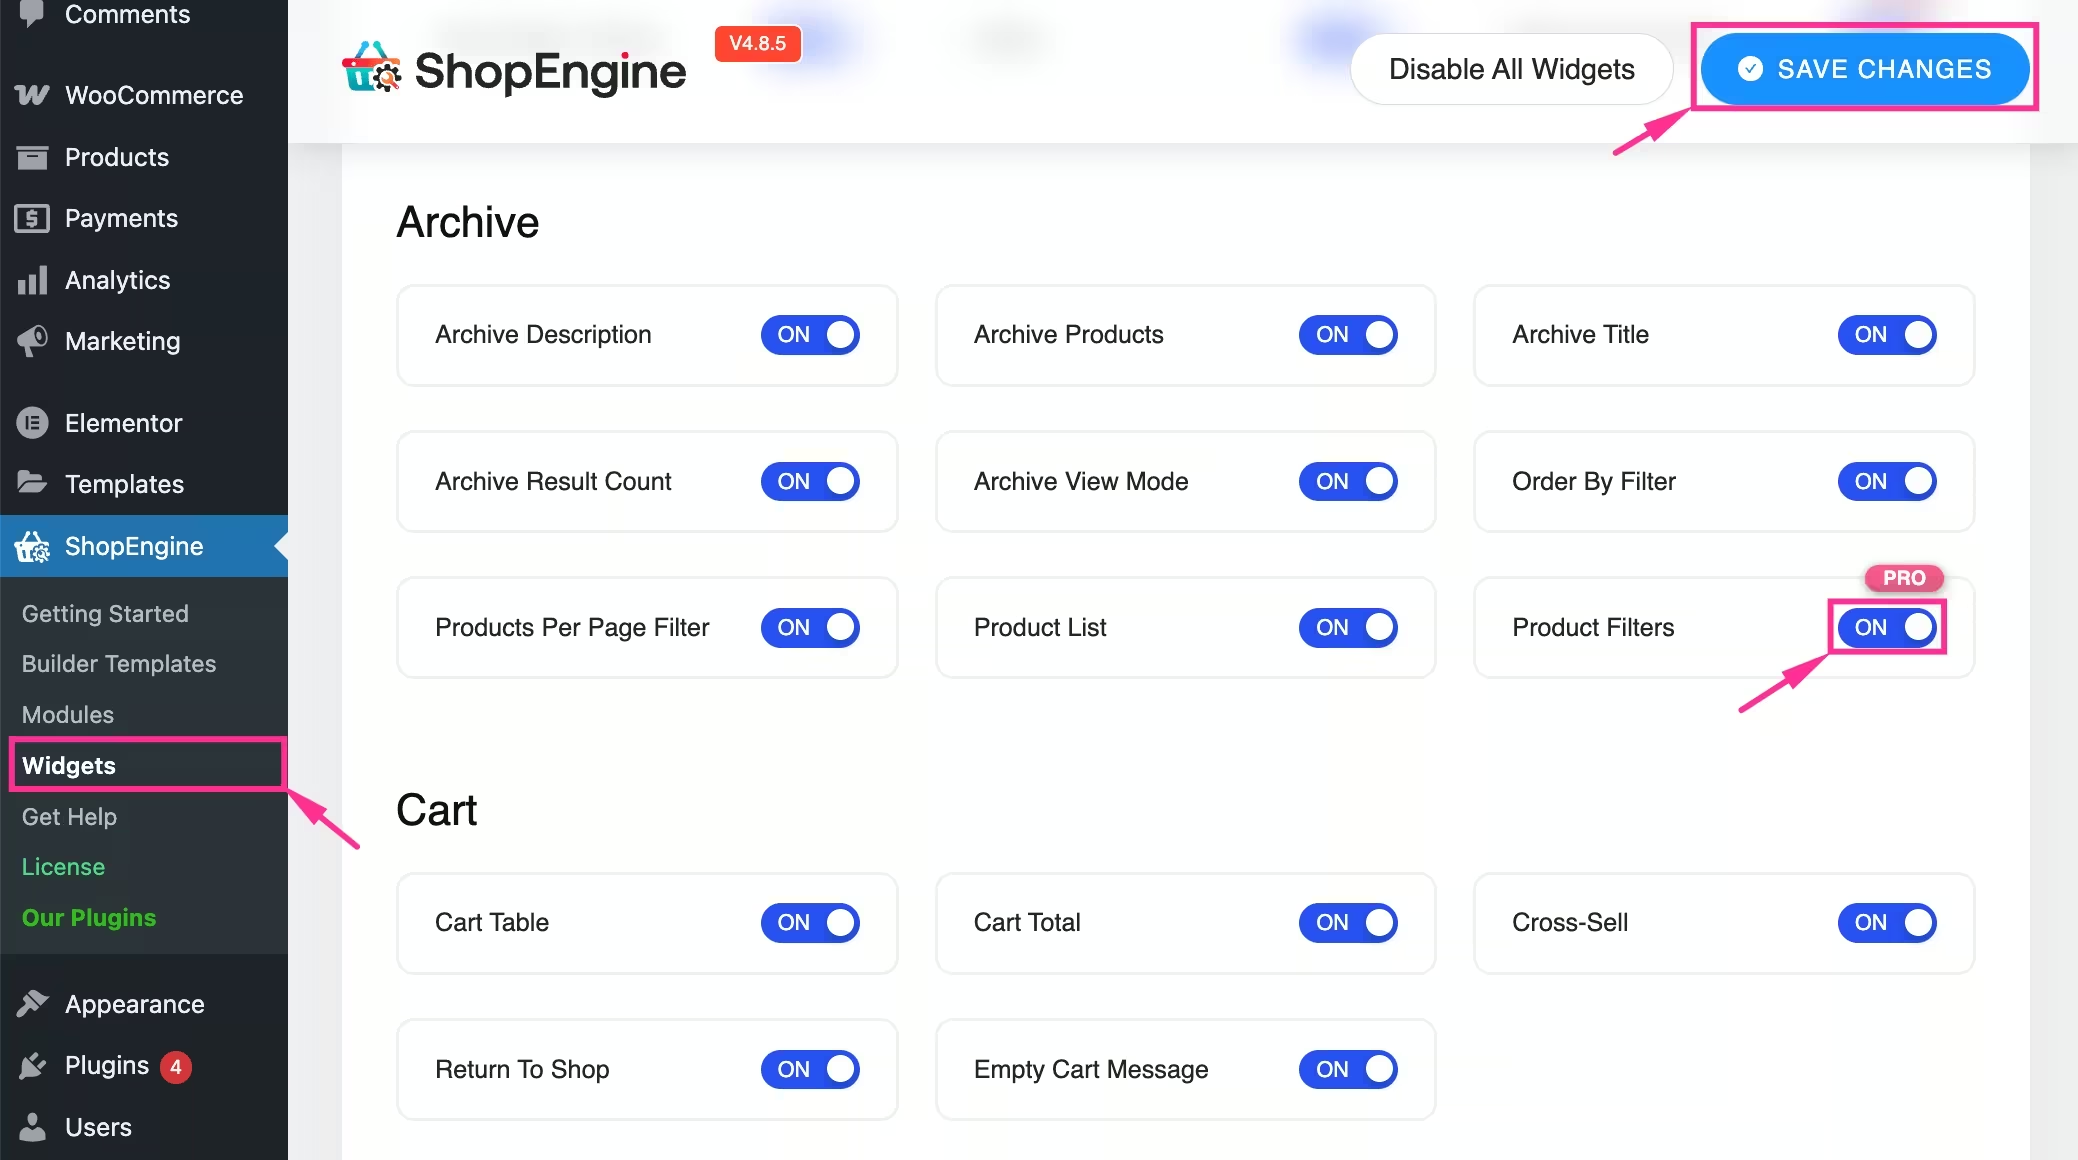
Step 3: Enable the Product Filters widget
- Navigate to ShopEngine → Widgets.
- Locate Product Filters and enable the toggle button.
- Save your settings.
Step 4: Add the Product Filter to the shop page
- Open your shop template and click Edit with Elementor.
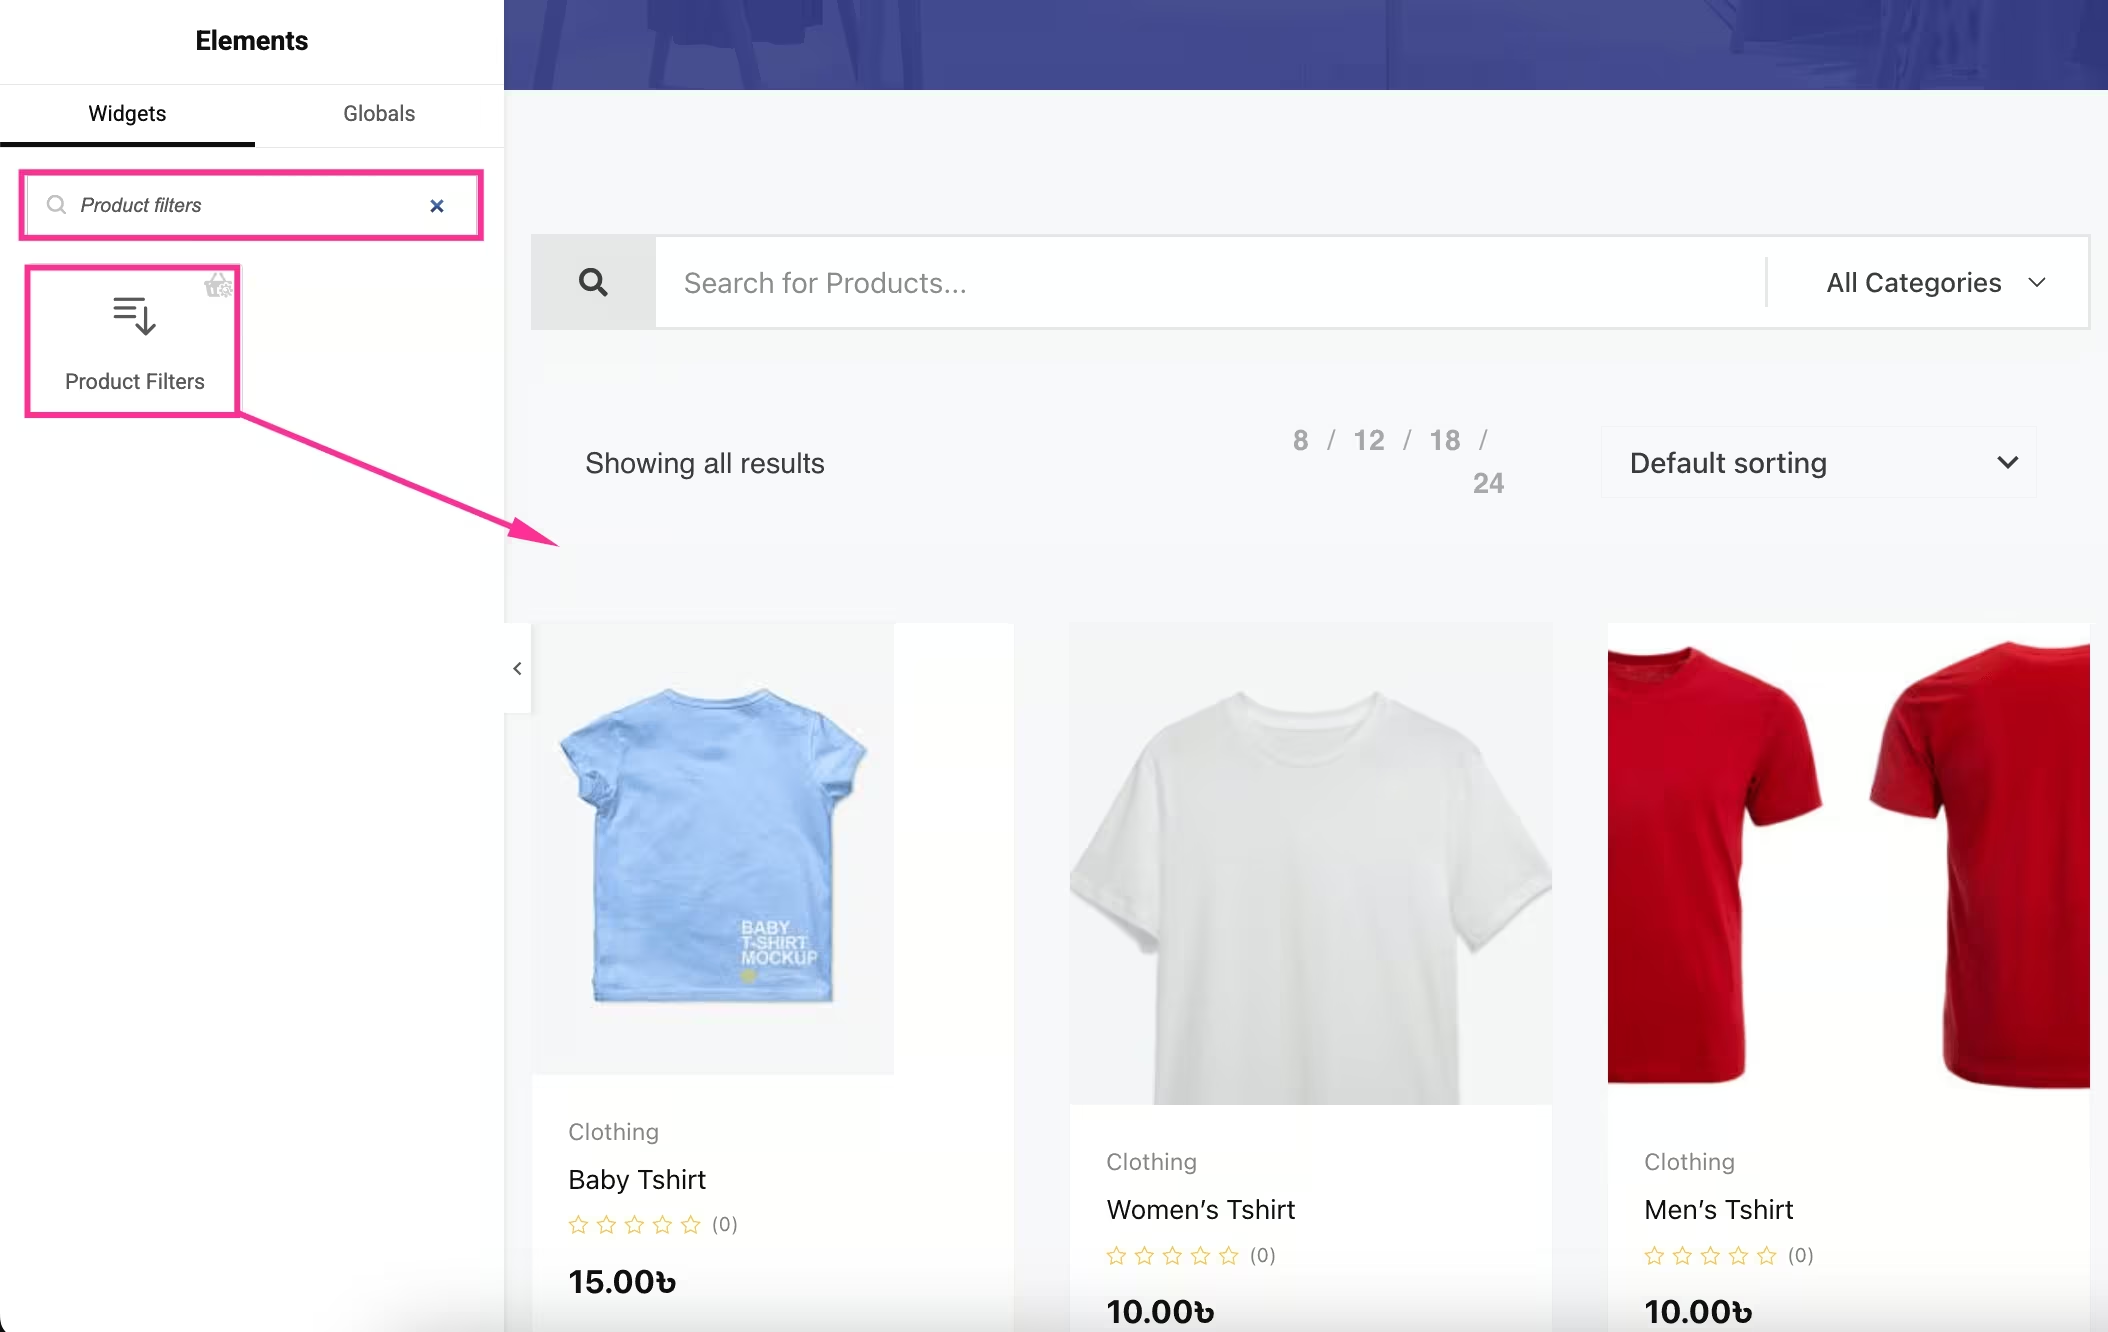
- Search for the Product Filters widget and drag it to the desired area on the page.
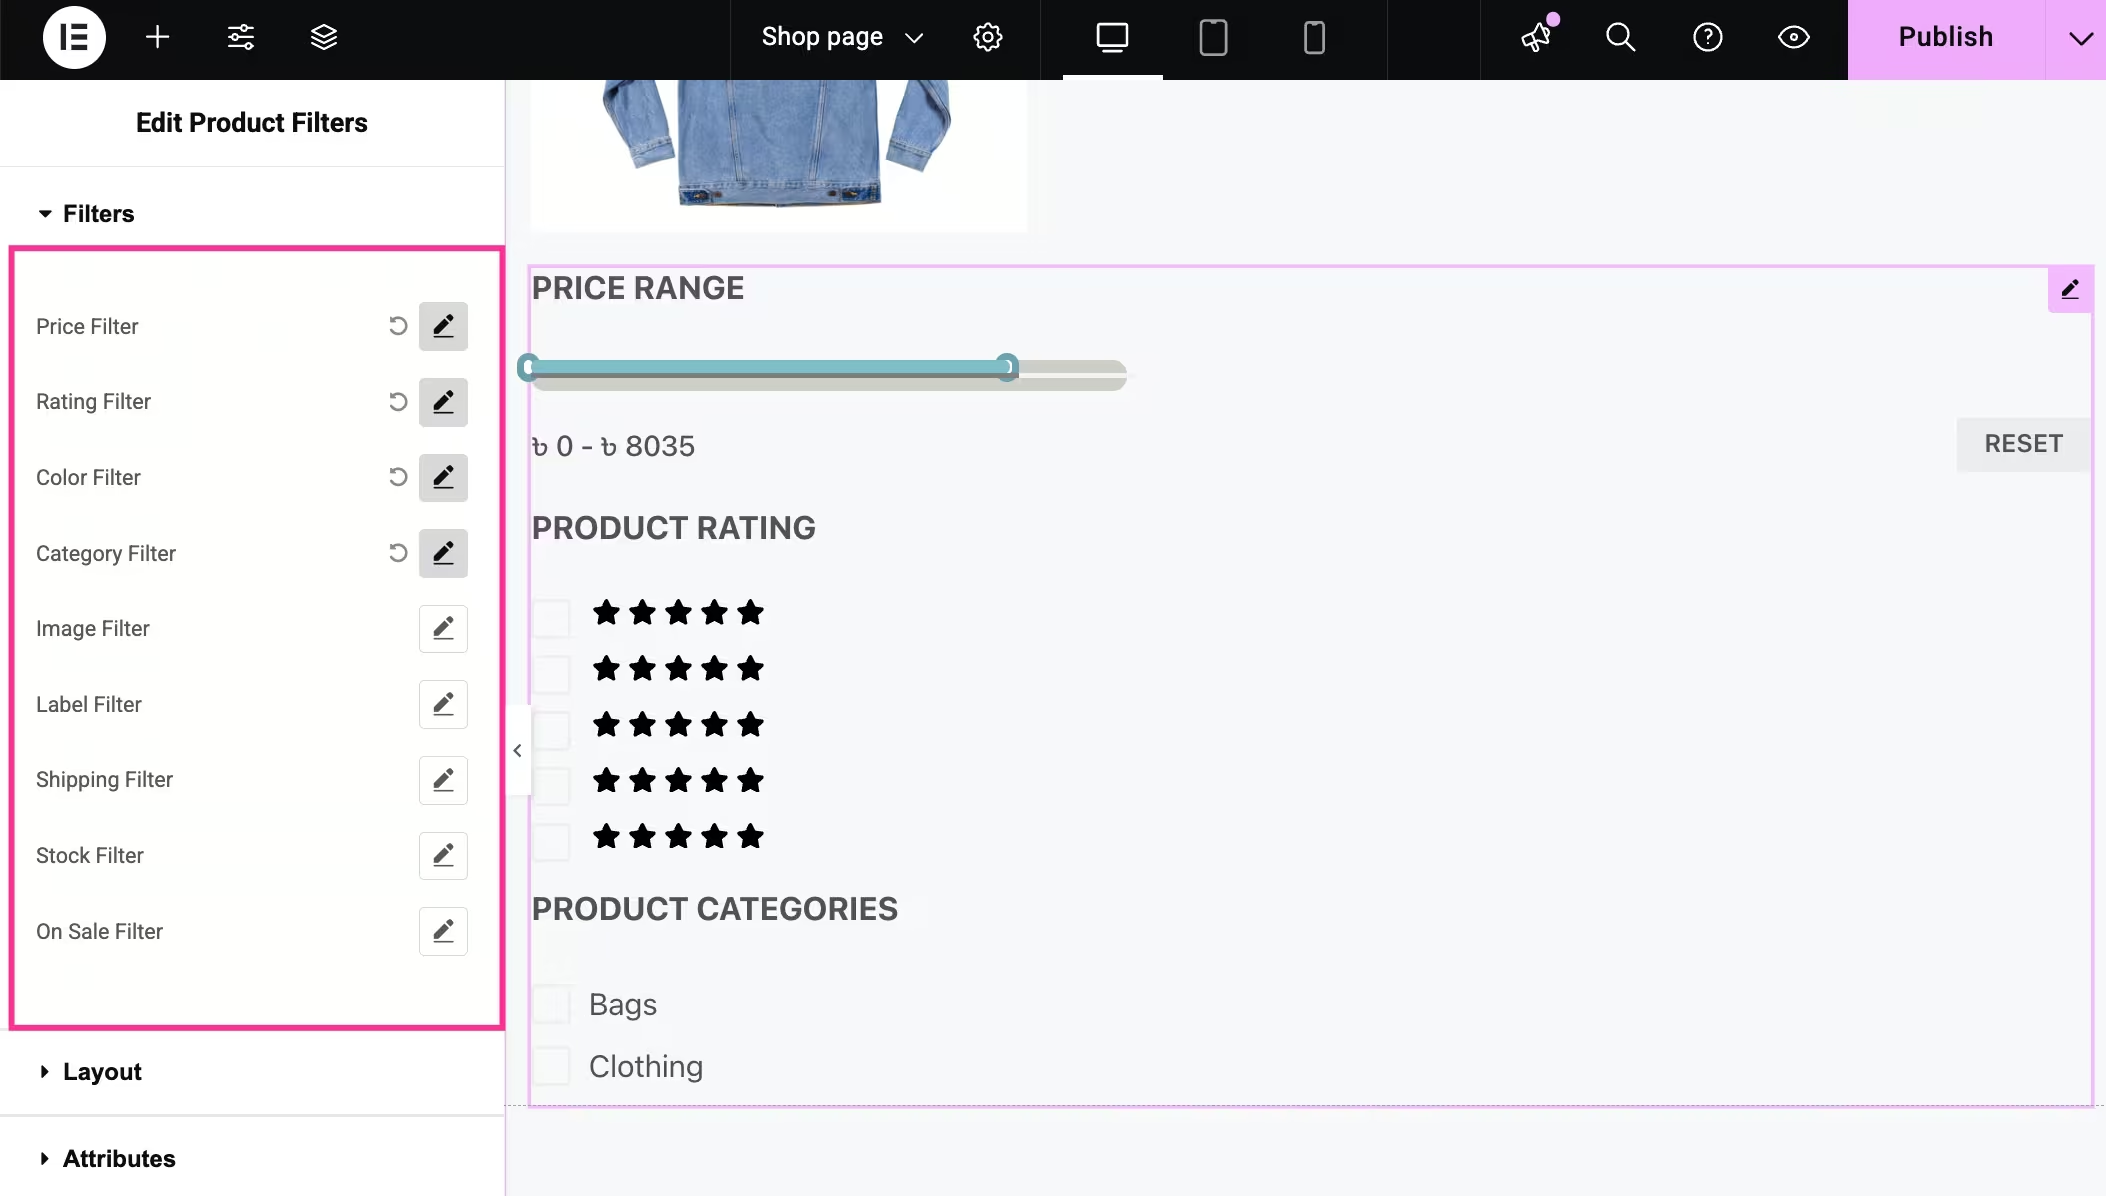
Step 5: Configure product filter content
- Set up filters such as Price, Rating, Color, Category, Stock, Shipping, On Sale, Label, and Image filters.
- Adjust layout options like filter view mode, columns, toggle button, and spacing.
Step 6: Customize filter style
- Customize typography, colors, hover effects, borders, padding, and spacing.
- Match the filter design with your WooCommerce store branding.
Step 7: Publish and activate
- Review all settings and click Publish to make the product filter live on your shop page.
What is product filter in WooCommerce?
WooCommerce product filter is a feature that lets your customers narrow down product options based on specific criteria such as price, color, rating, category, on sale, etc.
Why integrate product filter in your WooCommerce store?
Browsing your entire store of items is tiring and time-consuming. Sometimes, customers get lost and forget to buy essential things they are looking for. Or the worst scenario, they left being annoyed without placing an order. The reason?
They get tired of searching for and finding the product they are looking for. That’s why now store owners focus on adding product filter option to their online venture so that customers can easily narrow down item lists according to their preferences.
This not only simplifies search functionality but also drives faster purchasing decisions. Besides, there are many more advantages of adding product filter in WooCommerce, such as:
- Enhances experiência de usuário.
- Decreases taxa de rejeição.
- Reduces cart abandonment rate.
- Leads to higher customer satisfaction.
- Increases repeat customers.
Guide to add product filter in WooCommerce
Integrating a product filter option into your eCommerce website is the most convenient way to assist your customers in product navigation. This product filter feature can be added using multiple methods.
Here we’ll disclose the most friendly process, using a WooCommerce product filter plugin to add product filter in WooCommerce that requires zero coding skills:
Step 1: Install prerequisite solutions
In the very first step, you need to install and activate the prerequisite solutions, including the WooCommerce product filter plugin, ShopEngine. ShopEngine is a WooCommerce page builder that comes with all freemium and premium eCommerce features, including pedido antecipado, pedido pendente, olhada rápida, venda cruzada, and obviously product filter.
So, install and activate ShopEngine by navigating Plugin >> Add Plugin. Agora procure por ShopEngine e instalar e ativar this plugin.

Also, add the ShopEngine Pro by uploading it.
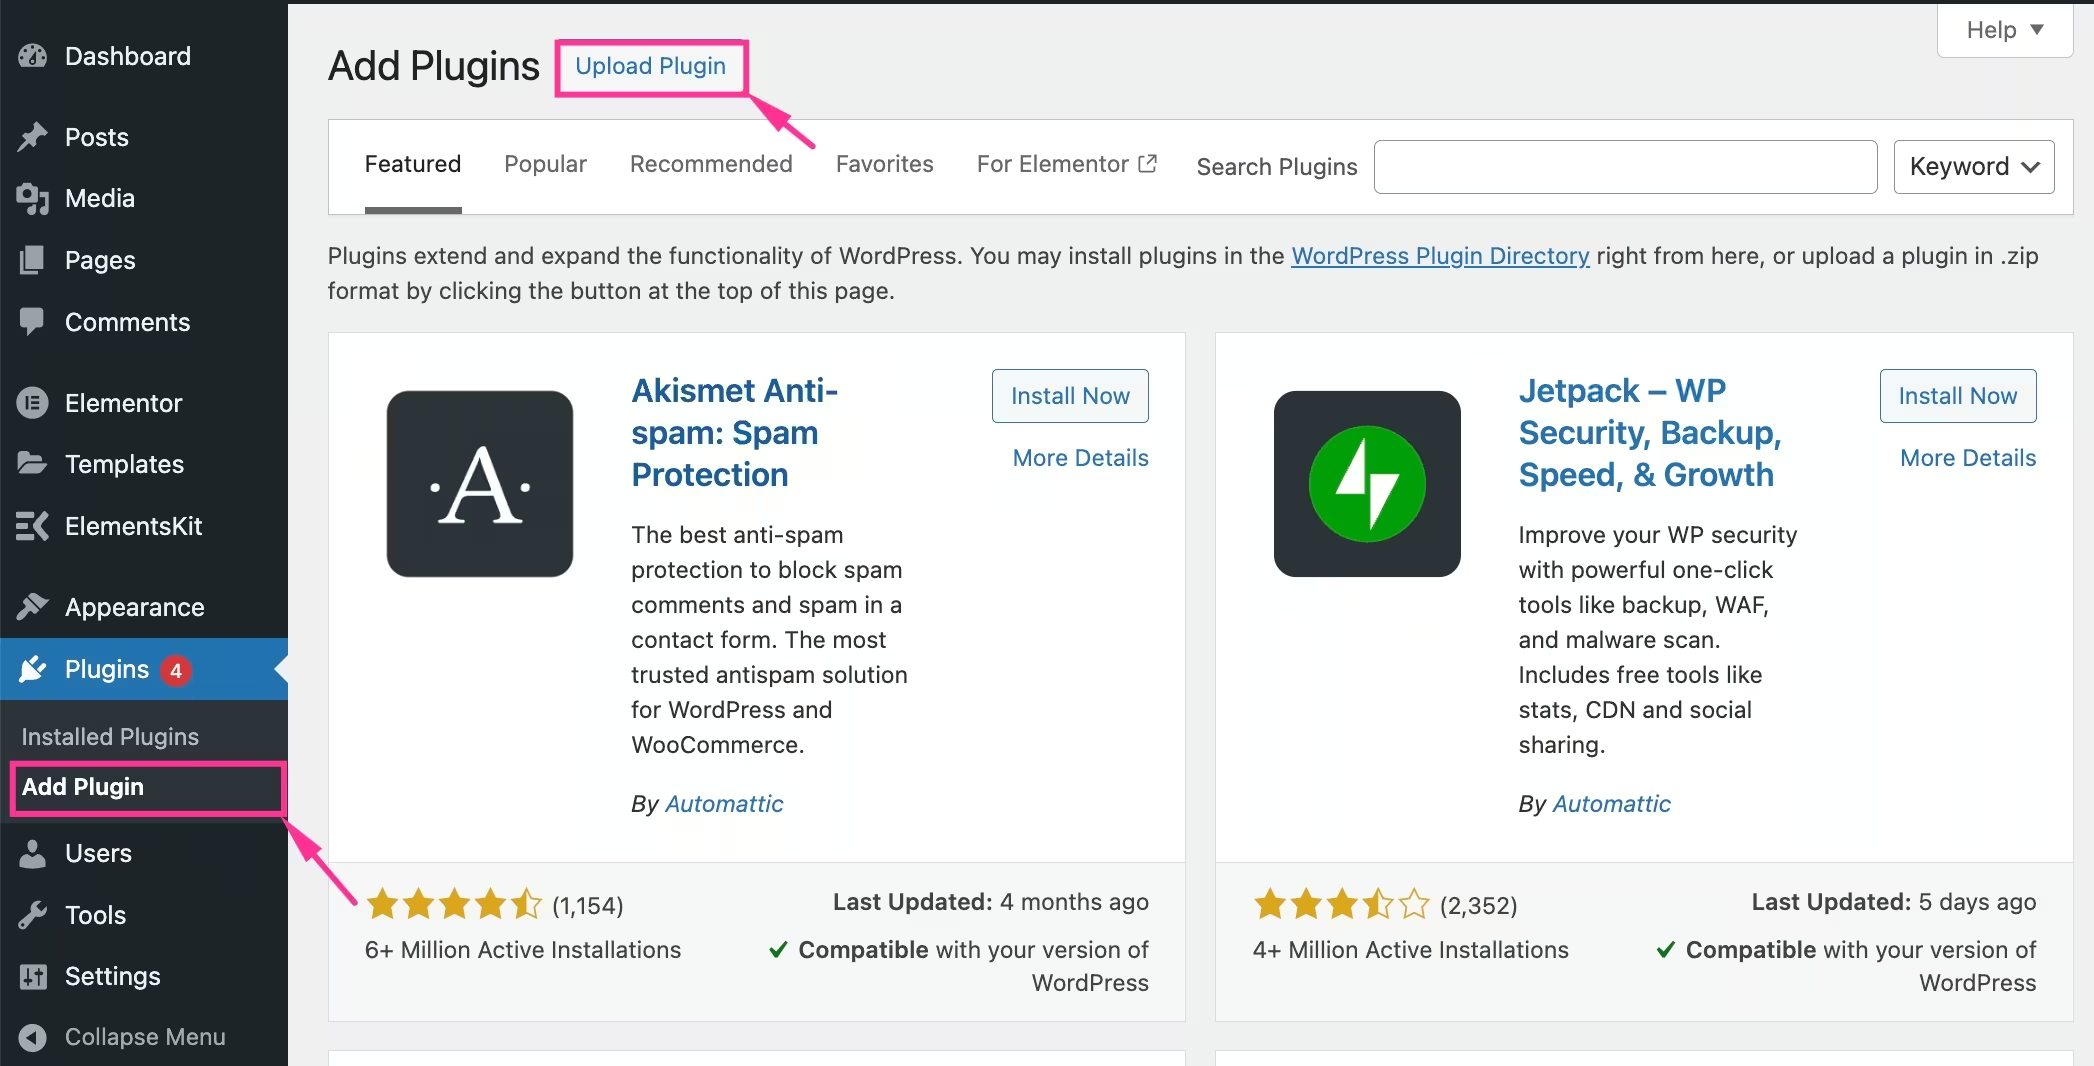
Besides ShopEngine free and pro, you need to install the free version of WooCommerce and Elementor plugin. Since ShopEngine is an Elementor and WooCommerce addon, you will require both plugins.
Step 2: Create a shop page template
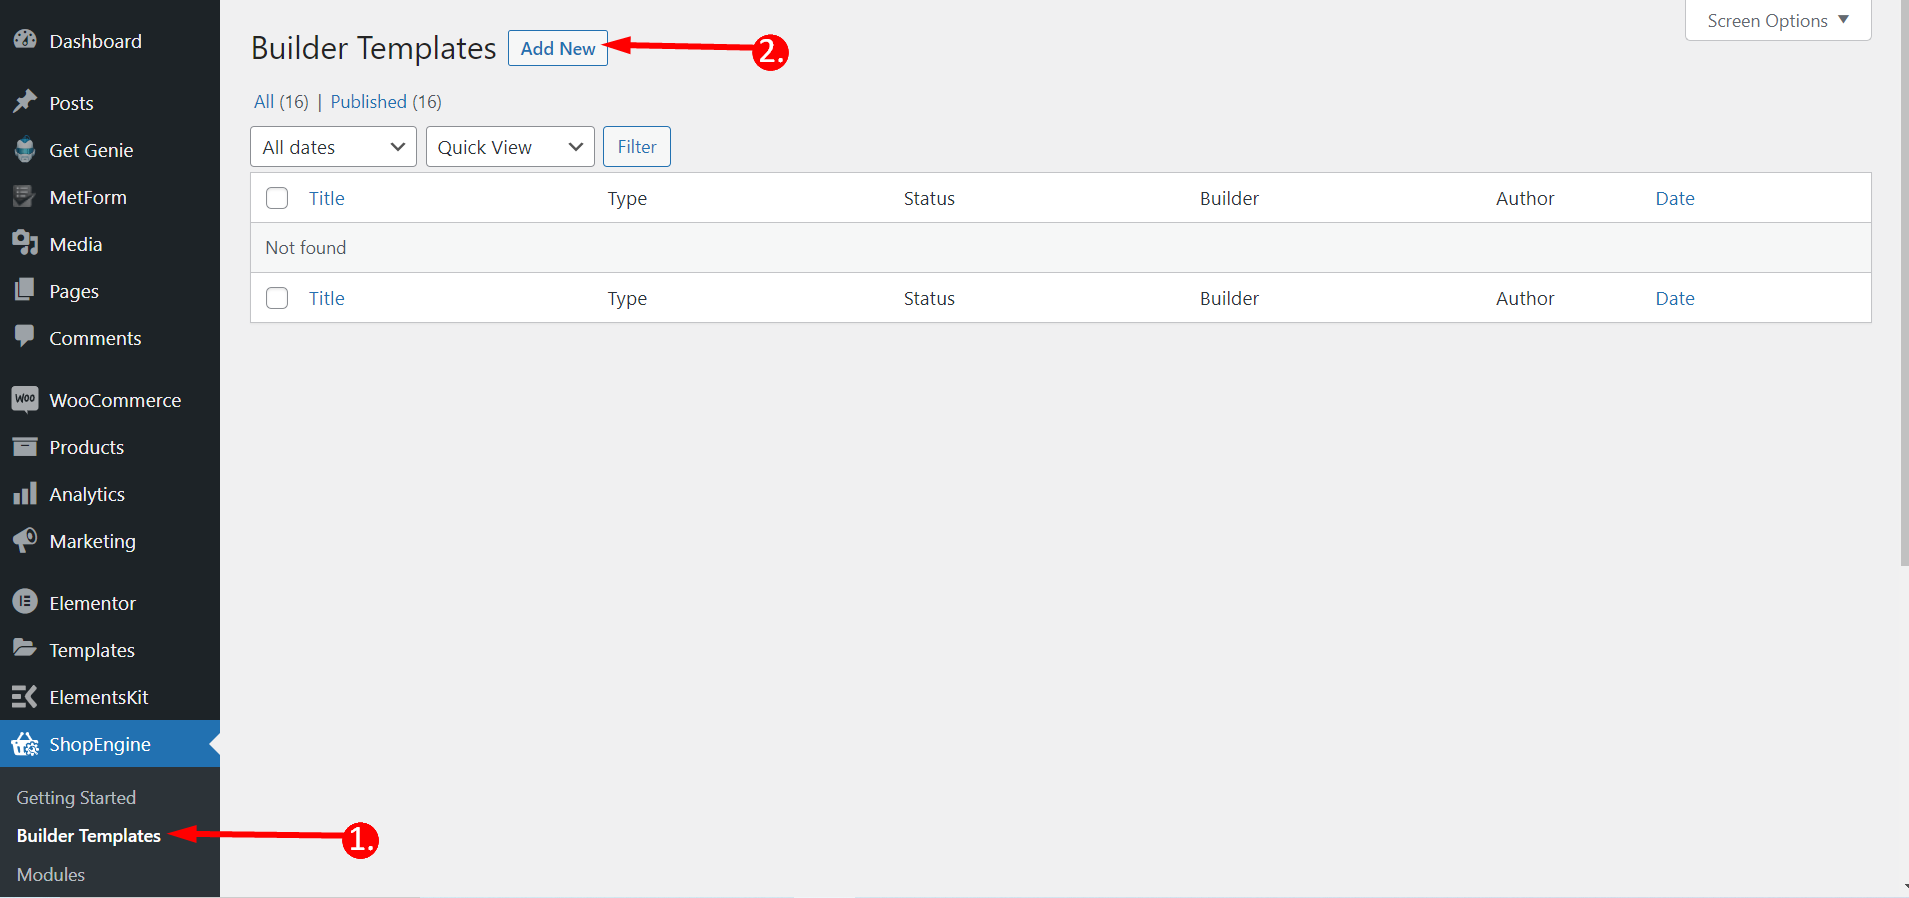
In the second step, you need to create a shop page template by visiting ShopEngine >> Modelos de construtor e pressing the “Add New” botão.
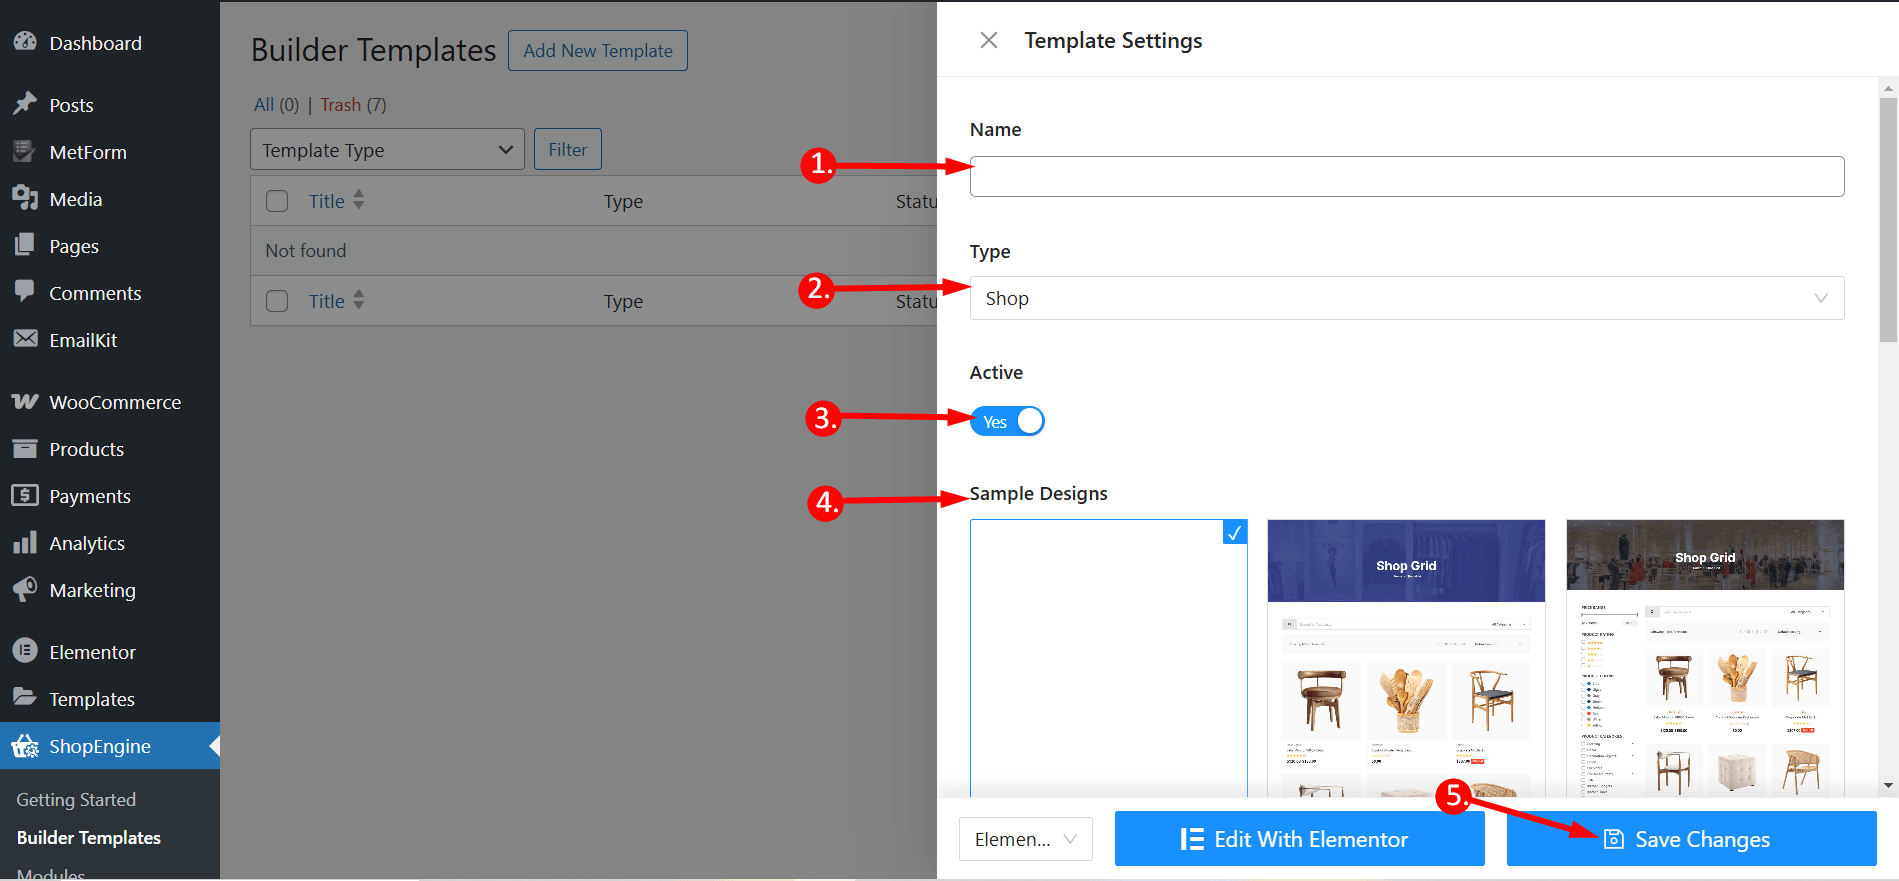
A tab for Template Settings will open up from the right side, which you have to fill up by entering a name, selecting a shop from the dropdown menu, activating, and choosing a sample design. You can either choose a readymade template or start from scratch. Now, clique em “Salvar alterações” botão.
Step 3: Enable Product Filter widget
After adding a shop page template, you have to enable the Product Filters widget of ShopEngine. This is an archive page widget that you will find by navigating to ShopEngine → Widgets.
Now, scroll down until you find Product Filters and turn on the toggle button. Next, clique em “Salvar alterações” botão.
Step 4: Add Product Filter
In the fourth step, you need to visit “Builder Templates” no ShopEngine e pressione o botão “Editar com Elementor” option for the Shop page template.
Depois disso, search for the “Product Filters” widget in the search panel and drag-and-drop the widget to the area where you need to add a filter widget. Later adding a widget, you need to configure the content and style of the Product Filters option.
Step 5: Content configuration of product filter
In the fifth step, you need to adjust Filters, Layout, and Attributes. First, expand the Filters tab and edit all the following areas:
- Filtro de preço: Set title, min price, max price, and dot type for your price filter.
- Filtro de classificação: Customize title and styles for rating filter.
- Filtro de cor: Edit title, styles, and color dot to add a filter based on color.
- Filtro de categoria: Adjust title, styles, order by, show hierarchy, hide empty category, etc., for integrating category filter.
- Filtro de imagem: Add a custom title and styles to set the image filter.
- Filtro de etiqueta: Display label filter after editing title and styles.
- Filtro de envio: Edit title and styles for shipping filter.
- Filtro de estoque: Customize title and styles for adding a stock filter.
- Filtro de venda: Show on sale filter by customizing title and styles.
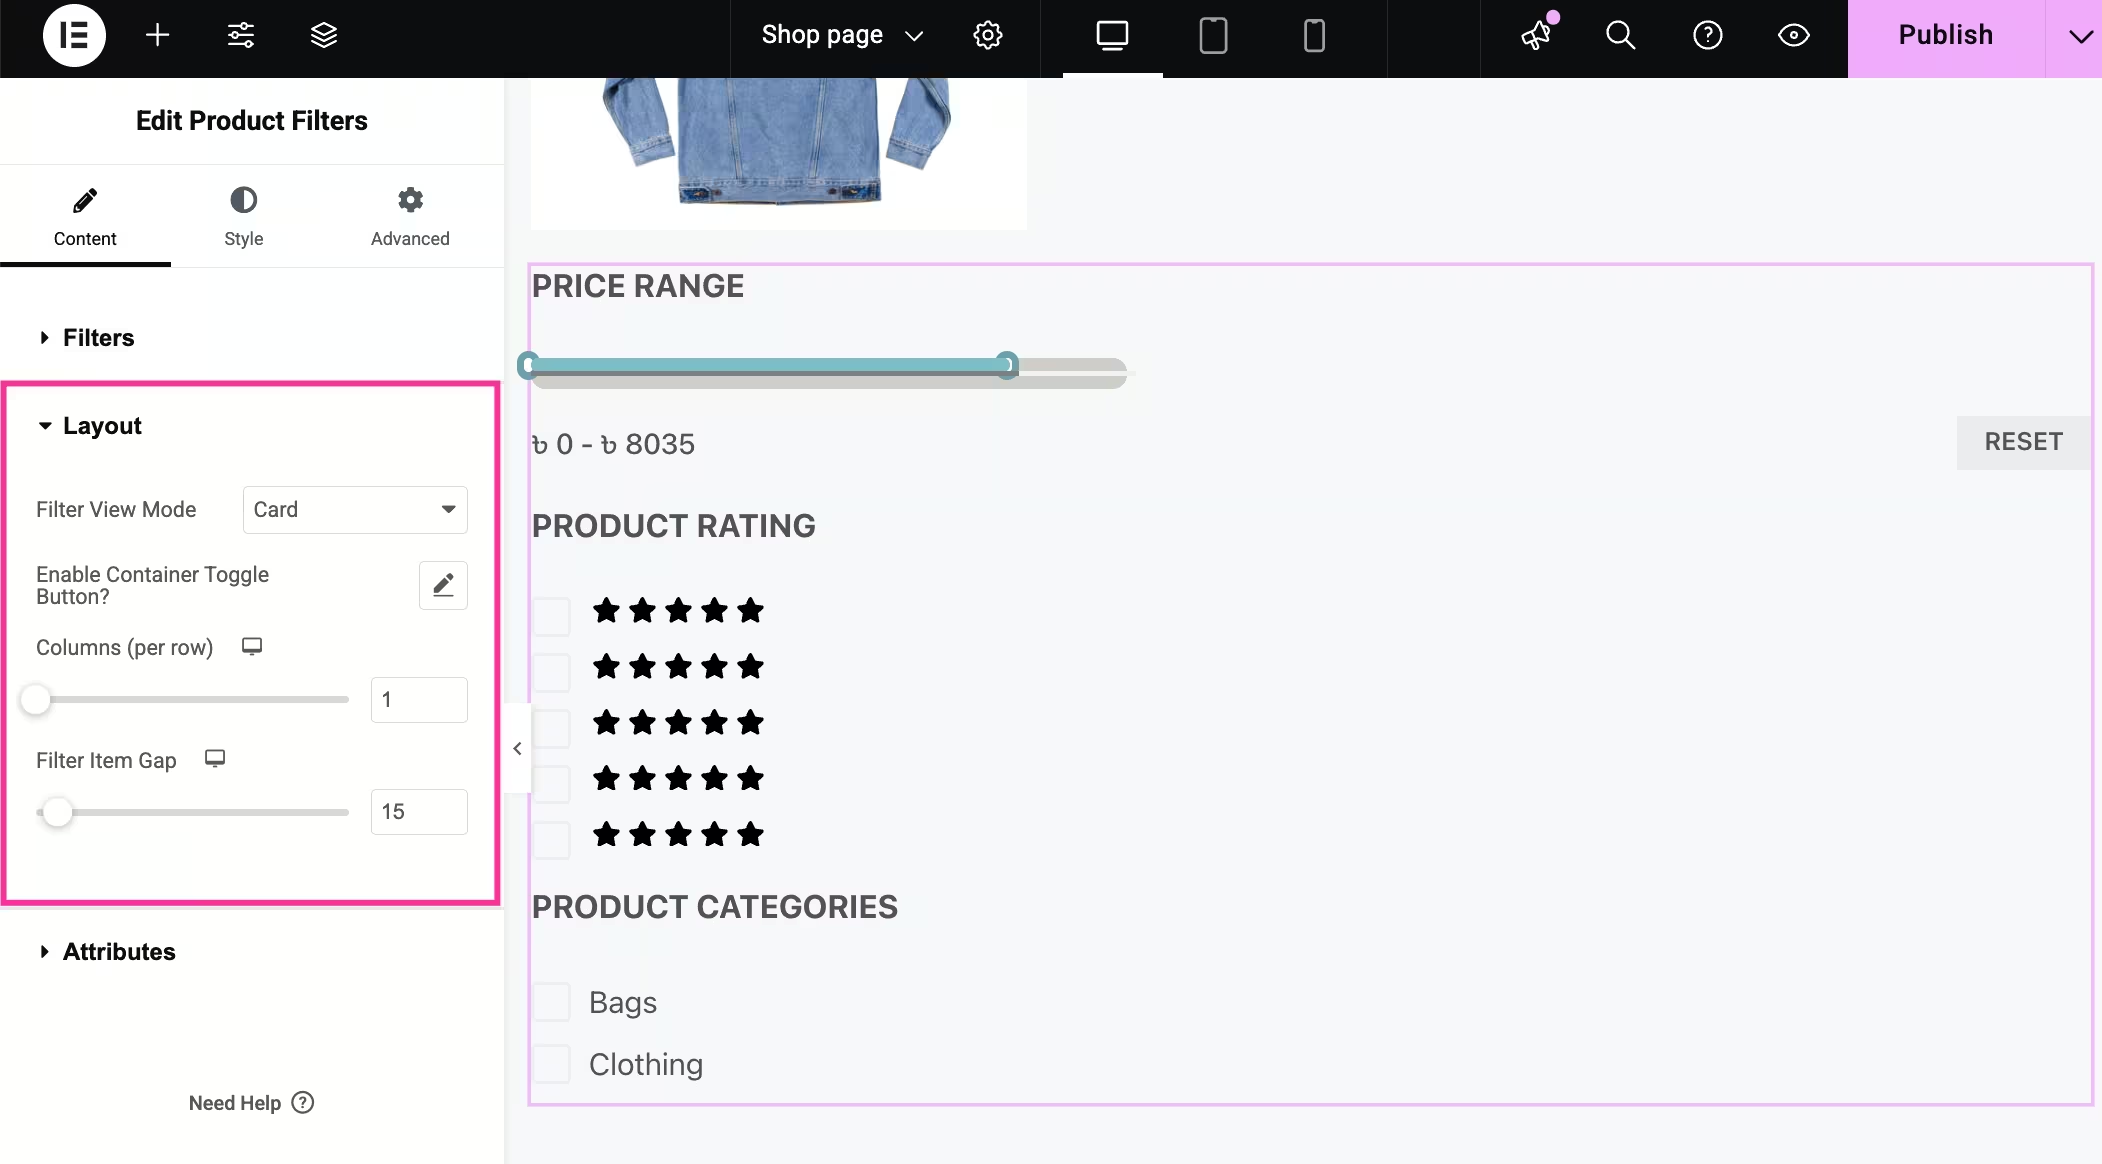
Afterwards, extend the Layout tab, and you will get all the settings for layout adjustments:
- Filter View Mode: Select mode from the dropdown menu.
- Enable Container Toggle Button?: display by editing toggle button text, alignment, icon, icon position, off-canvas, container width, and breakpoints.
- Colunas: Edit columns for layout.
- Filter Item Gap: Set item gap by dragging and dropping.
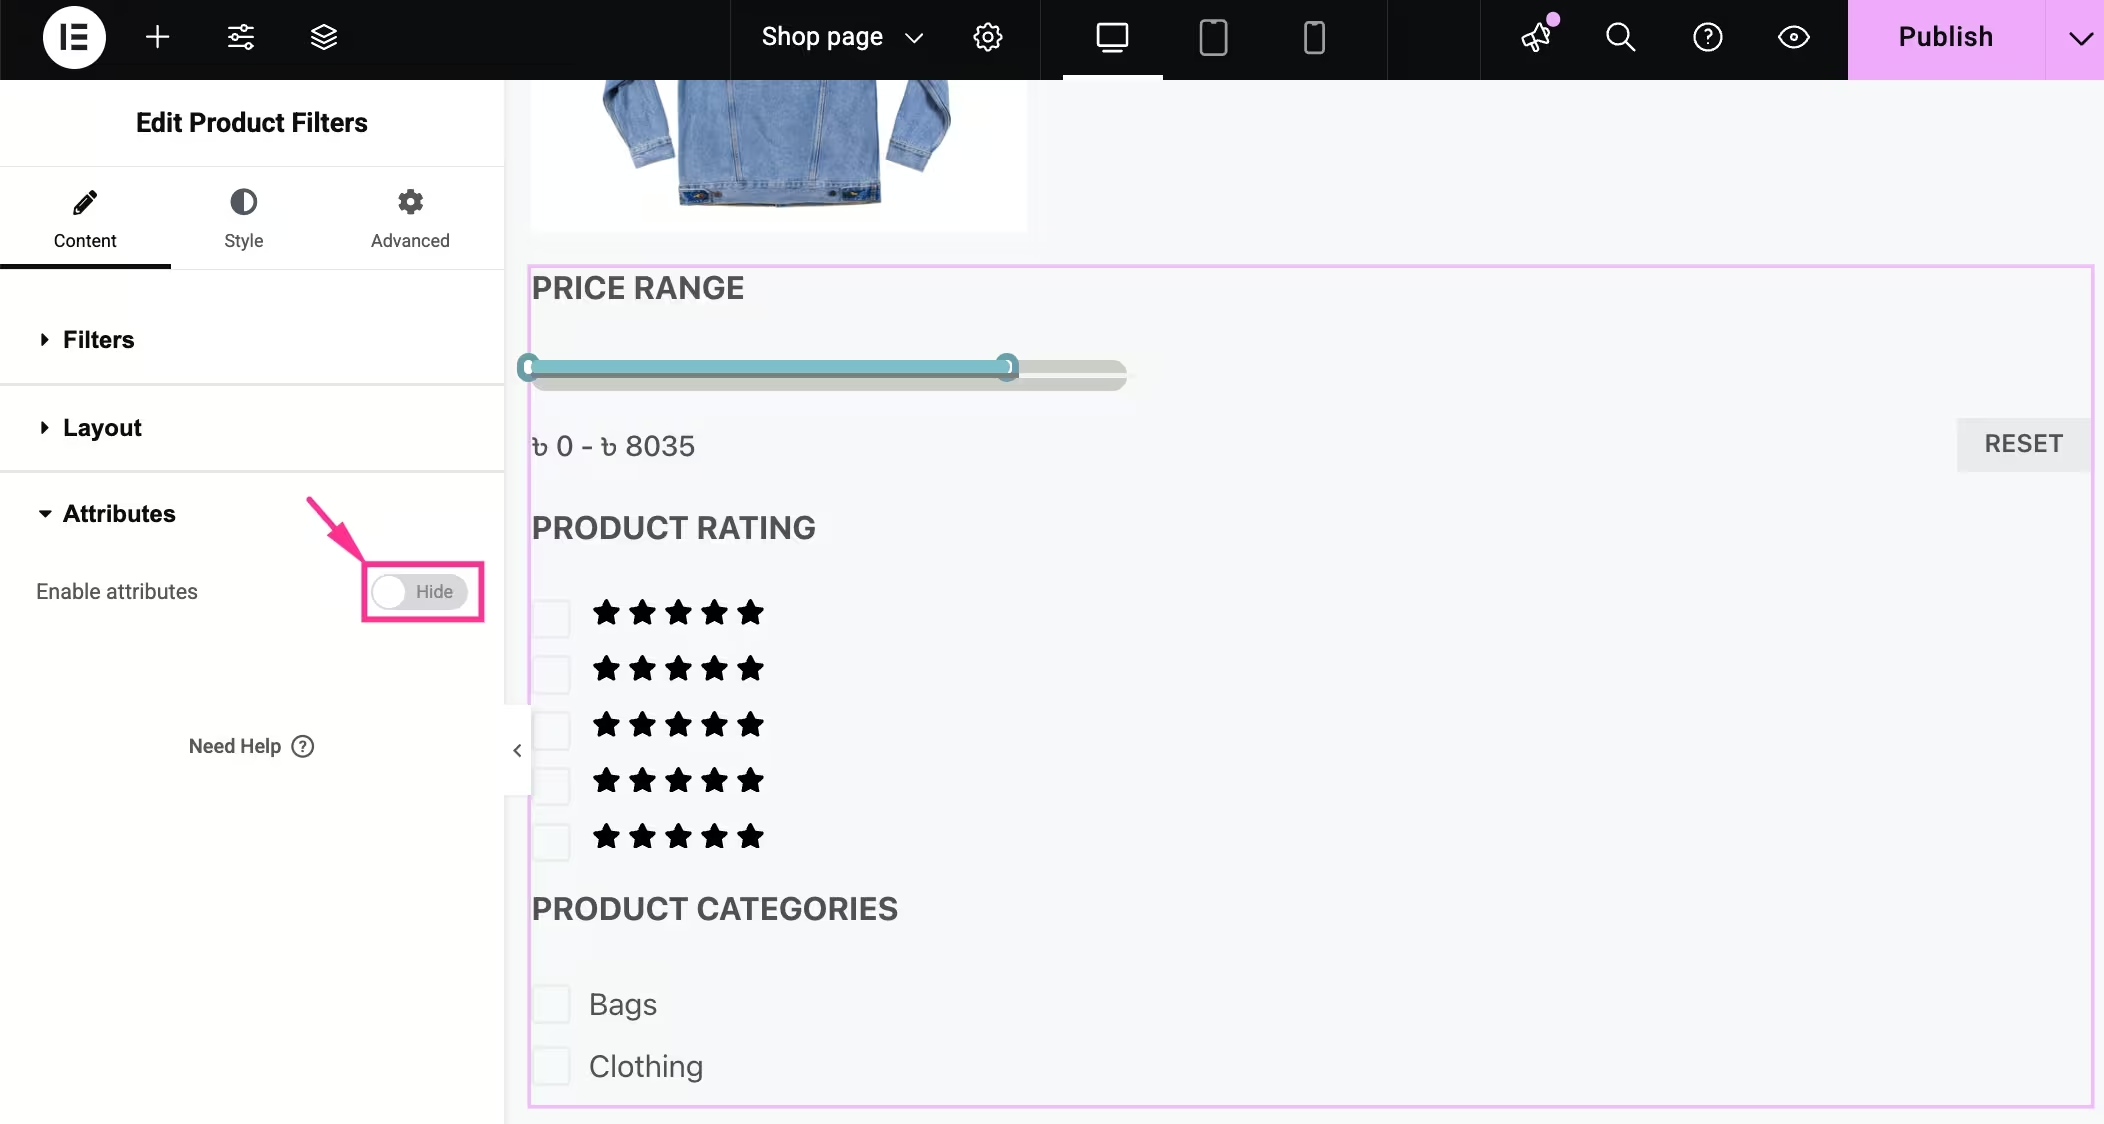
You can also add attributes by turning on the “Enable attributes” toggle.
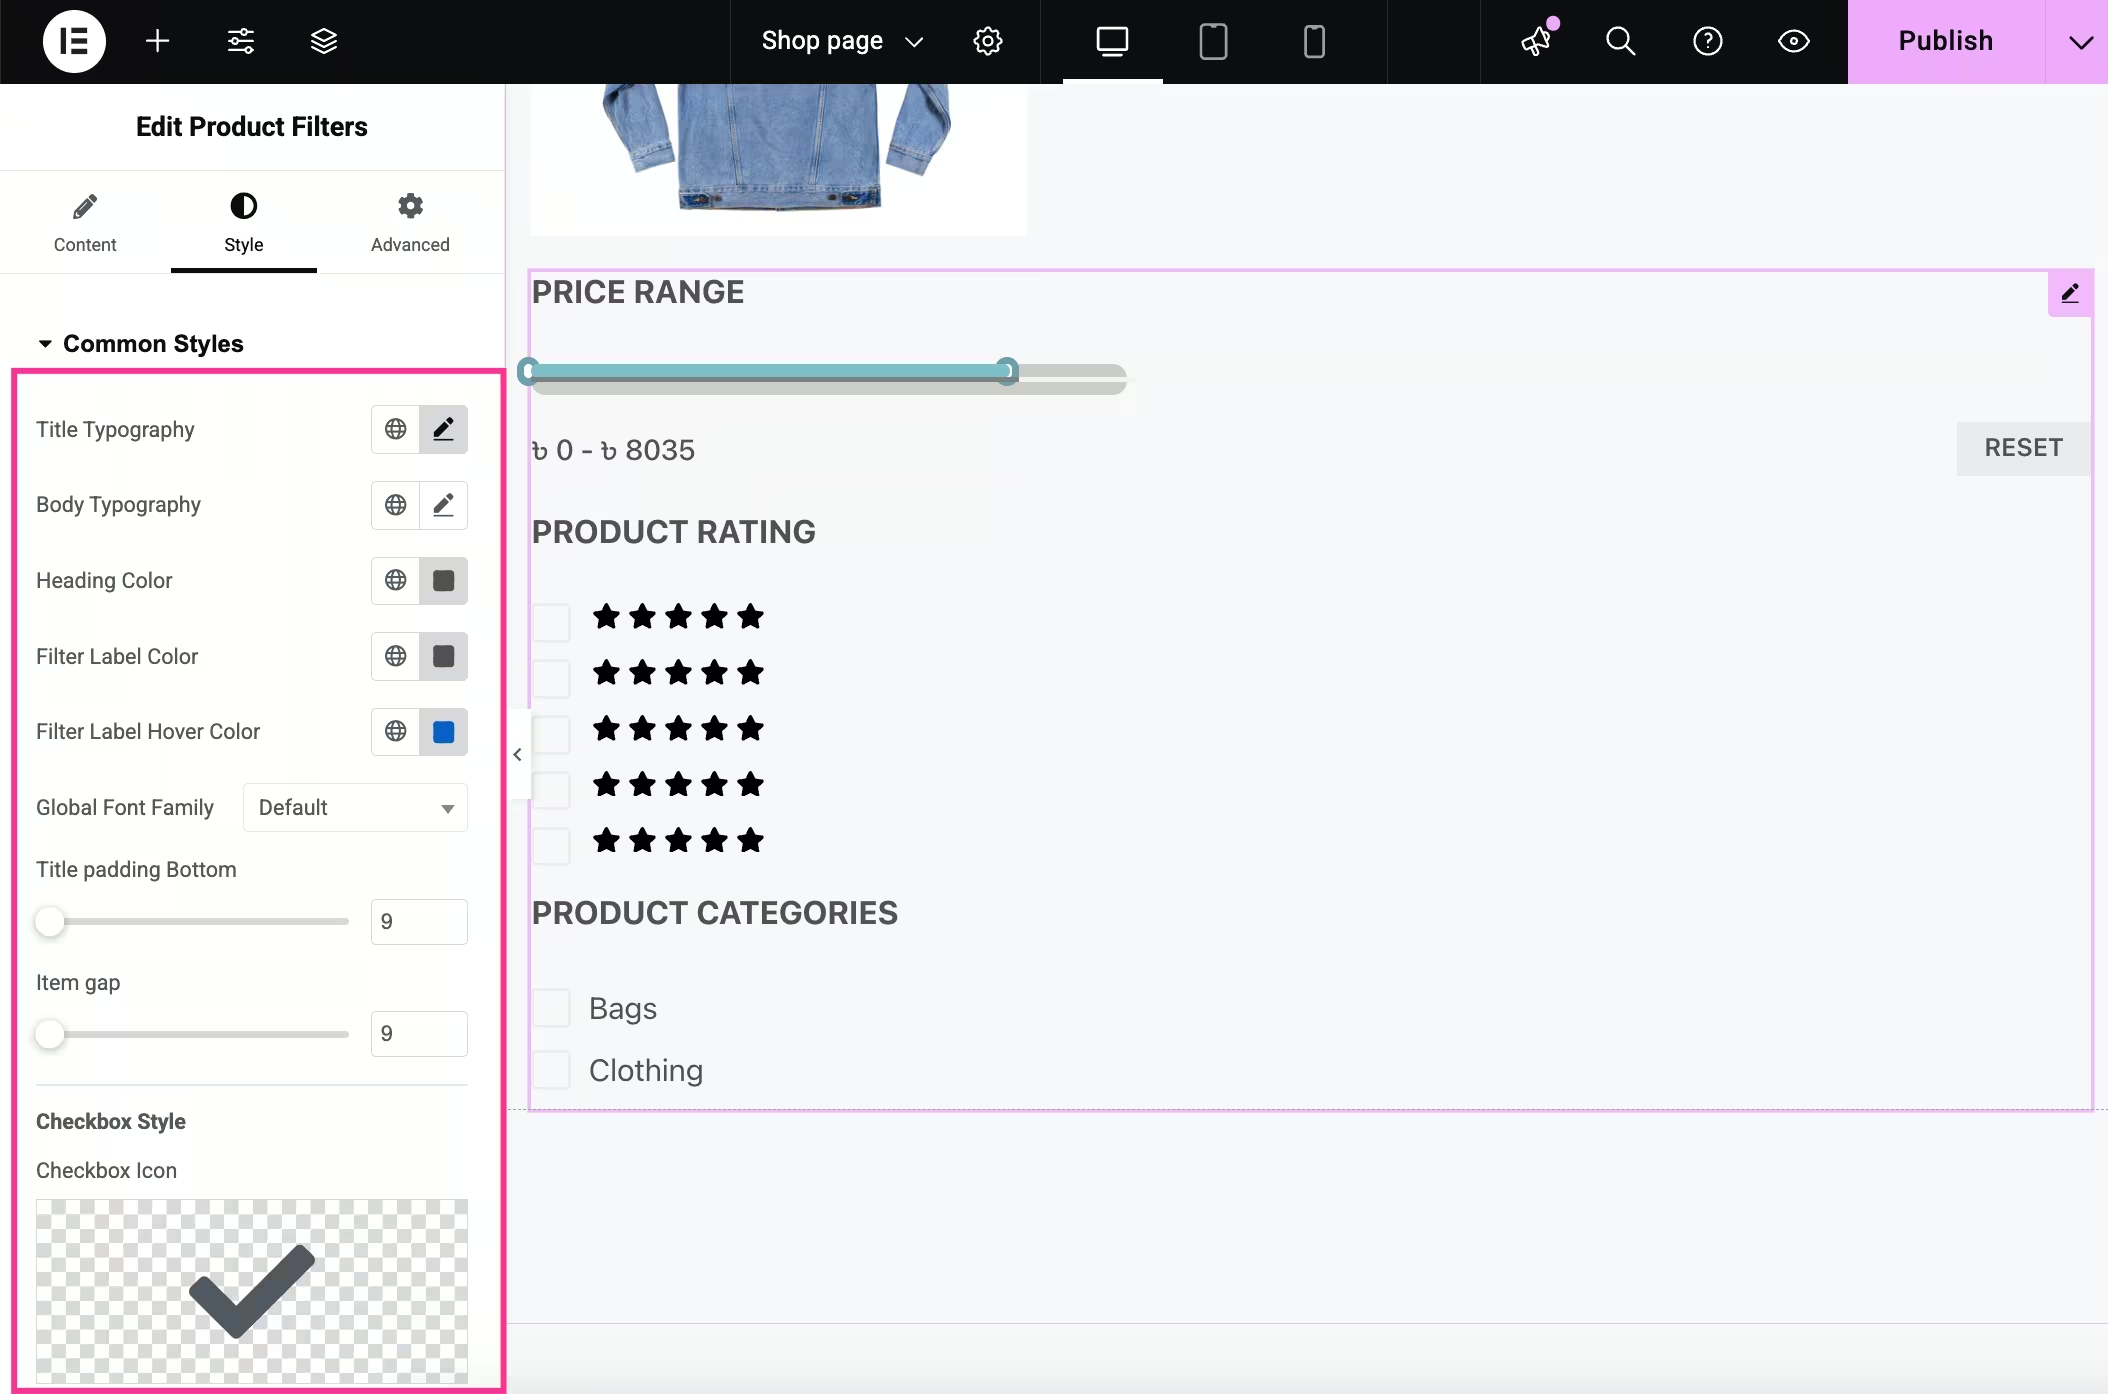
Step 6: Style customization
In the next step, you can customize common styling for the product filter option, such as title typography, body typography, heading color, filter label color, filter label hover color, global font family,item gap, Cor da borda,border width, preenchimento, etc., for WooCommerce product filter display.
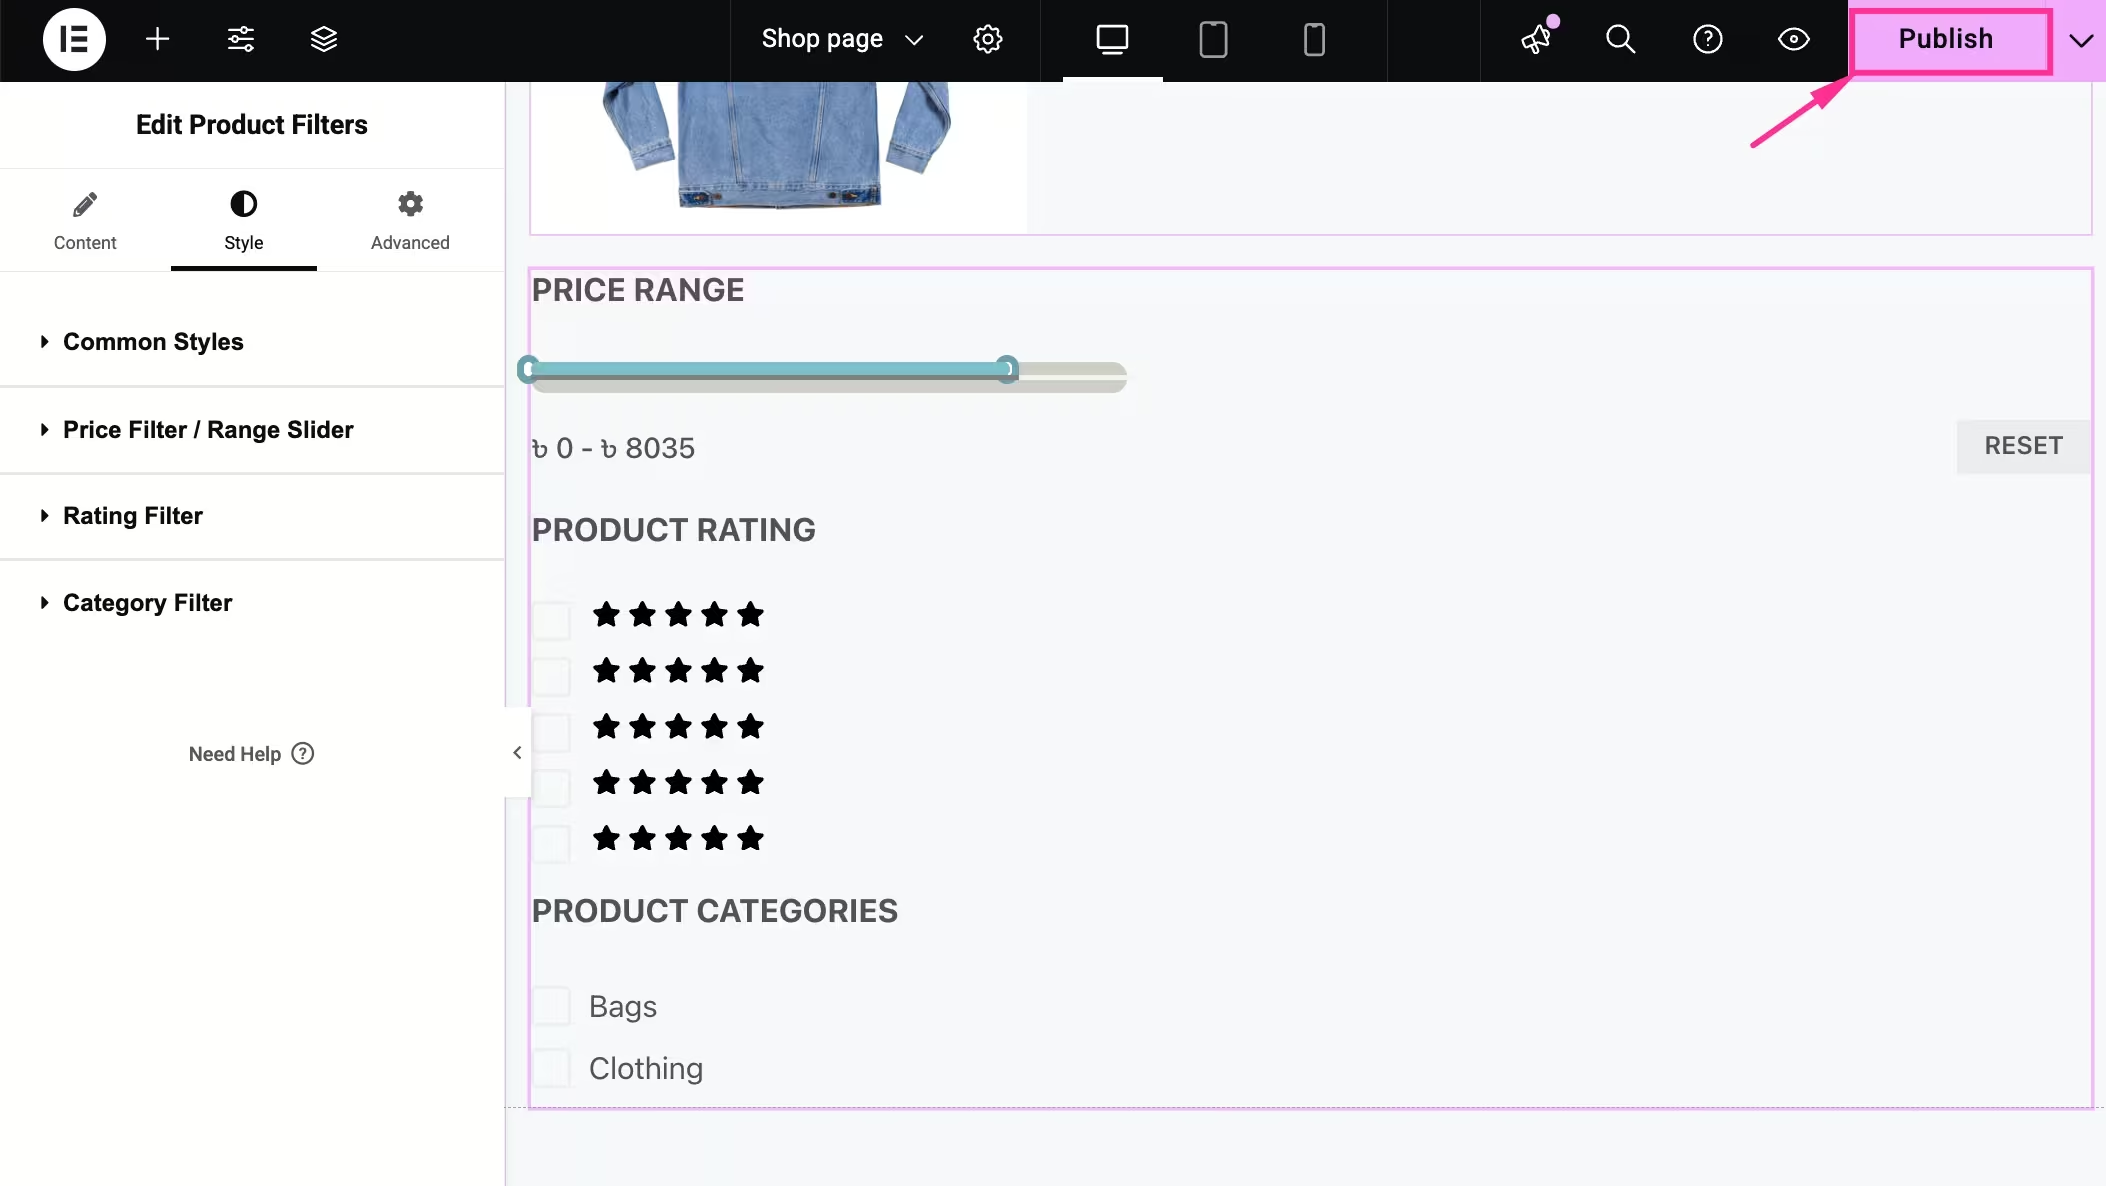
Finally, after wrapping up all the needed customizations, pressione o botão “Publicar” button to live your product filter on the WooCommerce shop page. Similarly, you can add a product filter to all other pages.
Empacotando
Product filters in WooCommerce play a powerful role in reducing cart abandonment rate and boosting sales, followed by a seamless browsing and shopping experience. It helps your customers to find their required products in the shortest possible time by letting them sort and refine products based on their preferences.
With a WooCommerce product filter plugin like ShopEngine, you can add filters and customize layout, style, and everything in the Elementor drag-and-drop interface. Once it steps up, your customers can instantly find what they need, which leads to a higher conversion rate and customer satisfaction.
So, integrate product filter and ensure fast and effortless navigation throughout your WooCommerce store with ShopEngine.

Deixe um comentário