Adicione facilmente um botão deslumbrante no editor de blocos com o Bloco de Botão GutenKit. Você pode facilmente criar um botão interativo com um ícone, texto, efeitos de animação e todas as opções de personalização necessárias que incentivam os usuários a clicar.
Nesta documentação, mostraremos como usar o bloco de botões GutenKit no editor Gutenberg.
Como usar o bloco de botões GutenKit #
Vá para o painel do WordPress > Adicionar uma página ou postagem > Clique em “+” ícone no topo da tela do editor de blocos > Pesquisar Botão GutenKit. Clique ou arraste e solte na tela do editor.
Agora, você verá as configurações do bloco Botão GutenKit na barra lateral direita da tela do editor de blocos.
Etapa 1: Adicionar texto de botão e ícone no Gutenberg Builder #
Começaremos adicionando o texto e o ícone. Vamos como inseri-los:
Debaixo de Guia de conteúdo,
Contente #
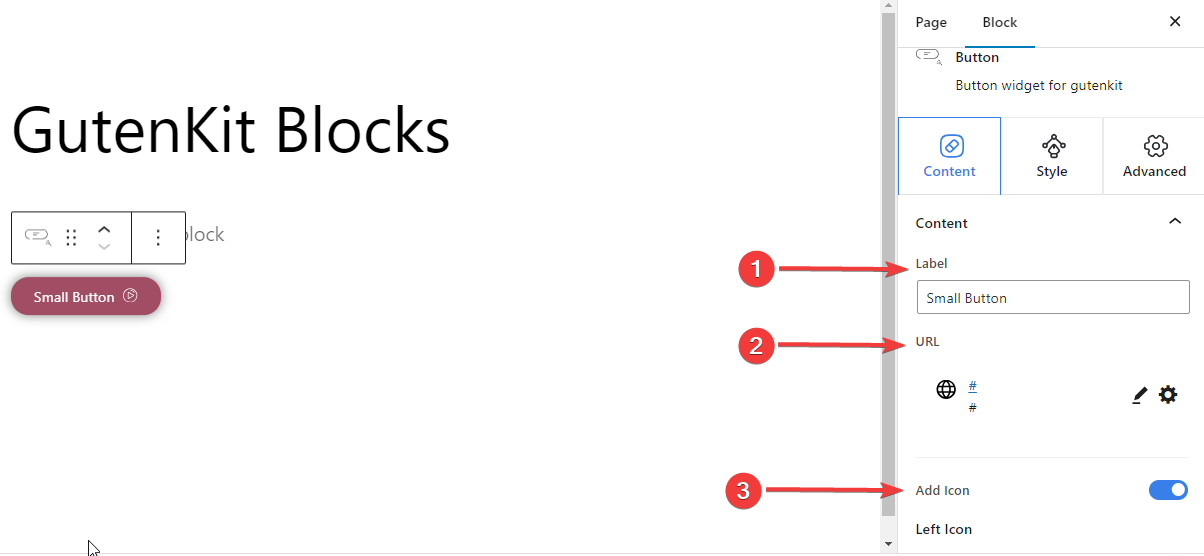
- Rótulo: Edite ou adicione um novo rótulo para o botão.
- URL: Adicione a URL que aparecerá depois de clicar no botão.
- Adicionar ícone: Alterne este ícone dentro do botão.
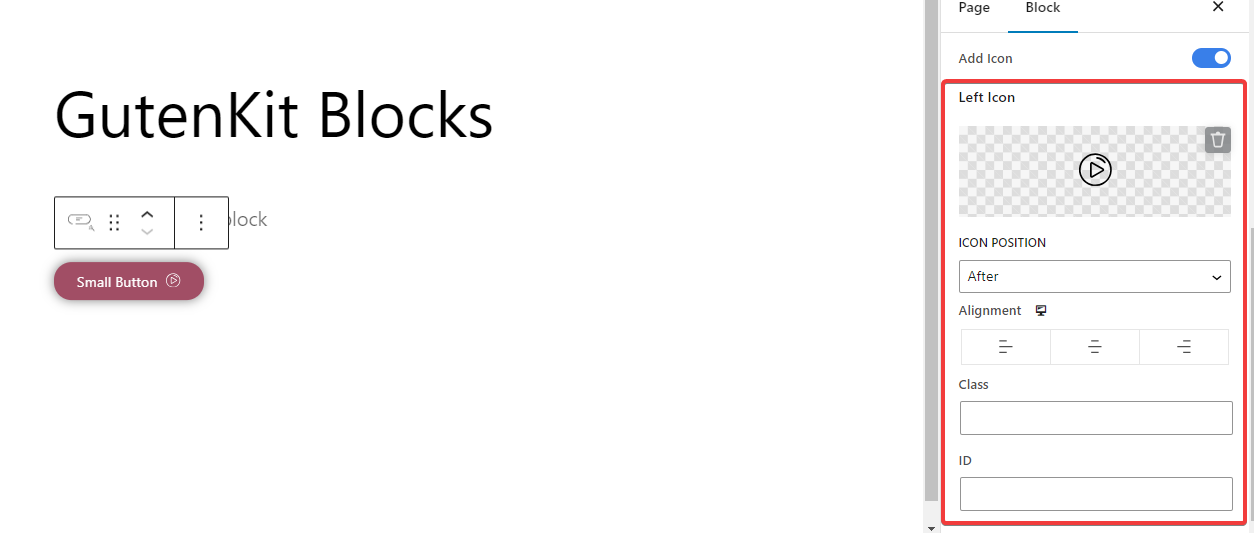
- Ícone da esquerda: Selecione um ícone da biblioteca ou carregue o seu próprio.
- Posição do ícone: Mostra o ícone antes ou depois do texto do botão.
- Alinhamento: Alinhe seu botão à esquerda, ao centro ou à direita.
- Aula: Dê classe ao botão.
- EU IA: Dê ao botão um ID exclusivo.
Etapa 2: estilize o bloco de botões no Gutenberg Builder #
Passando para as opções de estilo para o bloco de botões. As configurações a seguir ajudarão você a personalizar o estilo do botão.
Botão: #
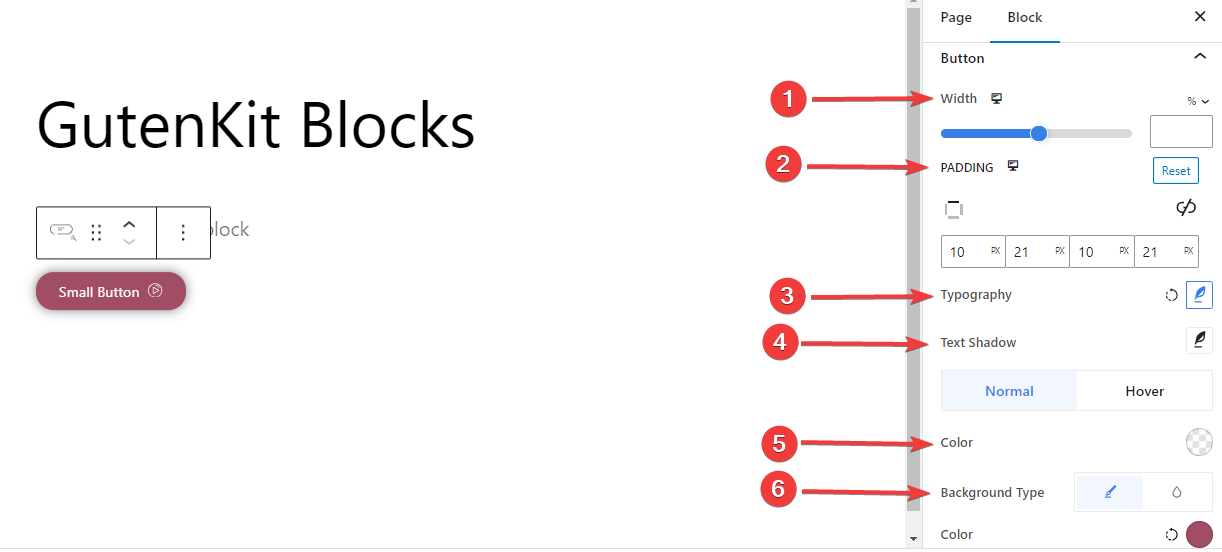
- Largura: Use a barra ou insira manualmente o valor para a largura do seu botão.
- Preenchimento: Defina o preenchimento dentro do seu botão.
- Tipografia: Controle todas as opções de tipografia para o texto do botão.
- Sombra de texto: Forneça todas as opções para os efeitos visuais de sombra do texto do botão.
- Cor: Escolha uma cor para o texto do botão.
- Tipo de plano de fundo: Adicione um fundo clássico ou de cor sólida.
Fronteira #
Você pode adicionar uma borda para estágios normais e hover. Clicar em qualquer opção revelará as configurações abaixo:
- Fronteira: Dê cor à borda e use o controle deslizante ou insira um valor manualmente para o tamanho da borda.
- Raio da Fronteira: Defina a redondeza da borda.
Sombra,
- Sombra da caixa: Adicione efeitos visuais de sombra à caixa e defina sua cor, tamanho, ângulo e posição.
Ícone,
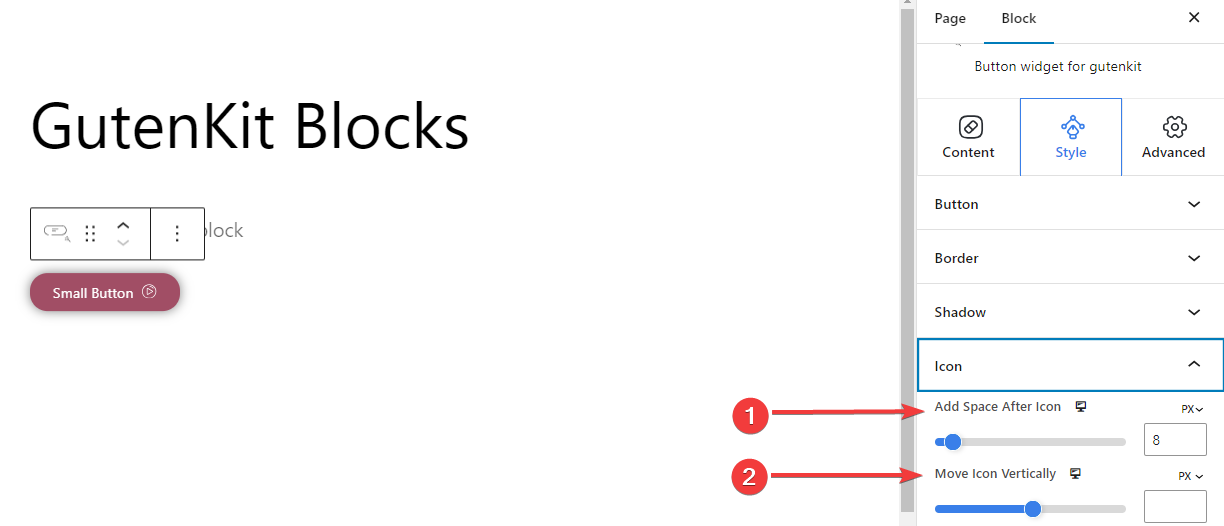
- Adicionar espaço após o ícone: Adicione espaço após o ícone para localizá-lo horizontalmente.
- Mover o ícone verticalmente: Defina a posição vertical do ícone.
Etapa 3: Configurações avançadas #
Usando a guia Configurações avançadas, você pode configurar o layout do bloco de botões, o plano de fundo, os estilos de borda e controlar sua visibilidade.
Disposição: #
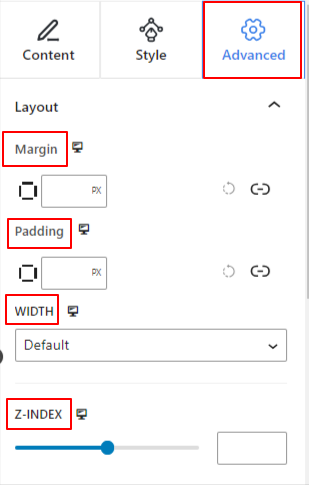
- Margem: Defina o espaço ao redor do layout do bloco. Ajuda a definir a lacuna entre outro bloco.
- Preenchimento: insira um valor para definir o espaço ao redor do bloco dentro de seu layout.
- Largura: Além de manter a largura padrão do layout.
- Largura completa: selecionar esta opção fará com que o layout ocupe toda a largura da tela.
- Em linha (automático): Aplicá-lo terá a mesma largura do elemento do bloco.
- Personalizado: Escolher esta opção revelará um controle deslizante para definir o espaço horizontal do layout do bloco.
- Índice Z: Use o controle deslizante para especificar a ordem da pilha do bloco com outros blocos.
Posição: #
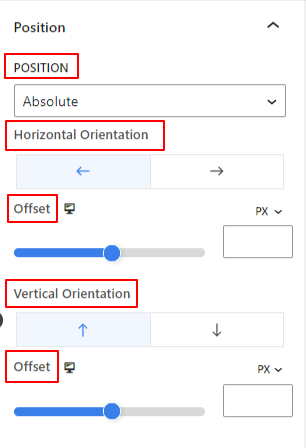
No menu suspenso, você verá três opções: Padrão, Absoluto, e Fixo.
- Absoluto: Selecionar esta opção lhe dará uma posição absoluta do bloco, o que significa que os elementos caberão em seu contêiner.
- Fixo: a opção Posição fixa permitirá que o elemento caiba em toda a viewport ou tela.
Ambas as opções Absoluta e Fixa têm configurações semelhantes às abaixo:
- Orientação horizontal: Escolha a direção de posicionamento entre esquerda e direita.
- Desvio: Use o controle deslizante ou coloque um valor manualmente para ajustar o posicionamento horizontal do bloco.
- Orientação Vertical: Selecione a direção de posicionamento entre para cima ou para baixo.
- Desvio: Use o controle deslizante ou coloque um valor manualmente para ajustar o posicionamento vertical do bloco.
Visibilidade #
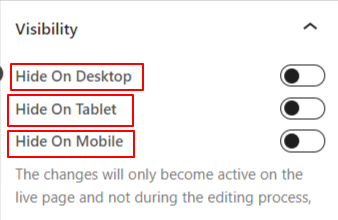
O módulo de visibilidade permite controlar a exibição de designs de blocos dependendo do tipo de dispositivo. Haverá três opções de dispositivos (Desktop, Tablet, Mobile) com um botão de alternância. Ative o botão de alternância para ocultar o design do bloco desse dispositivo.
No entanto, você ainda pode vê-lo na visualização do editor.
Avançado: #
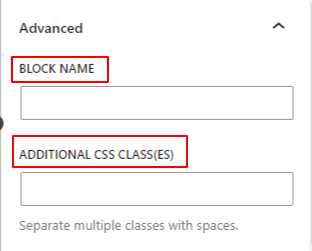
- Nome do bloco: forneça um nome para identificar este bloco exclusivamente ao vincular ou criar scripts para definir o estilo do bloco.
- Âncora HTML: adicione um URL para vincular uma página do site.
- Classes CSS adicionais: atribua classes CSS adicionais ao bloco, o que permitirá estilizar o bloco como desejar com CSS personalizado.
Observação: você pode adicionar várias classes separadamente com espaços.
Aplicando as configurações acima com precisão, você acabará com um botão atraente em seu site. Dê a si mesmo uma chance de adicionar um botão ao site.


