


You can integrate Google services like Google Sheets and Drives to your WordPress forms. For that you need to connect the MetForm with your Google Cloud Console.
Here is how to integrate Google services with MetForm:
Pre-requirements: #
- You will need a Google Cloud Console account, either you have to open a new account or log in to your exisiting account.
- Since MetForm is an Elementor form builder, you need to have Elementor plugin installed and activated on your website.
- Elementora: Pobierz wtyczkę
- MetForm Pro: Pobierz wtyczkę
👑 Google integration in only available with MetForm Premium version.
Step 1: Set up a project in the Google Cloud Console #
You will need APIs to connect the Google Sheet with WordPress form. For that, login to your Google Cloud console acoount. After that,
1. Click on the Select a project upuścić.
2. A popup will appear, there click on the Nowy projekt opcja.
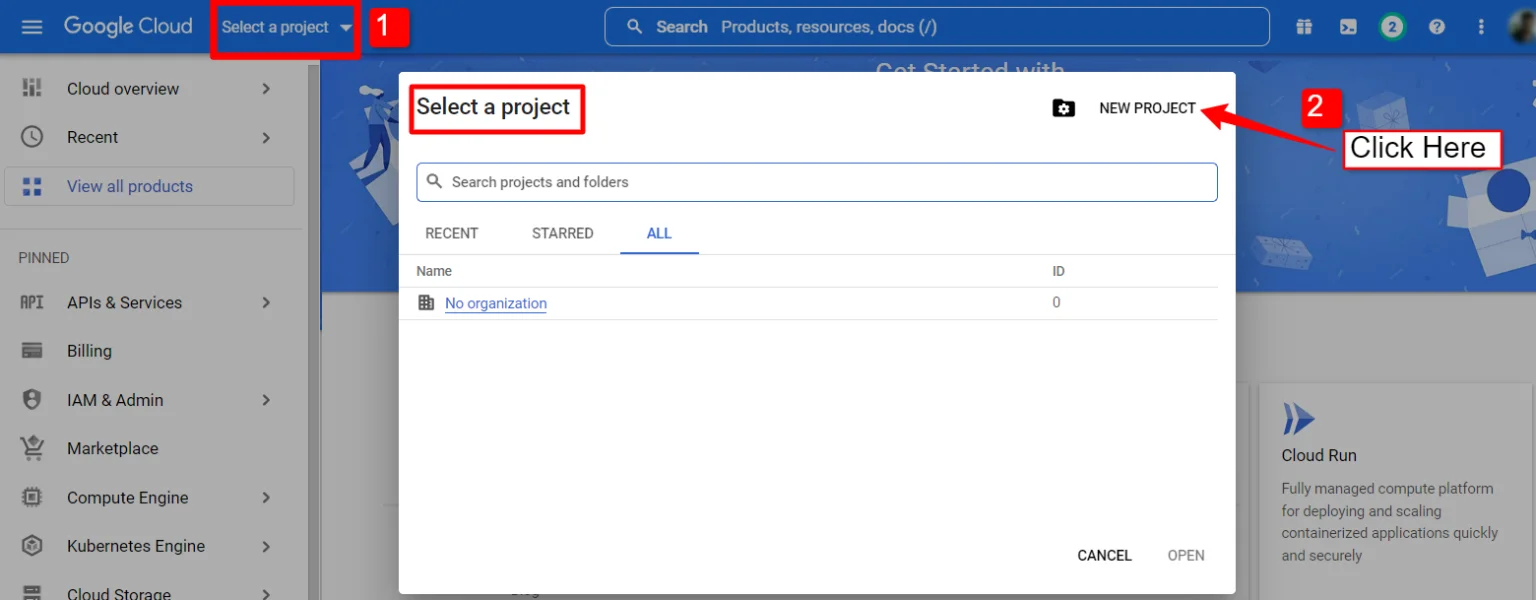
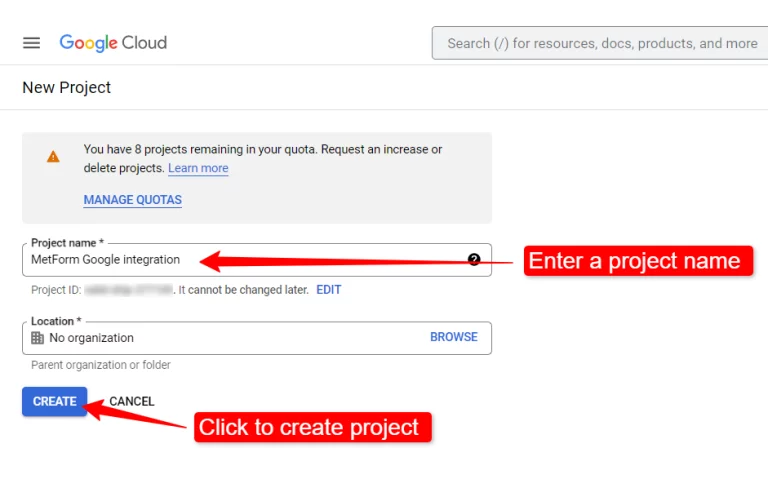
Aby utworzyć nowy projekt, wpisz a Nazwa Projektu I Lokalizacja (jeśli dotyczy) i kliknij przycisk Utwórz przycisk.
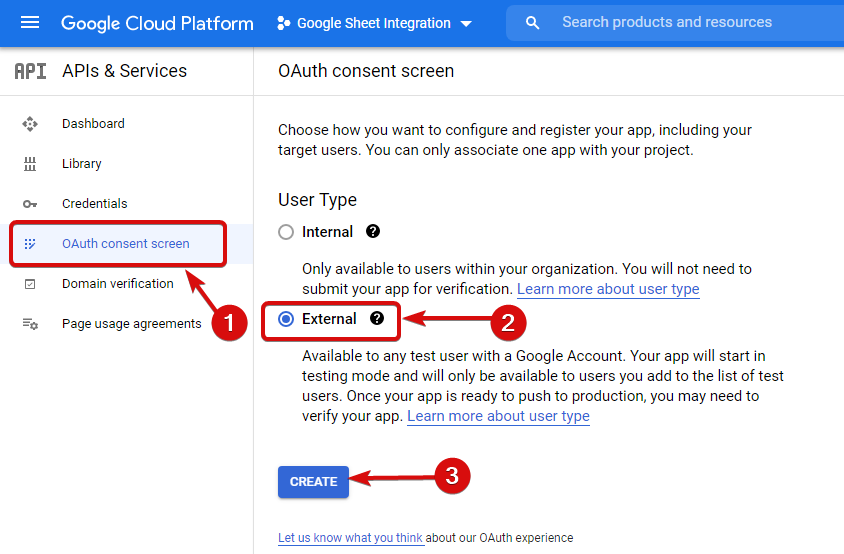
Then go to your project dashboard, and navigate to APIs overview >> OAuth consent screen.
On the OAuth consent screen select the Typ użytkownika na Zewnętrzny i kontynuuj, klikając przycisk „Utwórz”.
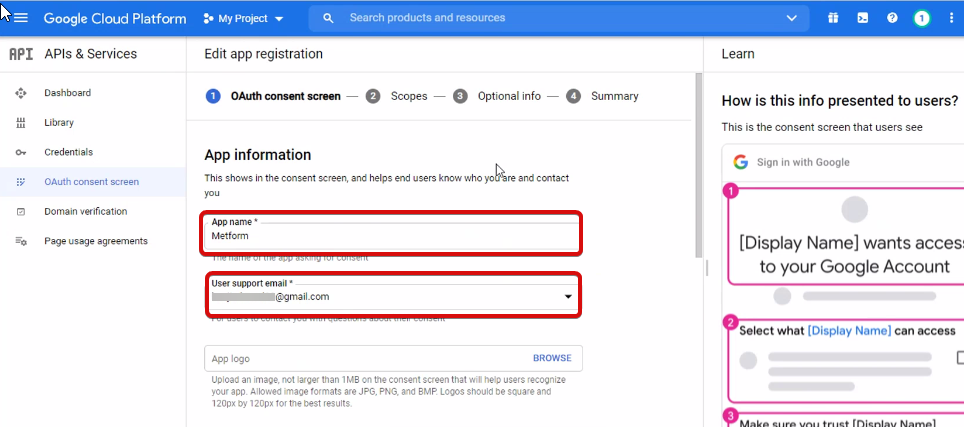
On the next screen, enter your App information including:
- Nazwa aplikacji
- E-mail wsparcia użytkownika
- Autoryzowane domeny
- Developer contact
Na koniec kliknij Zapisz i kontynuuj
Przejdź do Przeglądu interfejsów API
- Przejdź do strony ekranu zgody OAuth
- Wybierz typ użytkownika zewnętrzny
- Naciśnij przycisk tworzenia
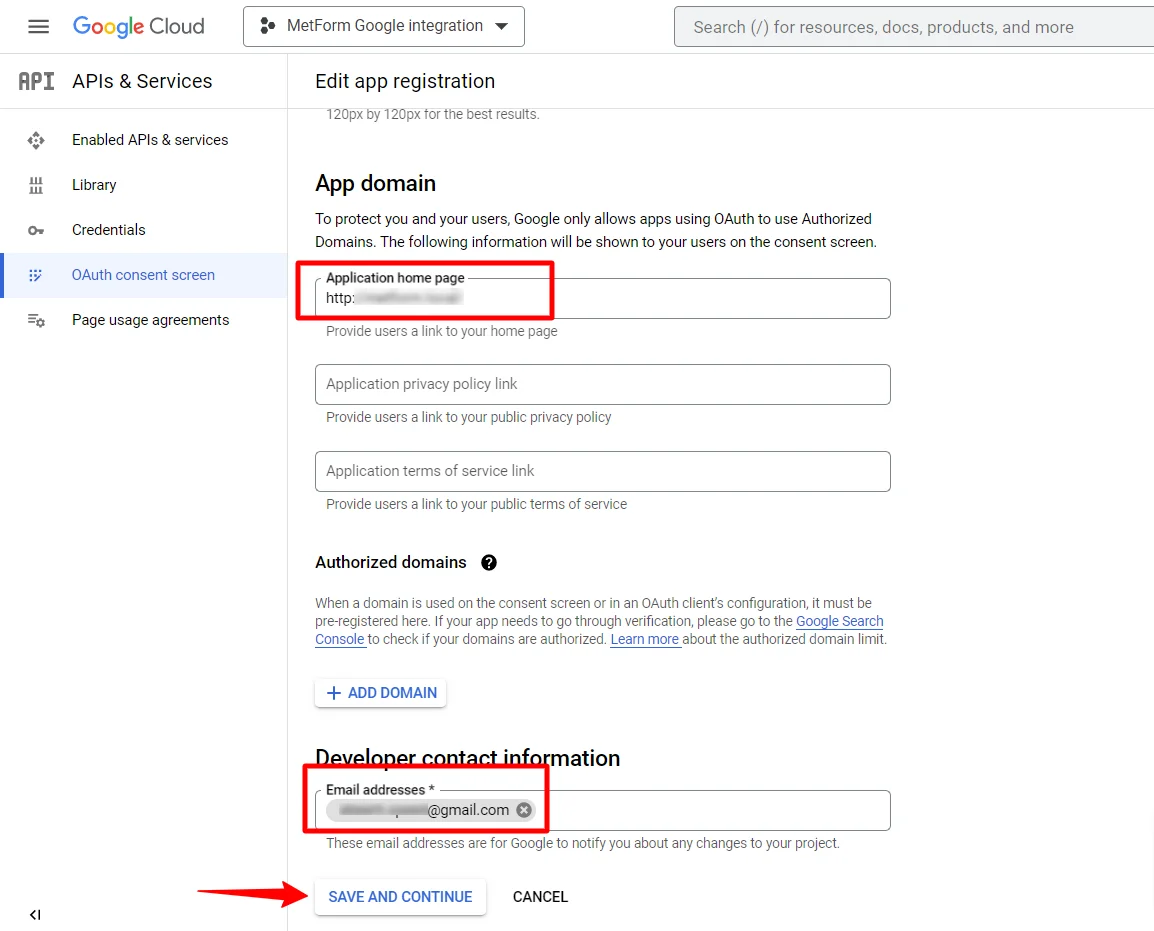
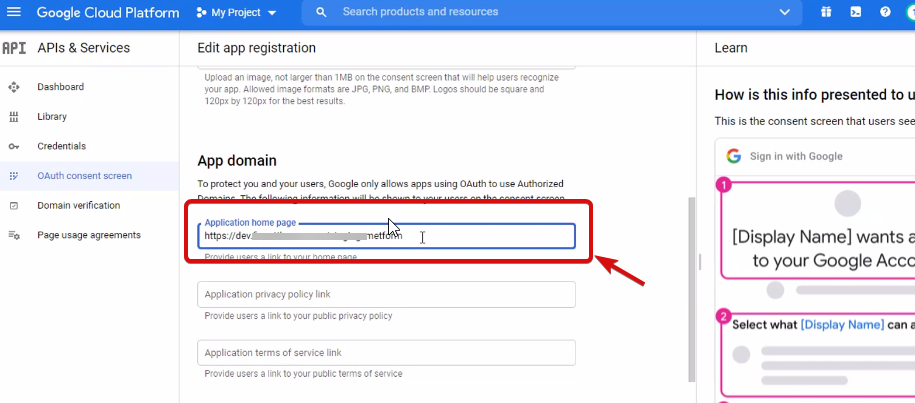
Podaj informacje o swojej aplikacji, zobacz obrazek poniżej –
Teraz musisz add App domain. If your site is on the live server then you need to authorize the domain. An authorized domain does not allow subdomain names and any protocol. However, you can use this Google project for websites created with your subdomain. For localhost, you do not need to authorize the domain.
Następnie zapisz i kontynuuj.
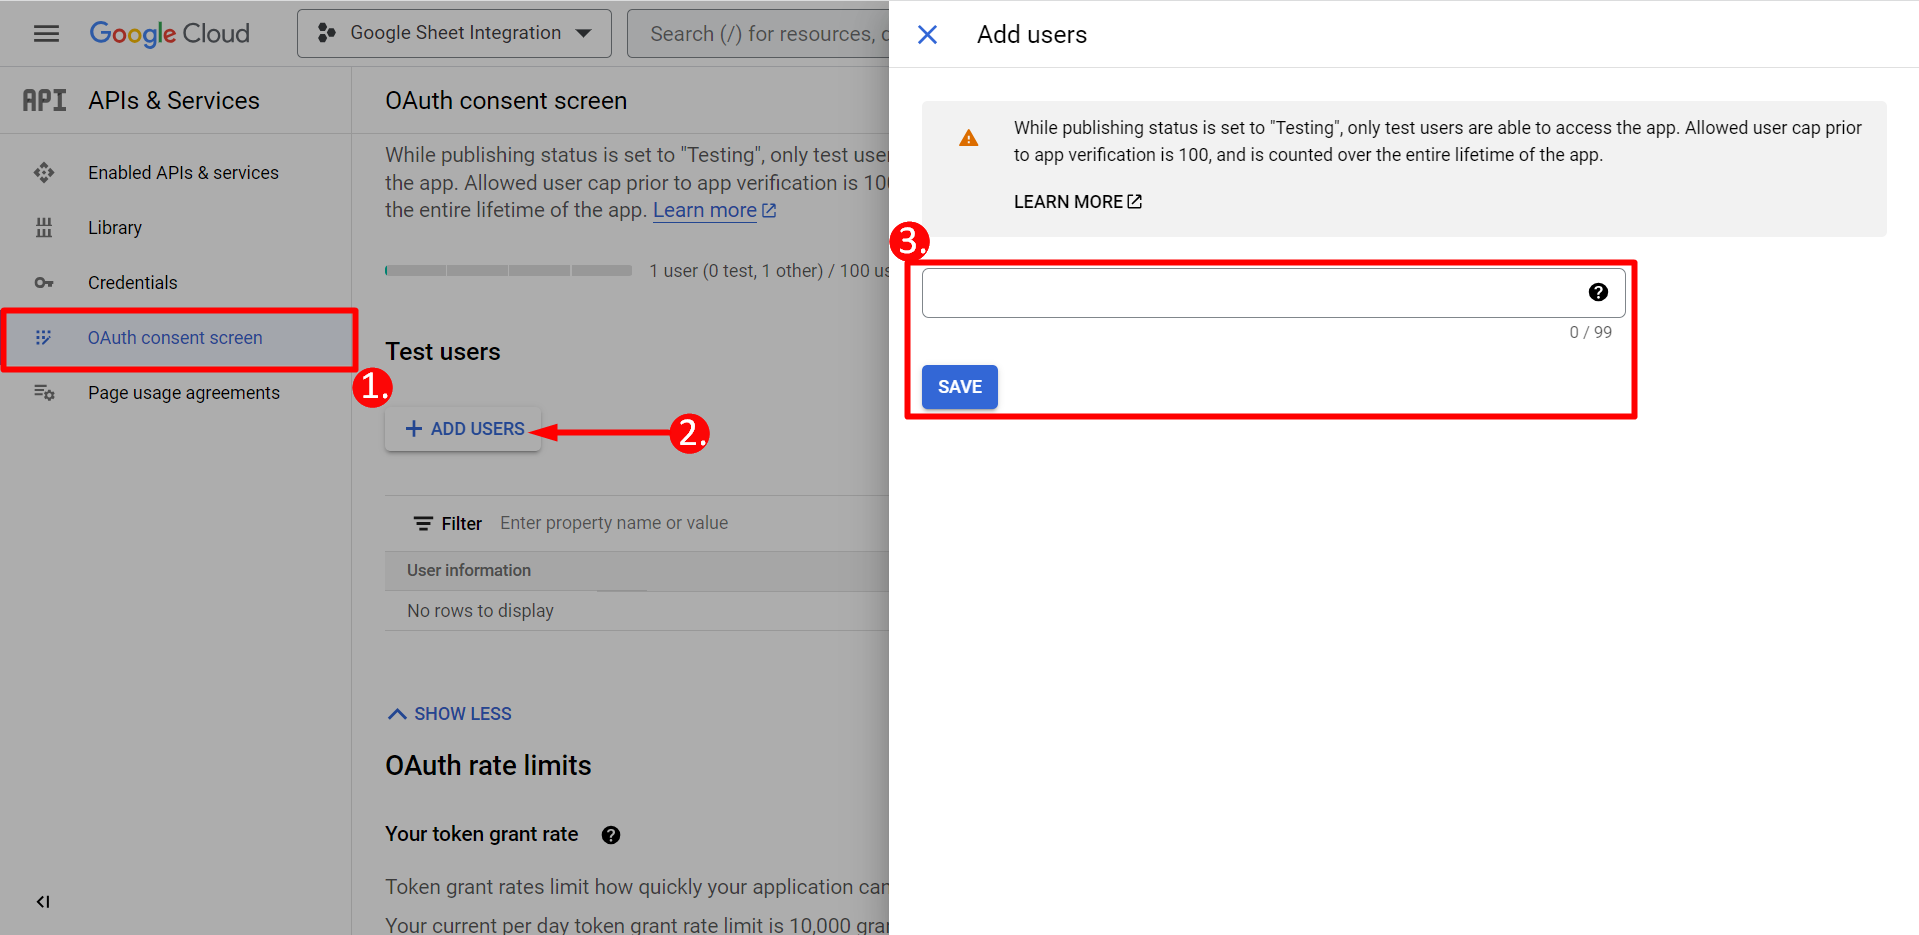
- Z ekranu zgody OAuth
- Kliknij Dodaj użytkowników
- Add your email address and save it
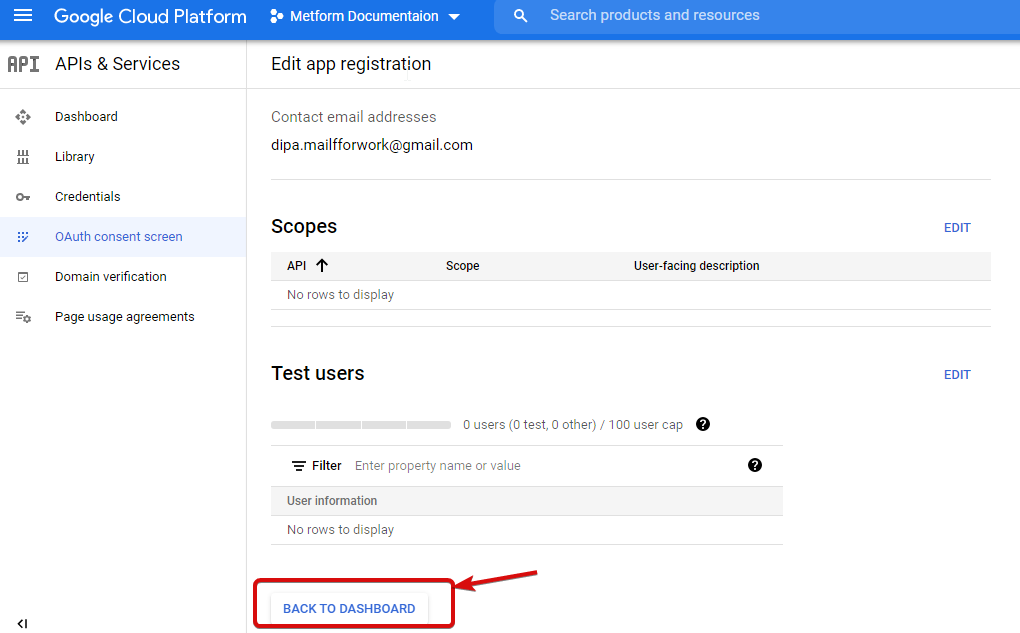
Kliknij przycisk powrotu do pulpitu nawigacyjnego
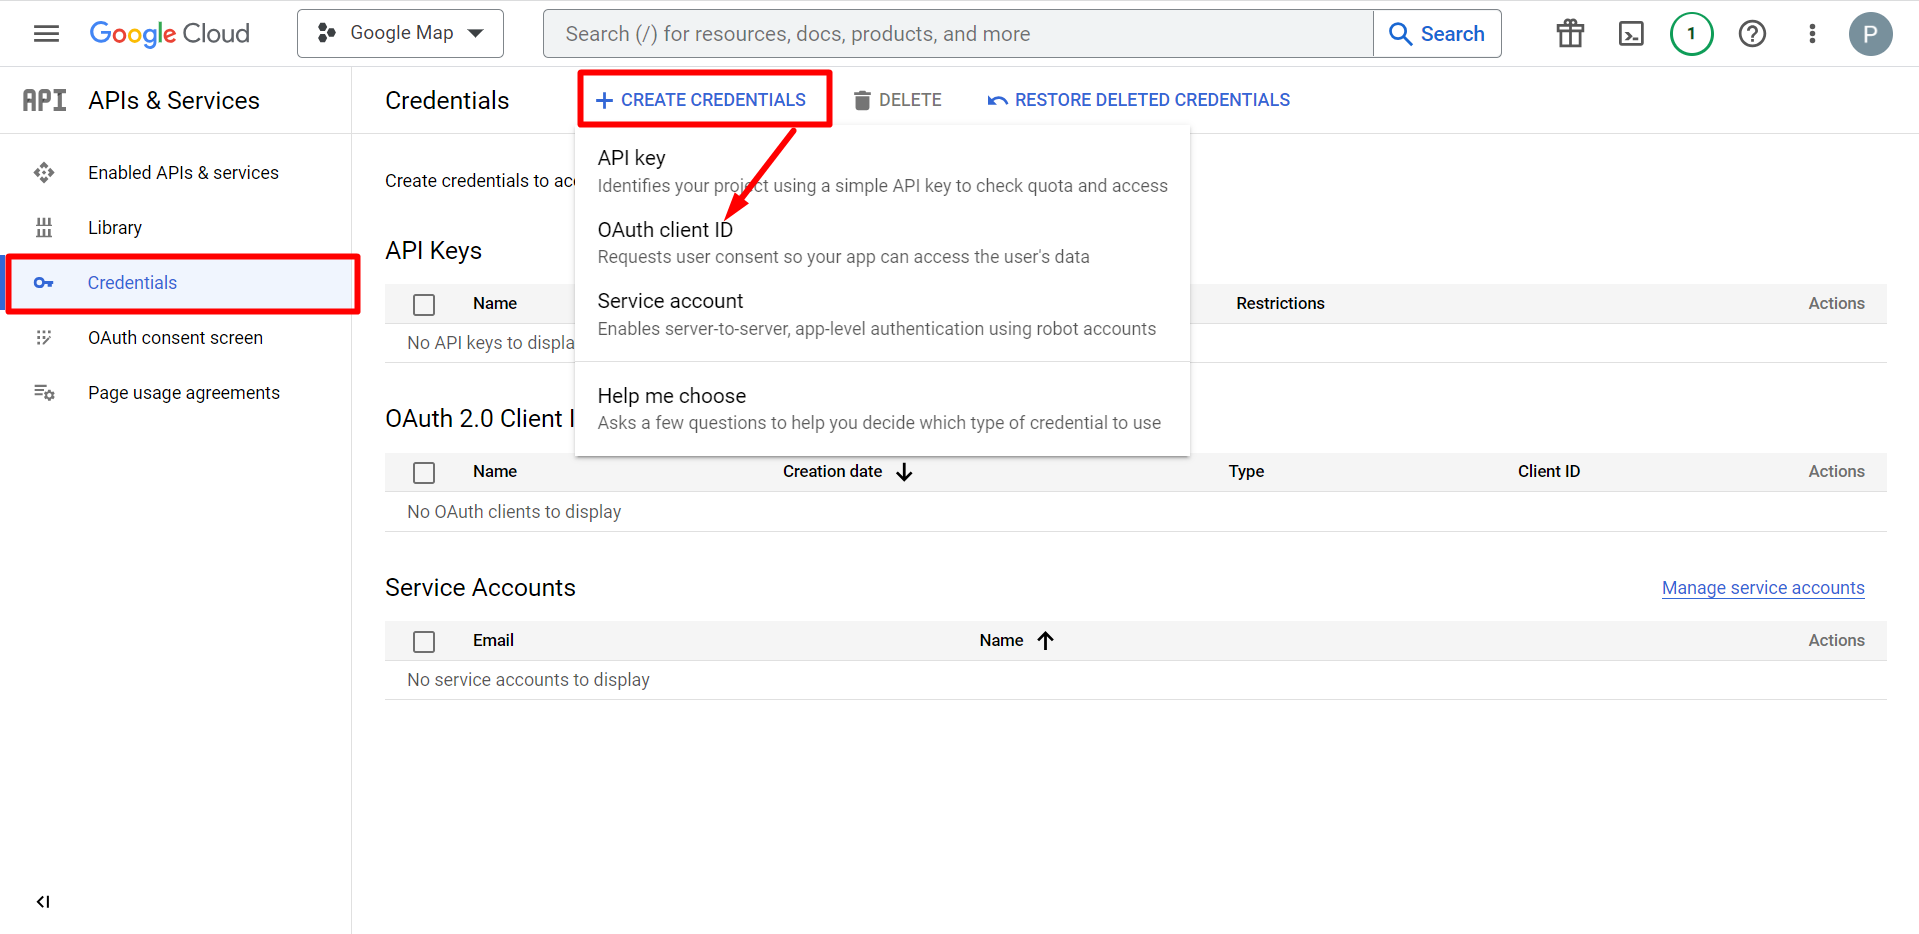
Kliknij przycisk publikowania aplikacji i przejdź do strony danych uwierzytelniających. Jeśli Twoja witryna znajduje się na serwerze localhost, nie musisz klikać przycisku publikowania aplikacji. Wystarczy przejść do strony z danymi uwierzytelniającymi.
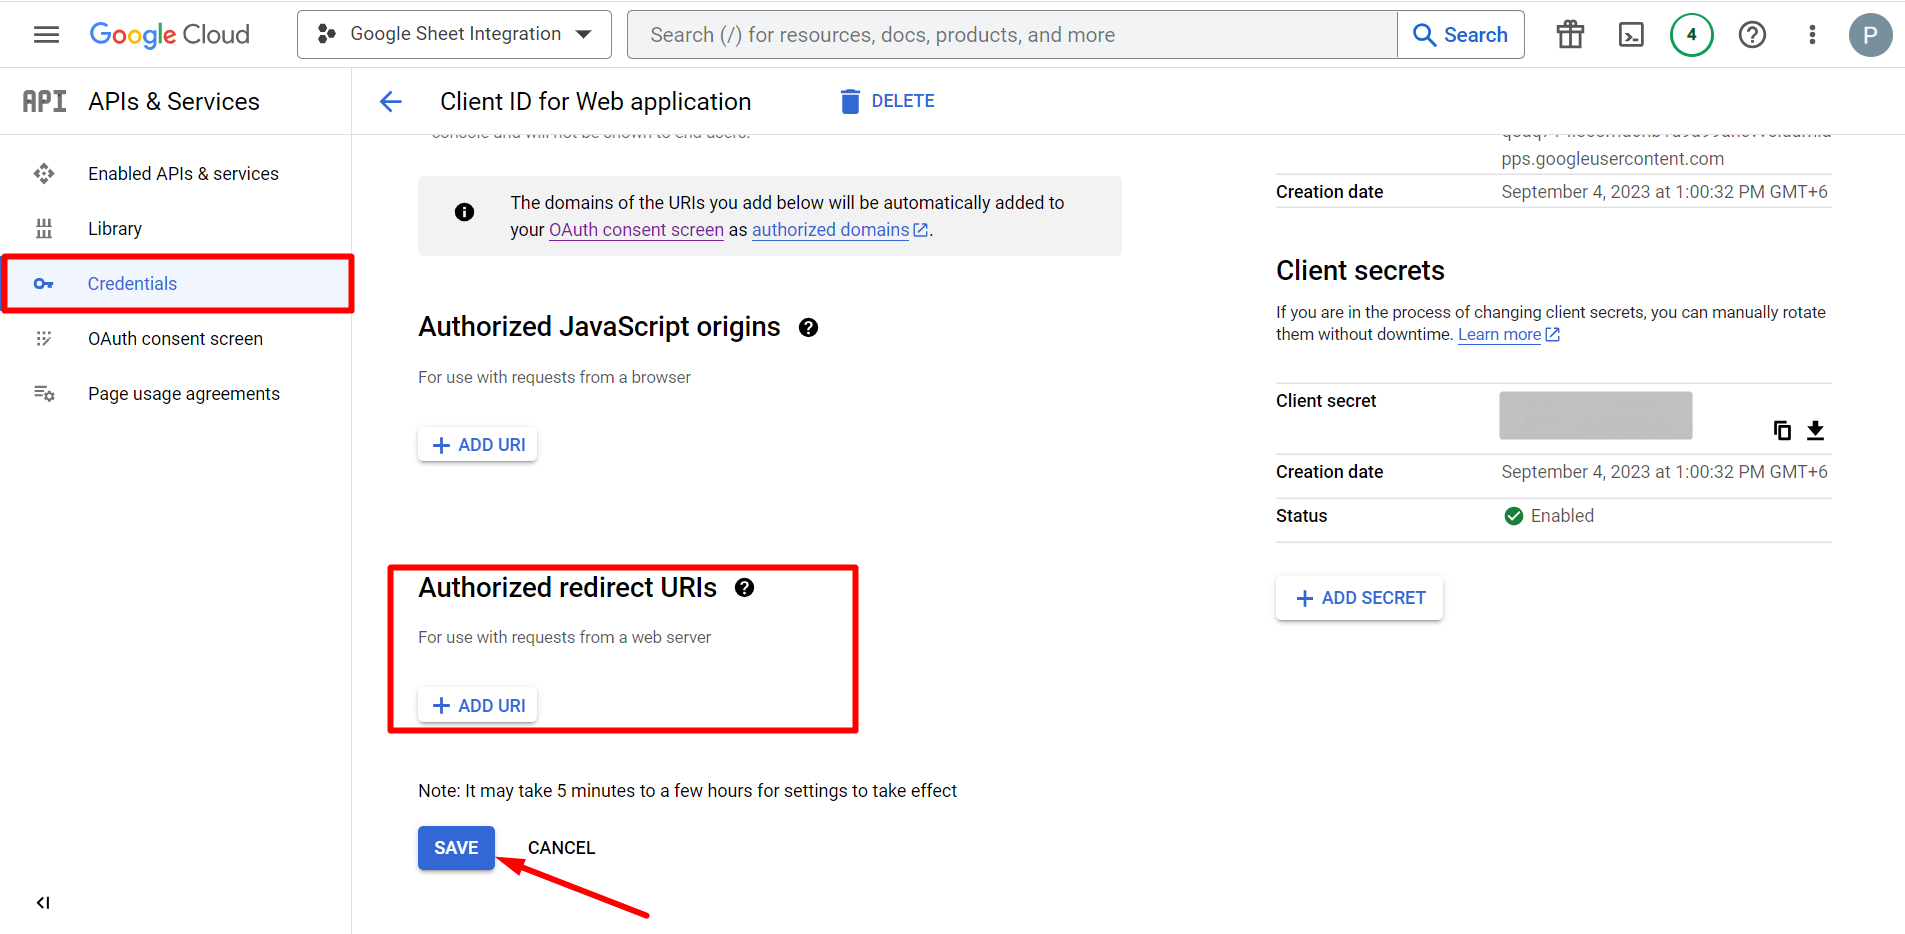
- Przejdź do Poświadczeń
- Utwórz poświadczenia
- Wybierz identyfikator klienta OAuth
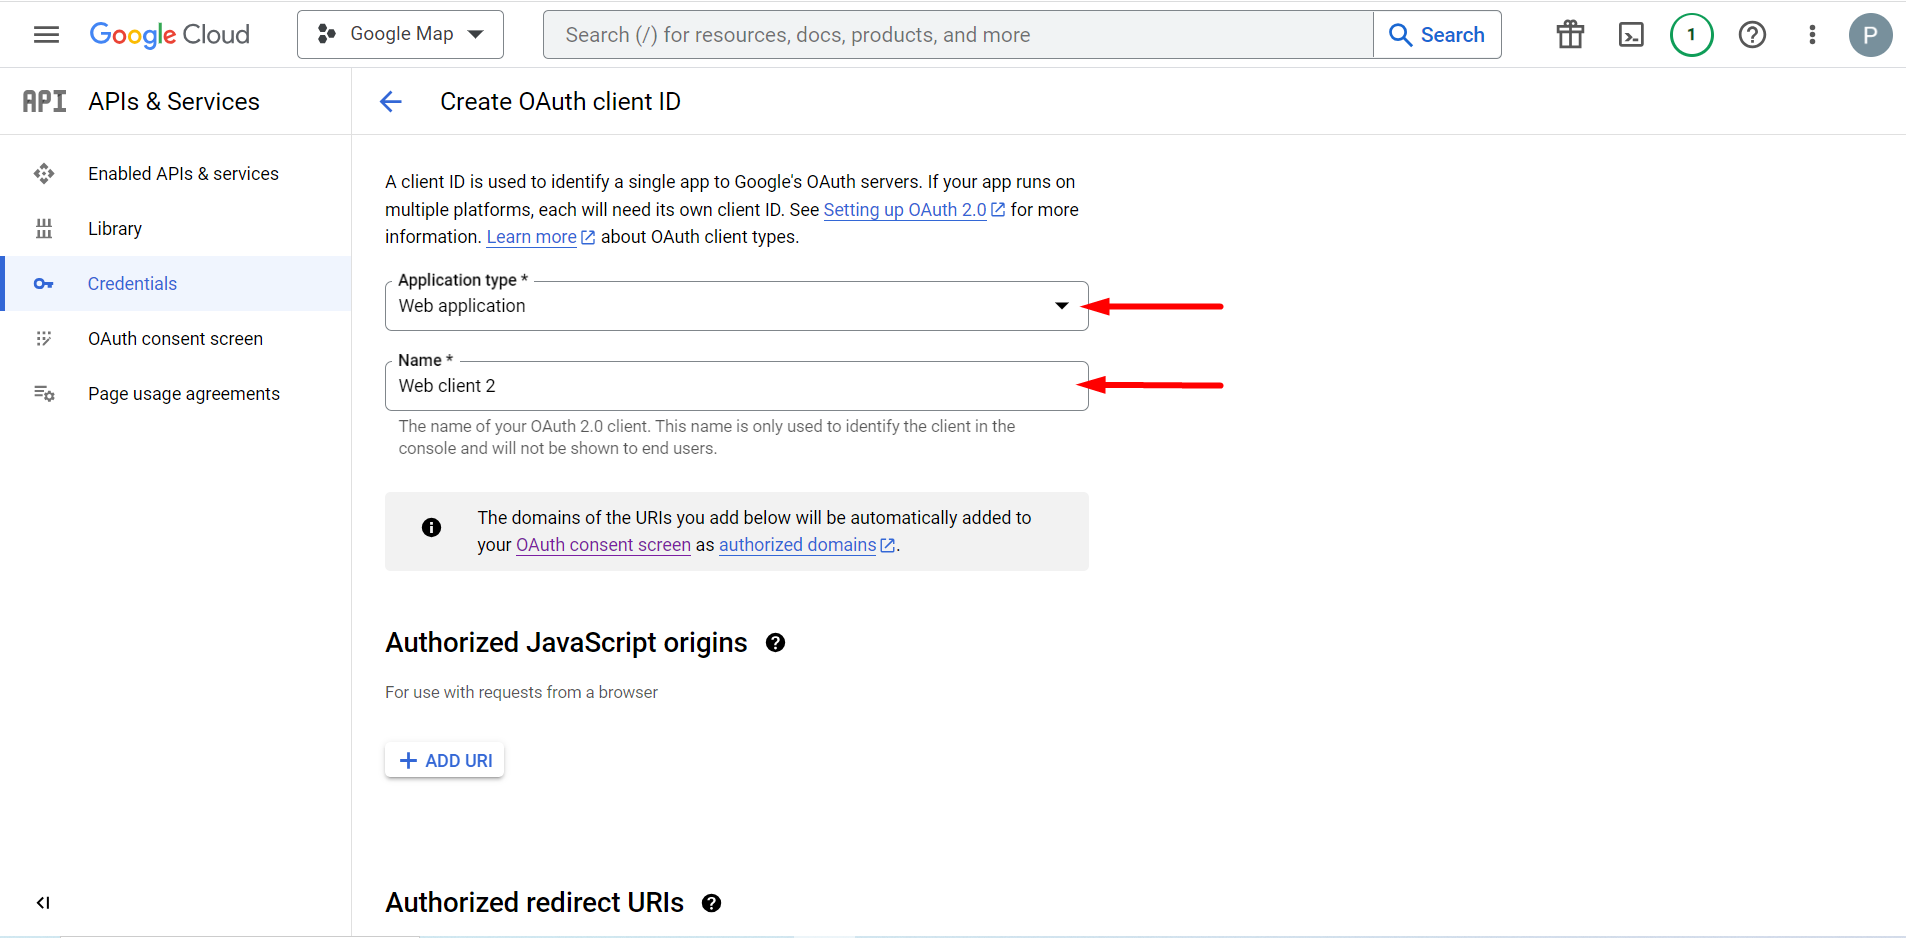
Wybierz typ aplikacji to aplikacja internetowa, wypełnij pole nazwy
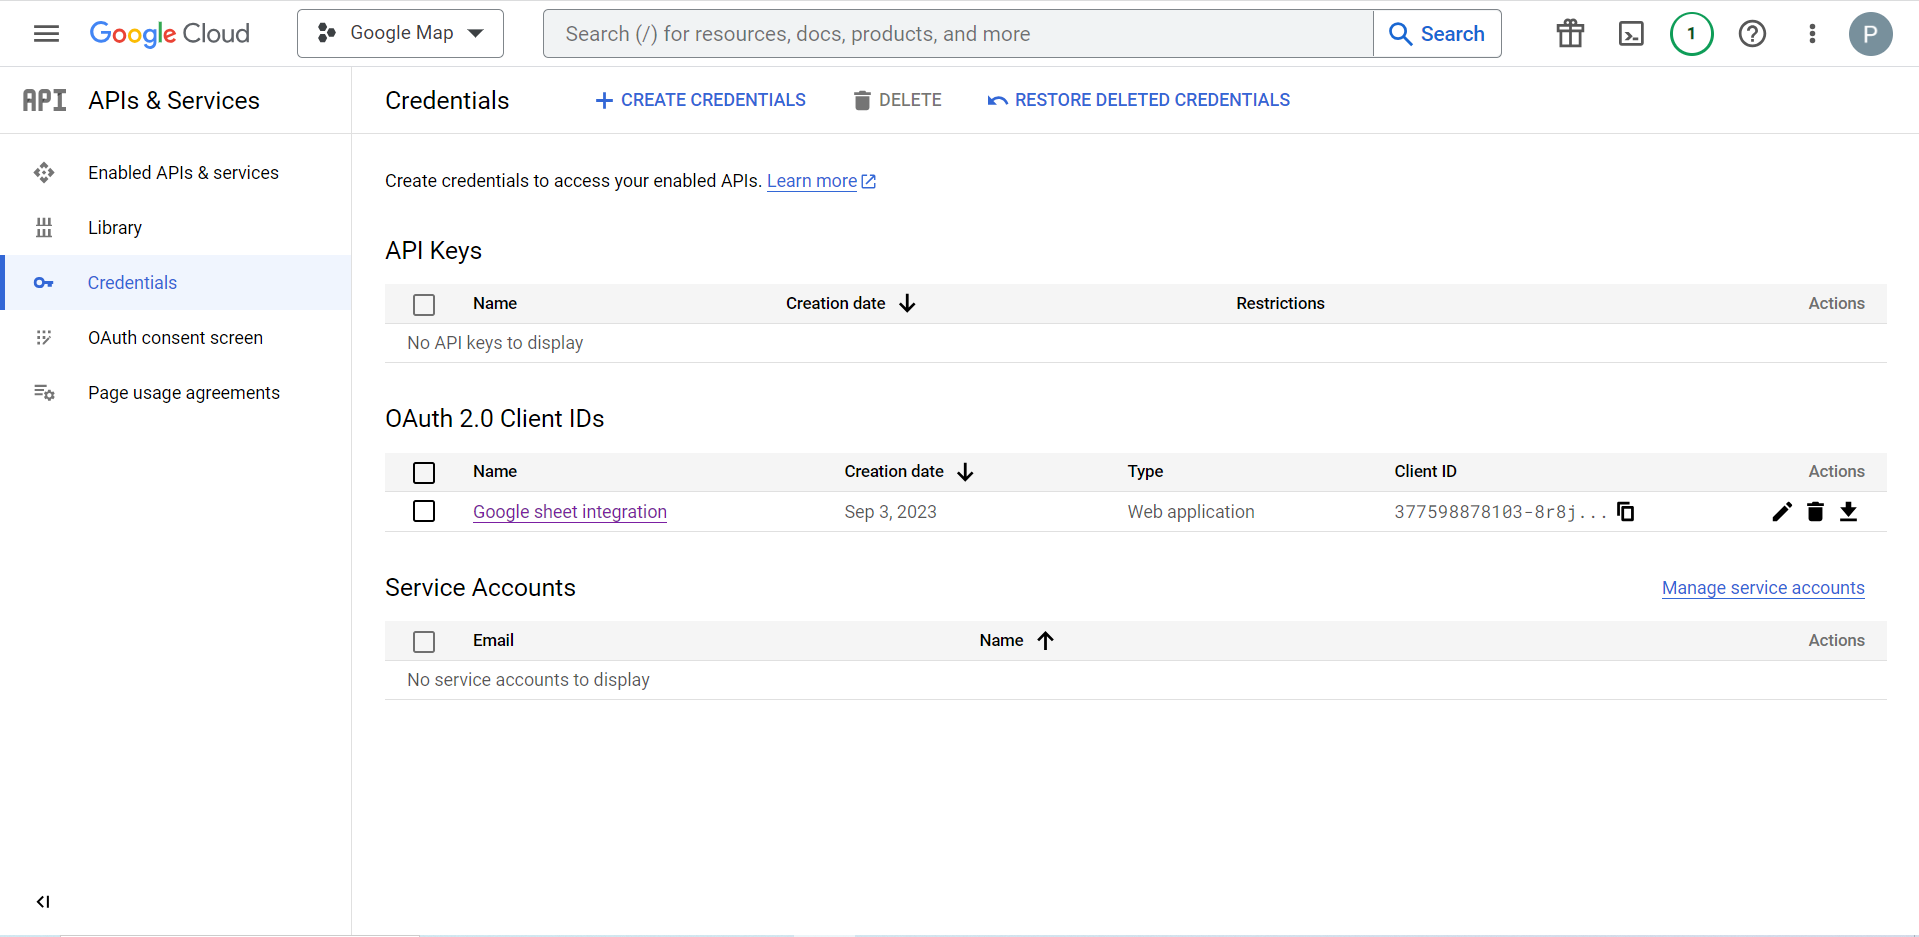
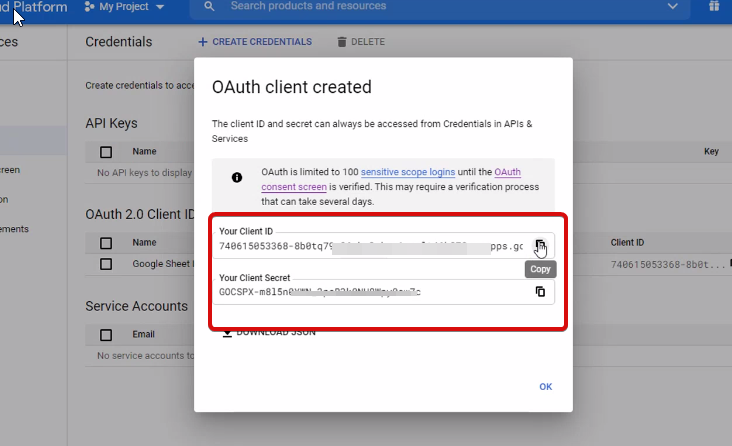
Możesz teraz sprawdzić identyfikator swojego Klienta, jest on dodany do Poświadczeń
Now you will get the client ID and client secret, just copy them from here.
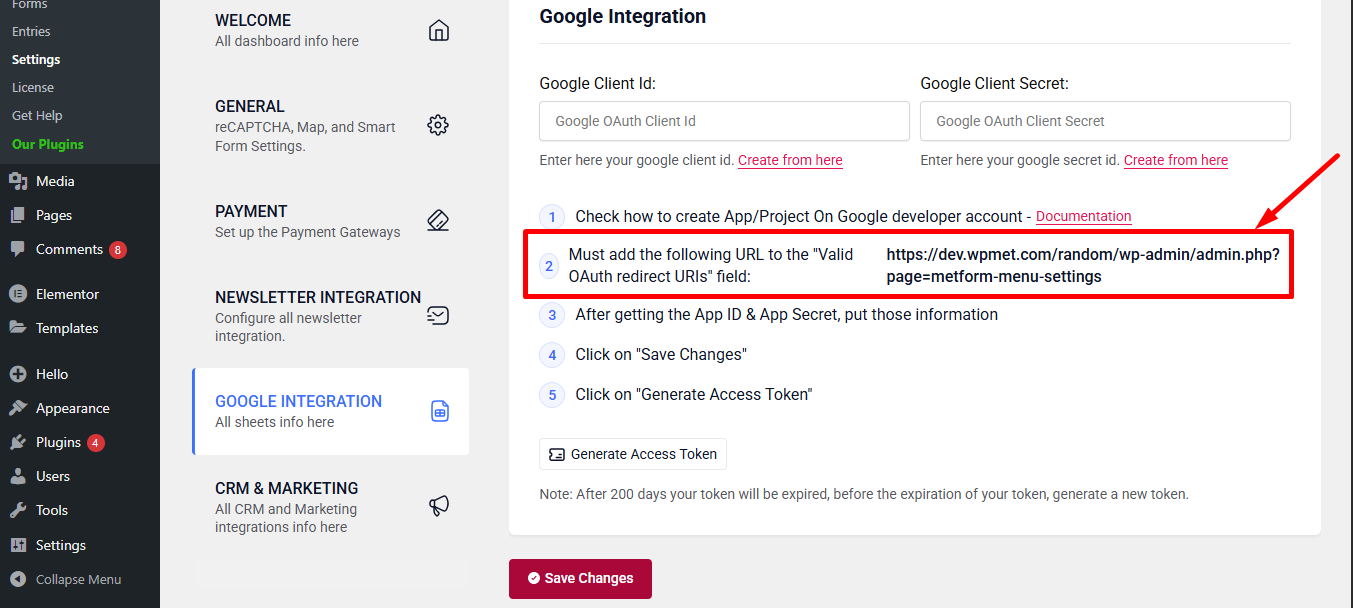
Step 2: Copy the URL From Metform’s Google Integration Tab #
W tym kroku musisz dodać autoryzowany identyfikator URI przekierowania. URI przekierowania otrzymasz w ustawieniach integracji Arkuszy Google w MetForm.
Następnie przejdź do Credentials again > find Authorized redirect URIs > Add URI that you have just copied from Metform’s Google Sheet Integration settings
Step 2: Insert the Copied Ids #
Now, return back to Metform’s Google Integration tab from your dashboard.
Here, you have to paste the copied Client ID and Client Secret in the fields and save changes.
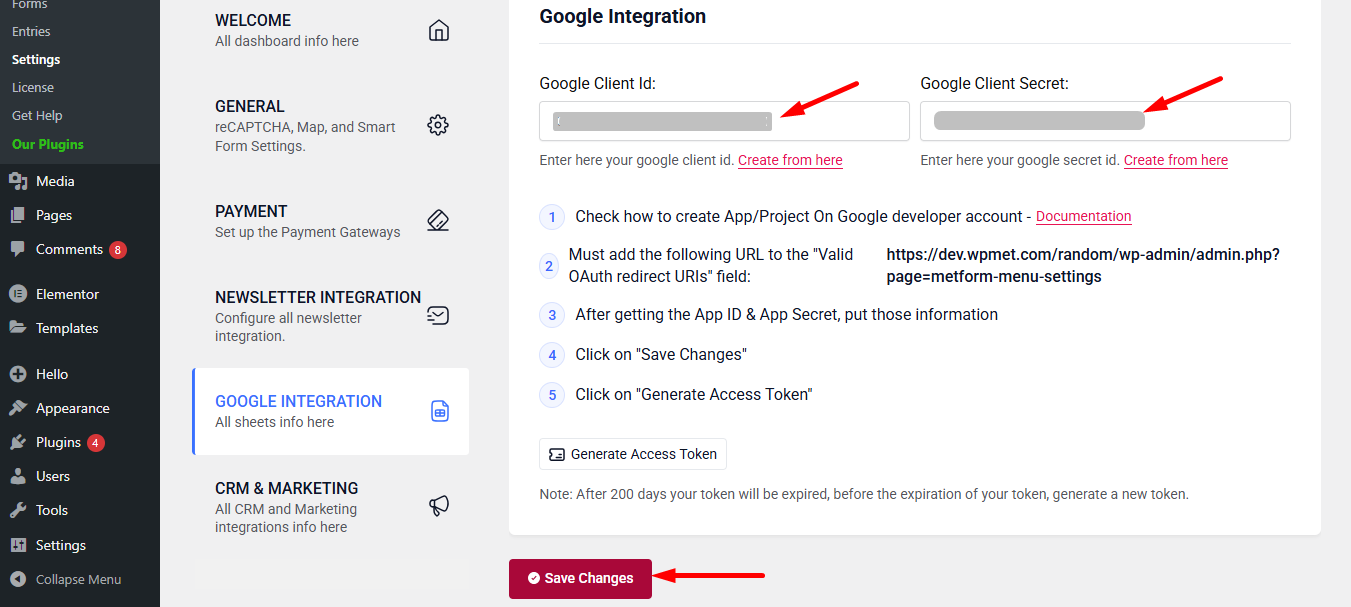
Finally you can connet Google services with your WordPress form.
Przeczytaj także:


