


전제 조건 #
Step 1: Activate QR Code Widget #
Once you’ve installed the necessary plugins, the first thing you need to do is enable the widget before adding the QR Code to a WooCommerce product.
- 로 이동 ShopEngine → Widgets 대시보드에서.
- 찾기 QR Code widget from the list of widgets and switch the toggle button to 에.
- 마지막으로 변경 사항을 저장하다 단추.
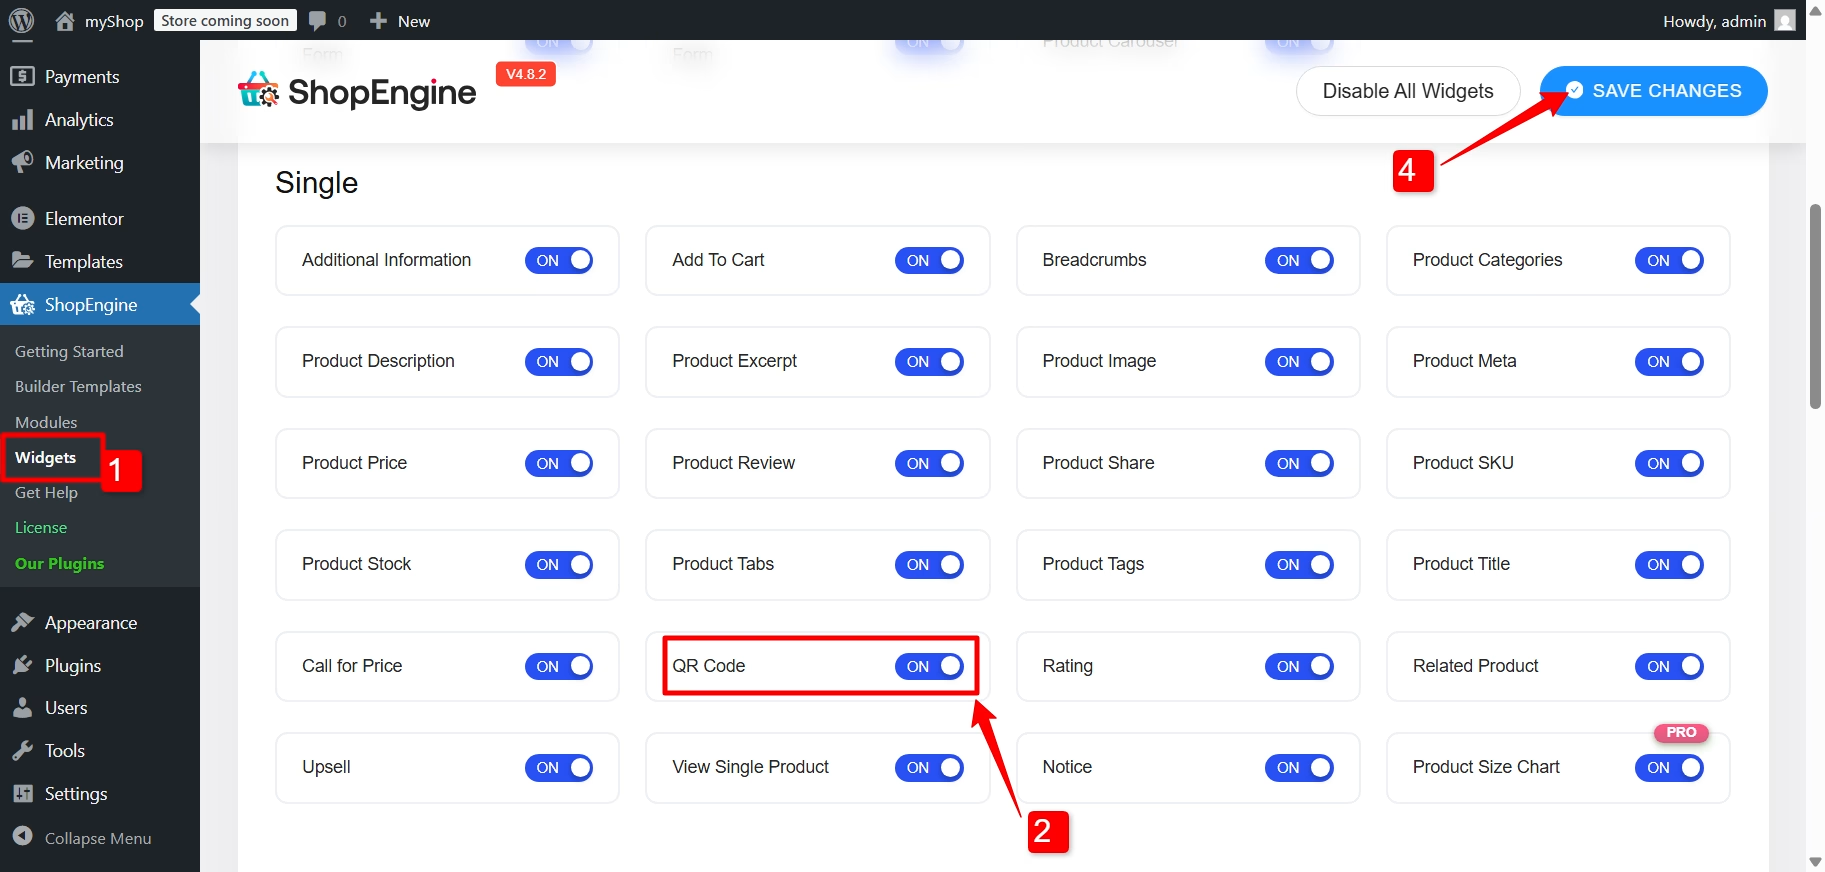
With the widget active, you’re ready to add it to your WooCommerce single product page.

Step 2: Add QR Code To A Single Product Page #
To add the QR code for WooCommerce products, you need to edit the single product page template built with ShopEngine. To edit the template:
- From your WordPress dashboard, go to ShopEngine → Builder Template.
- “를 클릭하세요.Elementor로 편집” option for the single product template.
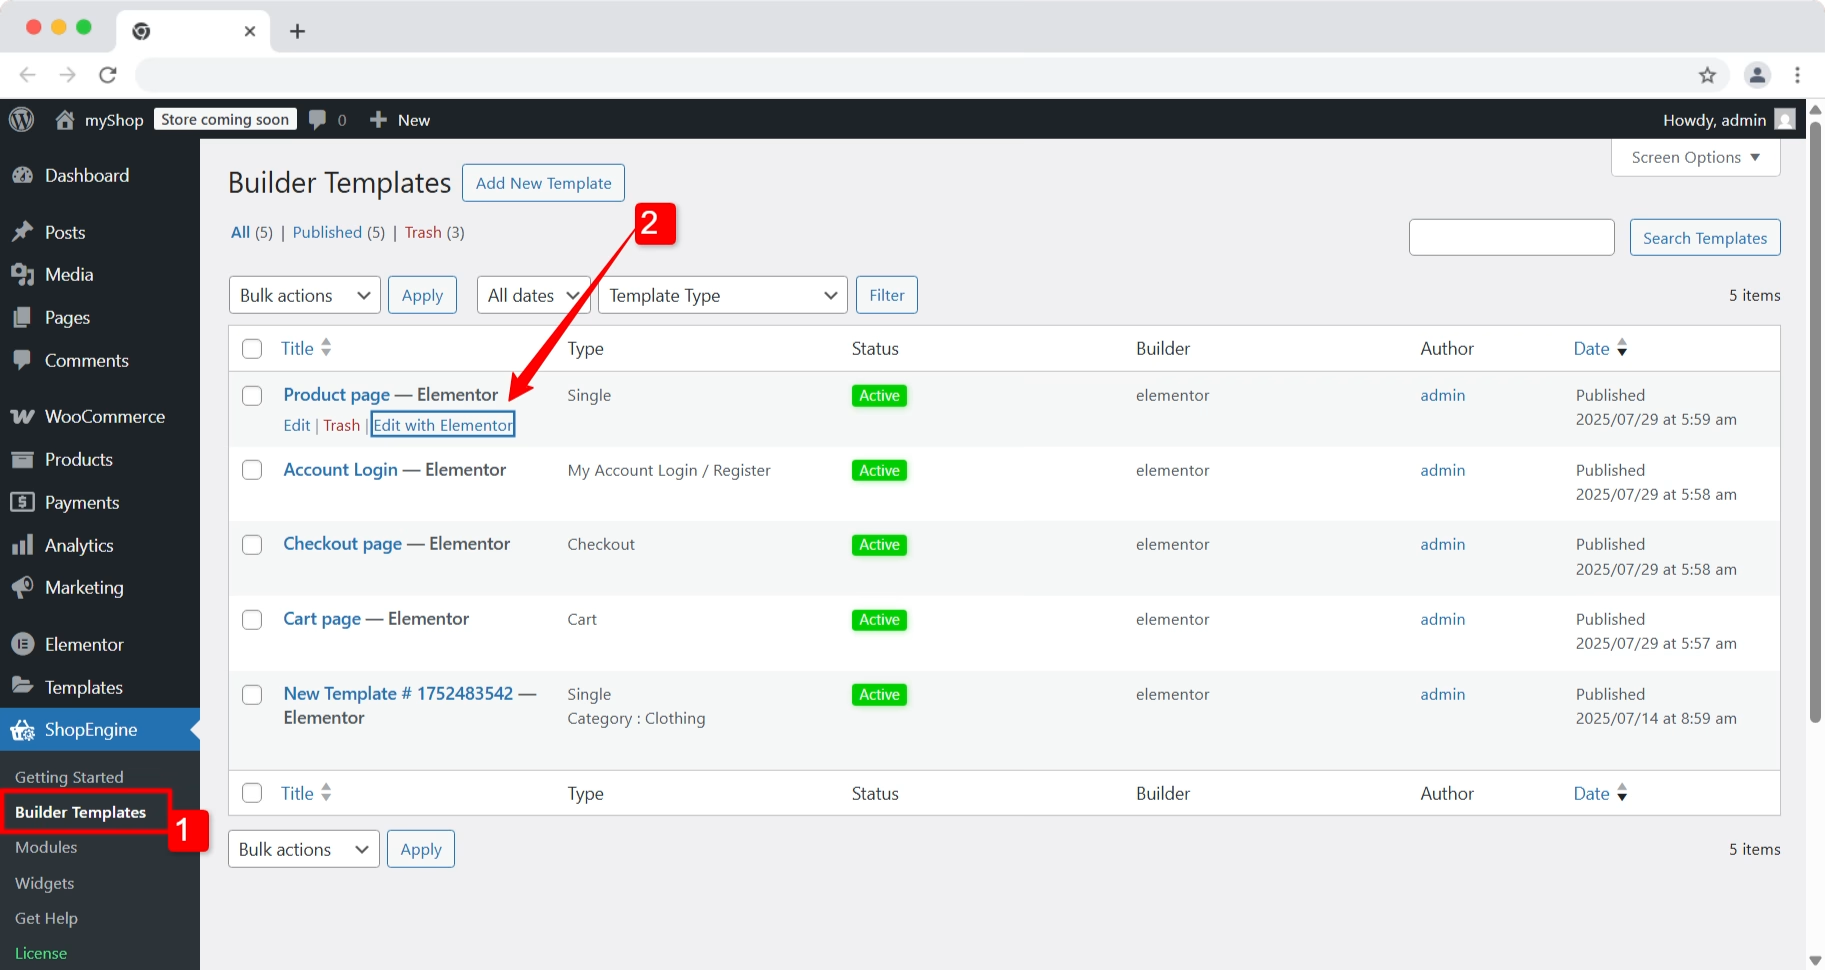
This will launch the Elementor editor, where you can start editing the template.
편집기에서는 search for the “QR Code” widget in the left side panel. Drag and drop it onto your design where you want it to appear on the product page.
Now that the widget is added, configure the QR code for the WooCommerce product.
Step 3: Configure QR Code for WooCommerce Product #
You have the following settings to configure the QR code widget for the WooCommerce product:
- 크기: Adjust the size of the QR code that appears on the screen.
- Scan to Add to Cart URL: When enabled, scanning the QR will add the product to the cart. If disabled, the QR will generate the product URL.
수량: When the “Scan to Add to Cart URL” option is enabled, you can set the quantity of the product to add to the cart.
- 조정: Set the alignment of the QR code to right, center, or left.
Like the QR Code widget, ShopEngine comes with 70+ widgets, 20+ modules, and 40+ pre-designed templates for WooCommerce. Get ShopEngine Pro now and enjoy the complete WooCommerce experience in Elementor.


