


If you want to boost the revenue for your WooCommerce store, cross sell popup is a great option. ShopEngine has made it easy with its cross sell popup module. If you want to integrate the WooCommerce cross sell popup, follow the instructions shared in this doc.
Quick Overview
This documentation will walk you through the process of displaying cross sell popup on your eCommerce store using a user-friendly plugin such as ShopEngine. ShopEngine is a WooCommerce builder that comes with a dedicated cross sell popup module.
필수 플러그인: Elementor (free), WooCommerce (free), & ShopEngine (free & pro)
The process is very simple. You need to install the needed plugins, then integrate cross sell popup by following the below 3 steps:
- Turn on Cross Sell Popup module
- Add cross sell products
- Check WooCommerce cross sell product display
WooCommerce에 대한 교차 판매 팝업을 활성화하는 방법은 무엇입니까? #
WooCommerce 매장의 모든 제품에 대해 교차 판매 옵션을 통합하려면 다음 단계를 따르세요.
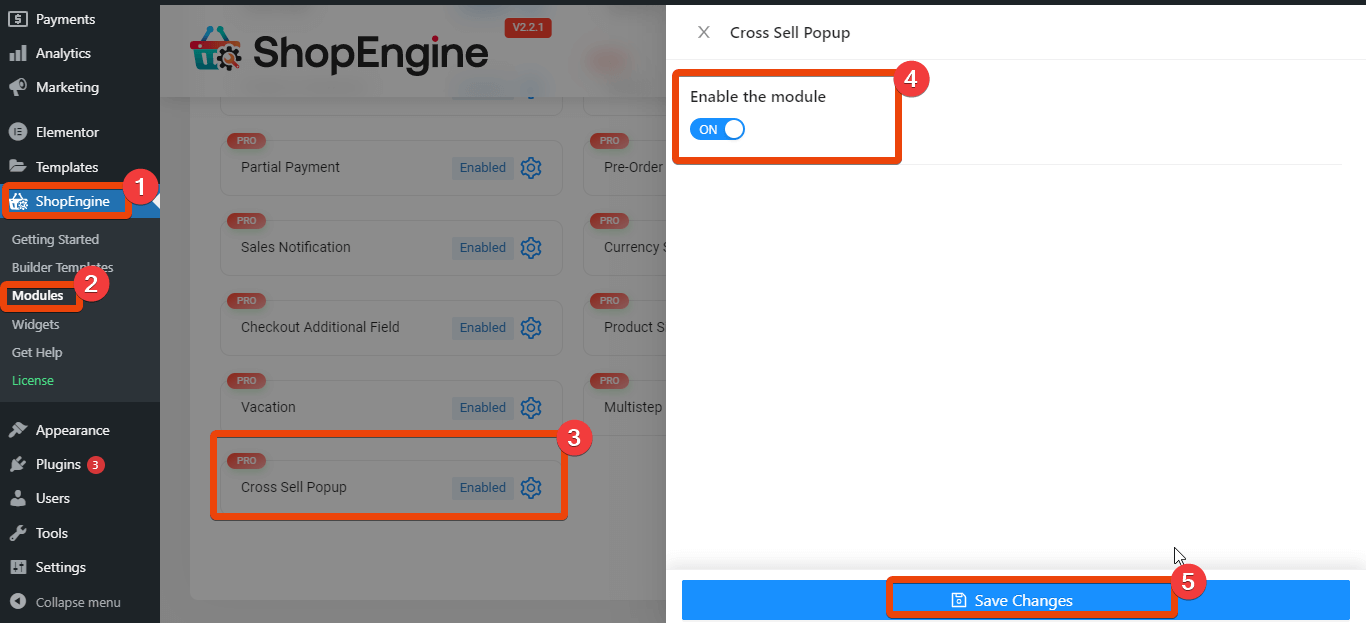
1단계: 교차 판매 모듈 활성화 #
WordPress 대시보드에서 ShopEngine > 모듈로 이동. 모든 모듈이 나타납니다. 목록에서, enable the ‘교차판매 팝업’ module.
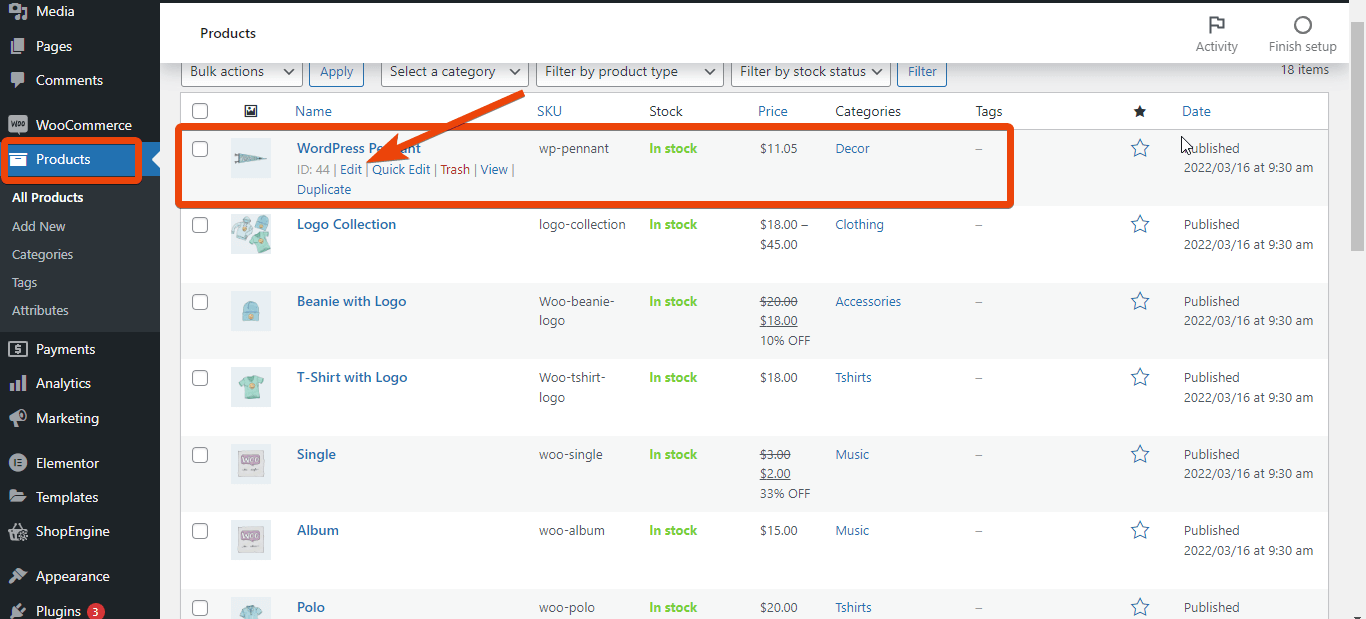
2단계: 제품 페이지 편집 #
이제 교차 판매 팝업을 표시하려는 제품 페이지를 편집해야 합니다. '제품'으로 이동하여 목록에서 필요한 제품을 선택하세요.
제품 페이지에서 '연결된 제품' 옵션으로 이동하여 클릭하세요. 교차 판매 옵션이 표시됩니다. 이제 팝업할 제품을 추가해야 합니다. 제품 이름의 처음 세 글자를 입력하면 제안에 해당 제품이 표시됩니다.
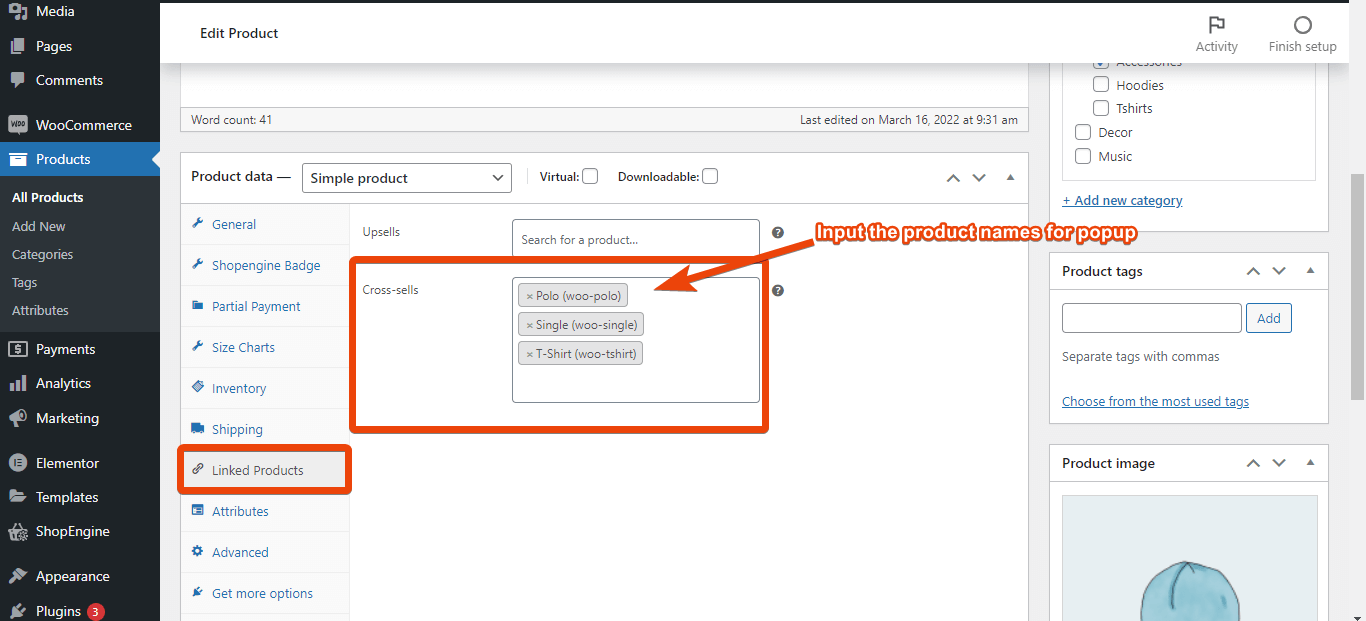
Now add the products for popup one by one. Once you have added the products for popup, update the product page. This will show WooCommerce cross sell items on product page.
3단계: 제품 페이지 미리보기 #
팝업할 제품을 추가한 후, 제품 페이지를 미리보기하고 '카트에 추가'를 선택하세요..
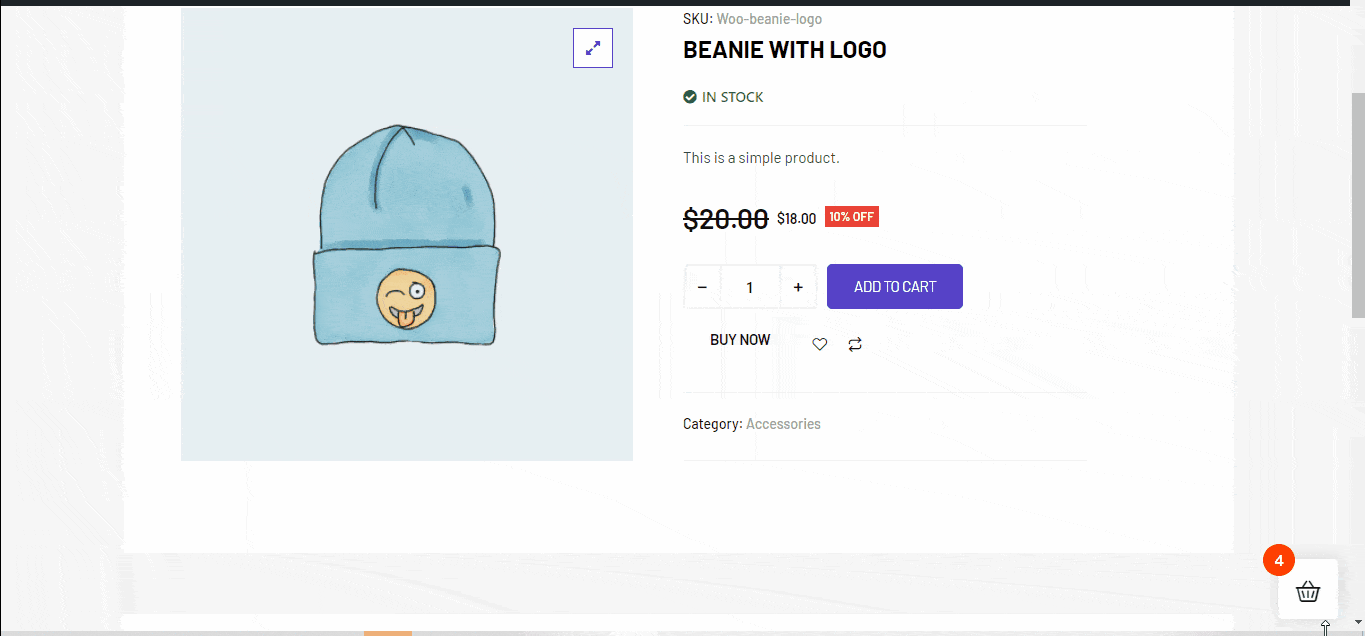
크로스셀 팝업을 제대로 통합하셨다면, 제품이 포함된 팝업이 표시됩니다..
확인하고 모든 것이 좋아 보인다면 WooCommerce 매장에서 교차 판매 팝업이 작동하고 있는 것입니다. 비슷한 스타일로 다른 제품에도 교차 판매 팝업을 추가할 수 있습니다.


