


Sending a confirmation email after each form submission lets users know their form was submitted successfully.
It is an acknowledgment message that reassures users, outlines next steps, and keeps the overall experience clear and professional.
You can also send a copy of their submitted form with the confirmation email.
In this documentation, we have discussed how you can set up and send WordPress form confirmation email after submission with MetForm. So, check out this simple process for your WordPress site.
전제 조건: #
To send a confirmation email on form submission you need to install the following plugins:
👑 This is a premium feature. MetForm Pro 받기 to use this feature.
How to Send WordPress Form Confirmation Emails After Submission #
확인을 설정하려면 먼저 create a WordPress form. To create a new form, you can also check this documentation: creating forms with MetForm.
Also, follow this Video Tutorial:
Enable Confirmation Email for WordPress Forms #
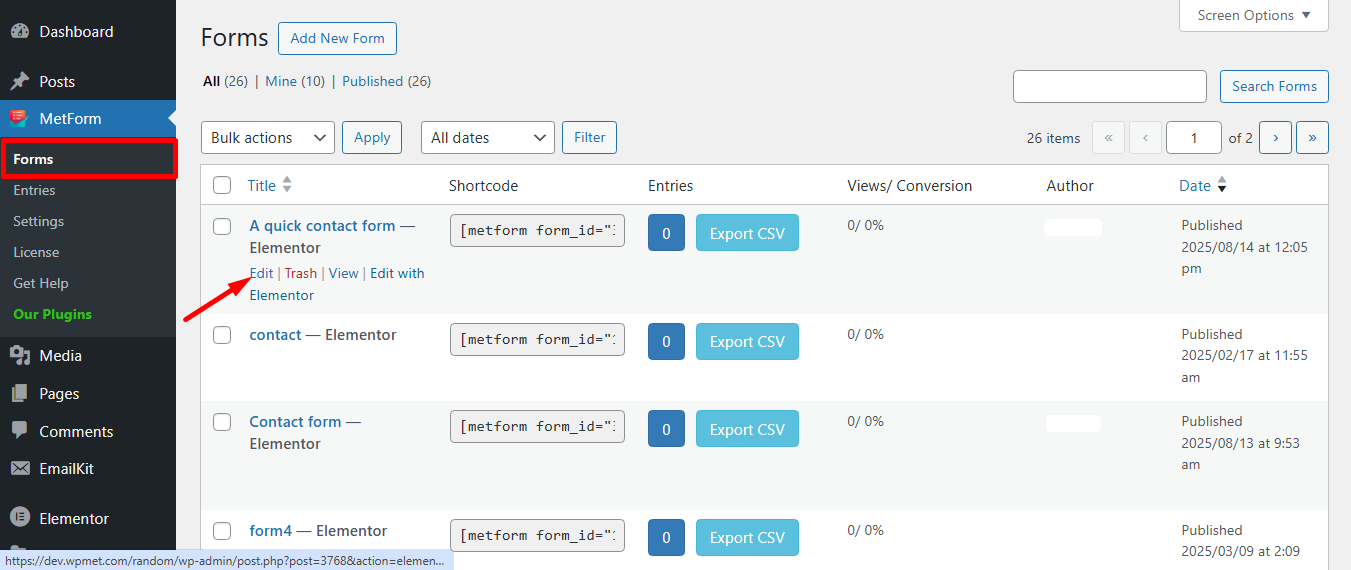
이제 다음으로 이동하세요. MetForm → Forms in your WordPress dashboard and click the 편집하다 option to open the Form Settings for the form you want to enable the confirmation email feature.
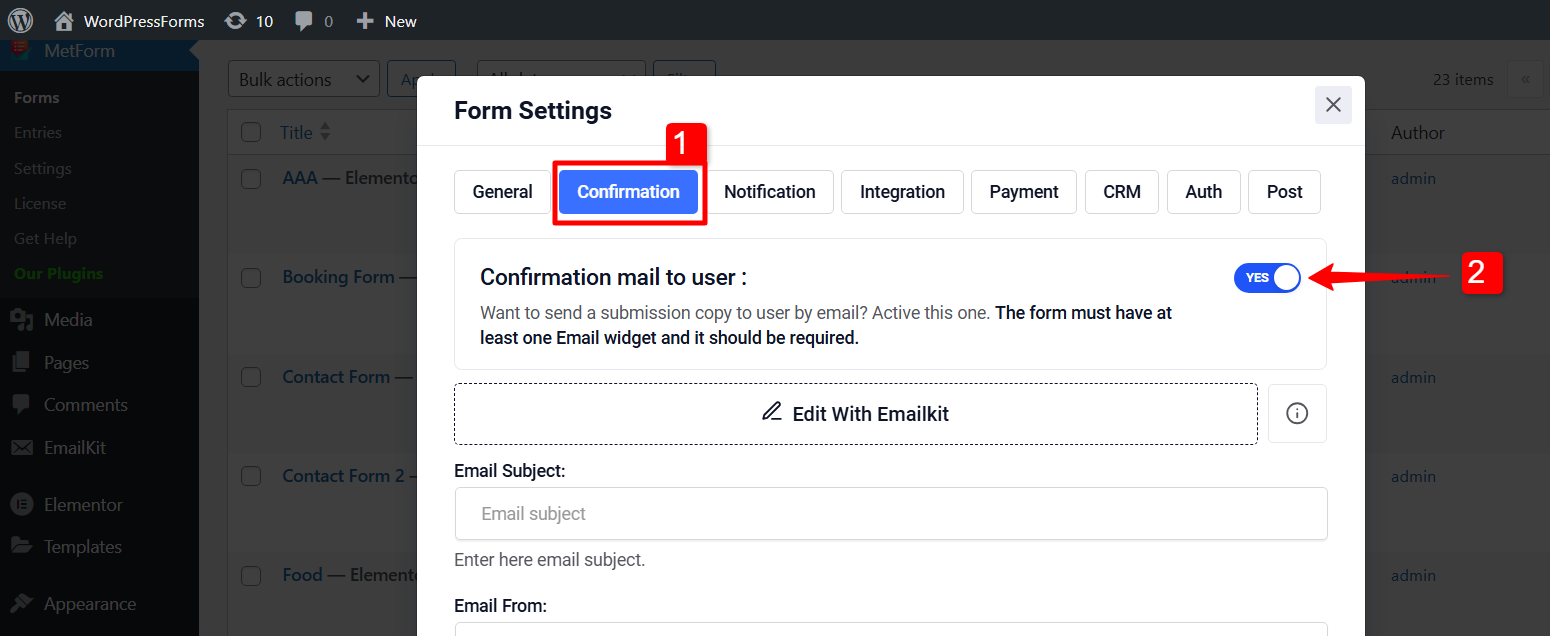
Now, you will see the 양식 설정 window. There,
1. Move to the Confirmation tab first in the form settings.
2. Enable 사용자에게 보내는 확인 메일 option there.
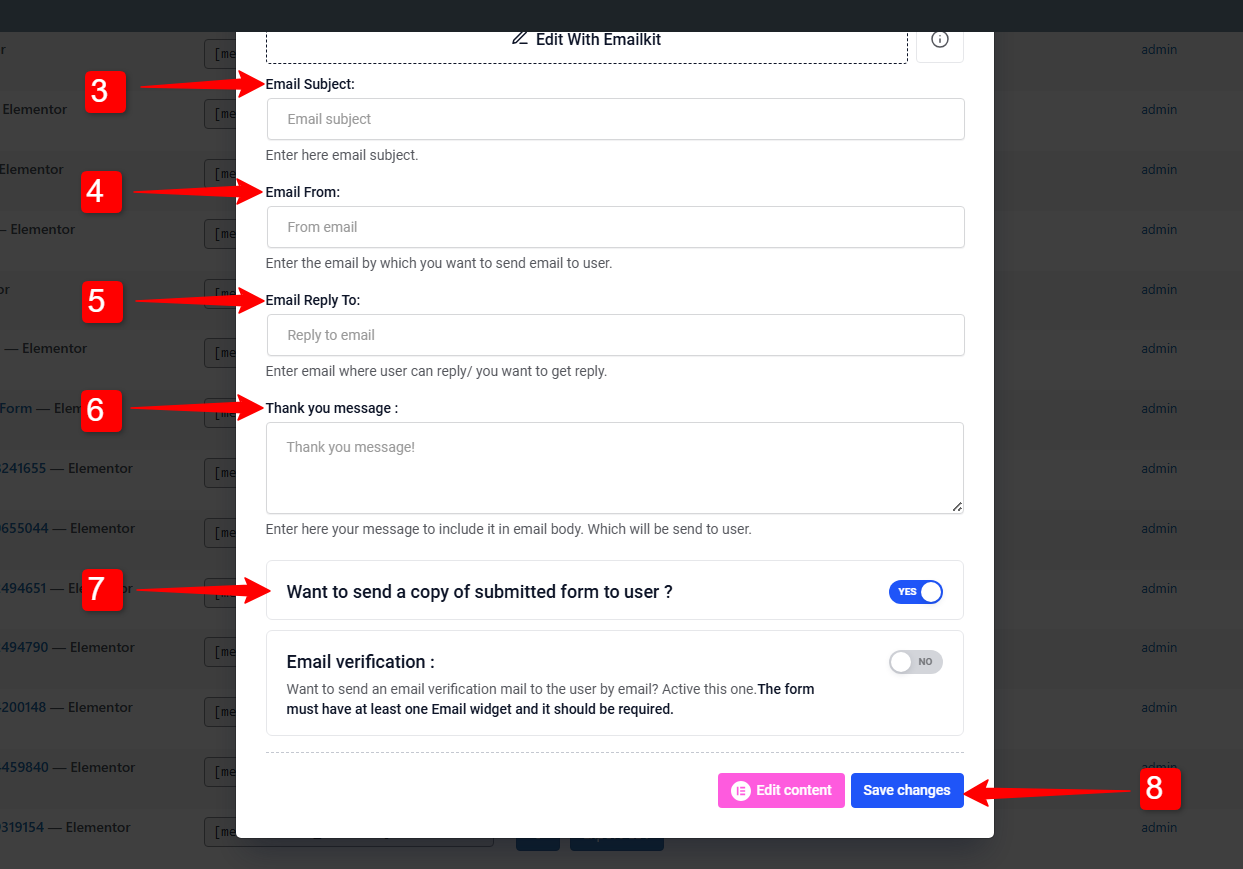
3. 메일 제목: 이메일 제목을 입력하세요
4. 이메일 보낸 사람: 사용자에게 이메일을 보낼 이메일을 입력하세요.
5. 이메일 답장: Use it to set a different email address for replies.
6. 감사 메시지 전달: 성공적인 양식 제출 메시지를 편집할 수 있는 권한이 부여되어 나만의 메시지를 개인화할 수 있습니다.
7. Want to send a copy of submitted form to user?: Sends a confirmation email to the user with a copy of their submitted information by enabling this button.
8. Ones done click on the 변경 사항을 저장하다 단추.
Send Custom Designed Confirmation Email for WordPress Forms #
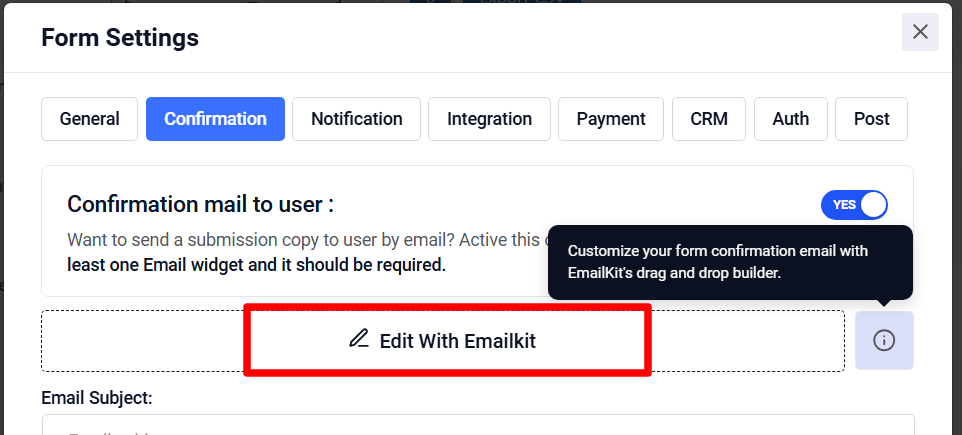
To send a custom designed email, you can click on the Edit With EmailKit. If you have the EmailKit plugin installed in your WordPress site, you will be taken to the EmailKit’s editor.
There you will abe to design and customize the whole look and feel of the of the WordPress form confirmation email.
이것을 확인하세요 EmailKit’s documentation for details: Customize Form Confirmation Email.
메모:
If you have EmailKit fress version installed, you can customize the confirmation email for only one form.
To customize the email for multiple forms, 이메일킷 프로 plan is required.
Confirmation email helps to boost relationships with new visitors and clients. You can send these emails easily with MetForm. So, get MetForm today, follow the above steps and you are done.


