귀하의 웹사이트는 결제 게이트웨이를 통해 인수 은행 및 결제 처리자와 통신합니다. 오늘, PayPal 결제 게이트웨이 국제적으로 유명한 이름이므로 게이트웨이 위젯도 마찬가지입니다. MetForm 위젯에서는 다음을 유지했습니다. PayPal 통화와 같은 동적 통화 선택 옵션.
WordPress에 이 강력한 결제 프로세서를 추가하는 방법과 그 기능은 무엇인지 살펴보겠습니다.
WordPress PayPal Integration with MetForm #
To integrate PayPal with WordPress form, you first need to connect your WordPress site with PayPal. Then you can enable the PayPal payment for WordPress form, and finally add the PayPal widget in the form design.
전제 조건: #
You must have the PayPal Account to integrate the Paypal payment services into MetForm.
필요한 플러그인: #
👑 You need to have the MetForm Professional Plan to use this feature.
Step 1: Get PayPal Identify Token #
First, you have to generate the PayPal 식별 토큰. To get the token:
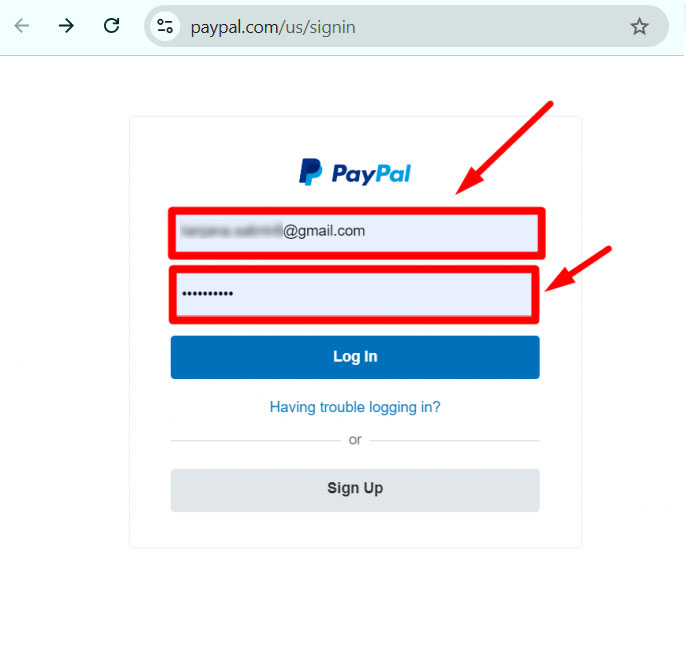
1. Create a PayPal business account and go to the URL: https://www.paypal.com/us/signin.
2. Log in with your created PayPal Email and Password.
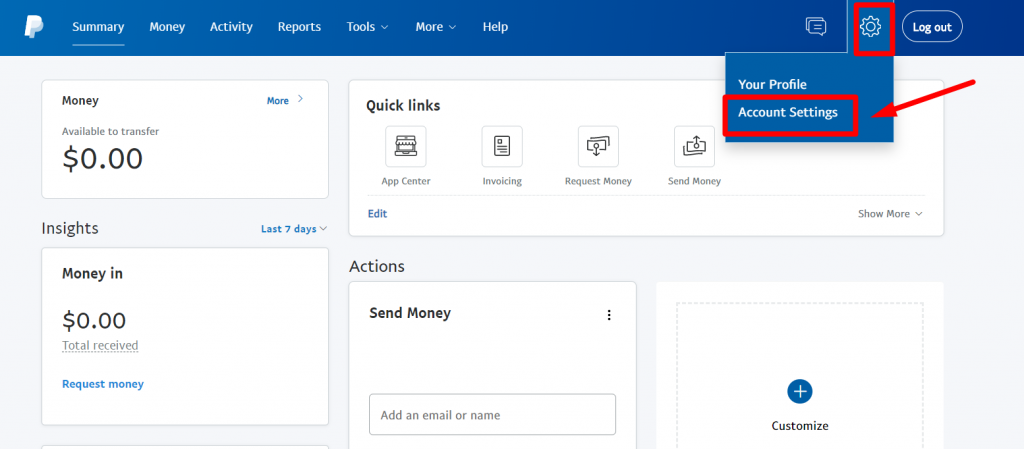
3. Access your PayPal dashboard, then navigate to Settings → Account Settings.
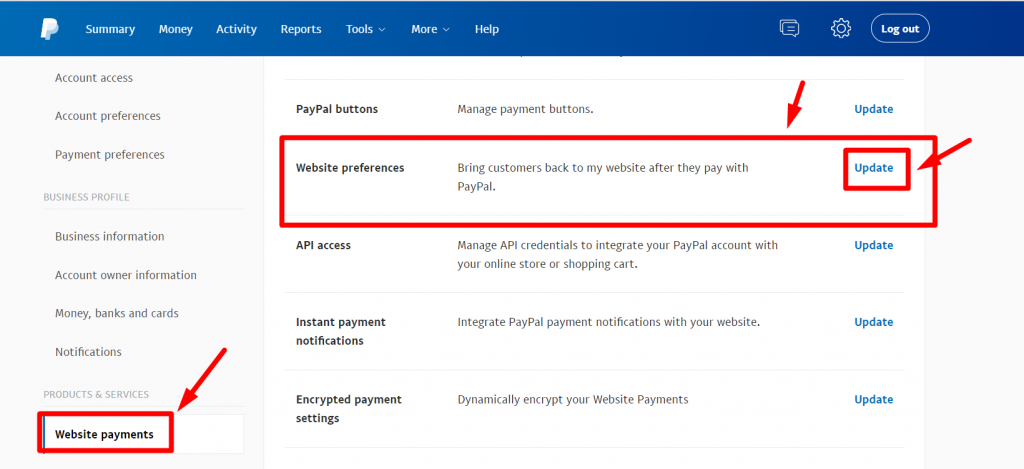
4. In account settings, go to 웹사이트 결제. Then tap the 업데이트 옆에 링크 웹사이트 환경설정 옵션을 탭하세요. 업데이트 옆에 링크 웹사이트 환경설정 옵션.
5. Enable the 웹사이트 결제 자동반환을 클릭한 다음 매장의 감사 페이지 링크를 반환 URL 필드.
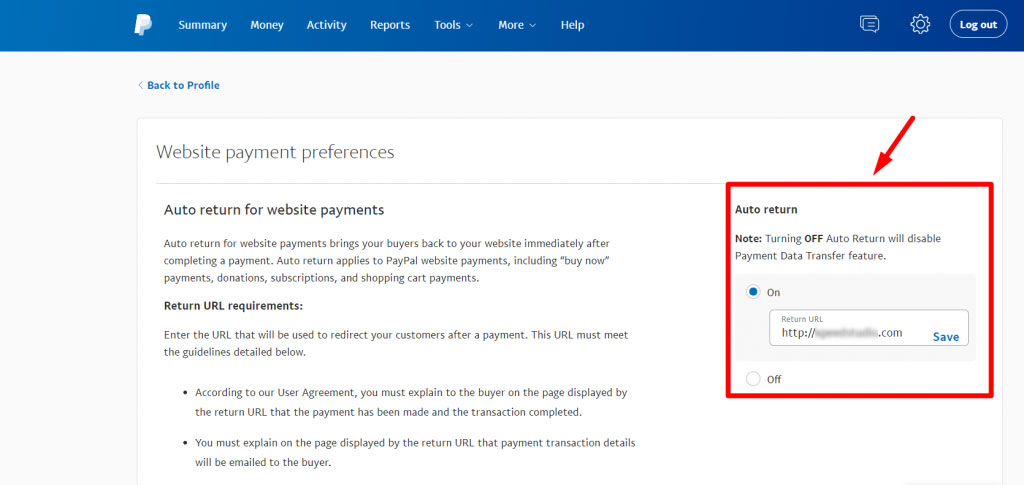
6. Enable the 결제 데이터 전송 또한. 섹션 하단에 ID 토큰이 표시되어야 합니다.

Step 2: Add PayPal payment to WordPress #
Now you can add this PayPal Identity Token to WordPress.
1. Navigate to MetForm → Setting WordPress 대시보드에서.
2. Then go to the 지불 and switch to 페이팔 탭.
3. Enter the same 이메일 address that you used for your PayPal account.
4. Enter the 페이팔 토큰 that you have generated earlier.
5. Tick the checkbox for the Enable sandbox mode.
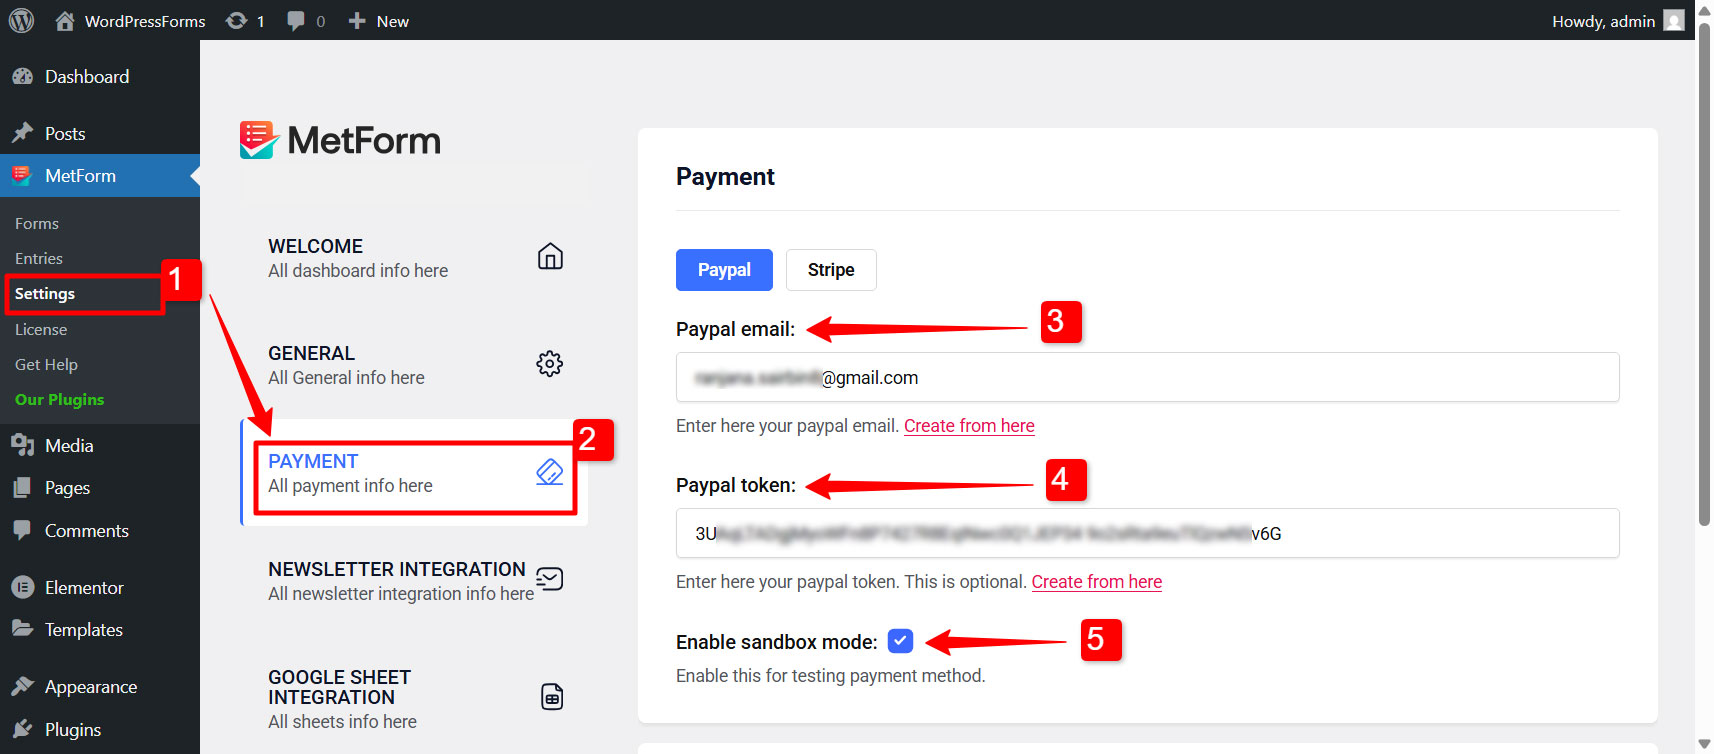
After that you can configre the redirect page settings in the same tab.
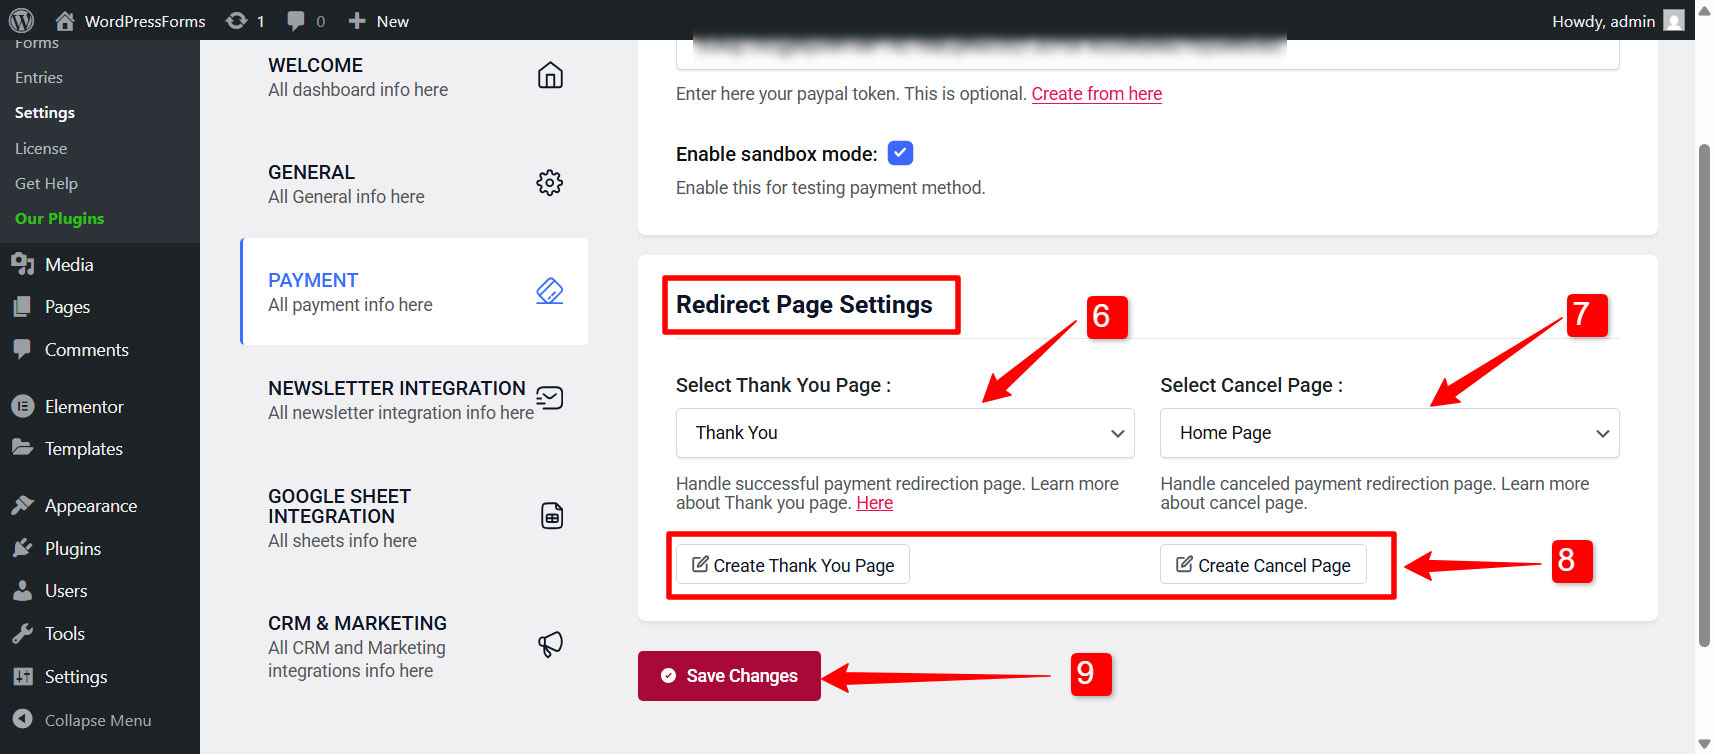
Redirect Page Settings:
You can also redirect the user after they complete their payment or cancel it. For that:
6. Select Thank You Page: From the dropdown list, select a page where the users will be redirected after they complete their payment. You can show a nice “thank you” message in that page.
7. Select Cancel Page: Choose a page where users will be redirected in case of payment cancellation.
8. If you don’t have these pages created on your WordPress site, you can create them by clicking on the “감사 페이지 만들기" 그리고 "Create Cancel Page” button respectively.
9. Finally click on the Save Changes button to finalize the changes. 메모: The email and PayPal token won’t be saved if you don’t click on the save changes button.
Step 3: Enable PayPal payment for a WordPress form #
To enable PayPal payment for a form built with MetForm,
- 이동 MetForm → Forms.
- 다음을 클릭하세요. 편집하다 option for an individual form to open form settings.
- ~ 안에 양식 설정, switch to 지불 탭.
- Under this tab, choose the Default currency for payment.
- Finally, enable the 페이팔 옵션.
Step 4: Add PayPal Payment Button to WordPress Form #
You can integrate PayPal payment gateway in WordPress forms as Payment Method in the input field. For that,
1. 이동 MetForm → Forms 그리고 open a form created in the Elementor editor.
2. In the Elementor editor, search for MetForm’s 결제수단 widget and drag it to the design area.
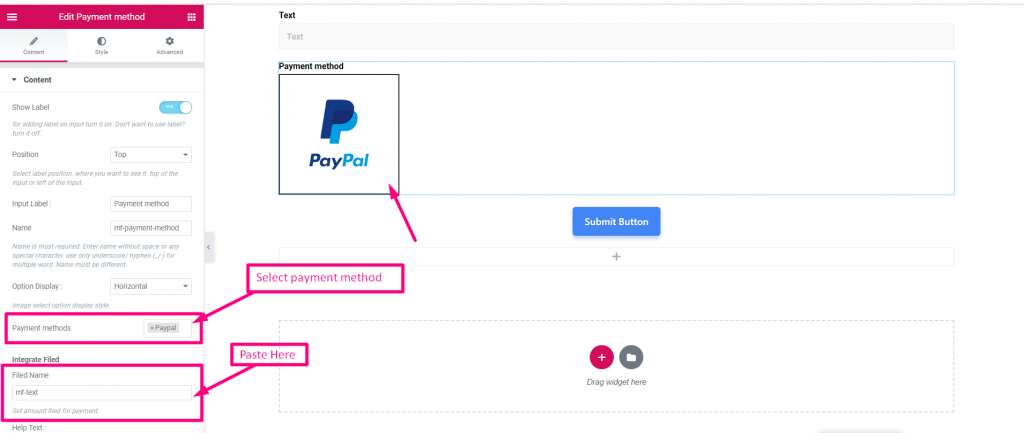
3. For this widget, add PayPal in the Payment methods 필드.
4. Set the 기본 결제 방법 to PayPal.
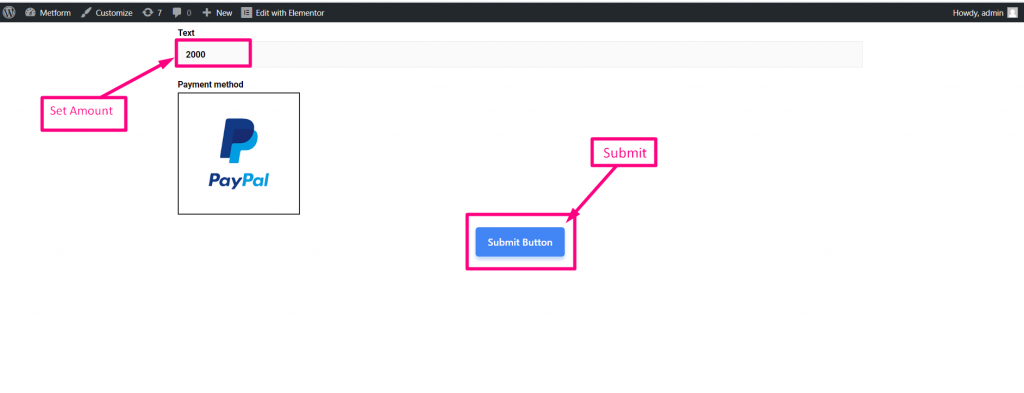
- 이제 선택한 이름을 복사하세요. Mf-텍스트
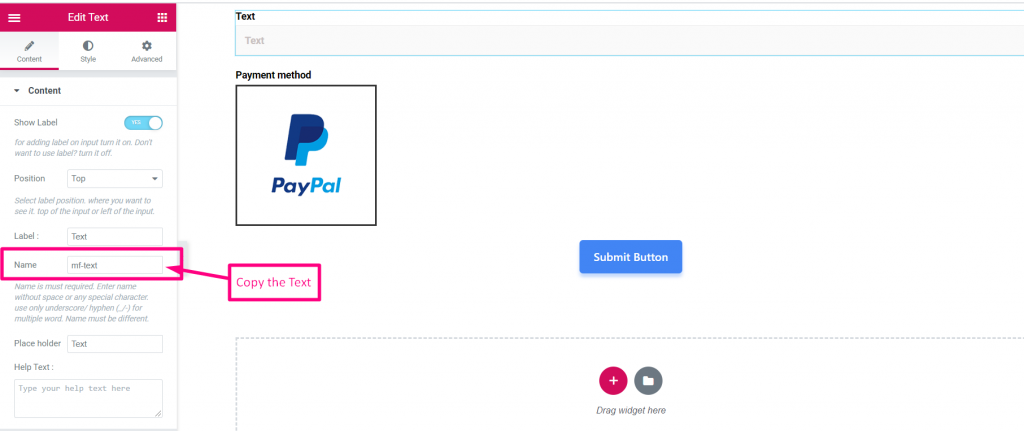
- 결제 방법 선택
- 통합 필드에 텍스트 이름 붙여넣기
- 설정금액
- 제출하다
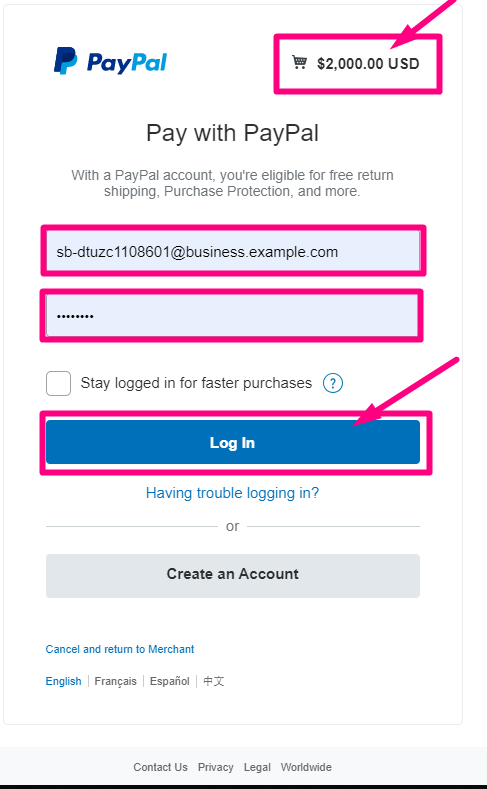
PayPal 계정으로 로그인하세요.. 금액이 표시됩니다. 이전에 선택한 통화.
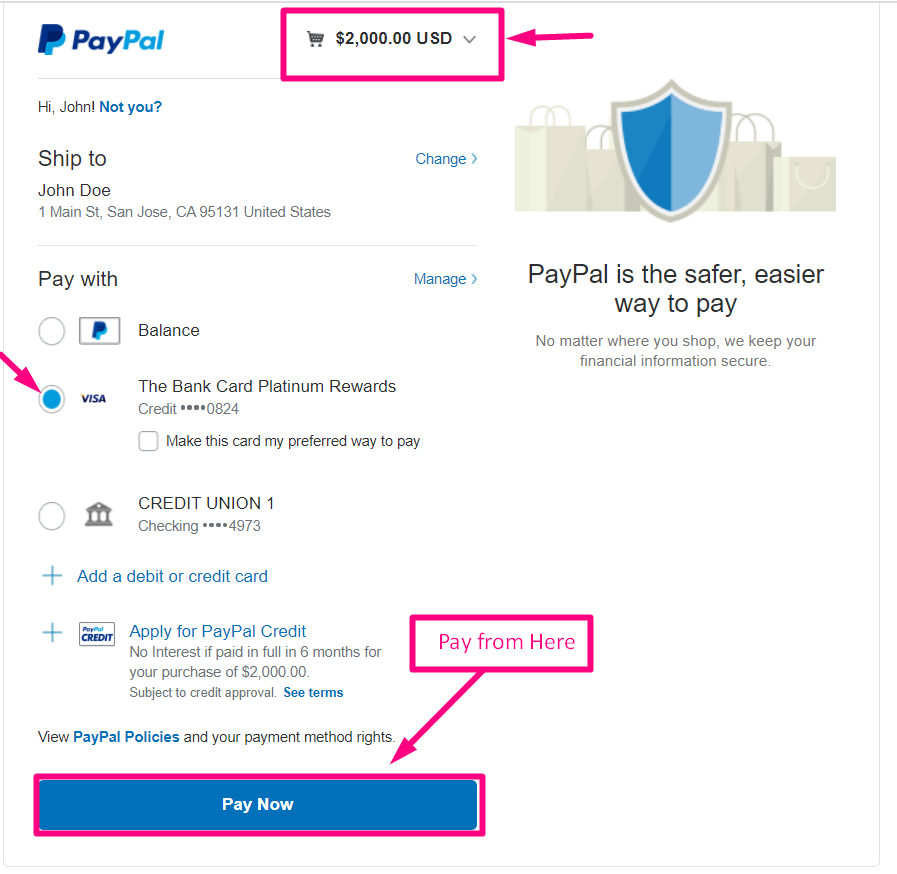
- 결제 유형을 선택하세요
- 지금 지불하세요
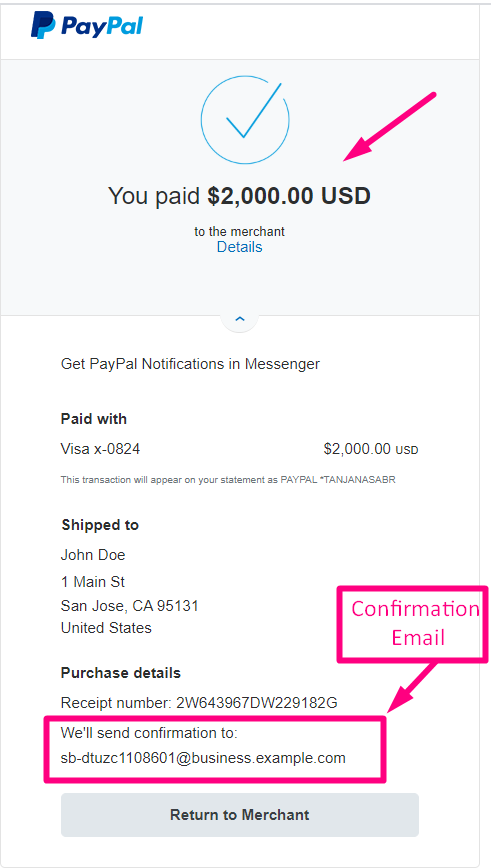
이메일로 확인 보내기
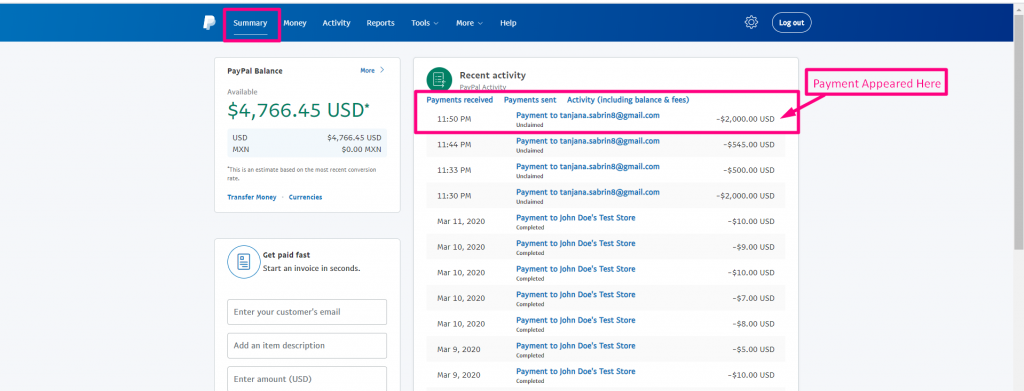
거래가 표시된 것을 볼 수 있습니다. PayPal 대시보드 결제 부분
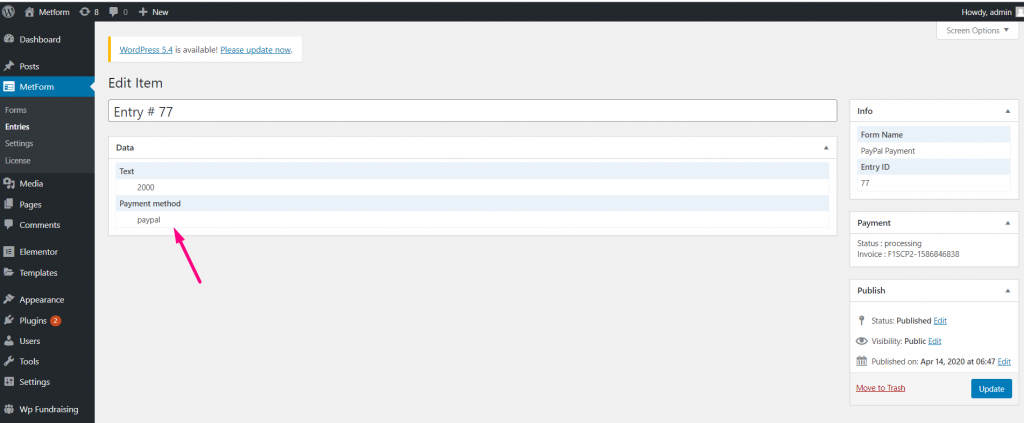
관리자 패널에서도 볼 수 있습니다: Metform=> 항목
PayPal is a mostly used payment gateway no doubt. So, just follow the steps of integrating PayPal payment with WordPress and make your customers feel more comfortable with the payment process. And, we hope people 유동적인 통화 옵션을 유연하게 찾으세요 도.


