


You can automatically store form entries from your WordPress site to a Google Sheet using MetForm.
This form builder plugin allows seamless integration between your forms and Google Sheets, so you can organize and manage form data more efficiently.
Here is the procedure:
필수 플러그인: #
Since MetForm is an Elementor form builder, you need to have Elementor plugin installed and activated on your website.
👑 This is a premium feature. MetForm Pro 받기 to use this feature.
Step 1: Set up a project in the Google Cloud Console #
You will need APIs to connect the Google Sheet with WordPress form. For that, login to your Google Cloud console acoount. After that,
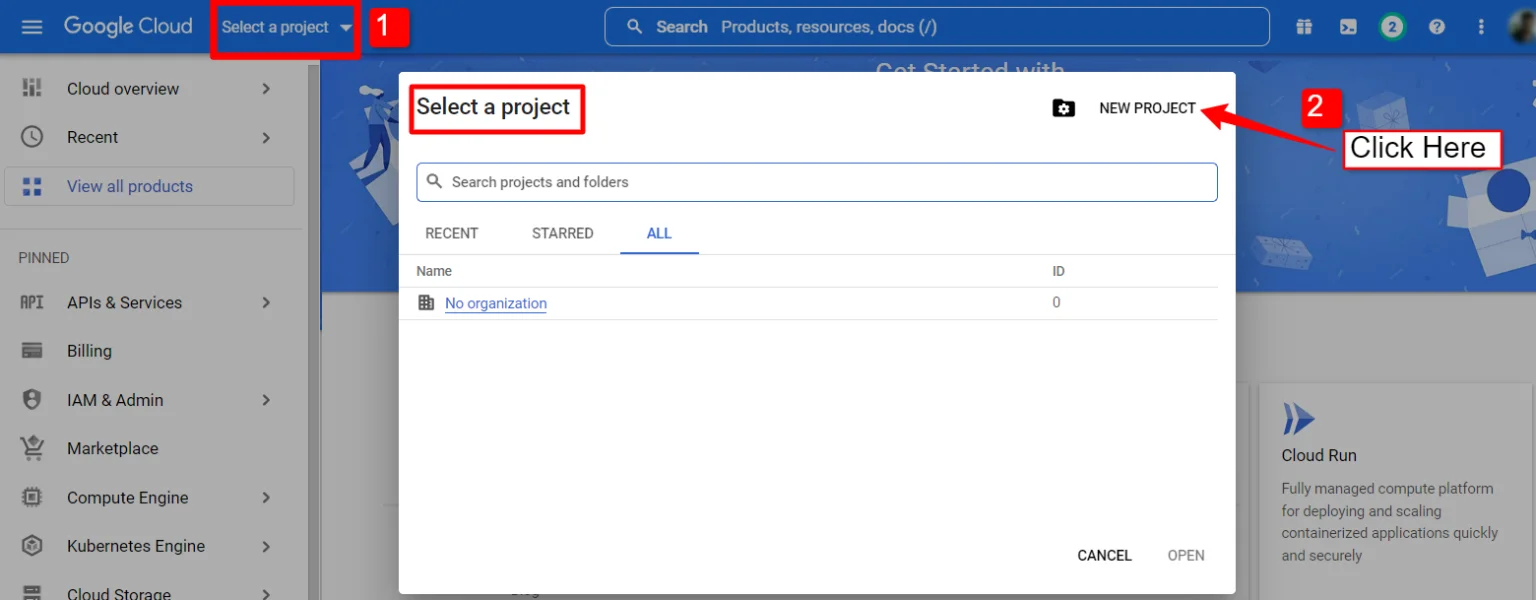
1. Click on the Select a project 드롭다운.
2. A popup will appear, there click on the 새 프로젝트 옵션.
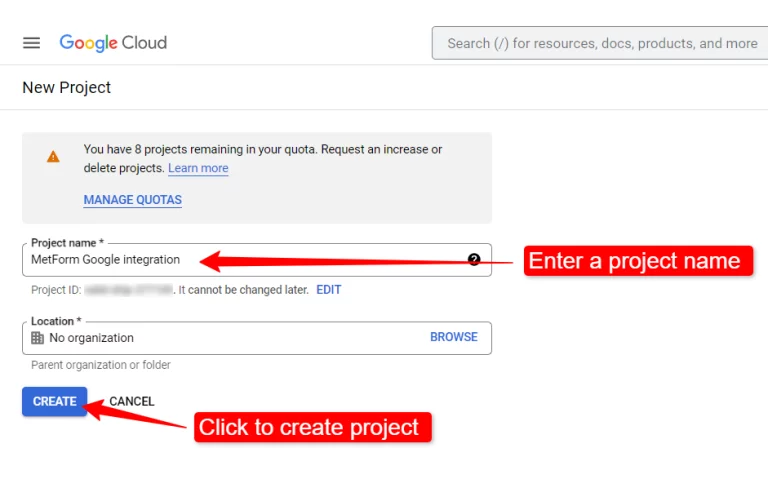
새 프로젝트를 생성하려면 프로젝트 이름 그리고 위치 (해당되는 경우)를 클릭하고 버튼 만들기.
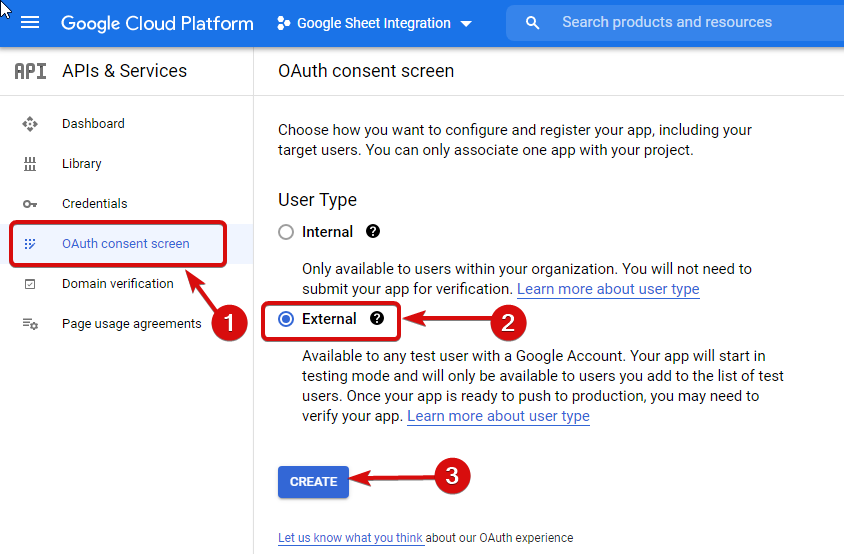
Then go to your project dashboard, and navigate to APIs overview >> OAuth consent screen.
On the OAuth consent screen select the 사용자 유형을 외부로 "만들기" 버튼을 클릭하여 진행하세요.
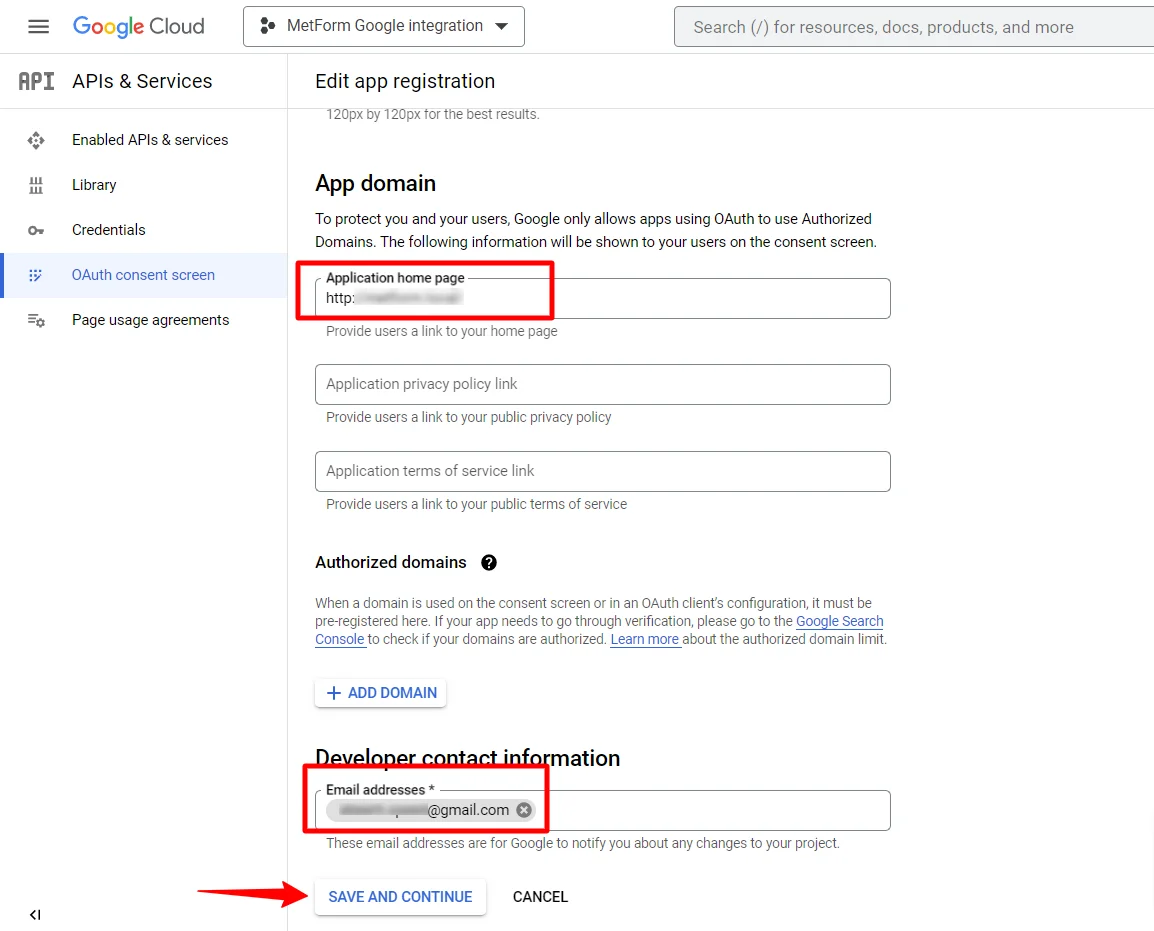
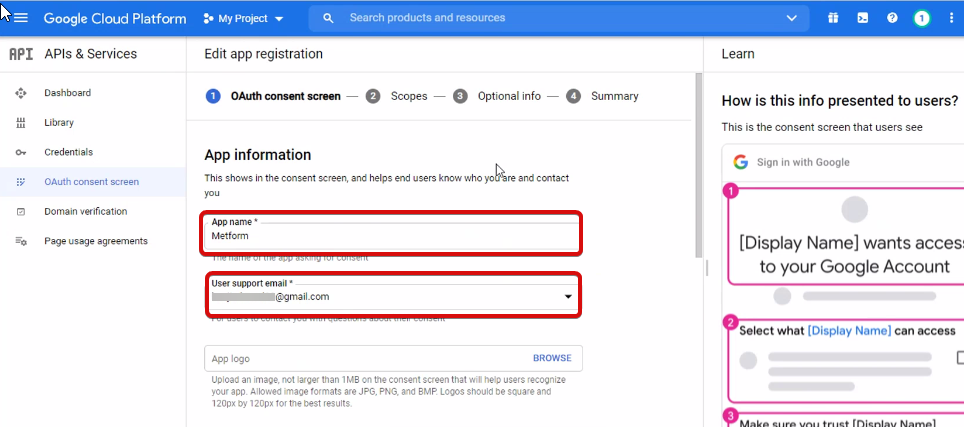
On the next screen, enter your App information including:
- 앱 이름
- 사용자 지원 이메일
- 승인된 도메인
- Developer contact
마지막으로 다음을 클릭하세요. 저장하고 계속
API 개요로 이동
- OAuth 동의 화면 페이지로 이동
- 외부 사용자 유형 선택
- 생성 버튼 누르기
앱 정보를 제공하세요. 아래 이미지를 참조하세요.
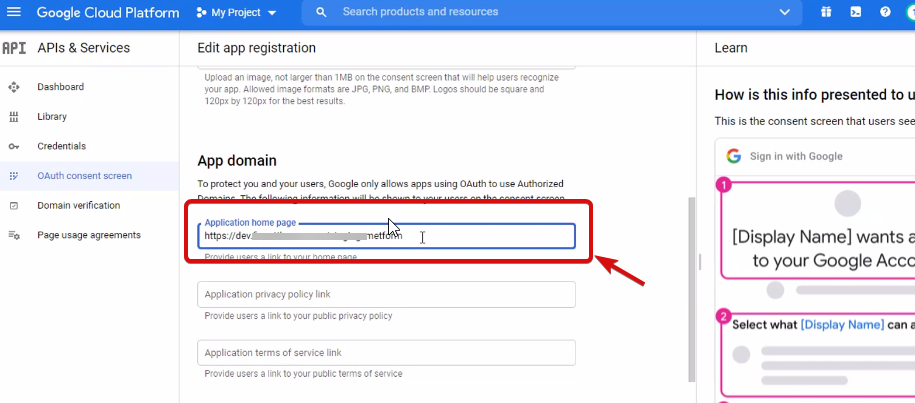
이제 해야 할 일 add App domain. If your site is on the live server then you need to authorize the domain. An authorized domain does not allow subdomain names and any protocol. However, you can use this Google project for websites created with your subdomain. For localhost, you do not need to authorize the domain.
다음으로 저장하고 계속하세요.
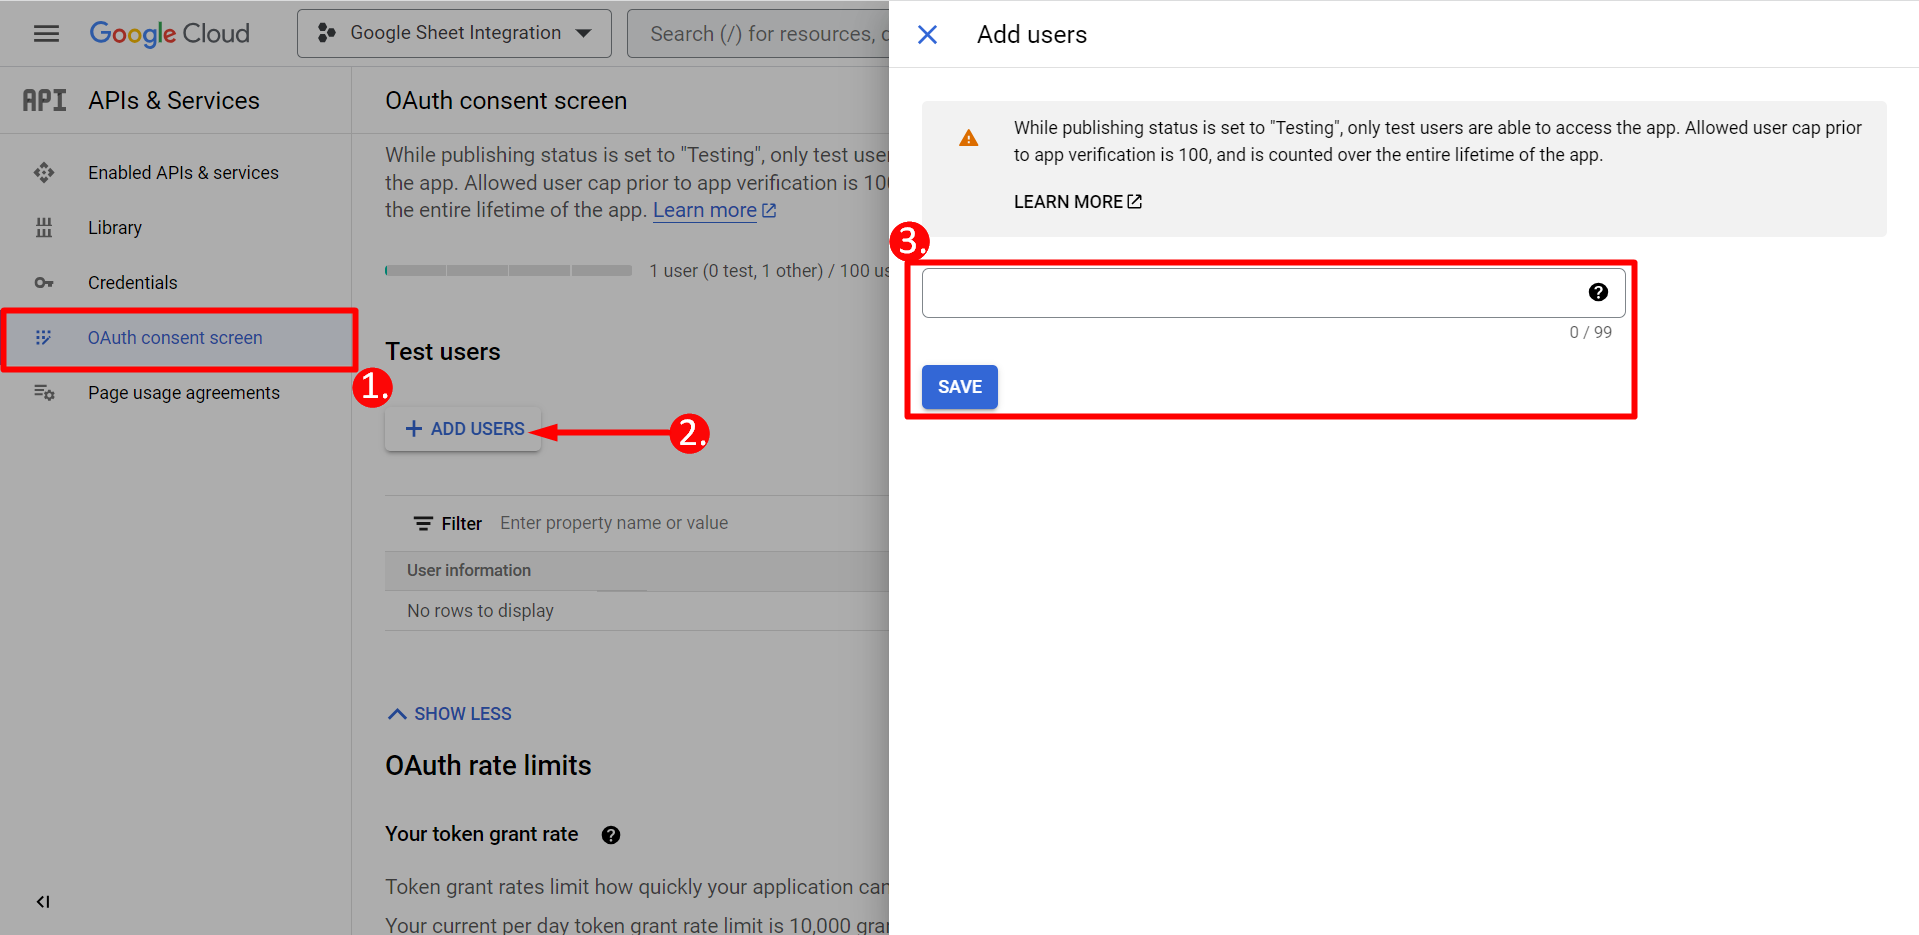
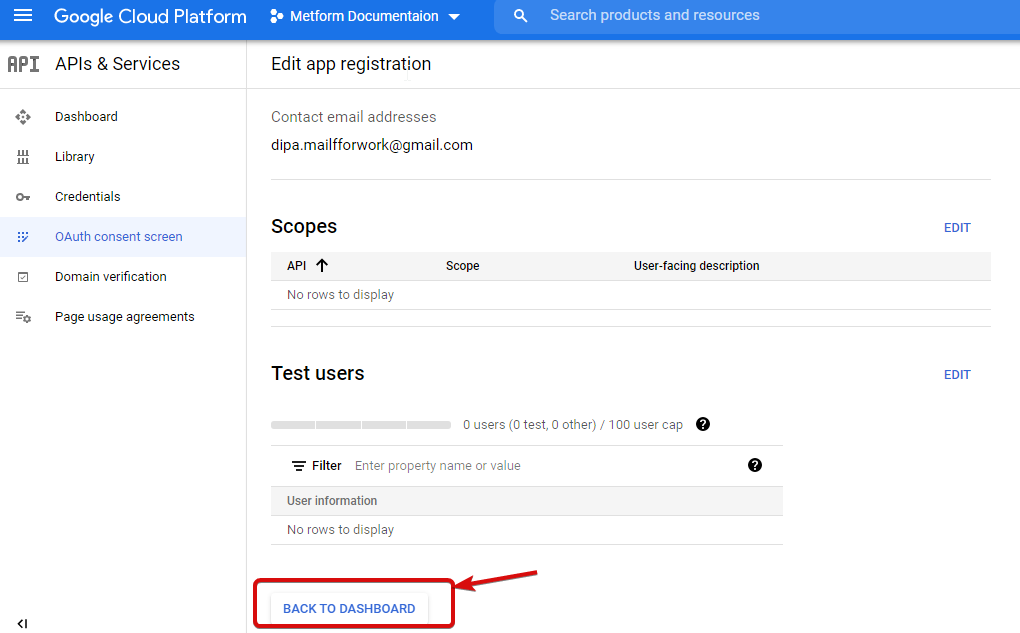
- OAuth 동의 화면에서
- 사용자 추가를 클릭하세요.
- Add your email address and save it
대시보드로 돌아가기 버튼을 클릭하세요.
앱 게시 버튼을 클릭하고 자격 증명 페이지로 이동합니다. 웹사이트가 localhost에 있으면 앱 게시 버튼을 클릭할 필요가 없습니다. 자격 증명 페이지로 이동하면 됩니다.
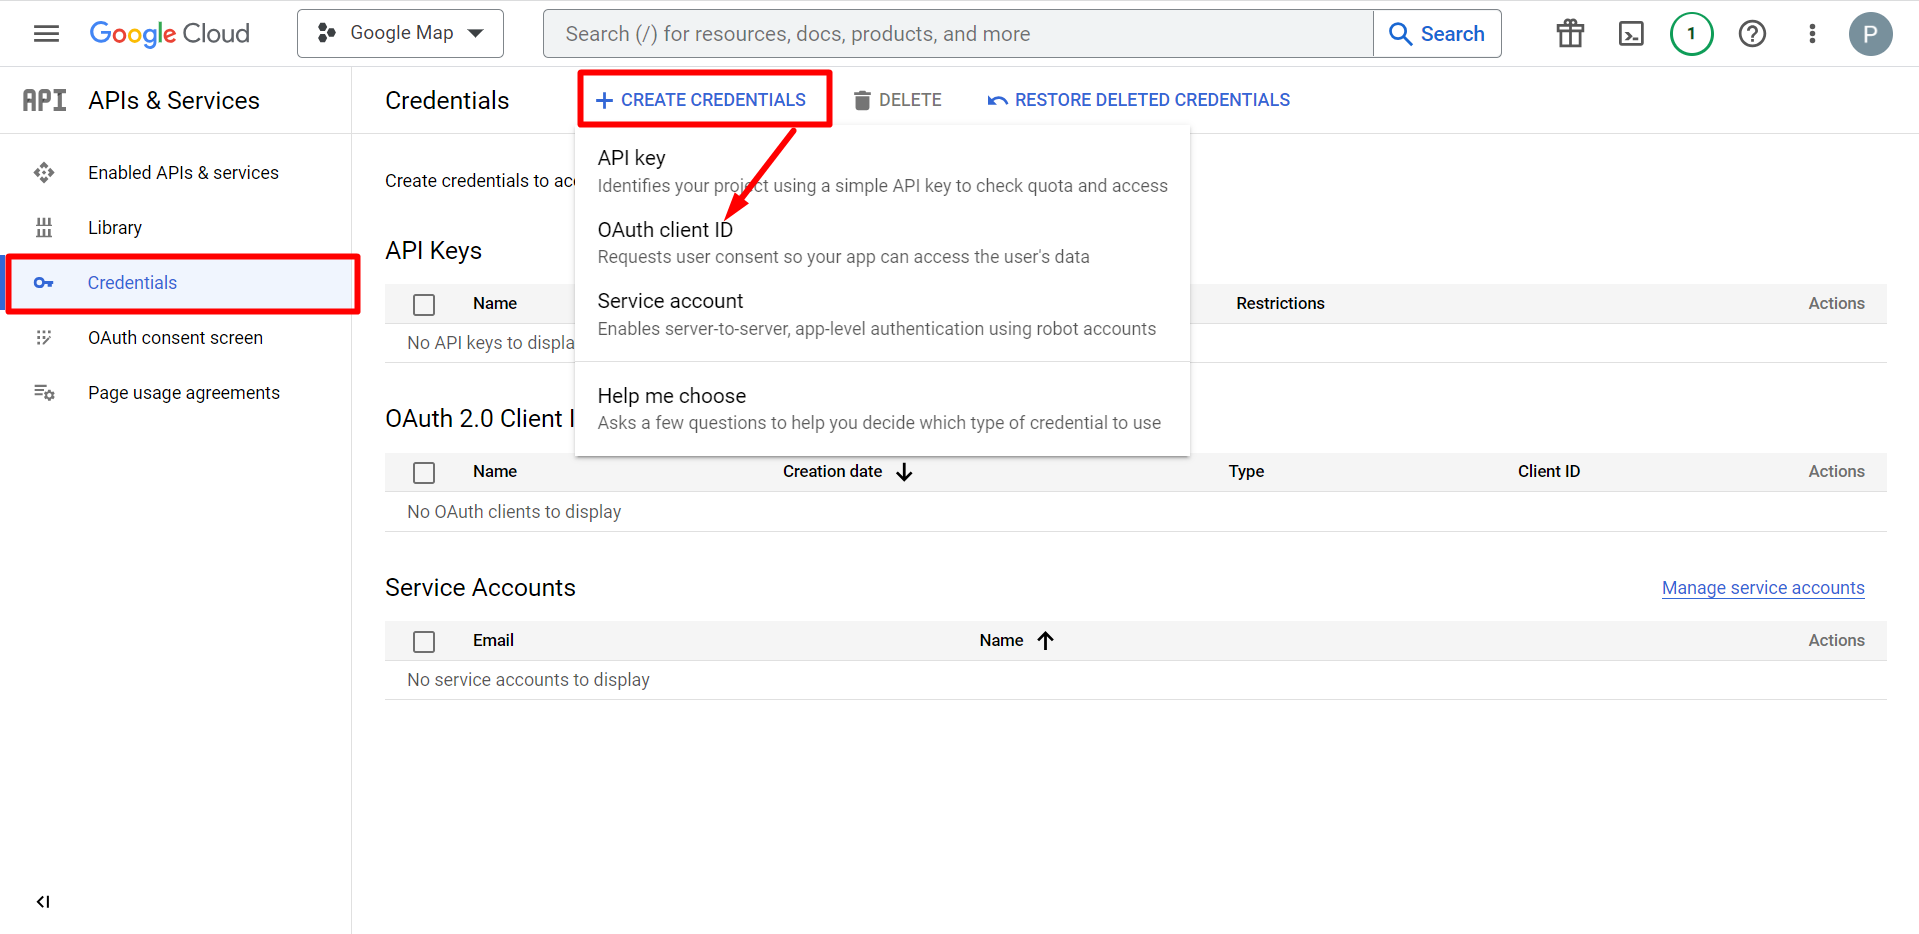
- 자격 증명으로 이동
- 자격 증명 만들기
- OAuth 클라이언트 ID 선택
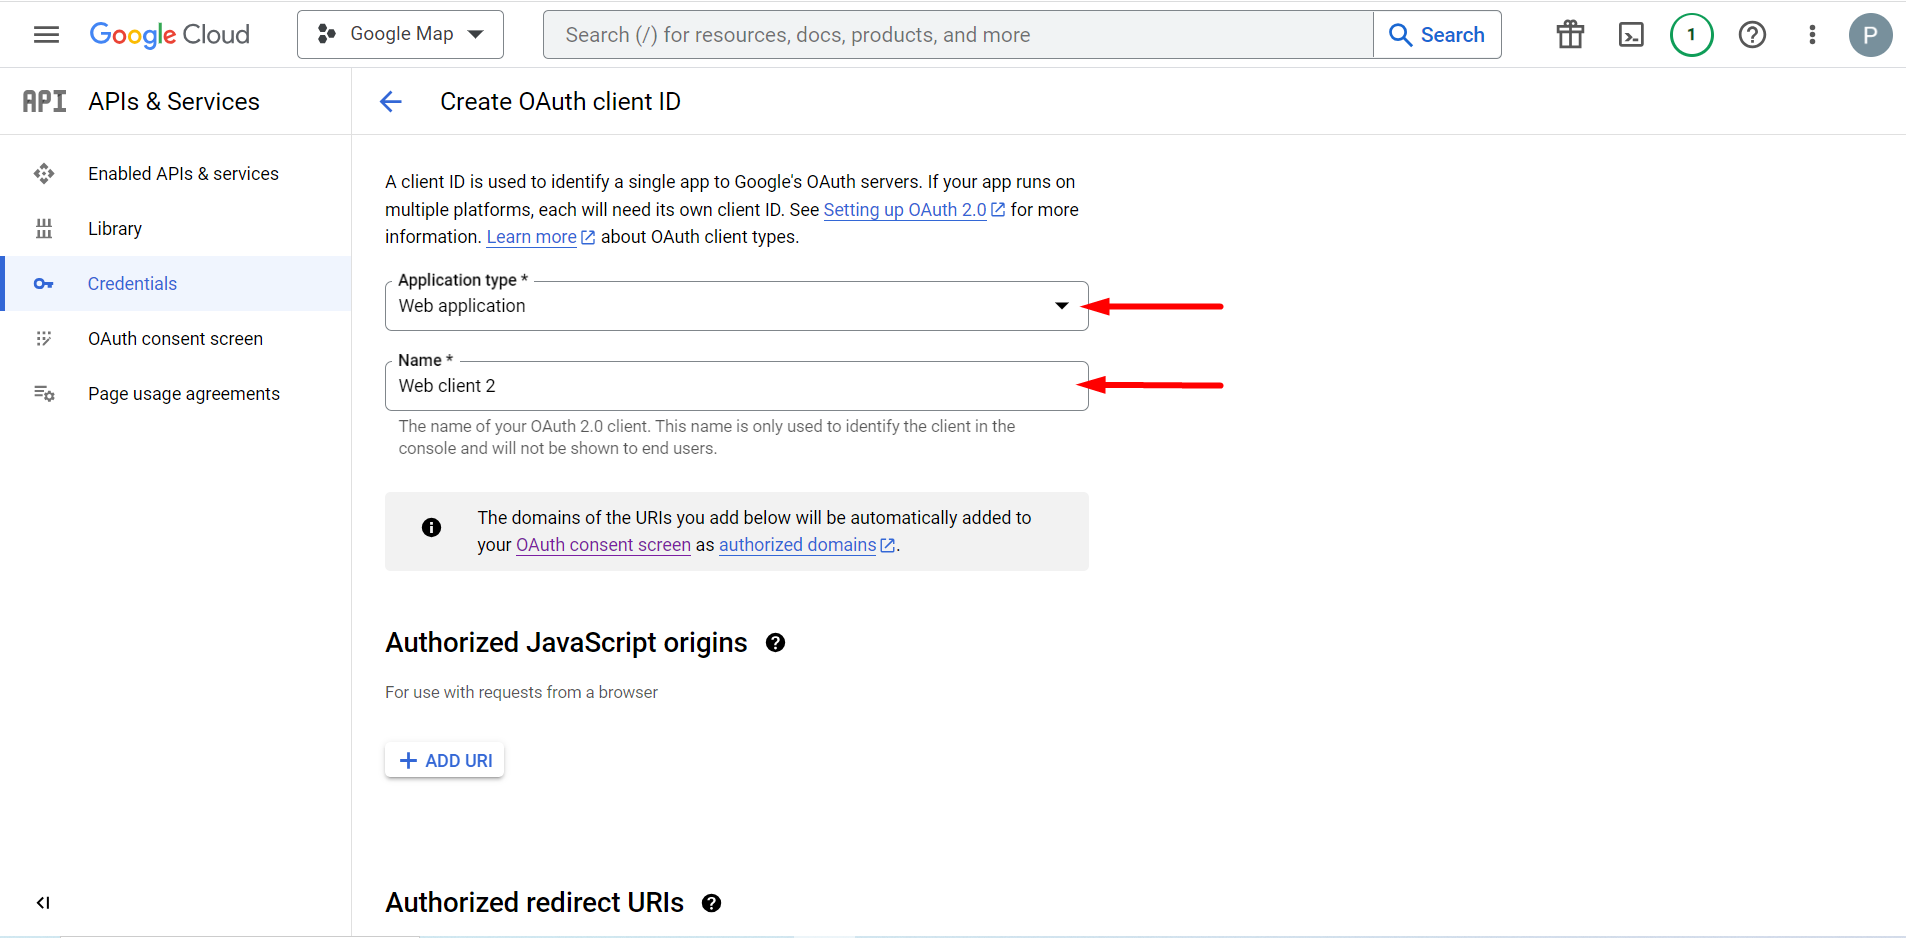
선택 애플리케이션 유형은 웹 애플리케이션입니다. 이름 입력 필드를 입력하세요.
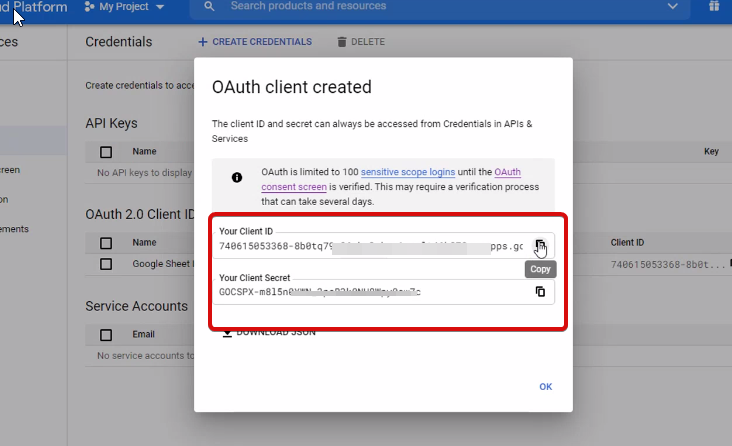
이제 귀하의 클라이언트 ID를 확인할 수 있으며 자격 증명에 추가되었습니다.
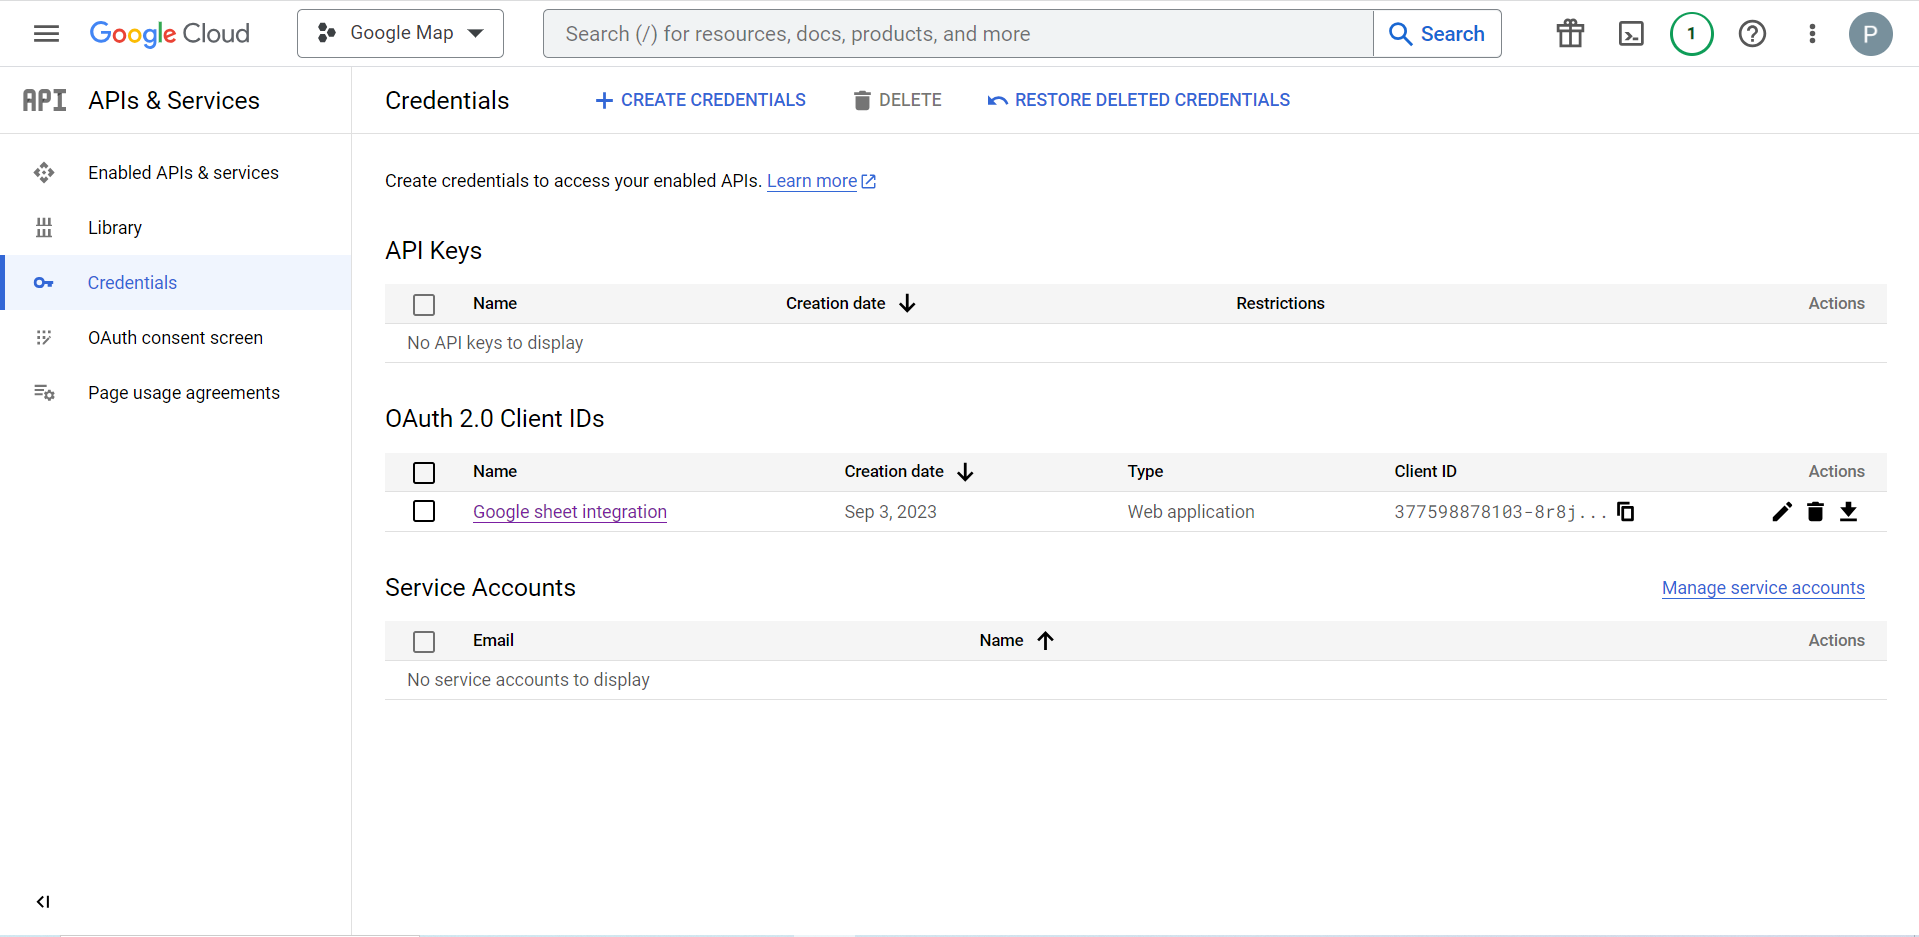
Now you will get the client ID and client secret, just copy them from here.
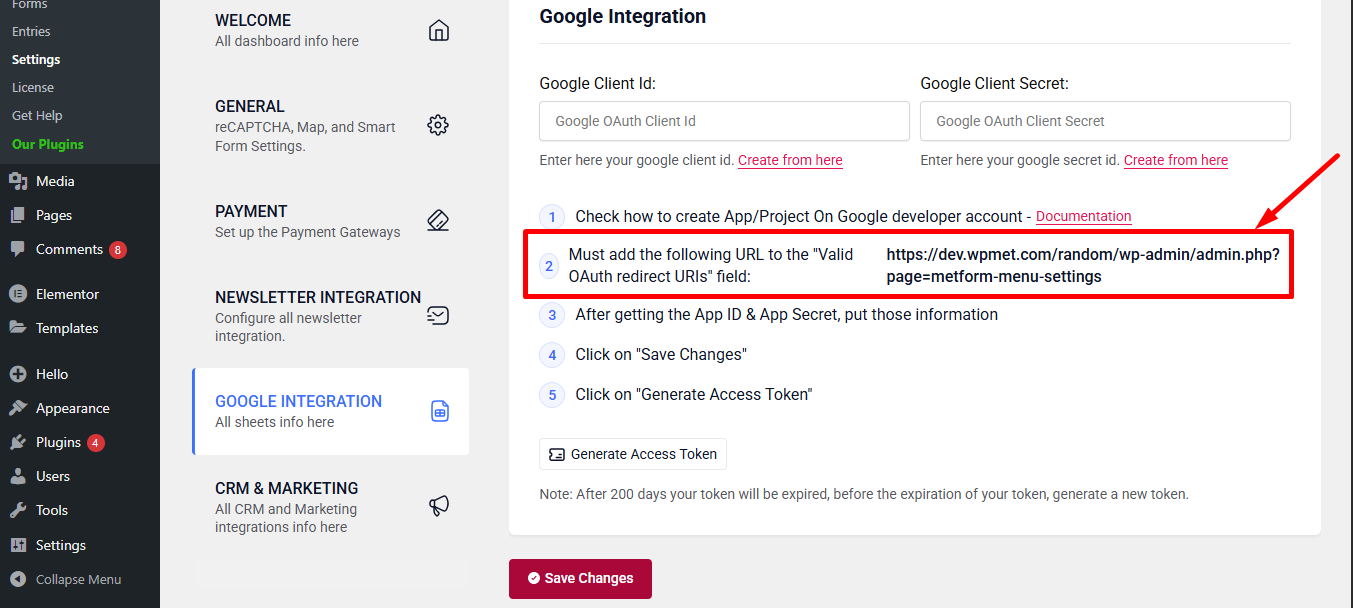
Step 2: Copy the URL From Metform’s Google Integration Tab #
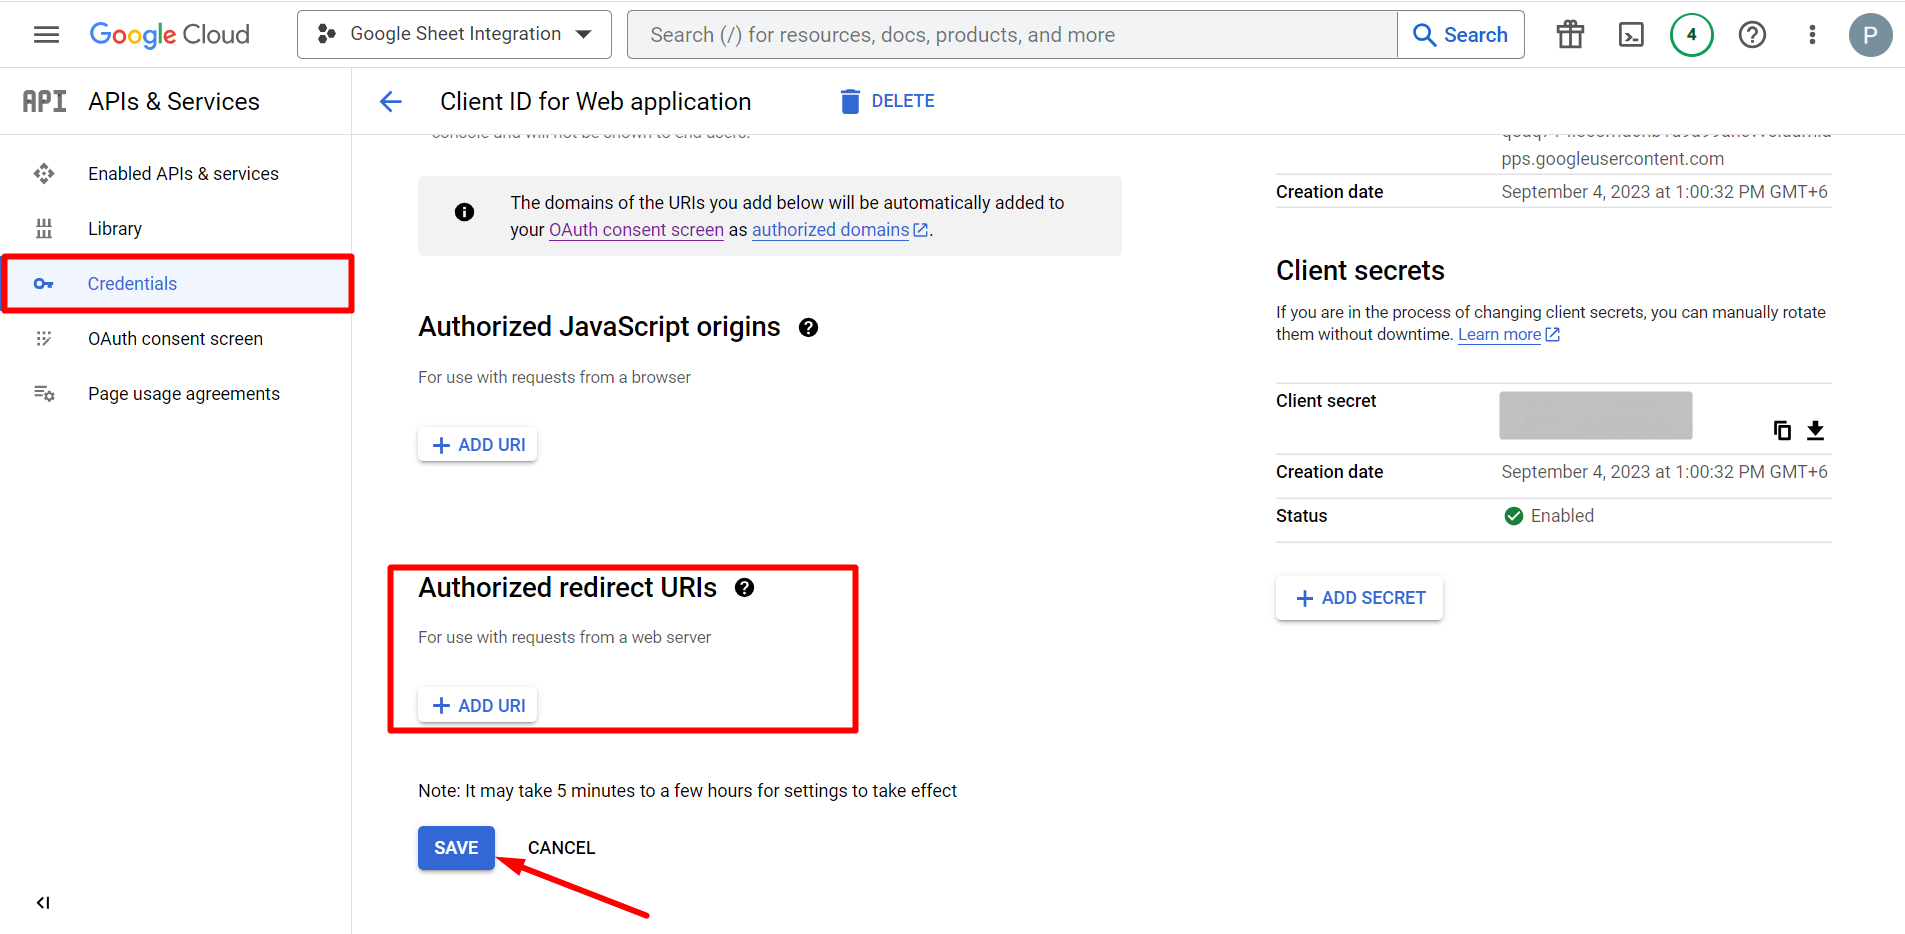
이 단계에서는 승인된 리디렉션 URI를 추가해야 합니다. MetForm의 Google 시트 통합 설정 내에서 리디렉션 URI를 얻을 수 있습니다.
다음으로 이동 Credentials again > find Authorized redirect URIs > Add URI that you have just copied from Metform’s Google Sheet Integration settings
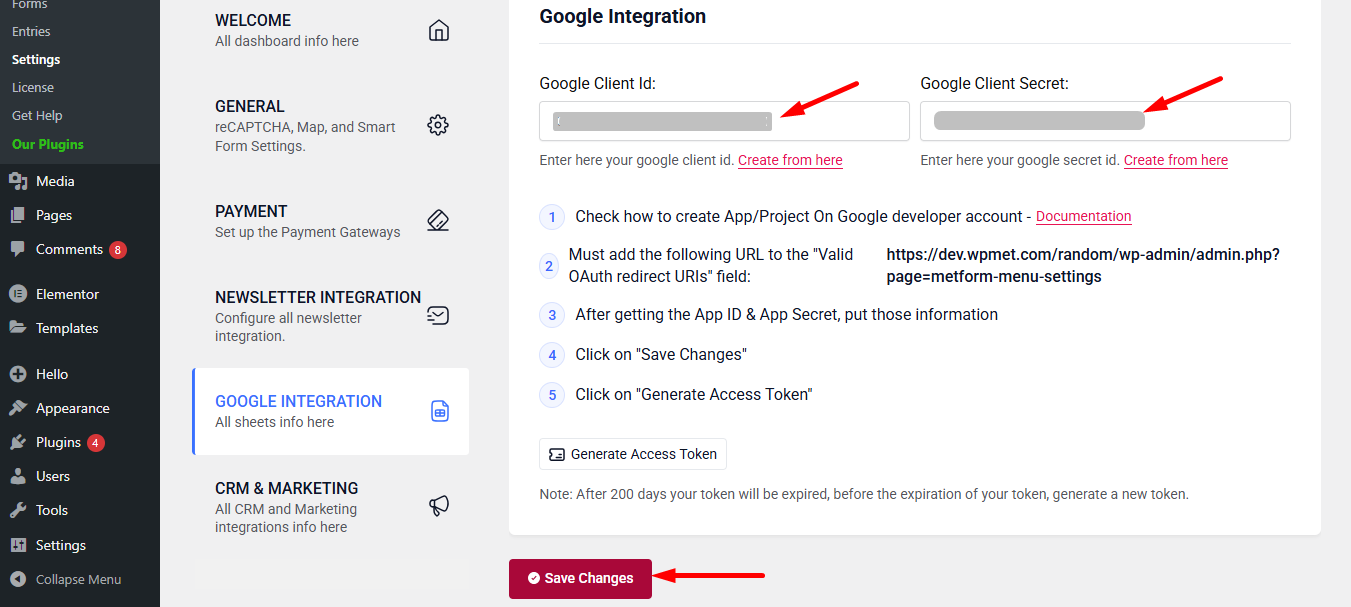
Step 2: Insert the Copied Ids #
Now, return back to Metform’s Google Integration tab from your dashboard.
Here, you have to paste the copied Client ID and Client Secret in the fields and save changes.
Step 3: Access Google Cloud console #
Now, select Library from APIs & Services
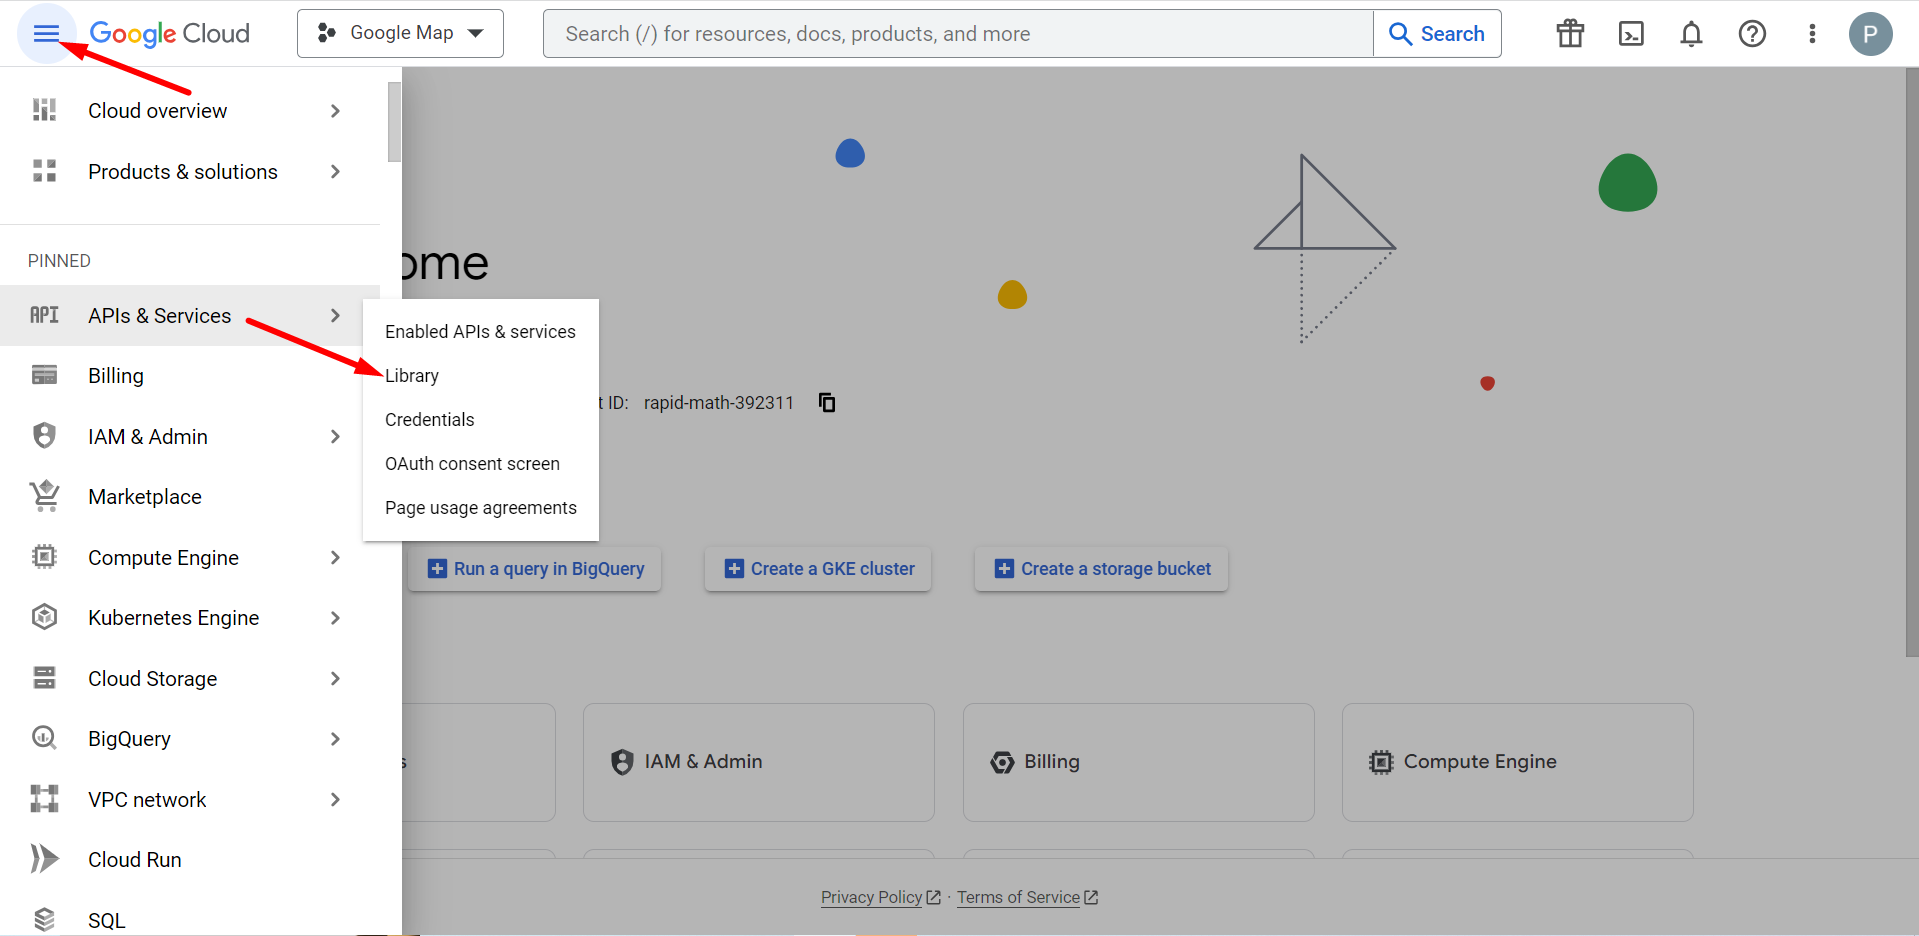
여기에서 Google Sheets API를 활성화해야 합니다.
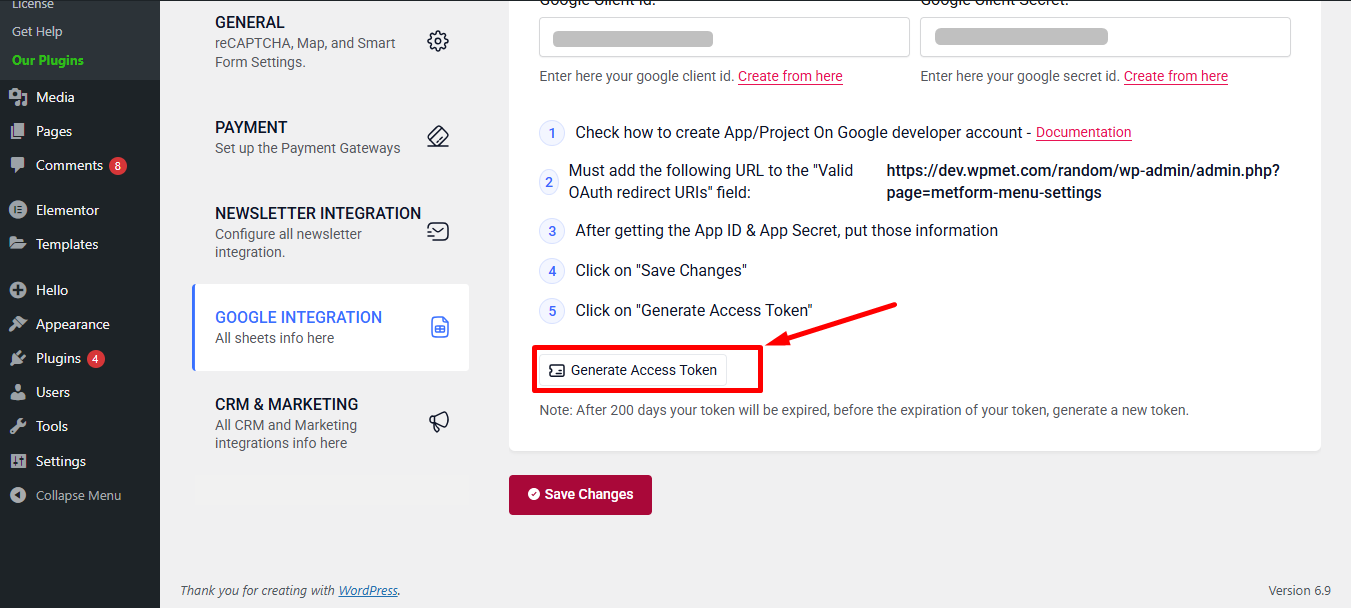
Step 4: Go to MetForm’s Google Integration Tab #
MetForm 대시보드로 이동하여 액세스 토큰 생성 링크를 클릭하세요.
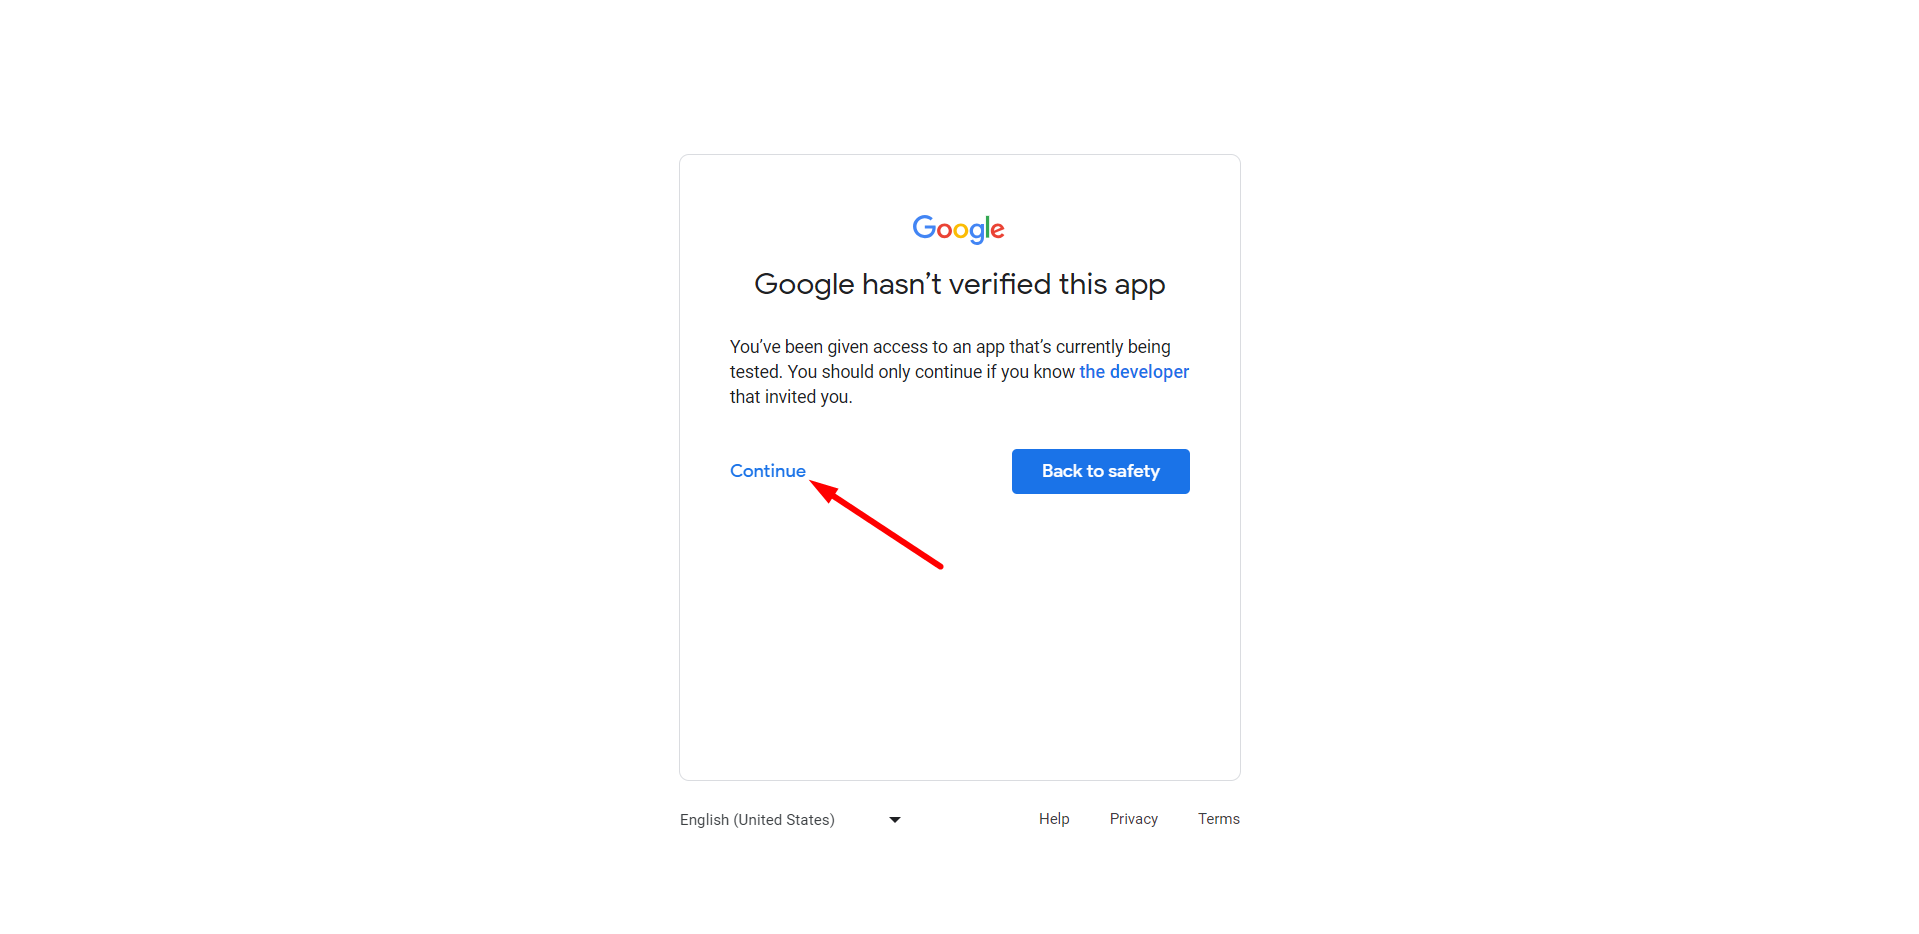
Gmail 계정에 로그인하고 계속 링크를 누르세요. 로그인하면 Google에서 이 앱을 확인하지 않았다는 메시지가 표시됩니다. 걱정하지 말고 그냥 계속을 클릭하세요.
Next, choose the form where you want integrate Google sheet and/or Google drive.
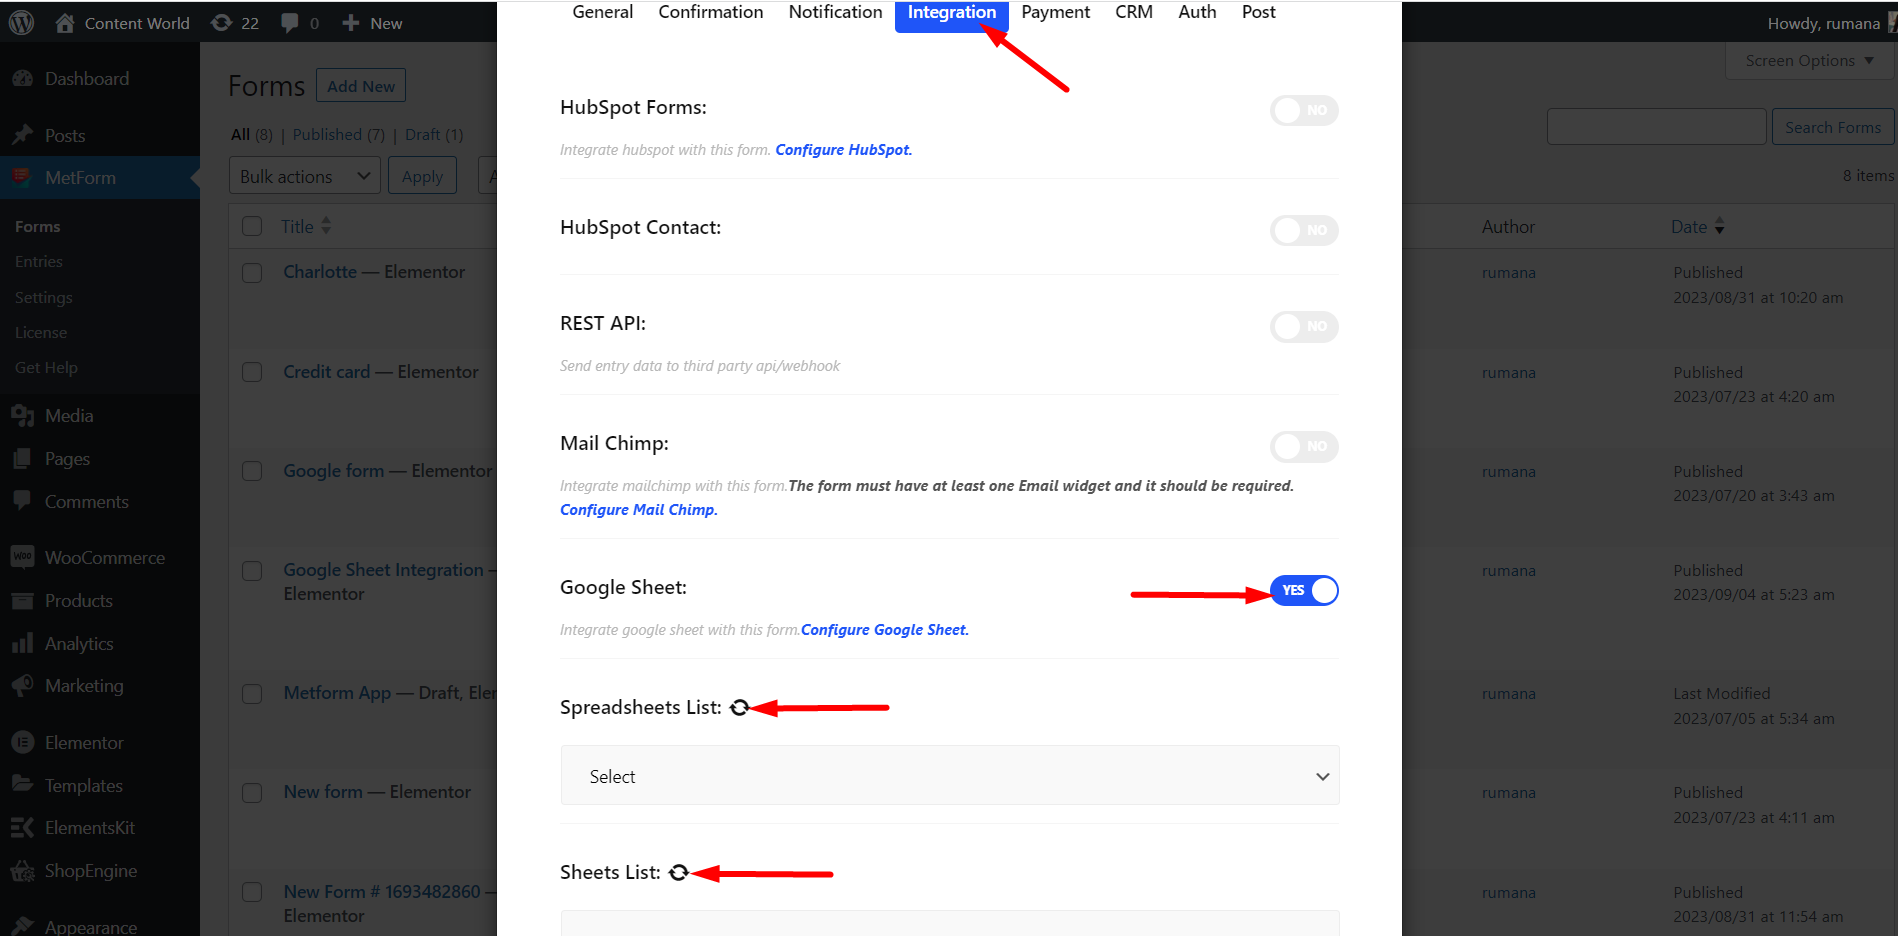
In the settings window, you need to turn on the Google sheet and/or Google drive integration options to use the form in your Google Sheet.
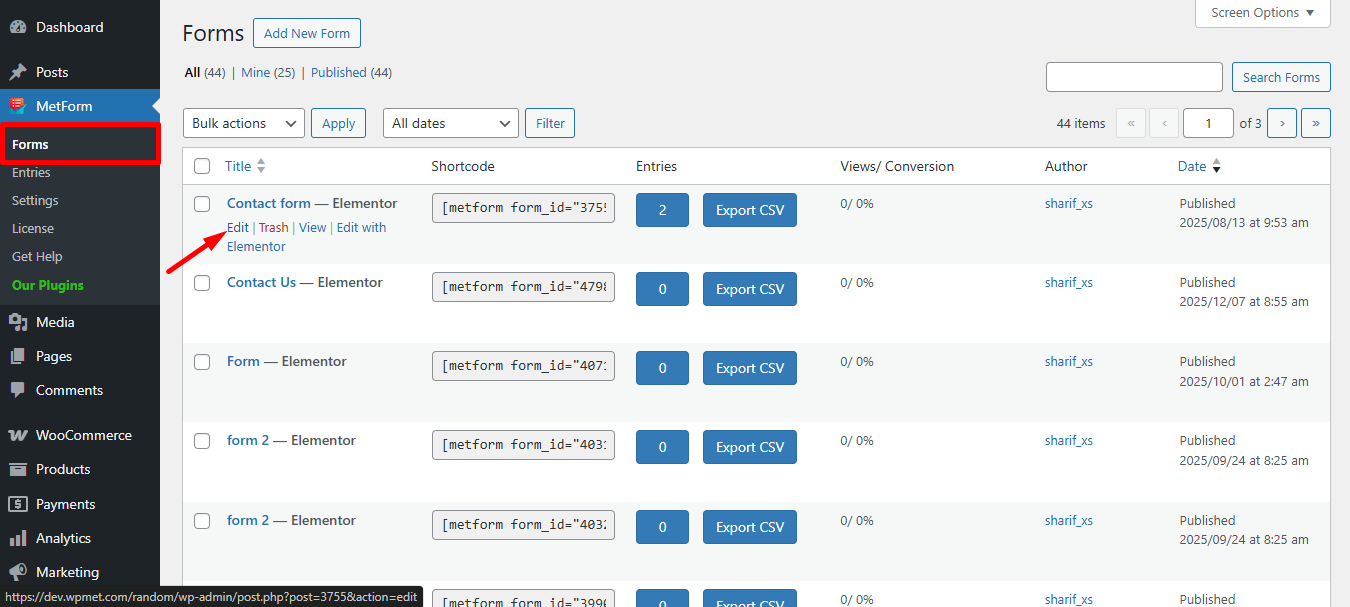
그러기 위해서는 다음부터 대시보드 > 이동 메트폼 > 양식 > 클릭 편집하다 시트에 추가하려는 양식의 옵션 > 이동 형태 설정 > 통합 > 켜다 Google 시트 옵션
마지막으로 다음과 같은 두 필드를 볼 수 있습니다. 스프레드시트 목록 및 스프레드시트 목록. 새로고침하면 스프레드시트 목록 옵션을 선택하면 드라이브의 모든 시트가 표시됩니다.
Learn in-depth about how to connect WordPress forms to Google Sheets.


