ShopEngine Pro에는 WooCommerce 아바타 모듈이 함께 제공되며, 이를 통해 사용자 아바타가 계정 대시보드에 어떻게 나타날지 구성할 수 있습니다.
Quick Overview
This documentation will guide you to the process of adding Avatar with ShopEngine. This WooCommerce Avatar plugin includes a dedicated module to set up avatar to your WP site.
For this Documentation, you will need the following tools to add Avatar:
Tools Used: 엘레멘터 (free), 우커머스 (free), ShopEngine (free & pro)
After download and activation of the above plugins, navigate Modules under ShopEngine and:
✅ Activate Avatar module
✅ Configure Avatar module
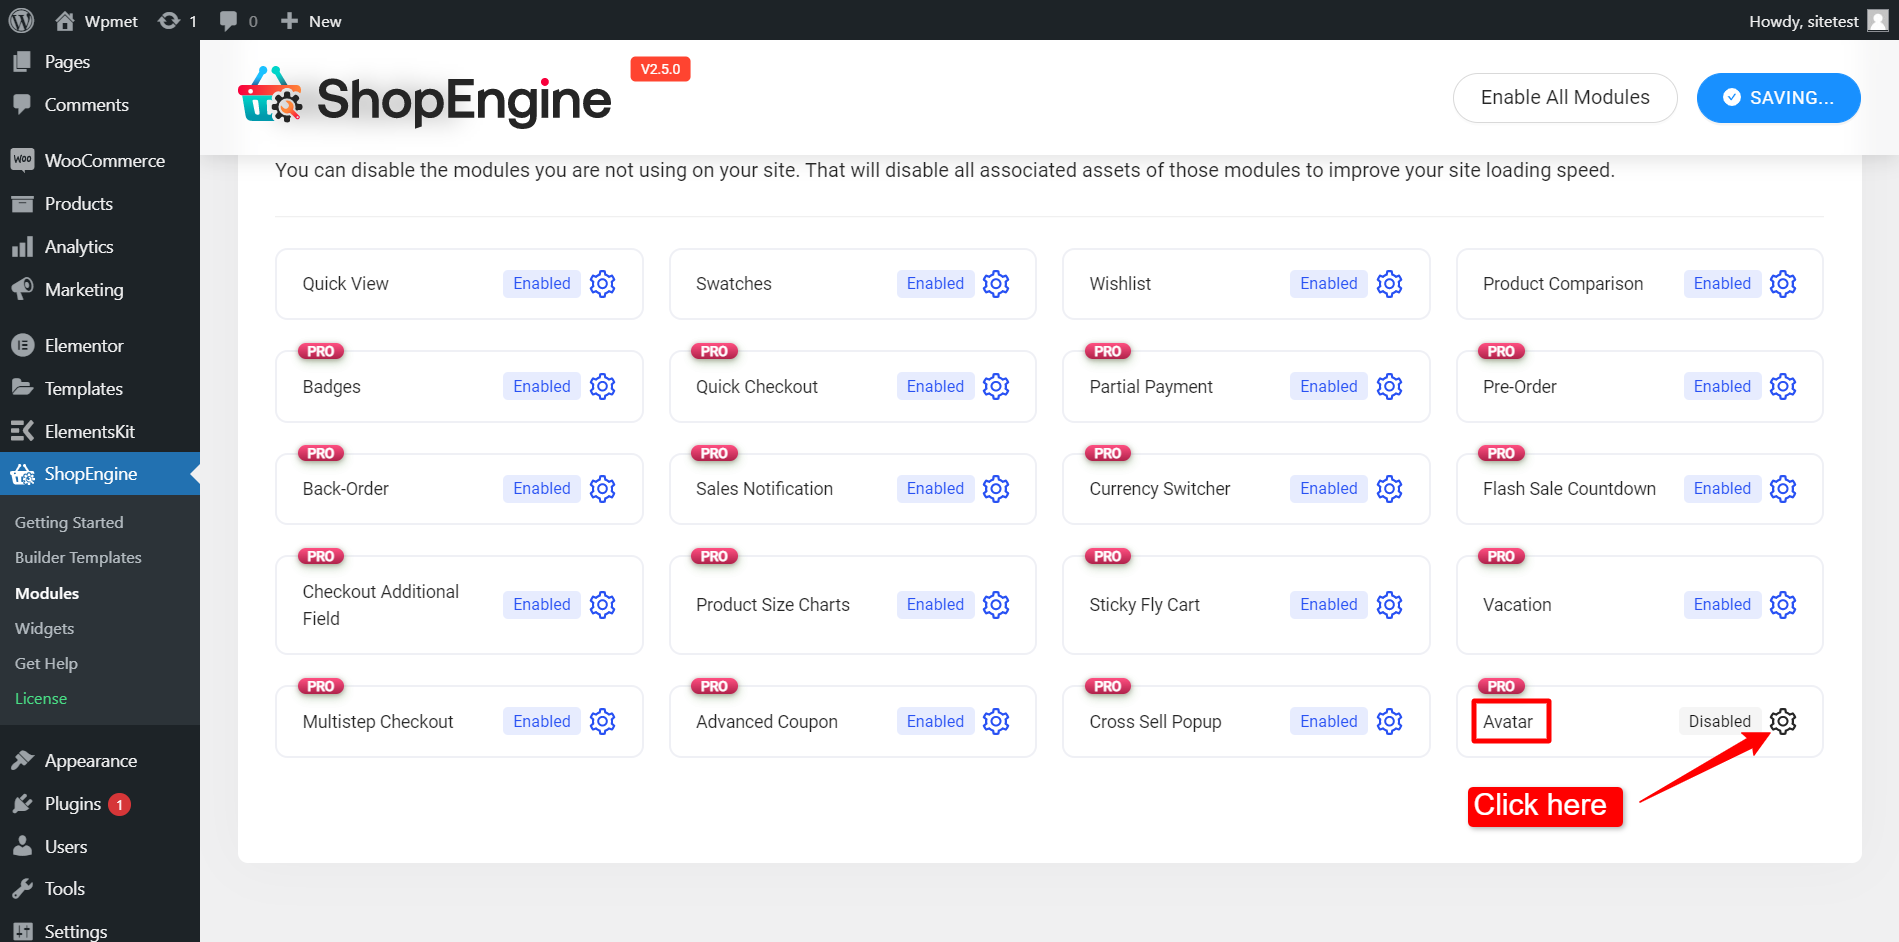
WooCommerce 아바타 모듈 활성화 #
To enable the ShopEngine WooCommerce Avatar module,
- WordPress 사이트에 로그인하세요.
- 로 이동 ShopEngine > 모듈 WordPress 대시보드에서.
- 찾기 화신 목록에서 모듈을 선택하세요.
- ⚙️ (설정 아이콘)을 클릭하세요.


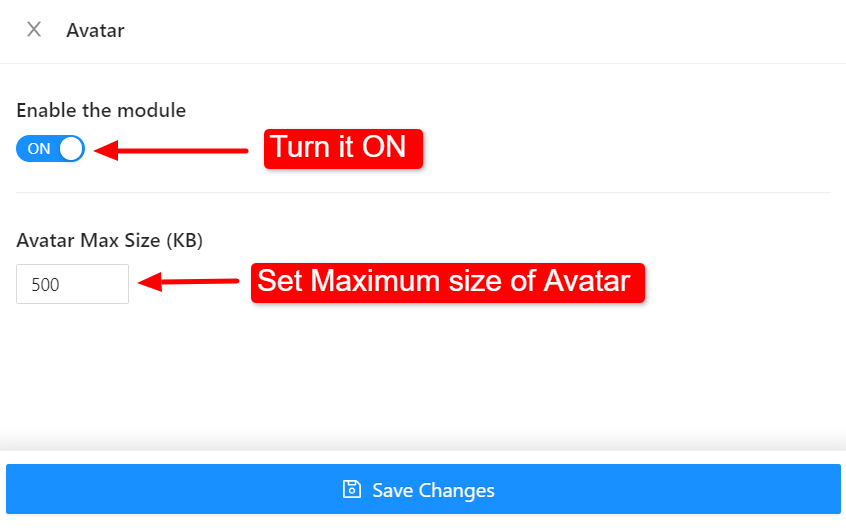
After that, an off-canvas window will show up for WooCommerce Avatar template settings. In the Template Settings,
- 첫 번째, 모듈 활성화.
- 설정 아바타 최대 크기 (KB)
- 다음을 클릭하세요. 변경 사항을 저장하다 화면 하단의 버튼을 클릭하세요.


이제 웹사이트의 계정 대시보드 페이지에 사용자 아바타를 추가할 수 있습니다. 설명서를 읽어보세요. 아바타 위젯 위젯을 사용하는 방법과 웹 페이지에 사용자 아바타를 추가하는 방법을 알아보세요.


