


This documentation guides you through how to purchase, install, and activate ElementsKit Pro. The process is quick and easy, just follow the steps below.
1단계: ElementsKit Pro 구매 방법 #
- 우리의 탐색 가격 페이지 ElementsKit
- 원하는 요금제를 선택한 후 클릭하세요. 지금 구입 단추.
- 귀하는 우리의 사이트로 리디렉션됩니다 점검 페이지. 이 페이지에서 필요한 절차를 완료하고 구입 단추.
- 이제 원하는 결제 방법을 선택하고 다음 단계를 진행하세요.
- Once payments are successfully made, you’ll get an email about your purchase and a link to download the plugin.
2단계: 플러그인을 다운로드하는 방법 #
다음을 클릭하세요. 로그인 URL that you got in the email and log in to Wpmet account. Alternatively, you can visit our site and log in easily.
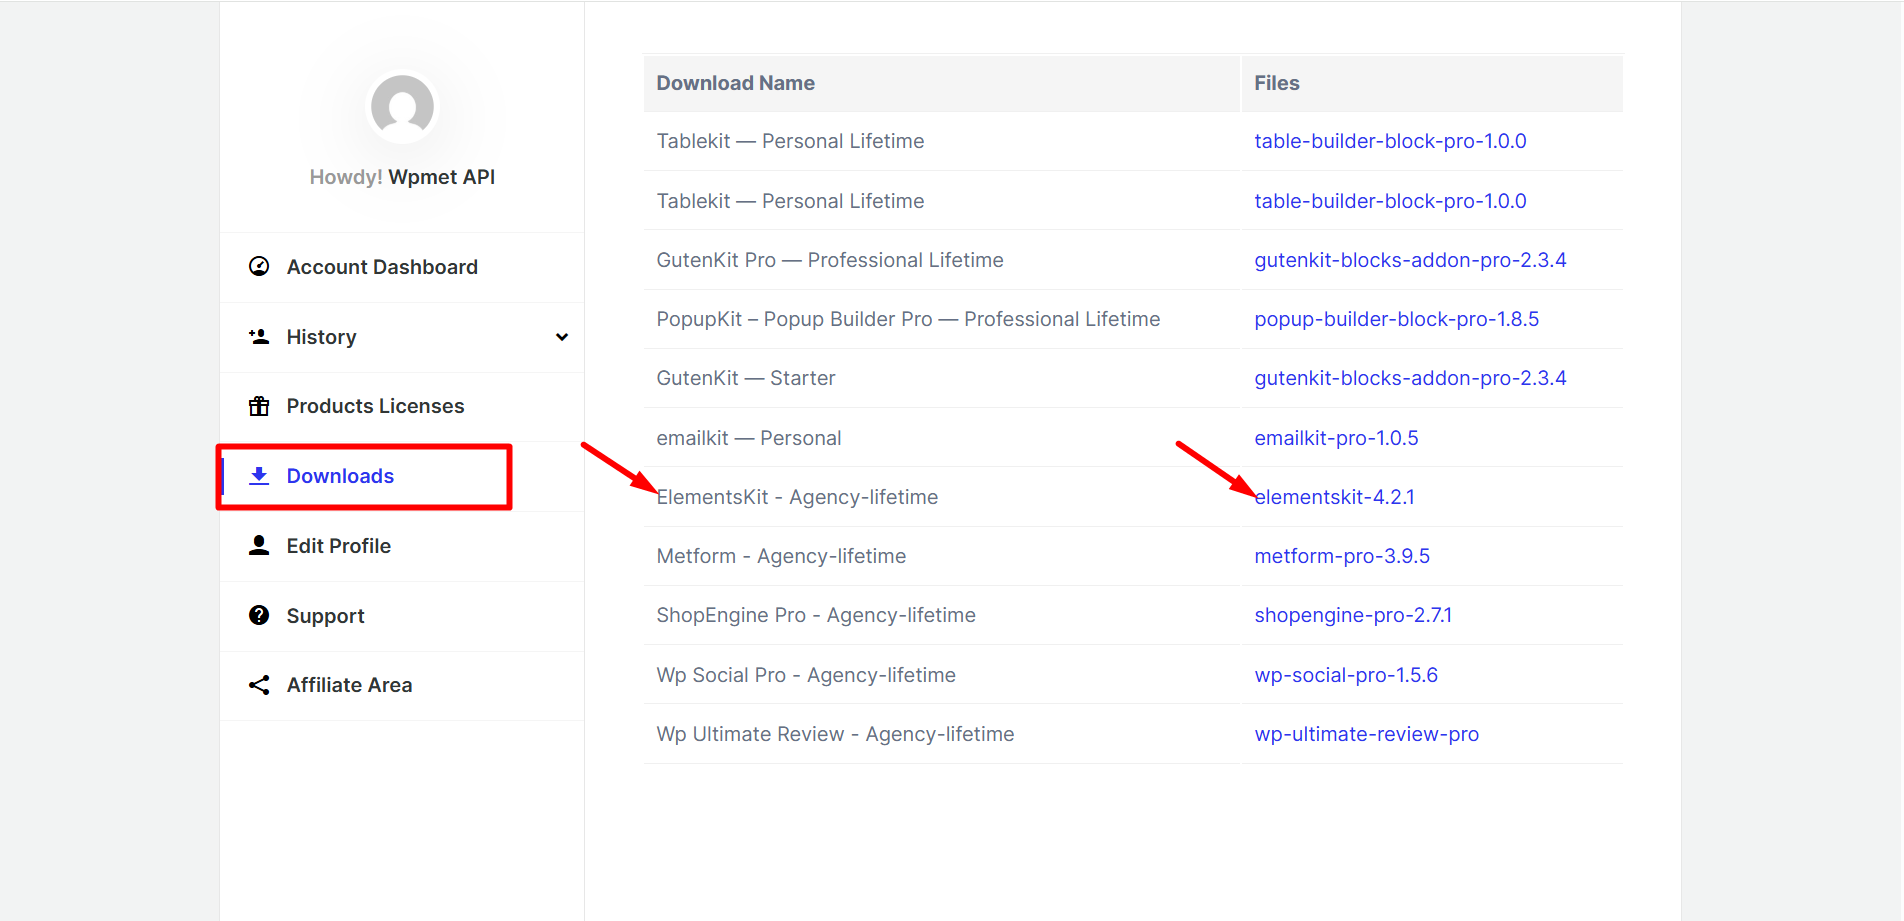
You’ll be redirected to your Account dashboard.
플러그인을 다운로드하려면: 다운로드로 이동하여 파일 이름을 클릭하여 플러그인을 다운로드하세요..
3단계: ElementsKit Pro 설치 방법 #
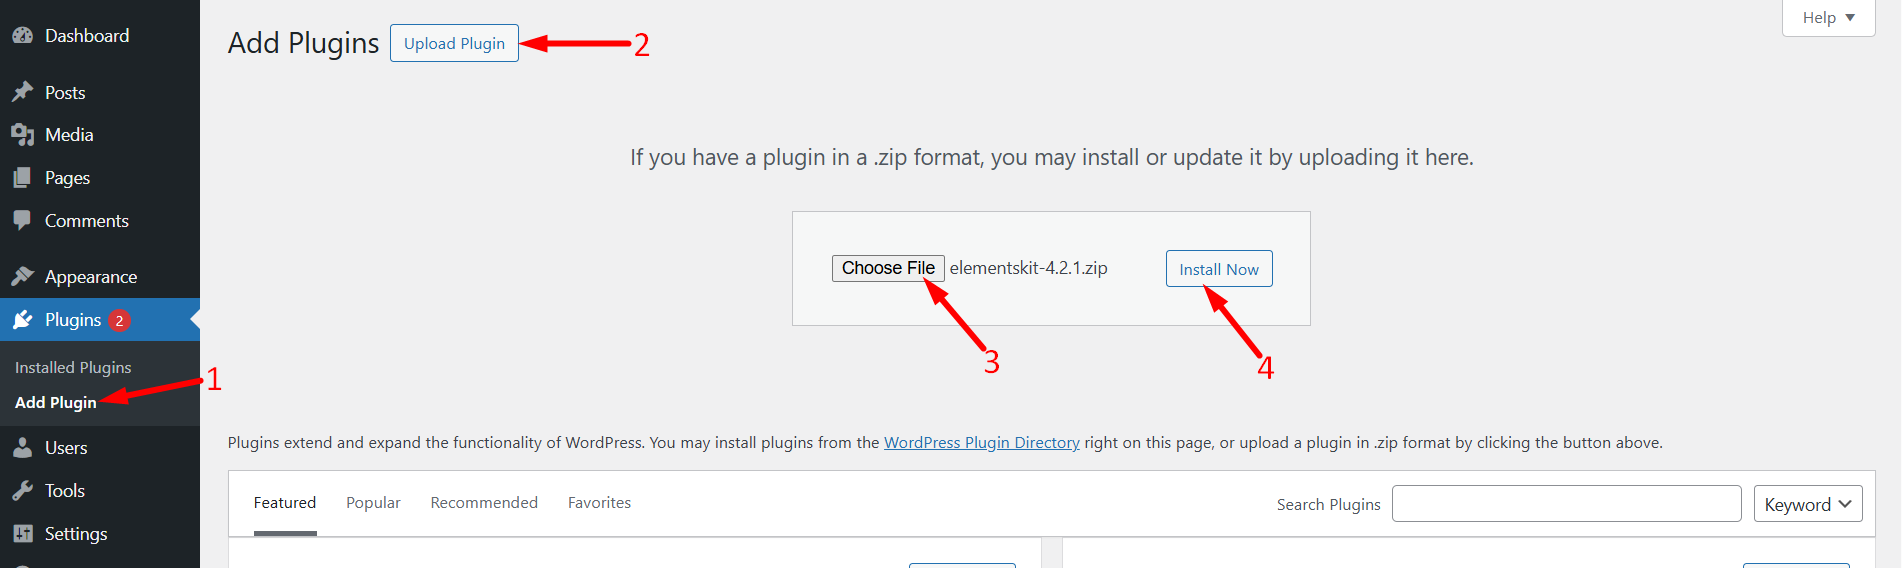
Access the Dashboard, click on Plugins, and continue with the following steps.
- 다음을 클릭하세요. 새로운 걸 더하다
- Next, cick on the 플러그인 업로드
- 다음을 선택하세요. ElementsKit 프로 plugin file you downloaded
- 클릭 Install the plugin
하지만, ElementsKit Pro depends on ElementsKit Lite. If you haven’t installed the Lite version yet, please install it first.
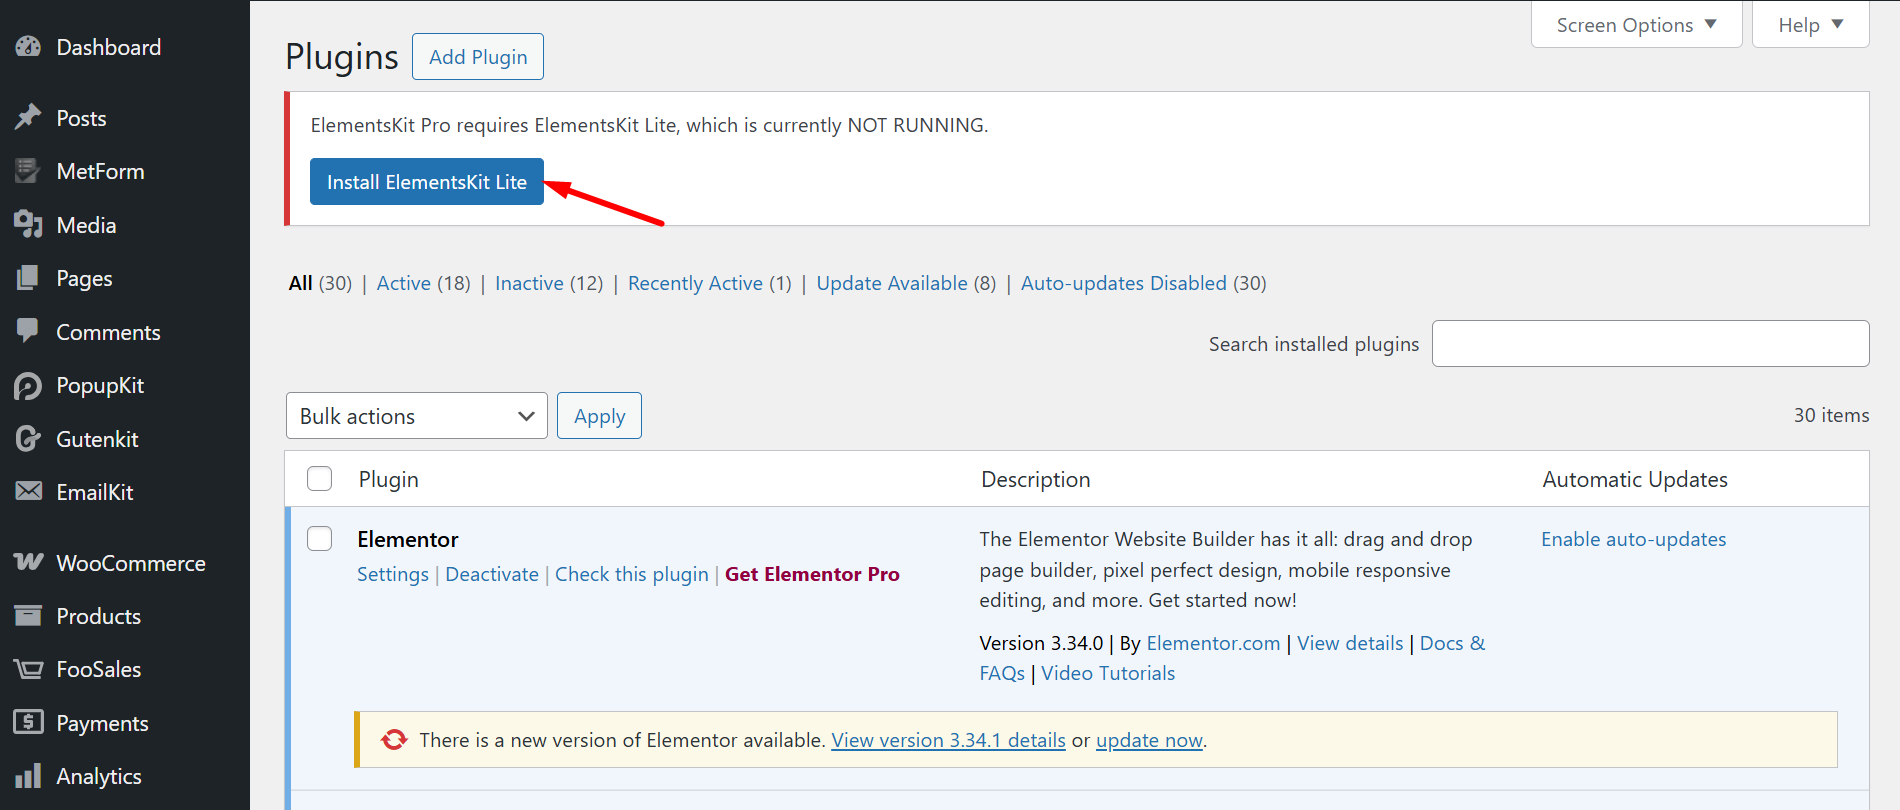
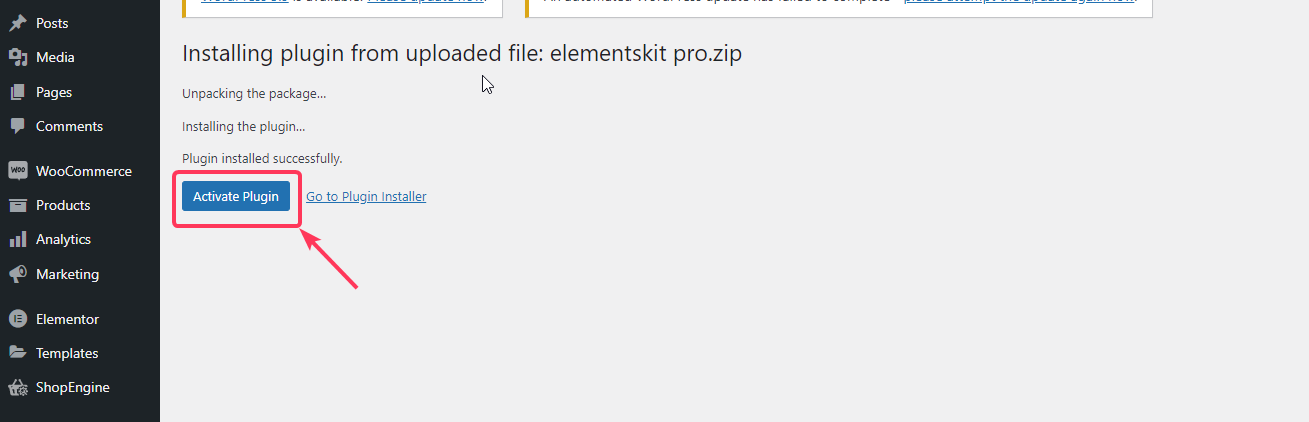
4. After the installation, 플러그인 활성화를 클릭하세요 활성화합니다.
라이선스 활성화 프로세스 #
그런 다음 Wpmet 계정에 다시 로그인하십시오.
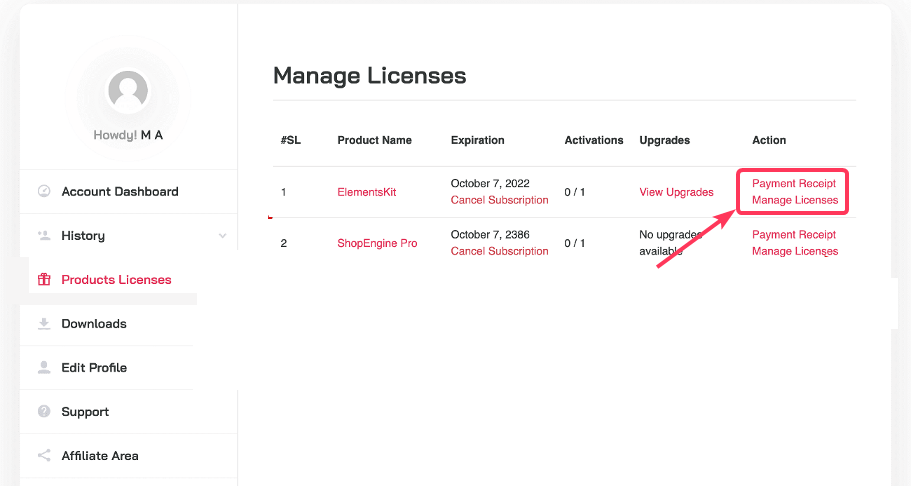
ElementsKit Pro의 라이센스 키를 얻으려면:
- 로 이동 제품 라이선스 페이지.
- 다음을 클릭하세요. 라이선스 관리 ElementsKit용. 거기에서 ElementsKit Pro의 라이센스 키를 찾을 수 있습니다.
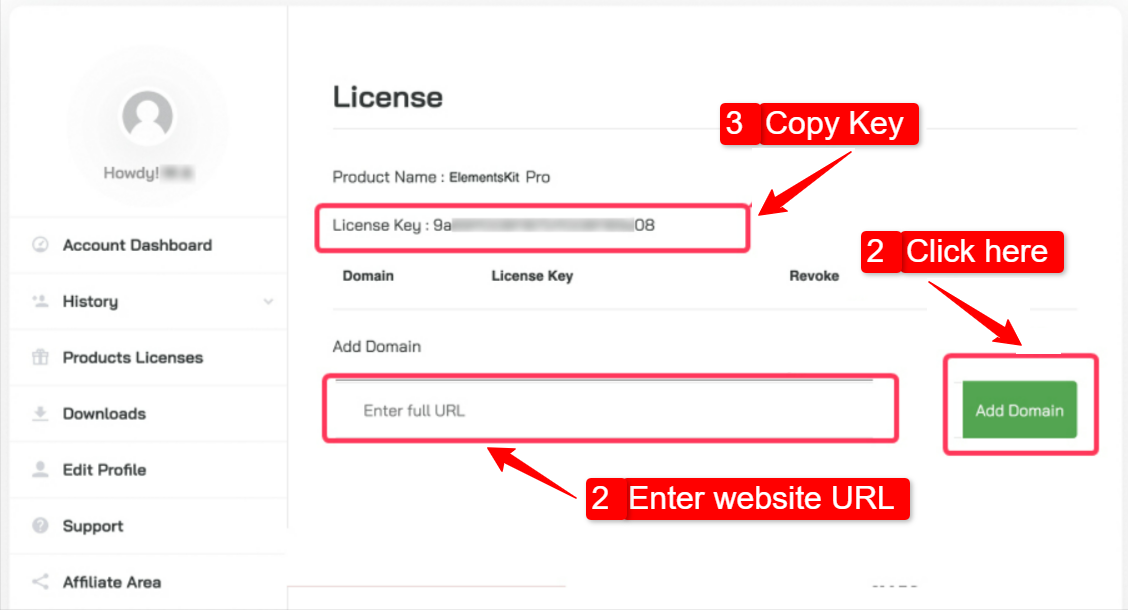
3. 라이선스 관리 페이지의 도메인 추가 필드에 웹사이트를 추가하세요. 다음을 클릭하세요. 저장할 도메인 추가 버튼. 이후 라이센스 키를 복사하세요 그리고 다음 단계로 넘어갑니다.
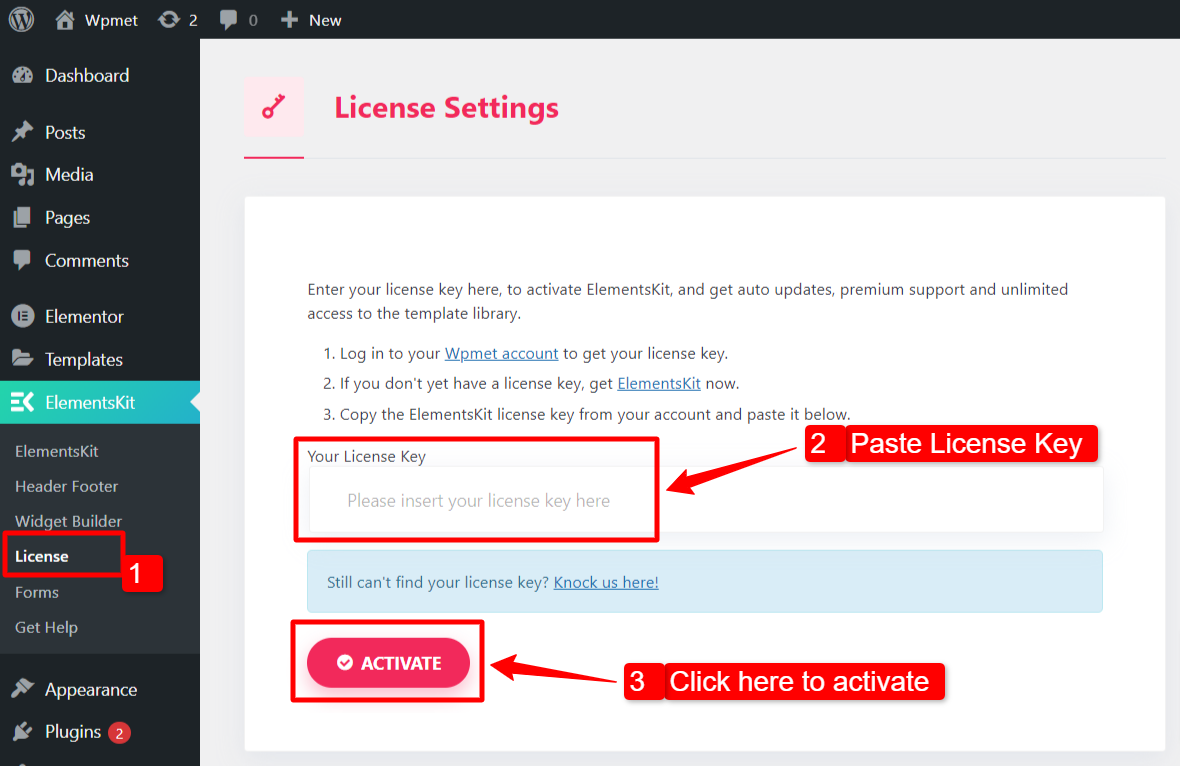
WordPress 사이트에서 라이센스 키를 활성화하려면:
- WordPress 관리 대시보드로 이동합니다.
- 로 이동 ElementsKit > 라이센스.
- 라이센스 키 붙여넣기 필수 필드에.
- 다음을 클릭하세요. 활성화 단추.
마지막으로 WordPress 웹사이트에 ElementsKit Pro를 설치하고 활성화했습니다. 이제 ElementsKit Pro와 함께 제공되는 Elementor의 수백 가지 고급 요소에 액세스할 수 있습니다.


