


If you’re running an online store with WooCommerce, you’ve probably encountered situations where customers need to complete pending orders or make partial payments.
What will happen if you don’t have a checkout order pay page? Without this, customers will need to repeat the process of adding cart and checking out for unsuccessful orders. This would create frustration among buyers. They would intend to leave rather than retry.
That’s where the Checkout Order Pay page comes in. This page allows customers to pay for specific orders directly, without going through the entire shopping process again.
In this guide, you’ll learn what the WooCommerce Order Pay page is, how it differs from the standard checkout page, and exactly how to create a checkout order pay page in WooCommerce.
Quick Overview
あ Checkout Order Pay page in WooCommerce lets customers pay for existing or pending orders without going through the full checkout process again. It’s perfect for failed, manual, or partial payments.
Tools Used: ShopEngine (Free and Pro) and Elementor
使用 ショップエンジン, you can easily create this page by:
✅ Enabling the Partial Payment Module.
✅ Activating the Checkout Order Pay Widget.
✅ Creating and customizing a Checkout Pay Template Elementor で。
This gives customers a simple, direct payment experience and helps reduce cart abandonment.
What is the WooCommerce Order Pay Page
The WooCommerce Order Pay page is a special checkout page generated for specific orders. This allows customers to bypass the usual process of adding products to the cart and checking out. Instead, the customer can visit a unique link to pay for an existing order.
WooCommerce Order Pay page is especially useful for:
- Pending payments: When a customer’s payment fails and they need to try again.
- Custom or manual orders: Created by the store admin and sent to the customer for payment.
- Partial payments: Allowing customers to pay a portion of the total upfront.
Once they click the payment link, they’re taken directly to the order payment interface, making it quick, easy, and friction-free.
Difference Between Order Pay and Checkout Page
While the two may look similar, the Order Pay ページ そしてその チェックアウト ページ have different purposes:
| 特徴 | チェックアウトページ | Order Pay Page |
|---|---|---|
| 目的 | Used for new orders from the cart. | Used for paying for an existing order. |
| Flow | Add to cart → Checkout → Payment. | Click payment link → Payment directly. |
| Cart Requirement | Requires cart contents. | No cart needed, order already exists. |
| Customer Experience | Full checkout process. | Streamlined, payment-only process. |
In short, チェックアウト is for placing a new order, while Order Pay is for completing payment on a specific order.
How to Create A Checkout Order Pay Page in WooCommerce Using ShopEngine
ShopEngine makes creating a customized Checkout Order Pay page incredibly simple. Here, we will need one widget and one module of ShopEngine to create a checkout page.
Here’s how to do it step-by-step.
Step 1: Enable Partial Payment Module
If you want to allow customers to pay partially for an order, you first need to enable the Partial Payment module in ShopEngine.
Navigate to your WordPress dashboard and open ショップエンジン. Select Module and look for the 一部支払い Module. Enable it and set the partial payment settings. Then save the changes.
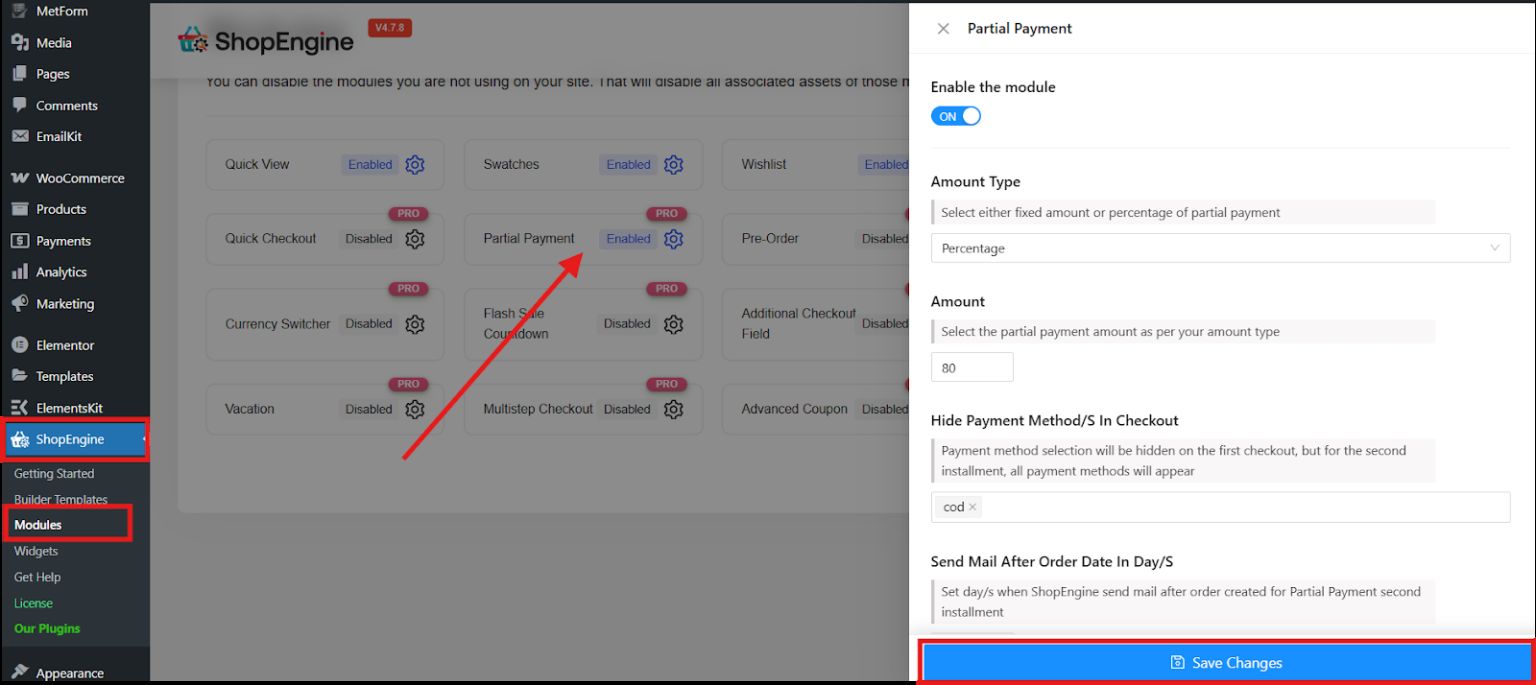
This ensures your store supports partial payments, which is often paired with the Order Pay page.
Step 2: Enable Checkout Order Pay Widget
Next, you’ll need to enable the Checkout Pay widget so you can design your Order Pay page.
選択する ウィジェット and look for Check Order Pay. Enable it and save the changes.

This widget will display the payment form for an existing order.
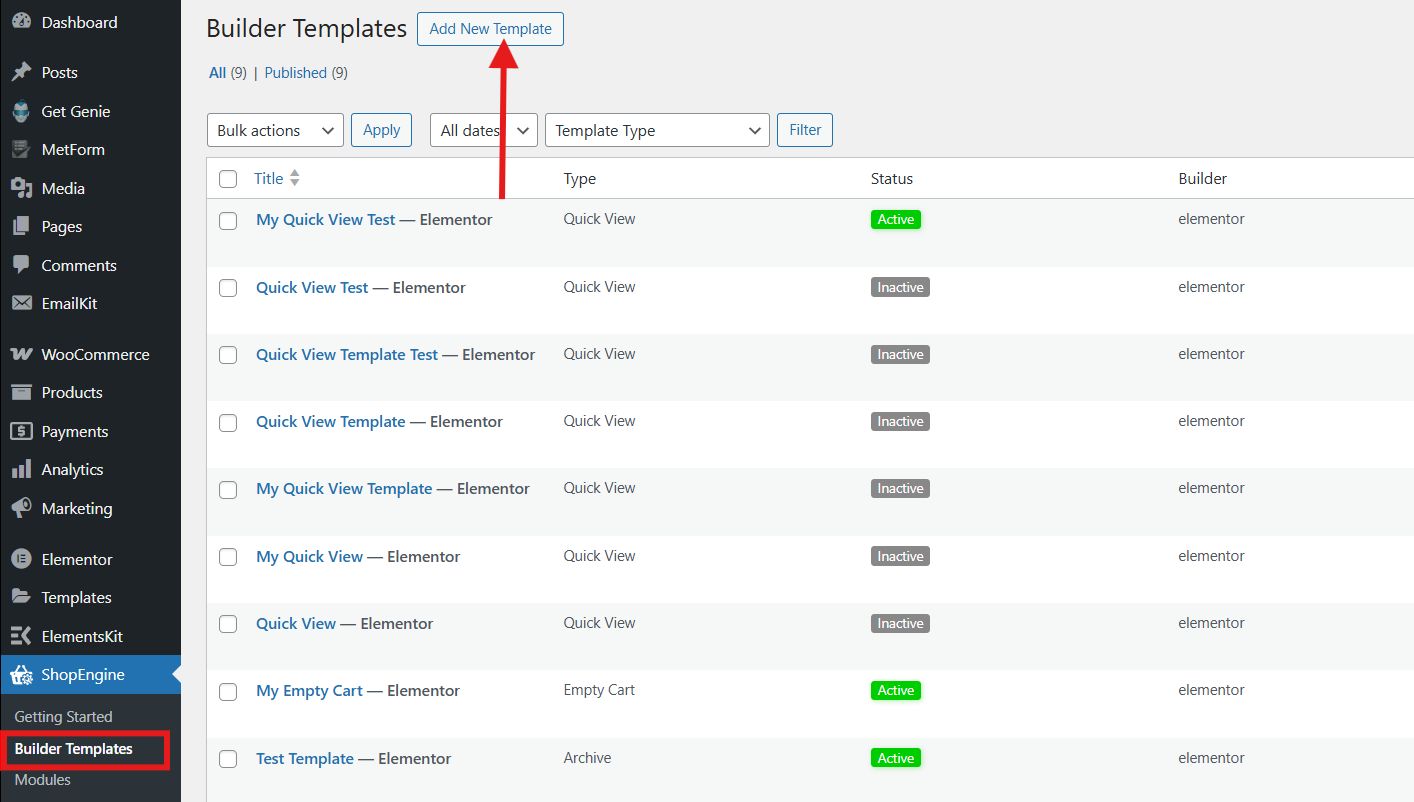
Step 3: Create Checkout Pay Template
Now, it’s time to create the template for your Order Pay page. In your WordPress dashboard, go to ショップエンジン そして選択します ビルダーテンプレート to add a new template.
Complete the settings of your new template:
- Enter a name for your WooCommerce checkout page template.
- Select the Checkout Order Pay type.
- Activate the template.
- Select Elementor as the editor
- Click on the Edit with Elementor.
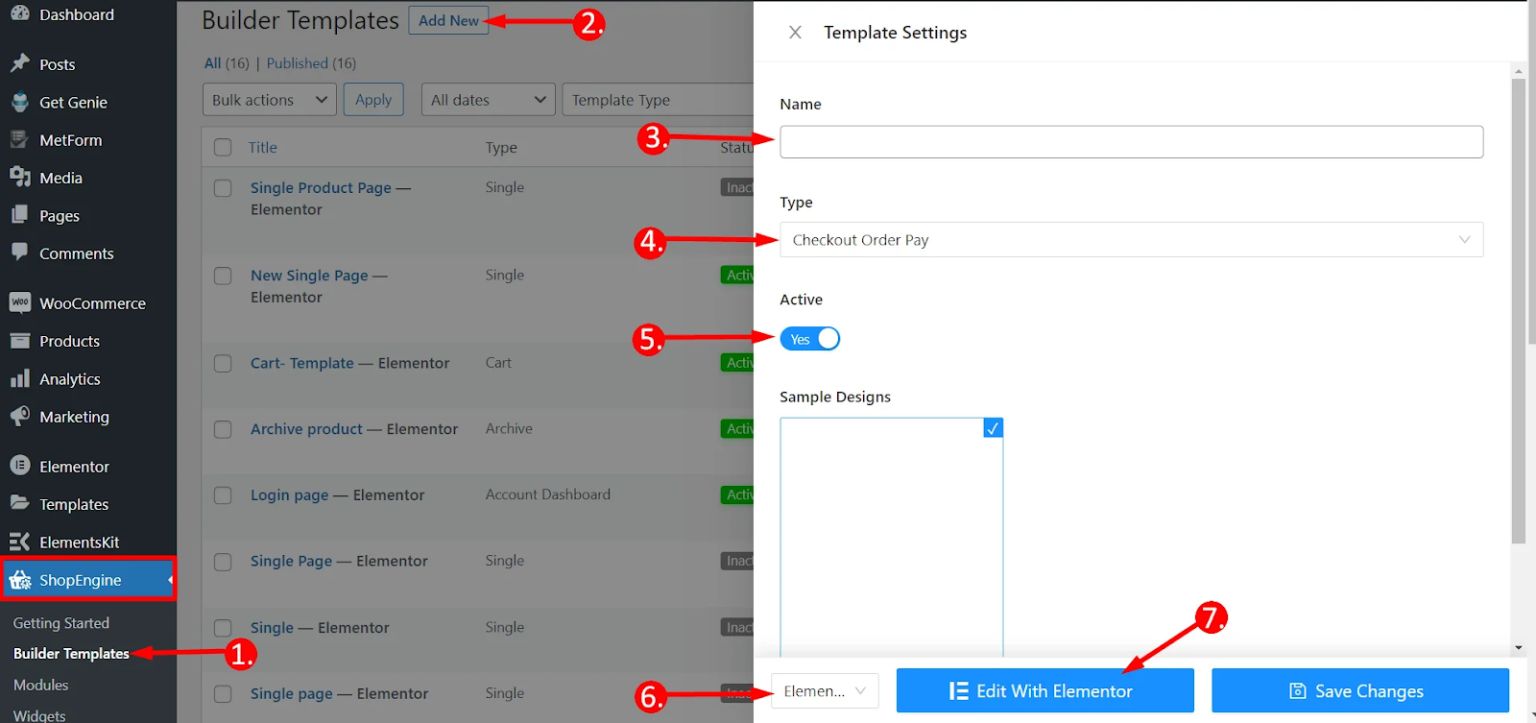
You’ll now have a blank canvas to start designing.
Step 4: Customize Pay Template
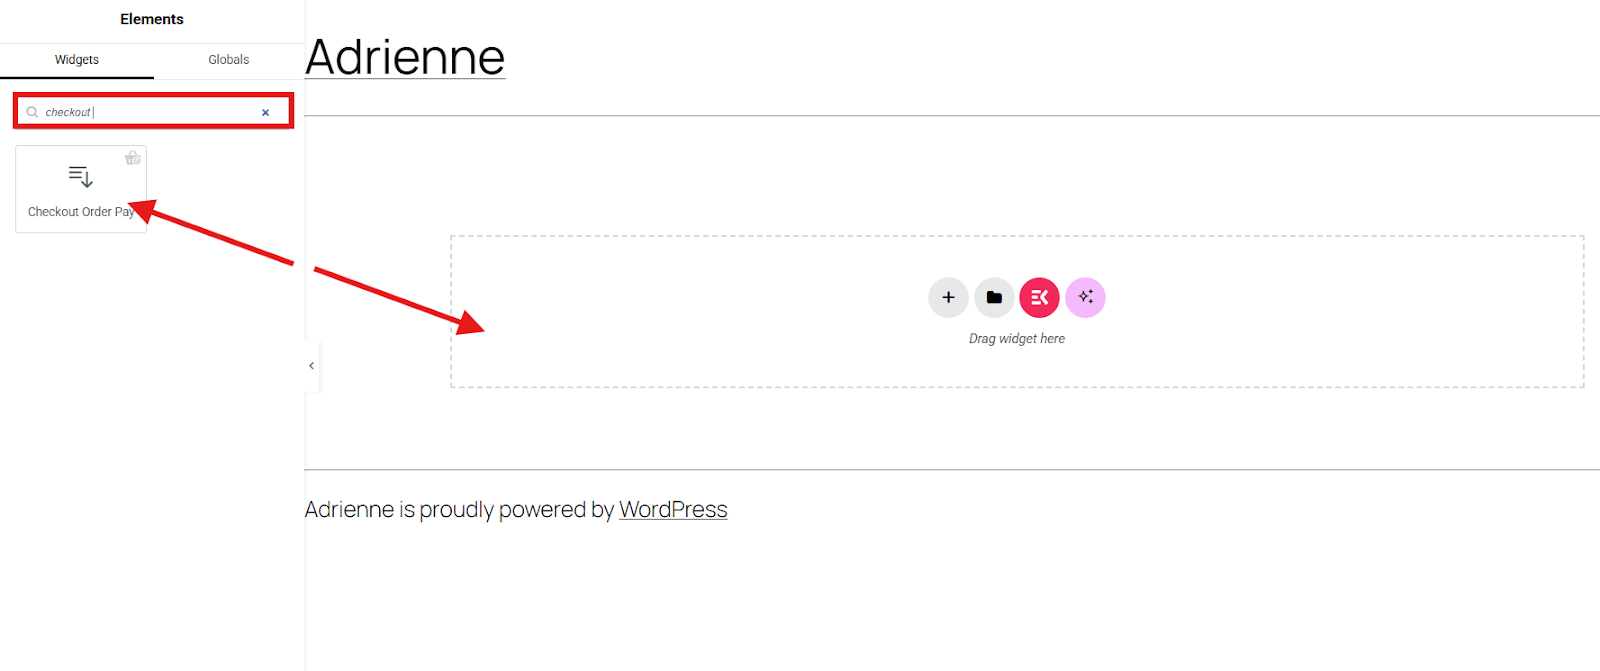
With your template created, you can now start your WooCommerce checkout page customization using Elementor. In the search bar, search for the Checkout order pay widget. Drag-and-drop it to the center of your screen.

In the content tab, you may adjust the text, background, and border colors, select the typography, and the padding for your table header, body, footer, etc.
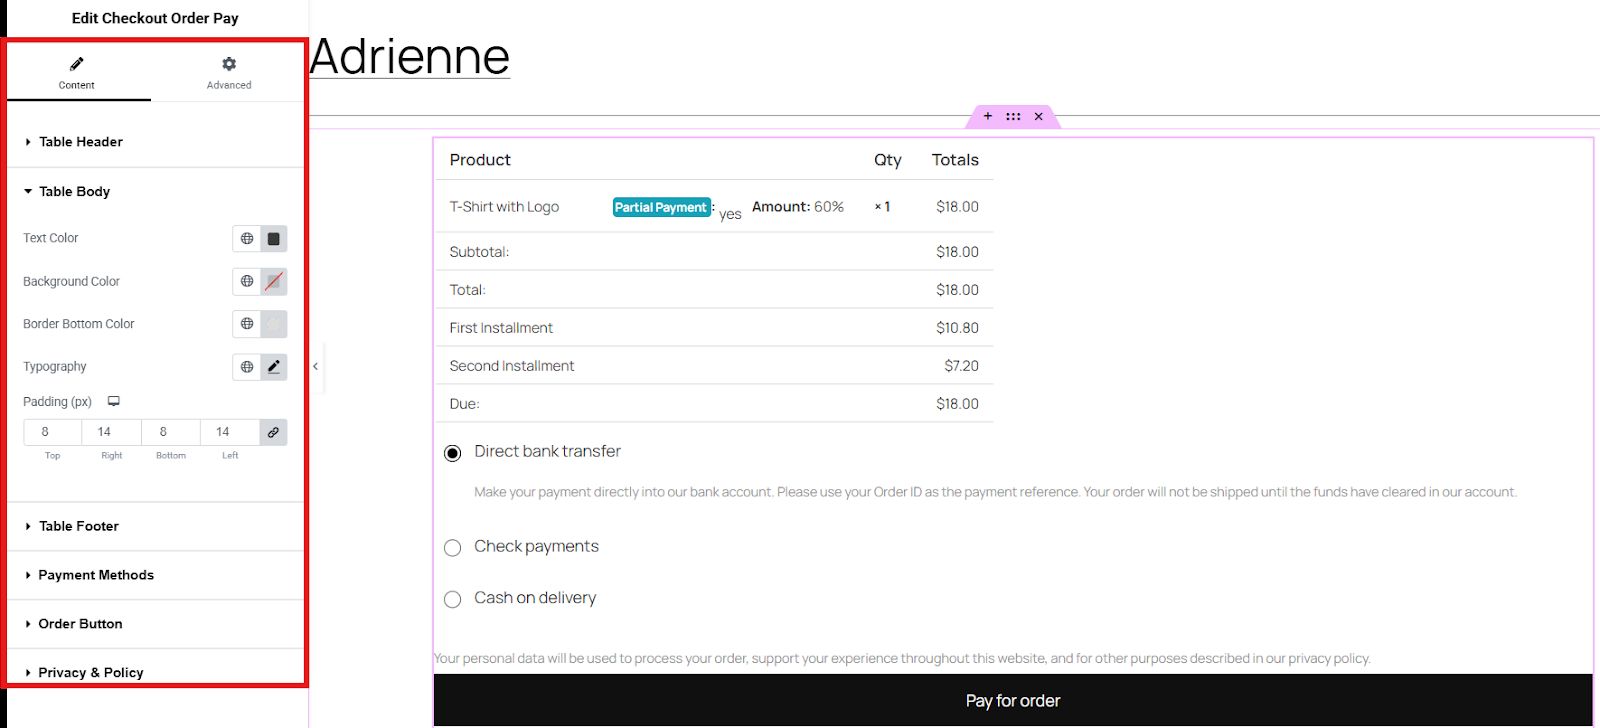
Now, at the advanced settings tab, you may enhance the look of your checkout order pay template by adjusting the layout, adding effects, etc.
Once satisfied, click 公開.
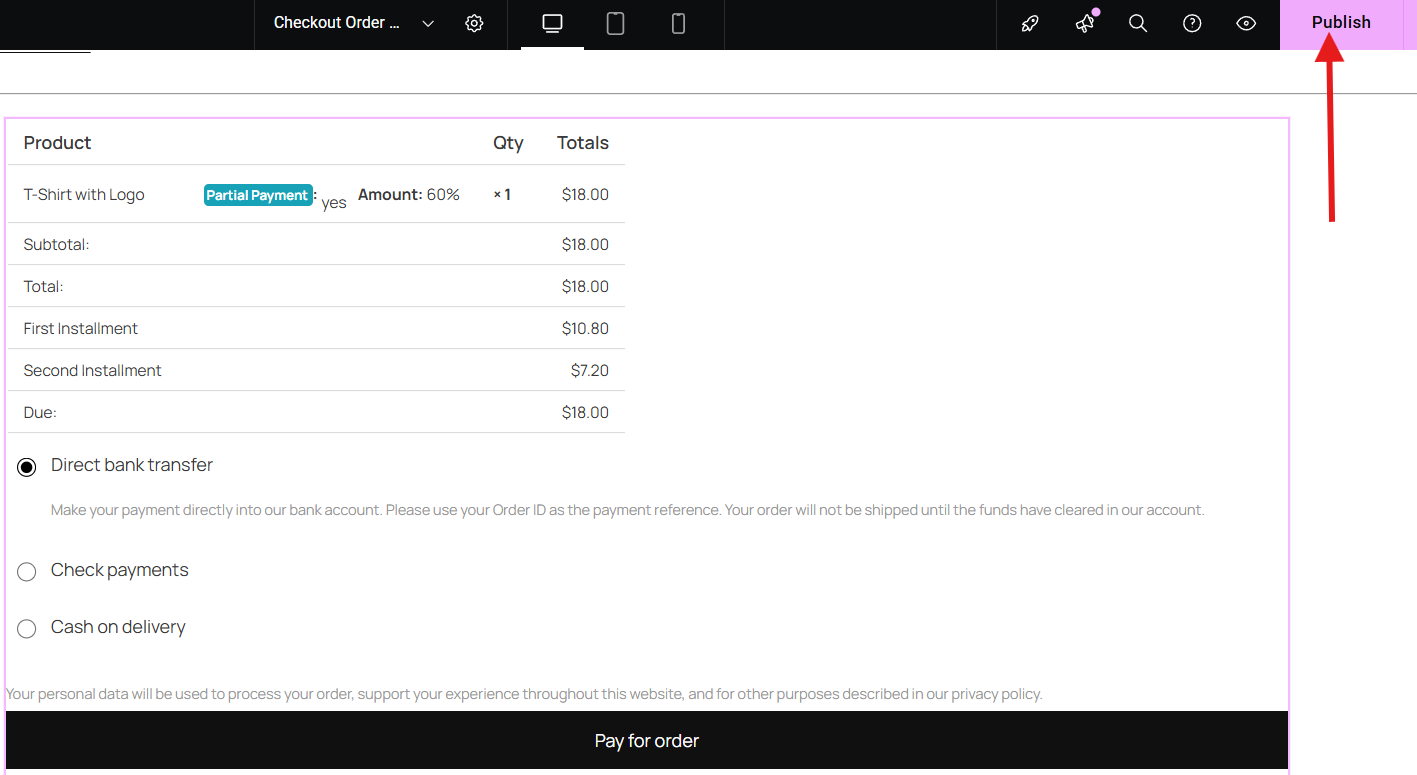
Your new Checkout Order Pay page is ready! When a customer is sent an order payment link, they’ll land on this customized page.
Why Choose ShopEngine to Create a Checkout Order Pay Page?
ShopEngine is a WooCommerce checkout page customization plugin that simplifies the creation of a Checkout Order Pay Page in WooCommerce. The process is simple, fast, and highly customizable. Instead of dealing with complex coding or multiple plugins, ShopEngine provides a smooth drag-and-drop builder where you can design a professional, user-friendly payment page in minutes.
Its powerful Checkout Pay Widgets allow you to easily add and customize payment forms, billing details, and order review sections to represent your brand. ShopEngine also offers advanced modules like Partial Payment, which offers your customers flexibility.

よくある質問
Do You Need ShopEngine Pro to Create an Order Pay Page?
Yes! The Checkout Pay Widget and Partial Payment Module are premium features available in ShopEngine Pro.
Can Customers Use Coupons on the Order Pay Page?
Yes! If you add the Coupon Form Widget, customers can apply coupons directly on the Order Pay Page.
What Happens if a Customer Abandons their Payment?
They can revisit their order from the My Account section or via the payment link and complete it later.
Is it Possible to Use Different Payment Gateways?
Absolutely. The Checkout Pay Page supports all WooCommerce-compatible payment gateways.
Your Turn
Creating a Checkout Order Pay page in WooCommerce is a smart move for improving customer experience and simplifying payments. With a tool like ShopEngine, the process on how to create a custom checkout page in WooCommerce is straightforward. You can easily set up and customize the page in just a few steps.
Whether you’re enabling partial payments, handling manual orders, or providing a quick way for customers to pay for pending purchases, a well-designed Order Pay page can help you close more sales with less friction.

コメントを残す