


If you want to overcome the plain and generic look of your site, using Lottie animation can make a huge difference. It’s responsive, smooth, and loads instantly without slowing down your site. With Lottie, you can turn a static website into interactive motion graphics that grab attention, promote your brand, and create a friendly browsing experience.
Luckily, in WordPress, you can add Lottie using a plugin. So, if you don’t want to sacrifice your site speed and still want it to load quickly than GIFs and videos, Lottie animations are the perfect solution. Learn how to add Lottie Animations in WordPress without code, a friendly process that anyone can understand and follow.
Quick Overview
This tutorial will show you two methods of adding Lottie animation such as using ElementsKit pre-built sections and Lottie widget. To follow this guide you need to install and activate following plugins to add free Lottie animation in WordPress:
Tools Used: エレメンター (free), ElementsKit (free & pro)
Method 1: Add Lottie using ElementsKit’s pre-built sections.
- Add a page.
- Import Lottie section.
- Content customization.
- Style customization.
- Publish.
Method 2: Integrate Lottie animation with widget.
- Enable Lottie widget.
- Create a page.
- Add widget.
- Import JSON file.
What is Lottie animation in WordPress?
Lottie animation is a high-quality, modern, lightweight, and open-source motion graphics in WordPress that can be added using a plugin. These are super small in size and a quickly loaded JSON file, perfect for web use.
Why add Lottie animation in WordPress?
Adding Lottie animations can completely change how your audience interacts with your website. These are not only beneficial for your website’s growth but also increase traffic. Here are more reasons why Lottie animations are worth adding to WordPress:
- Lottie animations boost site engagement そして increase average time on site.
- These animations 読み込みが早くなる than GIFs or videos.
- They are デバイス応答型 and look great on any screen size.
- These improve overall site performance with higher speed and engagement.
- Lottie animation helps you to present your brand with strong and professional storytelling.
- This animation effect increases visitors along with their engagement.
- Lotties are fully customizable with endless control over content and style customizations.
- These add 軽量 motion graphics without losing quality.
How to add Lottie animations in WordPress
In WordPress, you can add Lottie animations either using code or a plugin. Since the plugin is a friendly and effortless solution, here we’ll show in-depth about creating Lottie animation with ElementsKit’s ready-made section and widget. Before going through the methods, you need to install and activate the following solutions:
- エレメンター (無料)
- ElementsKit (free & pro)
After that, adopt any of the two methods below to create Lottie using the WordPress Lottie Animation plugin, ElementsKit:
Method 1: Create Lottie animation with a pre-built section
In the first method, we’ll show how to add Lottie animations in WordPress using ElementsKit’s ready-made sections. Besides, you will get to upload Lottie animations from LottieFiles that can be further customized.
Let’s learn the in-depth process of creating an Elementor Lottie animation in WordPress:
Step 1: Add a page for Lottie animation
First, navigate to your WordPress dashboard and press the "新しく追加する" option under Pages. You will be taken to a new page. Besides, you can also add Lottie animation to an existing page.
それから、 「Elementorで編集」をクリック button to create Lottie animation with ElementsKit.
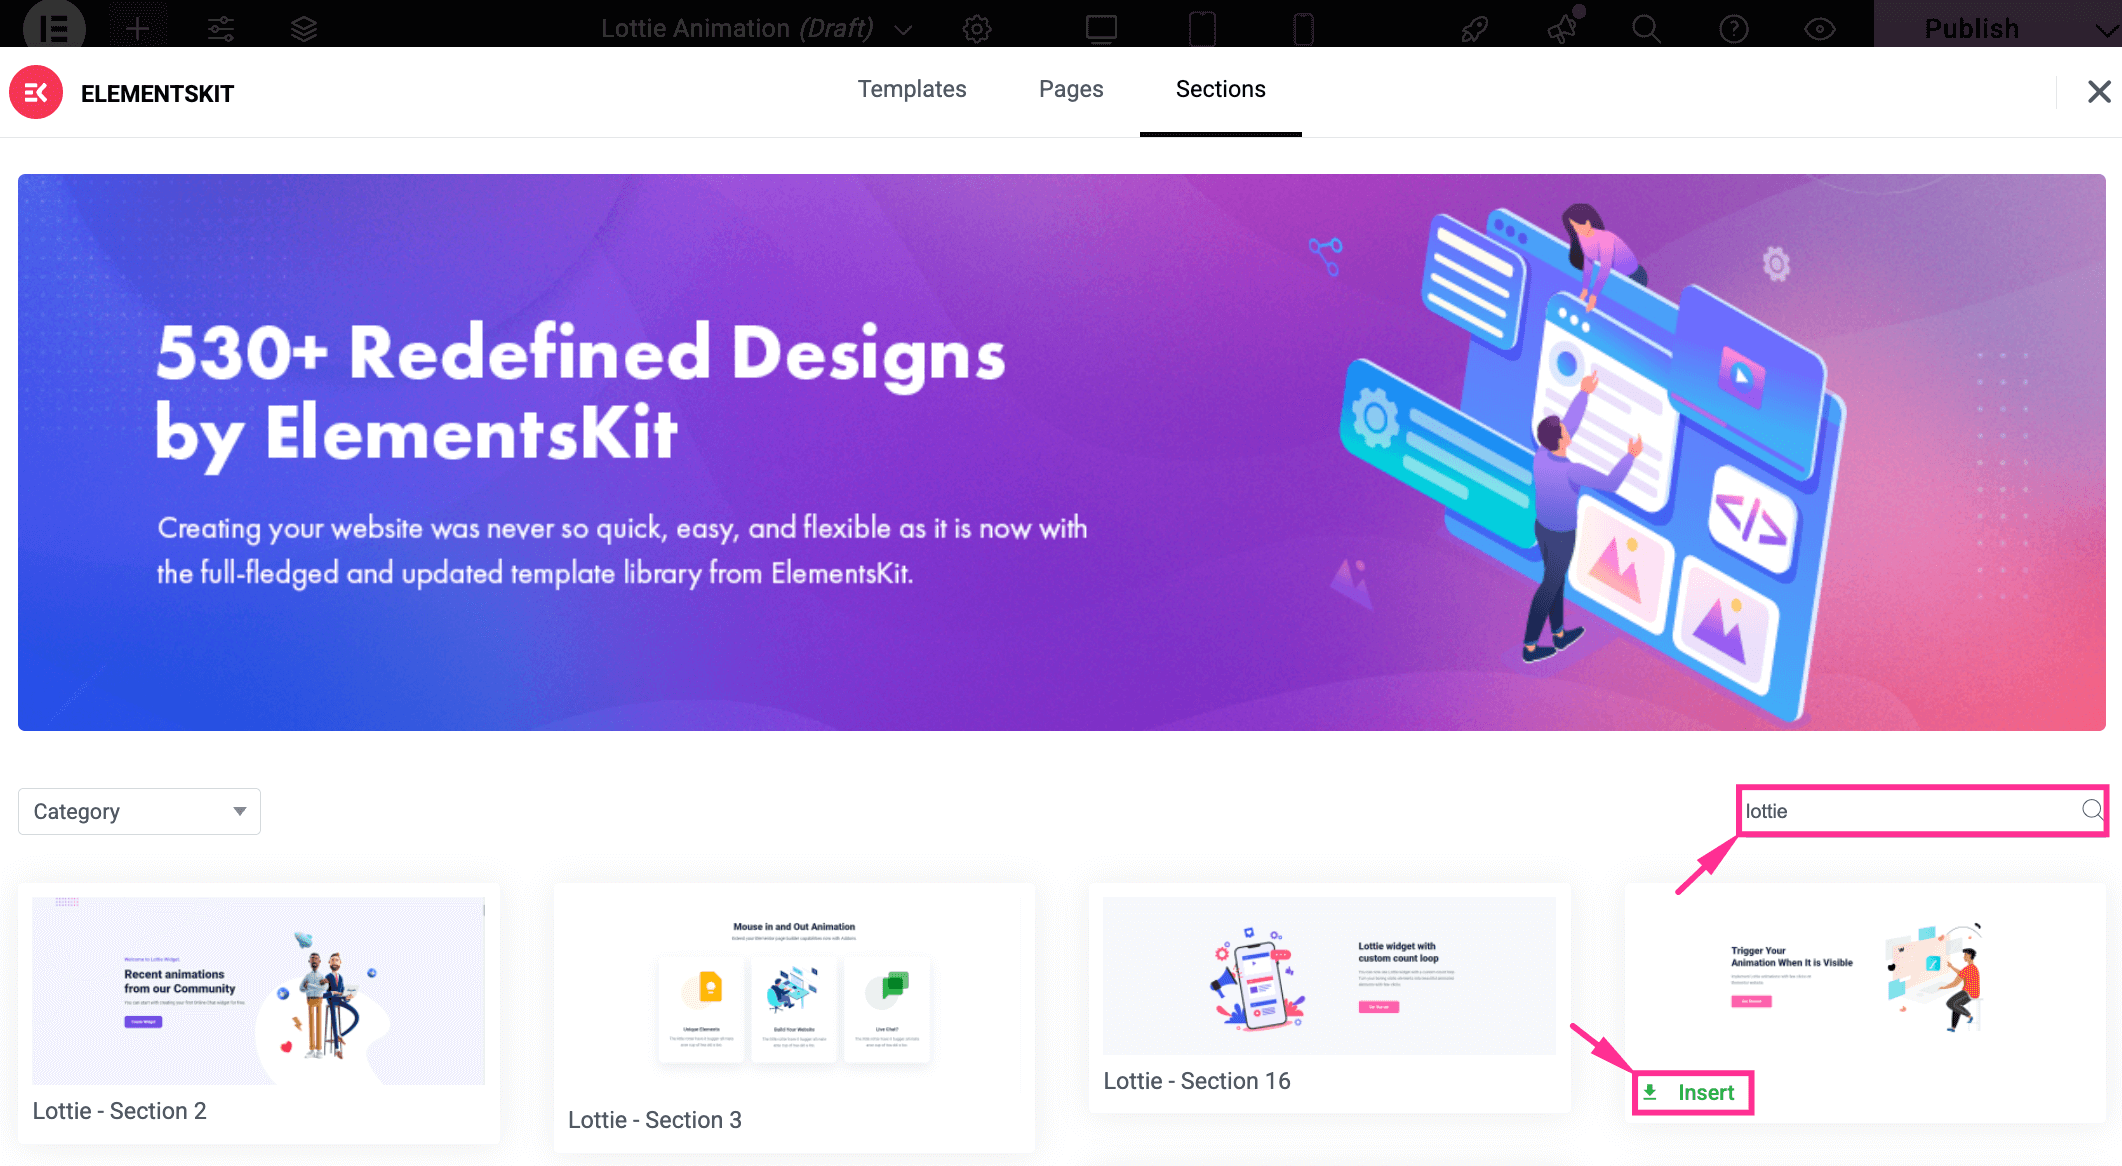
Step 2: Import the built-in Lottie section
After navigating to the Elementor editor, press the “ElementsKit” icon, and there you will get to see a template library full of built-in templates, pages, and sections.
Now, visit the “Sections” タブと search for “Lottie” in the search box. Afterwards, select a suitable Lottie animation section and press “Insert” to import that pre-built section.
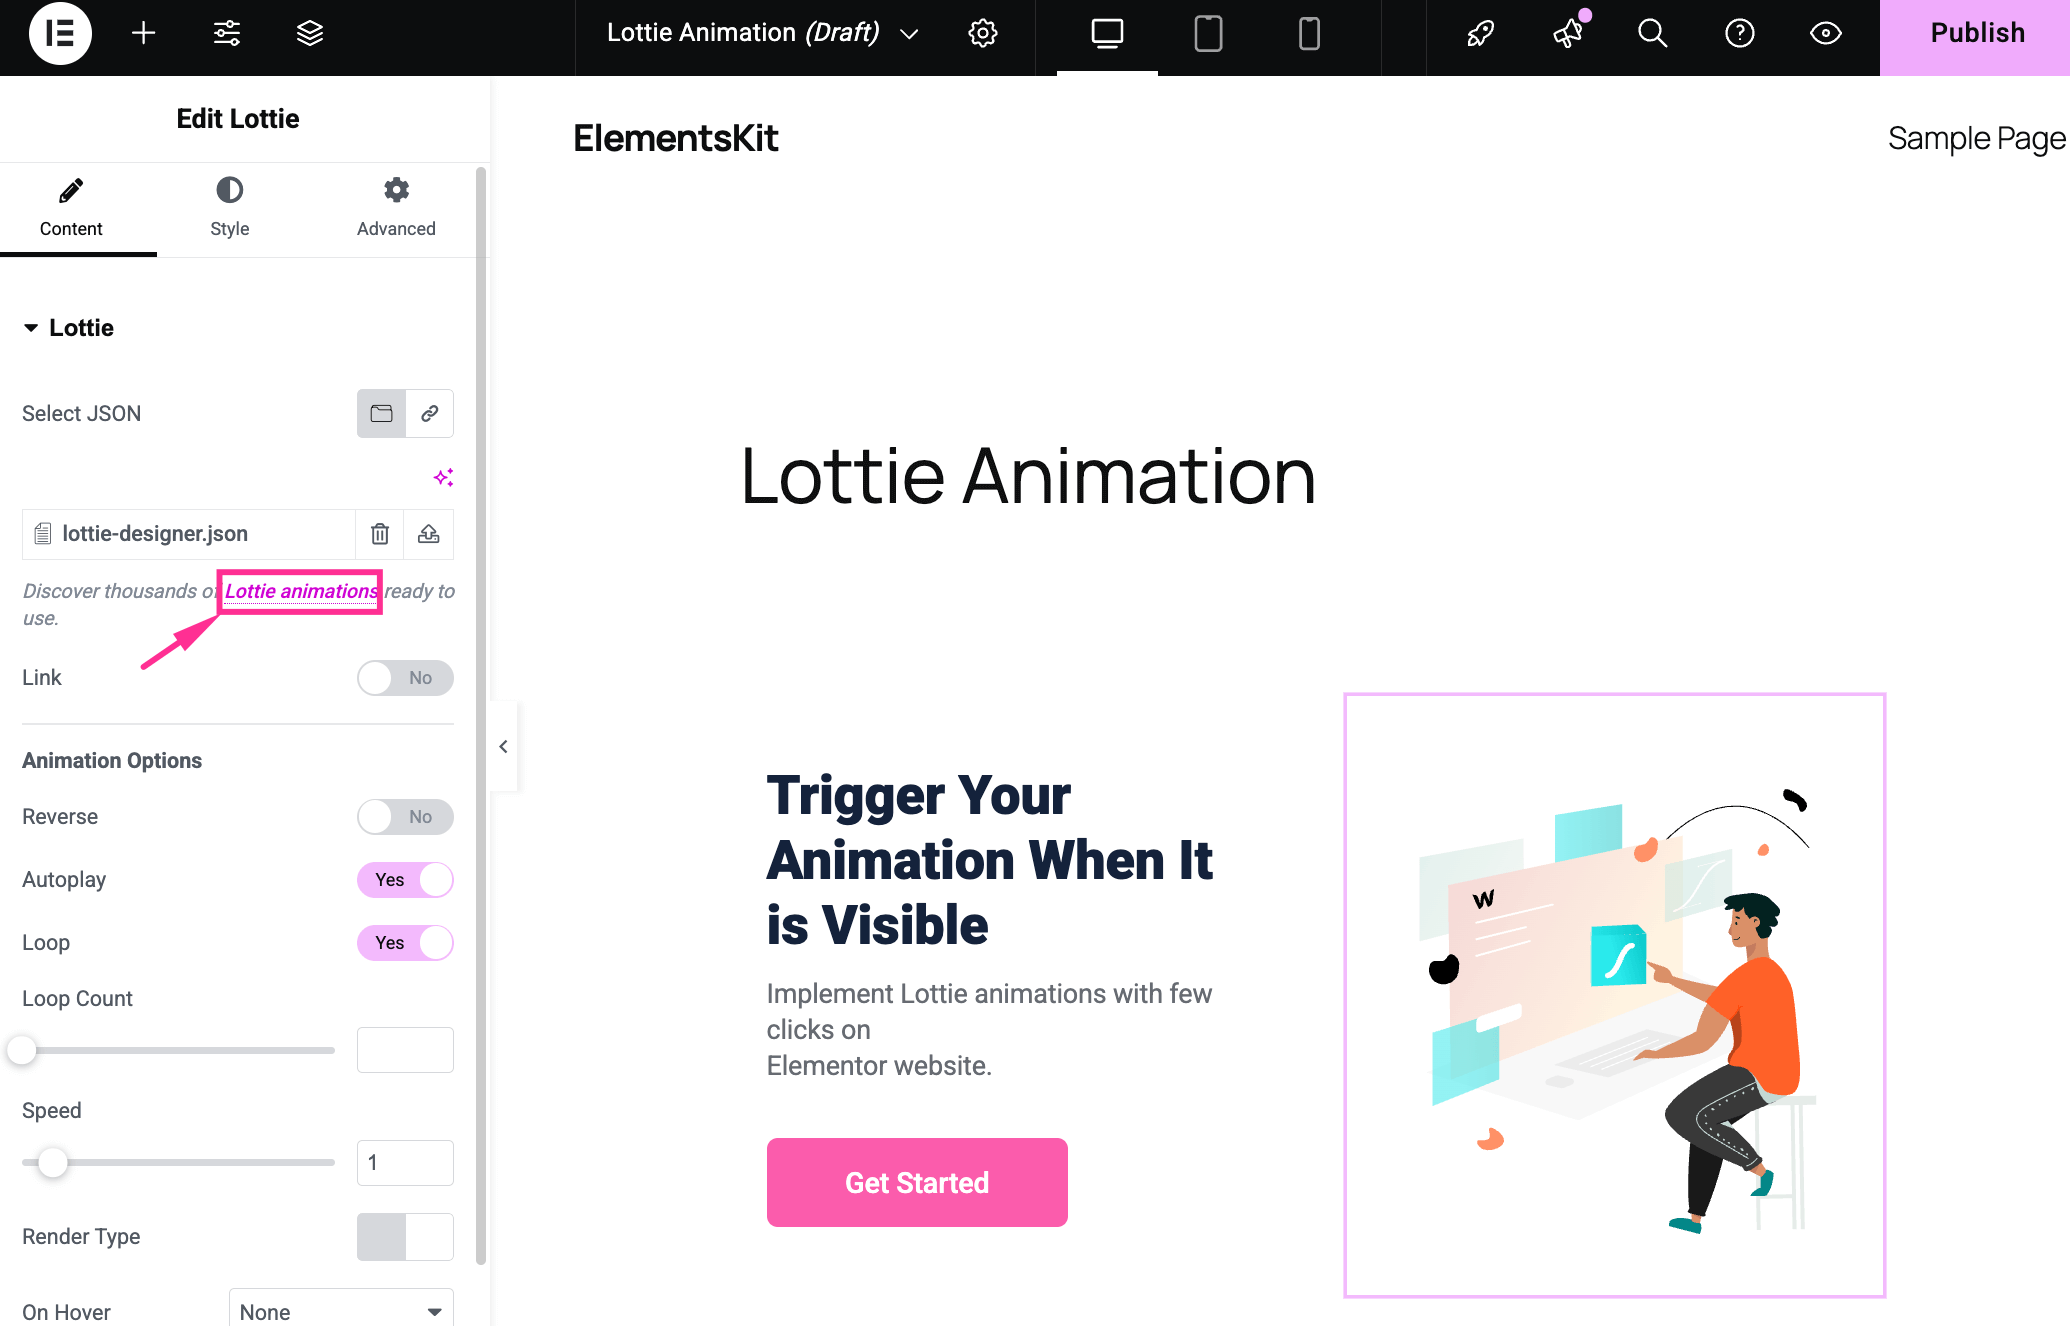
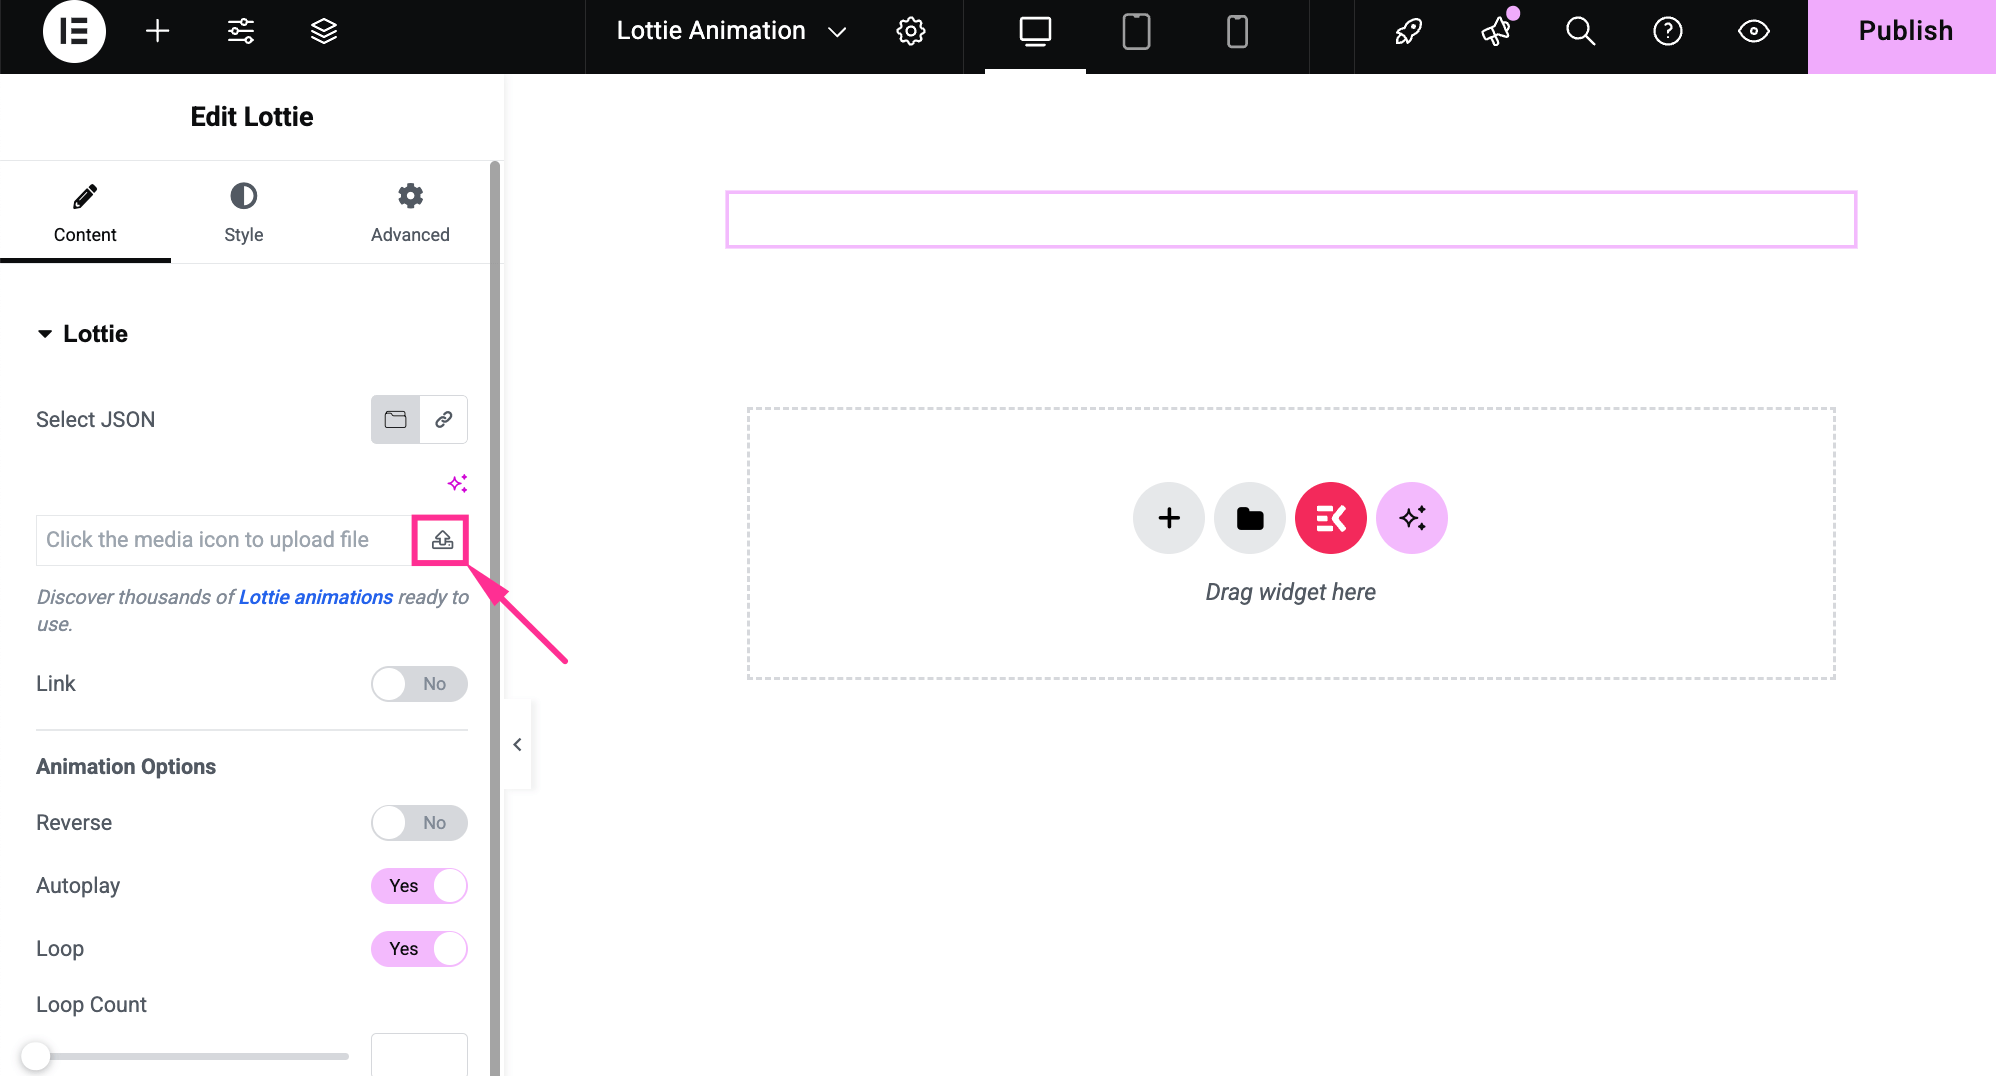
Step 3: Customize Lottie content
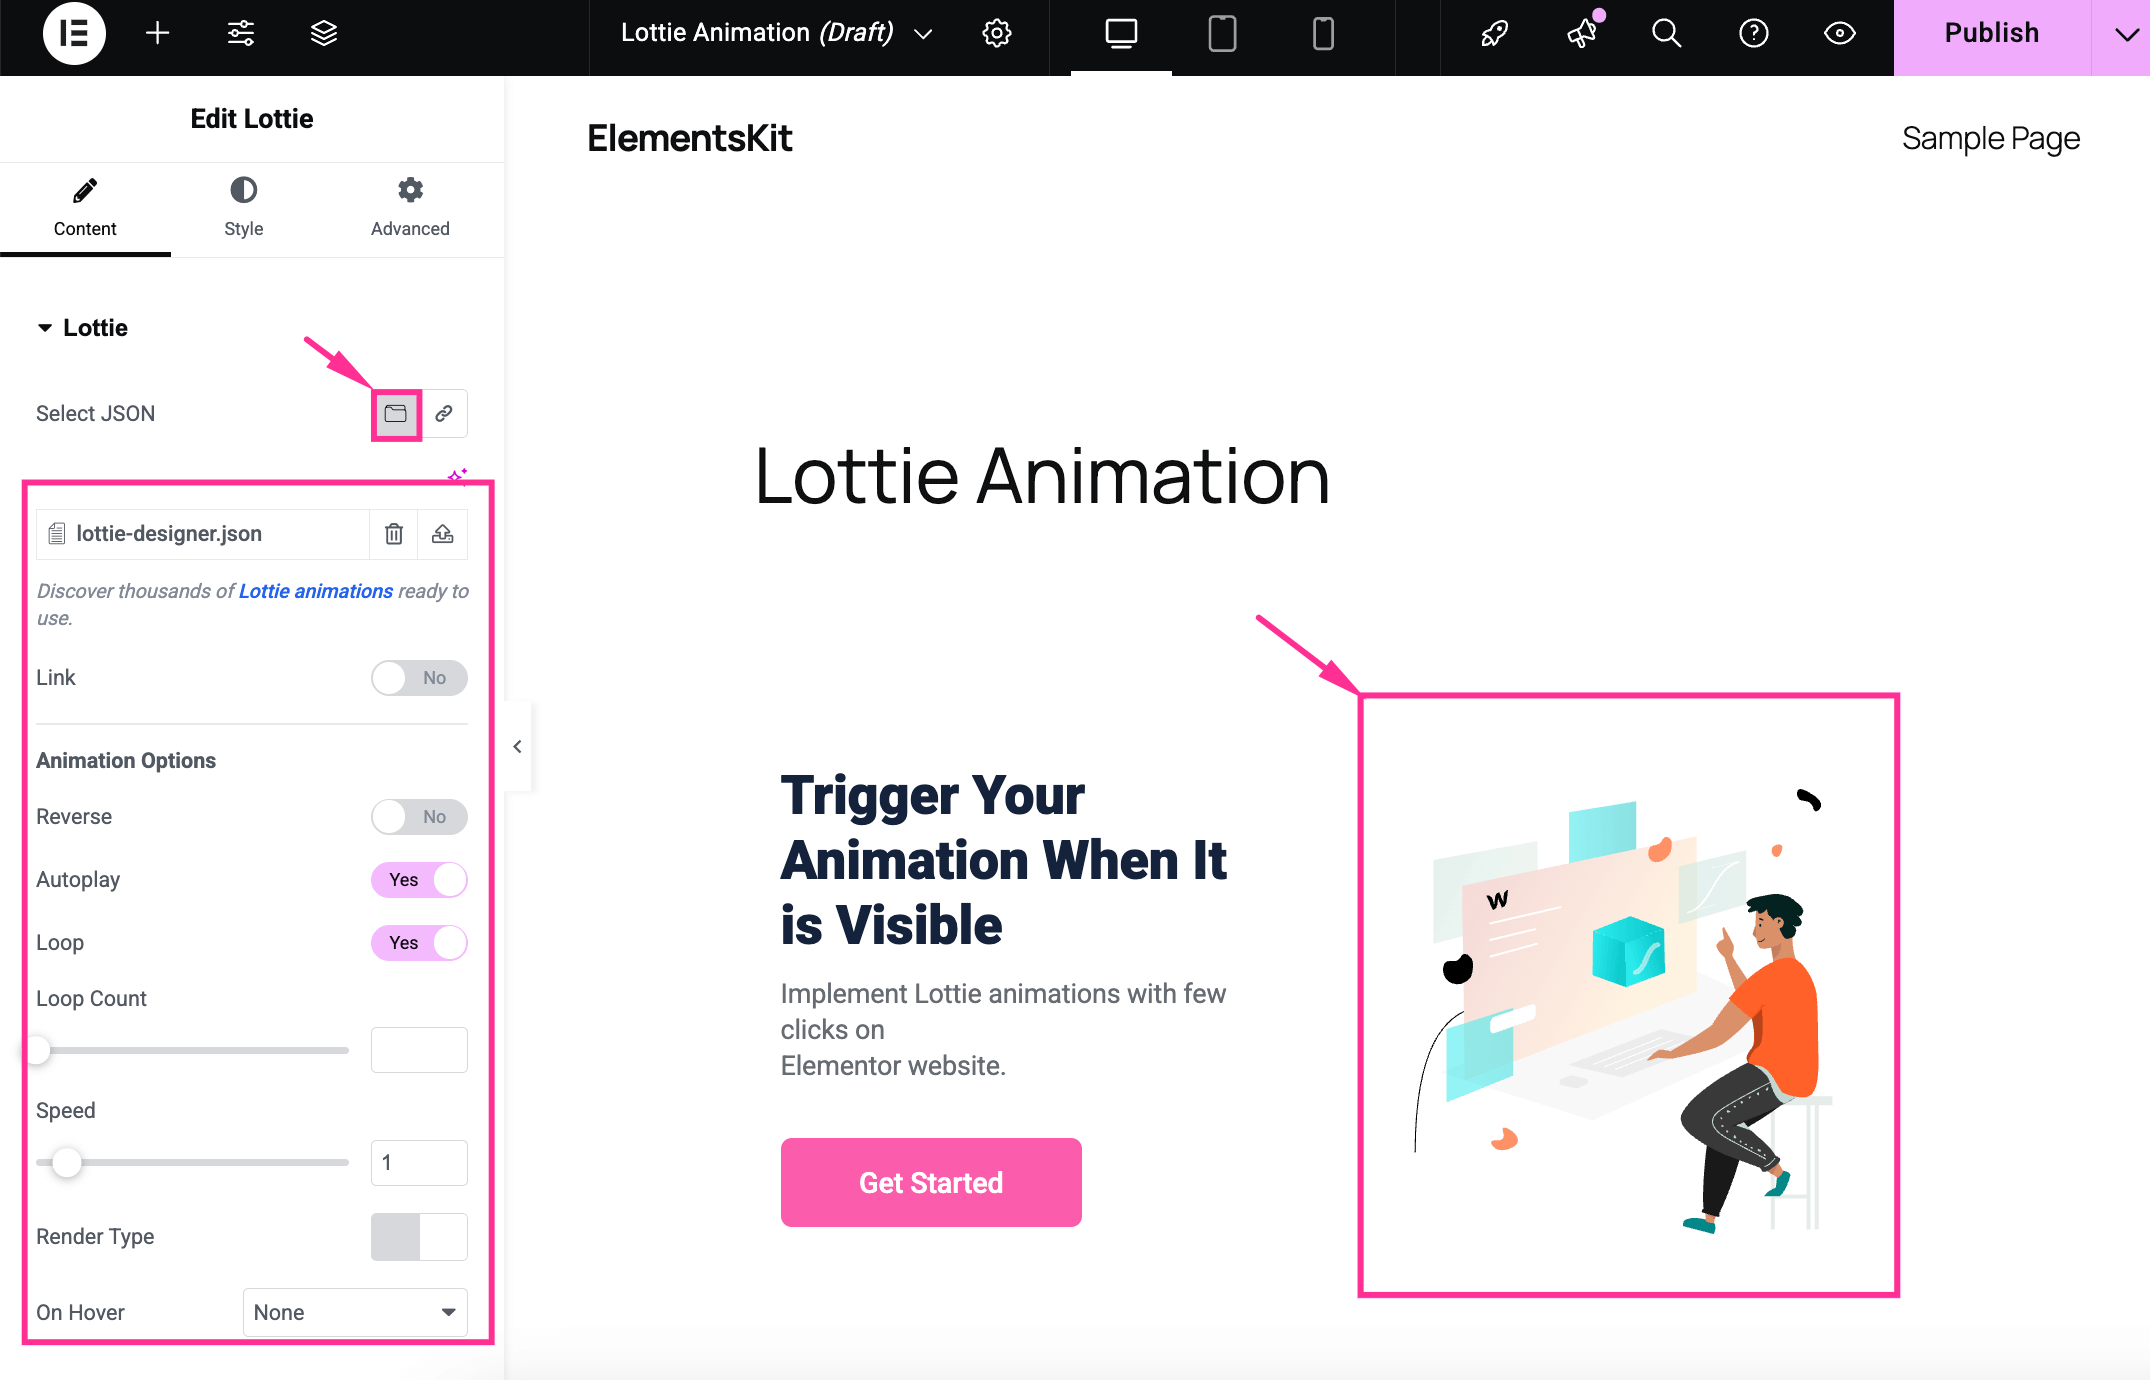
In this step, you have to customize your uploaded animation according to your desire. For that, navigate to the “Content” tab. There you will find two options: select a JSON file or a URL for your Lottie animation.
また、次のこともできます upload Lottie animations among thousands of options from LottieFiles. Now, press the highlighted “Lottie animations” text for that.
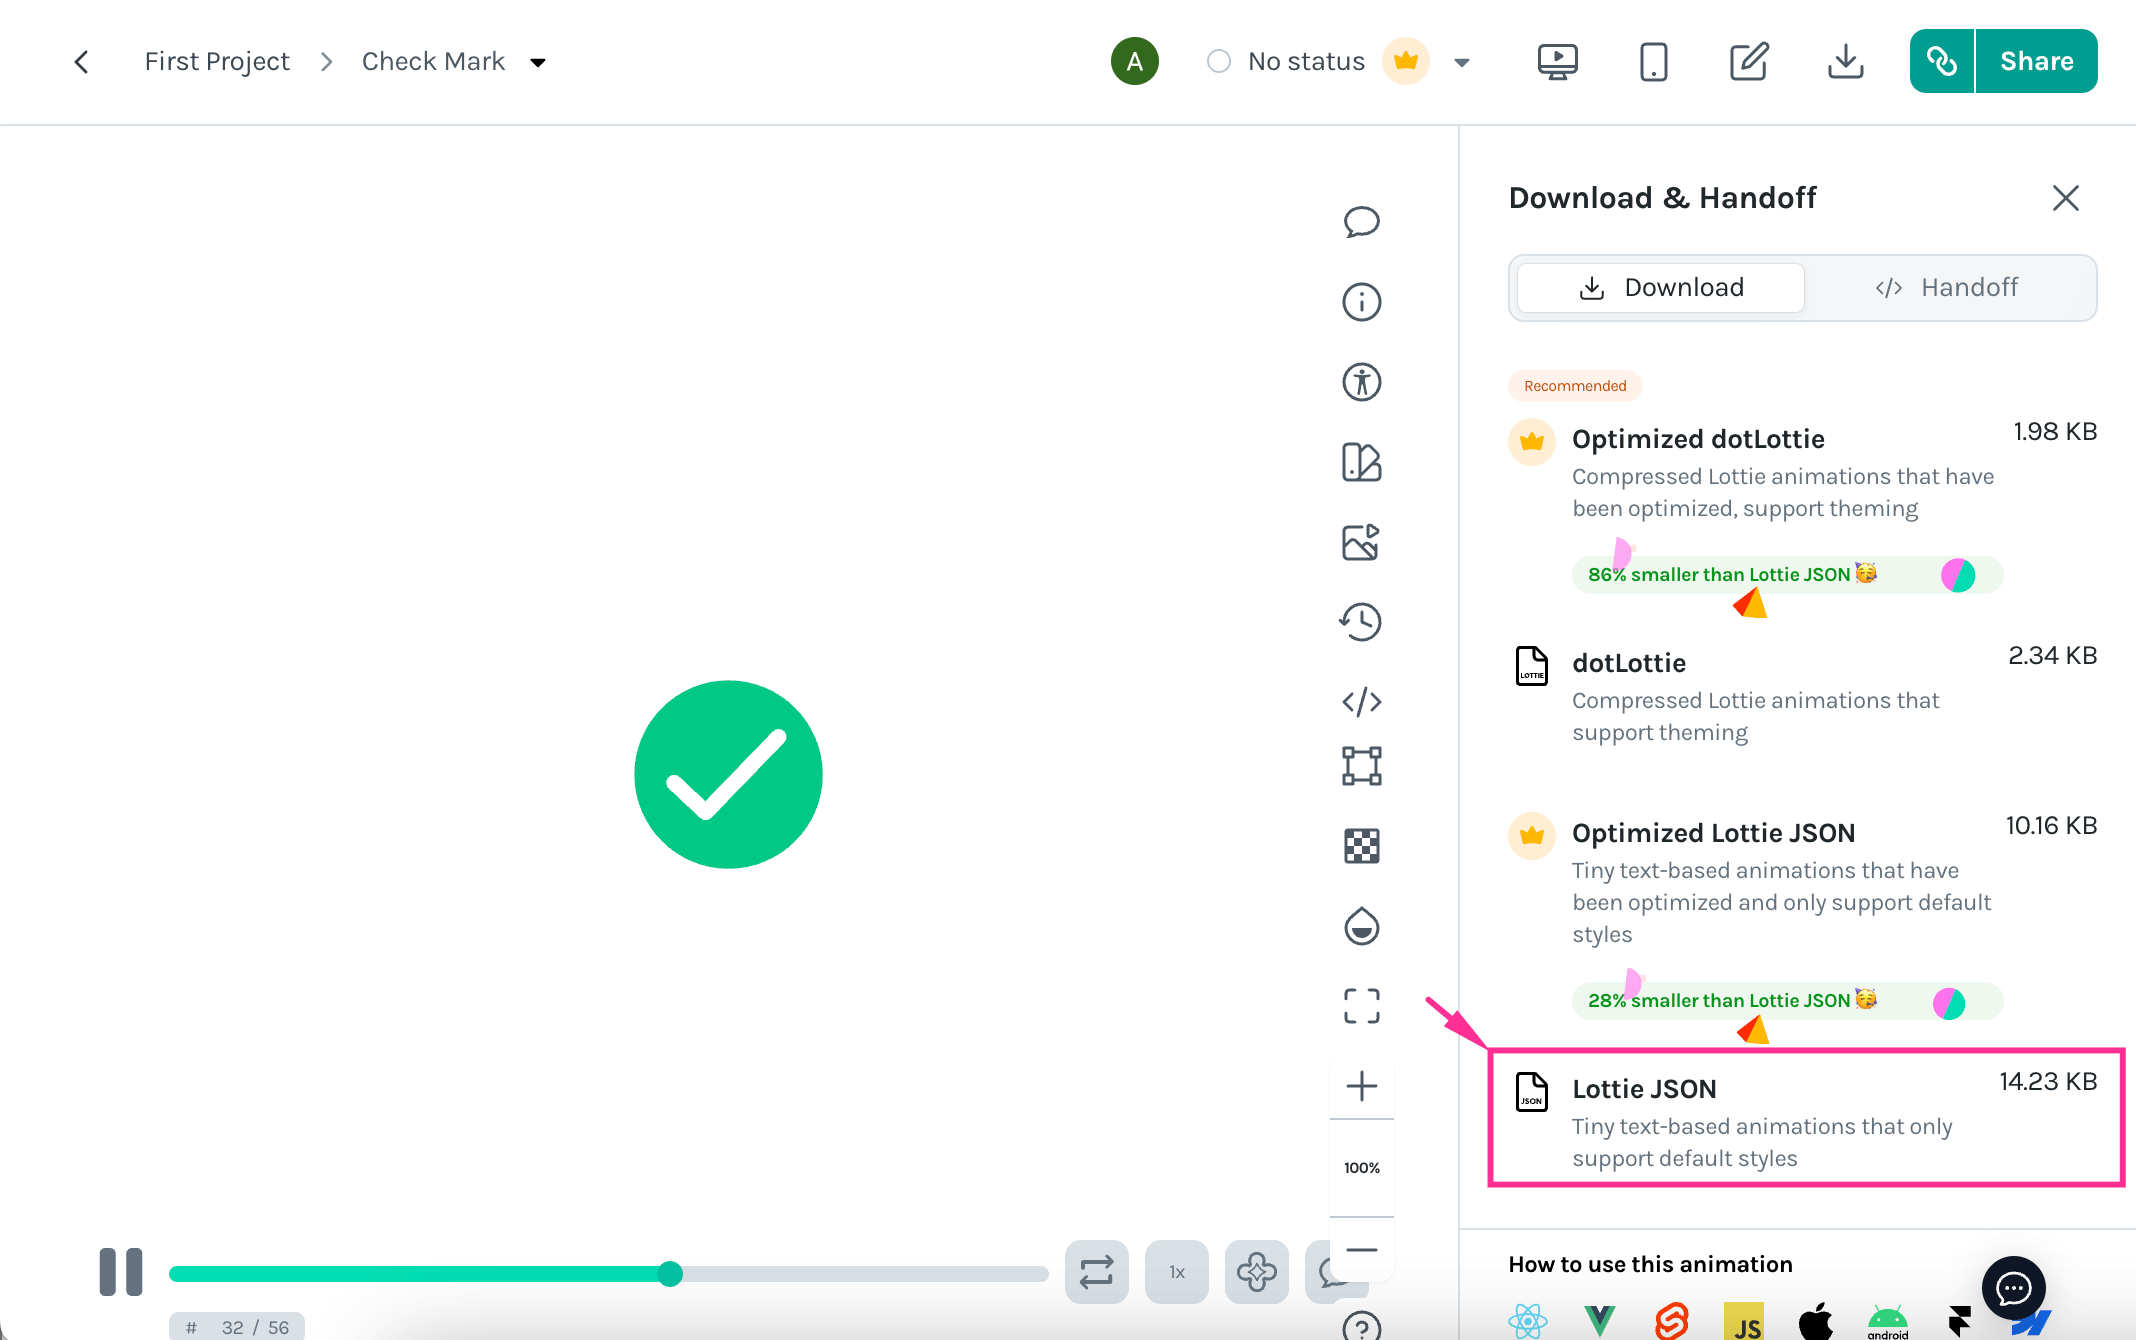
This will take you to LottieFiles, from where you can select a Lottie animation そして press download. Then, you have to select a folder and 「保存」を押します ボタン。
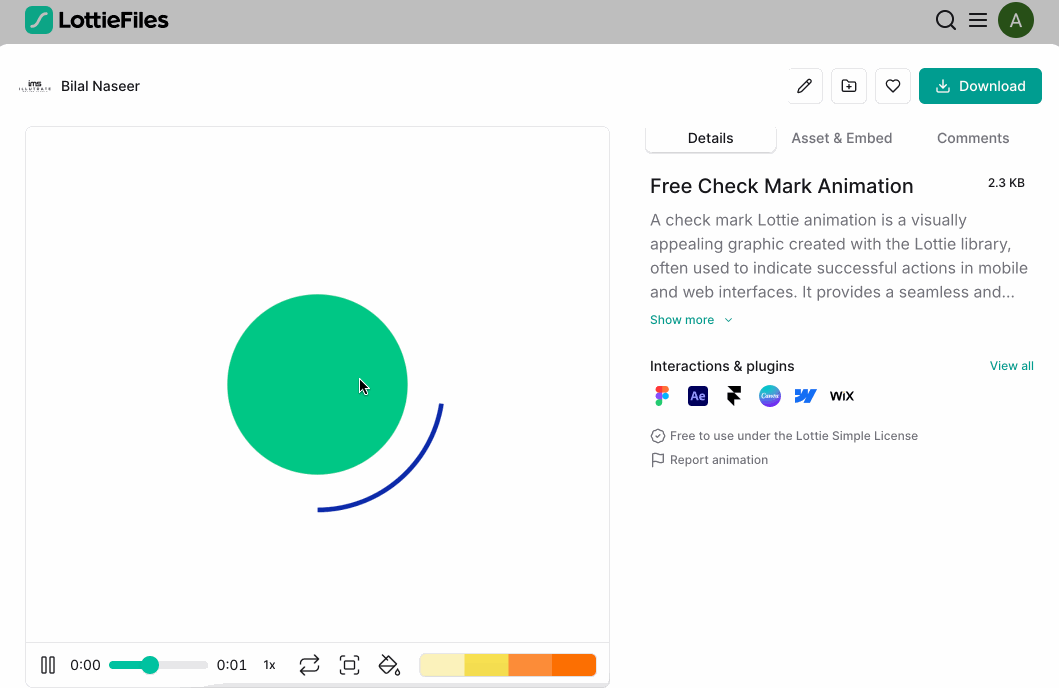
次、 select Lottie JSON to download your Lottie animation. Thus, your selected Lottie will be downloaded and saved to your selected media library.
今、 press the upload button to add your downloaded Lottie animation from LottieFiles.
From there, upload and select a file from your media library with ElementsKit. Here, your chosen Lottie animation will be added.
After that, adjust the following fields for additional customization:
- リンク: Turn on this toggle button to add a link to your Lottie animation.
- 逆行する: Enable this option to reverse this Lottie animation.
- 自動再生: Toggle on to automatically play the Lottie animation on your site.
- ループ: Enable to continuously play the Lottie animation.
- Loop count: Set loop number. For instance, if you add 2, your Lottie animation will play twice.
- スピード: Adjust animation speed.
- Render Type: Select SVG or Canvas.
- On Hover: Choose play, pause, or reverse from the dropdown option. If you select play, the animation will play whenever you hover your mouse over Lottie. For pause or reverse, Lottie animation will respectively pause or reverse.
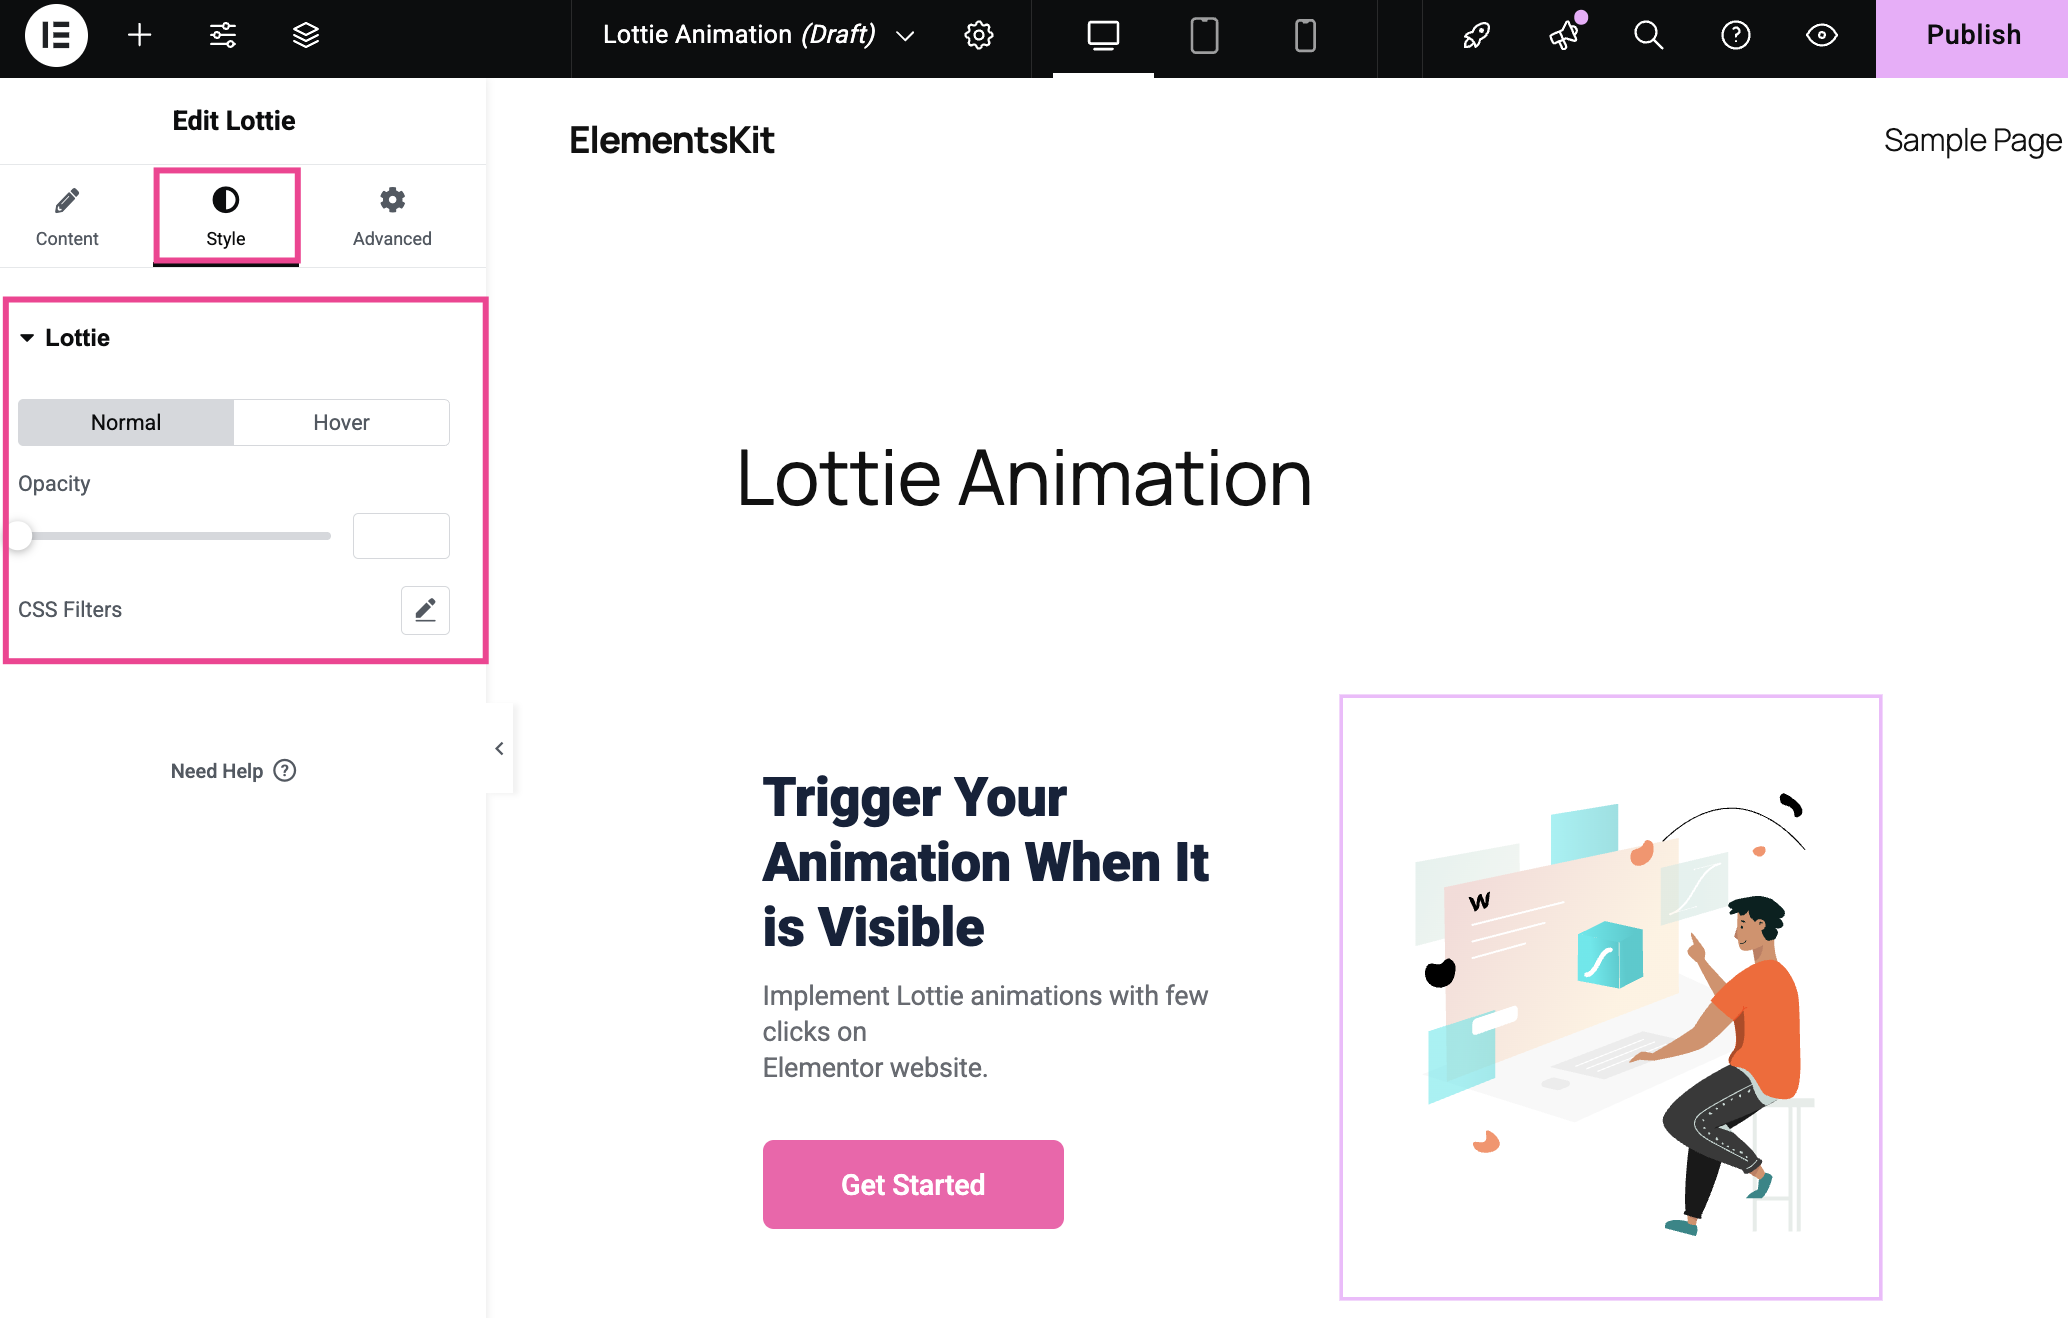
Step 4: Custom style for Lottie
Next to content customization, adjust the style of your Lottie animation. Navigate to your Style tab and select 通常またはホバー Lottie along with Custom Opacity and CSS Filters.
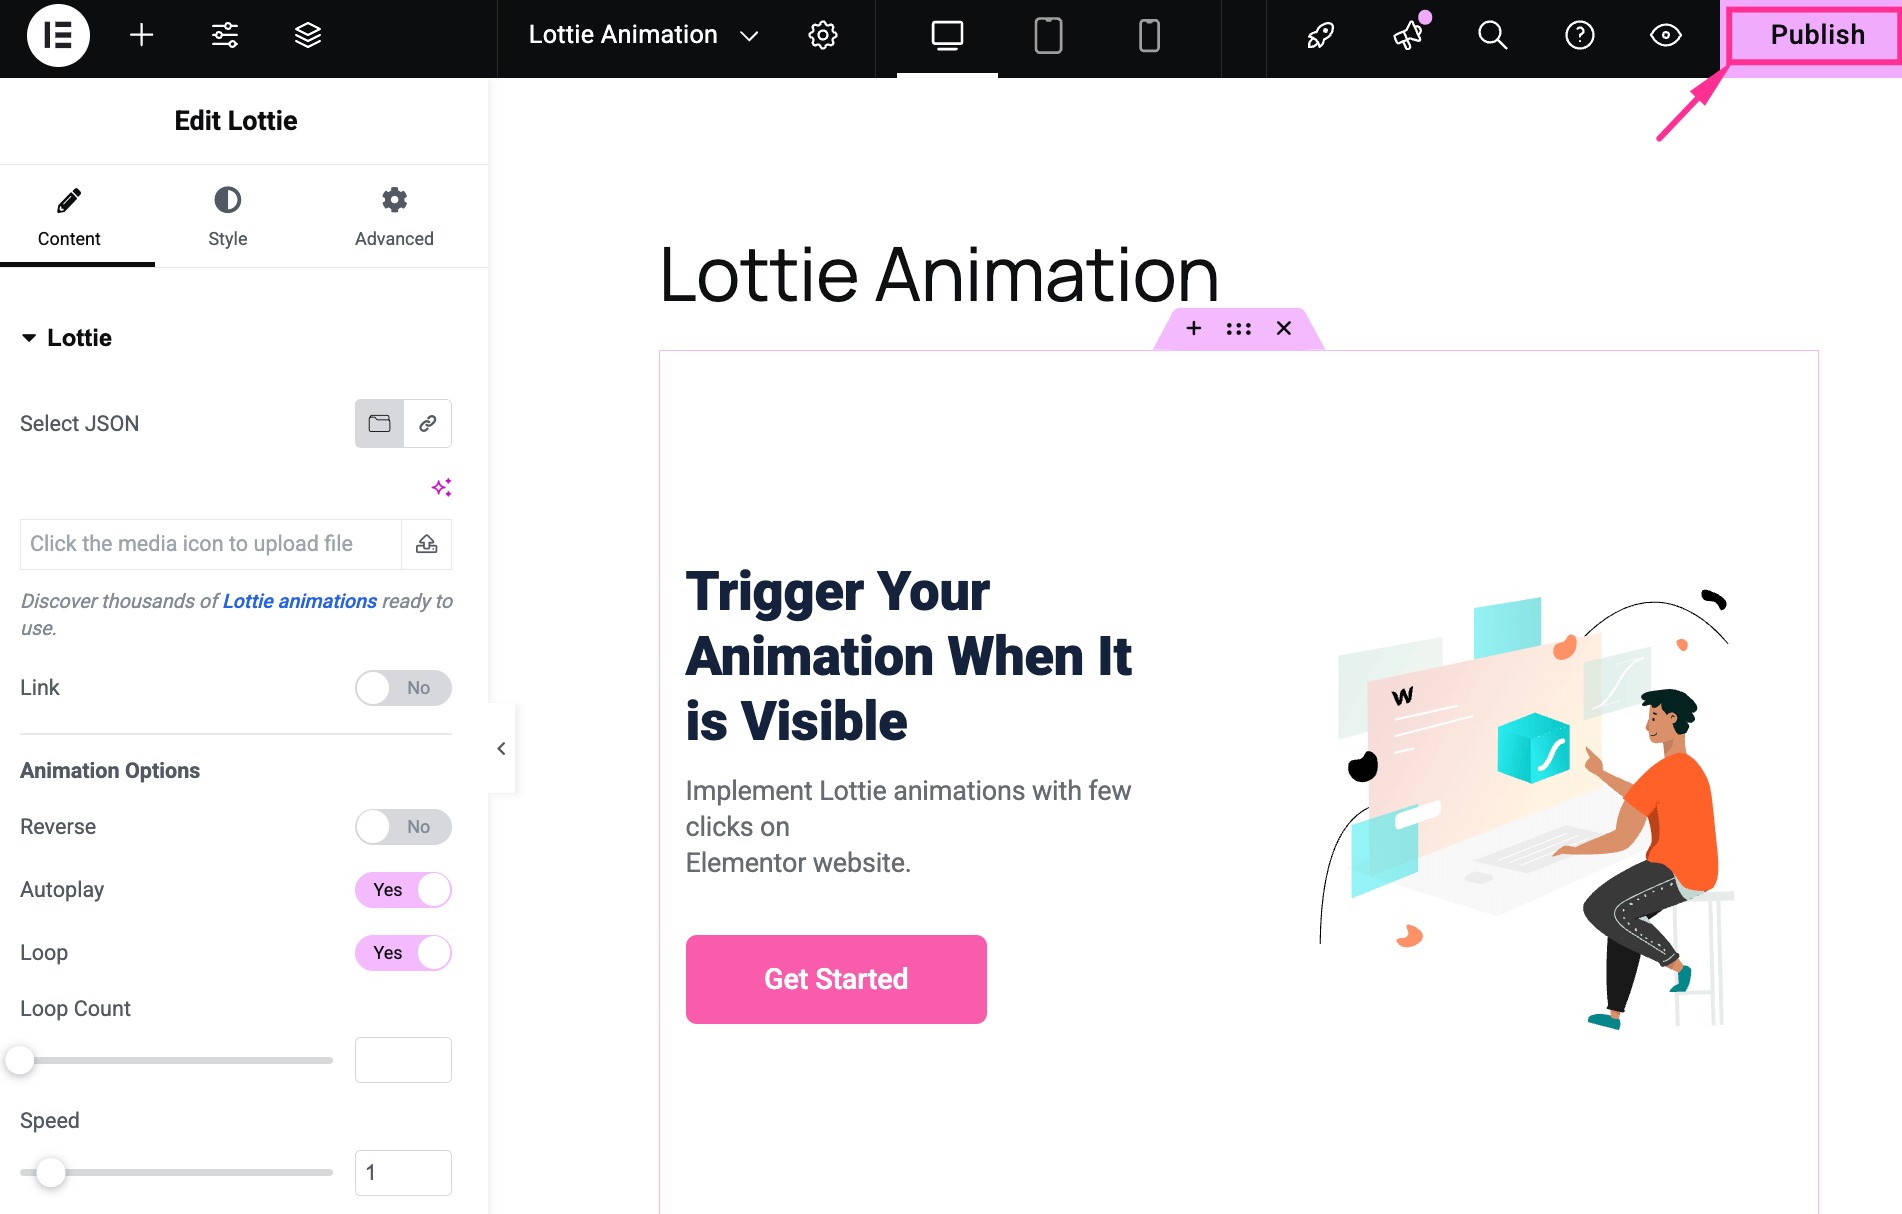
Step 5: Publish Lottie animation
In this final step, 「公開」をクリック button to make your Lottie animation live.
Method 2: Integrate Lottie animation with the ElementsKit widget
This process is about integrating WordPress Lottie animation in Elementor using a widget. ElementsKit comes with a ロッティウィジェット that smooths your overall process of adding Lottie animation.
Follow and adopt the steps to create a Lottie animation with ElementsKit:
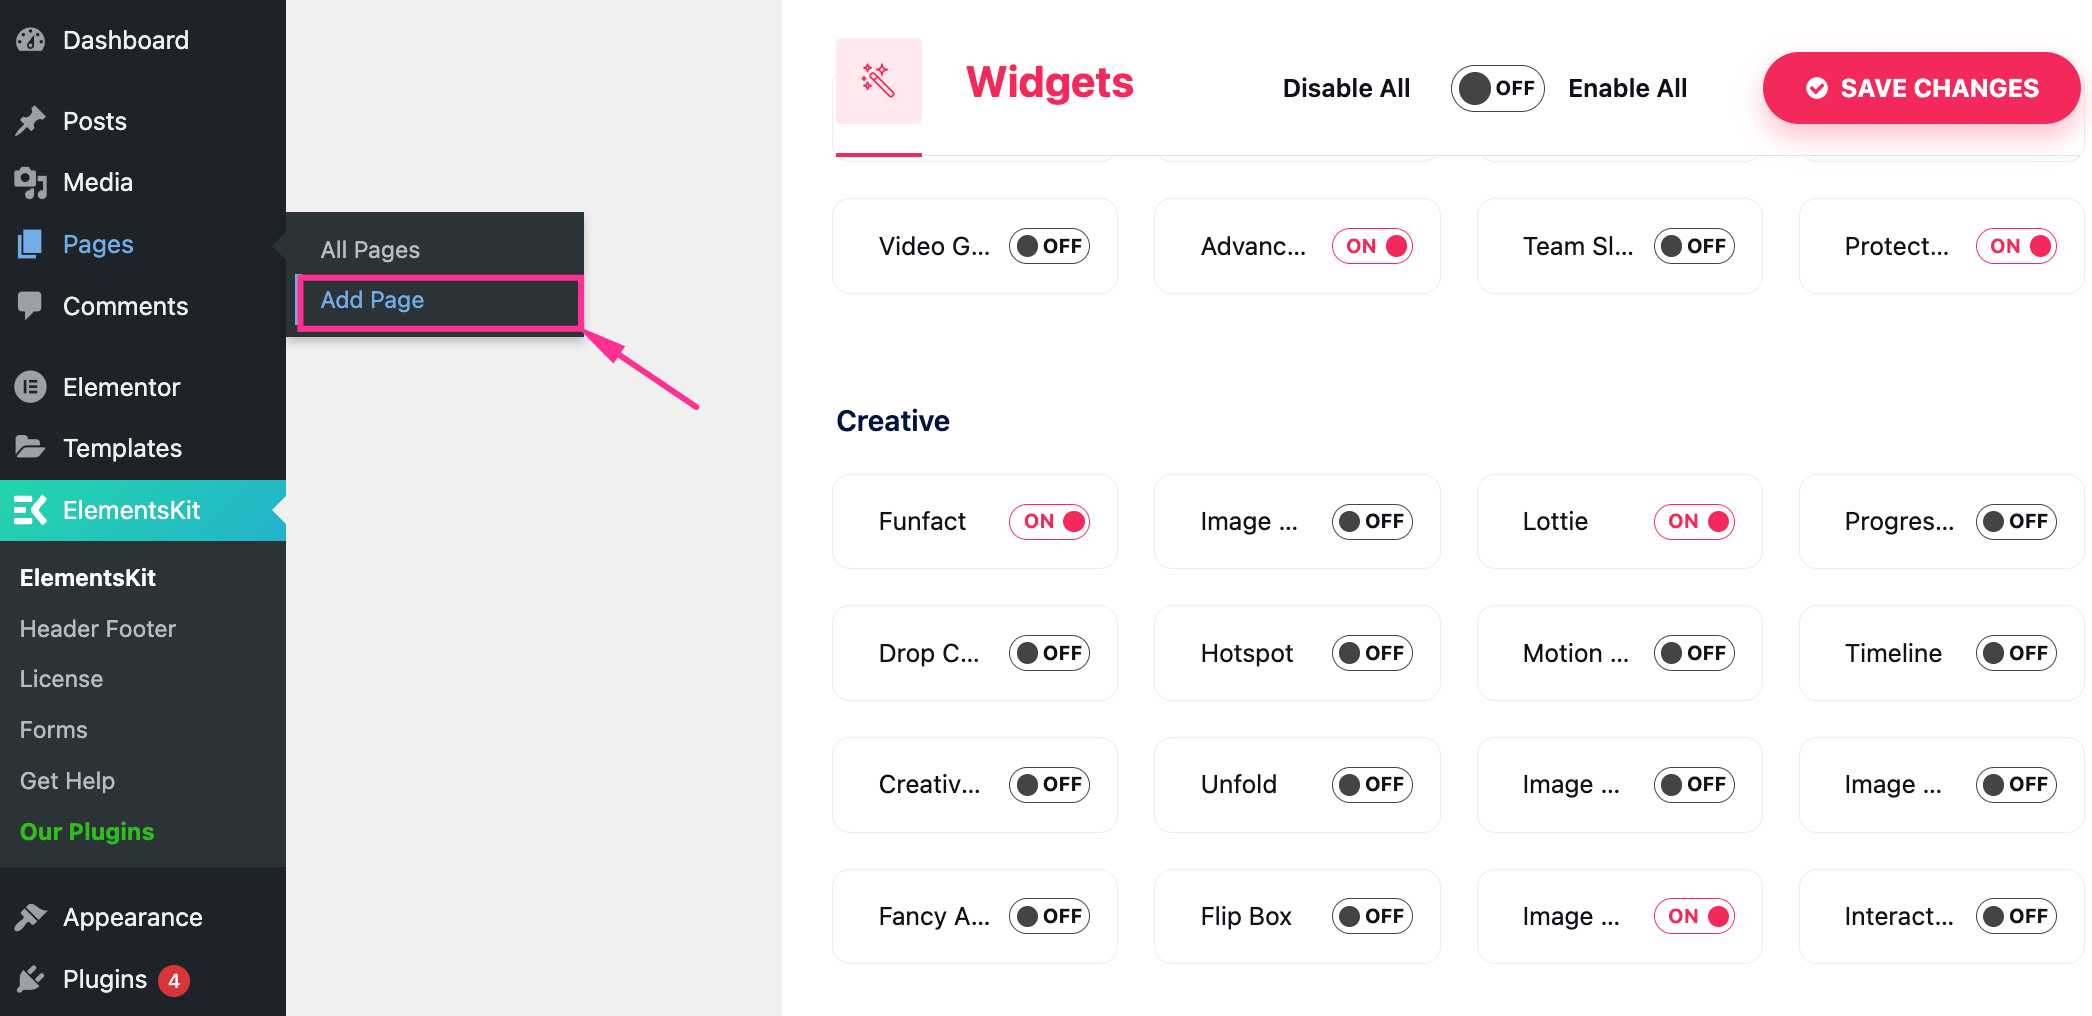
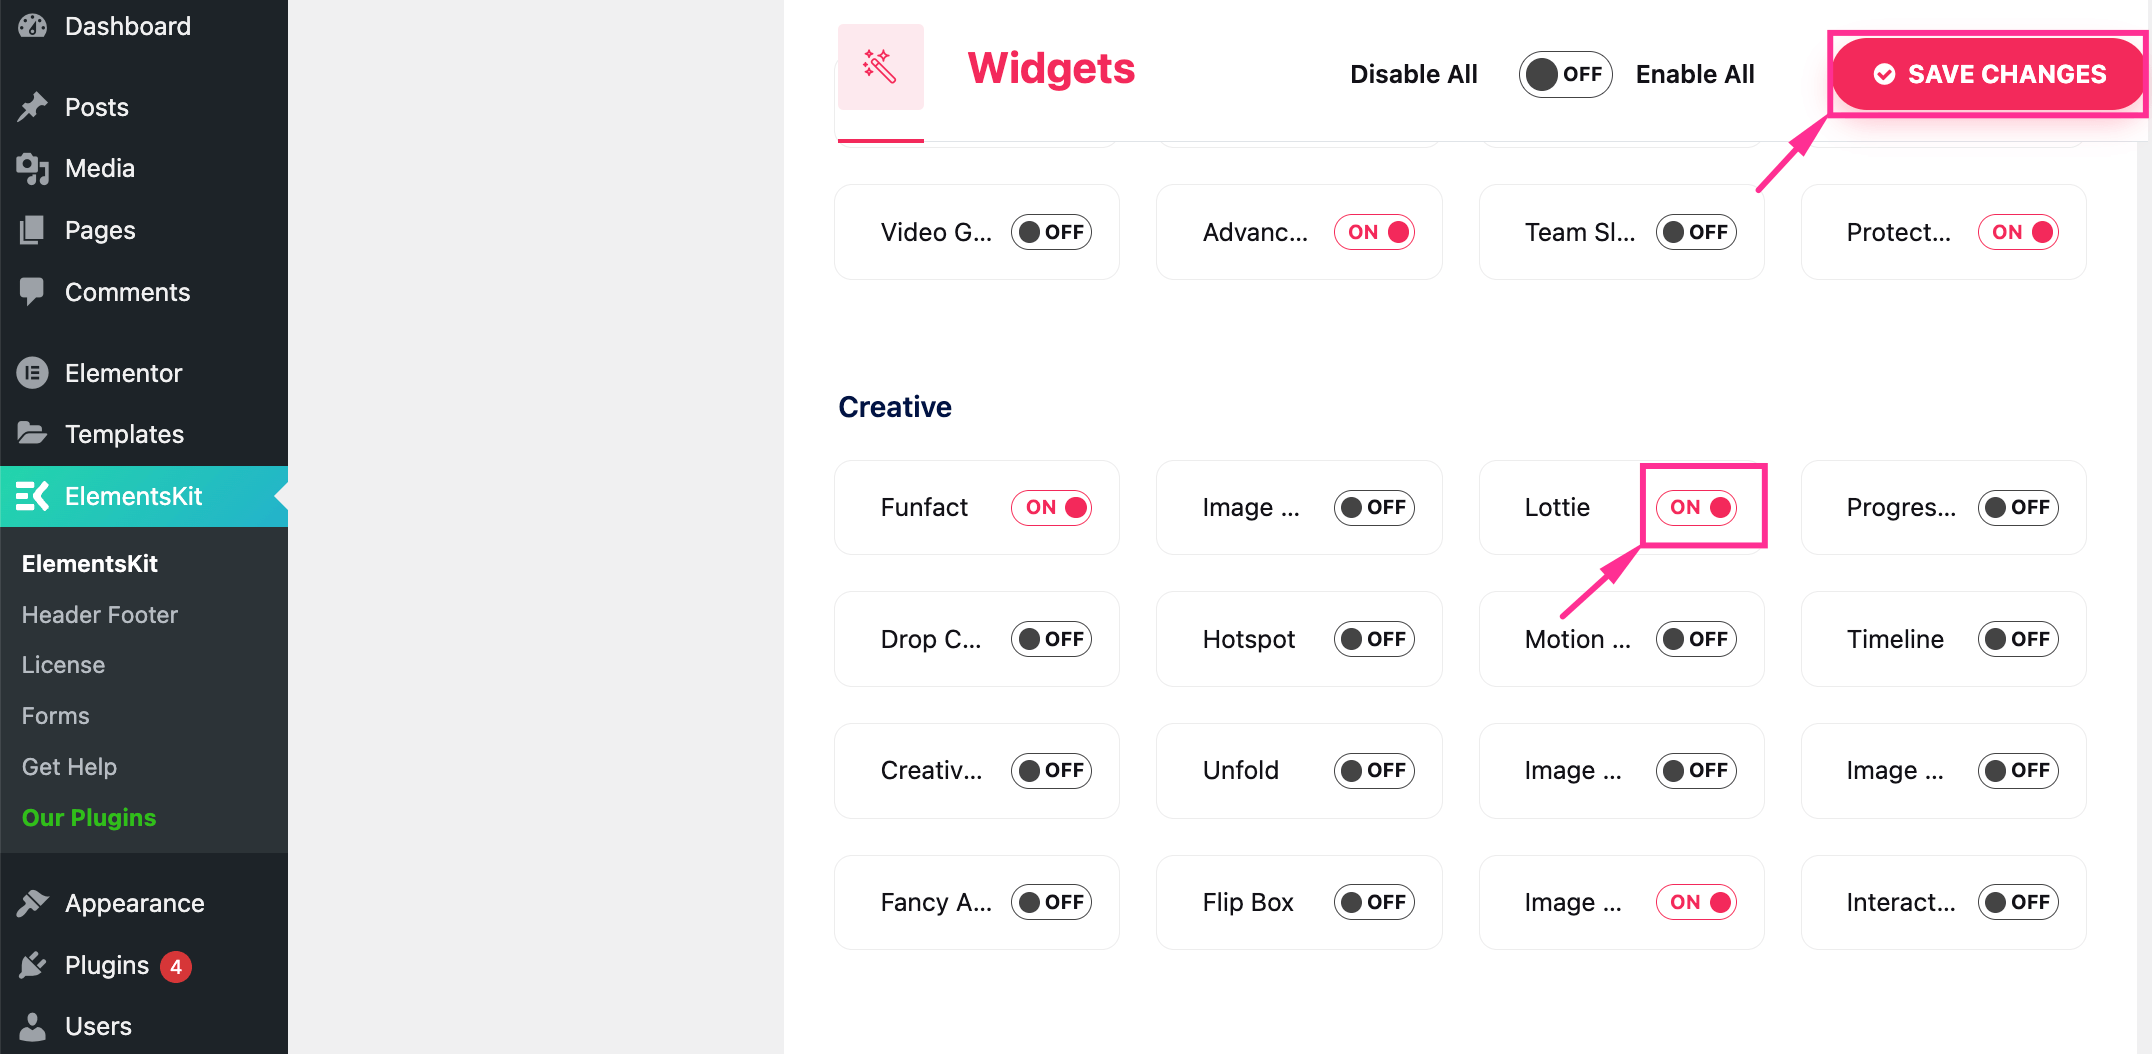
Step 1: Enable the Lottie widget.
In the first step, you have to enable the Lottie widget by navigating to ElementsKit >> Widgets. Later, 下へスクロール until you find the Lottie widget.
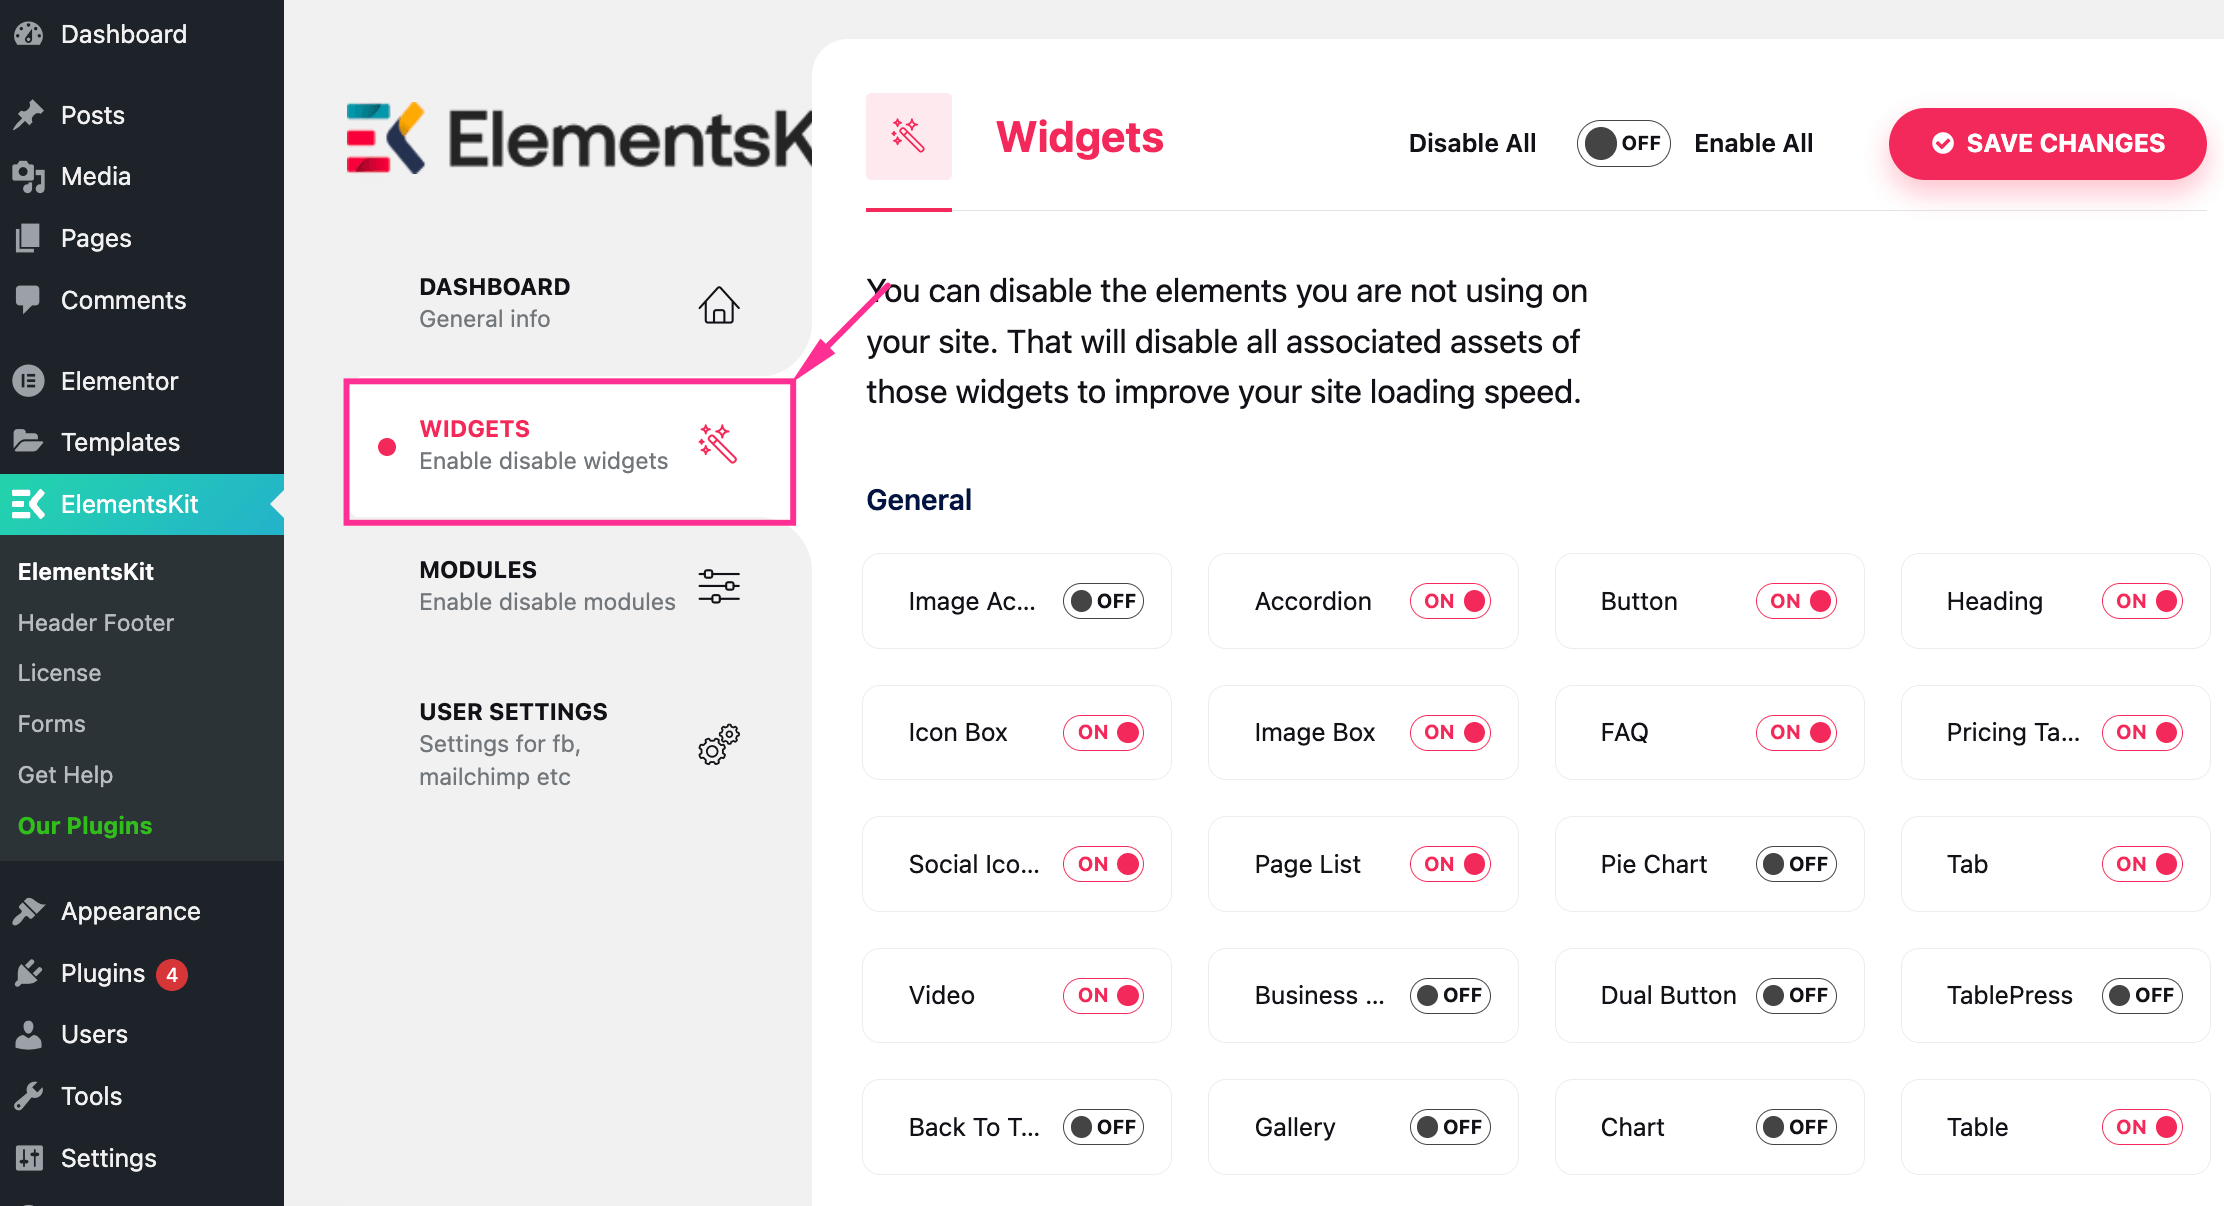
ここ、 オンにする the toggle button for the Lottie widget and press the "変更内容を保存" ボタン。
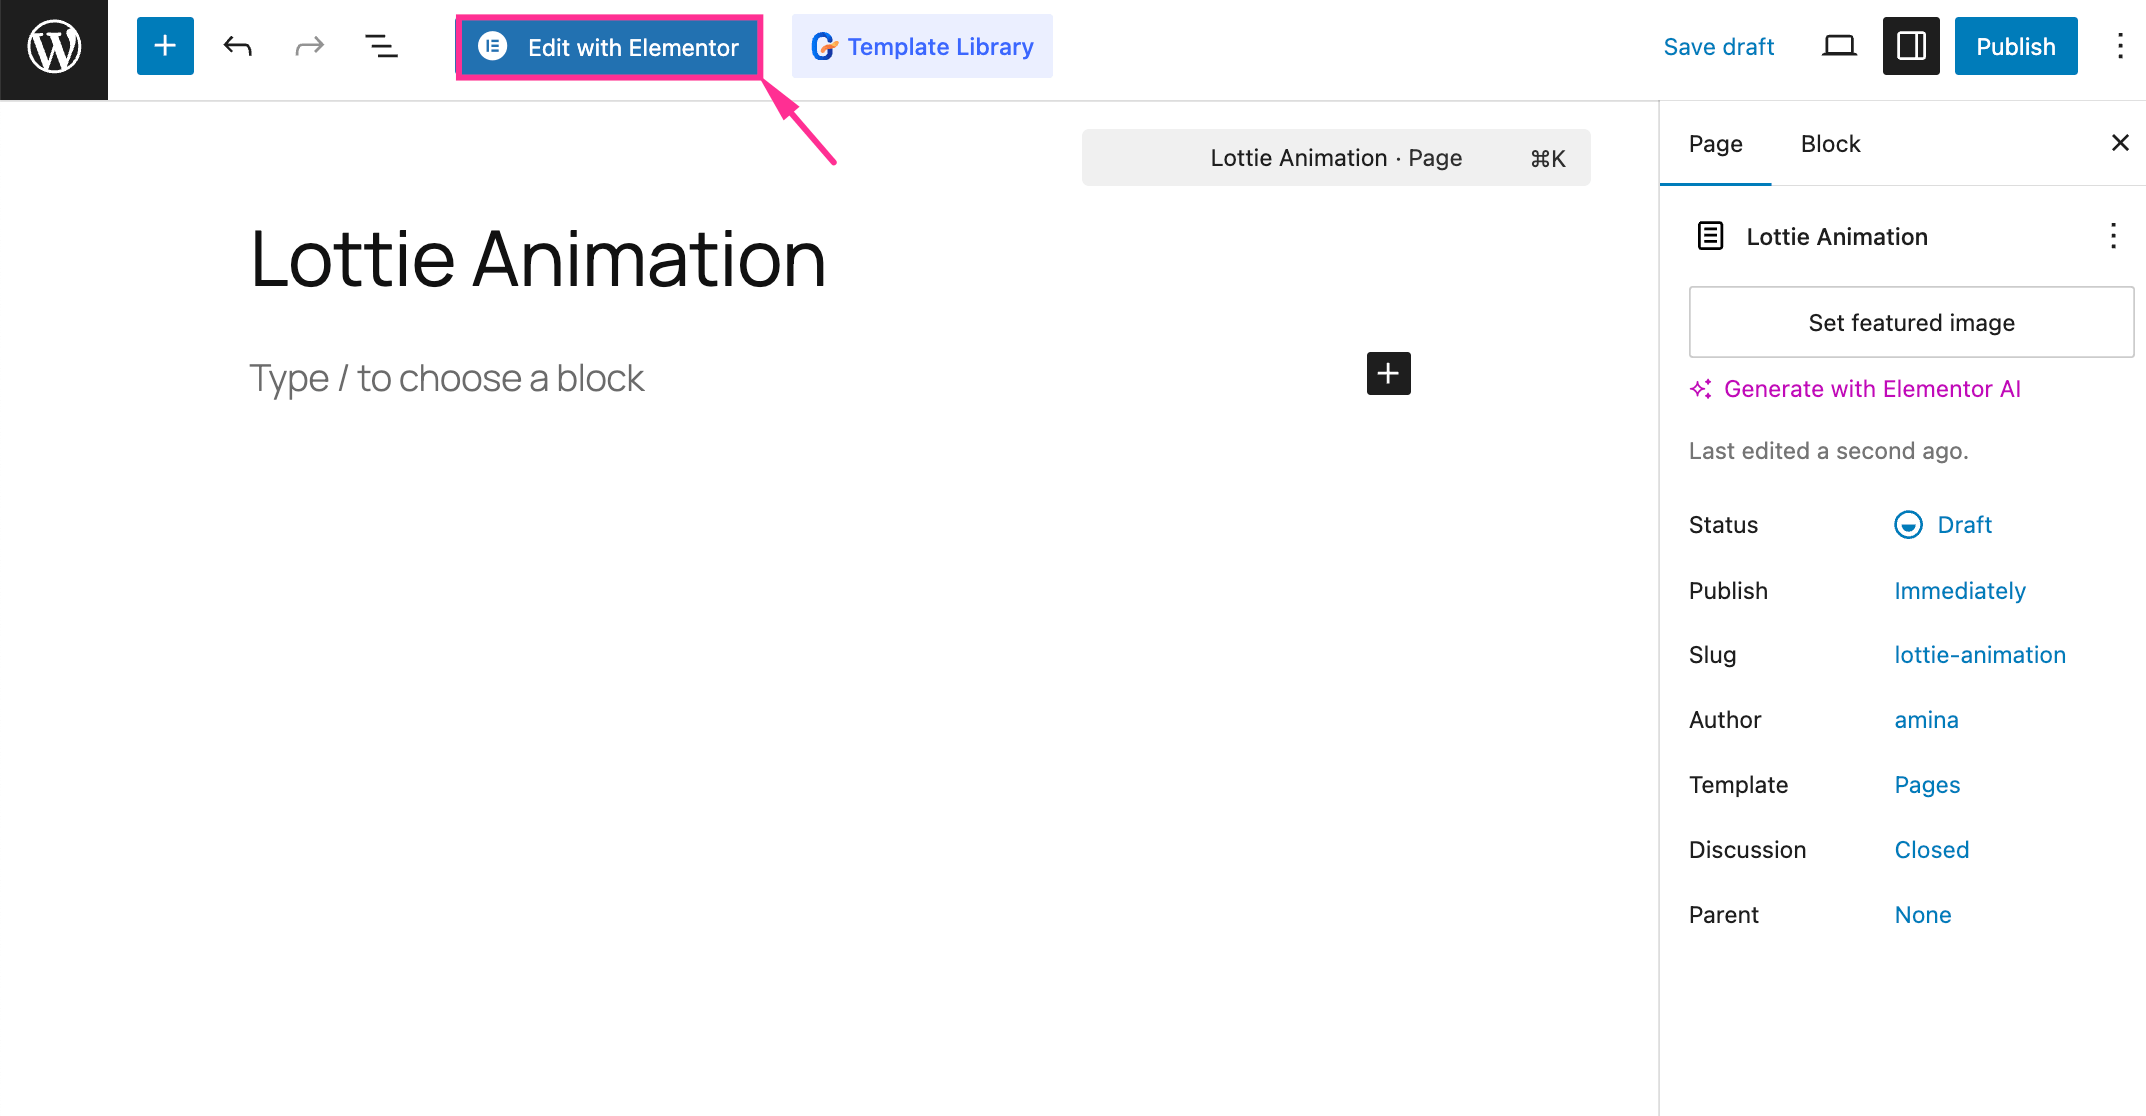
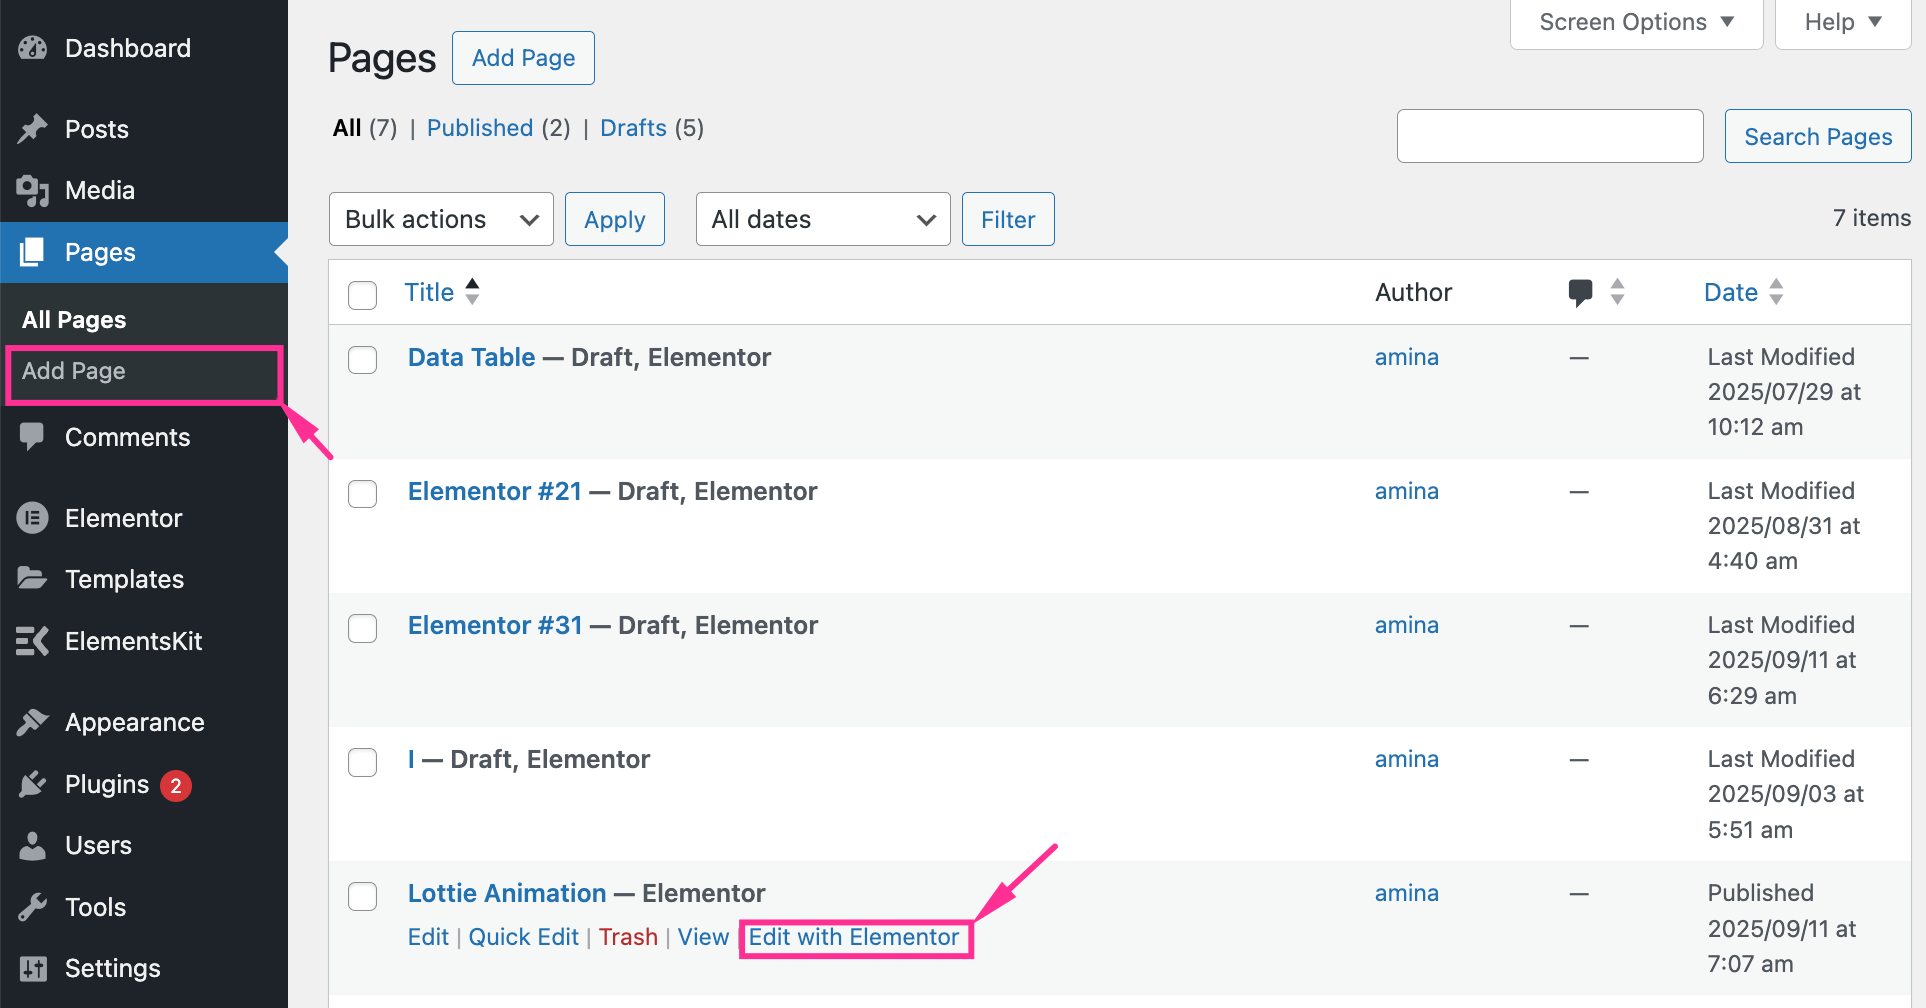
Step 2: Add page for Lottie animation.
Like the previous method, add a page by visiting Pages >> Add Page そして pressing the “Edit with Elementor” button to further integration. Also, you can open an existing page by pressing the “Edit with Elementor”.
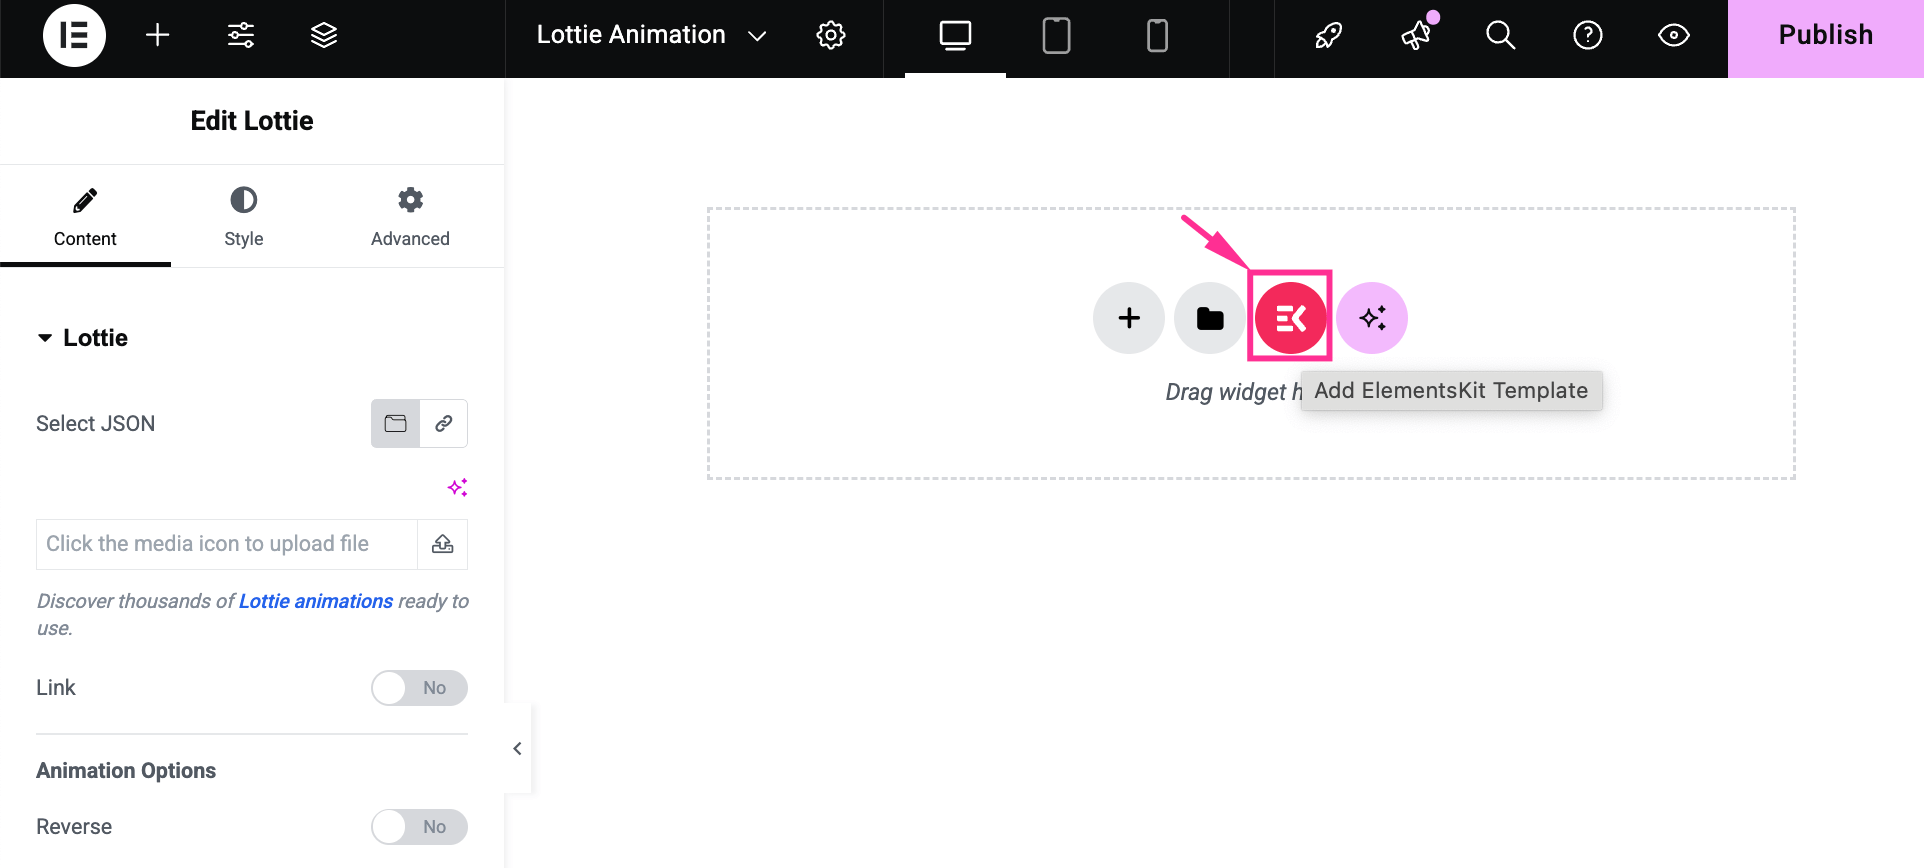
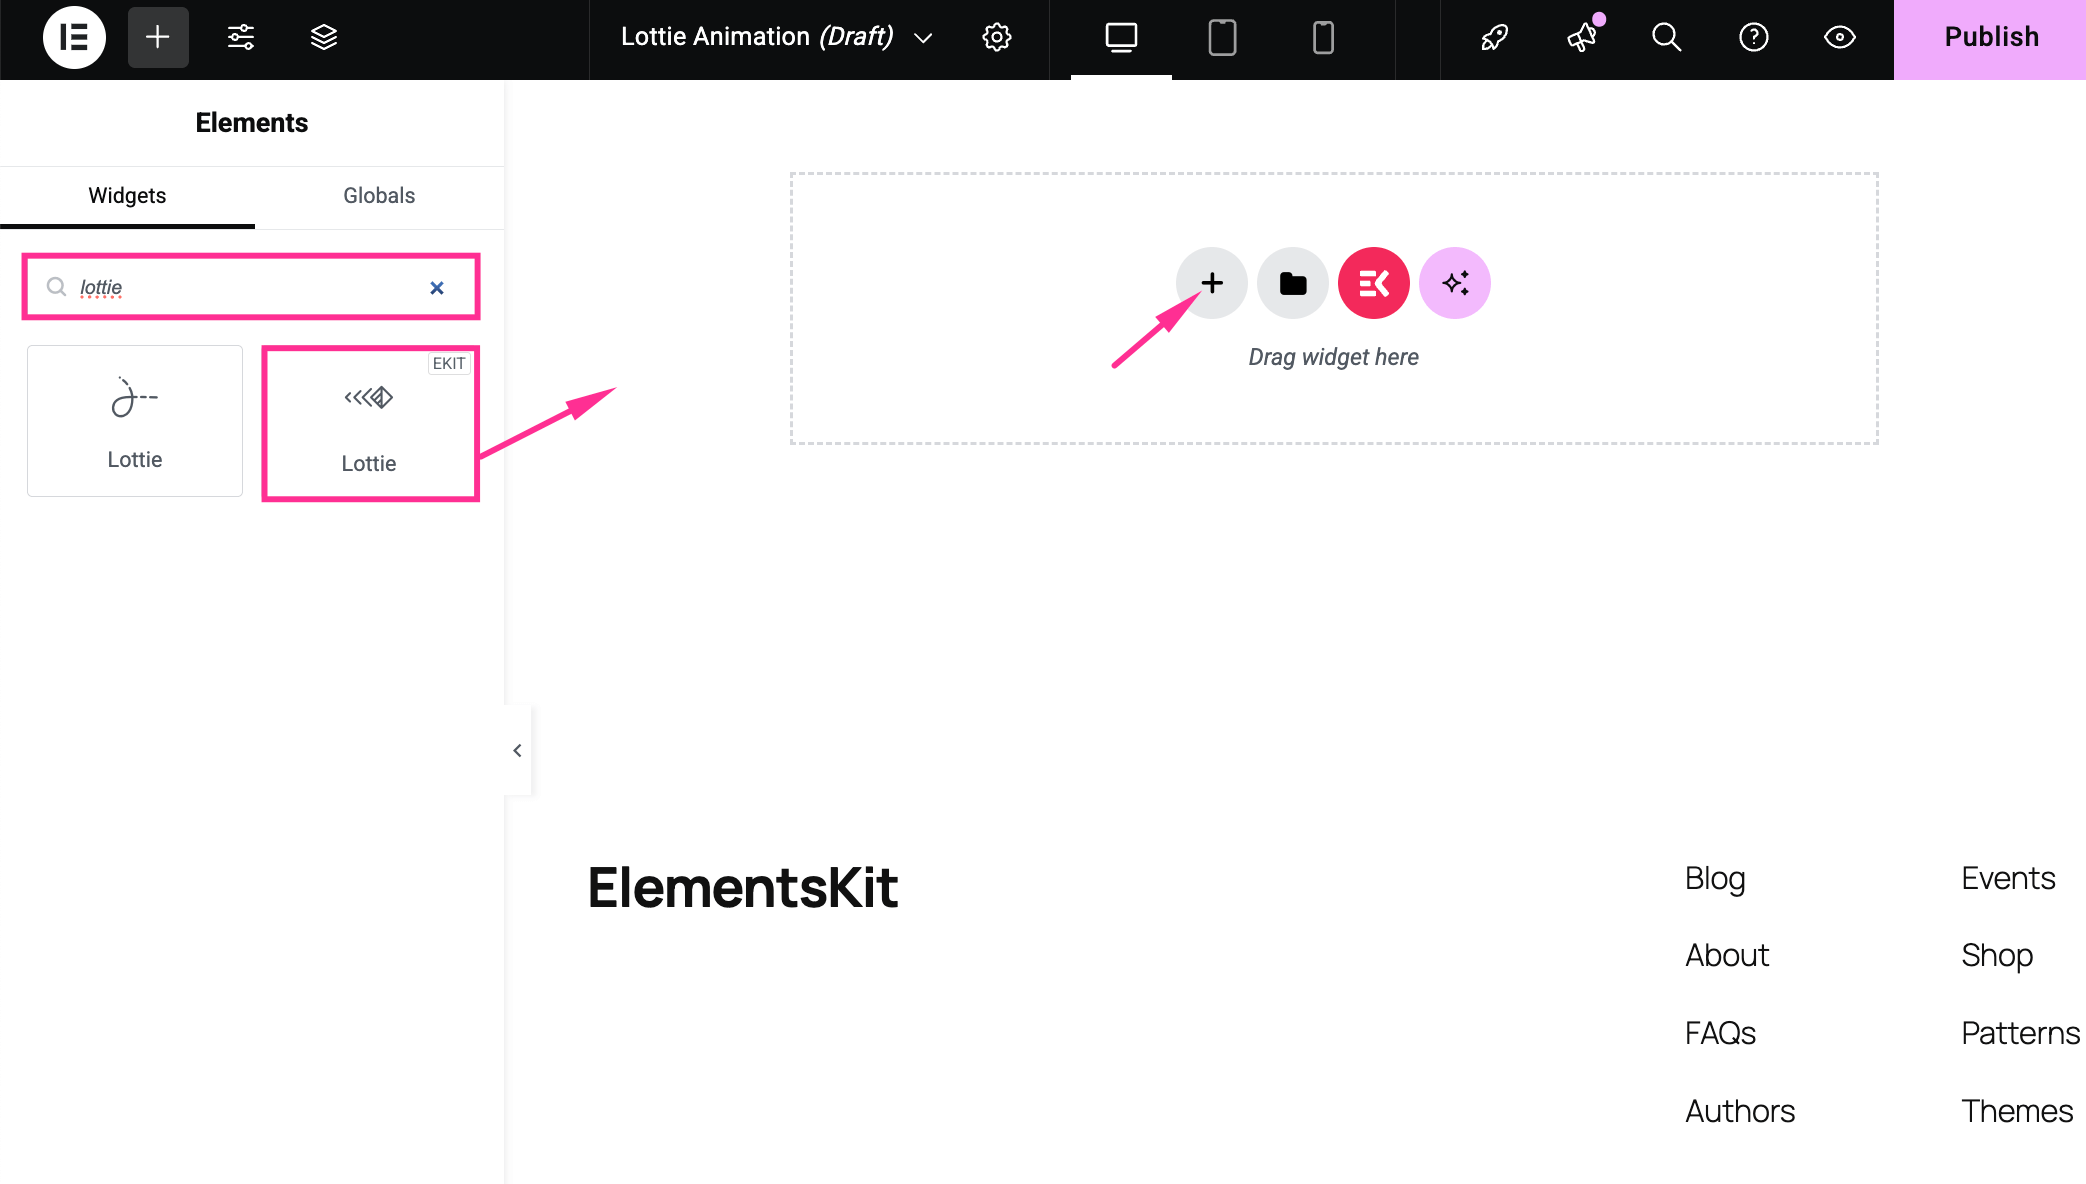
Step 3: Drag-and-drop Lottie widget.
In the third step, you will be taken to the Elementor editor from where search for “Lottie” and drag-and-drop the Lottie widget on the “Plus” アイコン。
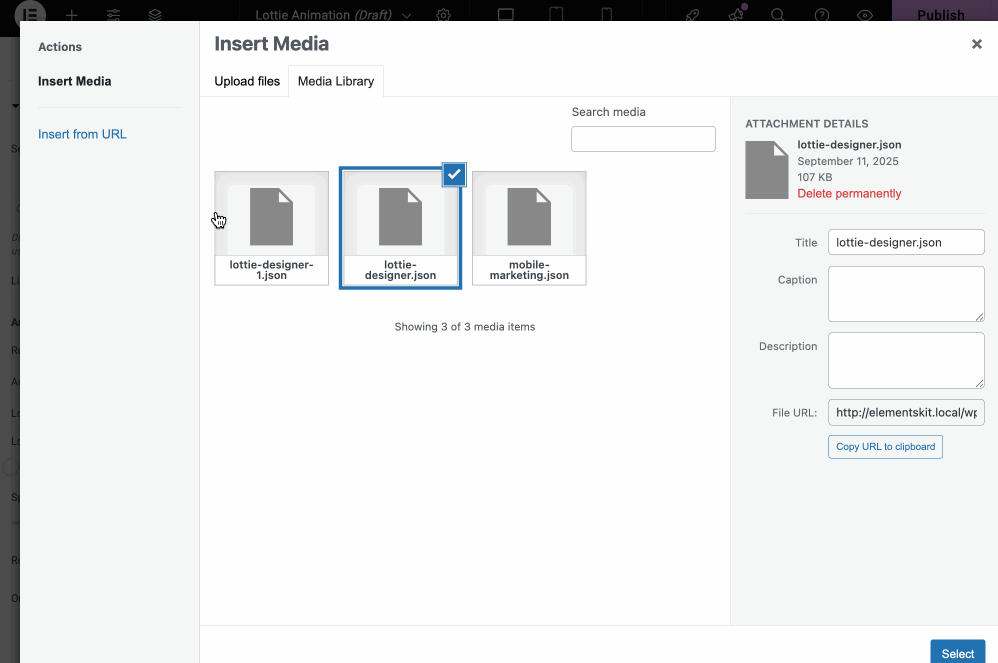
Step 4: Import the JSON file for Lottie animation.
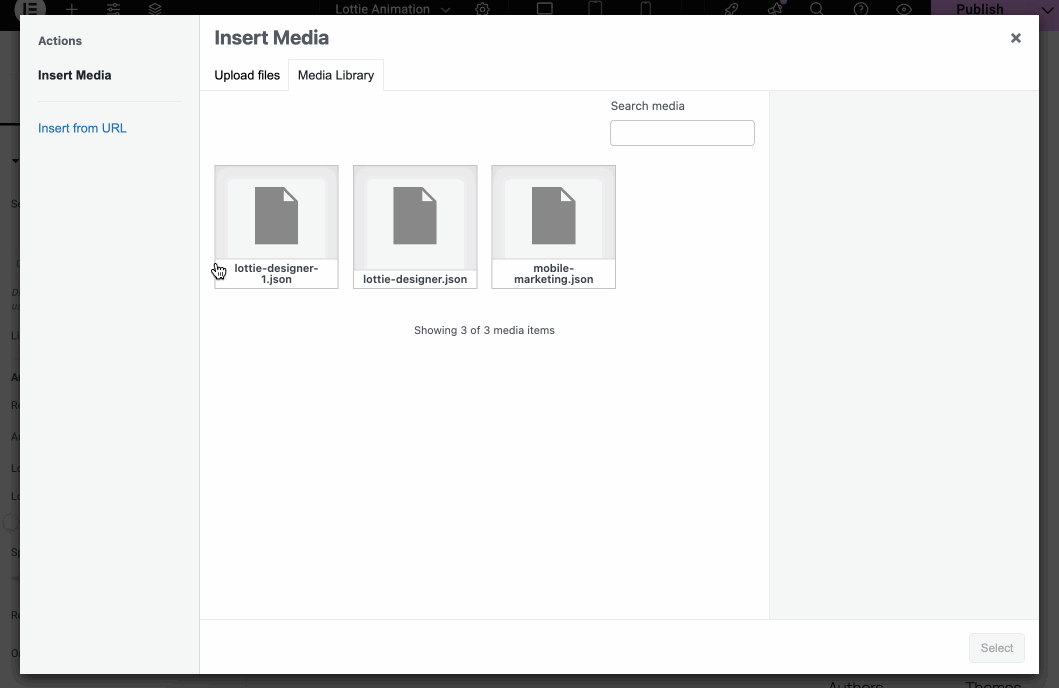
その後、 import the JSON file from your media library by pressing the “Upload” アイコン。
今、 pick a JSON file from your media library and hit the “Select” button. Here comes the content and style customization. The process of customizing content and style is similar to the previous method. So, follow the previous method and customize according to your requirements. Finally, 「公開」を押します ボタンをクリックしてライブにします。
よくある質問
Where to find free Lottie animations?
Yes, you will find thousands of Lottie animations on Lottiefiles.com from where you can add Lottie by downloading JSON file or embedding on WordPress.
Do Lottie animations slow down WP site?
No, Lottie animations are lightweight and speed optimized. It doesn’t hamper your site speed at all since they use vertor-based graphics.
Can you add Lottie animation without coding?
Yes, you can add Lottie animation without coding as WordPress provides no-code solution for everything. For example, using ElementsKit’s Lottie widget, you can add Lottie animation by dragging-and-dropping.
まとめ
WordPress Lottie animation can add life to your website in a way that static visuals can’t do. They are super lightweight, fully customizable, and fast-loading to present a professional and sleek look on your site. With a powerful tool like ElementsKit, you can create free Lottie animations in WordPress in minutes without coding knowledge.
Whether you want to integrate with pre-built sections or a widget, it comes with both options. So, integrate Lottie animation and see how your website engagement drives in a positive direction.

コメントを残す