


支払いゲートウェイを通じて、ウェブサイトは加盟銀行や支払い処理業者と通信します。今日では、 PayPal決済ゲートウェイ は国際的に人気のある名前であり、ゲートウェイウィジェットも同様です。MetFormウィジェットでは、 PayPal通貨として動的な通貨選択 オプション。
この強力な支払いプロセッサを WordPress に追加する方法とその機能について見てみましょう。
WordPress PayPal Integration with MetForm #
To integrate PayPal with WordPress form, you first need to connect your WordPress site with PayPal. Then you can enable the PayPal payment for WordPress form, and finally add the PayPal widget in the form design.
前提条件: #
You must have the PayPal Account to integrate the Paypal payment services into MetForm.
必要なプラグイン: #
- エレメンター: プラグインのダウンロード
- MetForm プロ: プラグインを入手する
👑 You need to have the MetForm Professional Plan to use this feature.
Step 1: Get PayPal Identify Token #
First, you have to generate the PayPal ID トークン. To get the token:
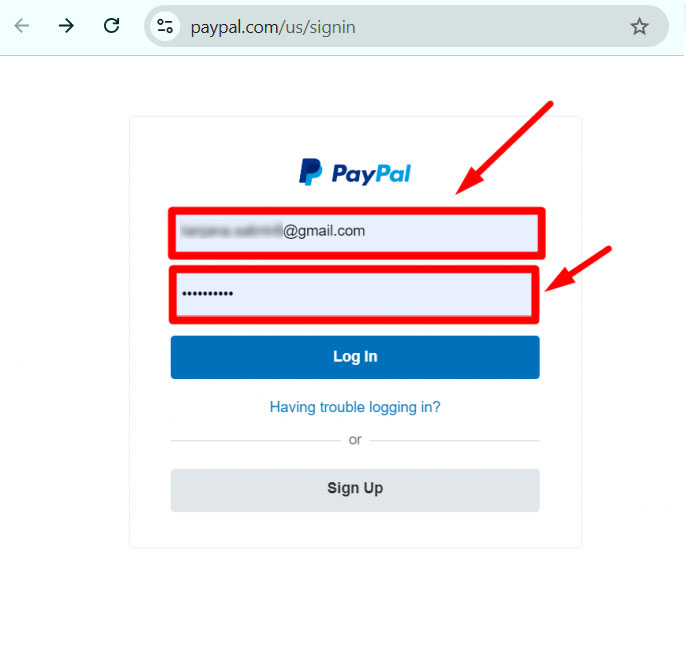
1. Create a PayPal business account and go to the URL: https://www.paypal.com/us/signin.
2. Log in with your created PayPal Email and Password.
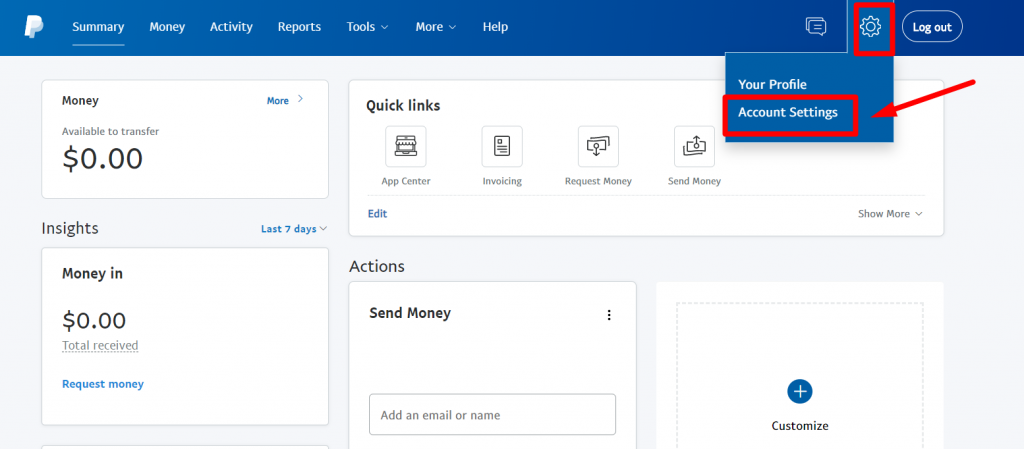
3. Access your PayPal dashboard, then navigate to Settings → Account Settings.
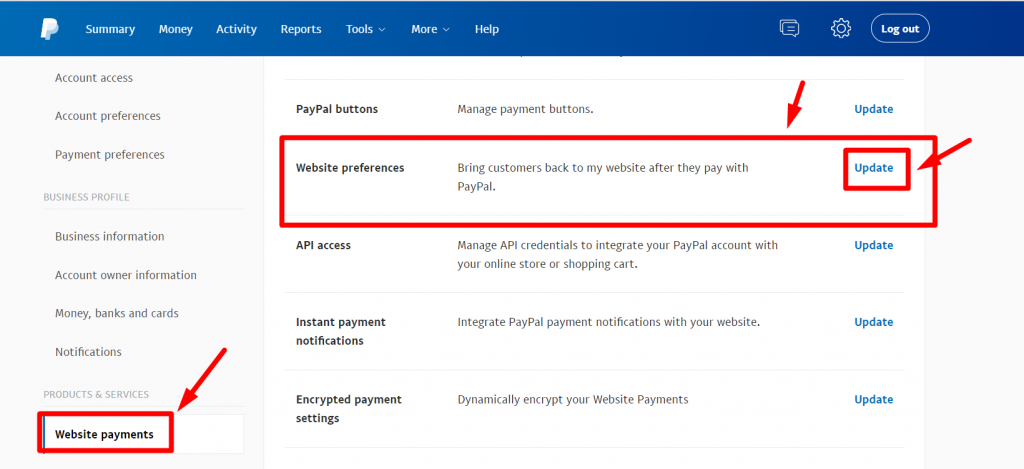
4. In account settings, go to ウェブサイトでの支払い. Then tap the アップデート の隣にあるリンク ウェブサイトの設定 オプションをタップします。 アップデート の隣にあるリンク ウェブサイトの設定 オプション。
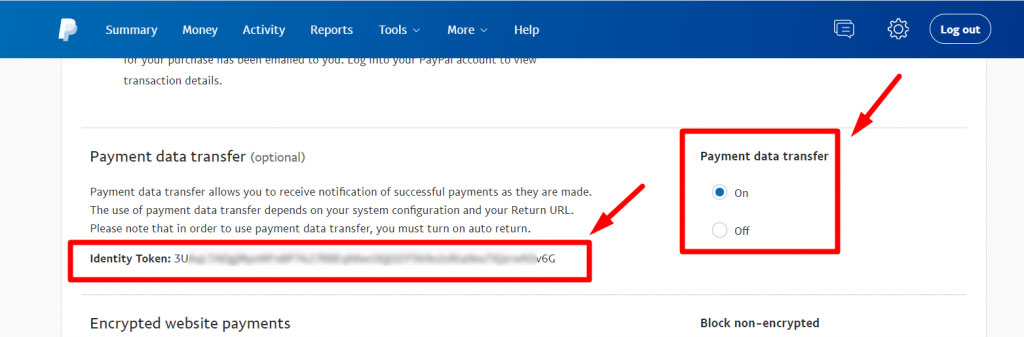
5. Enable the ウェブサイトでの支払いの自動返品にストアのサンキューページのリンクを追加します。 戻り先URL 分野。
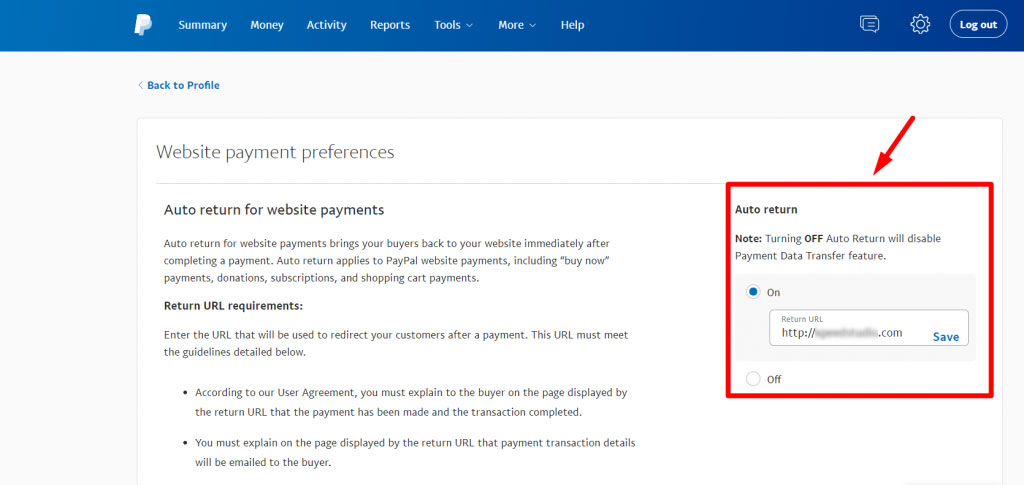
6. Enable the 決済データの転送 同様に、ID トークンがセクションの下部に表示されます。
Step 2: Add PayPal payment to WordPress #
Now you can add this PayPal Identity Token to WordPress.
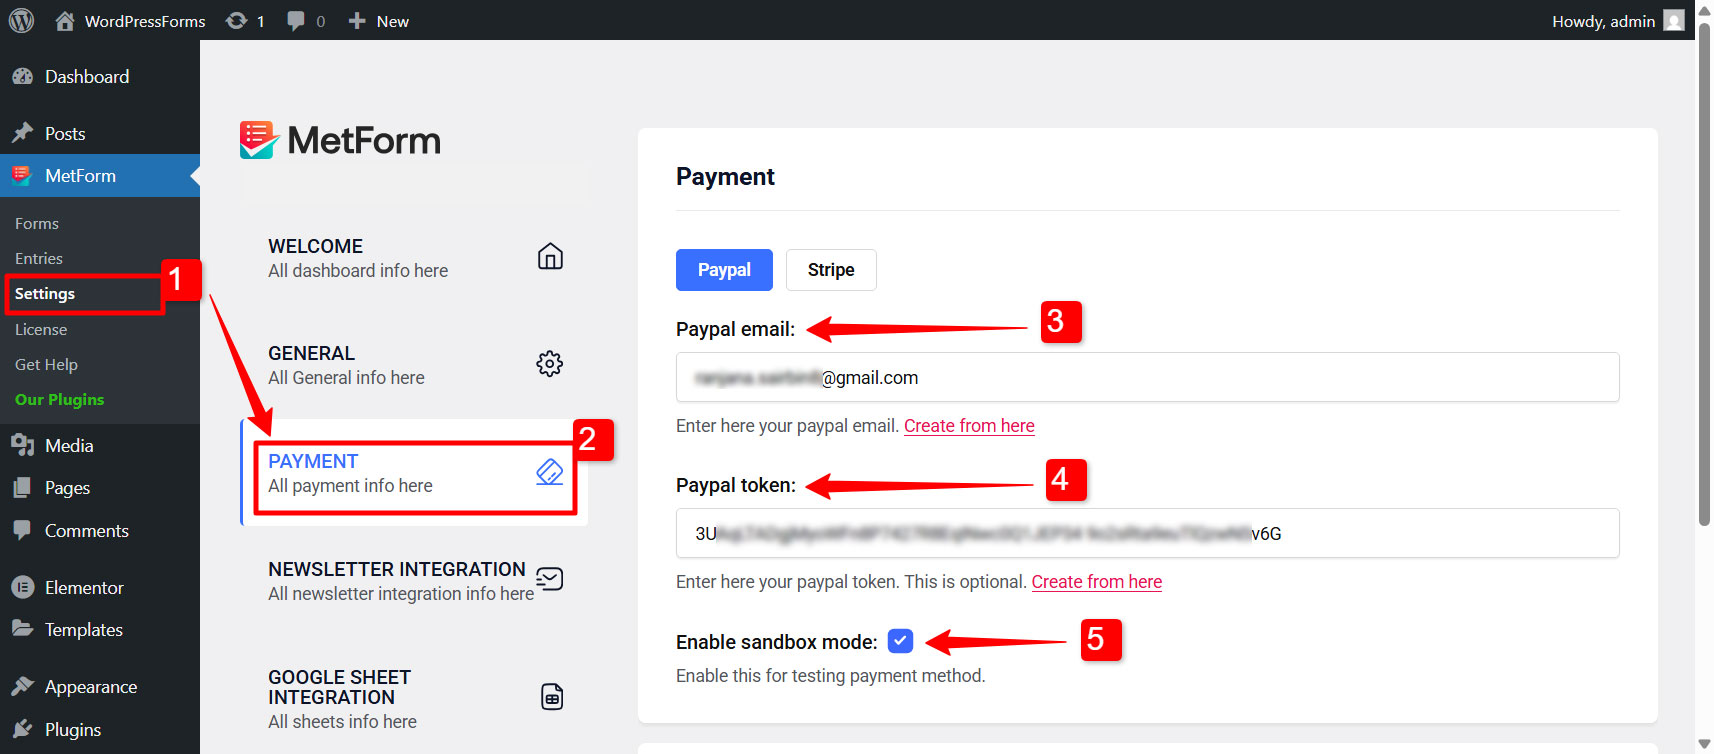
1. Navigate to MetForm → Setting WordPress ダッシュボードから。
2. Then go to the 支払い and switch to ペイパル タブ。
3. Enter the same Eメール address that you used for your PayPal account.
4. Enter the PayPalトークン that you have generated earlier.
5. Tick the checkbox for the Enable sandbox mode.
After that you can configre the redirect page settings in the same tab.
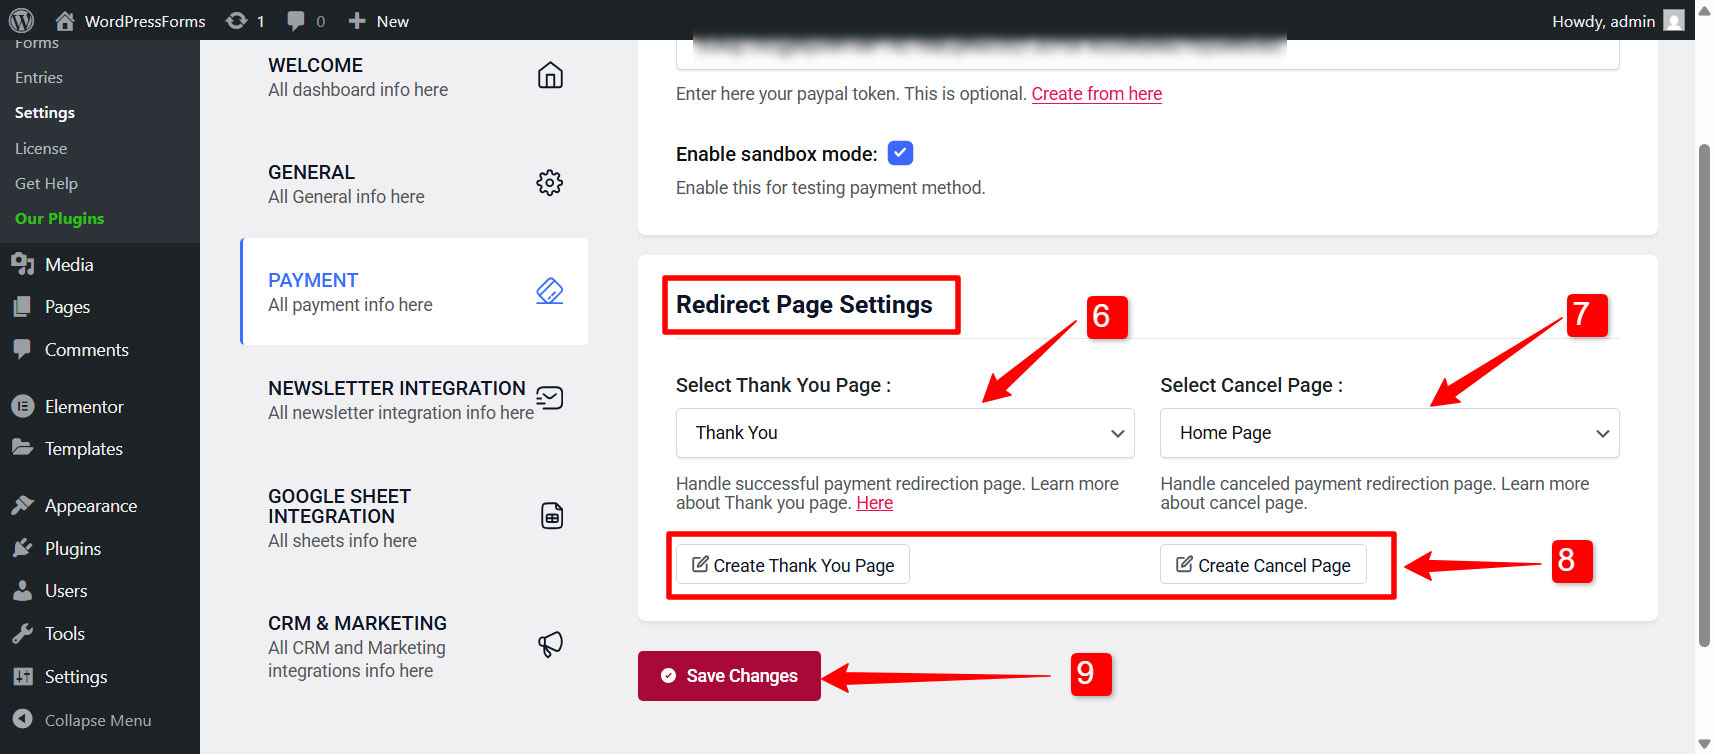
Redirect Page Settings:
You can also redirect the user after they complete their payment or cancel it. For that:
6. Select Thank You Page: From the dropdown list, select a page where the users will be redirected after they complete their payment. You can show a nice “thank you” message in that page.
7. Select Cancel Page: Choose a page where users will be redirected in case of payment cancellation.
8. If you don’t have these pages created on your WordPress site, you can create them by clicking on the “ありがとうページを作成する" そして "Create Cancel Page” button respectively.
9. Finally click on the Save Changes button to finalize the changes. 注記: The email and PayPal token won’t be saved if you don’t click on the save changes button.
Step 3: Enable PayPal payment for a WordPress form #
To enable PayPal payment for a form built with MetForm,
- に行く MetForm → Forms.
- クリックしてください 編集 option for an individual form to open form settings.
- で フォーム設定, switch to 支払い タブ。
- Under this tab, choose the Default currency for payment.
- Finally, enable the ペイパル オプション。
Step 4: Add PayPal Payment Button to WordPress Form #
You can integrate PayPal payment gateway in WordPress forms as Payment Method in the input field. For that,
1. に行く MetForm → Forms そして open a form created in the Elementor editor.
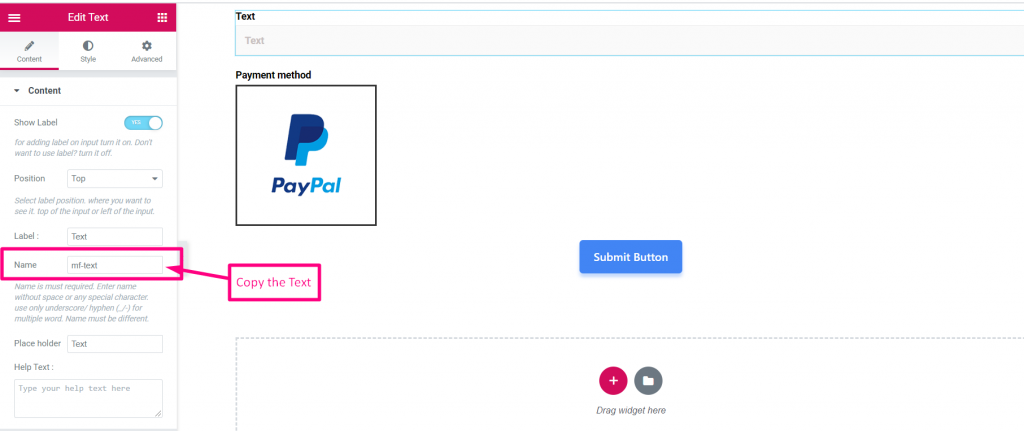
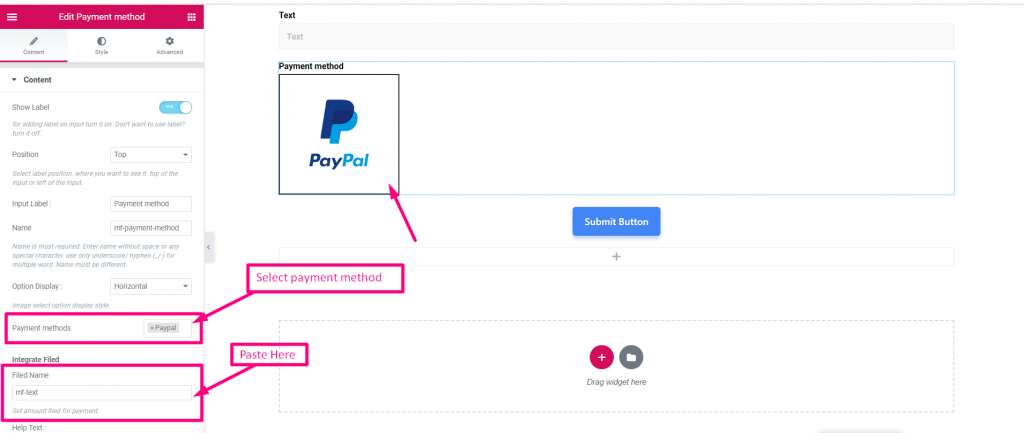
2. In the Elementor editor, search for MetForm’s 支払方法 widget and drag it to the design area.
3. For this widget, add PayPal in the Payment methods 分野.
4. Set the デフォルトの支払い方法 to PayPal.
- 次に、選択した名前をコピーします。 MFテキスト
- 支払い方法を選択してください
- テキスト名を統合フィールドに貼り付けます
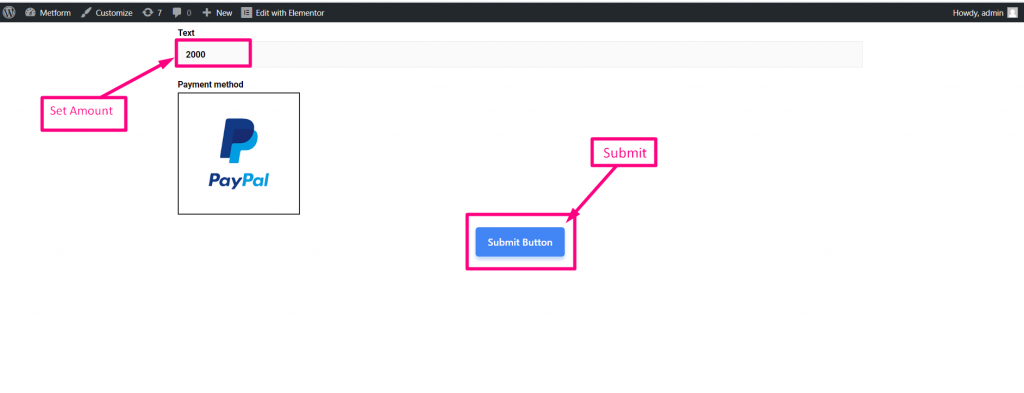
- 設定金額
- 提出する
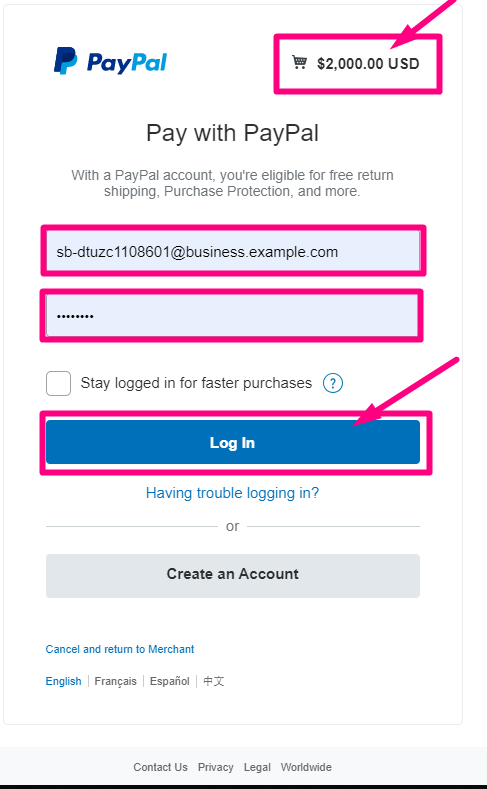
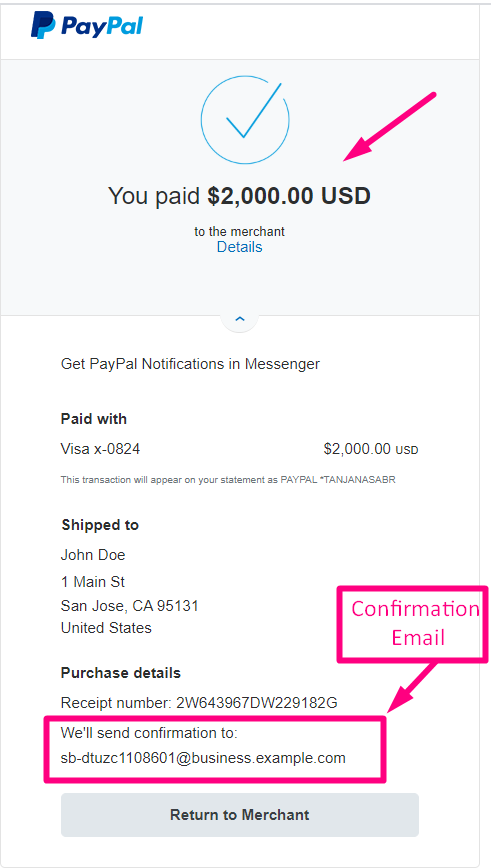
PayPal アカウントでログインします金額は 先ほど選択した通貨.
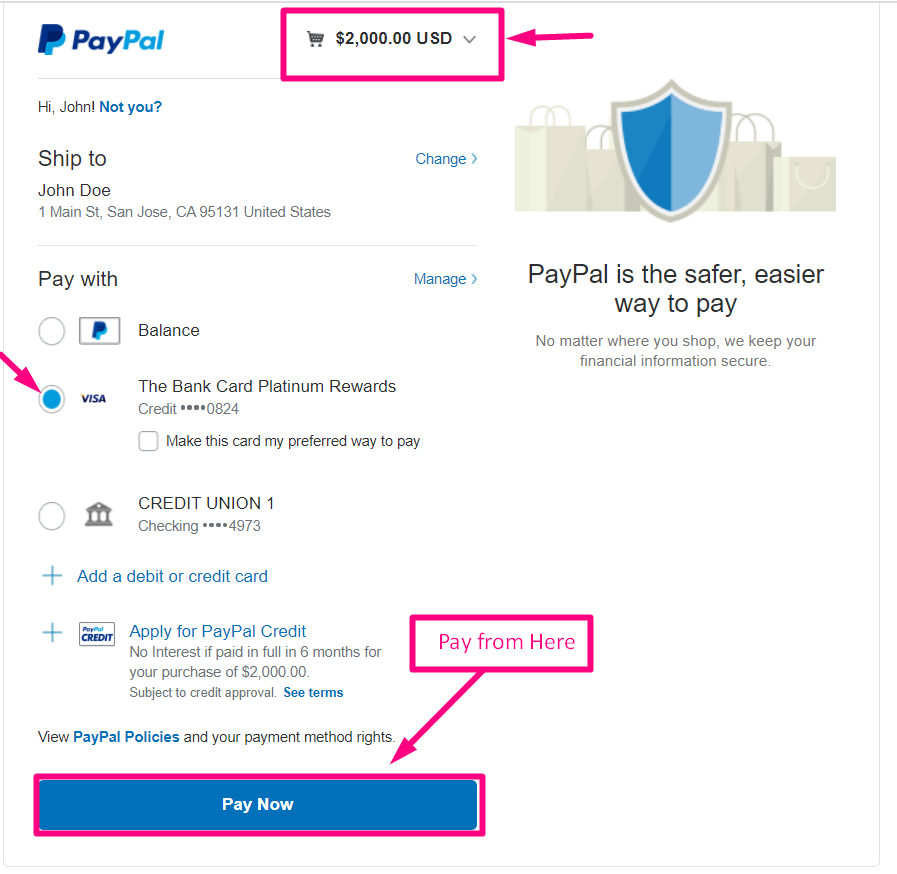
- お支払いタイプを選択してください
- 今払う
確認をメールに送信
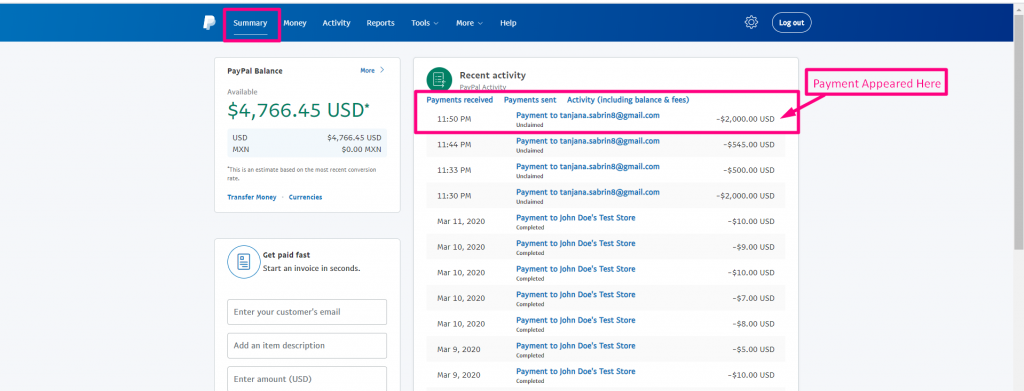
トランザクションが PayPalダッシュボード支払い セクション
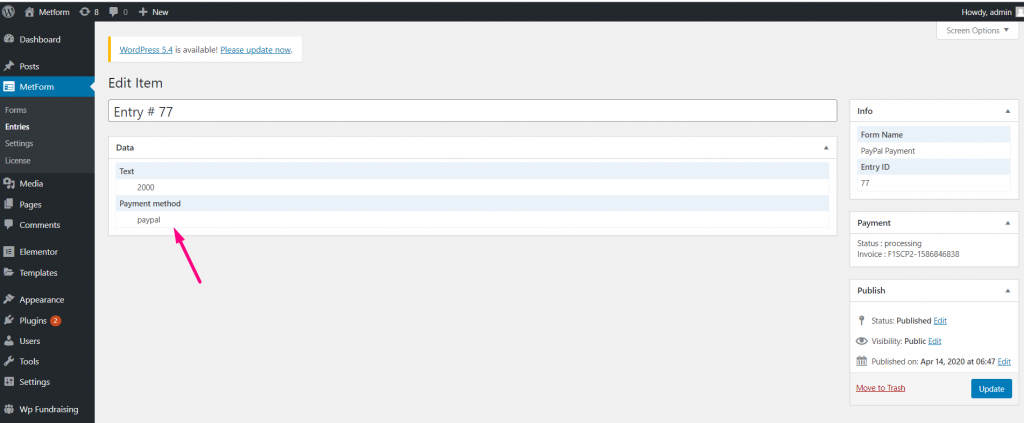
管理パネルからも表示できます。 Metform=> エントリ
PayPal is a mostly used payment gateway no doubt. So, just follow the steps of integrating PayPal payment with WordPress and make your customers feel more comfortable with the payment process. And, we hope people ダイナミック通貨オプションは柔軟です あまりにも。


