


You can automatically store form entries from your WordPress site to a Google Sheet using MetForm.
This form builder plugin allows seamless integration between your forms and Google Sheets, so you can organize and manage form data more efficiently.
Here is the procedure:
必要なプラグイン: #
Since MetForm is an Elementor form builder, you need to have Elementor plugin installed and activated on your website.
- エレメンター: プラグインのダウンロード
- MetForm プロ: プラグインを入手する
👑 This is a premium feature. MetForm Pro を入手 to use this feature.
Step 1: Set up a project in the Google Cloud Console #
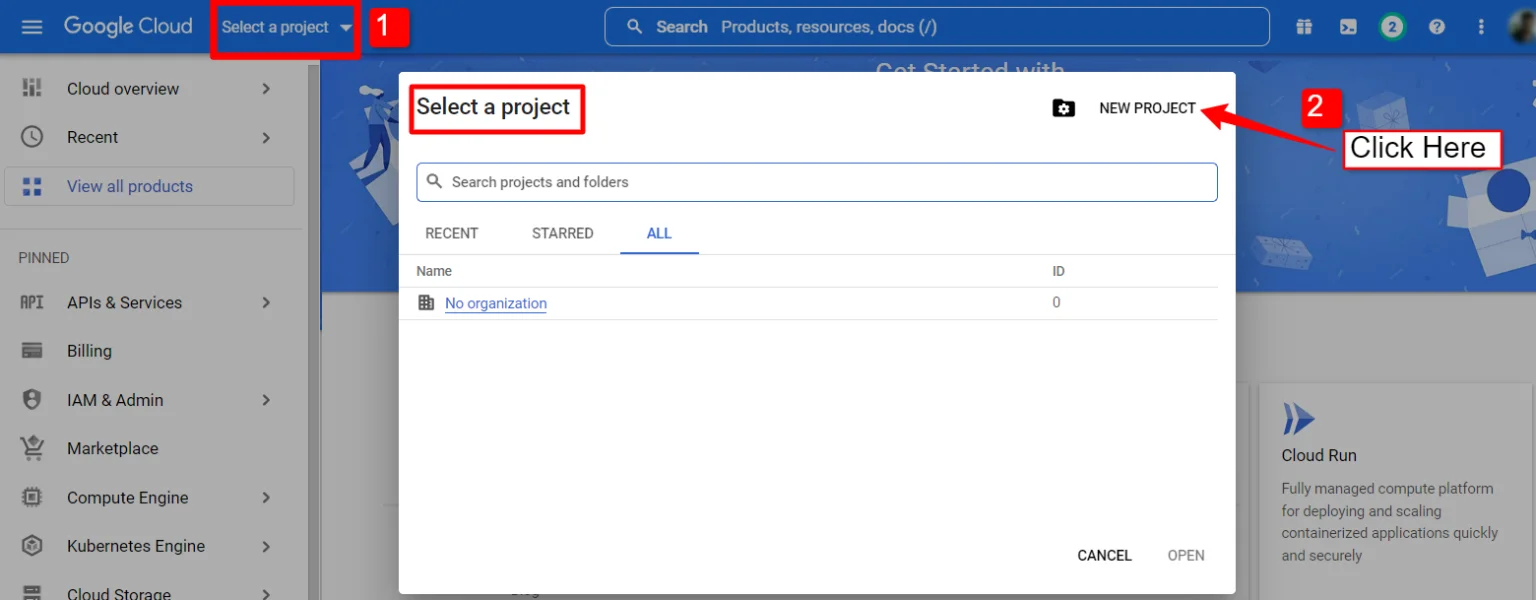
You will need APIs to connect the Google Sheet with WordPress form. For that, login to your Google Cloud console acoount. After that,
1. Click on the Select a project 落ちる。
2. A popup will appear, there click on the 新しいプロジェクト オプション。
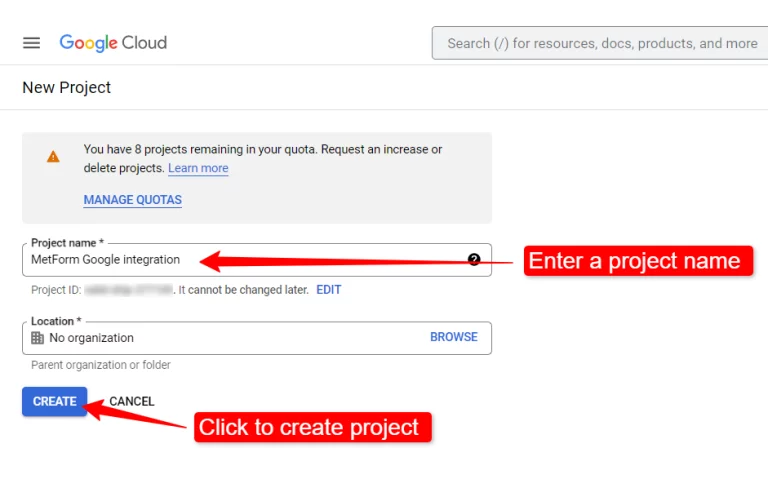
新しいプロジェクトを作成するには、 プロジェクト名 そして 位置 (該当する場合)、 「作成」ボタン.
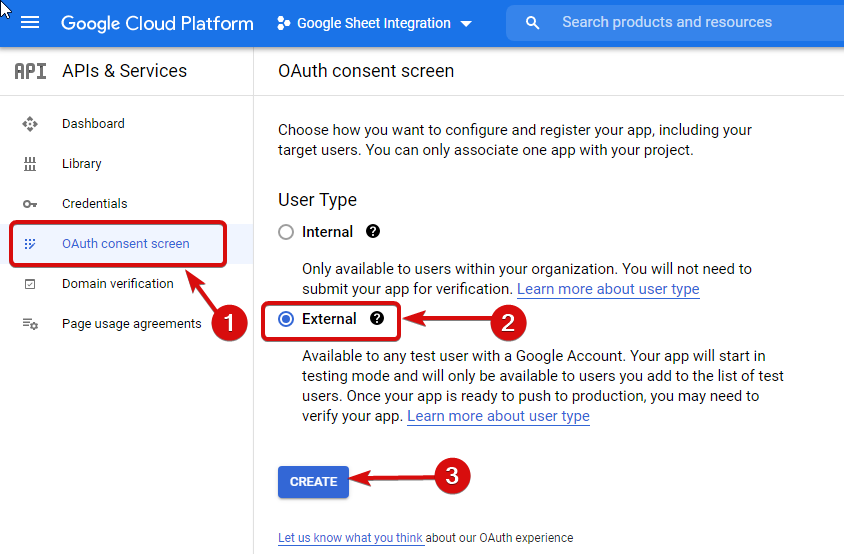
Then go to your project dashboard, and navigate to APIs overview >> OAuth consent screen.
On the OAuth consent screen select the ユーザータイプを外部へ 「作成」ボタンをクリックして続行します。
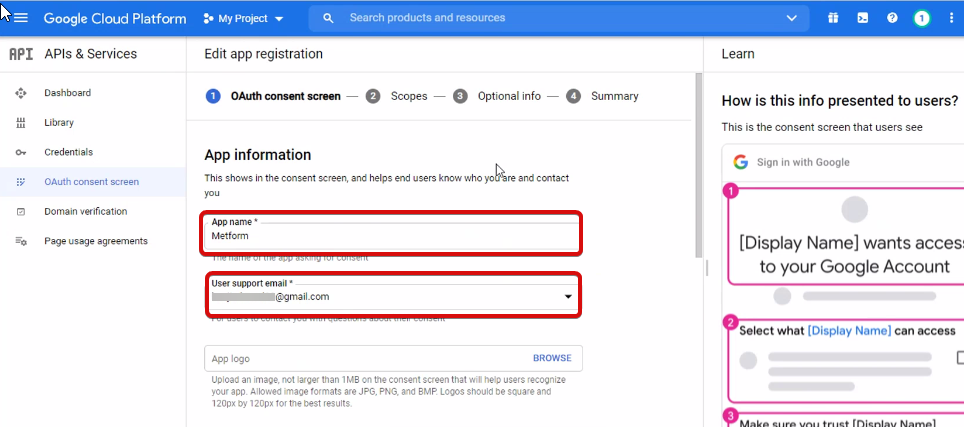
On the next screen, enter your App information including:
- アプリ名
- ユーザーサポートメール
- 認可されたドメイン
- Developer contact
最後に、をクリックします 保存して続行
APIの概要へ移動
- OAuth同意画面ページに移動
- ユーザータイプ外部を選択
- 作成ボタンを押す
アプリ情報を入力してください。下の画像を参照してください。
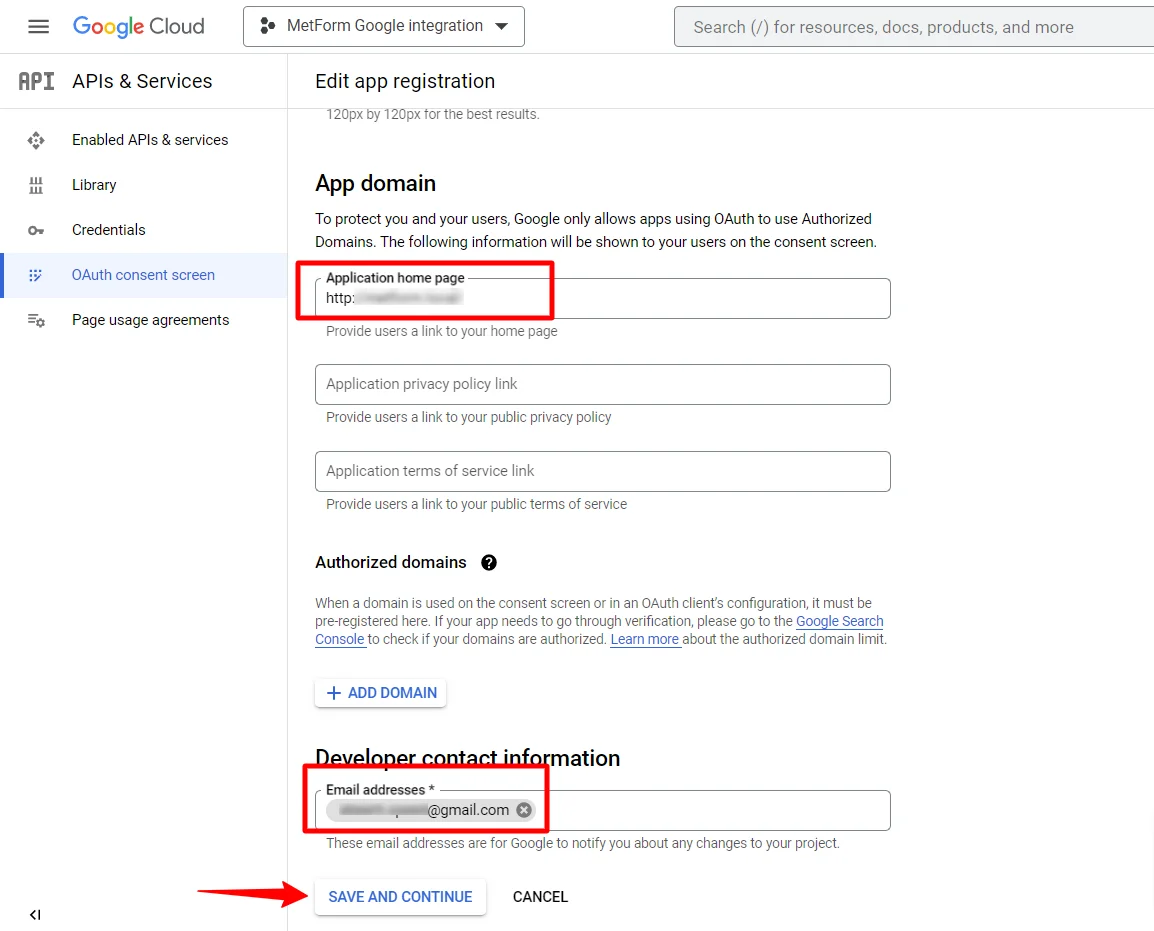
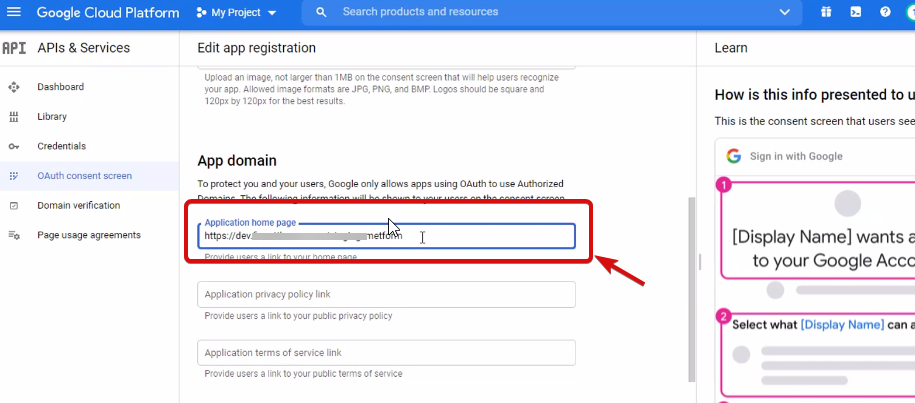
さて、あなたはしなければなりません add App domain. If your site is on the live server then you need to authorize the domain. An authorized domain does not allow subdomain names and any protocol. However, you can use this Google project for websites created with your subdomain. For localhost, you do not need to authorize the domain.
次に、保存して続行します。
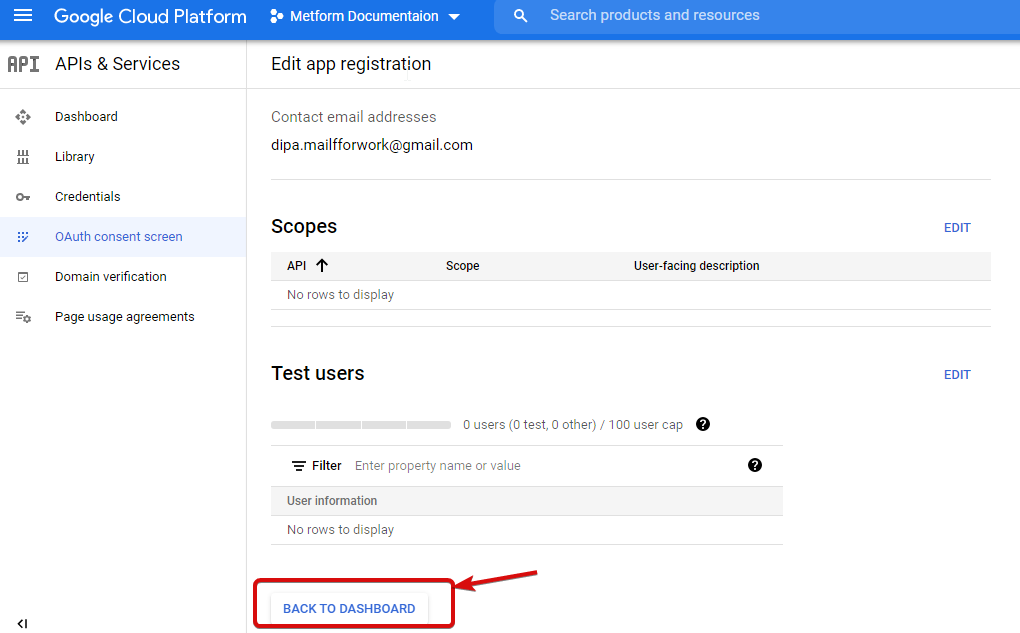
- OAuth同意画面から
- ユーザーの追加をクリック
- Add your email address and save it
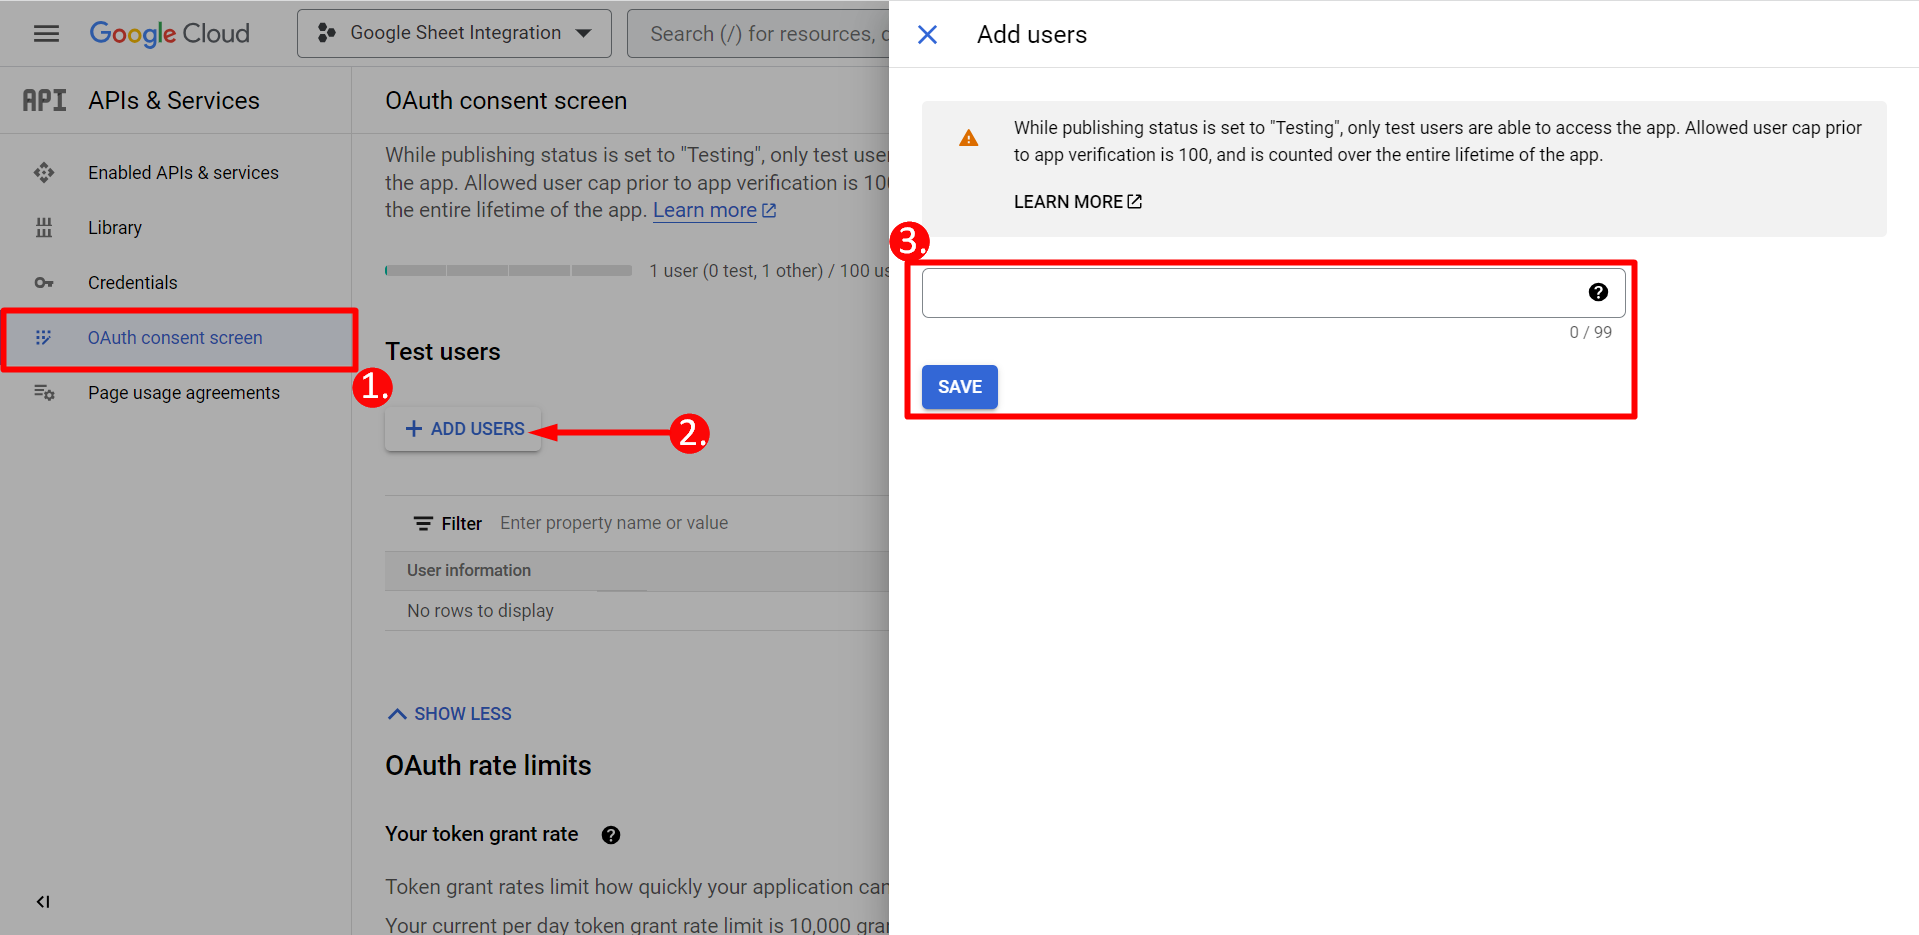
ダッシュボードに戻るボタンをクリック
アプリの公開ボタンをクリックして、資格情報ページに移動します。 ウェブサイトがローカルホスト上にある場合は、アプリを公開するボタンをクリックする必要はありません。資格情報ページに移動するだけです。
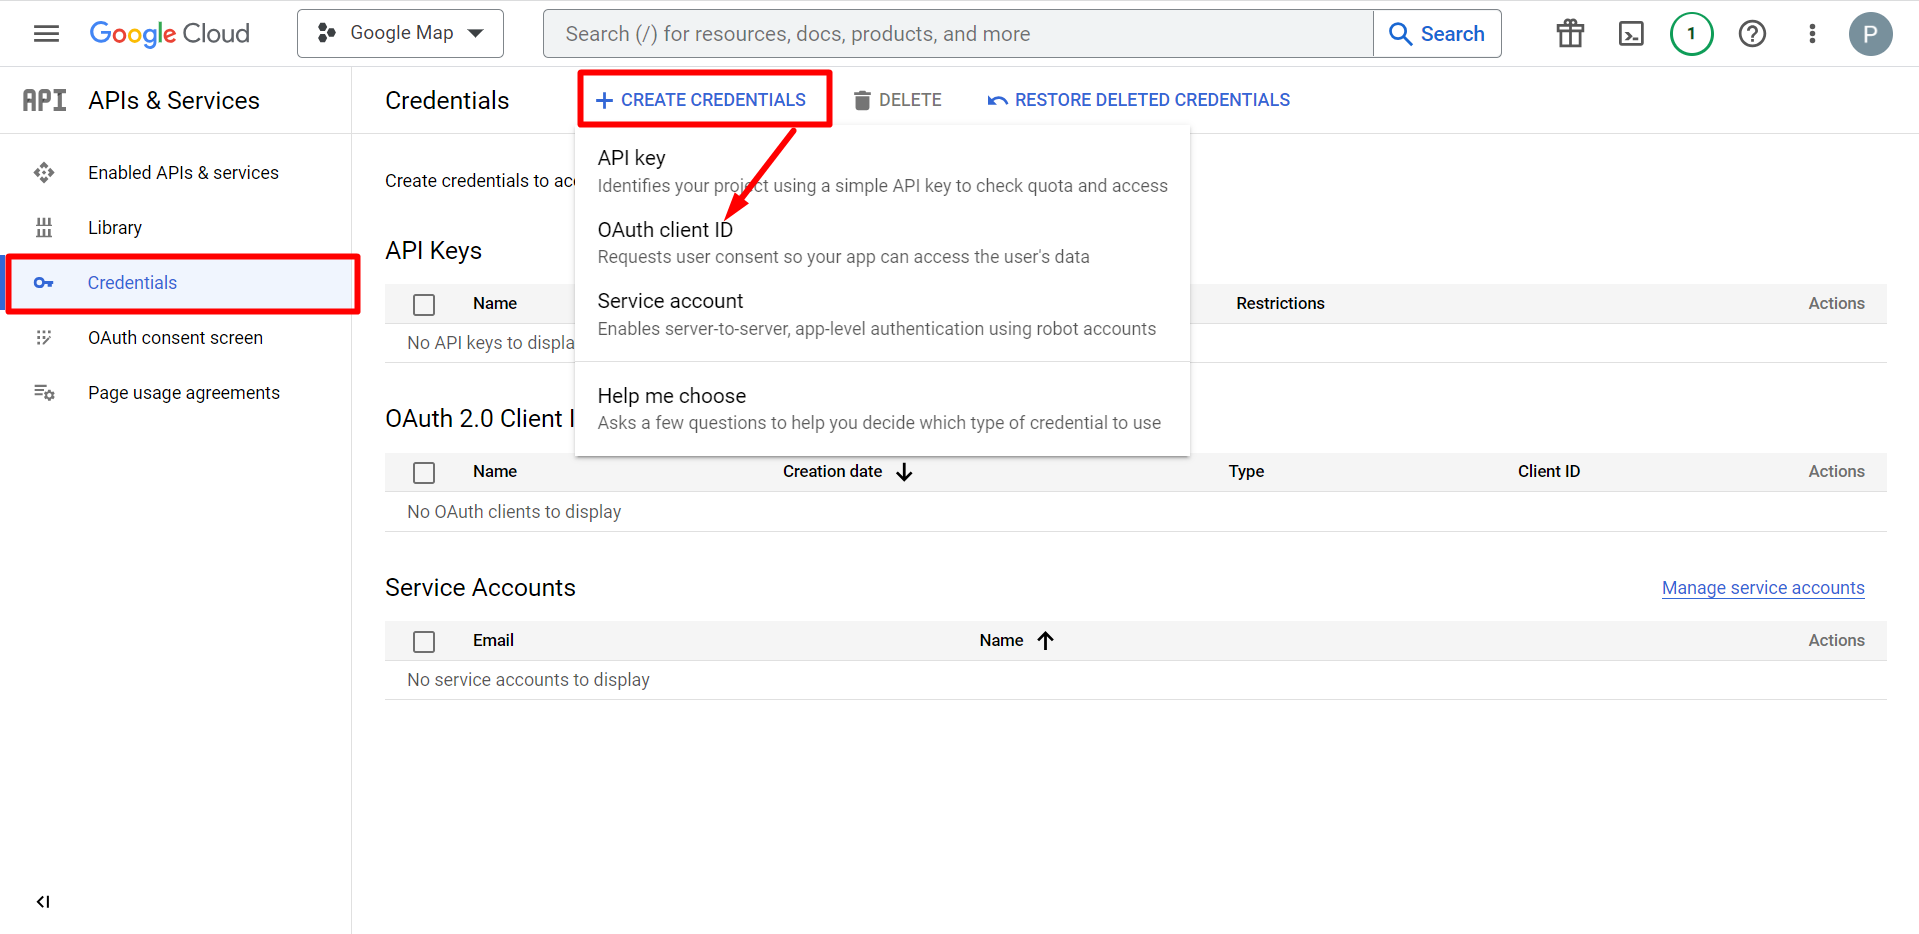
- 資格情報へ移動
- 資格情報を作成する
- OAuthクライアントIDを選択
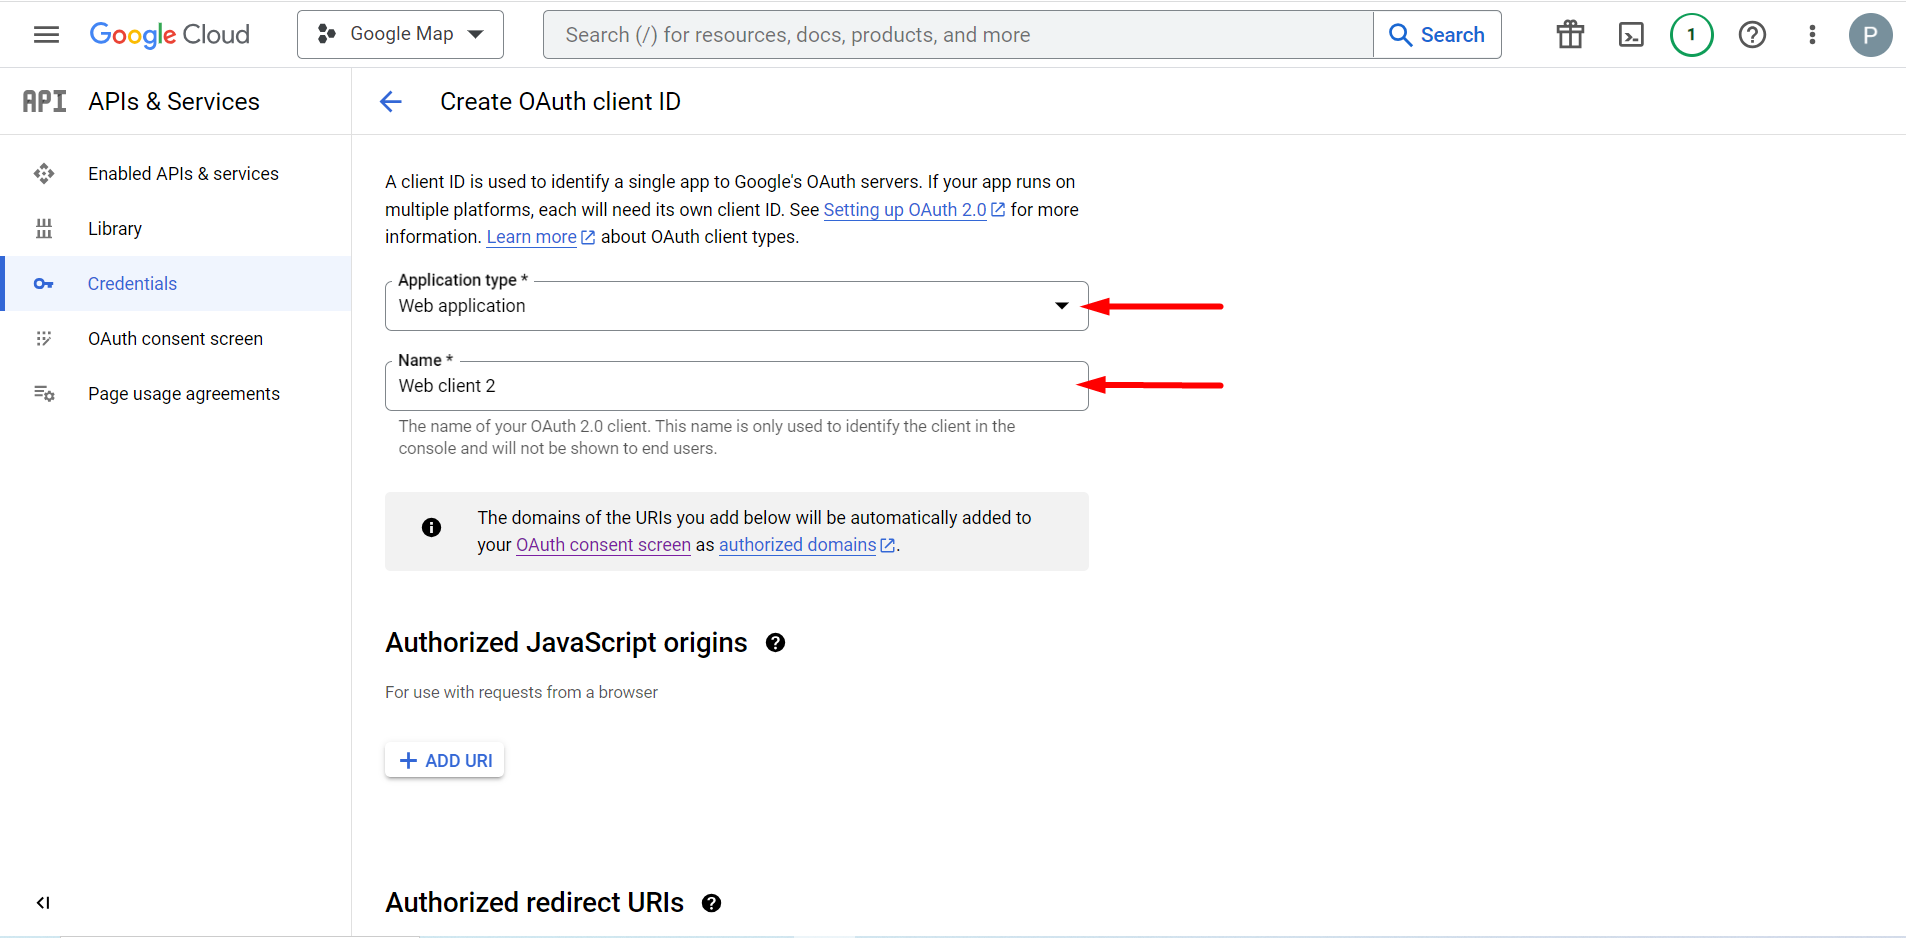
選択したアプリケーションの種類はWebアプリケーションです。名前入力フィールドに入力します。
クライアントIDが認証情報に追加されているので、確認することができます。
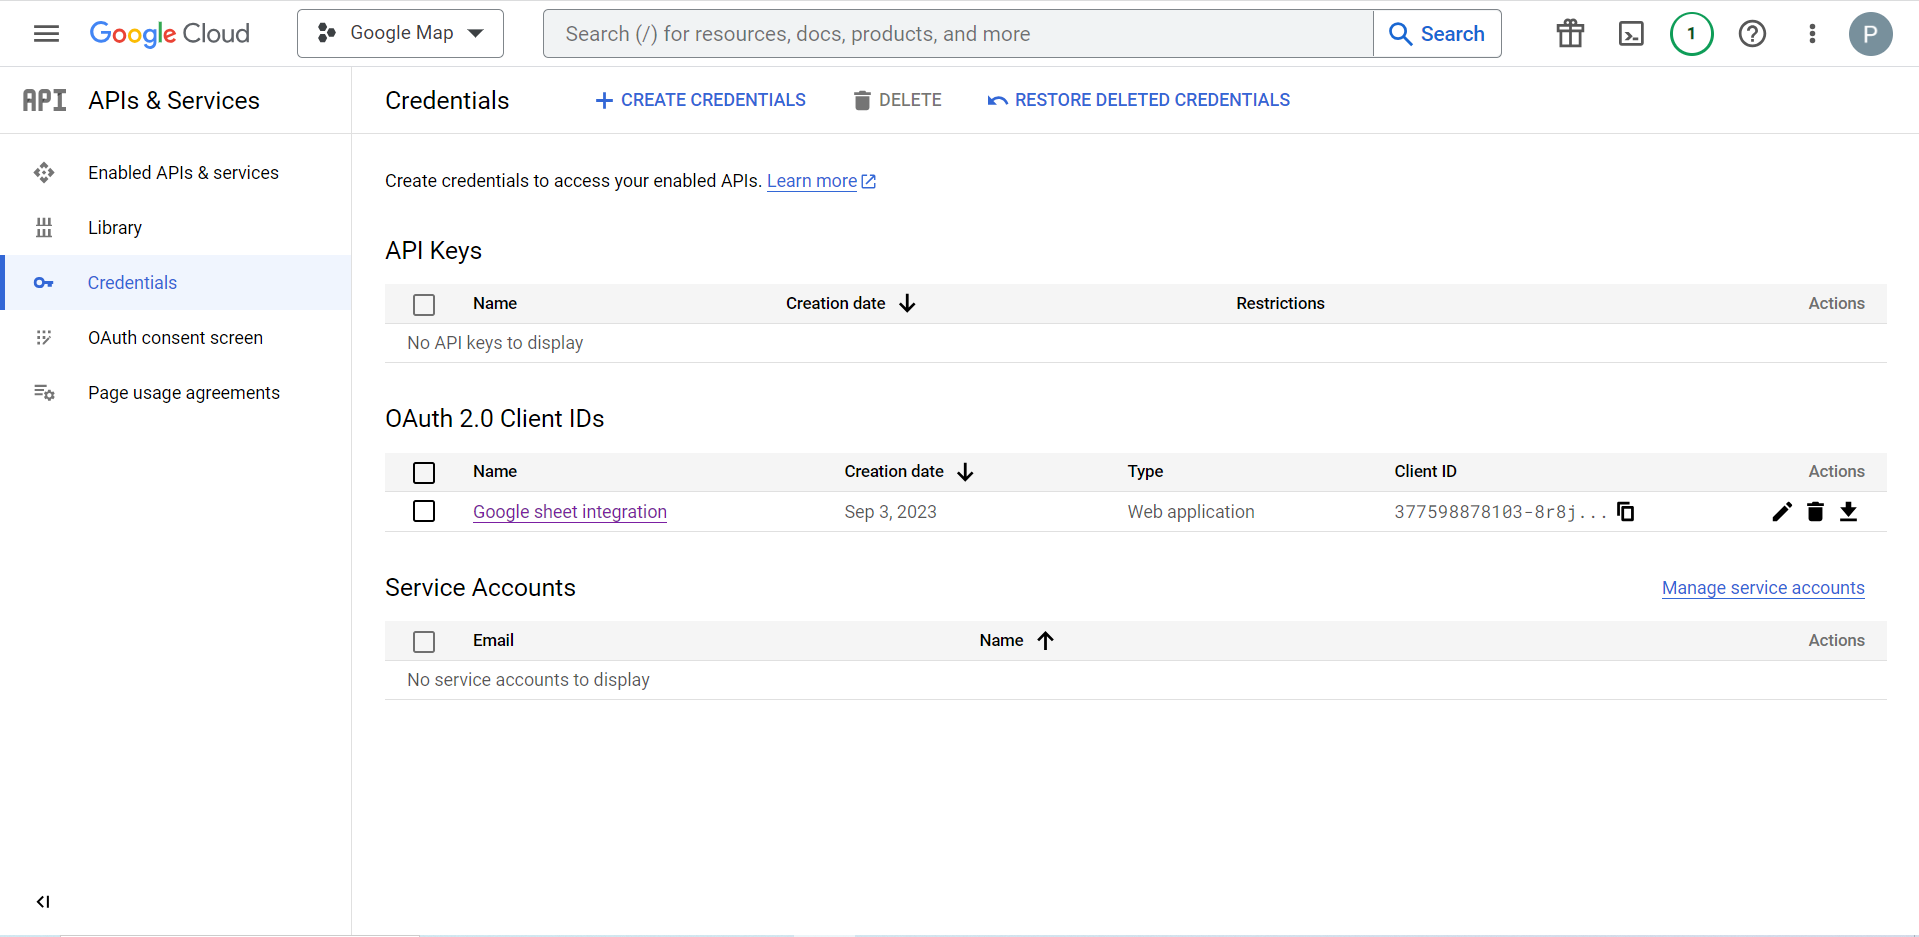
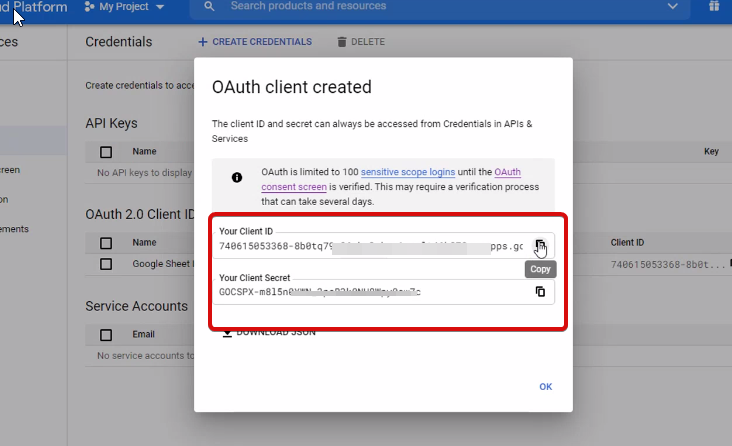
Now you will get the client ID and client secret, just copy them from here.
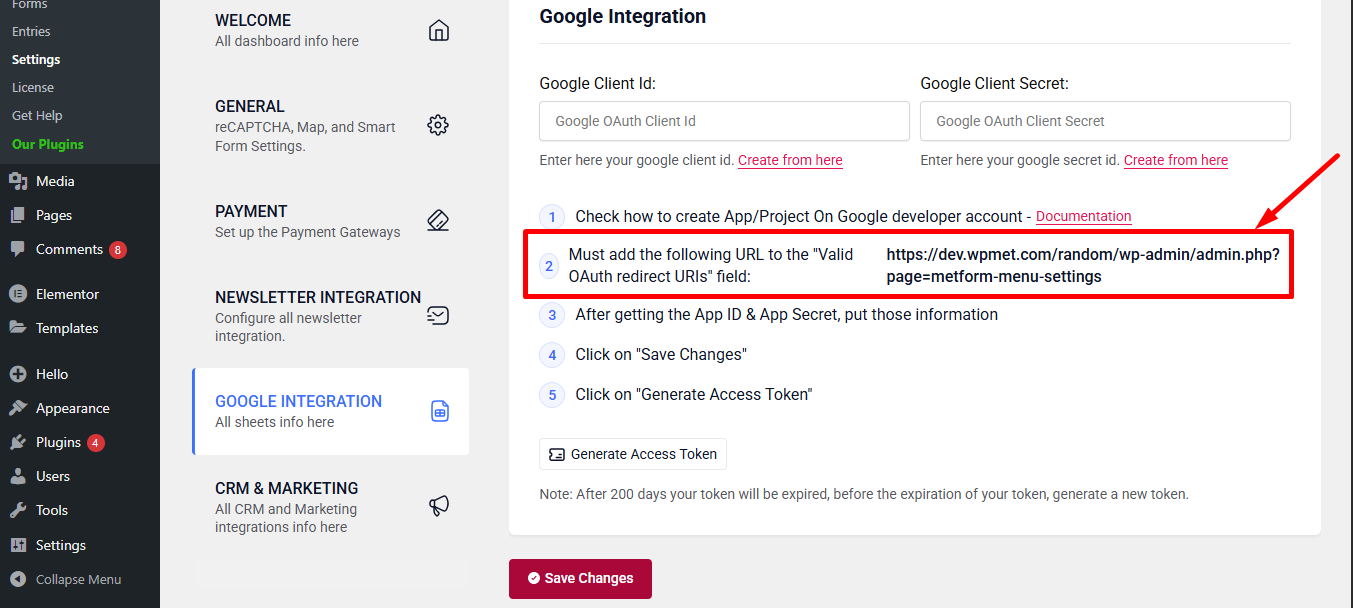
Step 2: Copy the URL From Metform’s Google Integration Tab #
この手順では、承認されたリダイレクト URI を追加する必要があります。リダイレクト URI は、MetForm の Google シート統合設定内で取得できます。
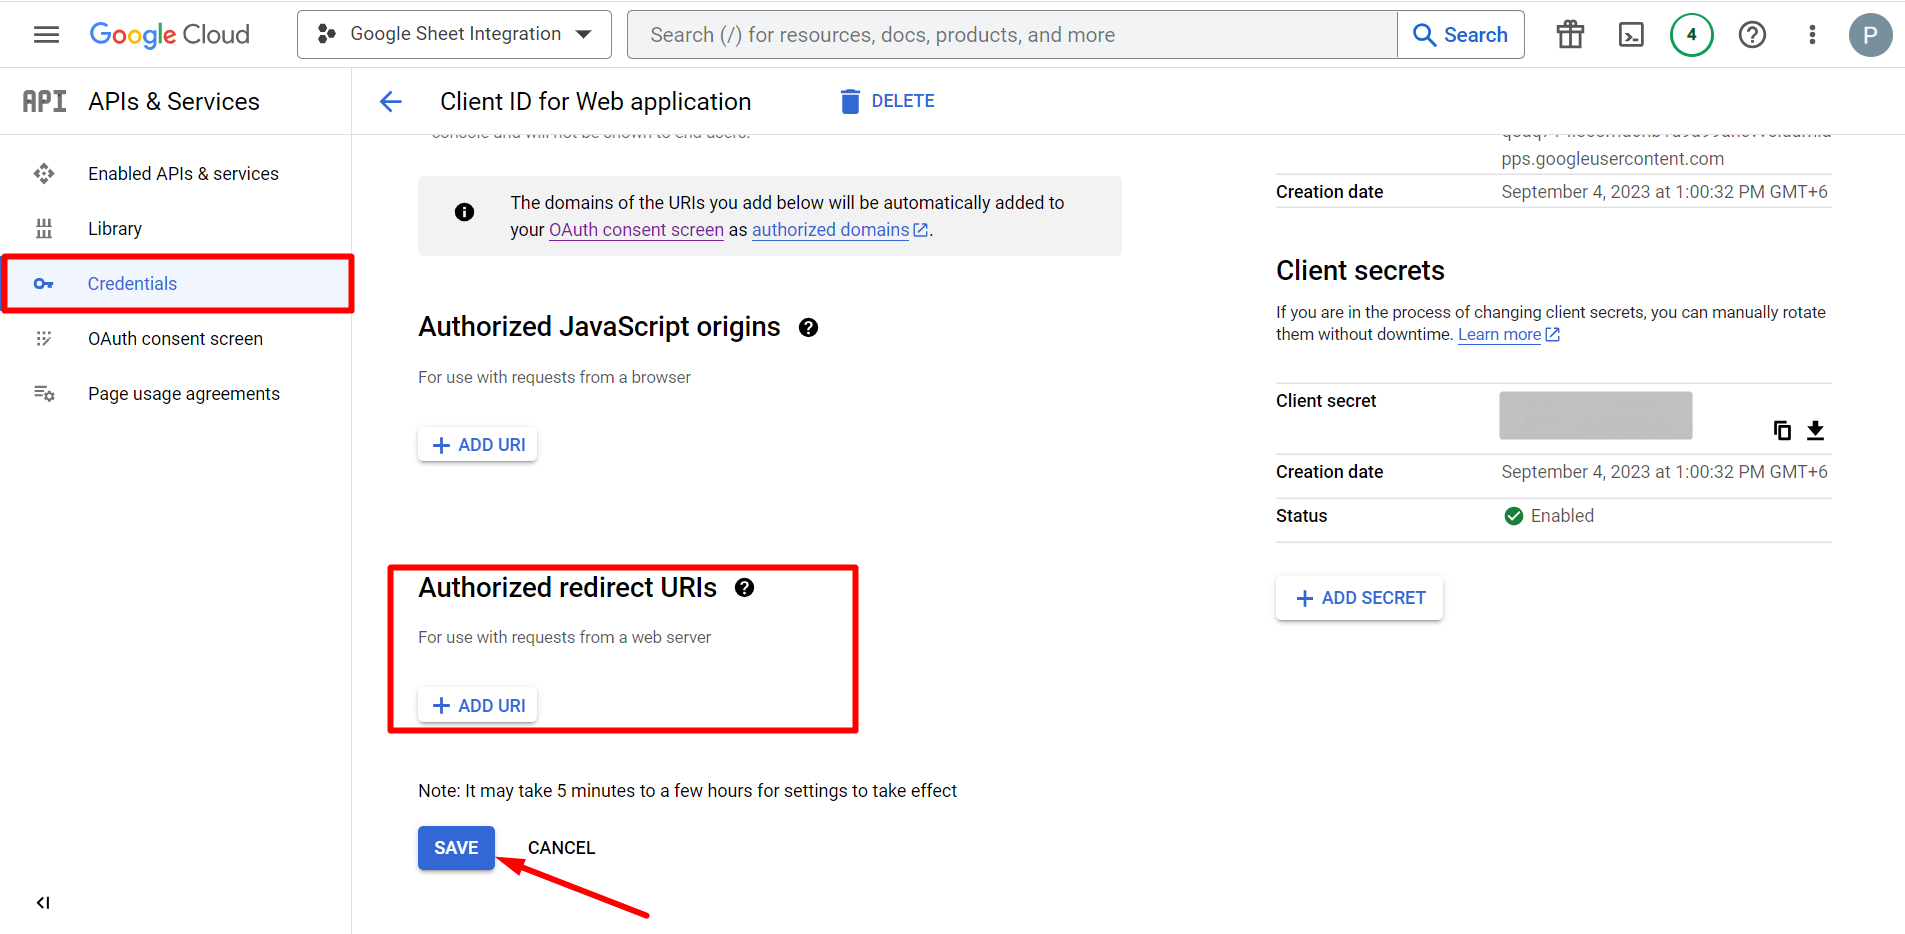
次に、 Credentials again > find Authorized redirect URIs > Add URI that you have just copied from Metform’s Google Sheet Integration settings
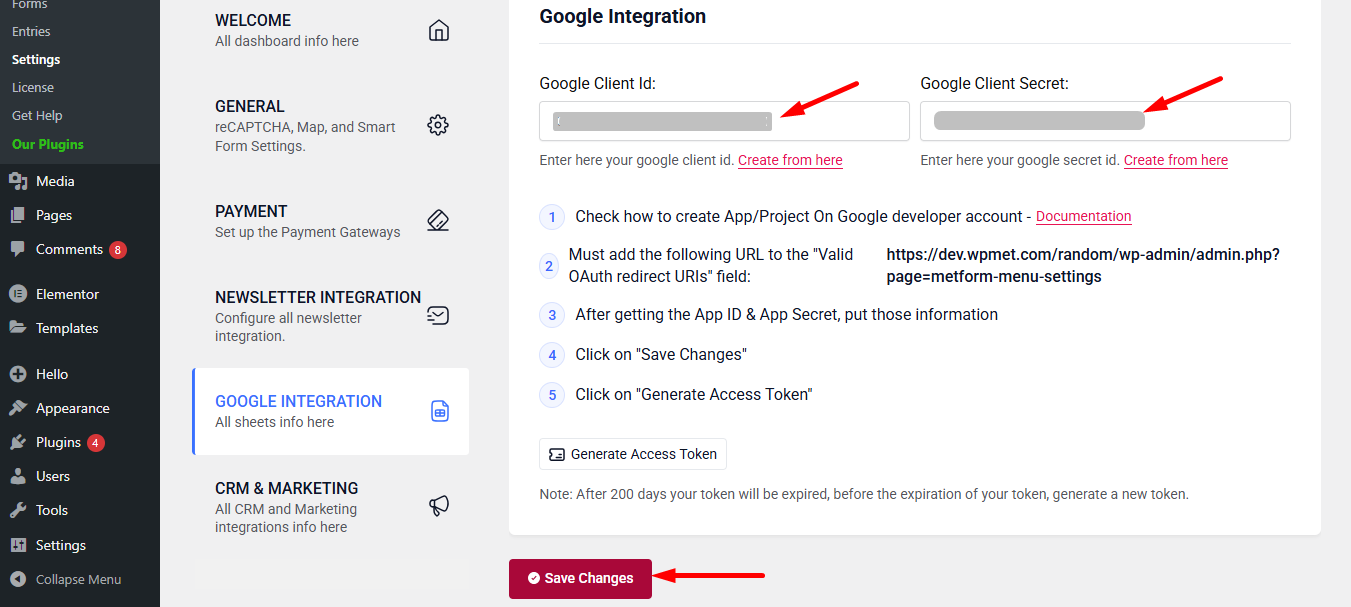
Step 2: Insert the Copied Ids #
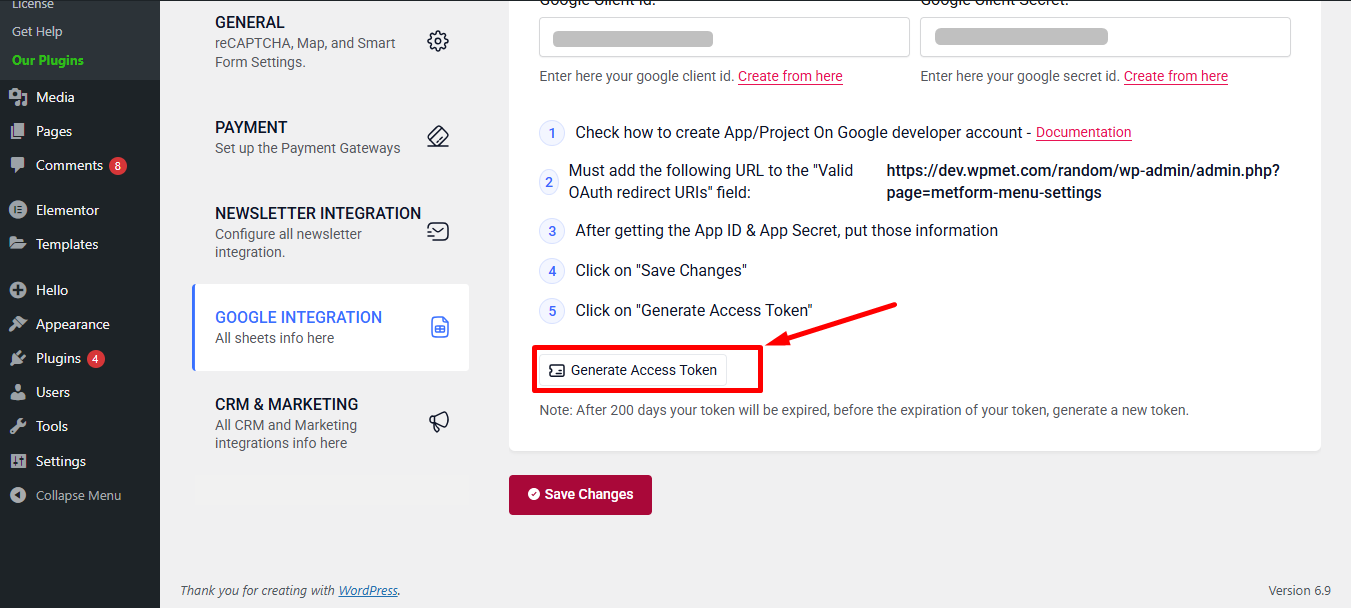
Now, return back to Metform’s Google Integration tab from your dashboard.
Here, you have to paste the copied Client ID and Client Secret in the fields and save changes.
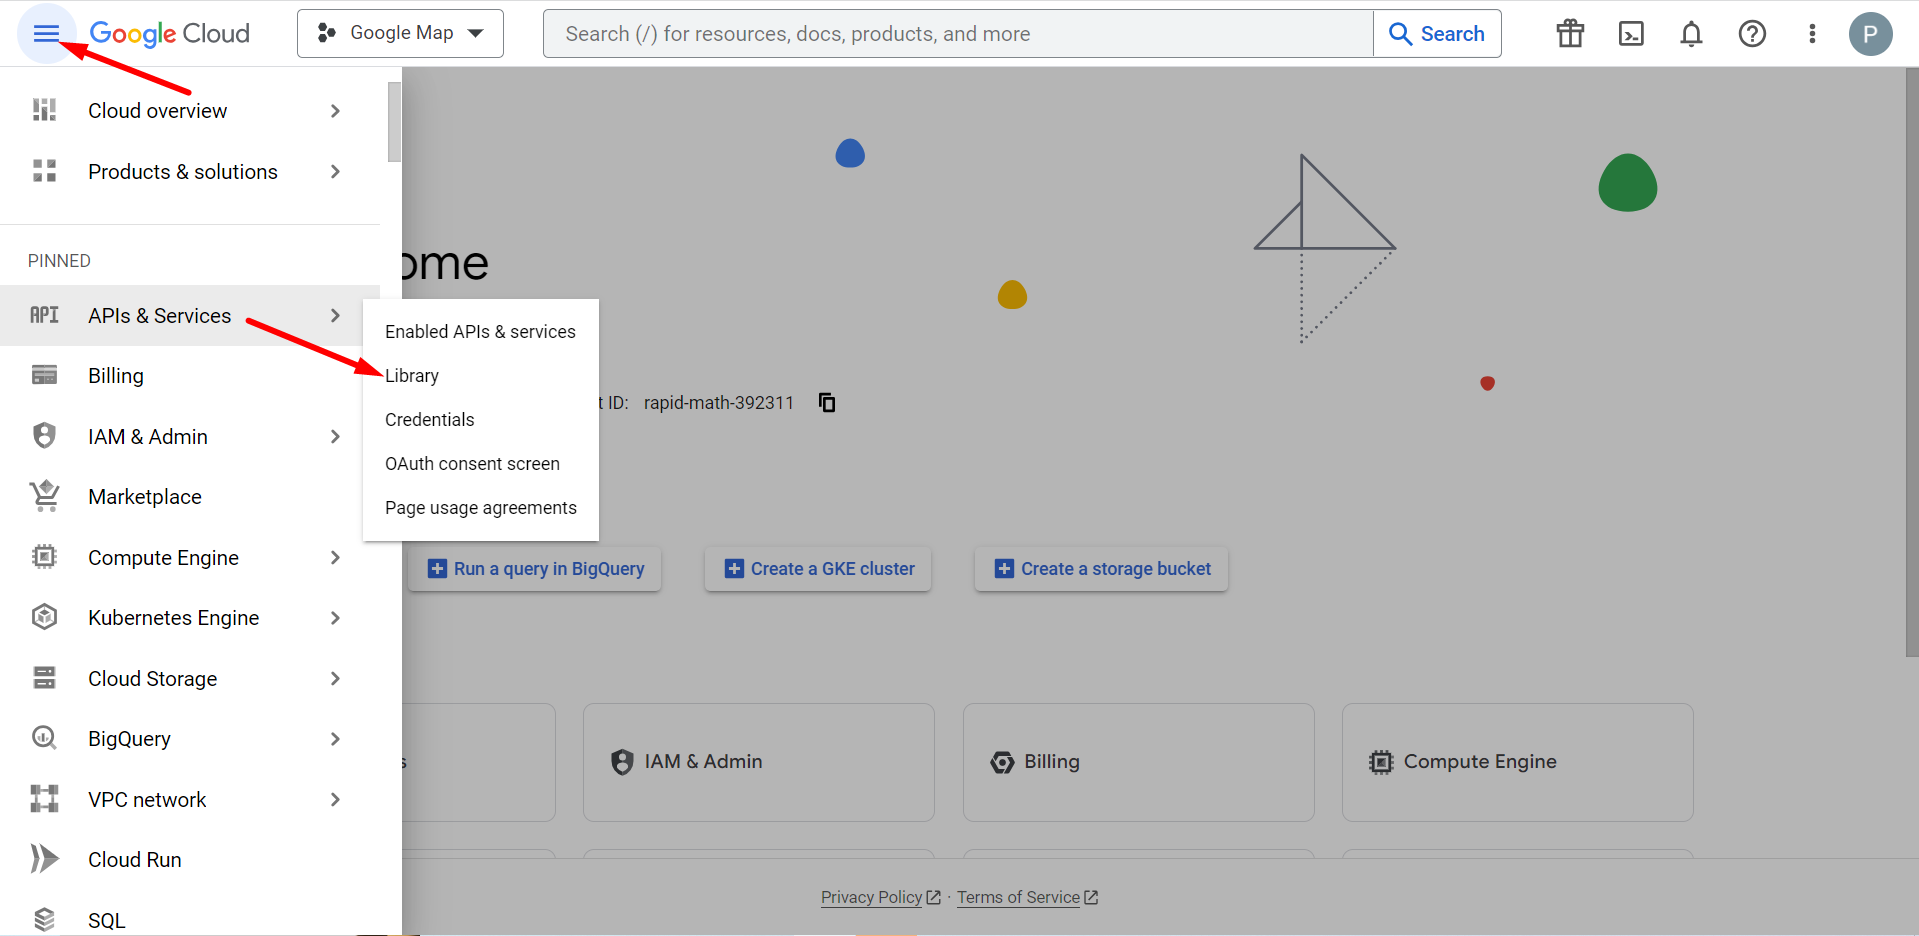
Step 3: Access Google Cloud console #
Now, select Library from APIs & Services
ここで、Google Sheets APIを有効にする必要があります
Step 4: Go to MetForm’s Google Integration Tab #
MetForm ダッシュボードに移動し、「アクセス トークンの生成」リンクをクリックします。
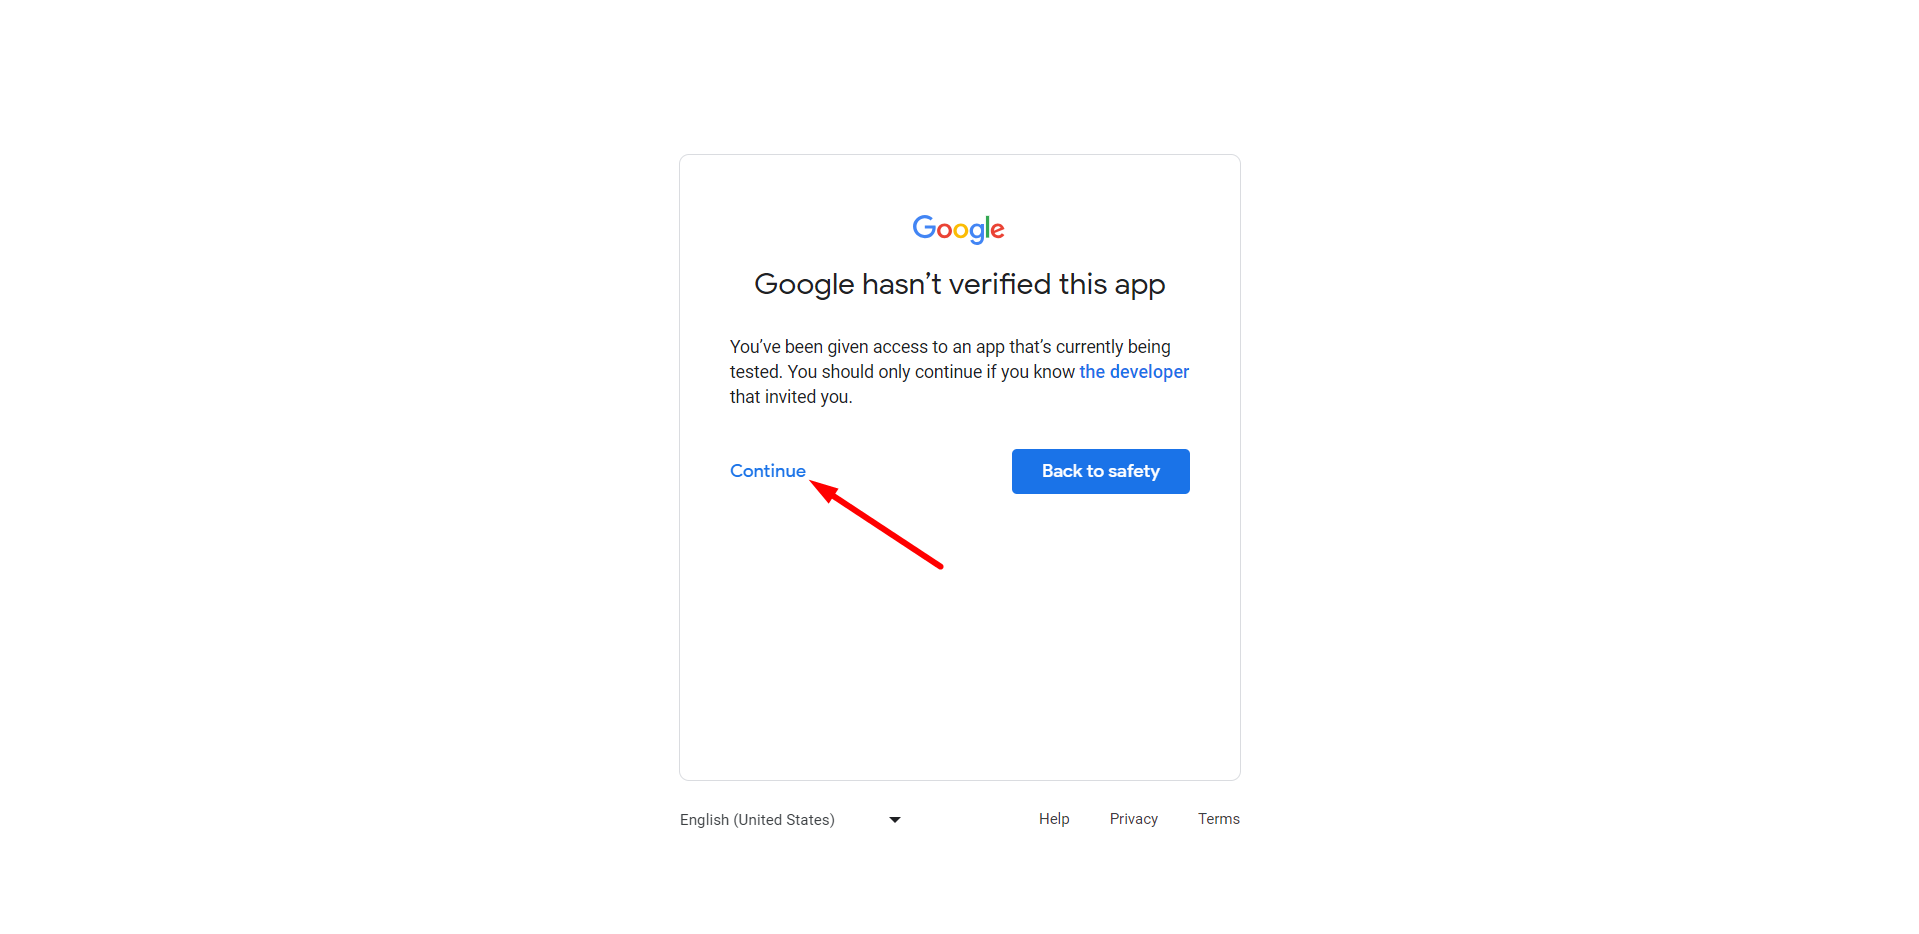
Gmailアカウントにログインして続行リンクを押します。ログイン後、Googleはこのアプリを検証していないと表示されます。心配しないでください。 続行をクリック.
Next, choose the form where you want integrate Google sheet and/or Google drive.
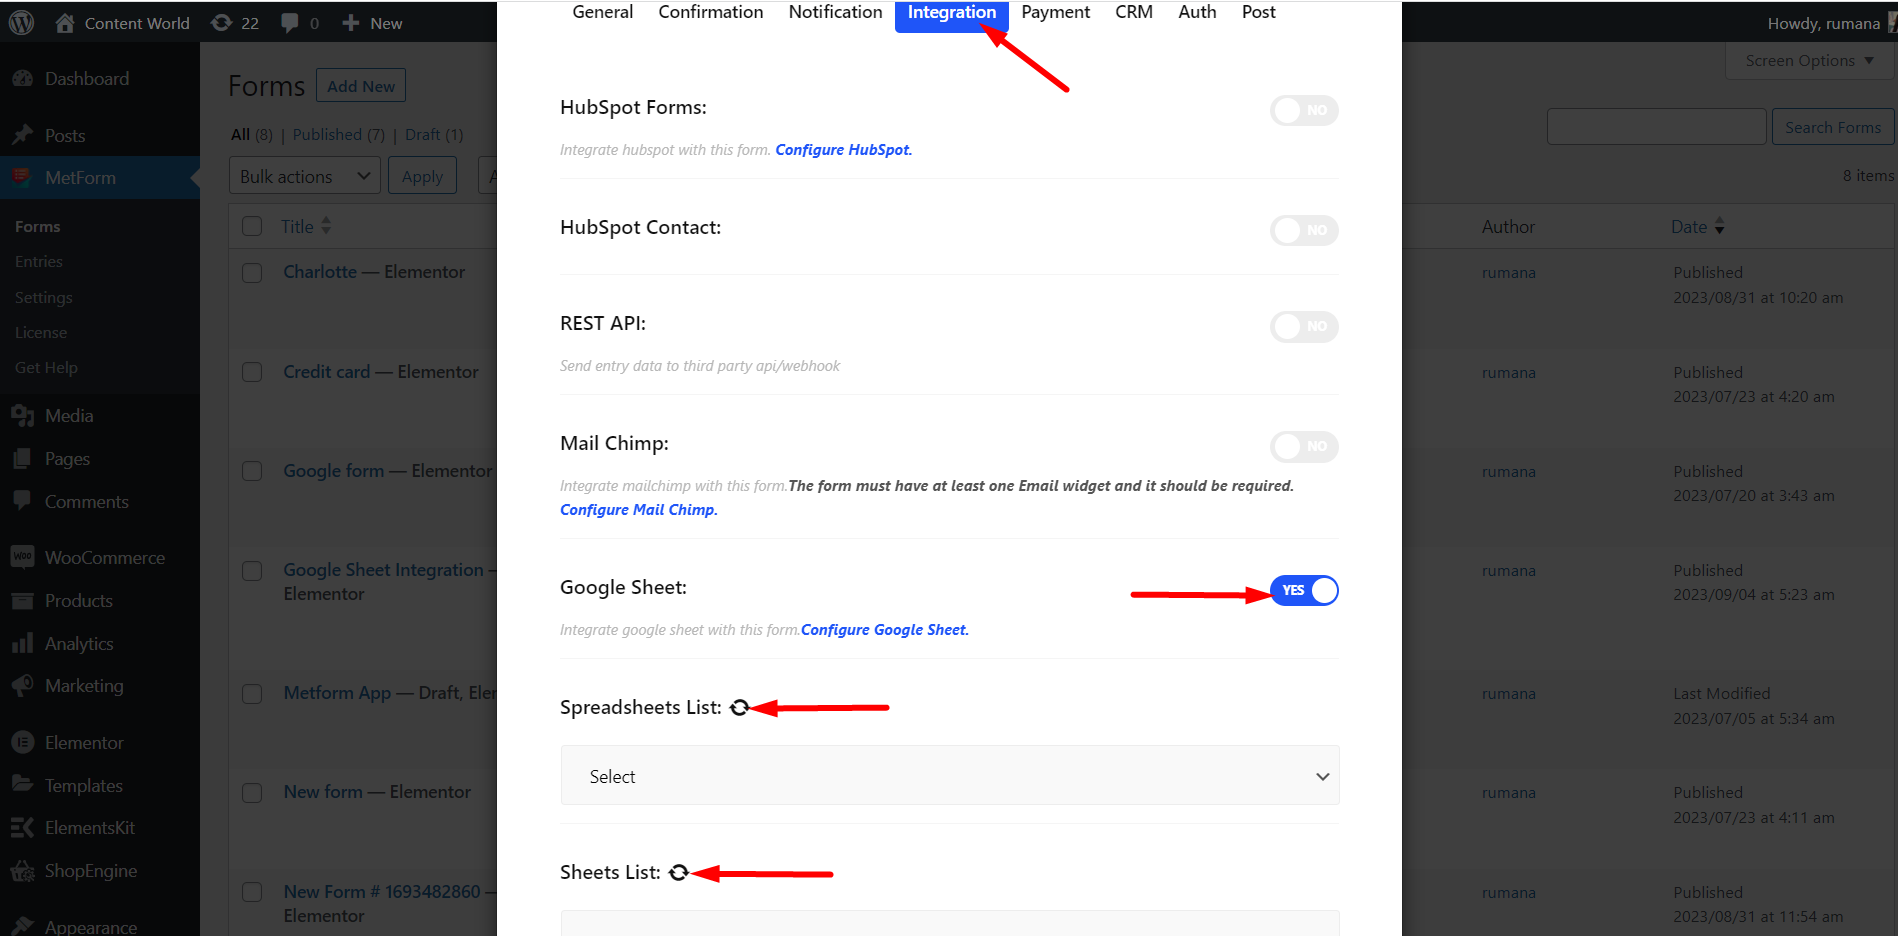
In the settings window, you need to turn on the Google sheet and/or Google drive integration options to use the form in your Google Sheet.
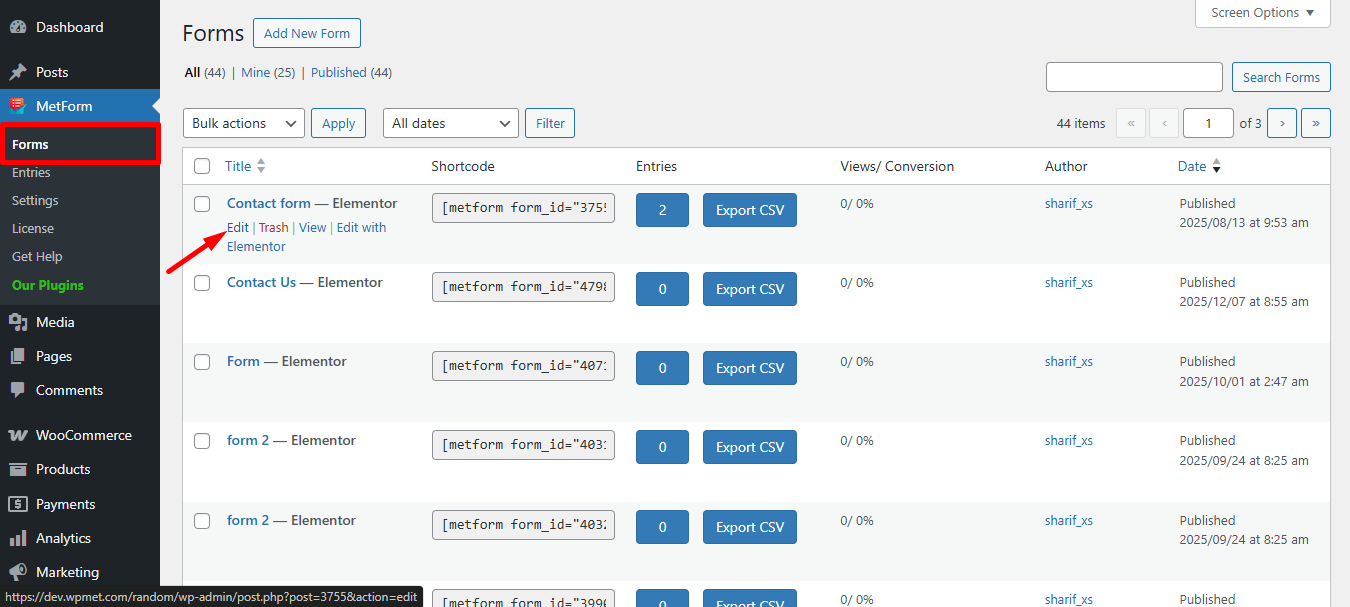
そうするためには、 ダッシュボード > に行く Metform > フォーム > クリック 編集 シートに追加したいフォームのオプション > 形状 設定 > 統合 > オンにする Google スプレッドシートオプション
最後に、2つのフィールドが表示されます。 スプレッドシートリストとスプレッドシートリスト更新すると スプレッドシートのリスト オプションを選択すると、ドライブのすべてのシートが表示されます。
Learn in-depth about how to connect WordPress forms to Google Sheets.


