


Sending a confirmation email after each form submission lets users know their form was submitted successfully.
It is an acknowledgment message that reassures users, outlines next steps, and keeps the overall experience clear and professional.
You can also send a copy of their submitted form with the confirmation email.
In this documentation, we have discussed how you can set up and send WordPress form confirmation email after submission with MetForm. So, check out this simple process for your WordPress site.
前提条件: #
To send a confirmation email on form submission you need to install the following plugins:
- エレメンター: プラグインをダウンロード
- MetForm プロ: プラグインを入手
👑 This is a premium feature. MetForm Pro を入手 to use this feature.
How to Send WordPress Form Confirmation Emails After Submission #
確認を設定するには、まず create a WordPress form. To create a new form, you can also check this documentation: creating forms with MetForm.
Also, follow this Video Tutorial:
Enable Confirmation Email for WordPress Forms #
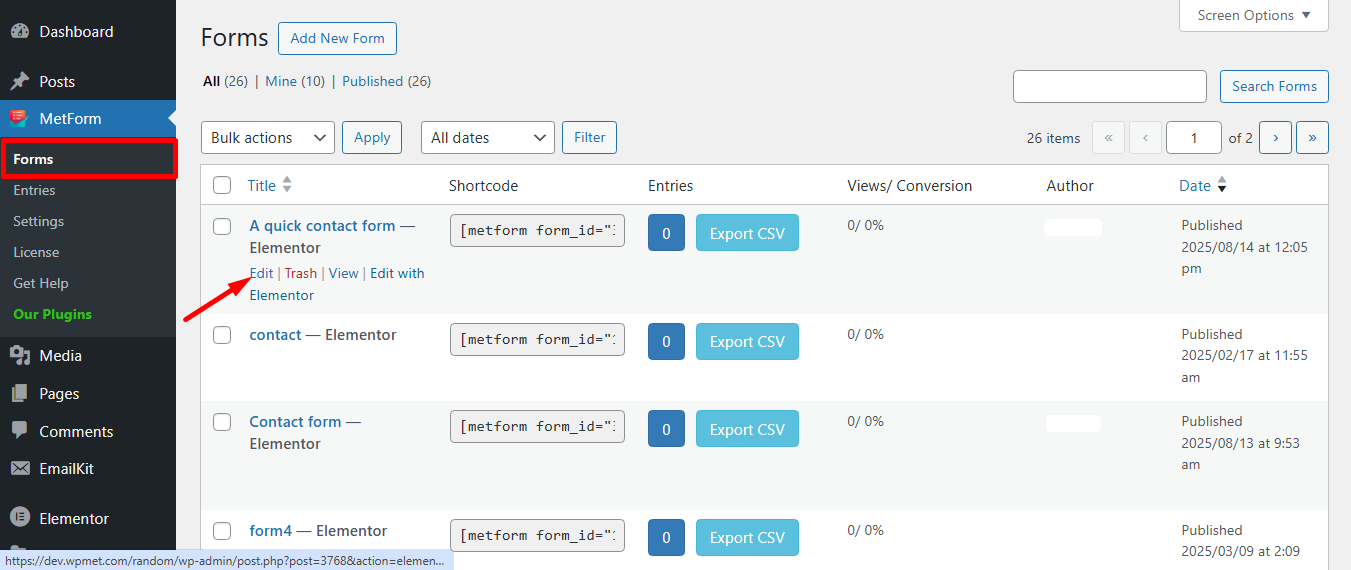
さて、 MetForm → Forms in your WordPress dashboard and click the 編集 option to open the Form Settings for the form you want to enable the confirmation email feature.
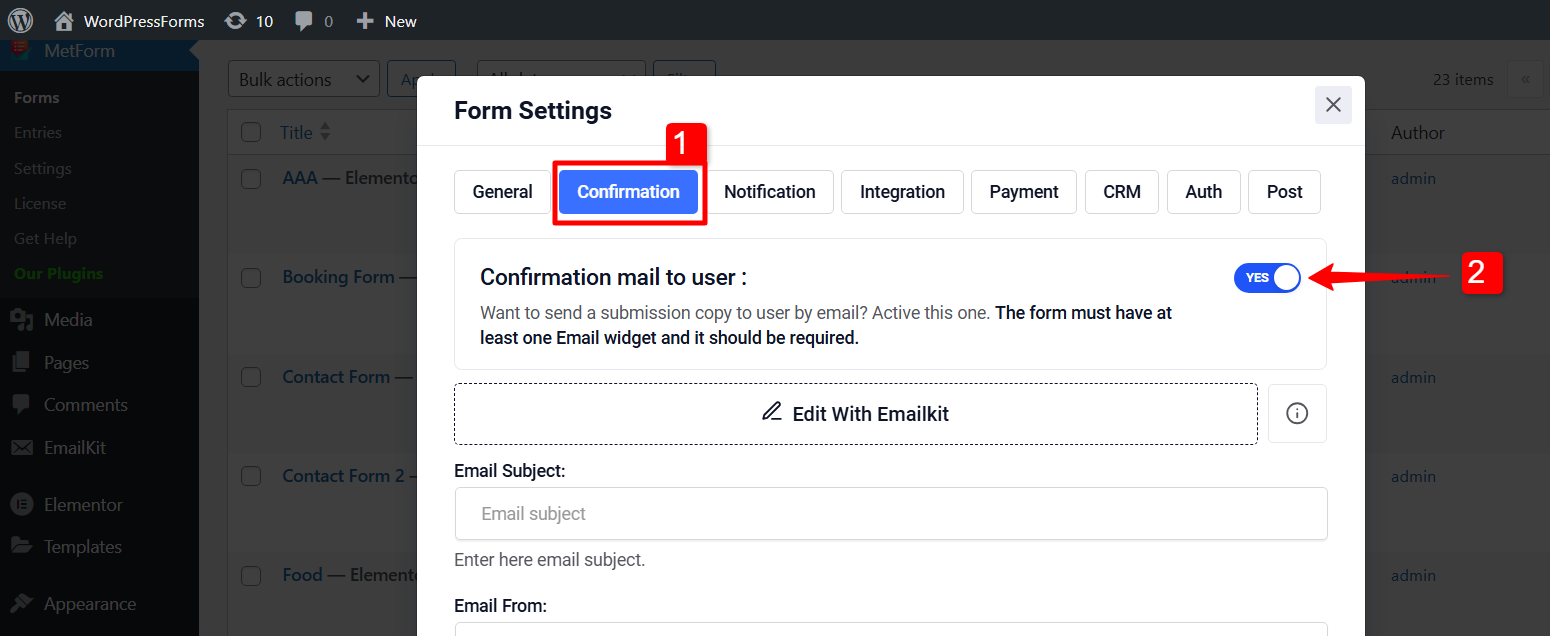
Now, you will see the フォーム設定 window. There,
1. Move to the Confirmation tab first in the form settings.
2. Enable ユーザーへの確認メール option there.
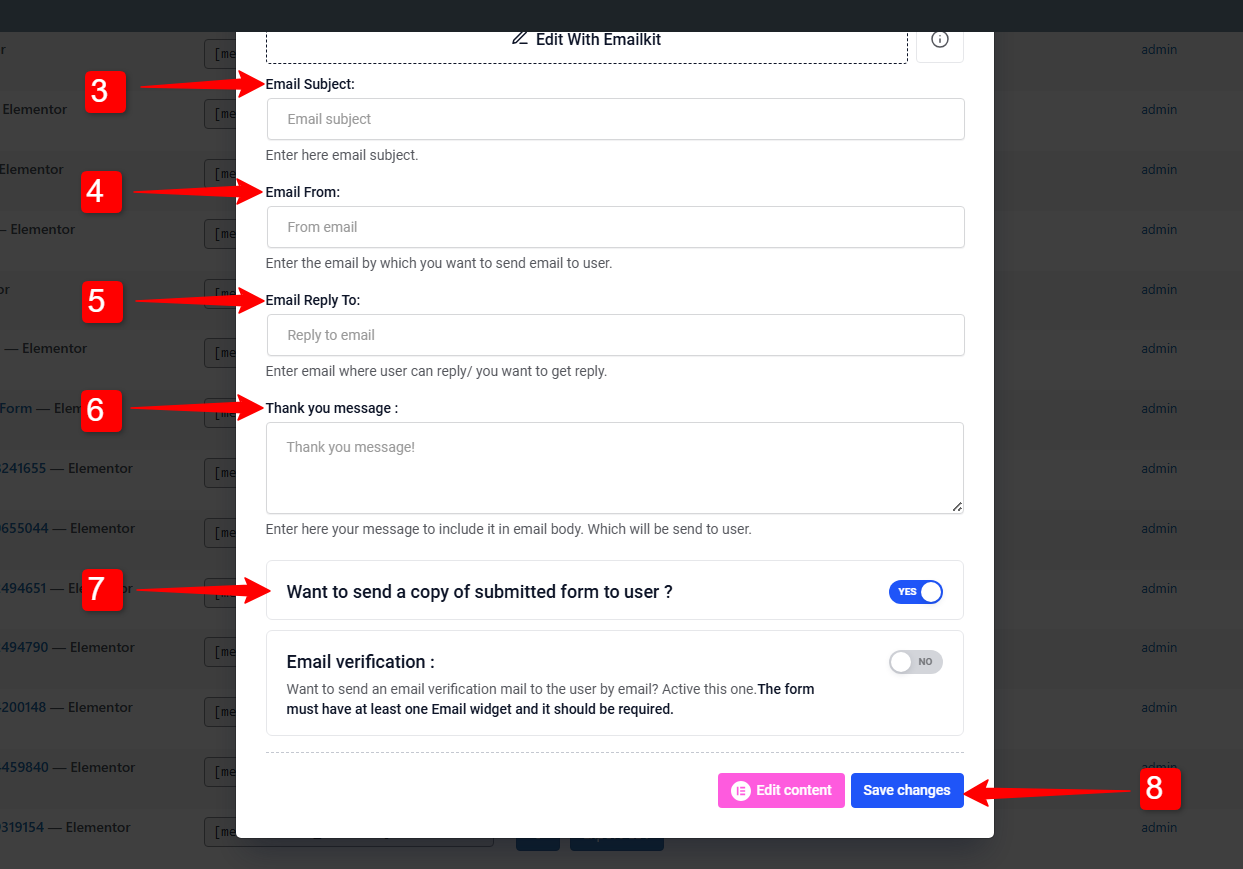
3. メールの件名: メールの件名を入力してください
4. メール送信者: ユーザーに電子メールを送信する電子メールを入力します。
5. 電子メールの返信先: Use it to set a different email address for replies.
6. 感謝のメッセージを入力してください: フォーム送信成功メッセージを編集して、独自のメッセージをカスタマイズできるようにします。
7. Want to send a copy of submitted form to user?: Sends a confirmation email to the user with a copy of their submitted information by enabling this button.
8. Ones done click on the 変更内容を保存 ボタン。
Send Custom Designed Confirmation Email for WordPress Forms #
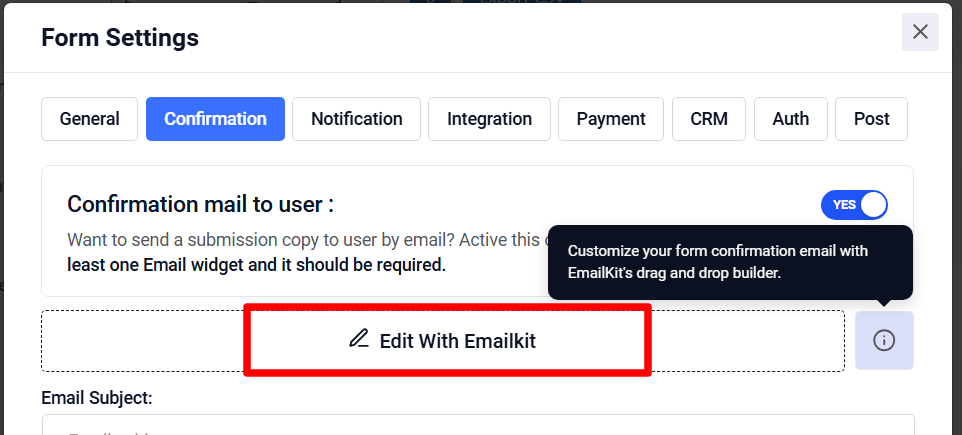
To send a custom designed email, you can click on the Edit With EmailKit. If you have the EmailKit plugin installed in your WordPress site, you will be taken to the EmailKit’s editor.
There you will abe to design and customize the whole look and feel of the of the WordPress form confirmation email.
これをチェックして EmailKit’s documentation for details: Customize Form Confirmation Email.
注記:
If you have EmailKit fress version installed, you can customize the confirmation email for only one form.
To customize the email for multiple forms、 メールキットプロ plan is required.
Confirmation email helps to boost relationships with new visitors and clients. You can send these emails easily with MetForm. So, get MetForm today, follow the above steps and you are done.


