


ShopEngine allows you to design a fully customized single product page for your WooCommerce store using Elementor. By creating a Single template from the Builder Templates section, you can control the layout and apply it to all product pages automatically.
Watch the video:
Quick Steps to Create #
- Install & Activate – Ensure ShopEngine and Elementor are installed and active on your WordPress site.
- Create a Template – に行く ShopEngine → Builder Templates, click 新しく追加する, enter a name, and 選択する シングル as the template type.
- Set as Default – Enable the Default option if you want the template applied to all single product pages.
- Edit with Elementor – クリック Elementorで編集する to open the visual builder.
- Add ShopEngine Widgets – Drag and drop widgets like Product Image, Title, Price, Description, Add to Cart, and Additional Information to build your layout.
- Save & Apply – Publish the template to activate the custom design across your store.
For detailed guide, check the steps below.
単一商品ページテンプレートを作成する方法 ShopEngineで #
ShopEngine offers Single Product Widgets including Product Title, Product Image, Product Price, Product Description, Add to Cart, Product SKU, etc. Using these widgets, you can easily set up your single product page template in your desired way. Just follow the step-by-step process to create & beautify your single product page template:
ステップ1: 単一製品テンプレートを作成する #
- に行く ショップエンジン-> ビルダー テンプレート > 新しく追加する.
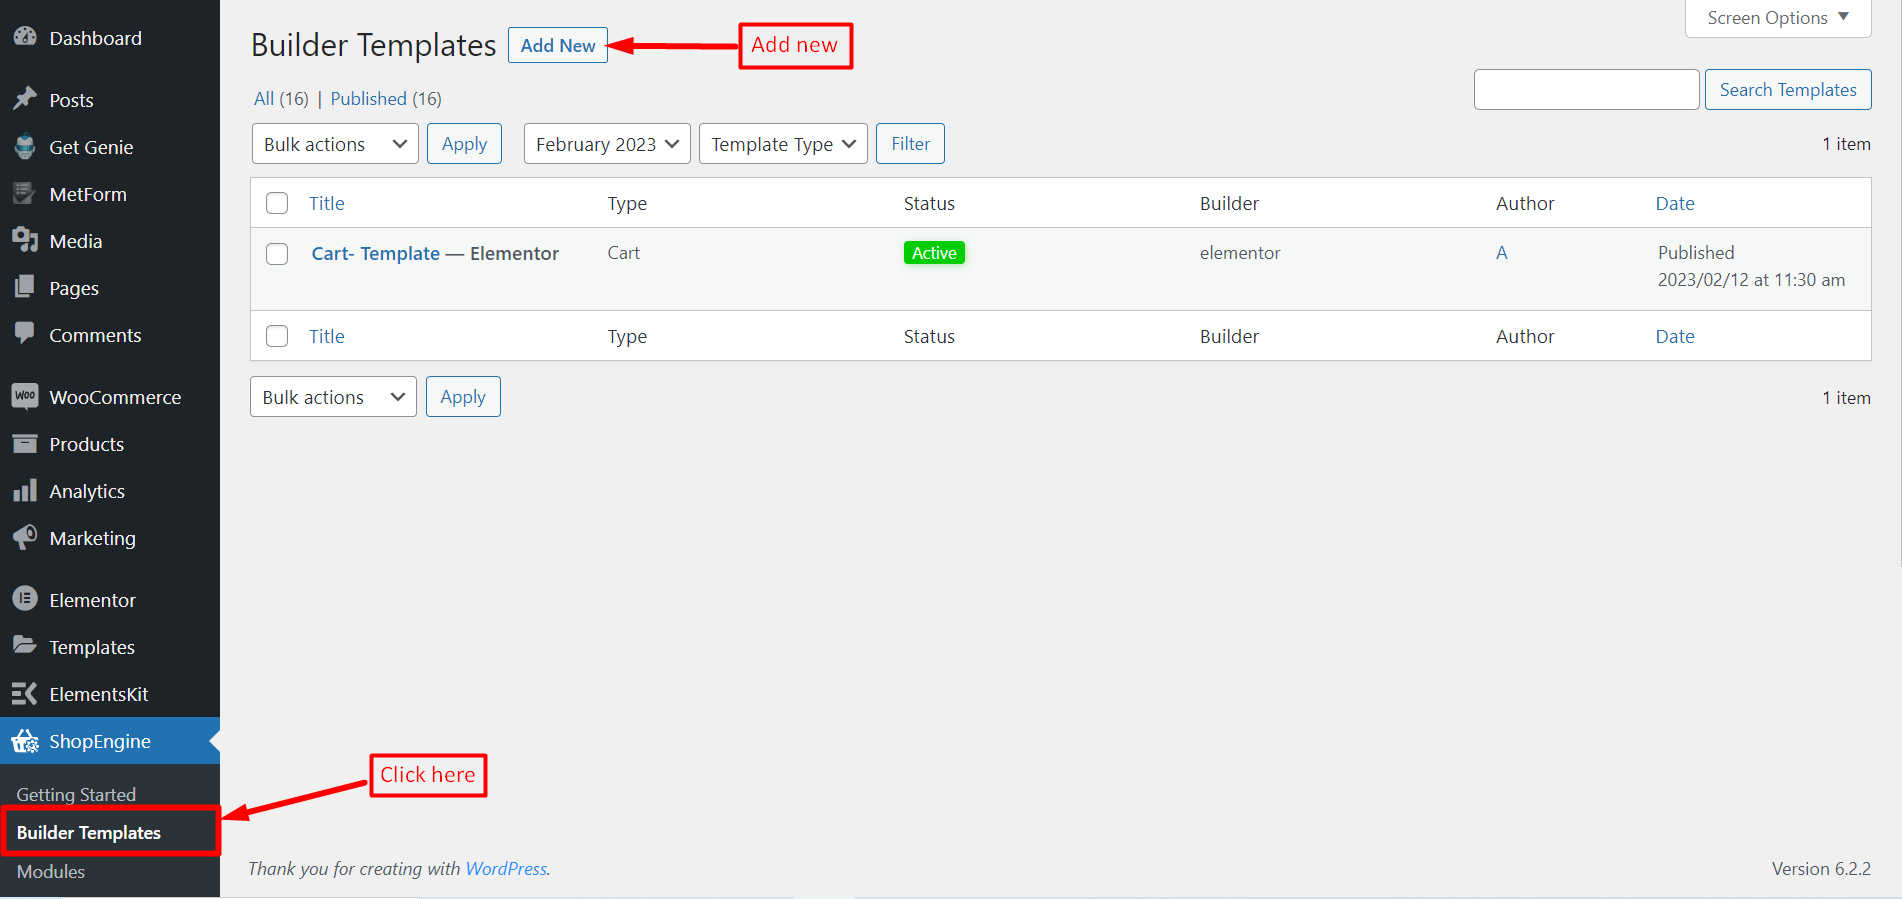
- 入力します 名前 テンプレート用。
- ページを選択してください タイプ として "シングル".
- 選ぶ 該当するカテゴリー.
- アクティブを有効にすると はい.
- 利用可能なテンプレートからデザインを選択するか、単一の製品ページ ウィジェットを使用してデザインを作成します。テンプレートの作成を最初から説明します。
- テンプレートの編集に使用するエディターを次のオプションから選択します。 エレメンター そして グーテンベルク.
- 今すぐクリックしてください 変更内容を保存.
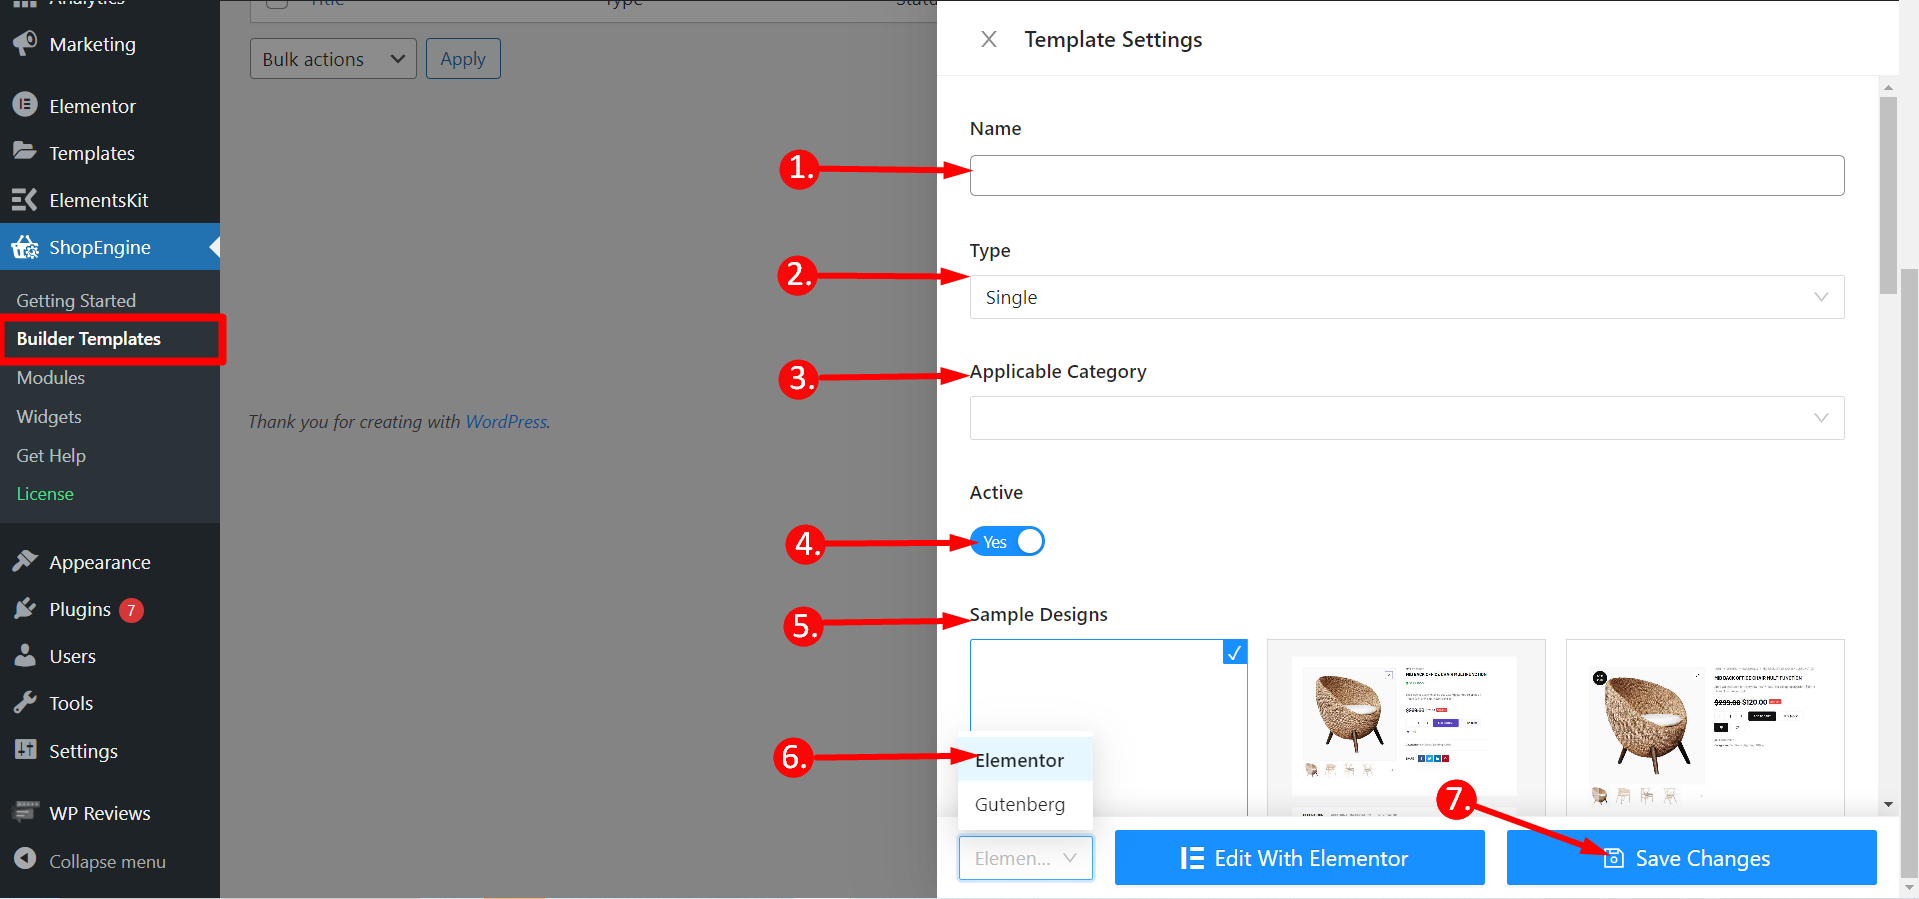
ステップ2: エディター(ElementorまたはGutenberg)でテンプレートを編集する #
その後すぐに、テンプレートが作成され、テンプレートリストの上部に表示されます。テンプレートを編集するには、選択したエディターの編集オプションが表示されます。たとえば、Elementorを選択した場合は、 Elementorで編集する。 Gutenberg を選択すると、次のオプションが表示されます。 グーテンベルクで編集する。ここではElementorエディターを選択しました。
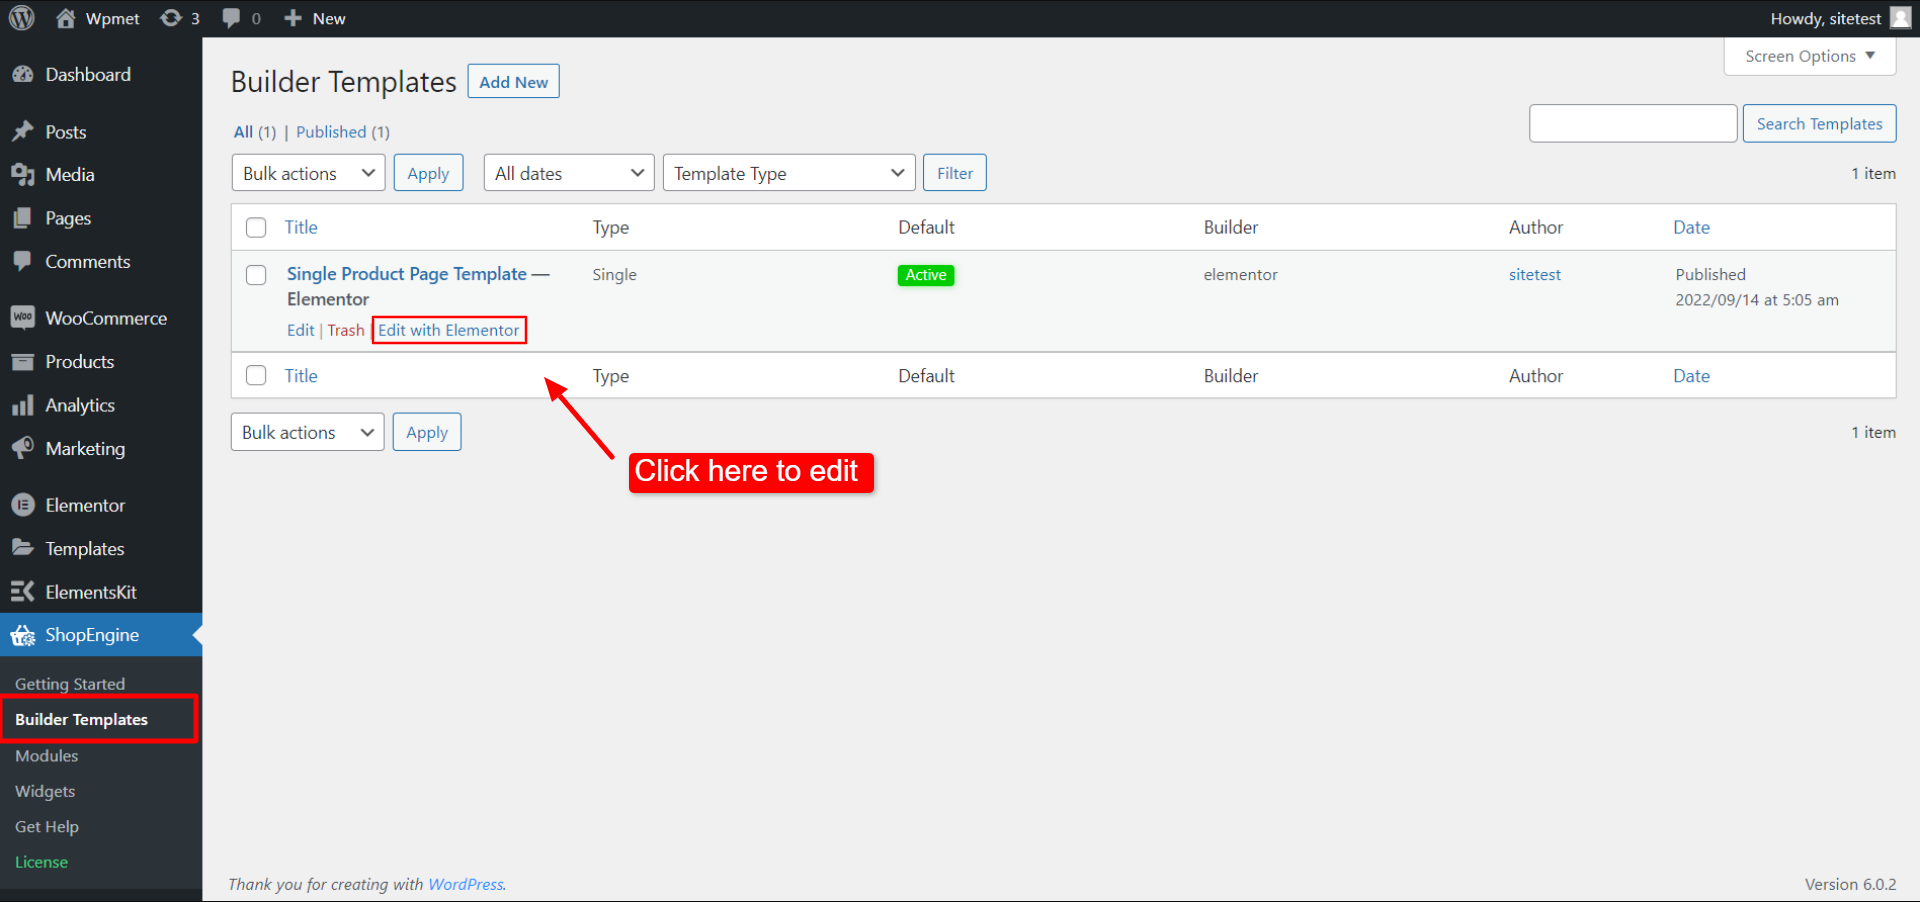
ステップ3: 選択した製品でテンプレートを編集する #
これはShopEngineのWooCommerce向け特別機能です。 特定の製品を選択する に customize the Single Product page template. When you click on “Edit with Elementor” (or Edit with Gutenberg), a popup will appear where you can 選択した製品によるテンプレート編集。ポップアップ上で、
- 商品を選択してください ドロップダウンリストから。
- クリック Elementorで編集する をクリックしてテンプレートの編集を開始します。
- また、次のこともできます 新しい製品を作成する テンプレートを編集します。
このオプションは、製品ビューページからも使用できます。ページ上部の管理バーに移動します。 Elementorで編集 > 単一商品ページテンプレートこの製品ではテンプレートを編集することができます。
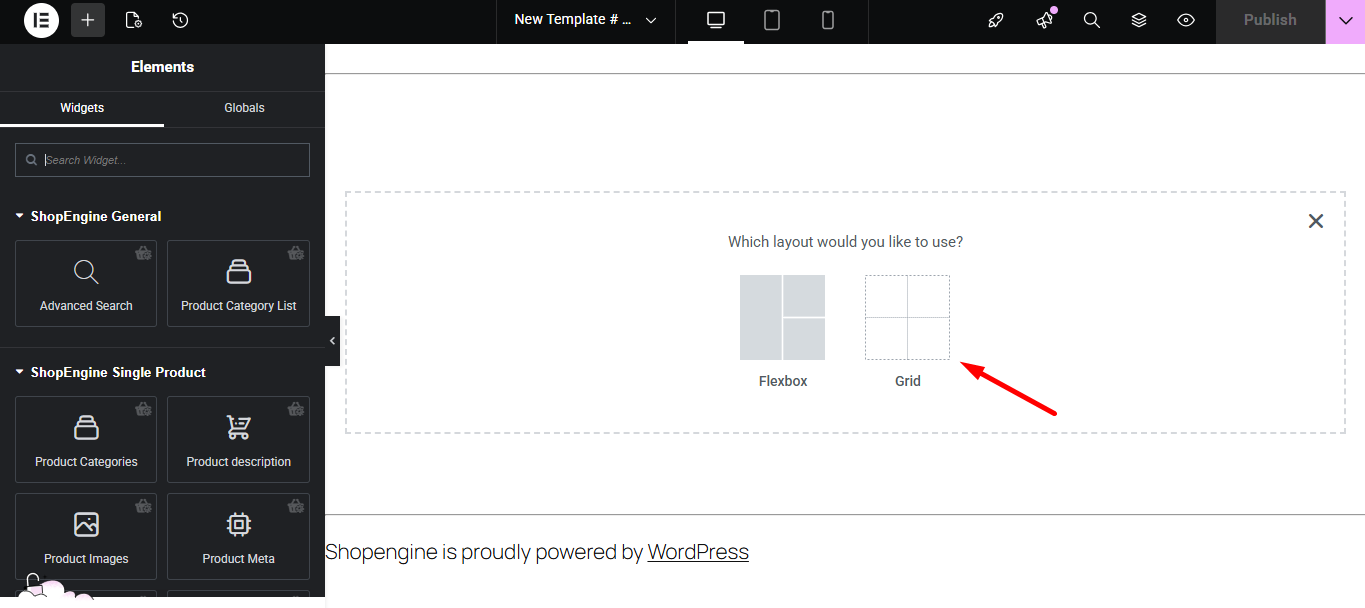
ステップ4: 構造を選択する #
- 選択したエリアから構造を選択します。
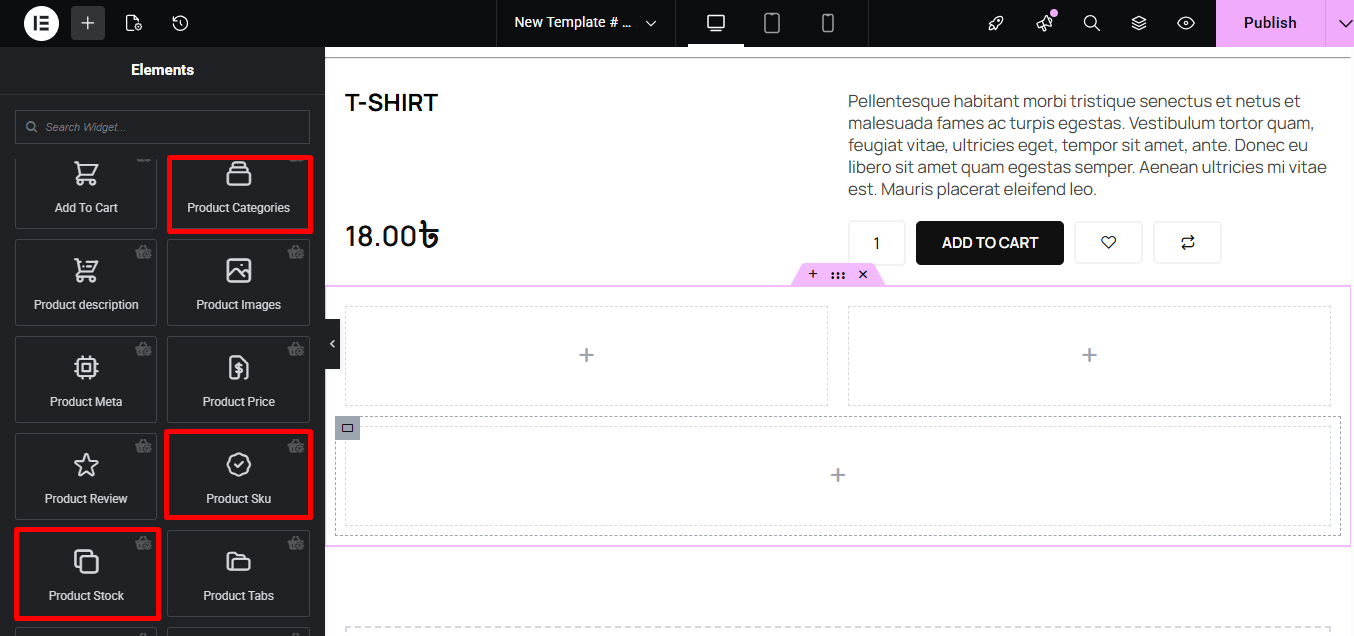
ステップ5:単一商品ウィジェットで単一商品ページテンプレートを美しくする #
ShopEngineのシングル商品ブロックに移動して、独自のデザインを作成できます。ここでは、いくつかの特定の製品が表示されます。 ショップエンジンシングル ウィジェットを含む 製品タイトル、製品画像、 製品価格, 製品説明, カートに追加、 製品SKU, 等カスタマイズ方法を見てみましょう。
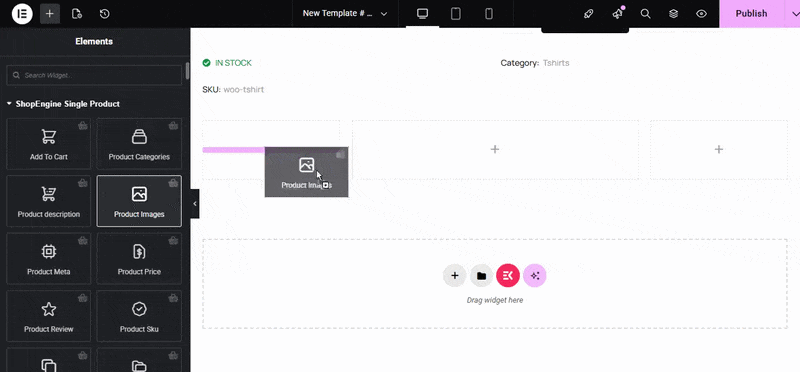
次のウィジェットをドラッグして 落とす 選択したエリアに.
- 製品タイトル.
- 製品価格.
- 製品説明.
- カートに追加.

- 追加情報.
- 製品SKU.
- 製品カテゴリ.
- 製品在庫.
- 製品画像。
- 製品タブ.
- 関連製品.
ステップ6: 単一製品ページテンプレートを公開する #
- デザインが完了したら、 をクリックします。 アップデート.
- どれかをクリックして 単一製品->ご希望の製品が表示されます シングル それに応じて製品ページが表示されます。
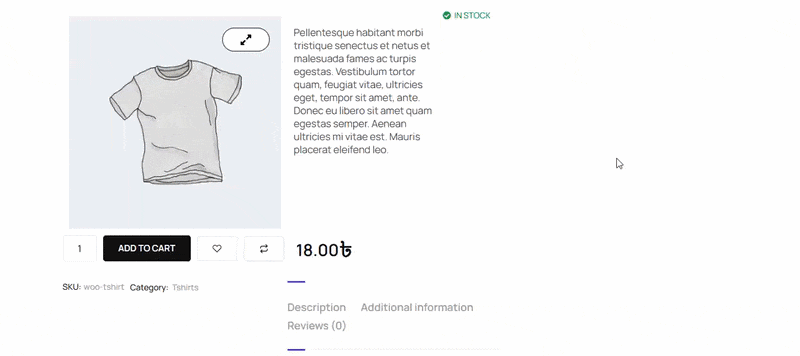
これで、単一製品ページ テンプレートの作成は完了です。非常にシンプルでわかりやすいです。ShopEngine は、WooCommerce サイト用の単一製品ページ テンプレートを構築するために必要なものをすべて提供します。


