


If you want to boost the revenue for your WooCommerce store, cross sell popup is a great option. ShopEngine has made it easy with its cross sell popup module. If you want to integrate the WooCommerce cross sell popup, follow the instructions shared in this doc.
Quick Overview
This documentation will walk you through the process of displaying cross sell popup on your eCommerce store using a user-friendly plugin such as ShopEngine. ShopEngine is a WooCommerce builder that comes with a dedicated cross sell popup module.
必要なプラグイン: Elementor (free), WooCommerce (free), & ShopEngine (free & pro)
The process is very simple. You need to install the needed plugins, then integrate cross sell popup by following the below 3 steps:
- Turn on Cross Sell Popup module
- Add cross sell products
- Check WooCommerce cross sell product display
WooCommerce のクロスセルポップアップを有効にする方法は? #
WooCommerce ストアの任意の製品にクロスセル オプションを統合するには、次の手順に従います。
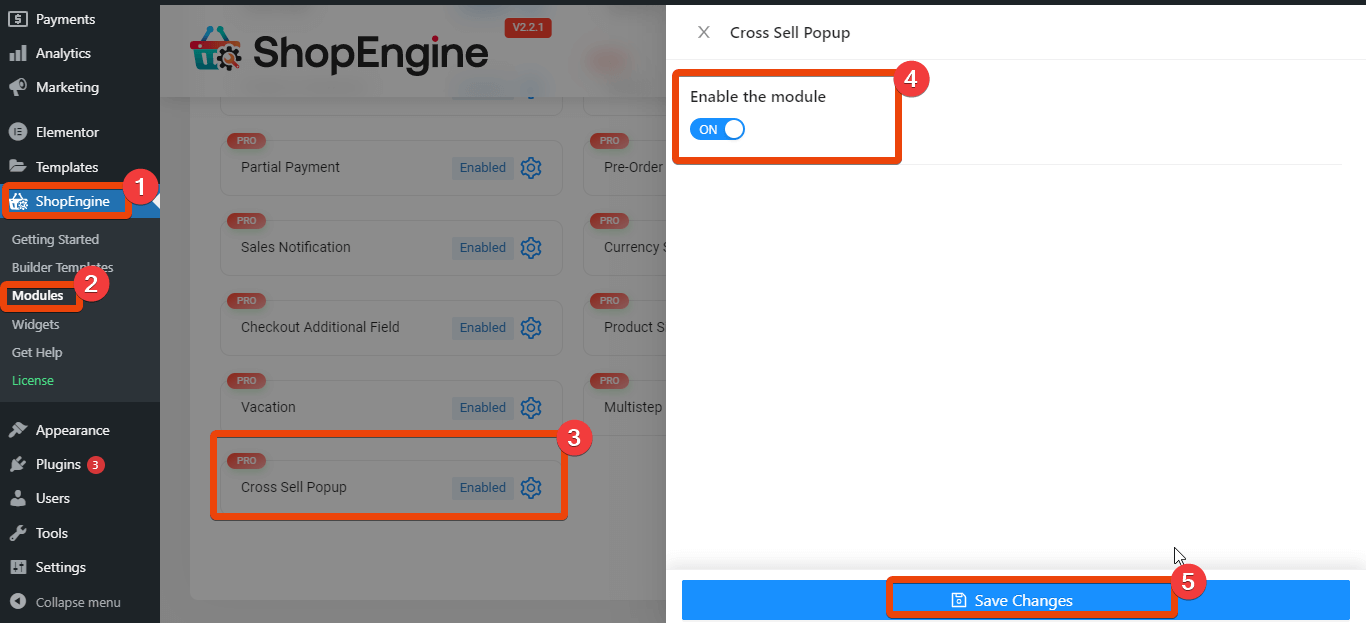
ステップ1: クロスセルモジュールを有効にする #
WordPress ダッシュボードから、 ShopEngine > モジュールに移動しますすべてのモジュールが表示されます。リストから、 enable the ‘クロスセルポップアップ’ module.
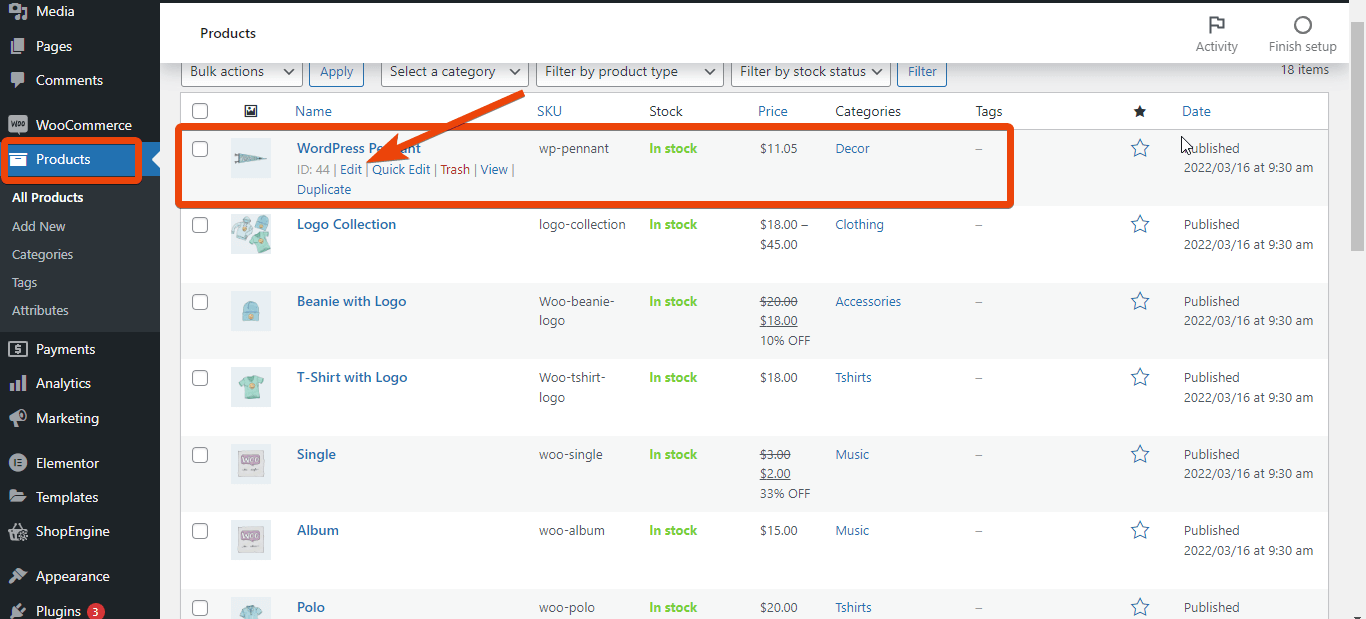
ステップ2: 製品ページを編集する #
次に、クロスセルのポップアップを表示する製品ページを編集する必要があります。「製品」に移動し、リストから必要な製品を選択します。
製品ページから、「リンクされた製品」オプションに移動してクリックします。クロスセル オプションが表示されます。次に、ポップアップに製品を追加する必要があります。製品名の最初の 3 文字を入力すると、提案に製品が表示されます。
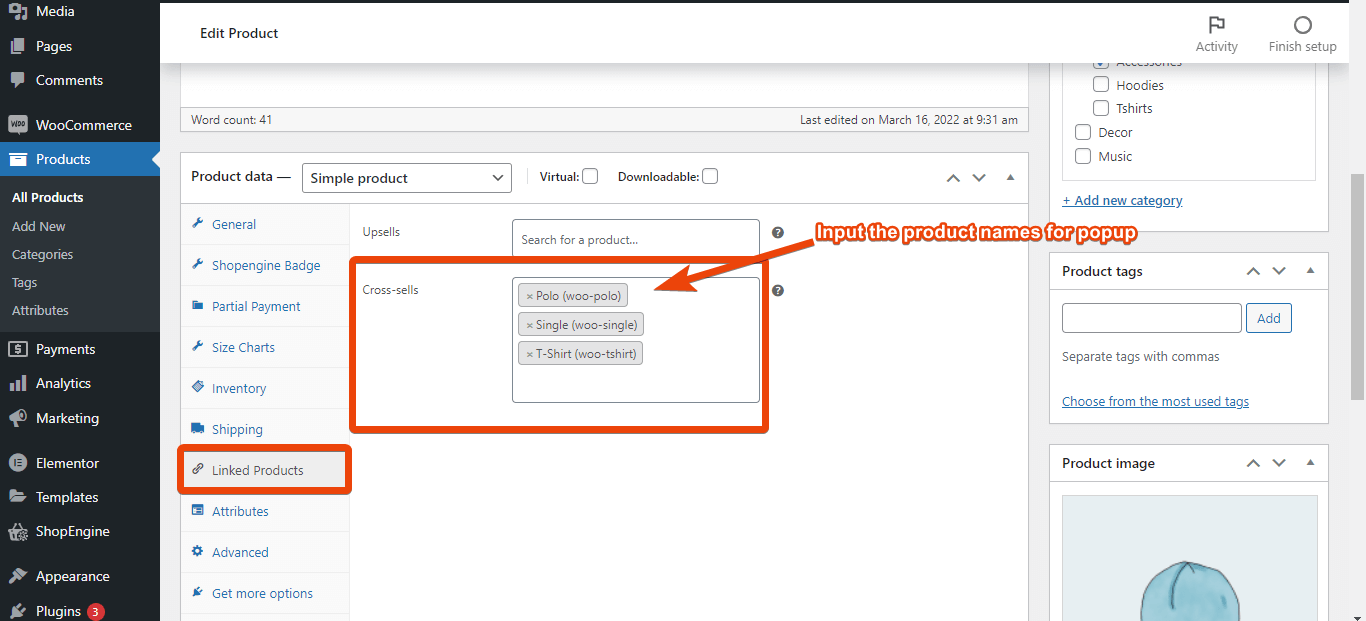
Now add the products for popup one by one. Once you have added the products for popup, update the product page. This will show WooCommerce cross sell items on product page.
ステップ3: 製品ページをプレビューする #
ポップアップに商品を追加したら、商品ページをプレビューし、 「カートに追加」を選択.
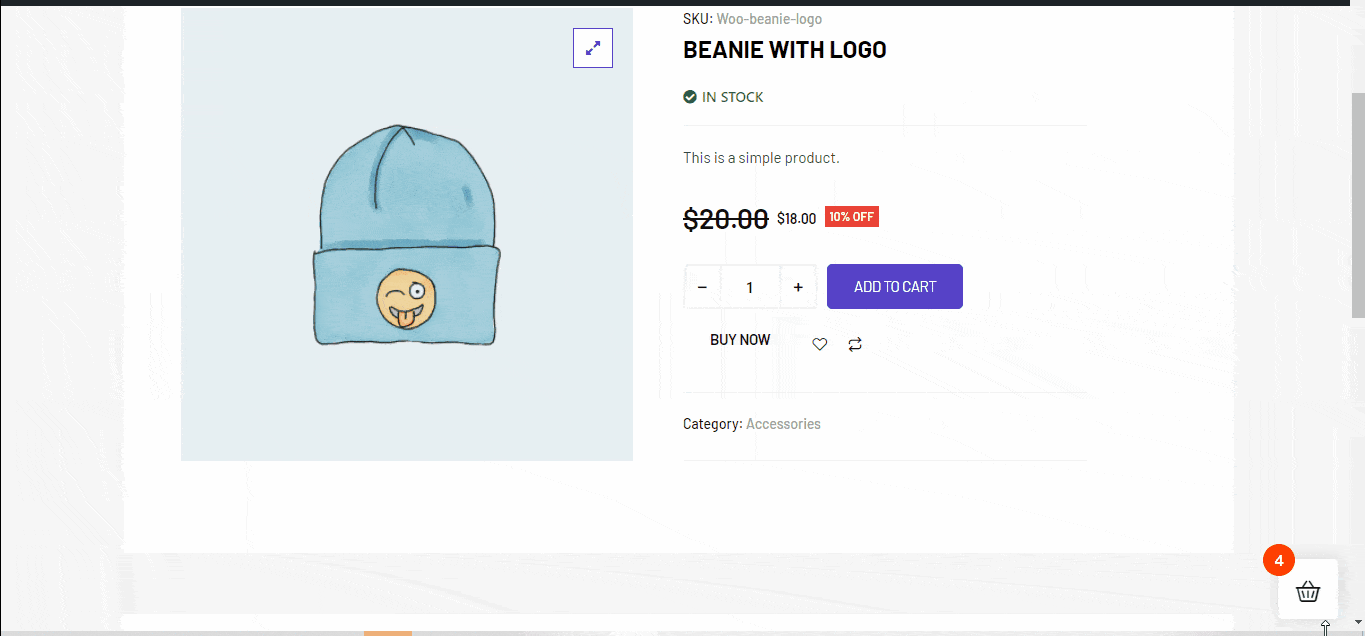
クロスセルポップアップを適切に統合した場合、 商品のポップアップが表示されます.
確認して問題がなければ、WooCommerce ストアでクロスセル ポップアップが機能しています。同様のスタイルで、他の製品のクロスセル ポップアップも追加できます。


