


The ElmentsKit interactive link widget is designed to bring dynamism and motion to your Elementor website user experience. Visitors can easily access different sections or features through behavioral effects like hover, scroll, or click. It’s like a mini navigation menu that adds visual interest and interactivity to your content through dynamic and animated responses.
Let’s see how you can use the ElementsKit Interactive Links Widget.
Before going to the main part:
あなたは ElementsKit Pro バージョン installed and activated on your Elementor website
How to Use ElementsKit Interactive Link Widget? #
Log in to your WordPress website and start with the step one:
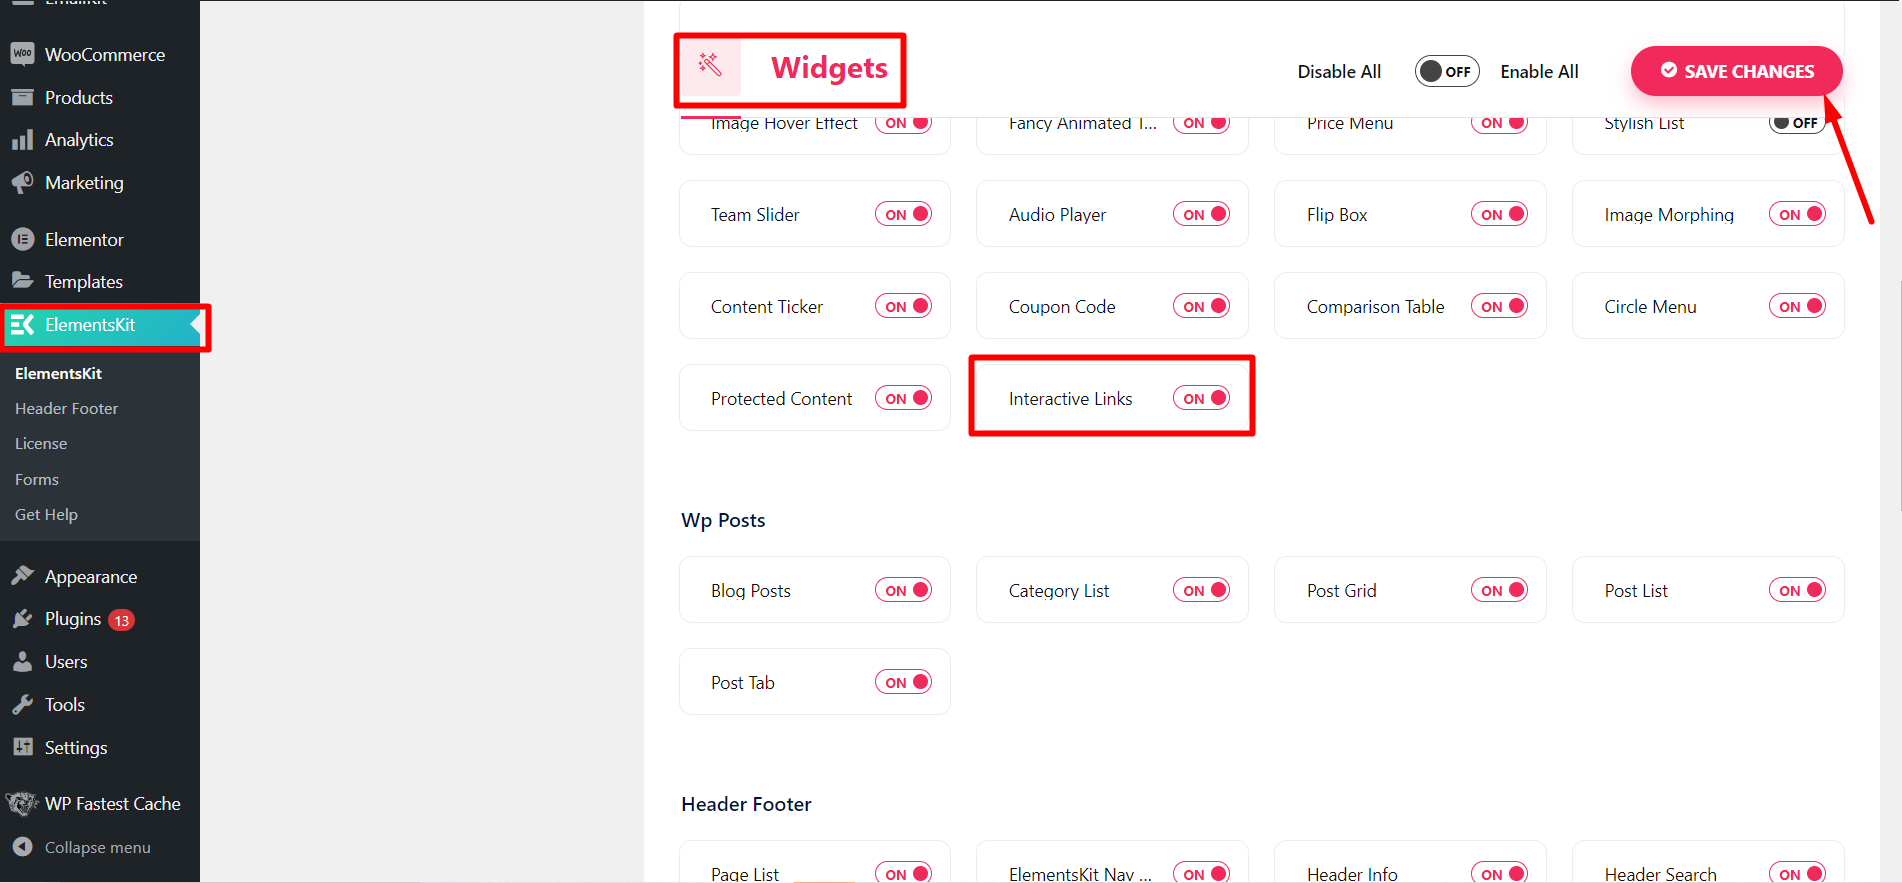
Step 1: Activate ElementsKit Interactive Link Widget #
Now start from your WordPress dashboard > Find ElementsKit > Go to Widgets > Interactive Links > Turn ON the widget and click 変更内容を保存.
Now, you have to open the page or post where you want to use the Interactive Links widget.
- Start with editing with Elementor.
- Search from ElementsKit Interactive Links Widget.
- When you see it, drag & drop the widget.
Step 2: Configure Interactive Link Section #
Go to the widget settings, and enter the コンテンツ tab. And, configure the settings below.
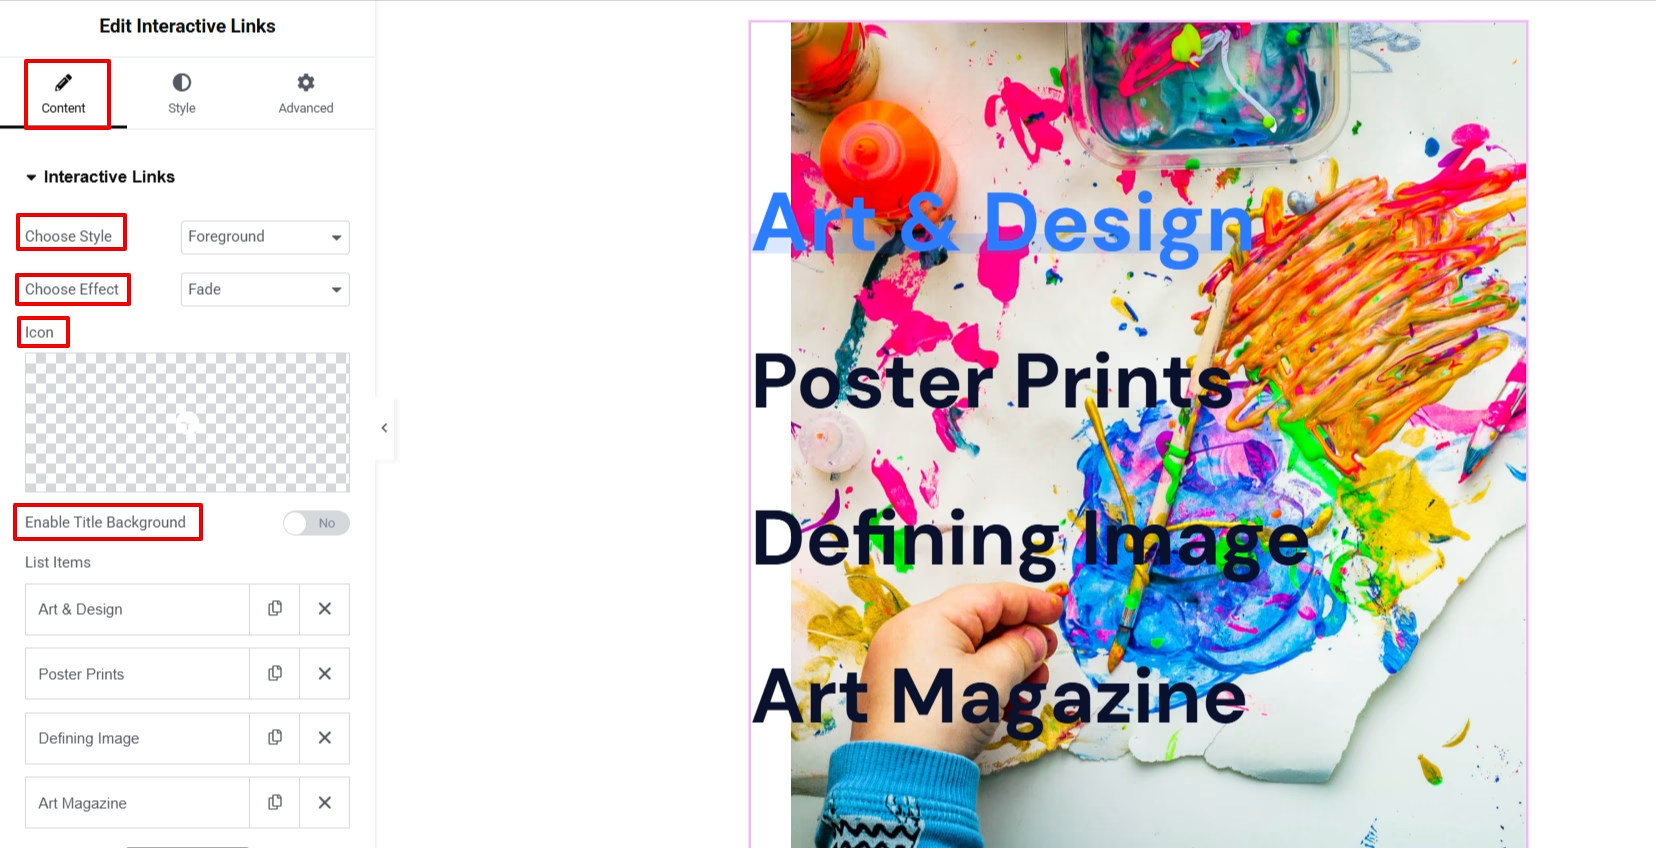
- スタイルを選択してください: ここでは、背景と前景の 2 つのオプションがあります。
- 効果を選択: There are various effects, including Fade, Slider, Zoom In, Zoom Out, Rotate, and Blur.
- アイコン: Use the icon library to add an icon with an interactive link list.
- アイコンの位置: Set icon position before or after an item.
- Show Icon on Hover: Enabling this option will show the icon only on the hover state.
- Enable Title Background: Add a background to the title of the interactive section.
Step 3: Add List Item #
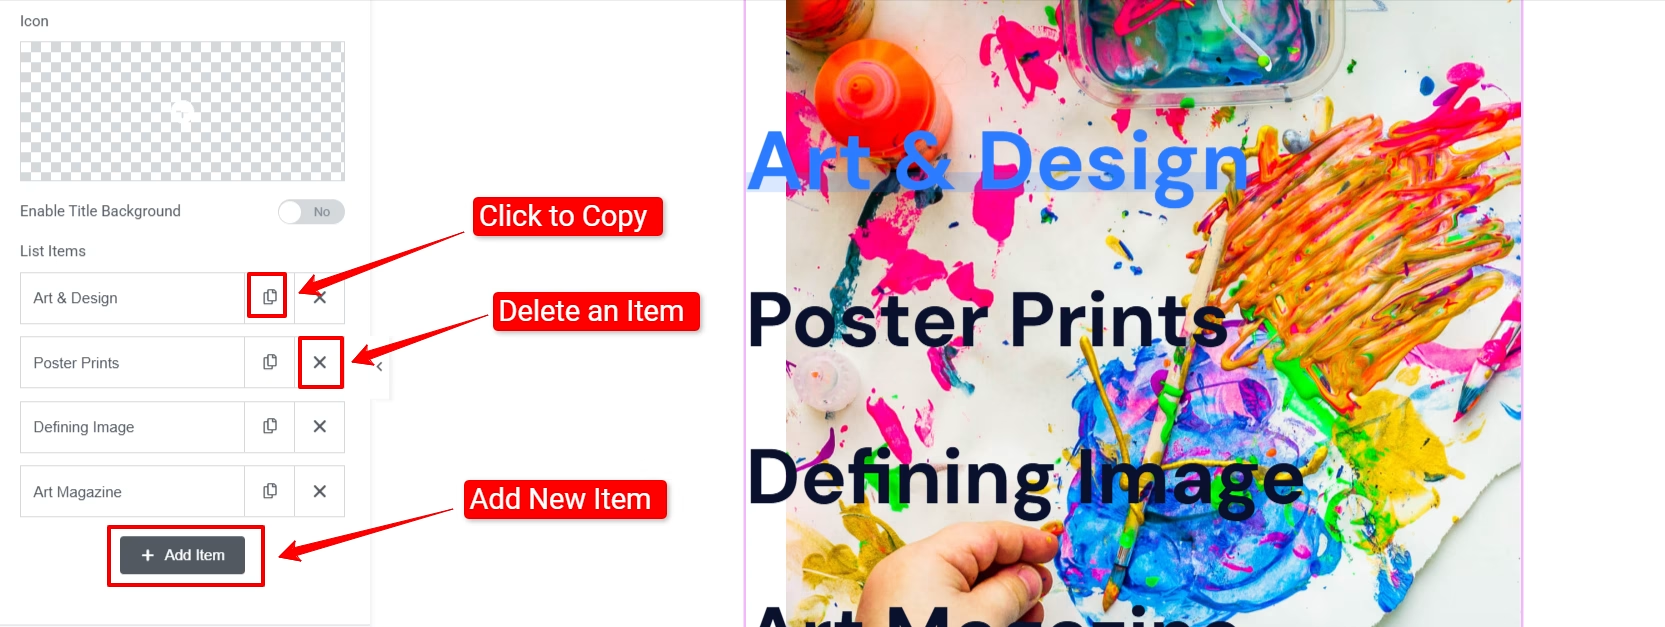
Add items based on your needs. Click the +アイテムを追加 option to add a new list item. Once you add an item, it reveals various options lto add title, subtitle, link, and image.
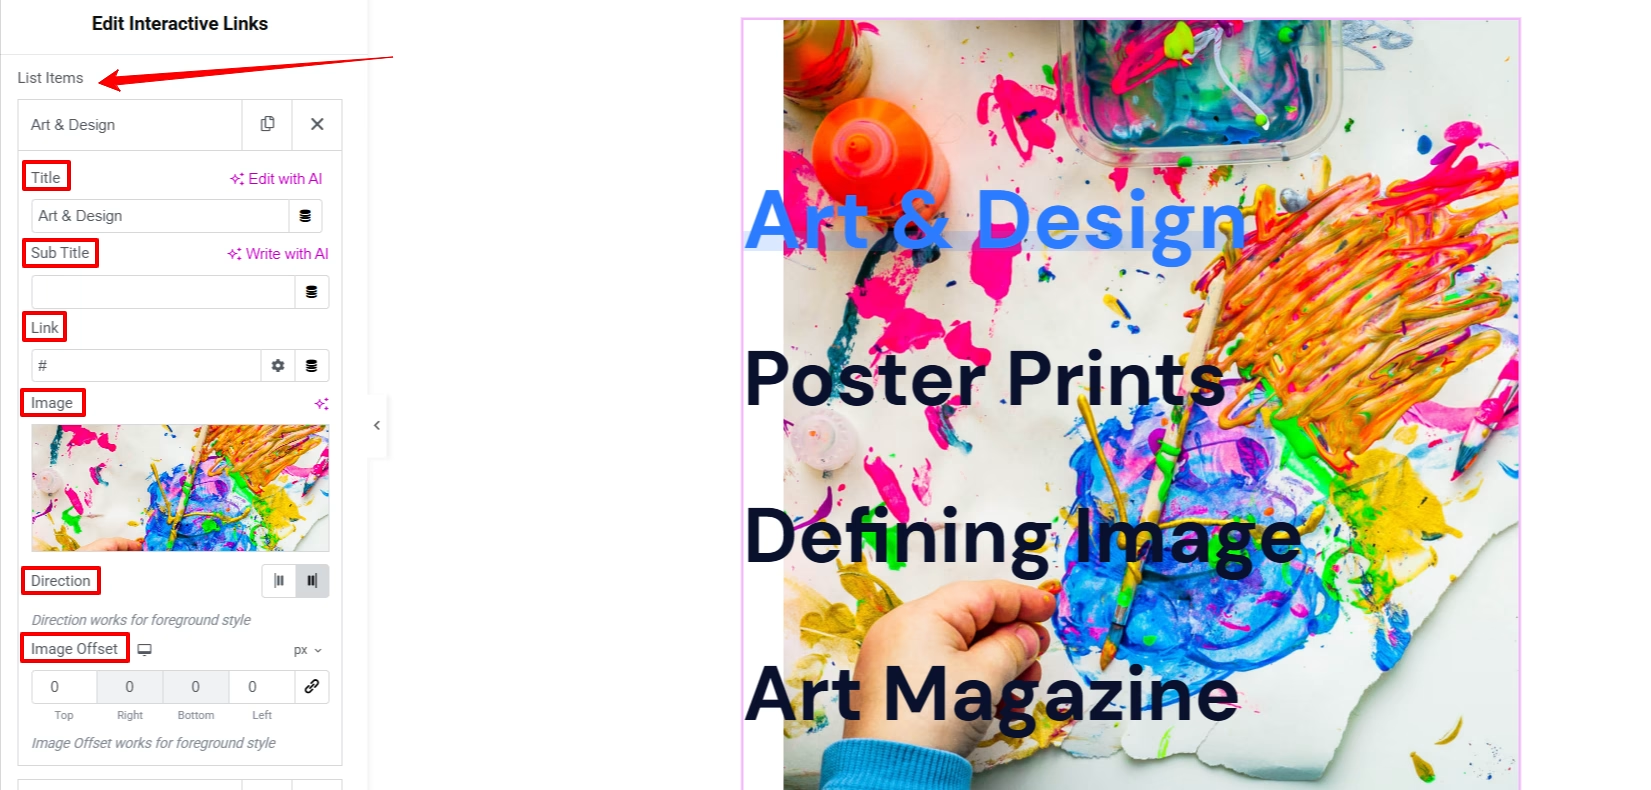
And, if you selected the “Foreground” option in the step 2, then you can set 方向 & adjust Image Offset of list items.
Step 4: Customize Interactive Link Section #
To customize the entire interactive links section, navigate to the スタイル tab. And, you will see the below’s styling options:
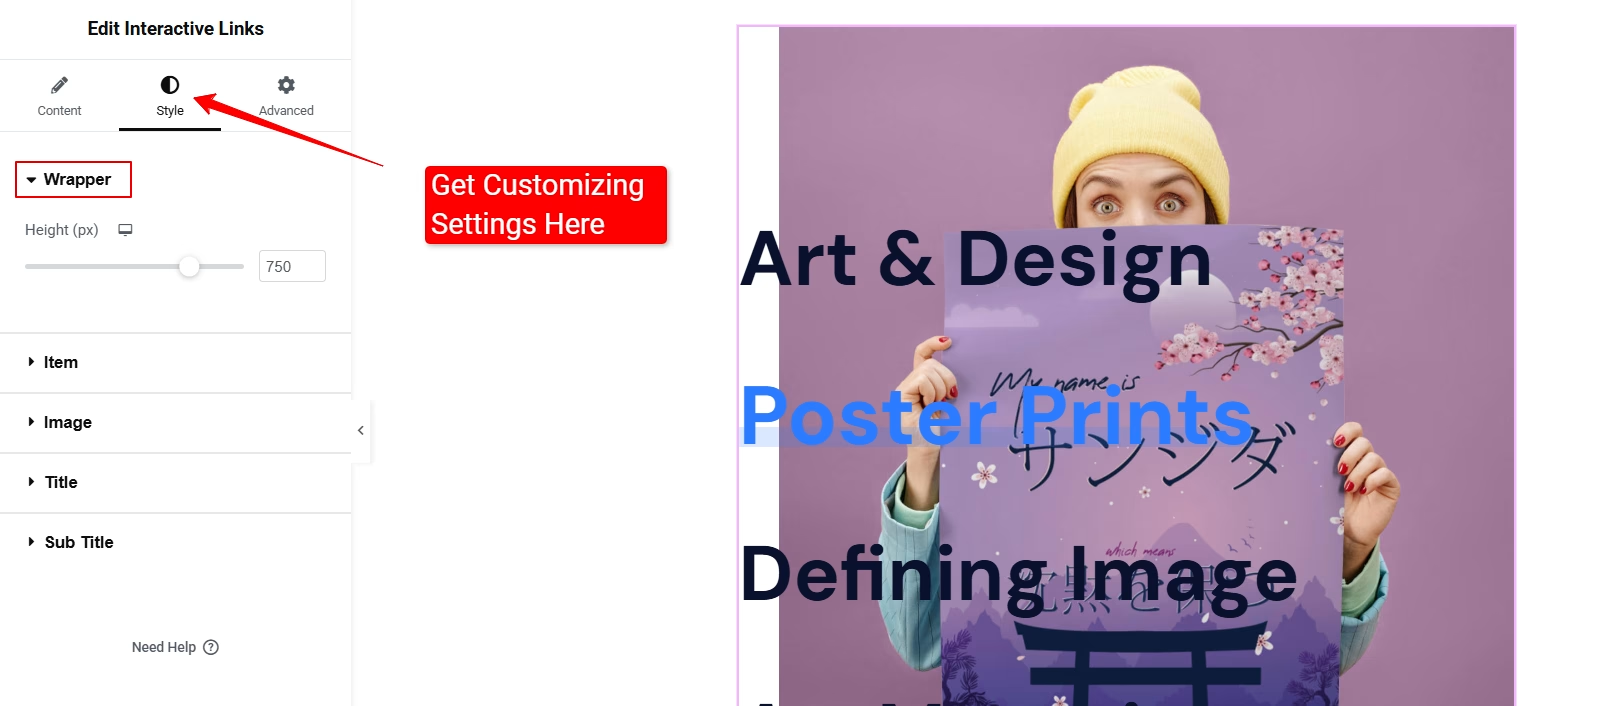
- ラッパー: ここから、ラッパーの高さを制御できます。
- アイテム: It allows you to justify content, align items, text alignments, control options of space between and width, border, padding, and margin, and hover animation choices.
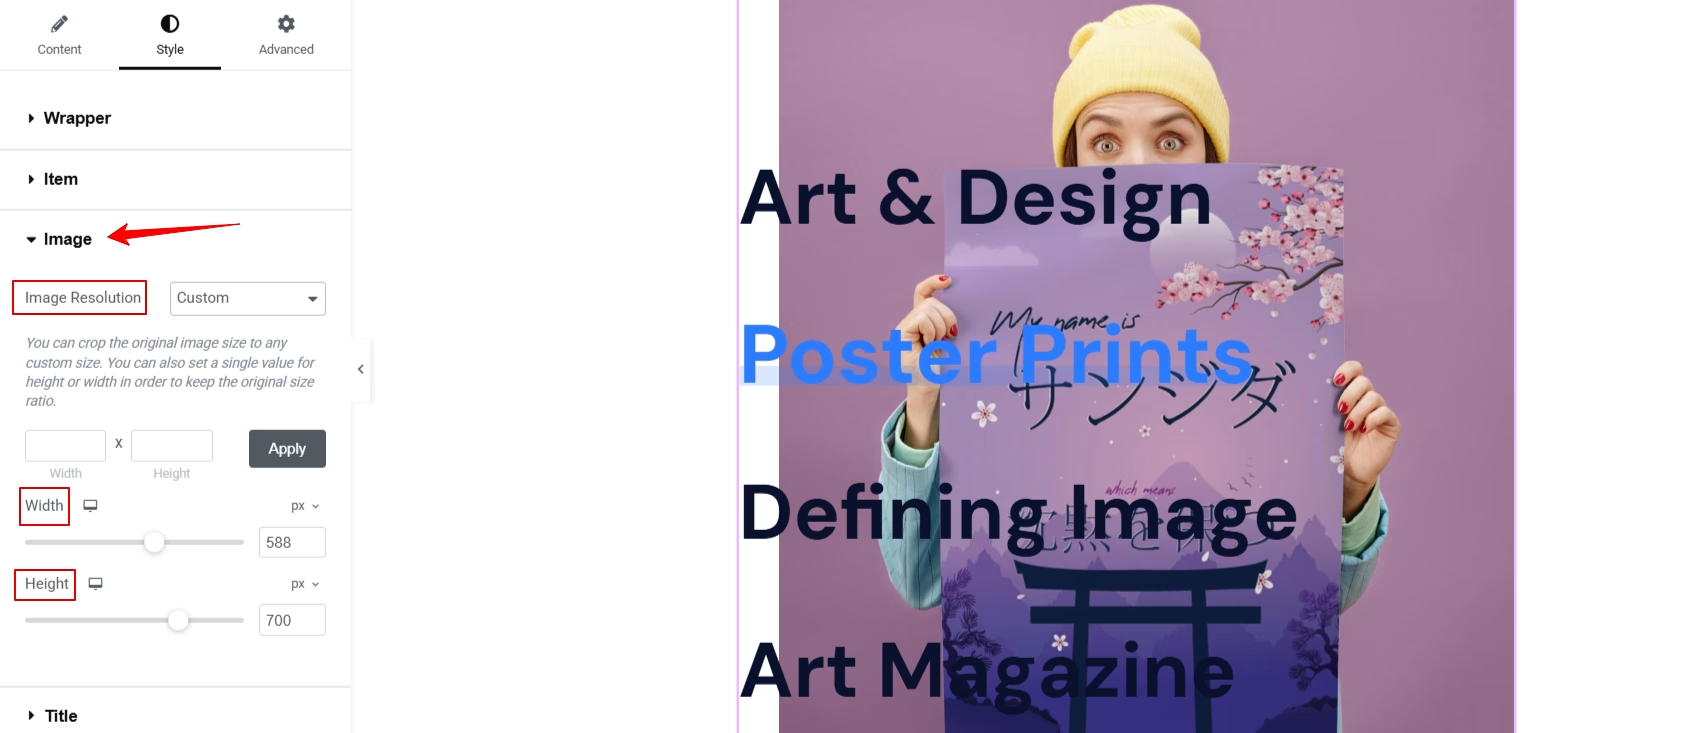
- 画像: このオプションを使用すると、画像の解像度、幅、高さを調整できます。
- タイトル: To change the title texts’ color, typography, hover & active color, you can use this option.
- アイコン: Define the icon size and determine the gap between icons. Also, give a color for your added icons.
- サブタイトル: Here, you can change the title texts’ color, typography, hover & active color.
Step 5: Preview, Check, & Publish #
Once done, preview your design before going live. Do all the adjustments if you notice any.
Here you go! Check how we have customized the widget 👇
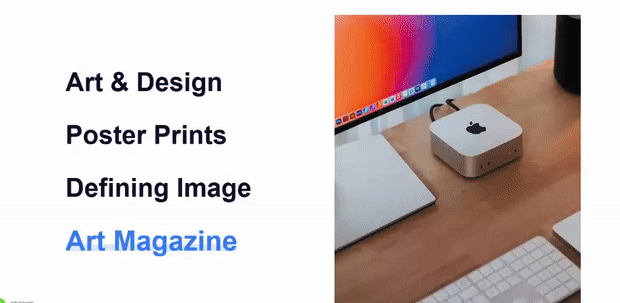
これです! ウィジェットは便利で、短時間で素晴らしい出力が得られます。
So, try ElementsKit Interactive Link widget now.


