
 Japanese
  English
  German
  Spanish
  Italian
  French
  Danish
  Portuguese
  Swedish
  Polish
  Korean
 ShopEngine Pro には WooCommerce Avatar モジュールが付属しており、アカウント ダッシュボードでのユーザー アバターの表示方法を設定できます。
WooCommerceアバターモジュールを有効にする #
ShopEngine WooCommerce Avatarモジュールを有効にするには、
- WordPress サイトにログインします。
- 案内する ショップエンジン > モジュール WordPress ダッシュボードから。
- を見つける アバター リストからモジュールを選択します。
- ⚙️(設定アイコン)をクリックします。
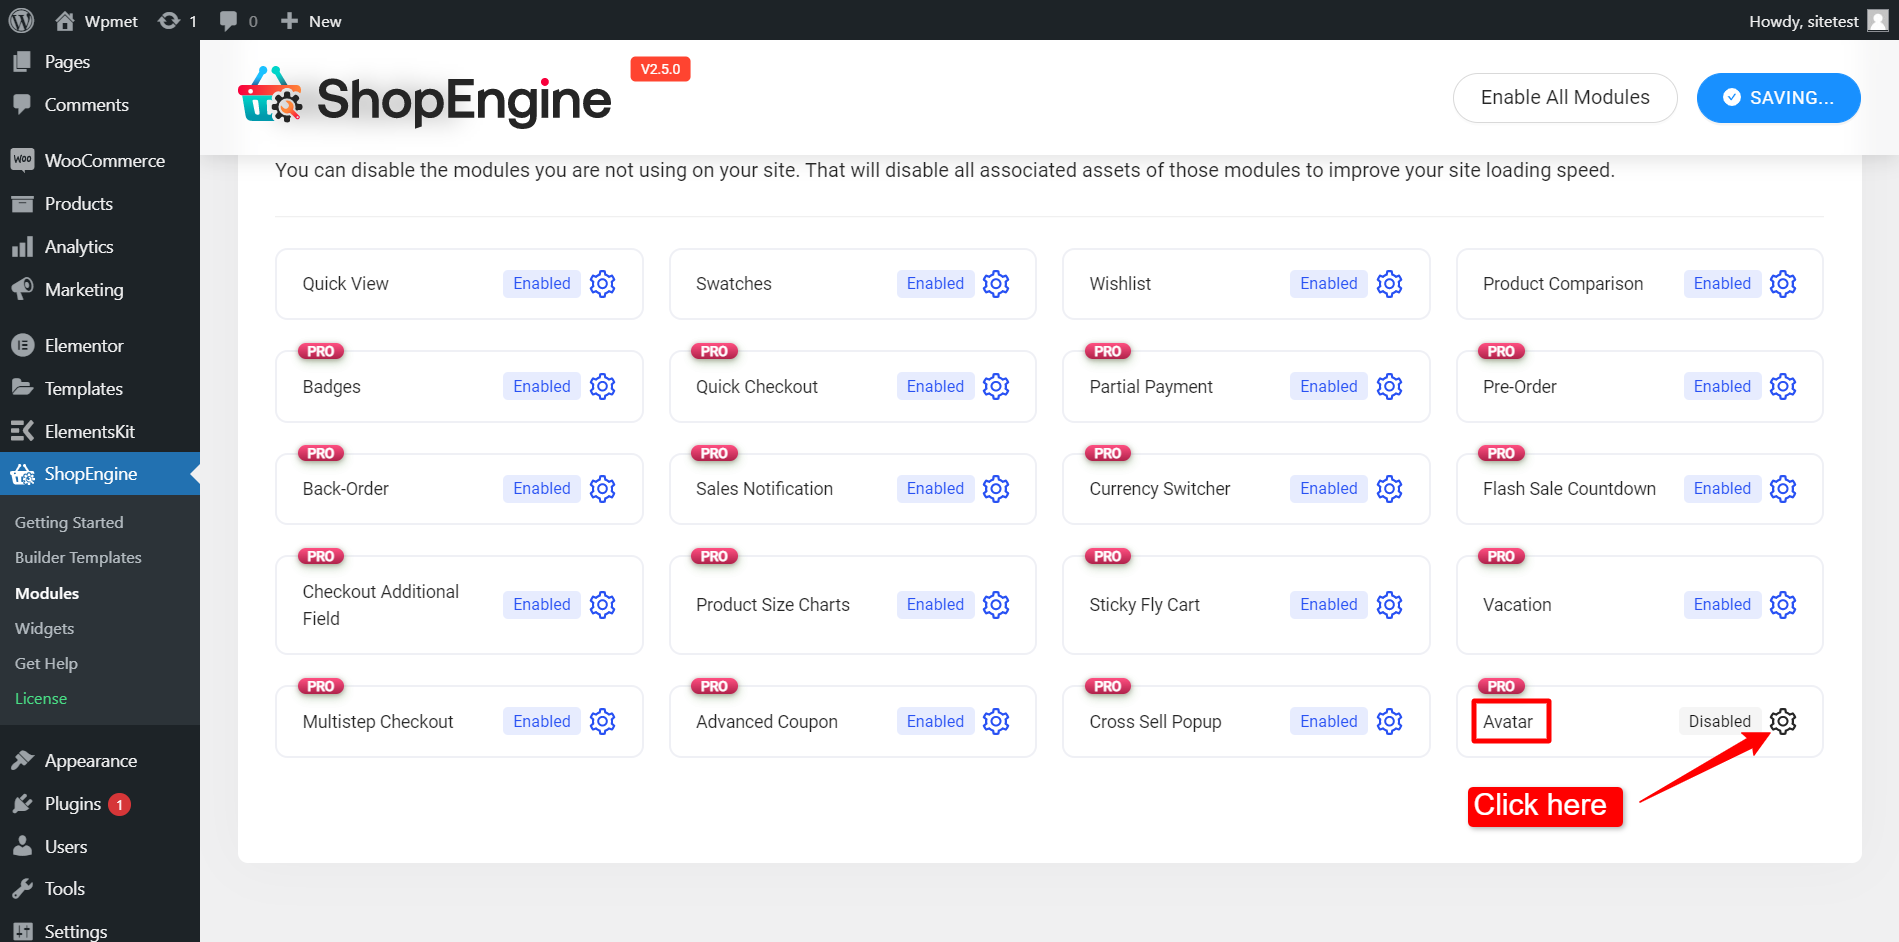
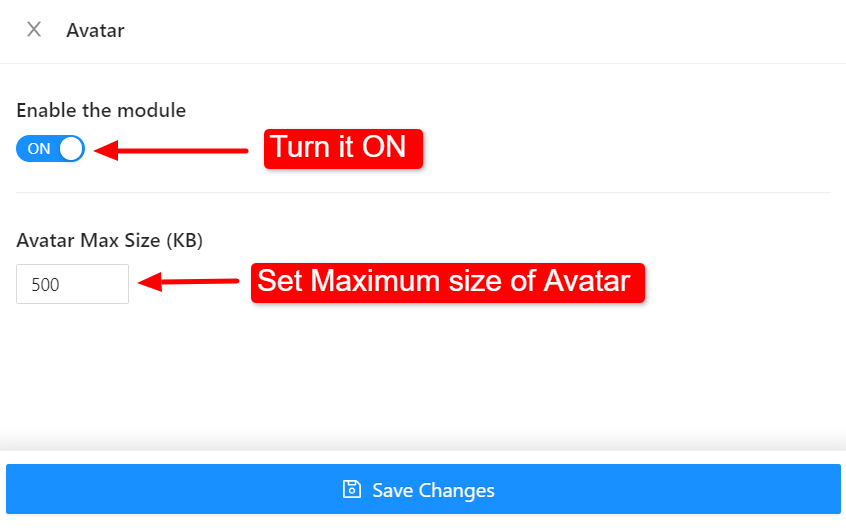
その後、テンプレート設定のためのオフキャンバスウィンドウが表示されます。テンプレート設定で、
- 初め、 モジュールを有効にする.
- をセットする アバター最大サイズ (KB)。
- クリックしてください 変更内容を保存 画面下部のボタンをクリックします。
これで、ウェブサイトのアカウントダッシュボードページにユーザーアバターを追加できるようになります。 アバターウィジェット ウィジェットを使用して Web ページにユーザー アバターを追加する方法を学習します。


