


 Japanese
  English
  German
  Spanish
  Italian
  French
  Danish
  Portuguese
  Swedish
  Polish
  Korean
 1 ページ スクロールを使用すると、単一ページのレイアウトを作成し、ページ全体を一度にスクロールできます。 1 ページ レイアウトには、ホーム、製品/サービス、お問い合わせ、会社概要など、Web サイトに通常含まれるすべてのセクションが含まれます。
ページ上のスクローラーで各セクションに移動できます。ElementsKit を使用すると、WordPress サイトで Elementor の 1 ページ スクロールを設定できます。さらに、ElementsKit は完全にレスポンシブな 1 ページ スクロールの Web サイト テンプレートも提供しています。
Without further ado, let’s take a look at how to set up one page scroll for Elementor.
始めましょう #
以下の手順に従って、1 ページスクロールの Web サイトを簡単に作成できます。
ステップ 1: 1 ページ スクロール モジュールを有効にして、1 ページ スクロールの Web サイトを作成します。 #
確認する 1 ページのスクロール モジュールは の上 から ElementsKit → モジュール
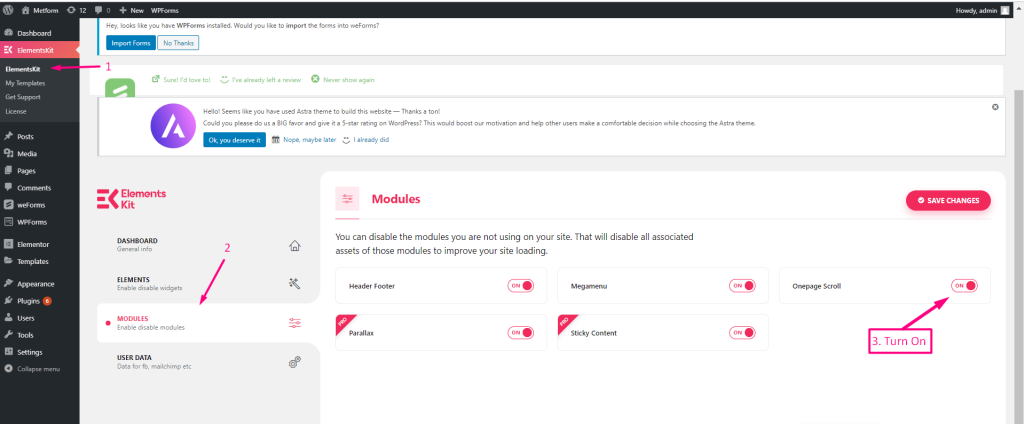
ステップ2: 1ページスクロールをカスタマイズする #
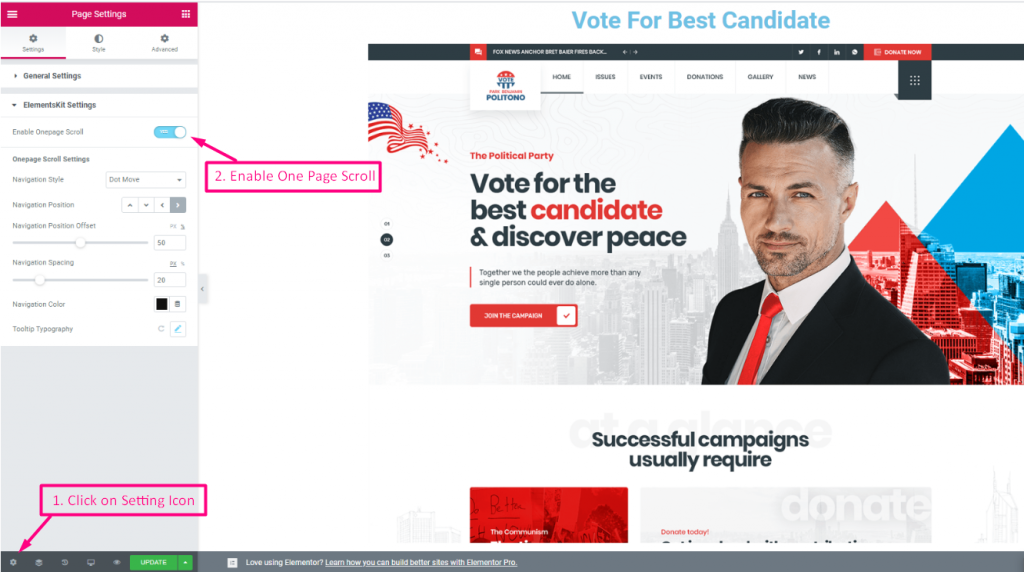
- 1 ページスクロールを追加するには、設定アイコンをクリックします。
- 1ページスクロールを有効にする
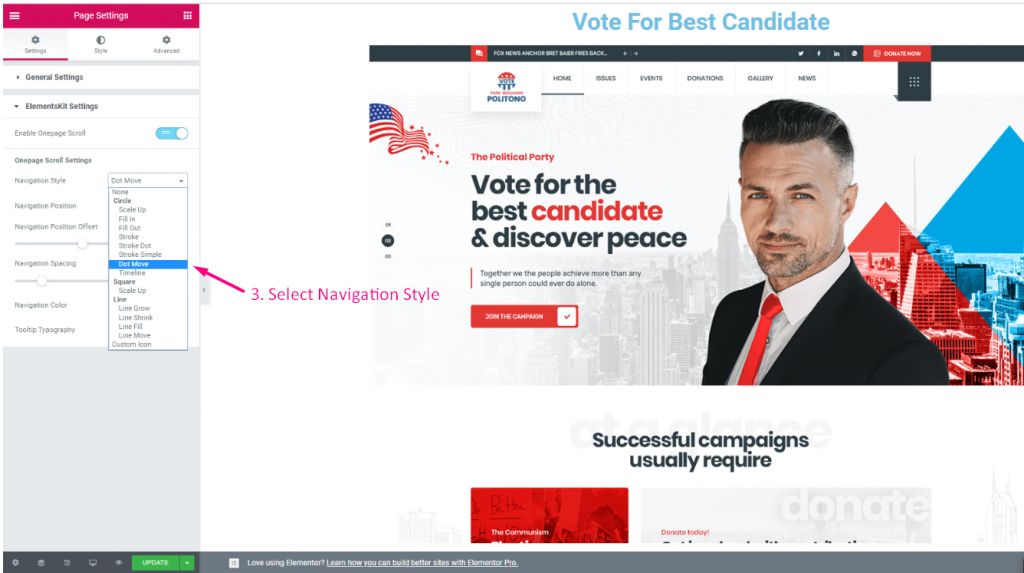
3. ドロップダウンからナビゲーション スタイルを選択して、1 ページ スクロールの Web サイトを追加します。
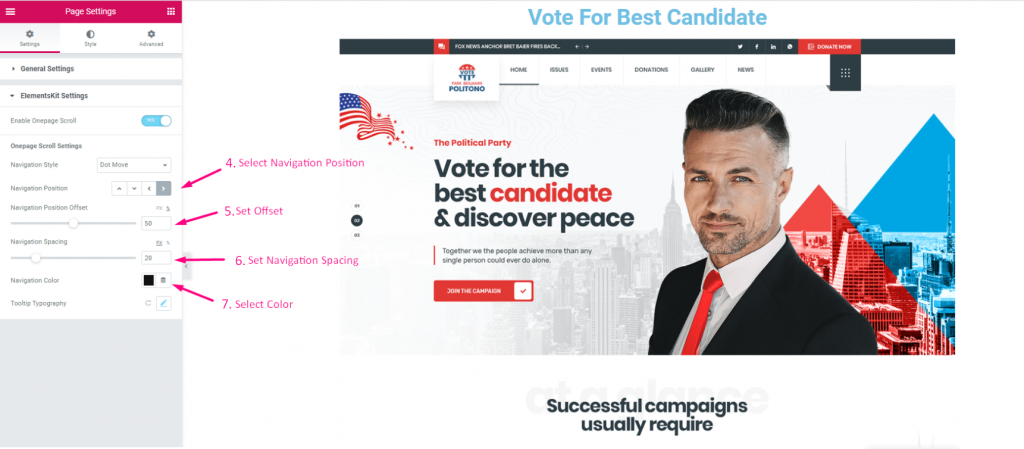
- 単一ページスクロール Web サイトのナビゲーション位置を選択します。
- オフセットの設定
- ナビゲーション間隔を設定する
- 色を選択
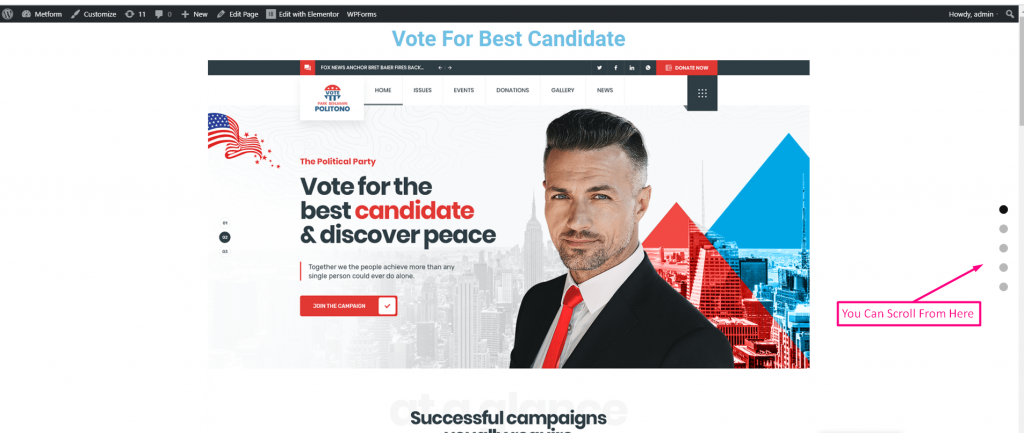
1ページスクロールオプションを表示しています。ドットオプションをクリックするだけでスクロールできるようになりました
ステップ3: ツールチップの書体をカスタマイズする #
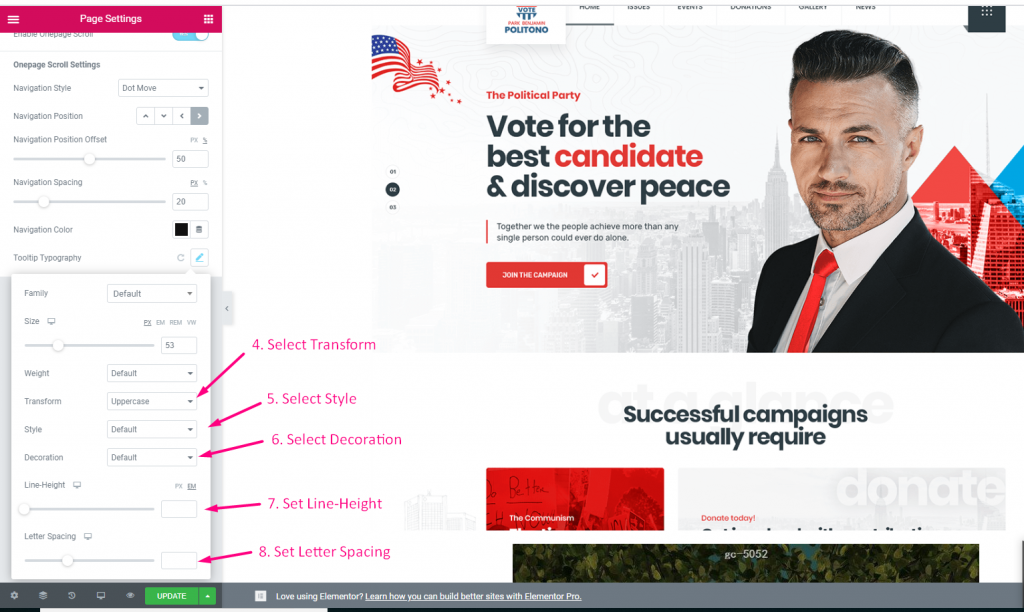
- アイコンをクリックして拡大します
- ドロップダウンからファミリーを選択

- セットアップサイズ
- 重量を選択

- 変換を選択
- スタイルの選択
- 装飾を選択
- 行の高さを設定する
- 文字間隔を選択
これは、ElementKit を使用して Elementor 用の 1 ページ スクロールを簡単かつスムーズに作成する方法です。1 ページ スクロールを設定すると、ユーザー エクスペリエンスも向上します。さらに、レスポンシブな 1 ページ スクロール Web サイトを作成できる 1 ページ スクロール WordPress テーマも見つかります。
Get ElementsKit now 👇



