🏆
World Cup Final Special

GET THE Wpmet AIO BUNDLE FOR JUST $699

ENDING IN:
00 DAY
:
00 HOUR
:
00 MIN
:
00 SEC
Claim the GOAT Deal Arrow Icon

視差効果

背景画像の視差 #

A major trend in web design is Parallax scrolling, which involves the Background Image is moving at a slower rate to the foreground content as you scroll down the page. This 視差効果 can be applied to Elementor site.

このガイドでは、ElementKit を使用して背景画像に視差効果を追加する方法を説明します。

ビデオガイドを見る:

または、以下の手順に従ってください。

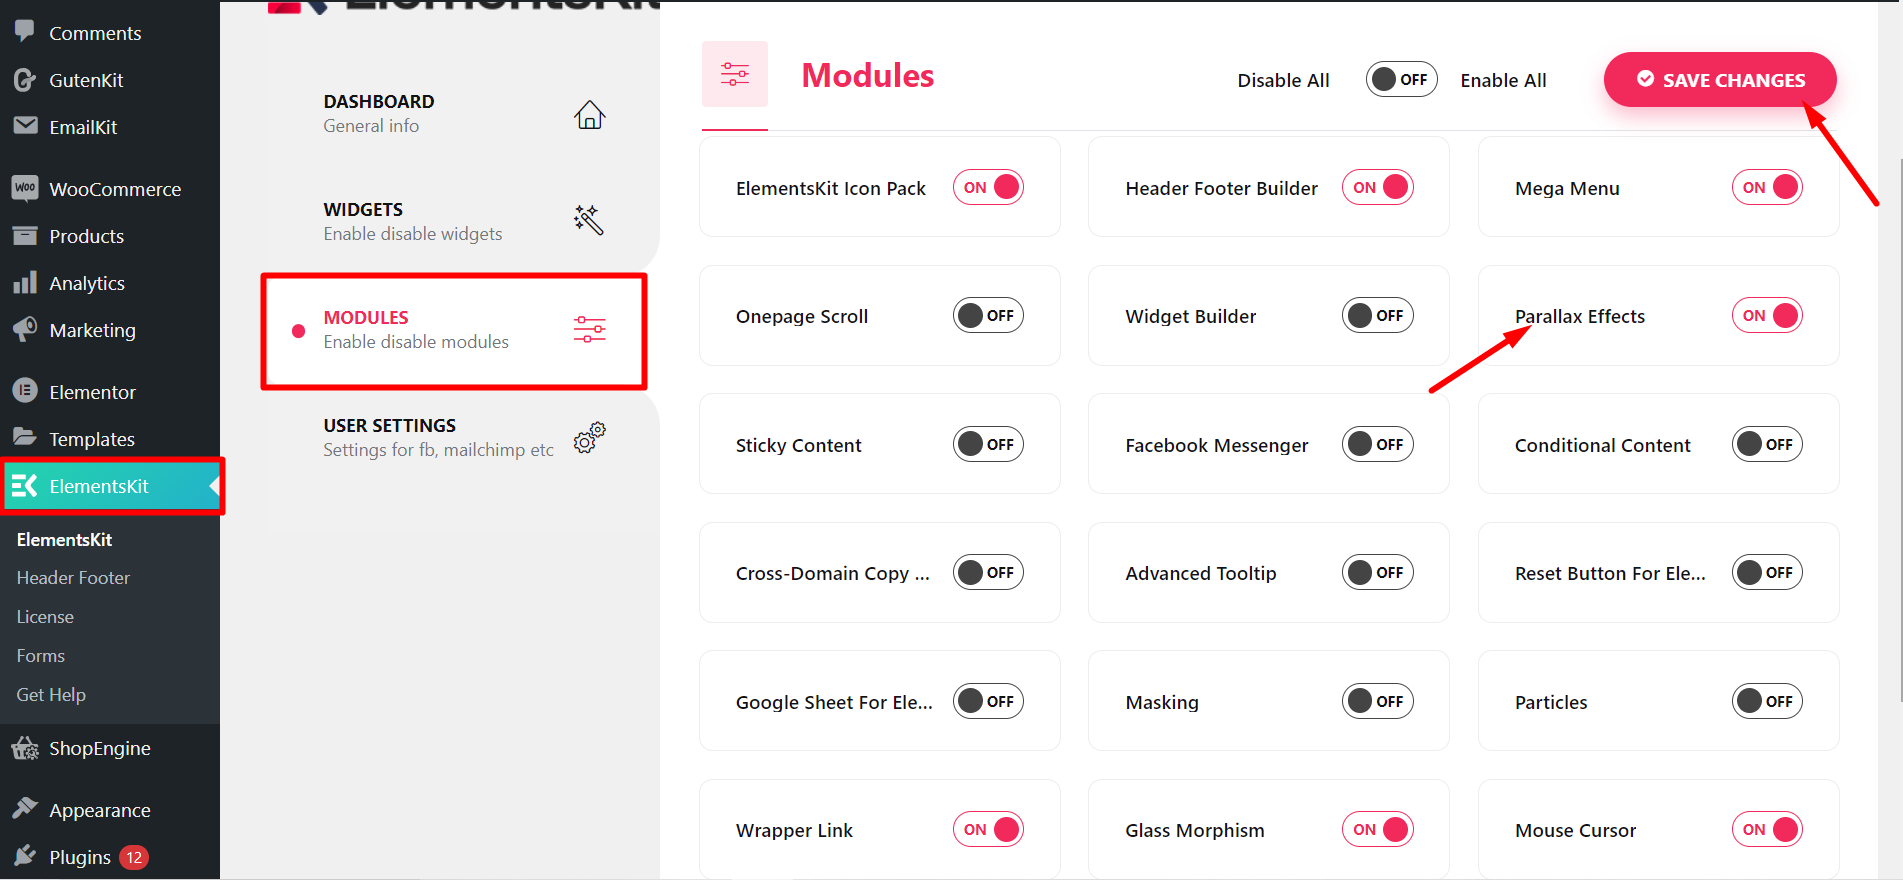
ステップ=>1: 必ず 視差 モジュールは の上 から ダッシュボード ElementsKit モジュール

Enable Elementor parallax effects with ElementsKit plugin

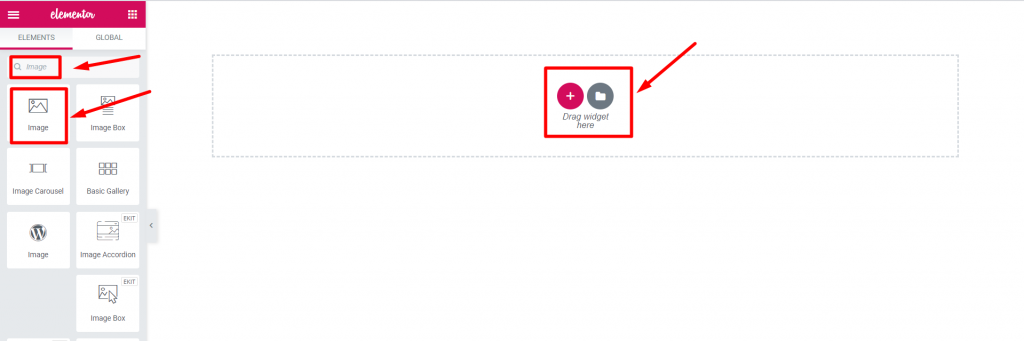
ステップ=>2: に行く 要素=> Search for 画像=> Drag and Drop the 画像セクション to add Elementor parallax effect with ElementsKit plugin.

Add imge to create Elementor parallax effect with ElementsKit

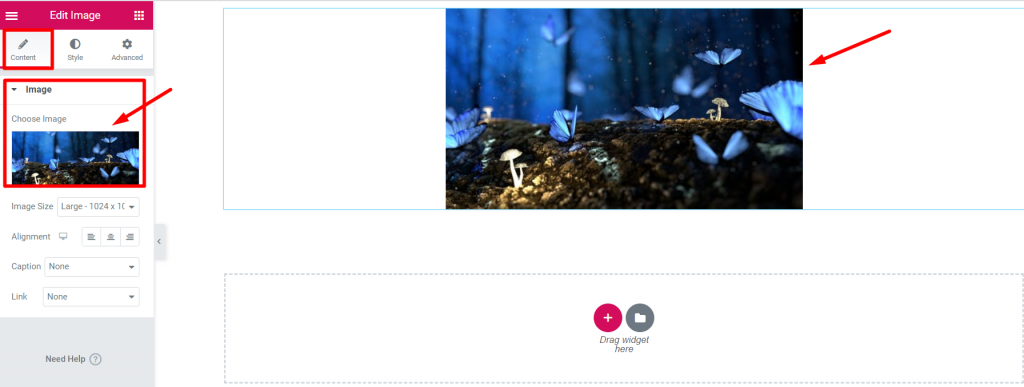
ステップ=>3: 追加 背景画像 から セクションの編集 コンテンツ タブ

Create Elementor parallax effect with ElementsKit

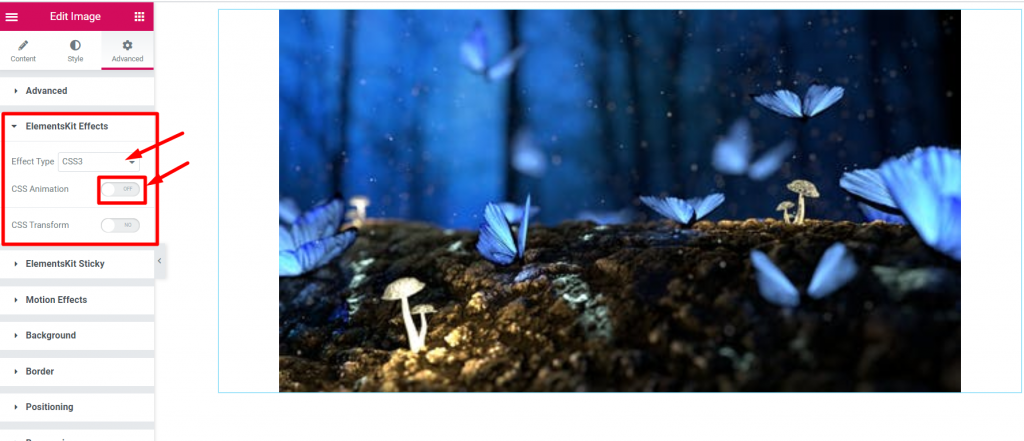
ステップ=>4: に行く 詳細設定タブ -> をクリックします ElementsKit エフェクト->エフェクトの種類を選択 CSS3、傾き、スクロール時、マウス移動時のオプション あなた自身の選択で
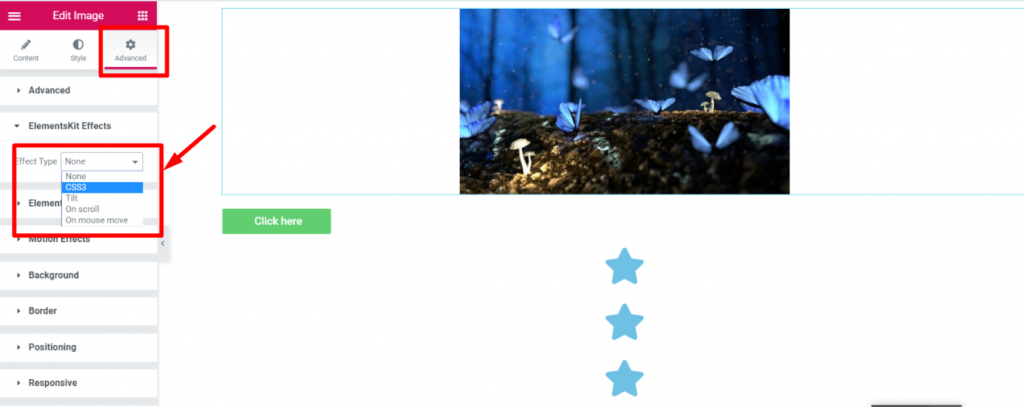
Customize Elementor parallax effect with ElementsKit

CSS3 #

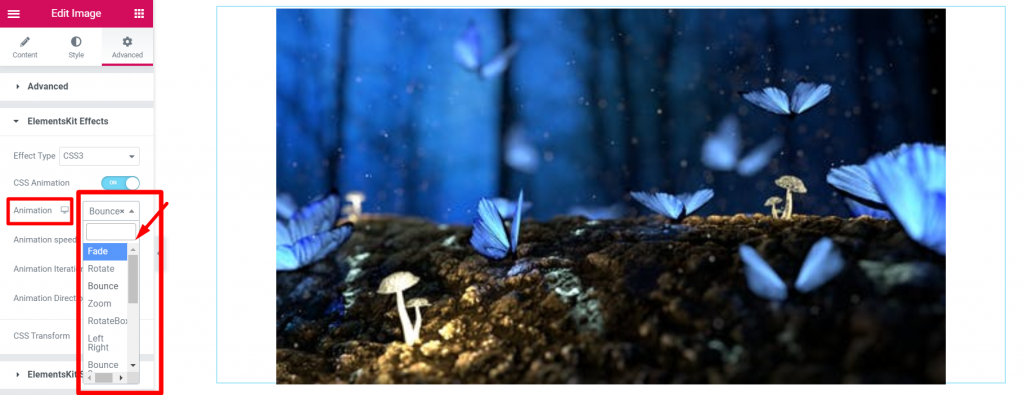
  • ステップ=>1: に行く 詳細設定タブ=>ElementsKit エフェクト=> 効果の種類=> 選択 CSS3=> Turn on the CSSアニメーション トグル
Customize Elementor parallax effect with ElementsKit
  • 選択する アニメーション効果 から 落ちる
Customize Elementor parallax effect with ElementsKit
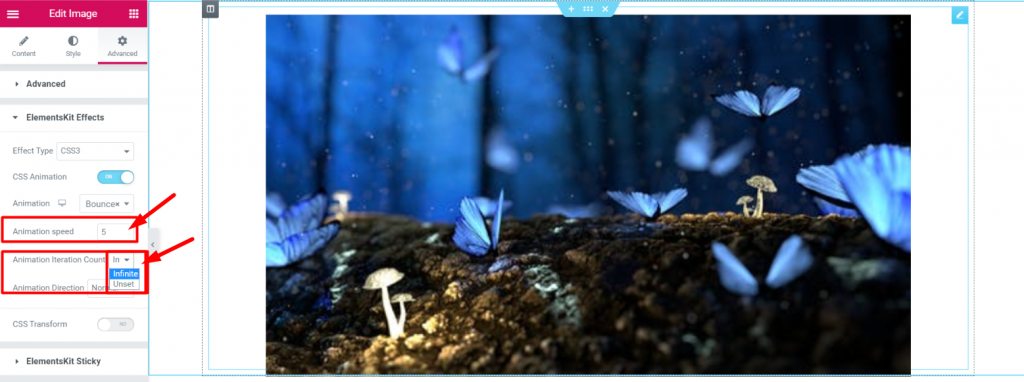
  • 修正する アニメーション スピード
  • アニメーション 反復回数=> 無制限または未設定
Edit Elementor parallax effect with ElementsKit
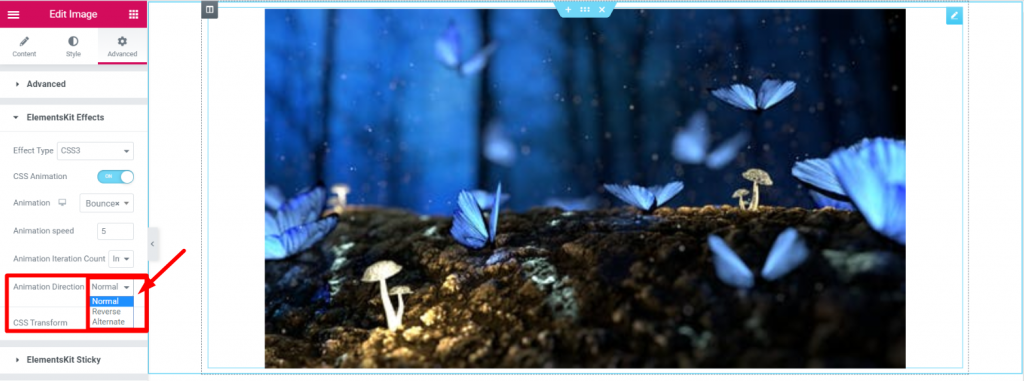
  • 選択する アニメーション監督
Edit Elementor parallax effect with ElementsKit
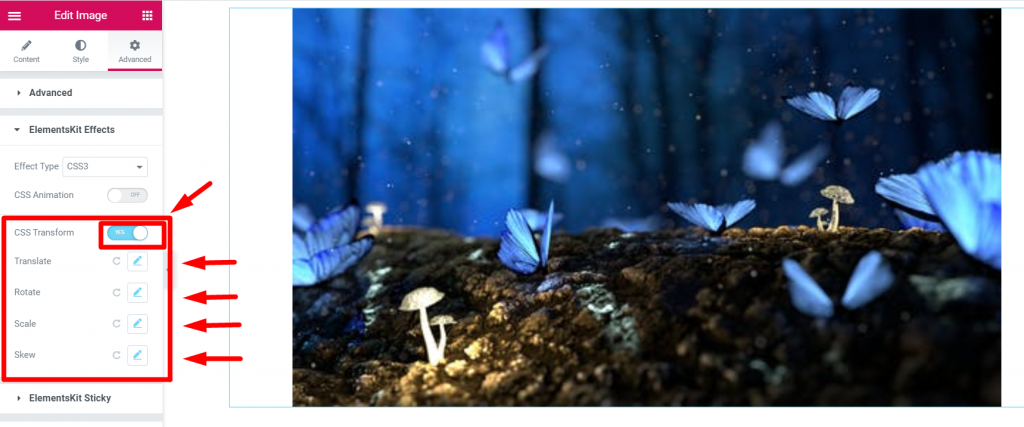
  • ステップ=>2: ElementsKit エフェクト=> 効果の種類=> 選択 CSS3=> Turn on the CSS 変換 トグル
  • 翻訳する
  • 回転
  • 規模
  • 斜め
  • 必要に応じてリセット
Add Elementor parallax tilt effect with ElementsKit

傾き #

ステップ=>1: に行く 詳細設定タブ=>ElementsKit エフェクト=> 効果の種類=> 選択 傾き
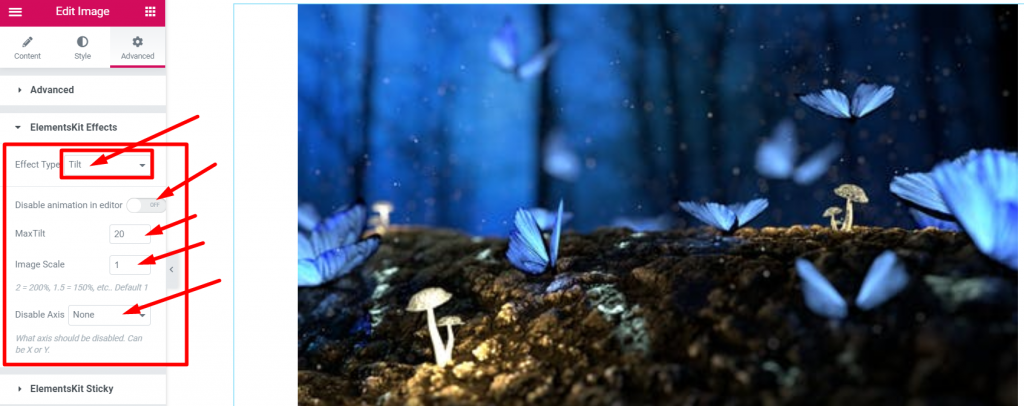
スクロールオン #

ステップ=>1: に行く 詳細設定タブ=>ElementsKit エフェクト=> 効果の種類=> スクロール時に選択
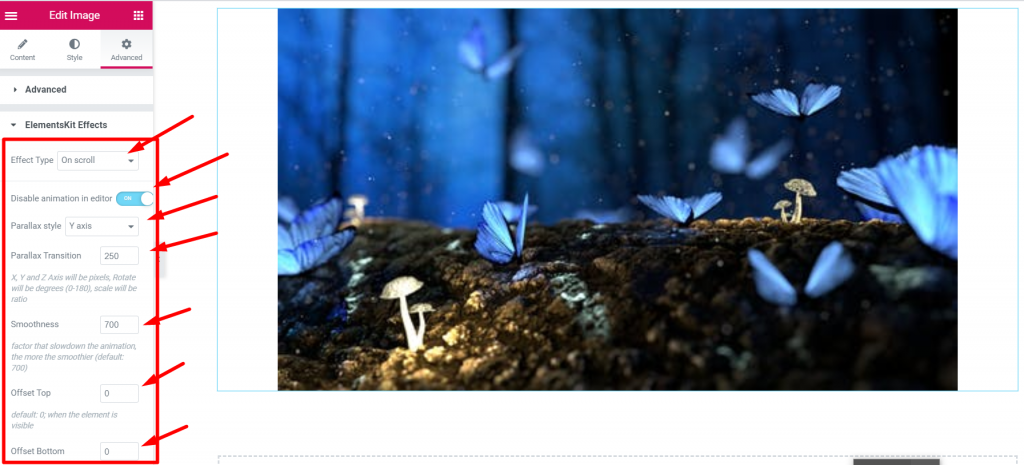
Add Elementor parallax on scroll effect with ElementsKit

マウス移動時 #

ステップ=>1: に行く 詳細設定タブ=>ElementsKit エフェクト=> 効果の種類=> マウス移動時に選択
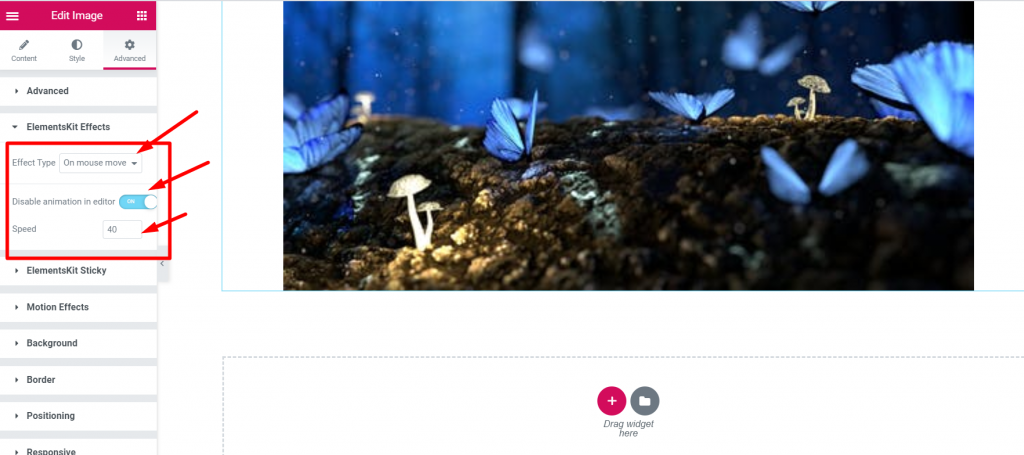
Add Elementor parallax On Mouse Move effect with ElementsKit

これが、Elementor ページまたは Web サイトにパララックス効果を適用する方法です。Elementor ページにパララックスを適用するこのシンプルでわかりやすい方法を学びましょう。

Quick Recap

Let’s recap what we covered in this tutorial on adding parallax effects on WordPress websites.

Tools Used: Elementor & ElementsKit エレメント アドオン

✅ Install and activate the ElementsKit Advanced Parallax Module.

✅ Start editing with Elementor the page or post where you want to add the parallax background effect

✅ From the Advanced tab, select the effect type between CSS3, Tilt, On scroll, or On Mouse Move option.

✅ Apply your preferred motion effects and save changes.

✅ Preview and publish the parallax design.

Following this, ElementsKit parallax effects tutorial, you can easily add an illusion of depth and 3D movement to any section or container of your WordPress page without any coding.

あなたの気持ちは

Updated on 7月 14, 2026