Prendi l'aiuto di GutenKit Fun Facts Gutenberg Blocks per una visualizzazione intuitiva e impressionante di fatti importanti con numeri e icone. Ti offre tutti i controlli di personalizzazione e gli stili di animazione per evidenziare i numeri sul tuo sito web WordPress.
Leggi questa documentazione per scoprire come creare uno straordinario contatore di fatti divertenti nell'editor a blocchi Gutenberg del tuo sito web.
Come aggiungere un contatore di fatti divertenti nell'editor a blocchi di WordPress? #
Prima di procedere al primo passaggio, è necessario installare il plugin GutenKit sul tuo sito web WordPress.
Passaggio 1: aggiungi il blocco Fun Fact GutenKit #
Dalla dashboard di WordPress:
- Aggiungi una pagina o un post e vai all'editor a blocchi.
- Clicca il "+" nella parte superiore della schermata dell'editor.
- Verrà visualizzata una libreria di blocchi.
- Utilizza la barra di ricerca per trovare "Fatto divertente” bloccare.
- Quando appare, cliccaci sopra o trascinalo e rilascialo nella schermata dell'editor.
Passaggio 2: aggiungere icona e contenuto #
Ora, la prima area di impostazione del blocco con cui lavorerai è la scheda Contenuto. Da qui, aggiungerai icone e altri contenuti come numeri, prefissi, suffissi, ecc.
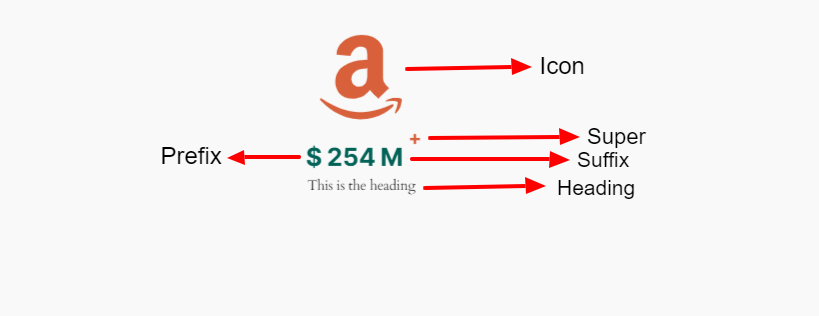

Icona: #
- Aggiungi icona: Per impostazione predefinita, questo pulsante di attivazione/disattivazione è attivato. Disattivalo se non vuoi mostrare un'icona. Puoi cambiare l'icona dalla libreria o caricare il tuo file icona SVG.
Contenuto: #
- Numero: Inserisci in questo campo il numero che vuoi visualizzare.
- Abilita prefisso: Usa questo pulsante di attivazione/disattivazione se vuoi aggiungere qualcosa prima del numero. Puoi semplicemente digitare qualsiasi cosa nella schermata dell'editor a blocchi.
- Abilita suffisso: Attiva questa opzione per aggiungere e digitare qualcosa dopo il numero.
- Abilita Super: Super funziona come un altro elemento di supporto per le tue informazioni di curiosità. Abilitalo e aggiungi un testo o un simbolo.
- Abilita intestazione: Abilita questo pulsante di attivazione/disattivazione per mostrare l'intestazione o il testo. Definisci inoltre il tag HTML dell'intestazione dal menu a discesa.
Impostazioni: #
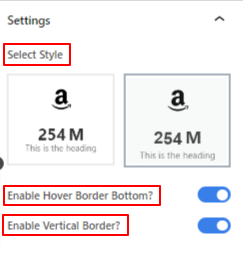

- Seleziona Stile: Scegli uno stile rivelatore per il numero del fatto sul lato visitatore.
- Durata: Imposta la durata del conteggio dei numeri durante la visualizzazione in millisecondi.
- Abilita passaggio del mouse in basso: Attiva questo pulsante per visualizzare la riga inferiore quando passi il mouse sopra.
- Abilita bordo verticale: Attivalo per mostrare un bordo verticale.
Passaggio 2: assegna uno stile all'icona #
In questa parte ci concentreremo sullo stile dell'icona e di altri elementi di contenuto.
Vai alla scheda stile:
Icona, #
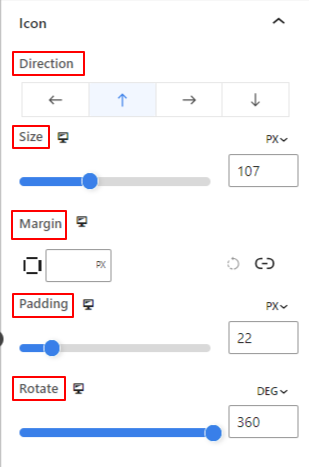

- Direzione: Definisce il posizionamento dell'icona (sinistra/alto/destra/basso)
- Misurare: Utilizzare il cursore per determinare la dimensione dell'icona.
- Margine: Inserisci il valore personalizzato di marting per regolare lo spazio attorno all'icona.
- Imbottitura: Definisci la spaziatura dell'icona utilizzando il cursore o immettendo un valore personalizzato nel campo.
- Ruotare: Assegna un valore specifico o applica il cursore per determinare il grado di rotazione dell'icona.
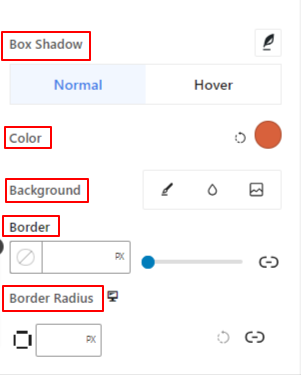

- Scatola Ombra: Utilizzando questi controlli è possibile aggiungere effetti ombra attorno all'icona.
- Colore: Utilizza il selettore colore per impostare un colore per l'icona.
- Sfondo: Aggiungi un tipo di sfondo tra colore pieno e sfumato.
- Confine e raggio del bordo: Imposta lo spessore, il colore e la rotondità del bordo dell'icona.
Passaggio 3: definire lo stile del contenuto del testo #
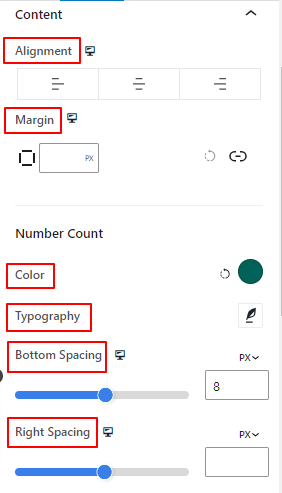

- Allineamento: Posiziona il contenuto del testo a sinistra, al centro o a destra.
- Margine: Regola il margine per il contenuto del testo.
Conteggio dei numeri:
- Colore: Seleziona un colore per il numero.
- Tipografia: Controlla tutte le impostazioni tipografiche come tipo di carattere, dimensione, peso, stile, spaziatura tra lettere e molto altro.
- Spaziatura inferiore: Definisci lo spazio inferiore tra il numero e il contenuto del titolo utilizzando il cursore o inserendo un valore personalizzato.
- spaziatura corretta: Definisce lo spazio tra il numero e il contenuto del suffisso.
Titolo:
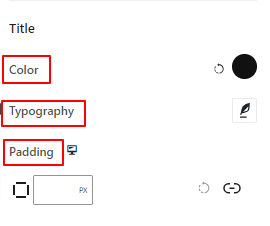

- Colore: Assegna un colore al testo del titolo.
- Tipografia: Ottieni tutti i controlli tipografici come tipo di carattere, dimensione, stile, interlinea, ecc.
- Imbottitura: Inserisci il valore personalizzato desiderato per aggiungere spaziatura attorno al titolo.
Passaggio 4: Definisci lo stile degli altri elementi #
Super: #
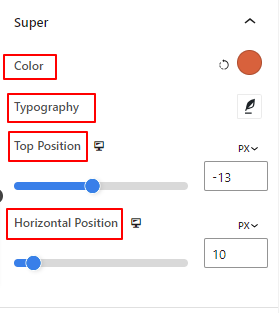

- Colore: Seleziona un colore per il super testo o il simbolo.
- Tipografia: Ottieni tutte le impostazioni tipografiche per il super testo.
- Posizione superiore: Regola il posizionamento verticale del super contenuto.
- Posizione orizzontale: Utilizza questo cursore per definire la posizione orizzontale del super contenuto.
Le due opzioni successive saranno visibili nella scheda Stile solo se abilitate nella scheda Contenuto.
Bordo passante: #
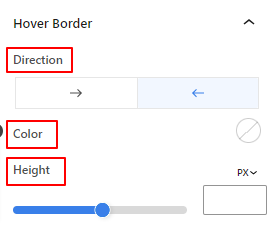

- Direzione: Imposta la direzione di visualizzazione del bordo su cui si passa il mouse.
- Colore: Assegna un colore al bordo su cui si passa il mouse sopra.
- Altezza: Definisci l'altezza del bordo del passaggio del mouse utilizzando il cursore o immettendo un valore personalizzato.
Bordo verticale: #
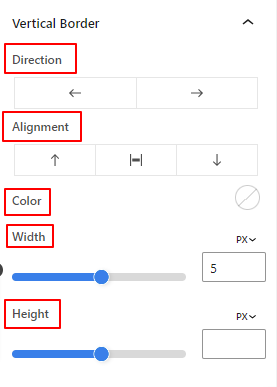

- Direzione: Seleziona la direzione sinistra o destra del bordo verticale.
- Allineamento: Da lì, imposterai il posizionamento verticale del bordo verticale.
- Colore: Utilizza il selettore colore per assegnare un colore al bordo verticale.
- Larghezza e altezza: Regola lo spessore e l'altezza del bordo verticale.
Ecco fatto. Abbiamo terminato tutte le impostazioni. Ora tocca a te provare tutte queste funzionalità per creare il tuo contatore di curiosità sul tuo sito web.
Passaggio 5: Impostazioni avanzate #
Dalla scheda Impostazioni avanzate puoi configurare il layout del blocco Fun Fact, lo sfondo, gli stili dei bordi e controllarne la visibilità.
Disposizione, #
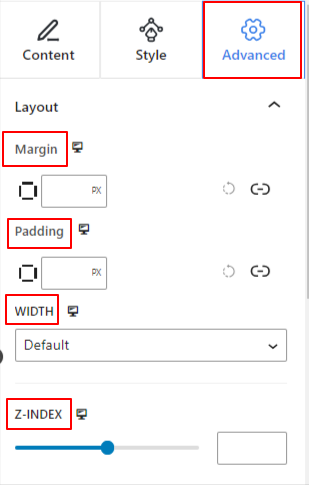

- Margine: Definisce lo spazio attorno al layout del blocco. Aiuta a impostare lo spazio tra un altro blocco.
- Imbottitura: inserisci un valore per impostare lo spazio attorno al blocco all'interno del suo layout.
- Larghezza: Oltre a mantenere la larghezza del layout predefinita.
- Intera larghezza: Selezionando questa opzione, il layout si estenderà per l'intera larghezza dello schermo.
- In linea (automatico): Applicandolo avrà la stessa larghezza dell'elemento blocco.
- Costume: Scegliendo questa opzione verrà visualizzato un cursore per definire lo spazio orizzontale del layout del blocco.
- Indice Z: utilizzare il cursore per specificare l'ordine di sovrapposizione del blocco con altri blocchi.
Posizione: #
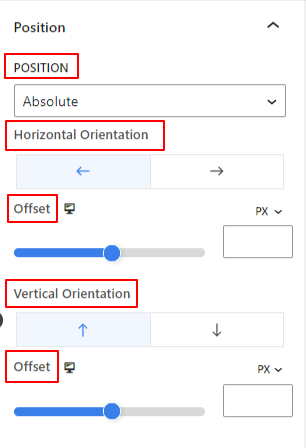

Sotto il menu a discesa, vedrai tre opzioni: Predefinito, Assoluto, E Fisso.
- Assoluto: Selezionando questa opzione ti verrà fornita una posizione assoluta del blocco, il che significa che gli elementi si adatteranno al loro contenitore.
- Fisso: l'opzione Posizione fissa consentirà all'elemento di adattarsi all'intera finestra o schermo.
Entrambe le opzioni Assoluto e Fisso hanno impostazioni simili come le seguenti:
- Orientamento orizzontale: scegliere la direzione di posizionamento tra sinistra e destra.
- Compensare: utilizzare il dispositivo di scorrimento o inserire manualmente un valore per regolare il posizionamento orizzontale del blocco.
- Orientamento verticale: Selezionare la direzione di posizionamento tra su o giù.
- Compensare: utilizzare il dispositivo di scorrimento o inserire manualmente un valore per regolare il posizionamento verticale del blocco.
Sfondo: #
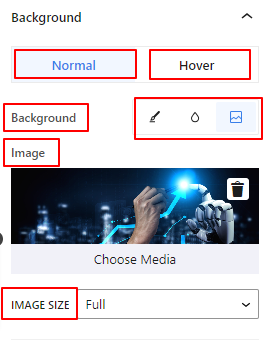

- Sfondo: scegli un'opzione di sfondo tra tinta unita, sfumatura o immagine.
Sotto l'opzione Al passaggio del mouse:
- Immagine: Se scegli l'opzione immagine si apriranno le seguenti opzioni:
- Immagine: scegli un'immagine dal catalogo multimediale o carica la tua.
- Dimensioni immaginee: selezionare la dimensione dell'immagine tra Miniatura, Media, Grande o Intera.
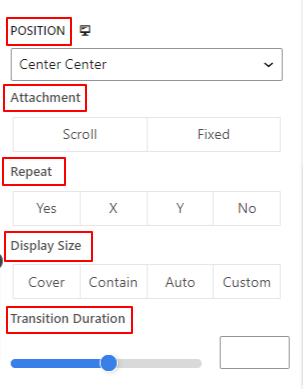

- Posizione: Seleziona la posizione delle 10 diverse opzioni.
- Allegato: Specifica la relazione fissa o scorrevole dell'immagine di sfondo con il resto della schermata del browser.
- Ripetere: selezionare un'opzione per impostare la modalità di ripetizione delle immagini di sfondo.
- Dimensioni dello schermo: consente di selezionare una dimensione di visualizzazione tra quattro diverse opzioni.
- Durata della transizione: utilizza il cursore per regolare la transizione dello sfondo dallo stato normale allo stato al passaggio del mouse.
Confine: #
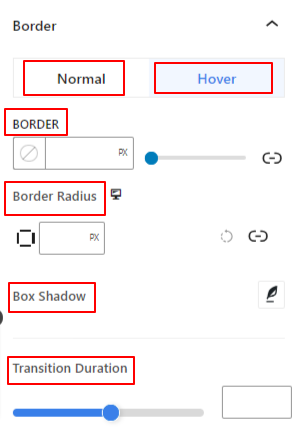

- Confine: sotto questa opzione di impostazione, otterrai opzioni di impostazione del bordo come larghezza, stile e colore.
- Raggio del confine: imposta la rotondità del bordo inserendo un valore.
- Scatola Ombra: Ottieni tutte le impostazioni come colore, orizzontale/verticale, sfocatura, diffusione e altro per dare effetti di ombra al bordo.
Sotto l'opzione al passaggio del mouse:
- Durata della transizione: puoi aggiungere un valore manualmente o utilizzare il dispositivo di scorrimento per impostare l'ora in cui modificare il design del bordo allo stato al passaggio del mouse.
Visibilità: #
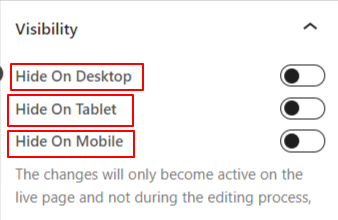

Il modulo visibilità consente di controllare la visualizzazione dei disegni a blocchi in base al tipo di dispositivo. Ci saranno tre opzioni del dispositivo (desktop, tablet, cellulare) con un pulsante di attivazione/disattivazione. Attiva il pulsante di attivazione/disattivazione per nascondere il design a blocchi di quel dispositivo.
Tuttavia, puoi ancora vederlo nella vista dell'editor.
Avanzate: #
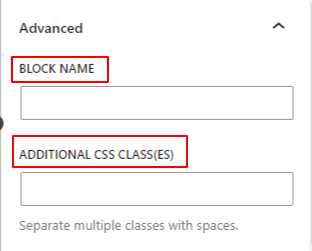

- Nome del blocco: assegna un nome per identificare questo blocco in modo univoco durante il collegamento o lo scripting per definire lo stile del blocco.
- Ancoraggio HTML: aggiungi un URL per collegare una pagina del sito web.
- Classi CSS aggiuntive: assegna classi CSS aggiuntive al blocco che ti consentiranno di modellare il blocco come desideri con CSS personalizzato.
NB: puoi aggiungere più classi separatamente con spazi.


