Personalizar el mensaje de respuesta es una característica profesional de MetForm. Este mensaje se muestra después de que un usuario completa un formulario.
It confirms to the users whether their message has been successfully submitted or not. Either way, creating such a response message is quite easy for the MetForm pro users.
Aquí le mostraremos el procedimiento de edición del mensaje de respuesta.
Abrir un formulario #
Siga el procedimiento a continuación para abrir un formulario donde agregará el mensaje de respuesta.
- Inicie sesión en el panel de administración de WordPress y cree una nueva página.
- Abra la página con el editor Elementor.
- Buscar MetForm en el panel de búsqueda de Elementor y arrastre y suelte el ícono en la página.
- Clickea en el Editar formulario botón ubicado en el panel izquierdo.
- Ahora, seleccione un formulario existente o haga clic en el Nuevo botón para crear un nuevo formulario.
- Agregue el campo requerido y haga clic en el ACTUALIZAR Y CERRAR botón.
Para obtener una descripción general clara de cómo crear un nuevo formulario y agregar el campo requerido, siga las instrucciones en video a continuación:
Editar el mensaje de respuesta #
Los usuarios de MetForm pro pueden personalizar el texto del mensaje de respuesta, la apariencia y otros estilos. Aquí está el procedimiento paso a paso para editar el mensaje de respuesta.
Editar el texto del mensaje de respuesta #
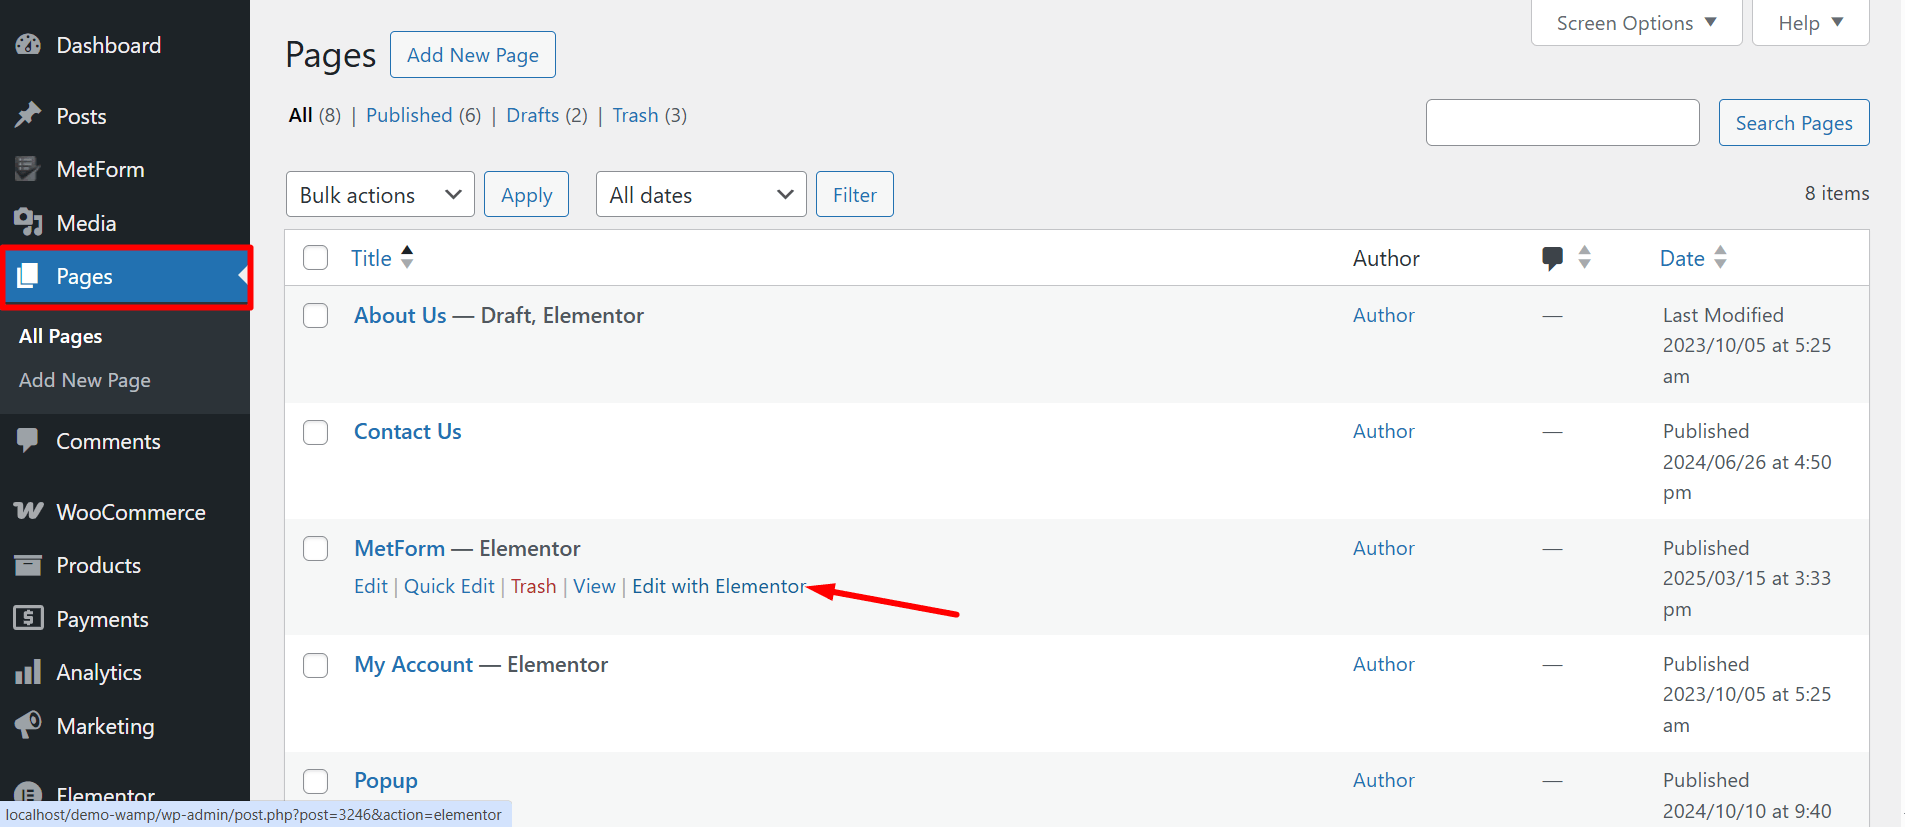
Start by accessing to your WordPress dashboard:
Navegar a pages/ posts > select the page or post where you want to add the form.

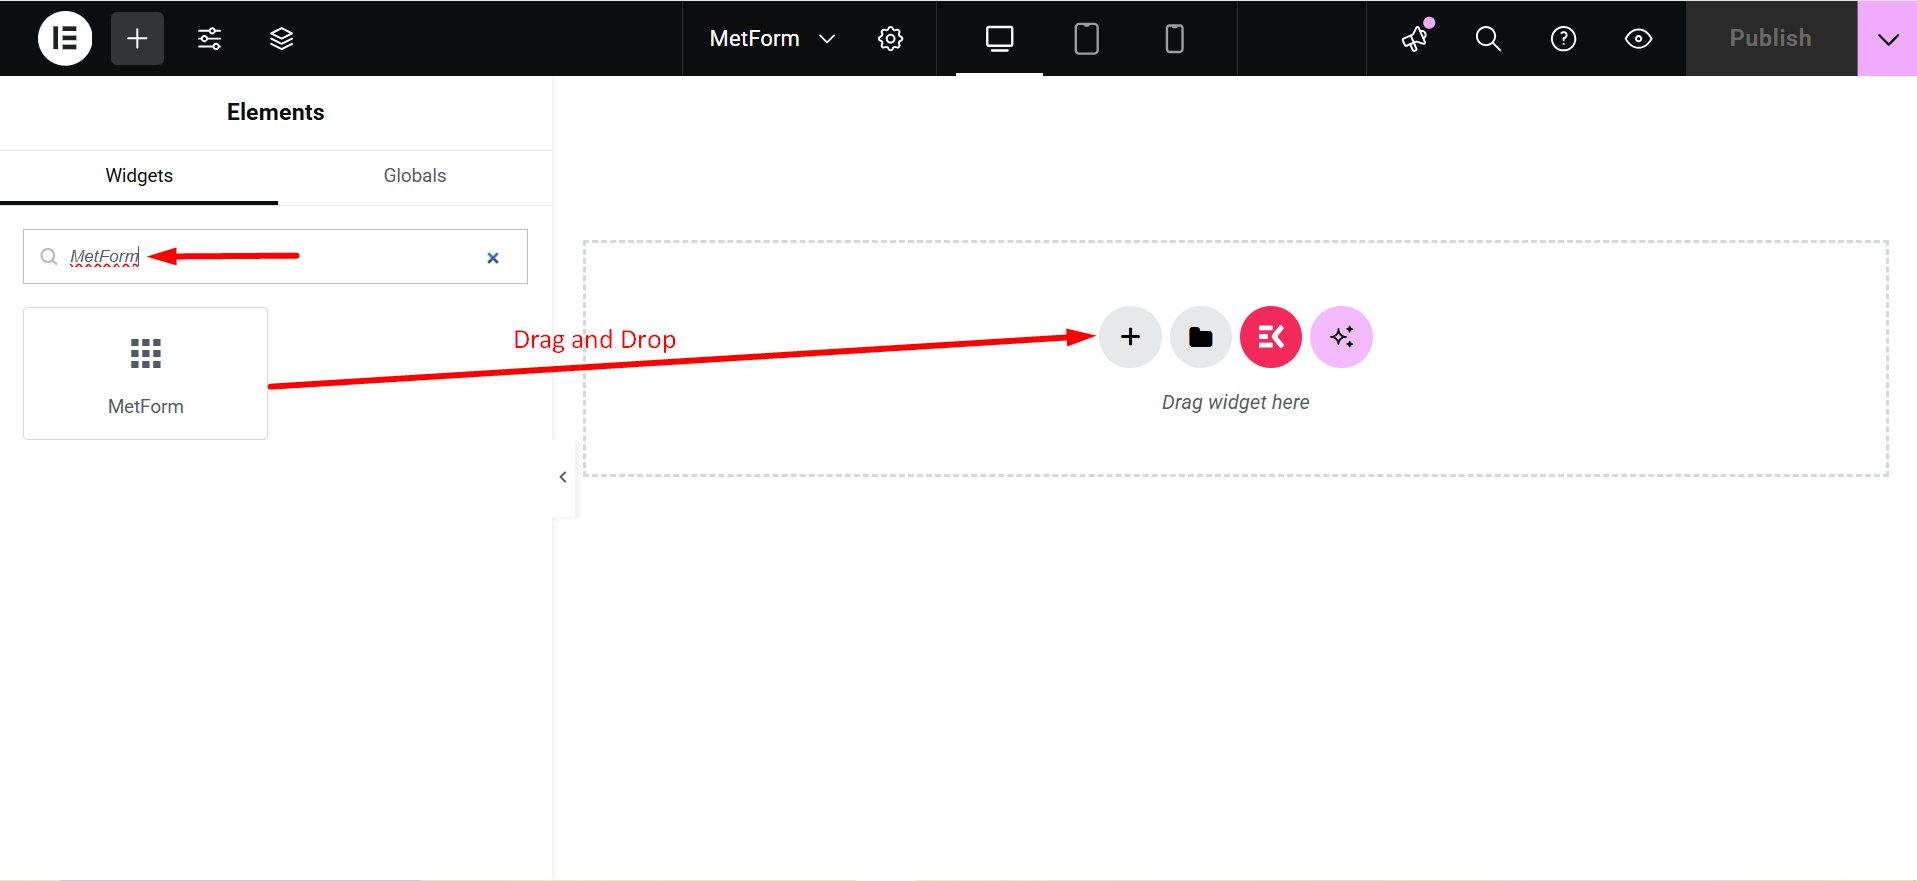
Buscar Metform on the search field > Arrastrar y soltar

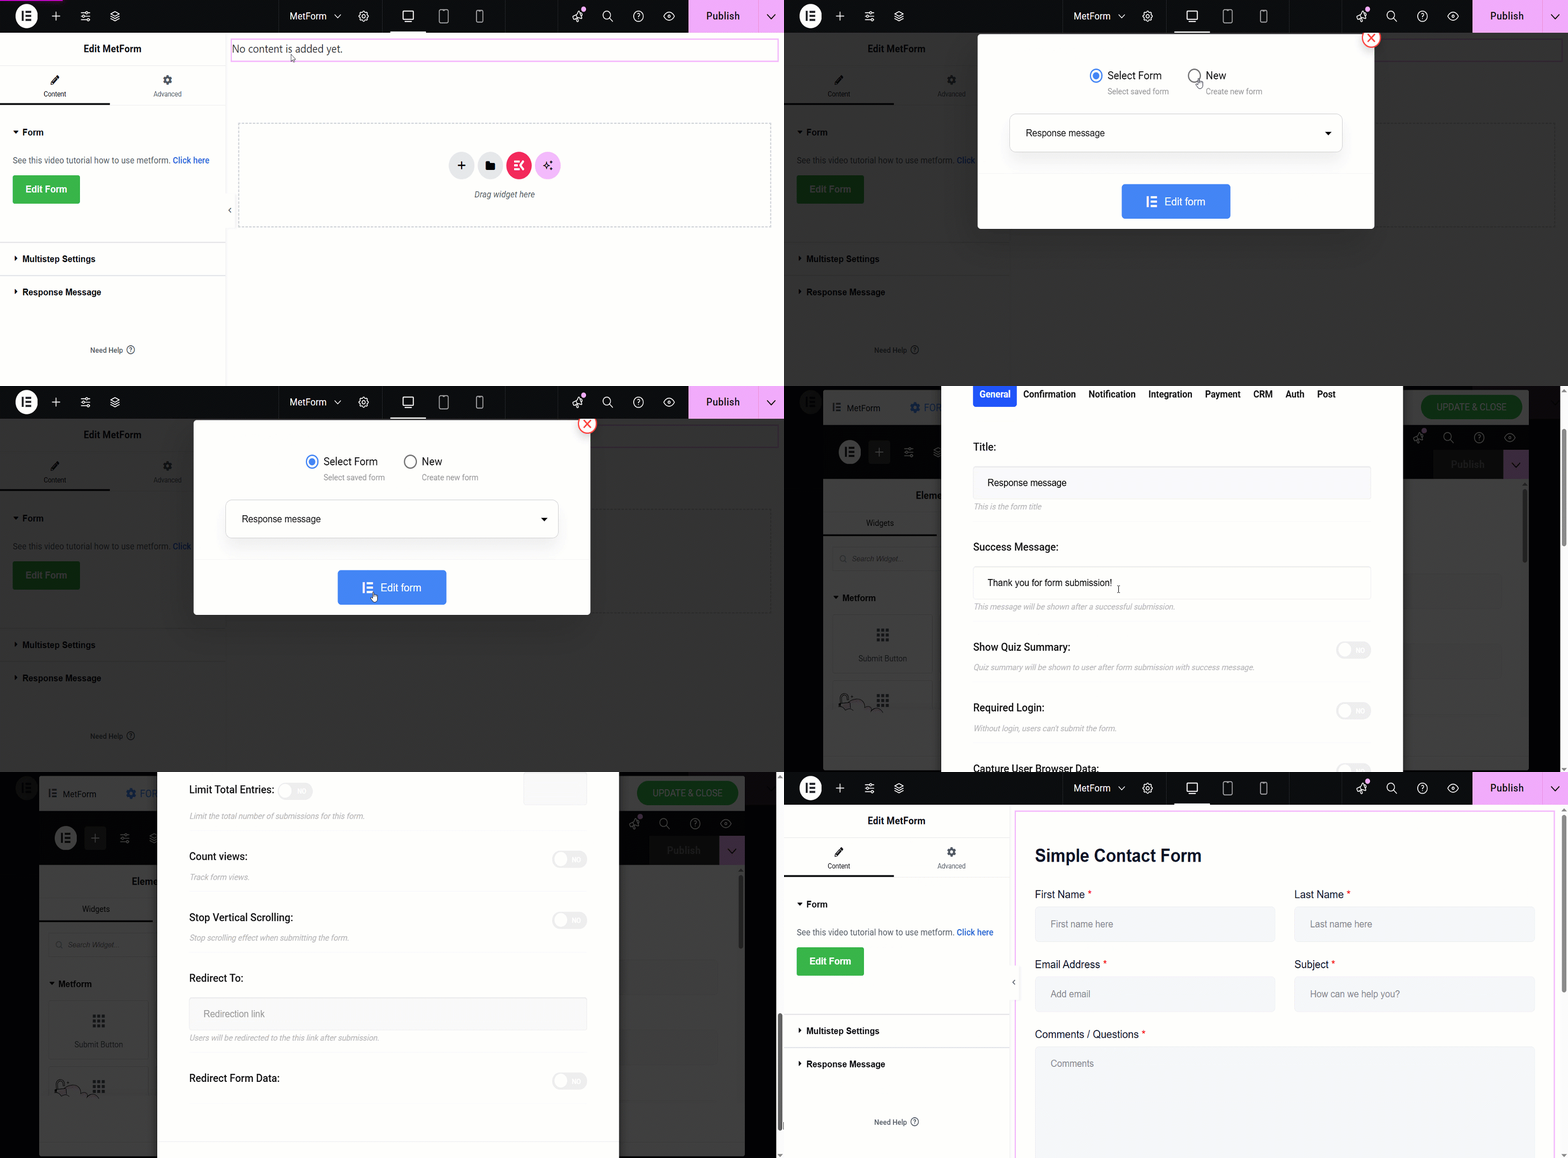
- Clickea en el Editar formulario button and choose the form. Choose your form from the drop-down and click on the blue Editar formulario button. However, you can also create a new form if you want.
- Now, you can just click on the CONFIGURACIÓN DEL FORMULARIO opción en la esquina superior izquierda.
- Editar el Mensaje de éxito campo de entrada y haga clic en el Guardar cambios botón.
- Por último, haga clic en el ACTUALIZAR Y CERRAR botón.
Now, look at the visual presentation of this entire procedure –

Configuraciones de personalización adicionales del mensaje de respuesta #
After toggling the Mensaje de respuesta button, it’ll show you the additional settings:
Response Type: Pop Alert Box and Alert.
- Pop Alert Box: It is a message displayed as a pop-up, often using JavaScript
alert(). It notifies users with important information or warnings.
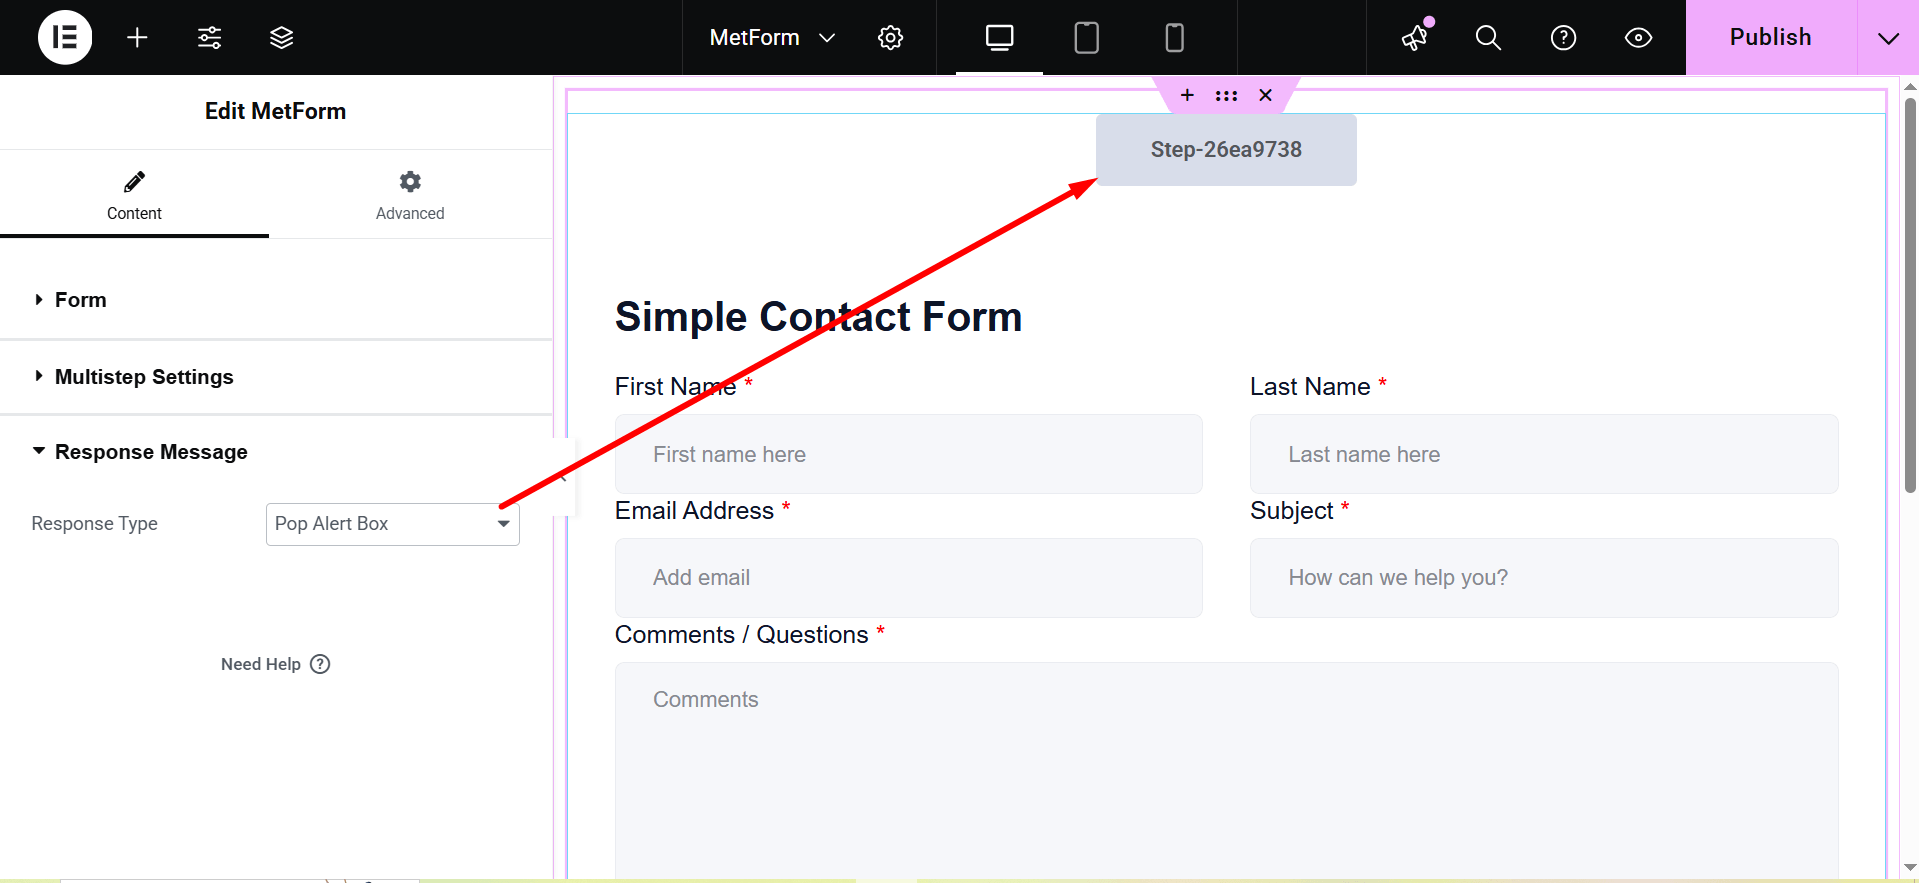

- Alert: This is also a pop-up message box.
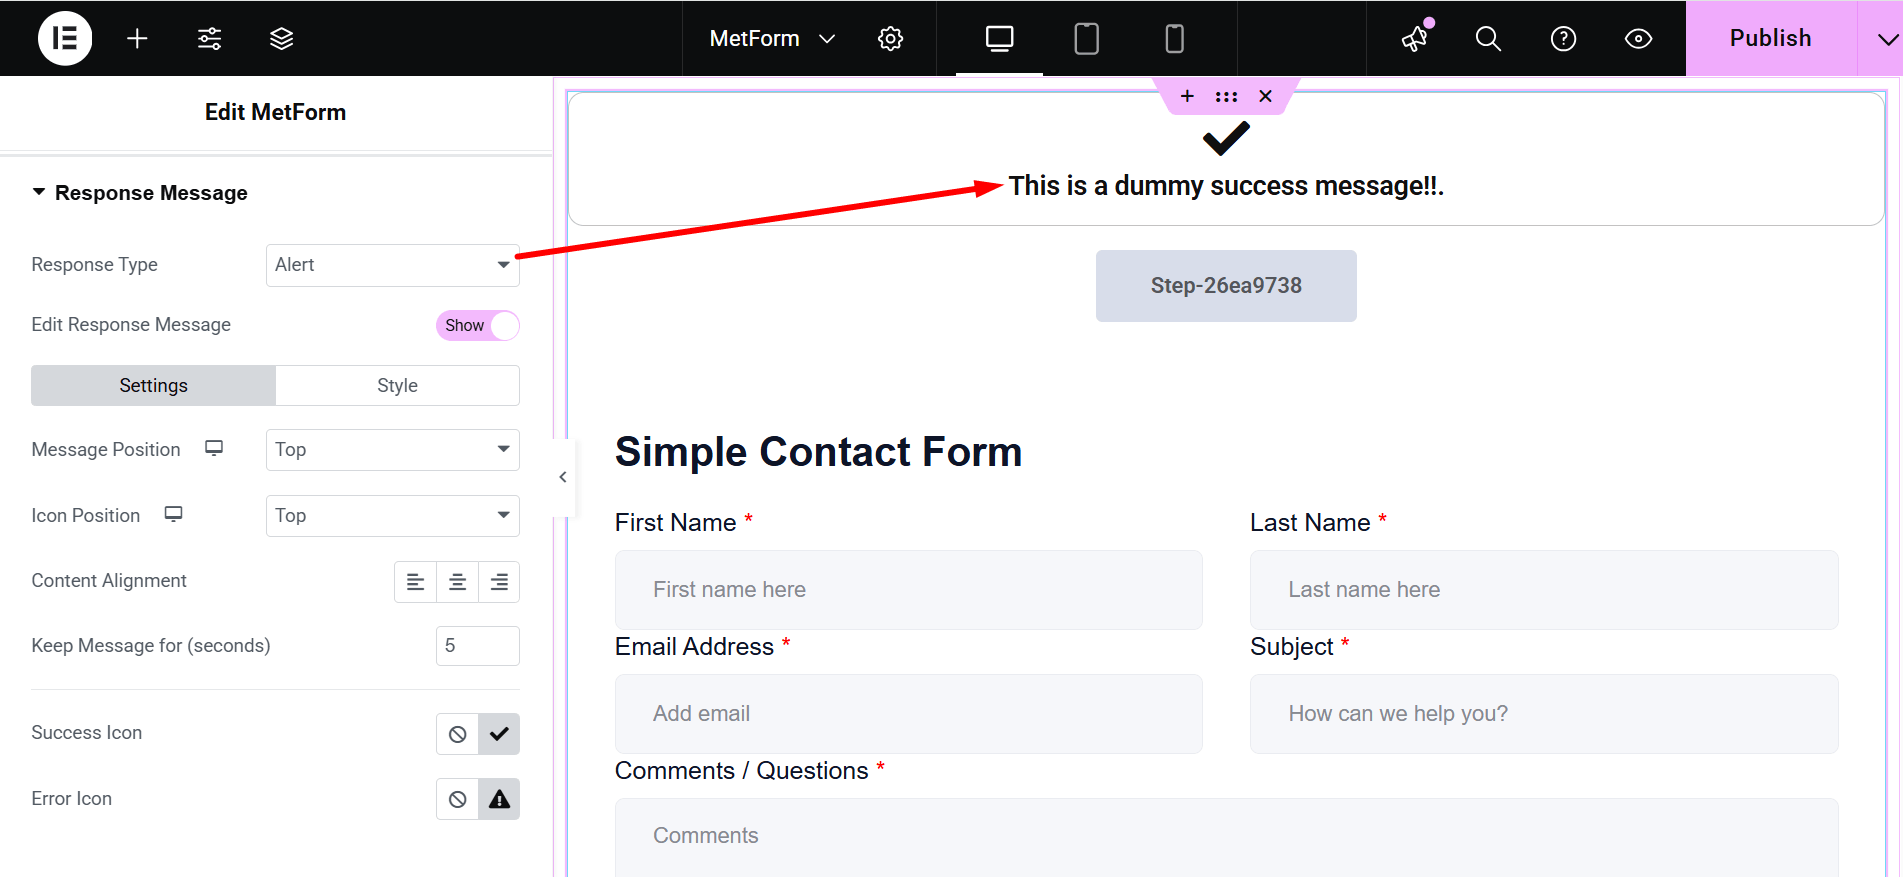

- Edit Response Message: Show/Hide. If you choose “Show”, there are two customization options: Settings and Style.
- Ajustes:`
- Message Position: You can show the message on the Top or at the Bottom.
- Posición del icono: Choose the position Top or Side
- Alineación de contenido: It lets you adjust the alignment.
- Keep Message for (seconds): Defines how long the message remains visible.
- Success Icon: Represents a visual indicator for successful actions.
- Error Icon: Displays a symbol to indicate an error or failure.
- Estilo: Here you can change the colors of Typography, Success Message Color, Error Message Color, Success Icon Color, Error Icon Color, Success Message Background and Error Message Background.
- Tamaño de ícono: This bar lets you adjust the dimensions of the displayed icon.
- Ancho del contenedor: Sets the overall width of the message container.
- Tipo de borde: The available border types are solid, double, dotted, dashed, and groove.
- Radio del borde: Controls the roundness of the container’s corners.
- Relleno de contenedores: Sets the spacing inside the message container.
- Margen de icono: Defines the space around the icon.
- Margen de contenedor: Specifies the spacing outside the message container.
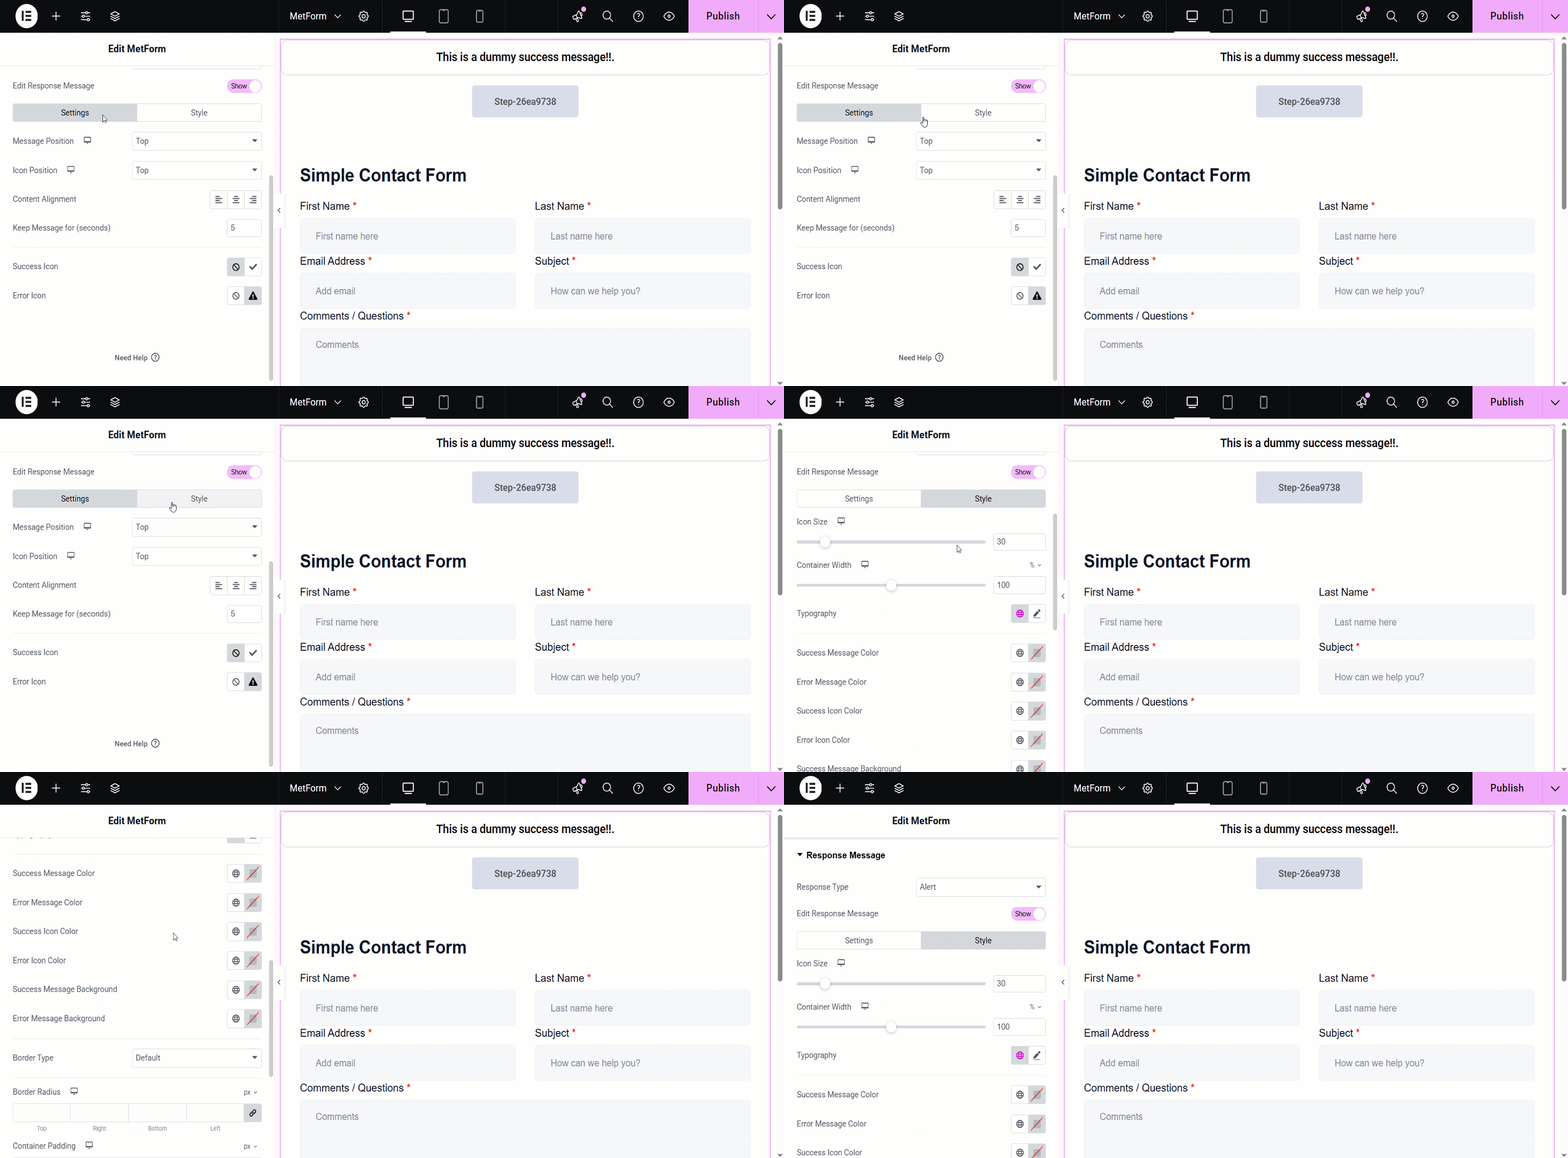

Punto a tener en cuenta: Esta función de edición de mensajes de respuesta está disponible solo para usuarios de licencia profesional y no funciona cuando se usa un formulario mediante código corto.
Característica adicional
Above the Response Message section, you might have already noticed another amazing feature called “Enable Multistep”. By enabling this feature you can create forms with multiple steps.
Here’s the video guideline about creating a multistep form using MetForm 👇


