Agregue fácilmente un botón llamativo en el editor de bloques con el bloque de botones GutenKit. Puede diseñar fácilmente un botón interactivo con un ícono, texto, efectos de animación y todas las opciones de personalización necesarias que animen a los usuarios a hacer clic.
En esta documentación, le mostraremos cómo utilizar el bloque de botón GutenKit en el editor Gutenberg.
Cómo utilizar el bloque de botones GutenKit #
Vaya al panel de WordPress > Agregar una página o publicación > Presione el botón “+" icono en el parte superior de la pantalla del editor de bloques > Buscar Botón GutenKitHaga clic o arrástrelo y suéltelo en la pantalla del editor.
Ahora, verá la configuración del bloque del botón GutenKit en la barra lateral derecha de la pantalla del editor de bloques.
Paso 1: Agregar texto e ícono de botón en Gutenberg Builder #
Comenzaremos agregando el texto y el ícono. Veamos cómo insertarlos:
Bajo la Pestaña de contenido,
Contenido #
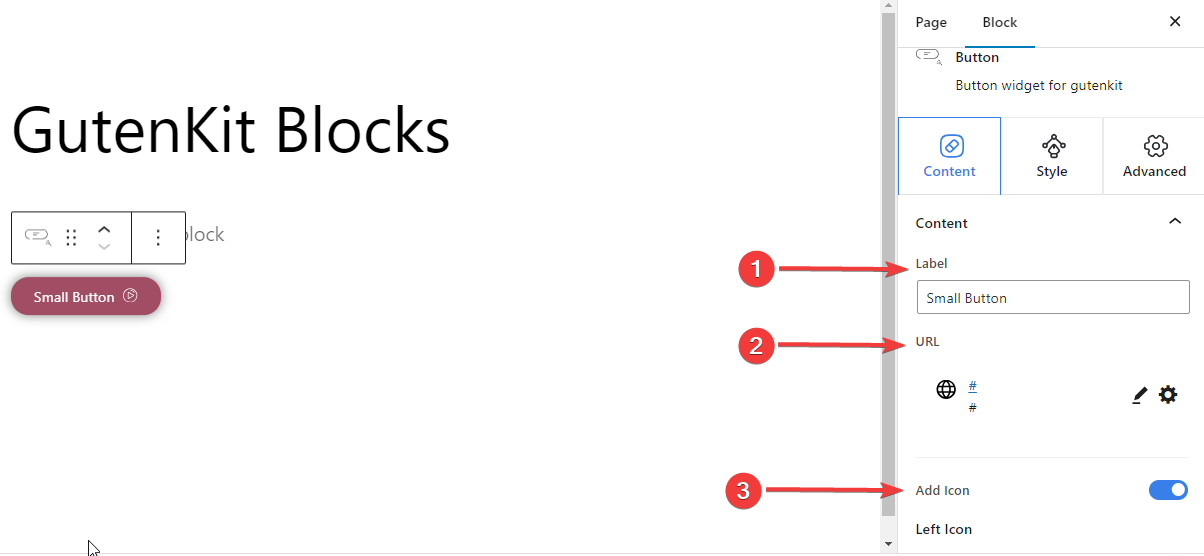

- Etiqueta:Editar o agregar una nueva etiqueta para el botón.
- URL:Agrega la URL que seguirá después de presionar el botón.
- Agregar icono:Alterna este icono dentro del botón.
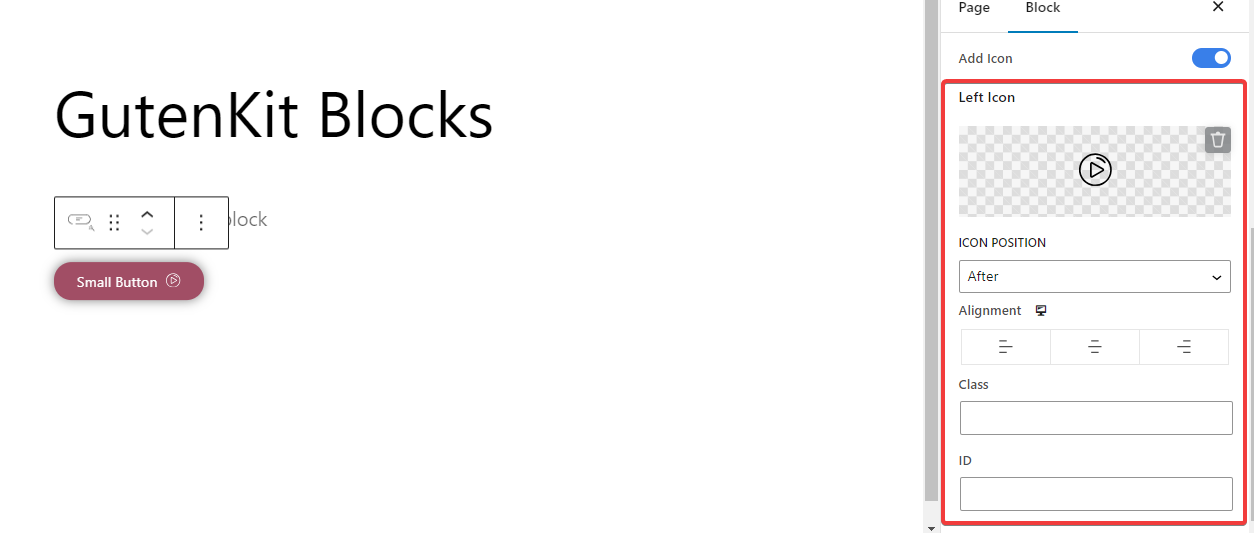

- Icono de la izquierda:Seleccione un ícono de la biblioteca o cargue el suyo.
- Posición del icono:Muestra el ícono antes o después del texto del botón.
- Alineación:Alinea tu botón hacia la izquierda, el centro o la derecha.
- Clase:Dale clase al botón.
- IDENTIFICACIÓN:Dale al botón una identificación única.
Paso 2: Dar estilo al bloque de botones en Gutenberg Builder #
Pasemos a las opciones de estilo del bloque de botones. Las siguientes configuraciones le ayudarán a personalizar el estilo del botón.
Botón: #
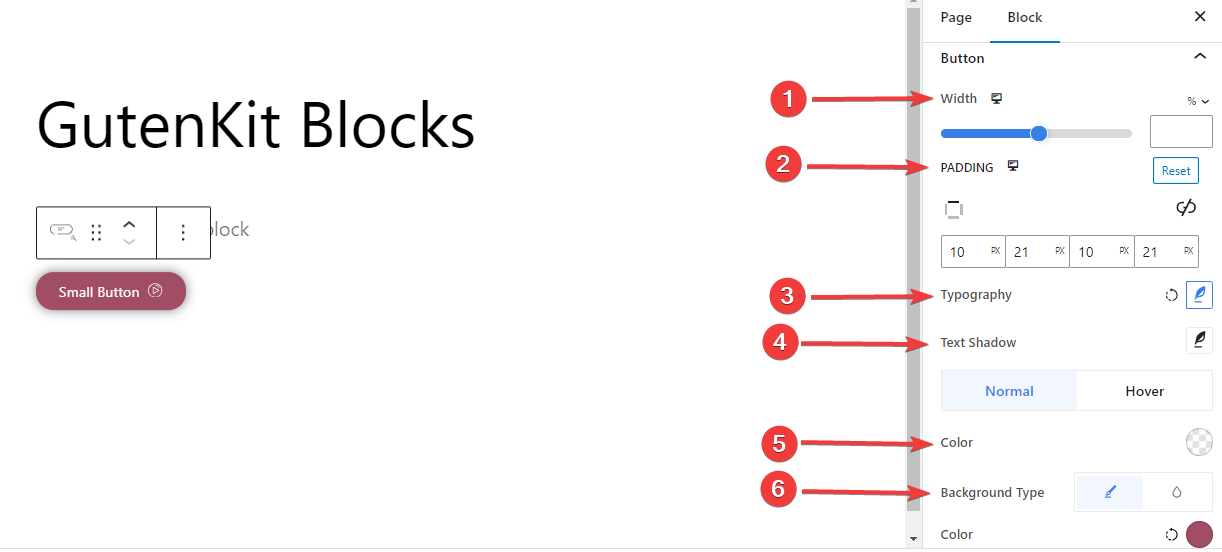

- Ancho:Utilice la barra o ingrese el valor manualmente para el ancho de su botón.
- Relleno:Establezca el relleno dentro de su botón.
- Tipografía:Controla todas las opciones de tipografía para el texto del botón.
- Sombra de texto:Proporciona todas las opciones para los efectos visuales de sombra del texto del botón.
- Color:Elige un color para el texto del botón.
- Tipo de fondo:Agrega un fondo de color clásico o sólido.
Borde #
Puedes agregar un borde tanto para la etapa normal como para la etapa en la que se pasa el mouse sobre ella. Al hacer clic en cualquier opción, se mostrarán las siguientes configuraciones:
- Borde:Dale color al borde y utiliza el control deslizante o ingresa un valor manualmente para el tamaño del borde.
- Radio del borde:Define la redondez del borde.
Sombra,
- Sombra de la caja:Agregue efectos visuales de sombra al cuadro y defina su color, tamaño, ángulo y posición.
Icono,
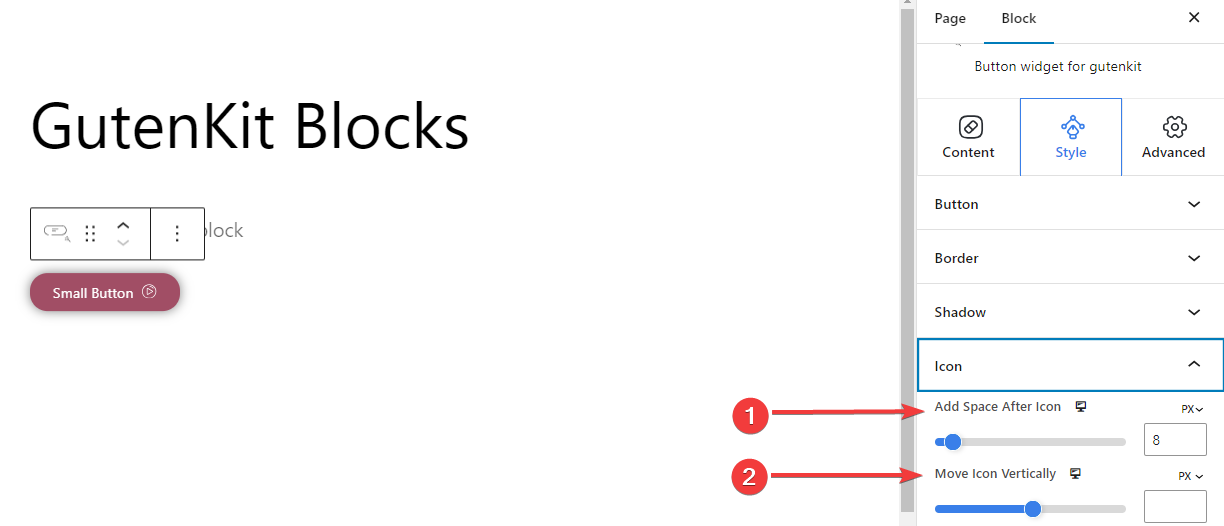

- Agregar espacio después del icono:Agregue espacio después del ícono para ubicarlo horizontalmente.
- Mover el icono verticalmente:Define la posición vertical del icono.
Paso 3: Configuración avanzada #
Usando la pestaña Configuración avanzada, puedes configurar el diseño del bloque de botones, el fondo, los estilos de borde y controlar su visibilidad.
Disposición: #
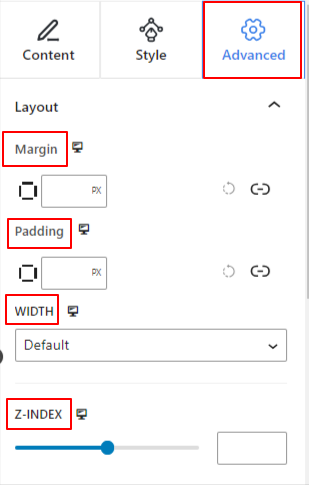

- Margen: define el espacio alrededor del diseño del bloque. Ayuda a establecer un espacio entre otro bloque.
- Relleno: ingrese un valor para establecer el espacio alrededor del bloque dentro de su diseño.
- Ancho: Además de mantener el ancho de diseño predeterminado.
- Ancho completo: Al seleccionar esto, el diseño abarcará todo el ancho de la pantalla.
- En línea (automático): Al aplicarlo tendrá el mismo ancho que el elemento del bloque.
- Costumbre: Al elegir esta opción, se mostrará un control deslizante para definir el espacio horizontal del diseño del bloque.
- Índice Z: utilice el control deslizante para especificar el orden de pila del bloque con otros bloques.
Posición: #
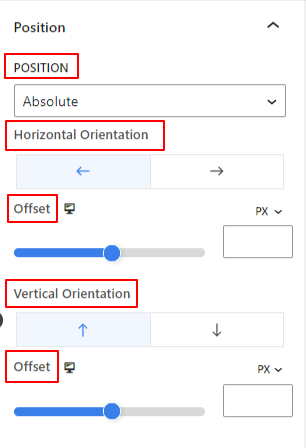

Debajo del menú desplegable, verá tres opciones: Por defecto, Absoluto, y Fijado.
- Absoluto: Al seleccionar esta opción, obtendrá una posición absoluta del bloque, lo que significa que los elementos encajarán en su contenedor.
- Fijado: La opción Posición fija permitirá que el elemento encaje en toda la ventana gráfica o pantalla.
Tanto la opción Absoluta como la Fija tienen configuraciones similares a las siguientes:
- Orientación horizontal: Elija la dirección de posicionamiento entre izquierda y derecha.
- Compensar: Utilice el control deslizante o introduzca un valor manualmente para ajustar la posición horizontal del bloque.
- Orientación vertical: Seleccione la dirección de posicionamiento entre arriba o abajo.
- Compensar: Utilice el control deslizante o introduzca un valor manualmente para ajustar la posición vertical del bloque.
Visibilidad #
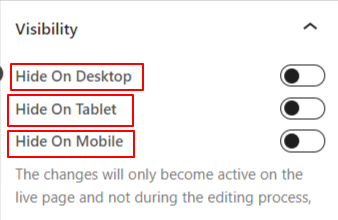

El módulo de visibilidad le permite controlar la visualización de diseños de bloques según el tipo de dispositivo. Habrá tres opciones de dispositivo (escritorio, tableta, móvil) con un botón de alternancia. Active el botón de alternancia para ocultar el diseño de bloque de ese dispositivo.
Sin embargo, aún puedes verlo en la vista del editor.
Avanzado: #
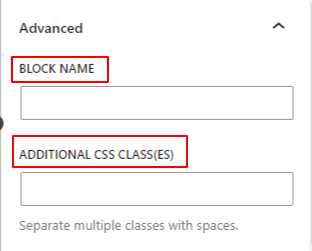

- Nombre del bloque: proporcione un nombre para identificar este bloque de forma única mientras lo vincula o crea una secuencia de comandos para darle estilo al bloque.
- Ancla HTML: agregue una URL para vincular una página de sitio web.
- Clases CSS adicionales: Asigne clases CSS adicionales al bloque, lo que le permitirá diseñar el bloque como desee con CSS personalizado.
NÓTESE BIEN: Puede agregar varias clases por separado con espacios.
Si aplicas las configuraciones anteriores con precisión, obtendrás un botón atractivo en tu sitio web. Prueba a agregar un botón a tu sitio web.


