


Quick Overview
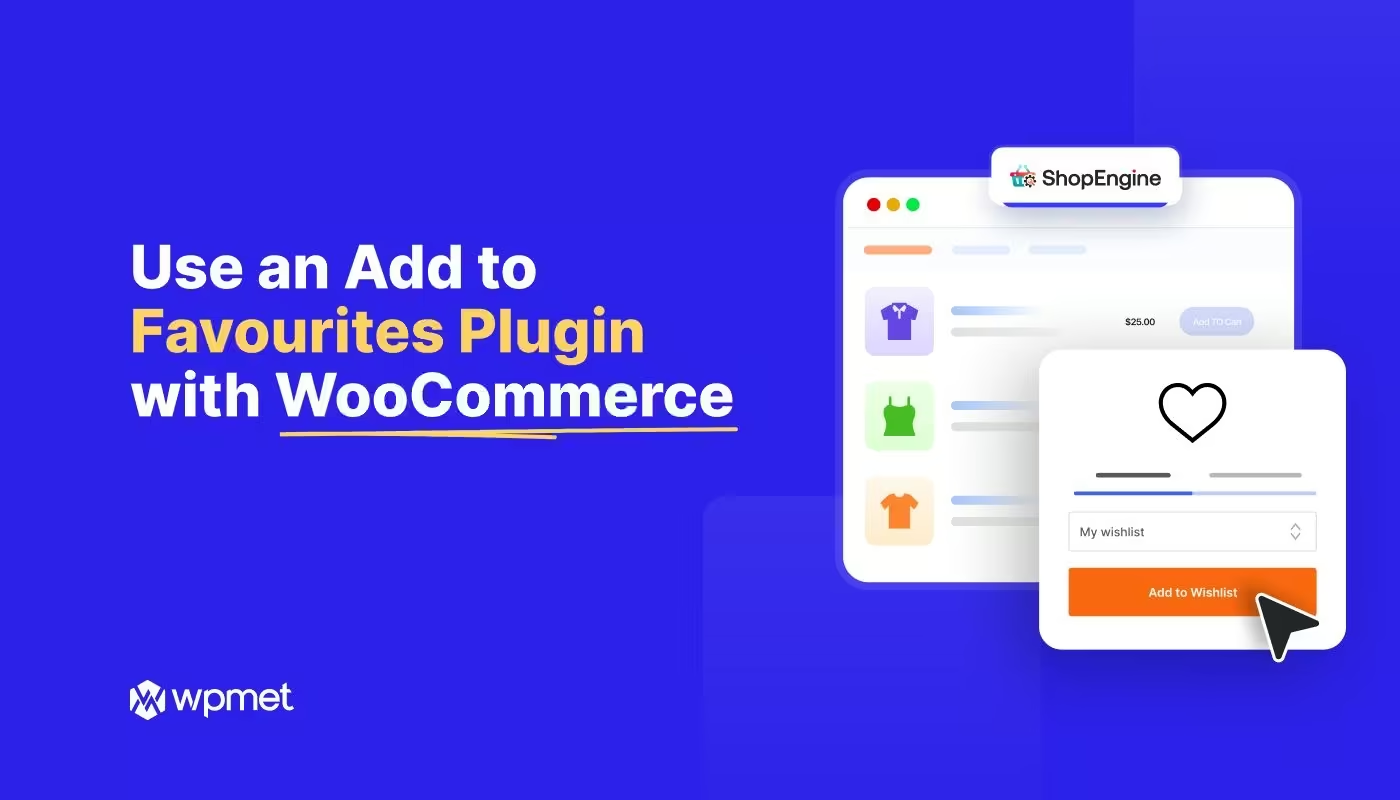
To add your favourite items for future purchases, you should use an add to favourites plugin like ShopEngine. This feature can help boost engagement and repeat sales without slowing down your site.
The setup involves two main phases: activating the Wishlist module within ShopEngine and strategically placing “Save” buttons across your shop pages and product layouts.
Here are the key steps for a successful wishlist setup:
✅ Enable Modular Features: Turn on the Wishlist add-on in ShopEngine settings to keep your site lightweight.
✅ Automate Placement: Toggle the “Show in Archive” and “Single Page” options to display icons where they matter most.
✅ Optimize UX: Position the wishlist button near the “Add to Cart” call-to-action for a simplified flow.
✅ Instant Feedback: Configure pop-up notifications to confirm when an item is successfully saved.
✅ Builder Flexibility: Use the dedicated Wishlist widget smoothly in the editor.
✅ Style to Match: Customize icon colors and button styles to match your brand.
Step-by-Step: How to Use an Add to Favourites Plugin with WooCommerce
Follow these three simple steps to get your wishlist up and running.
Step 1: Download and Activate ShopEngine
ShopEngine is a modular plugin, meaning you only enable the features you need, keeping your site fast and lightweight.
- Navigate to your WordPress dashboard > Plugins > Add New.
- Suchen nach ShopEngine, then click Installieren Und aktivieren Sie.
- If you have the Pro version, upload the zip file provided at purchase and activate your license under the ShopEngine dashboard.
Note: Ensure you have WooCommerce and Elementor (or Gutenberg) installed, as ShopEngine works as an add-on for these builders.
Step 2: Enable the WooCommerce Wishlist Add-on
Once ShopEngine is active, you need to turn on the Wishlist functionality.
- Gehe zu ShopEngine > Add-ons in your WordPress sidebar.
- Suchen Sie die Wunschzettel add-on.
- Klick auf das Einstellungen (gear icon) for the Wishlist module.
- Toggle the switch to Enable the add-on.
Step 3: Configure the Wishlist Add-on Settings
Now that the module is active, you can customize how the wishlist appears to your customers. After enabling the module, stay in the settings popup to adjust the following:
- Show in Archive Page: Toggle this on to display the “Heart” icon on your shop and category pages.
- Show in Single Page: This adds the wishlist button to your individual product pages.
- Button Position: Choose whether the button appears before or after the “Add to Cart” button.
- Benachrichtigungsposition: Decide where the “Added to Wishlist” confirmation pop-up appears, such as Top Right, Bottom Left, etc.
Don’t forget to hit Änderungen speichern once you’ve styled the buttons to match your brand!

And here’s the final output!

FAQs
1. What is a Product Wishlist in WooCommerce?
A product wishlist in WooCommerce allows customers to save products they’re interested in for future purchase.
2. Can You Control Where the Wishlist Button Appears on Your Store?
Yes, you can fully customize the placement of your list favourites. You can:
- Show the wishlist icon on archive (shop/category) pages
- Display it on single product pages
- Choose whether it appears before or after the “Add to Cart” button
- Set the position of the notification pop-up (e.g., top right, bottom left)
3. How Do Customers View Their Wishlist?
By default, ShopEngine integrates the wishlist into the Mein Konto page. You can also create a dedicated Wishlist page by using the ShopEngine Wishlist widget in your page builder.
4. Is Wishlist Beneficial for Your WooCommerce Store?
Yes. A wishlist can:
- Improve user engagement
- Increase repeat visits
- Provide valuable customer insights
- Boost seasonal and promotional sales
5. Will Adding a Wishlist Slow Down Your WooCommerce Store?
No. ShopEngine is modular, meaning you only enable the features you need. This helps keep your WooCommerce store optimized and lightweight, minimizing any performance impact.

Abschluss
Setting up a product wishlist in your WooCommerce store is a simple but powerful way to boost engagement and increase sales. It helps customers save products, return later, and complete their purchases.
This guide explains how to set up your product wishlist with the drag-and-drop WordPress favourites plugin for eCommerce. You can easily customize the product wishlist feature without slowing down your site.
Schreibe einen Kommentar