


Displaying a size chart for your WooCommerce products is essential to improve the shopping experience and reduce the cart abandonment rate. Shoppers often hesitate to buy products due to sizing-related doubt that leads to low conversion rates and sales.
However, this sizing uncertainty and queries can be solved easily by integrating size charts into your WooCommerce products. But, how?
No, worries. The guide with a complete demonstration of how to add product size chart in WooCommerce using the most flexible no-code solution is here to help you. So, let’s dive into the easiest way to add product size chart without any coding proficiency.
Quick Overview
This documentation will walk you through the process of adding a product size chart to a single product page. First, you need to install ShopEngine free and pro, along with Elementor and WooCommerce.
Required tools: Elementor (free), WooCommerce (free), ShopEngine (free & pro)
Next, after these plugins are installed and activated, add a product size chart to a single product page by:
- Enabling the Product Size Chart widget and module.
- Adding a cart to a single product page.
- Editing the modal and normal views of the size chart.
Finally, publish your custom size chart. Also, you will learn the best practices for adding size charts.
Why size chart matters in WooCommerce
Displaying a WooCommerce product size chart is helpful for correctly placing orders with the right sizes. This allows customers to confidently purchase products from your E-Commerce-Shop. It also connects to other business factors that positively drive overall growth and success.
Here are the key benefits of attaching a size chart with your WooCommerce products:
- A proper size chart reduces product return rates.
- Widely boosts customer’s confidence Und Zufriedenheit while making purchases.
- It increases sales by eliminating all confusion that comes with sizes.
- A size chart is quite useful for minimizing size-related queries.
- It ensures long-term success with brand reliability.
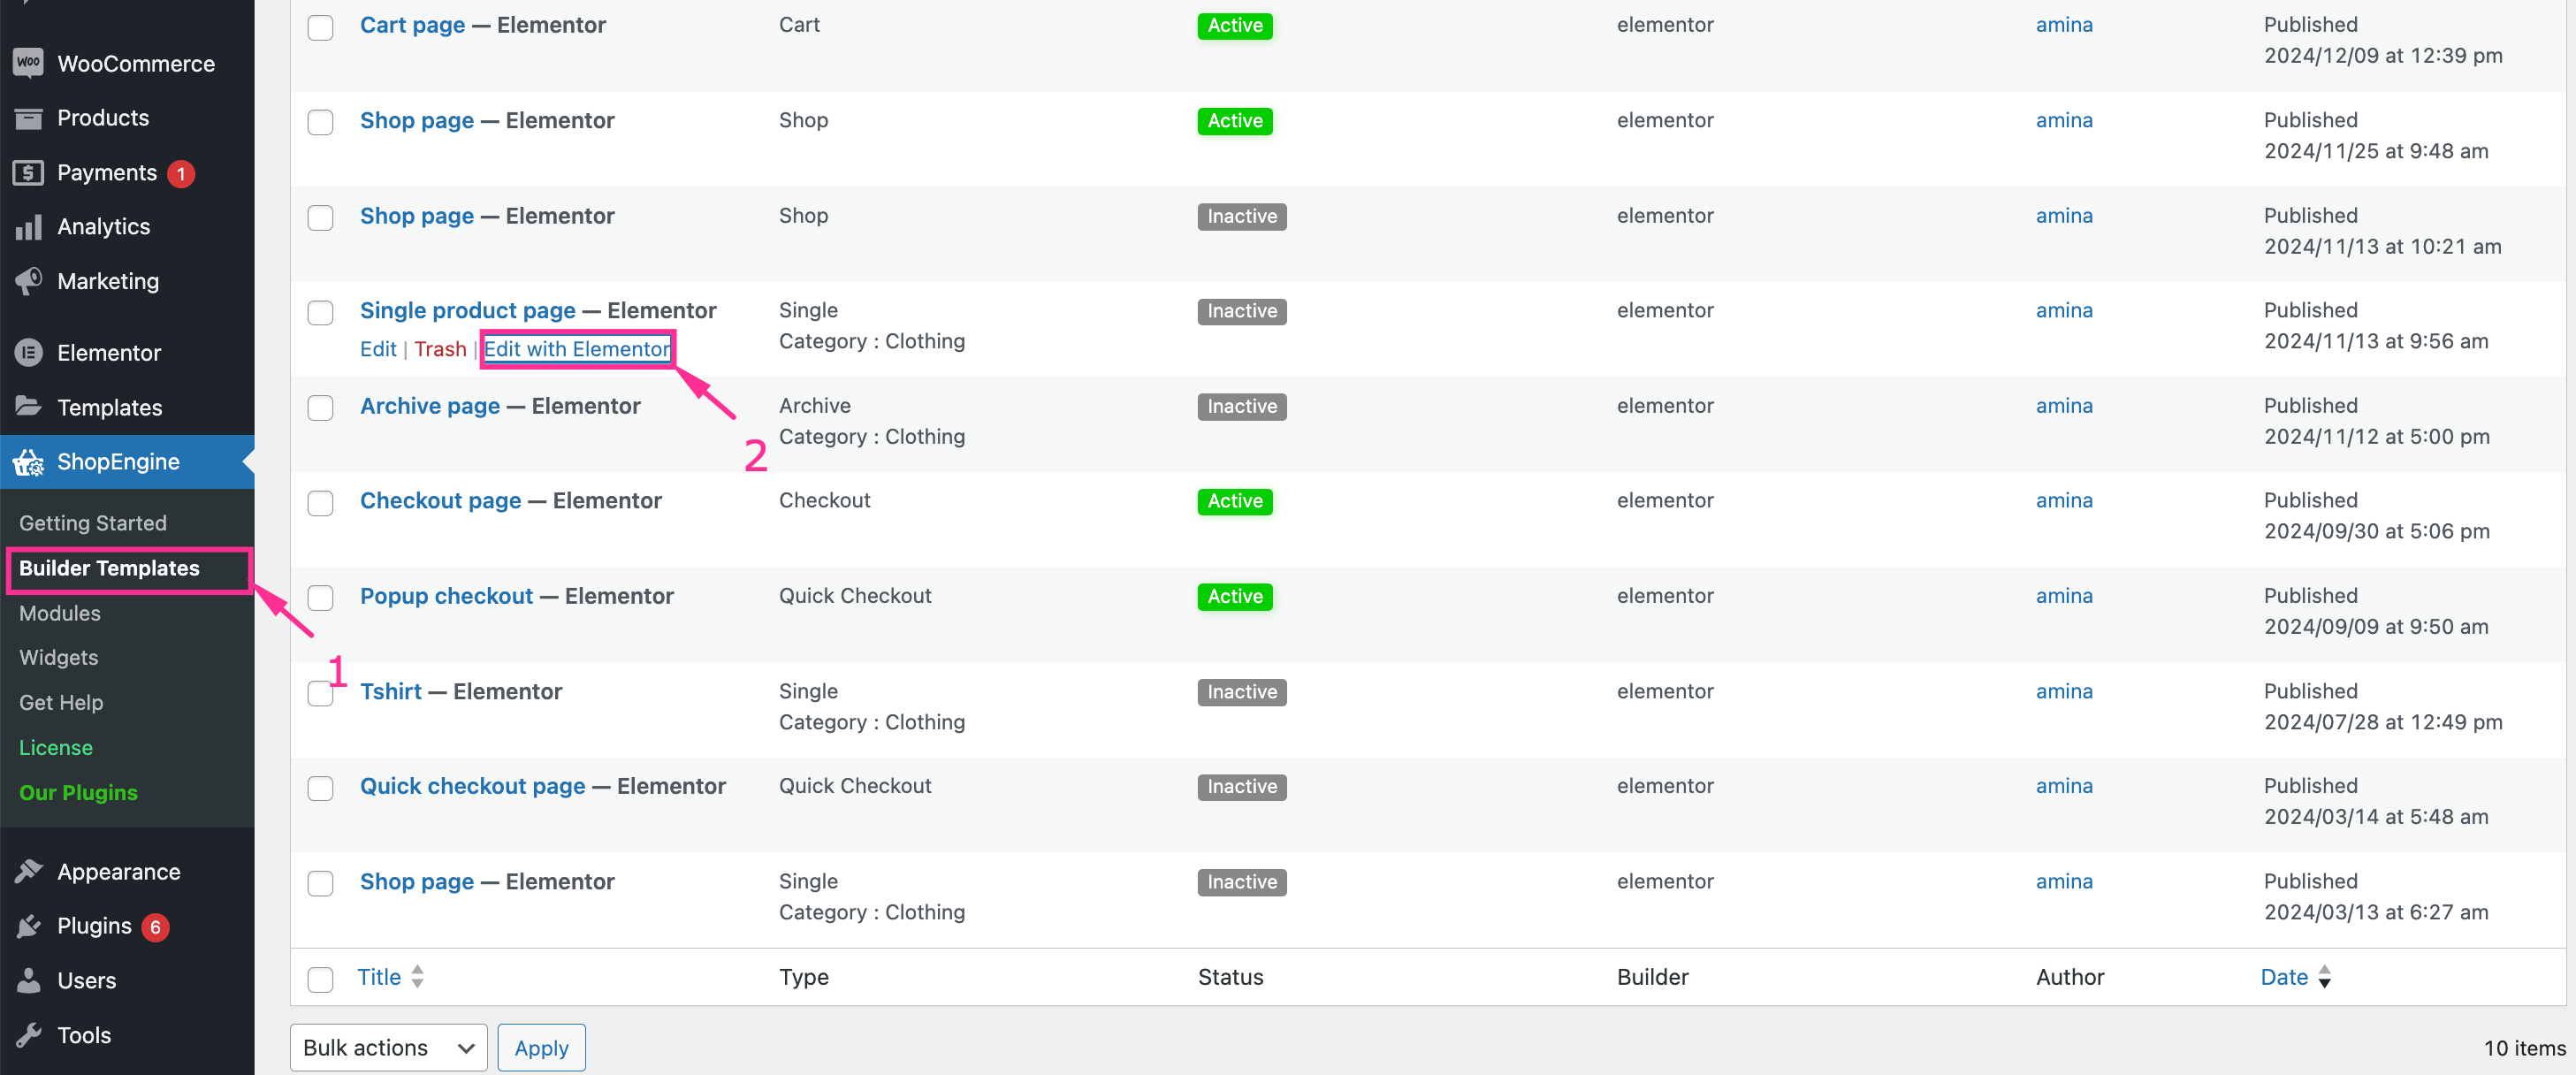
How to add product size chart in WooCommerce
WooCommerce allows you to add product size charts in two ways. One is with coding, friendly for coders and another is with plugins, appropriate for beginners. Considering the user access, here we’re providing you with a comprehensive guide with a plugin that is easy to follow for all.
ShopEngine is one of the best Woocommerce product size chart plugins that serves many purposes besides adding product size charts. Since it’s a premium feature, you will require both free and paid subscriptions. Also, you will need some other secondary plugins.
So, here is the group of plugins you will be required to install and activate before diving into the tutorial:
Step 1: Enable the product size chart module and widget.
After installing and activating ShopEngine, you need to enable the “Product Size Chart” widget by navigating to ShopEngine >> Widgets. Dann Klicken Sie auf „Änderungen speichern“ Taste.
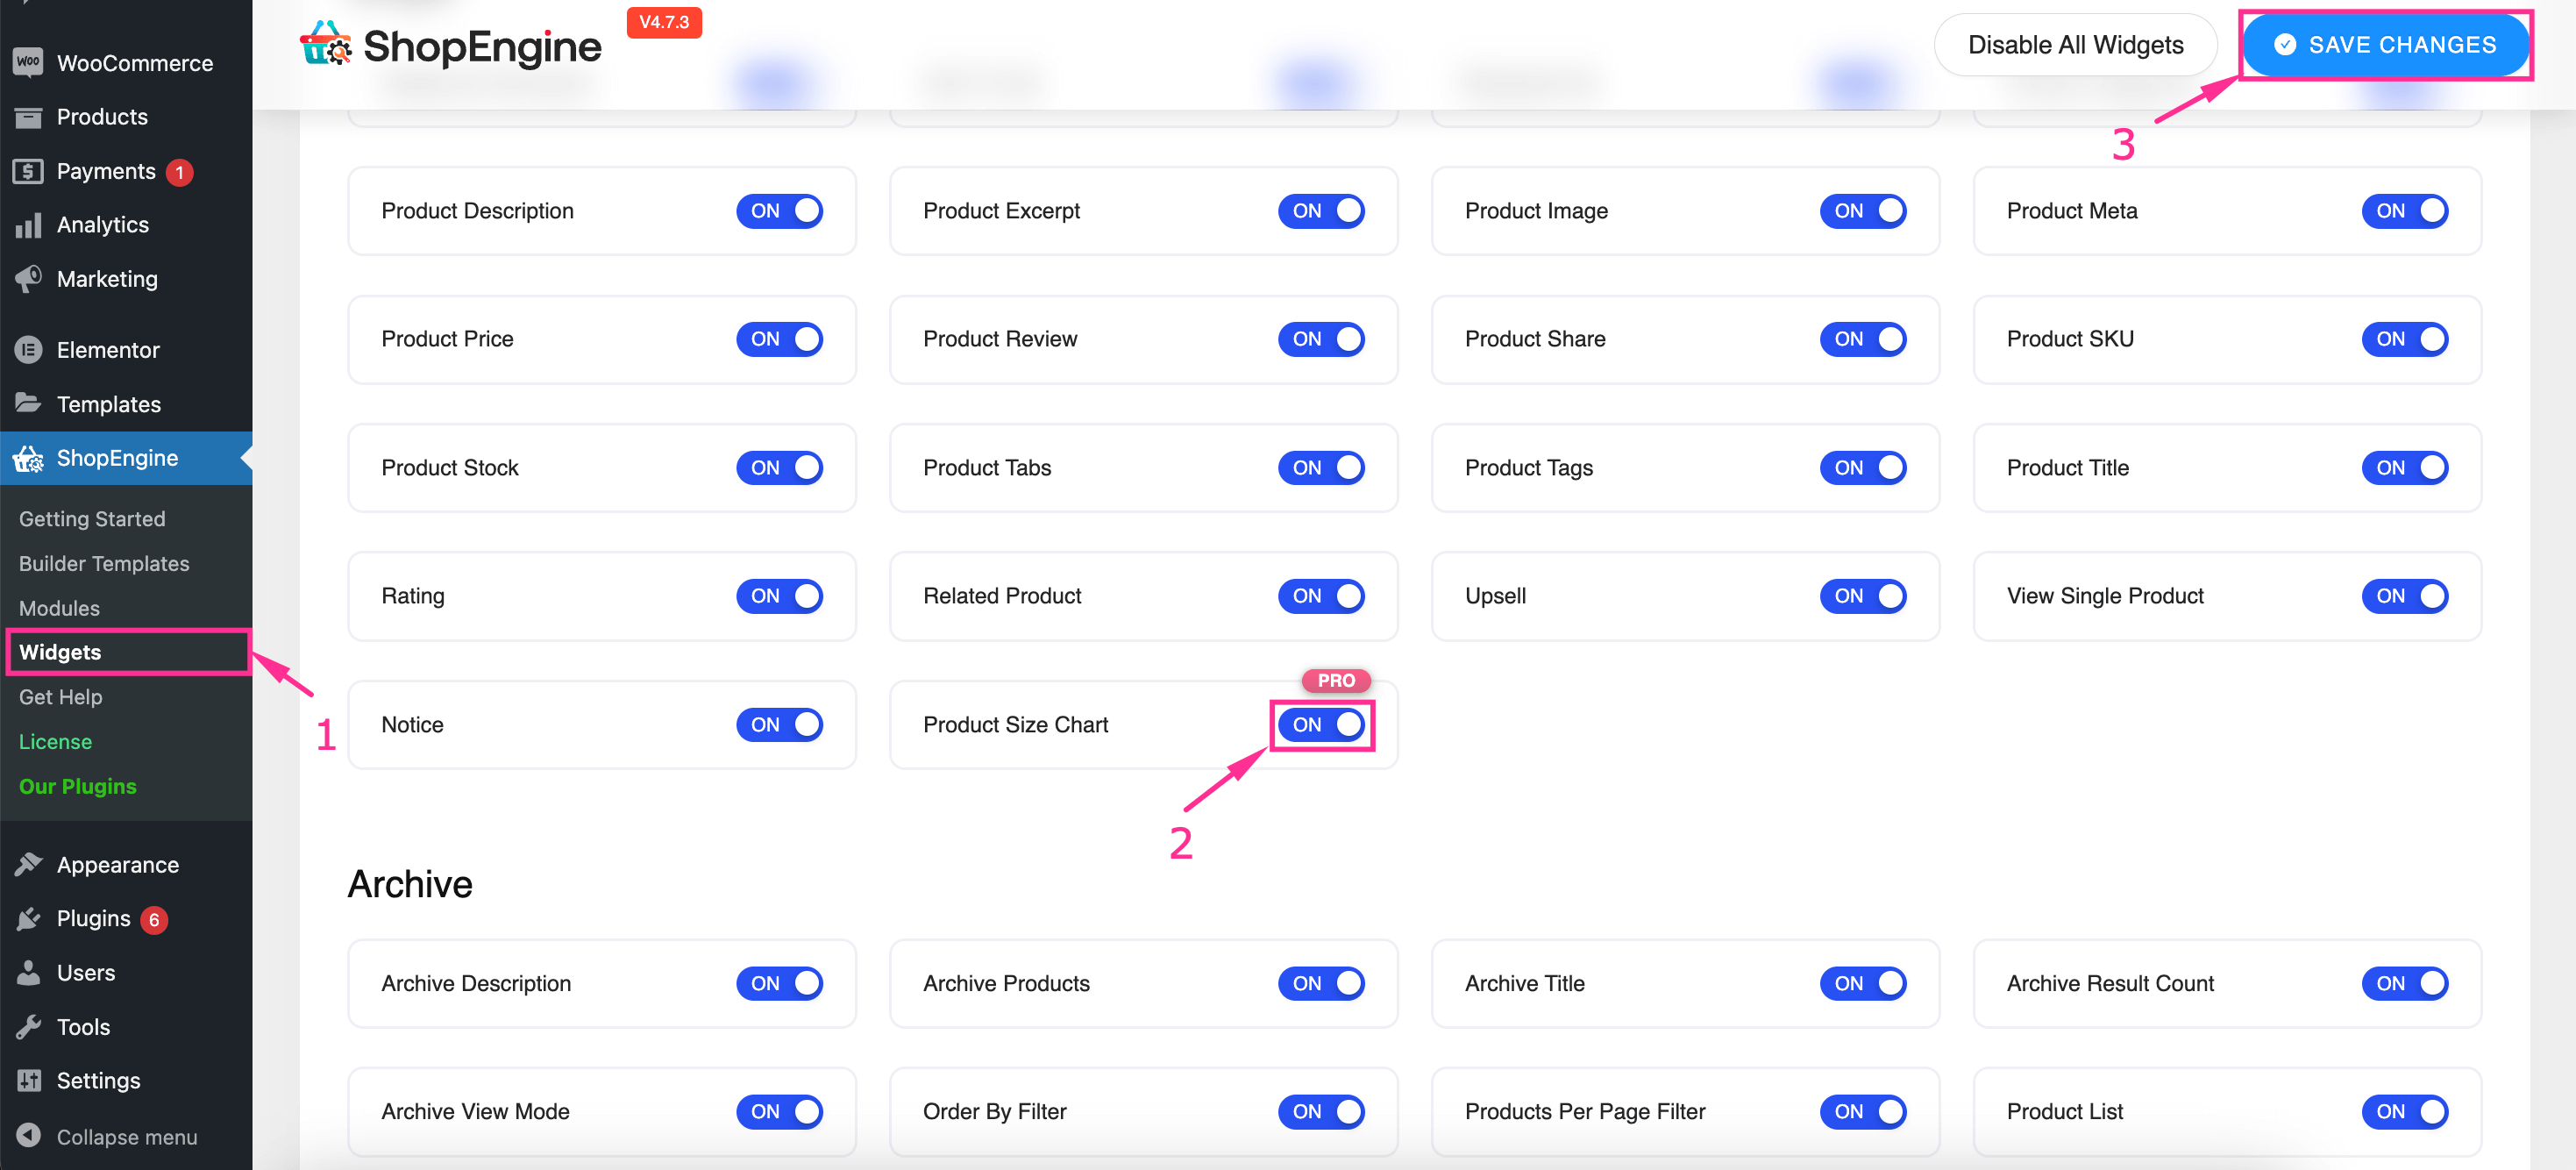
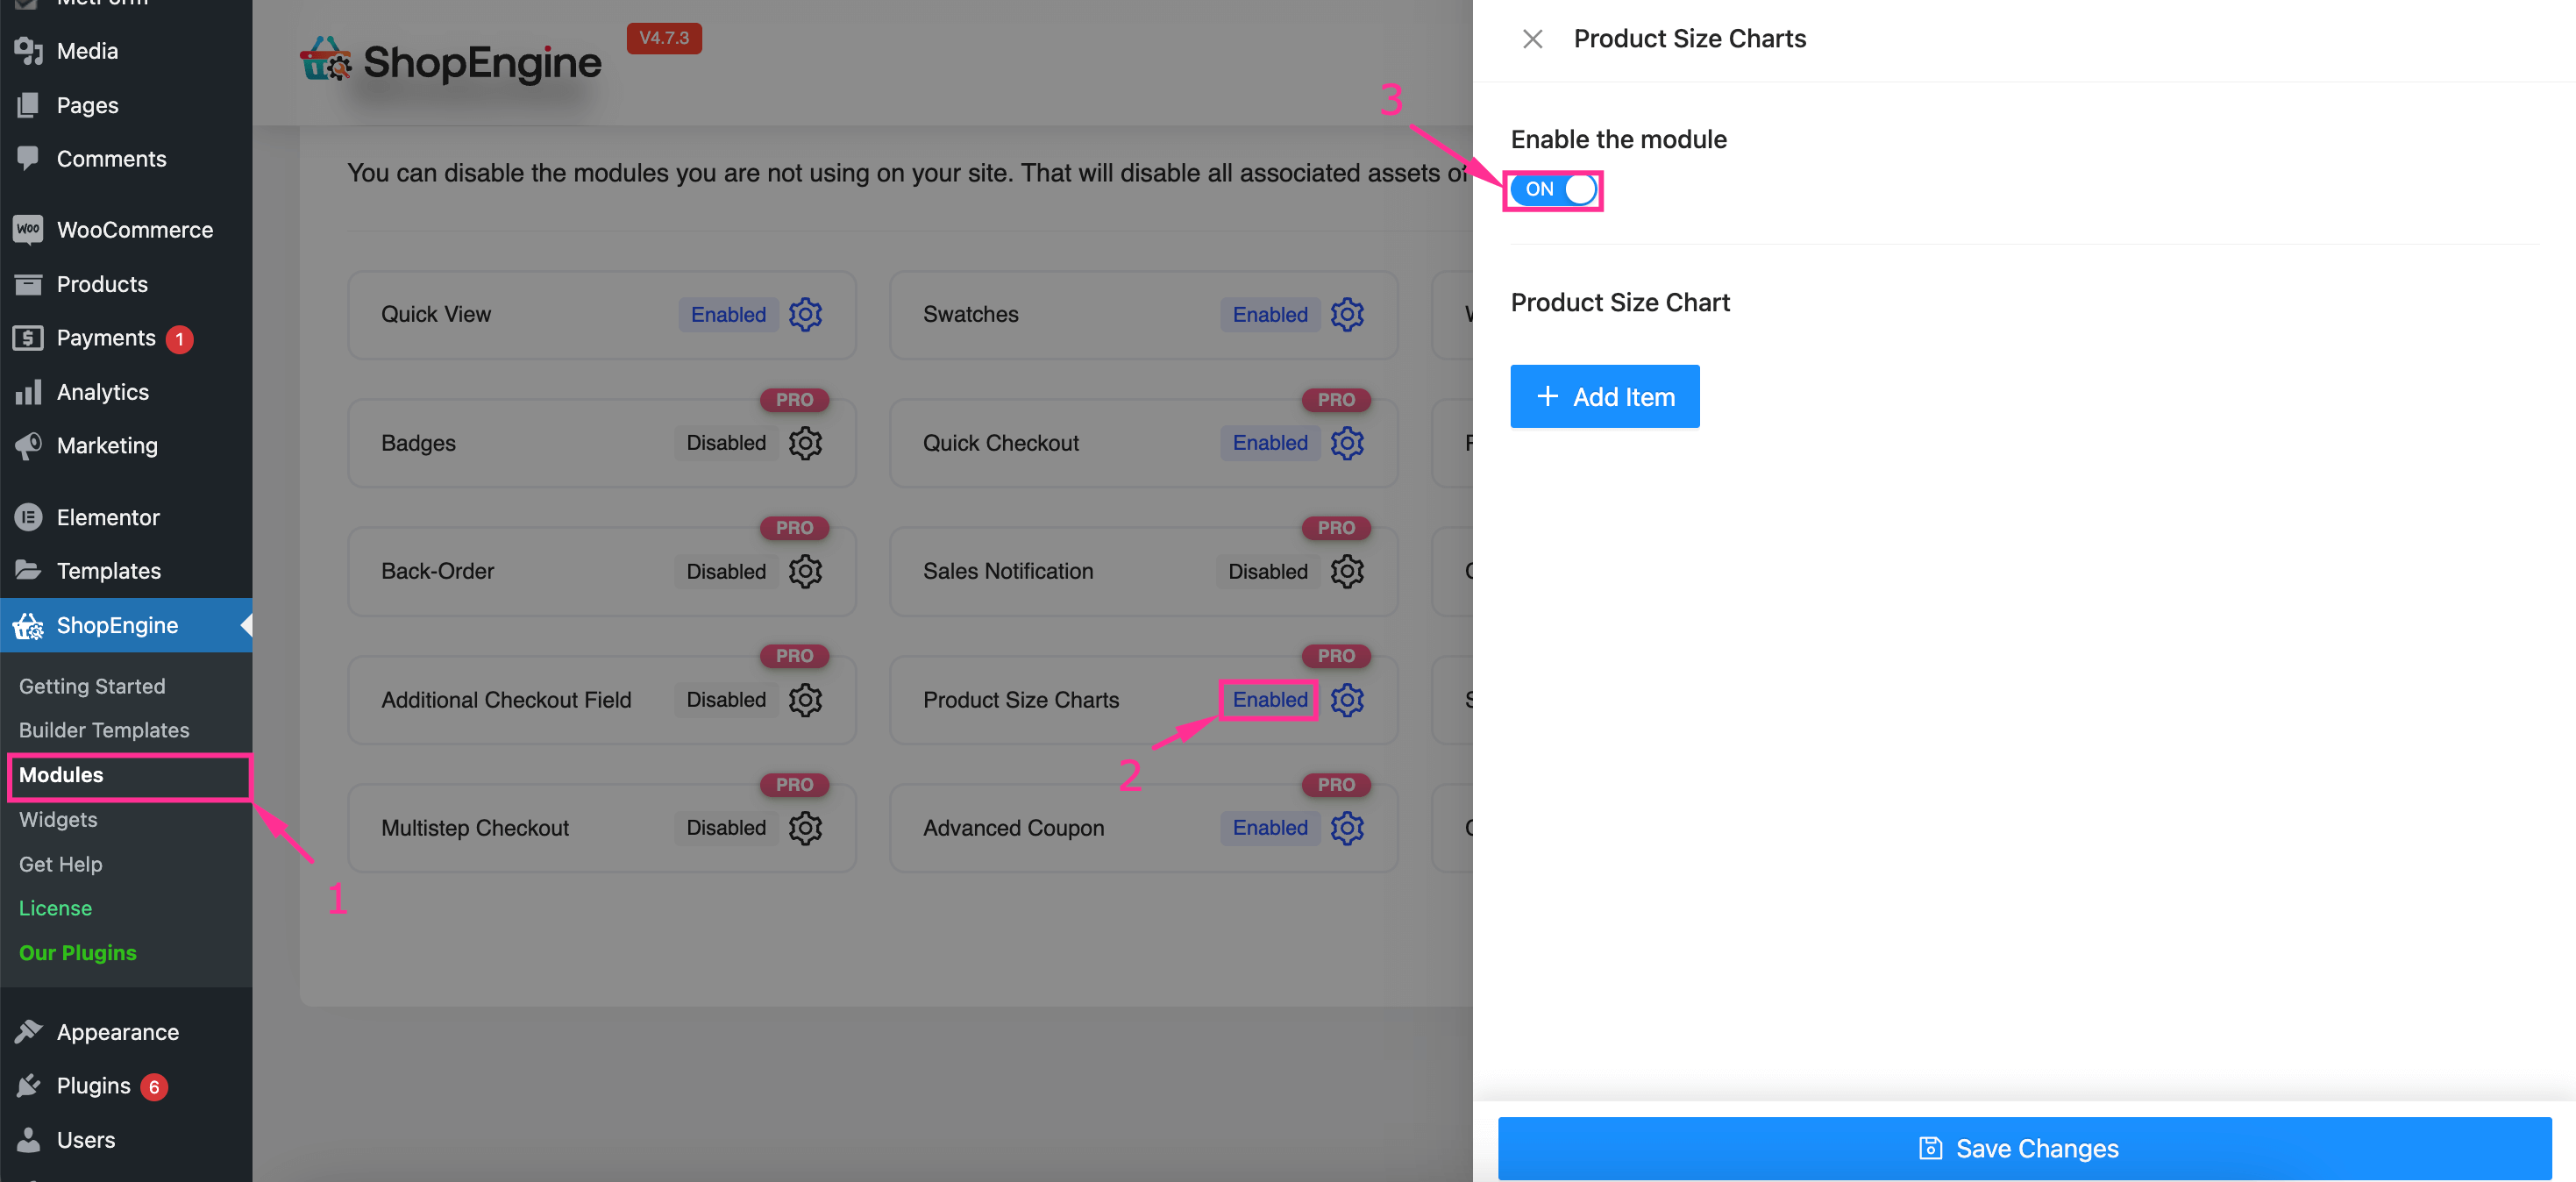
Als nächstes müssen Sie navigate the “Modules” tab which is just below the Builder Templates, and enable the “Product Size Charts” module. Now, turn on the “Enable the module” option from the slider that opens from the right side.
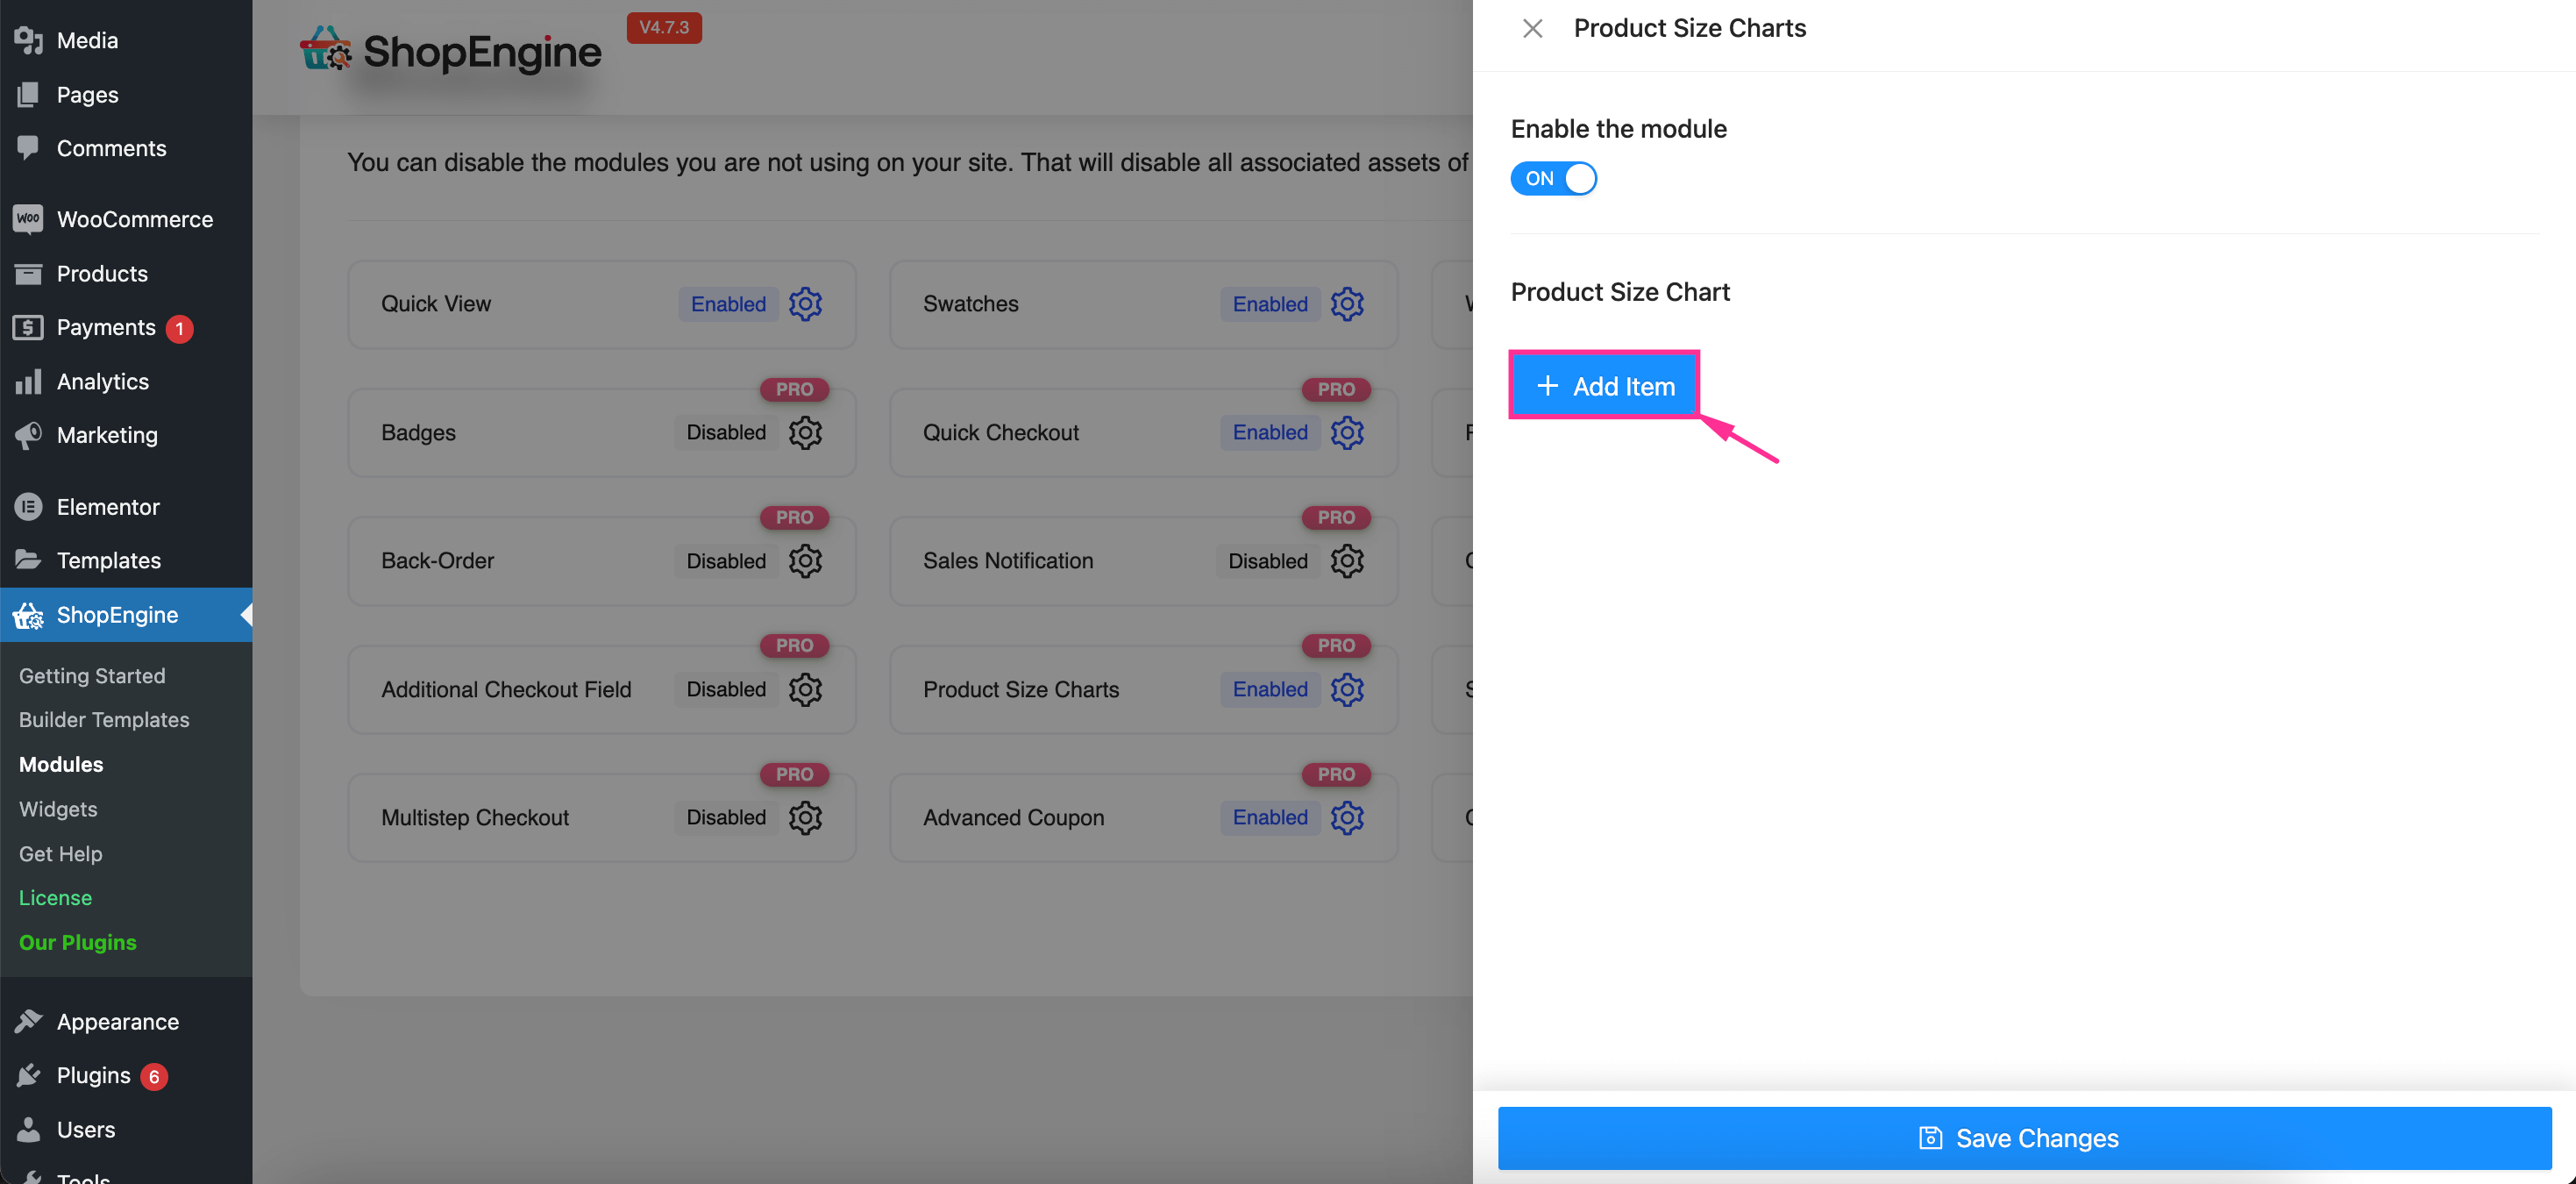
Step 2: Create a WooCommerce product size chart.
In the second step, you need to create a size variation in WooCommerce by Drücken Sie auf „Artikel hinzufügen“ button. This will make more fields visible for adding a product size chart.
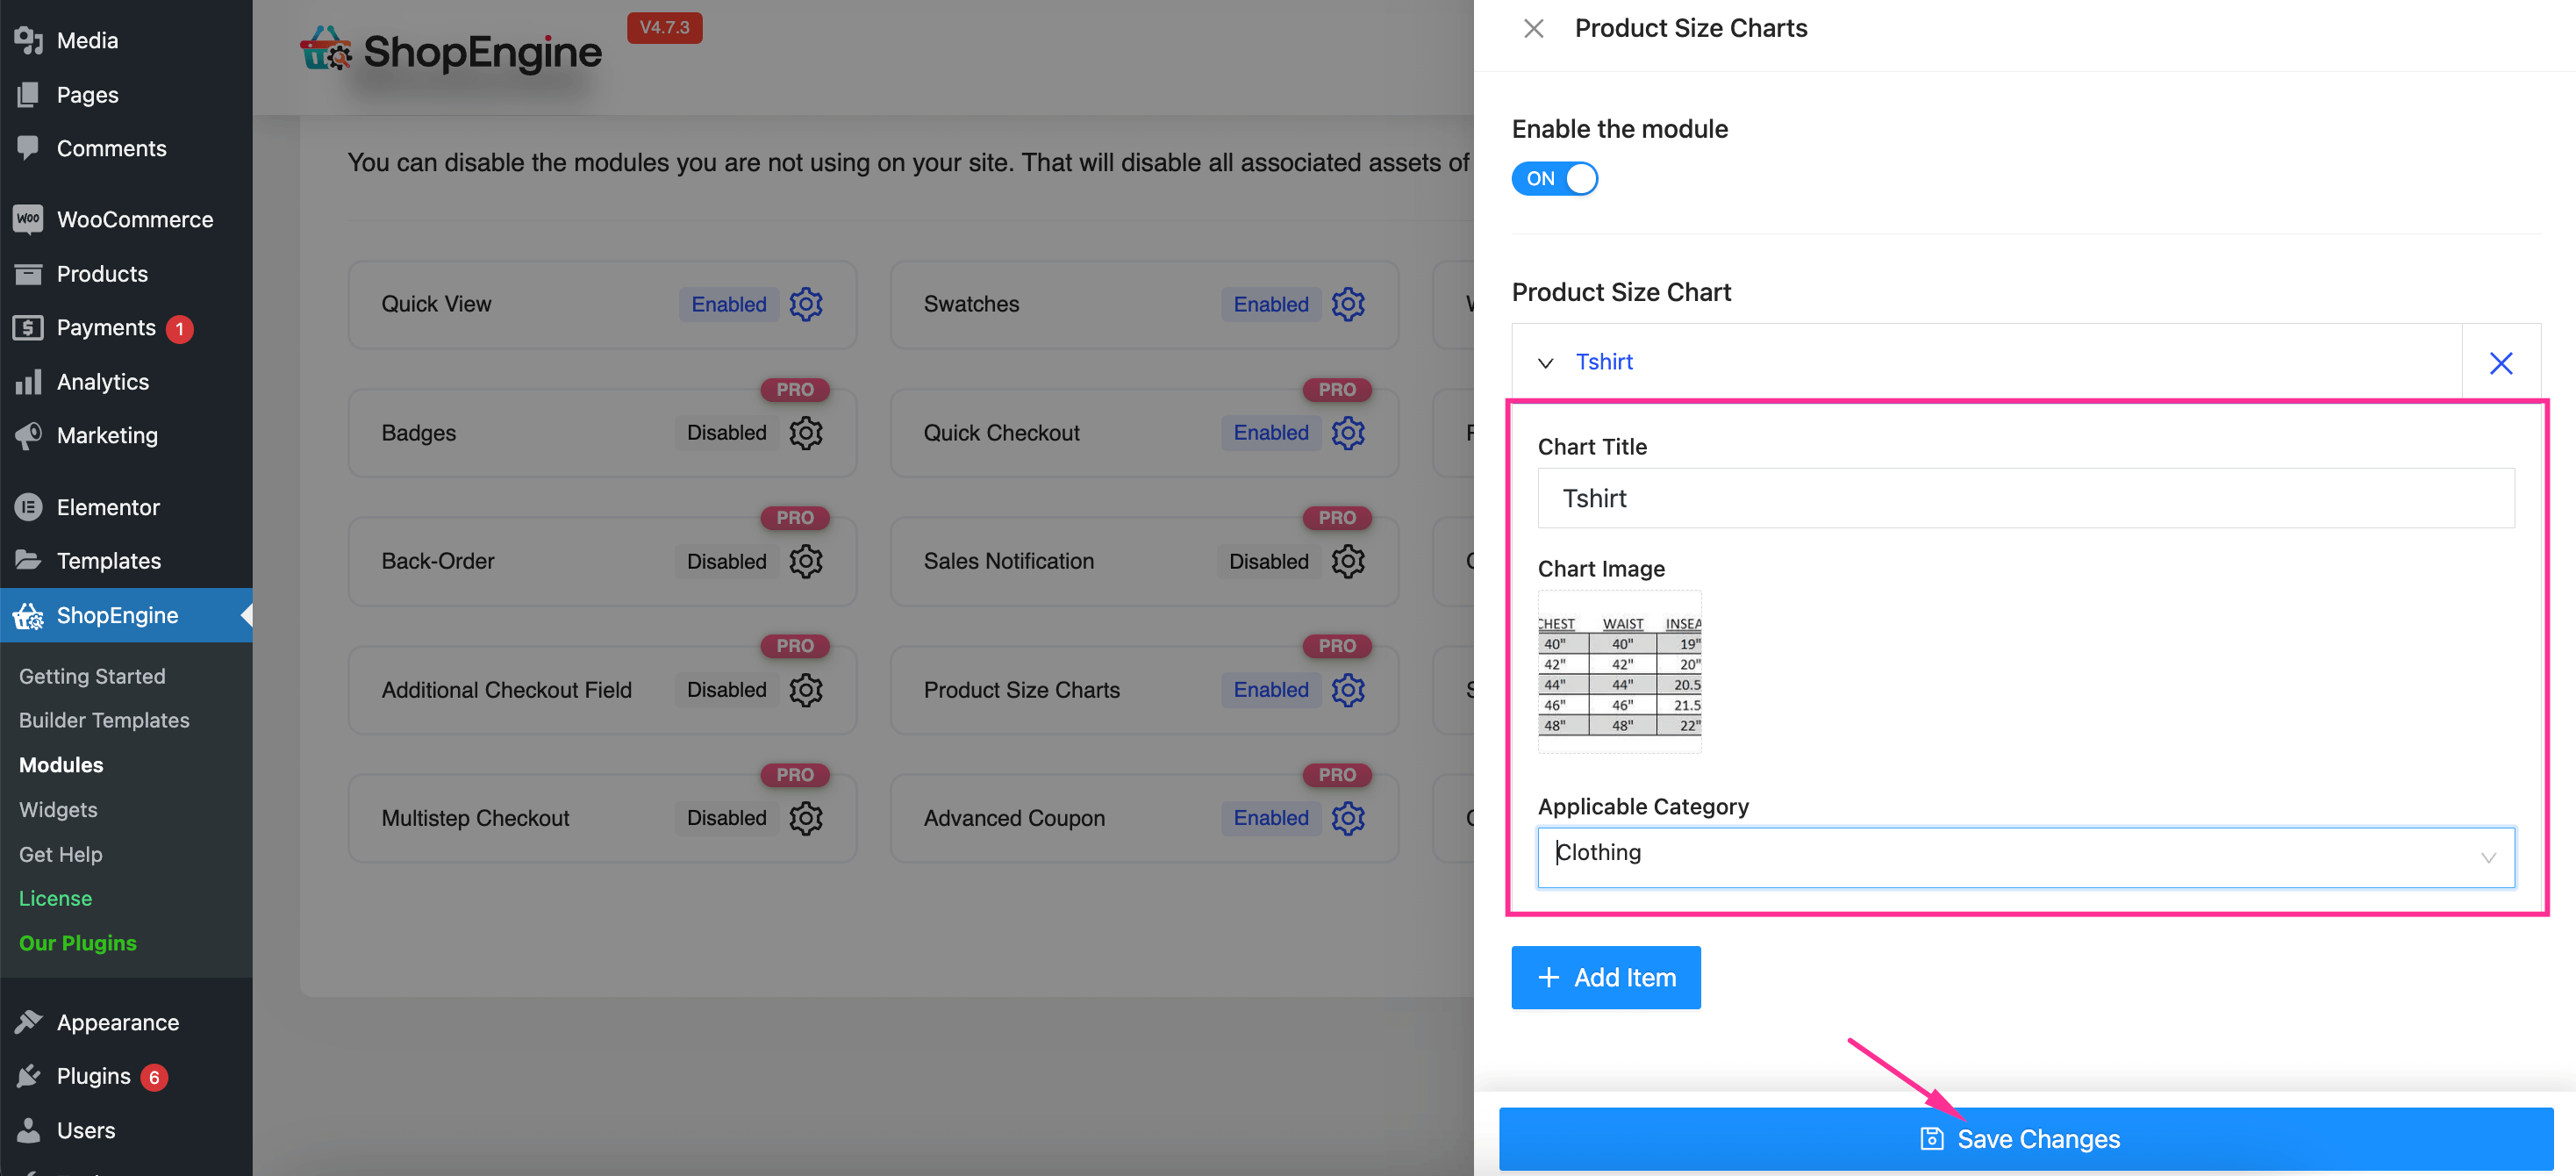
Now, fill the following fields with proper inputs for the product size chart:
- Chart Title: Enter the title for your size chart.
- Chart Image: Upload an image from your media library.
- Anwendbare Kategorie: Select the category for your product.
Danach, Klicken Sie auf „Änderungen speichern“ Taste.
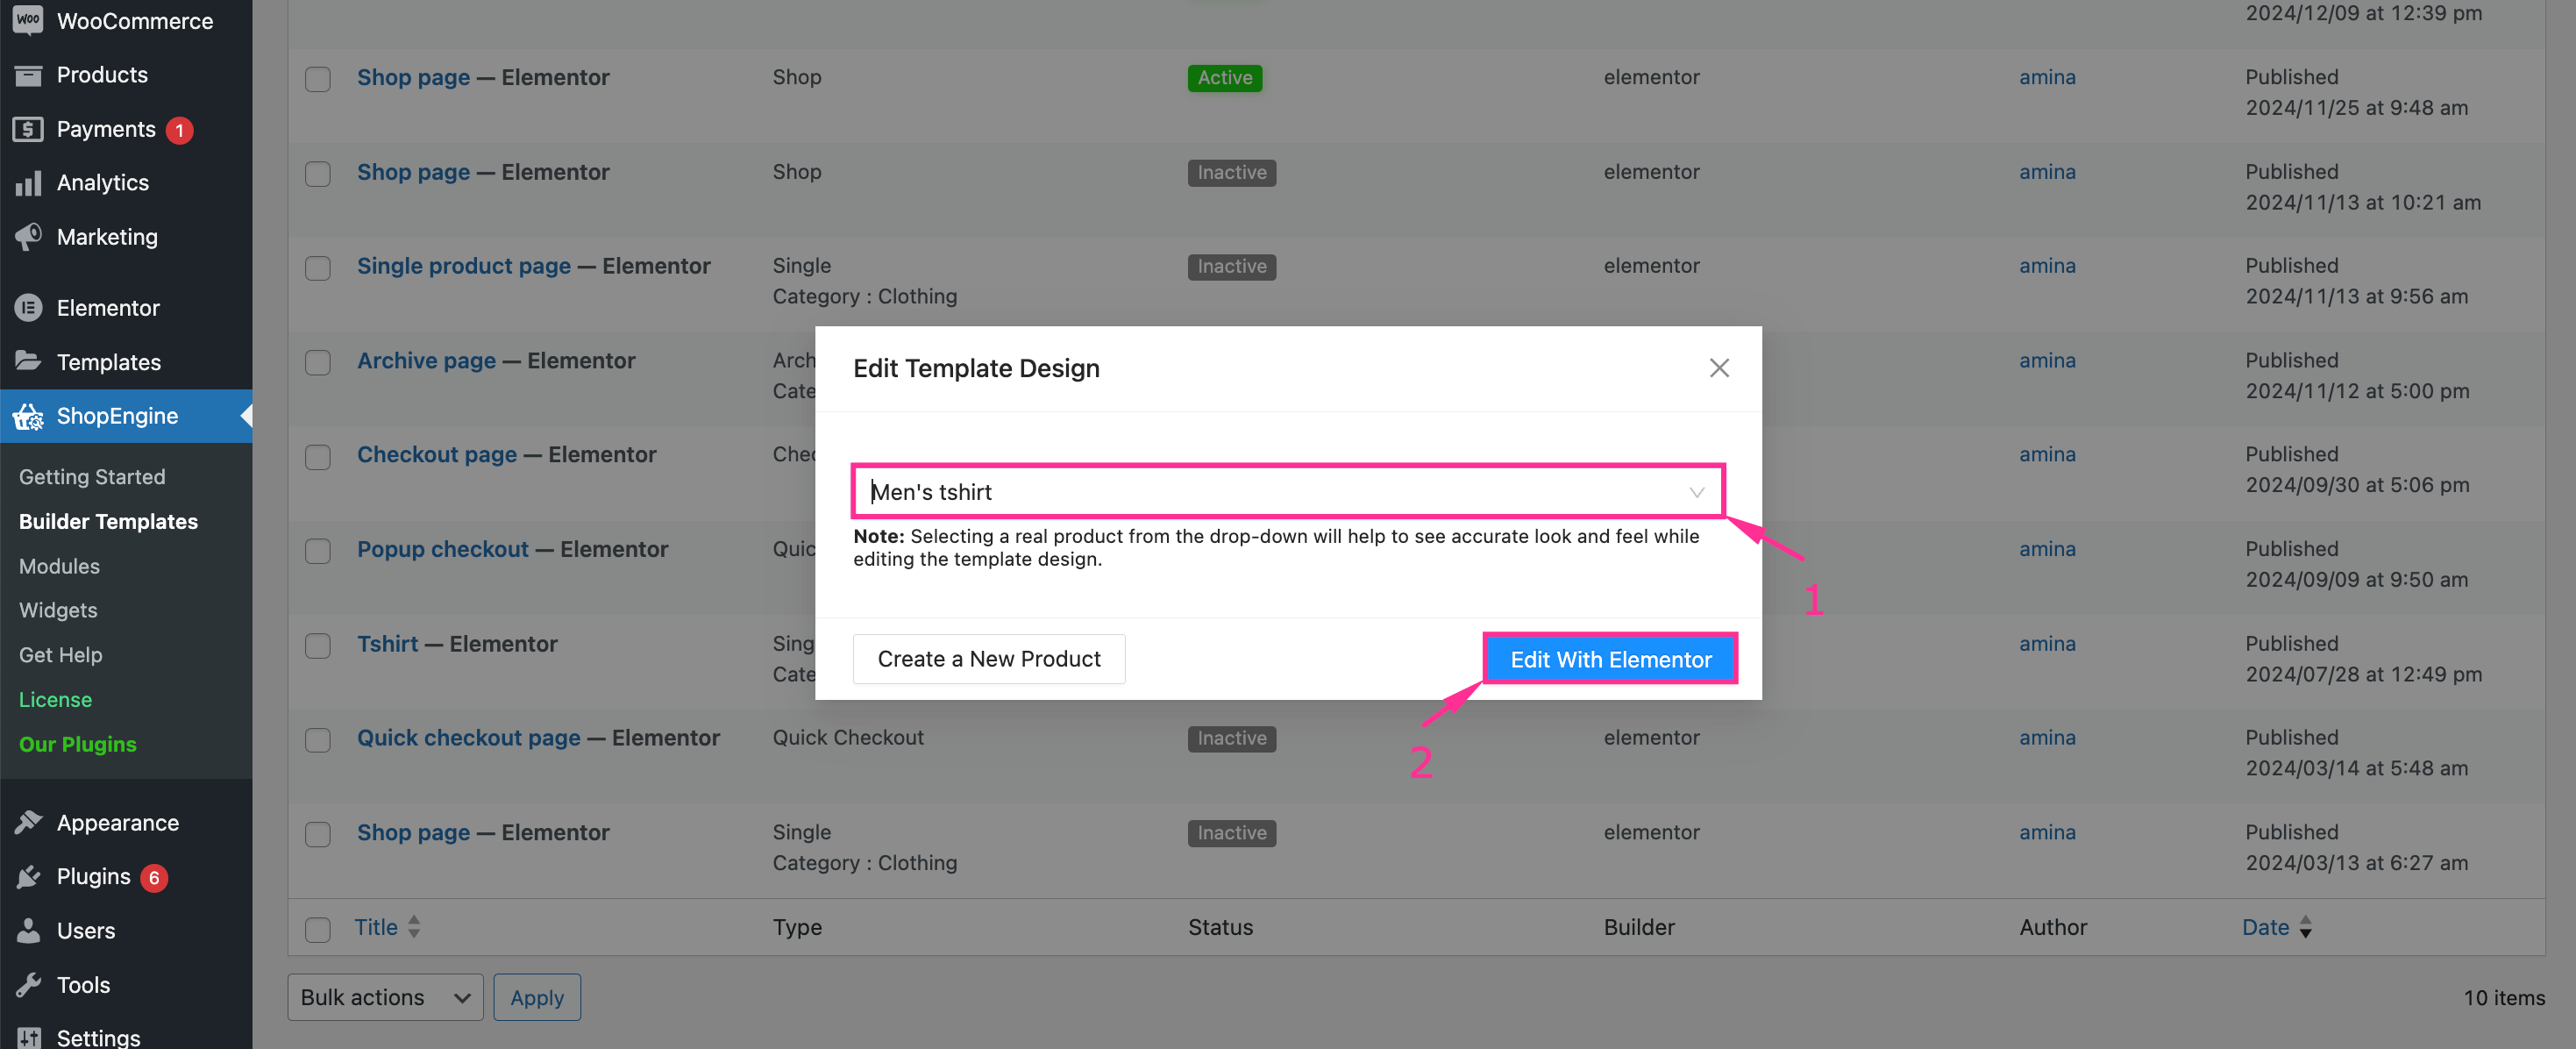
Step 3: Add size chart to a single product page.
In this step, add a size chart to your single product page template. If you don’t know how to create a single product page, visit the Vorlage für eine einzelne Produktseite. Dann, Klicken Sie auf „Mit Elementor bearbeiten“ field for your single product page.
After opening a popup, select a product from the drop-and-down menu and Klicken Sie auf „Mit Elementor bearbeiten“ button. Thus, you will be taken to the Elementor editor.
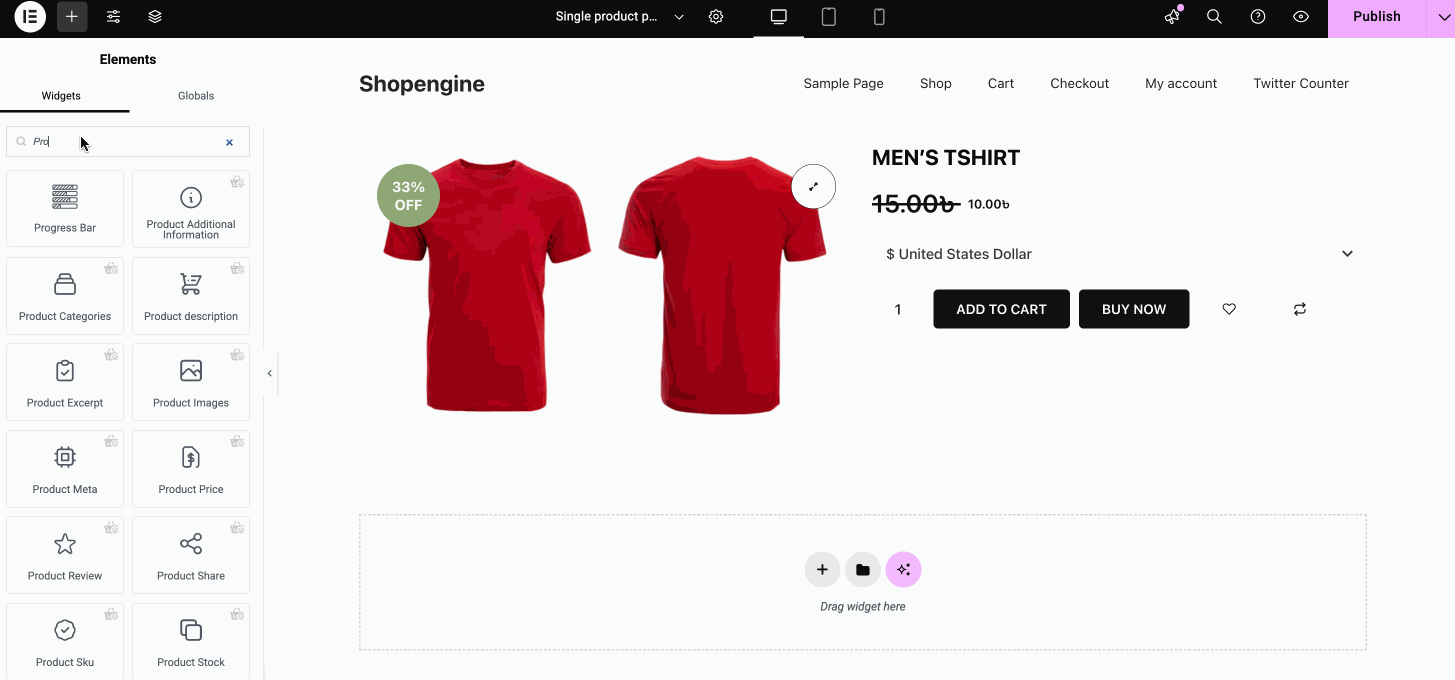
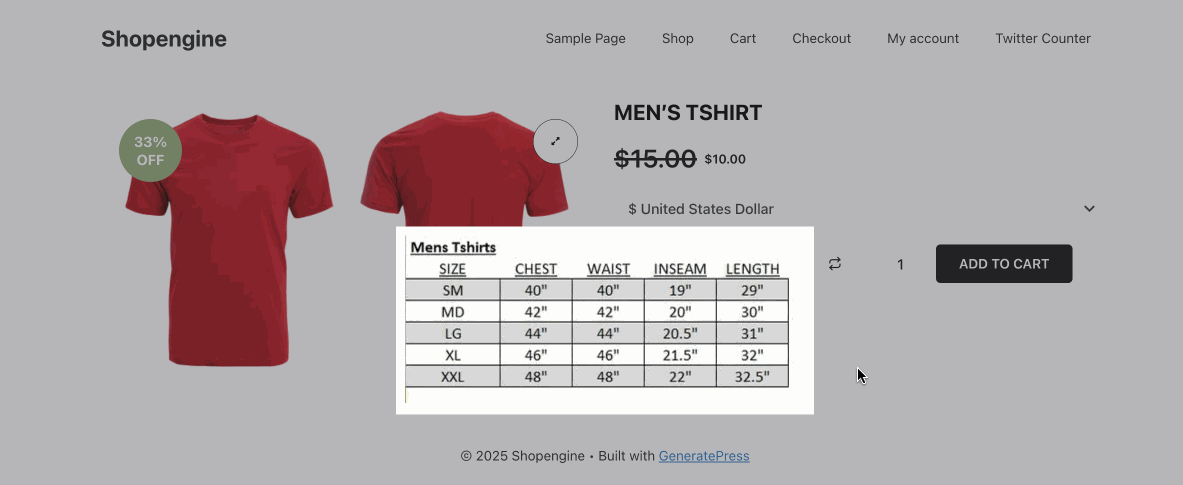
Step 4: Customize the size chart for normal or modal view.
In the last step, you have to add a size chart to your single product page. For that, search for the “Product Size Charts” widget and place it under the Add to Cart button.
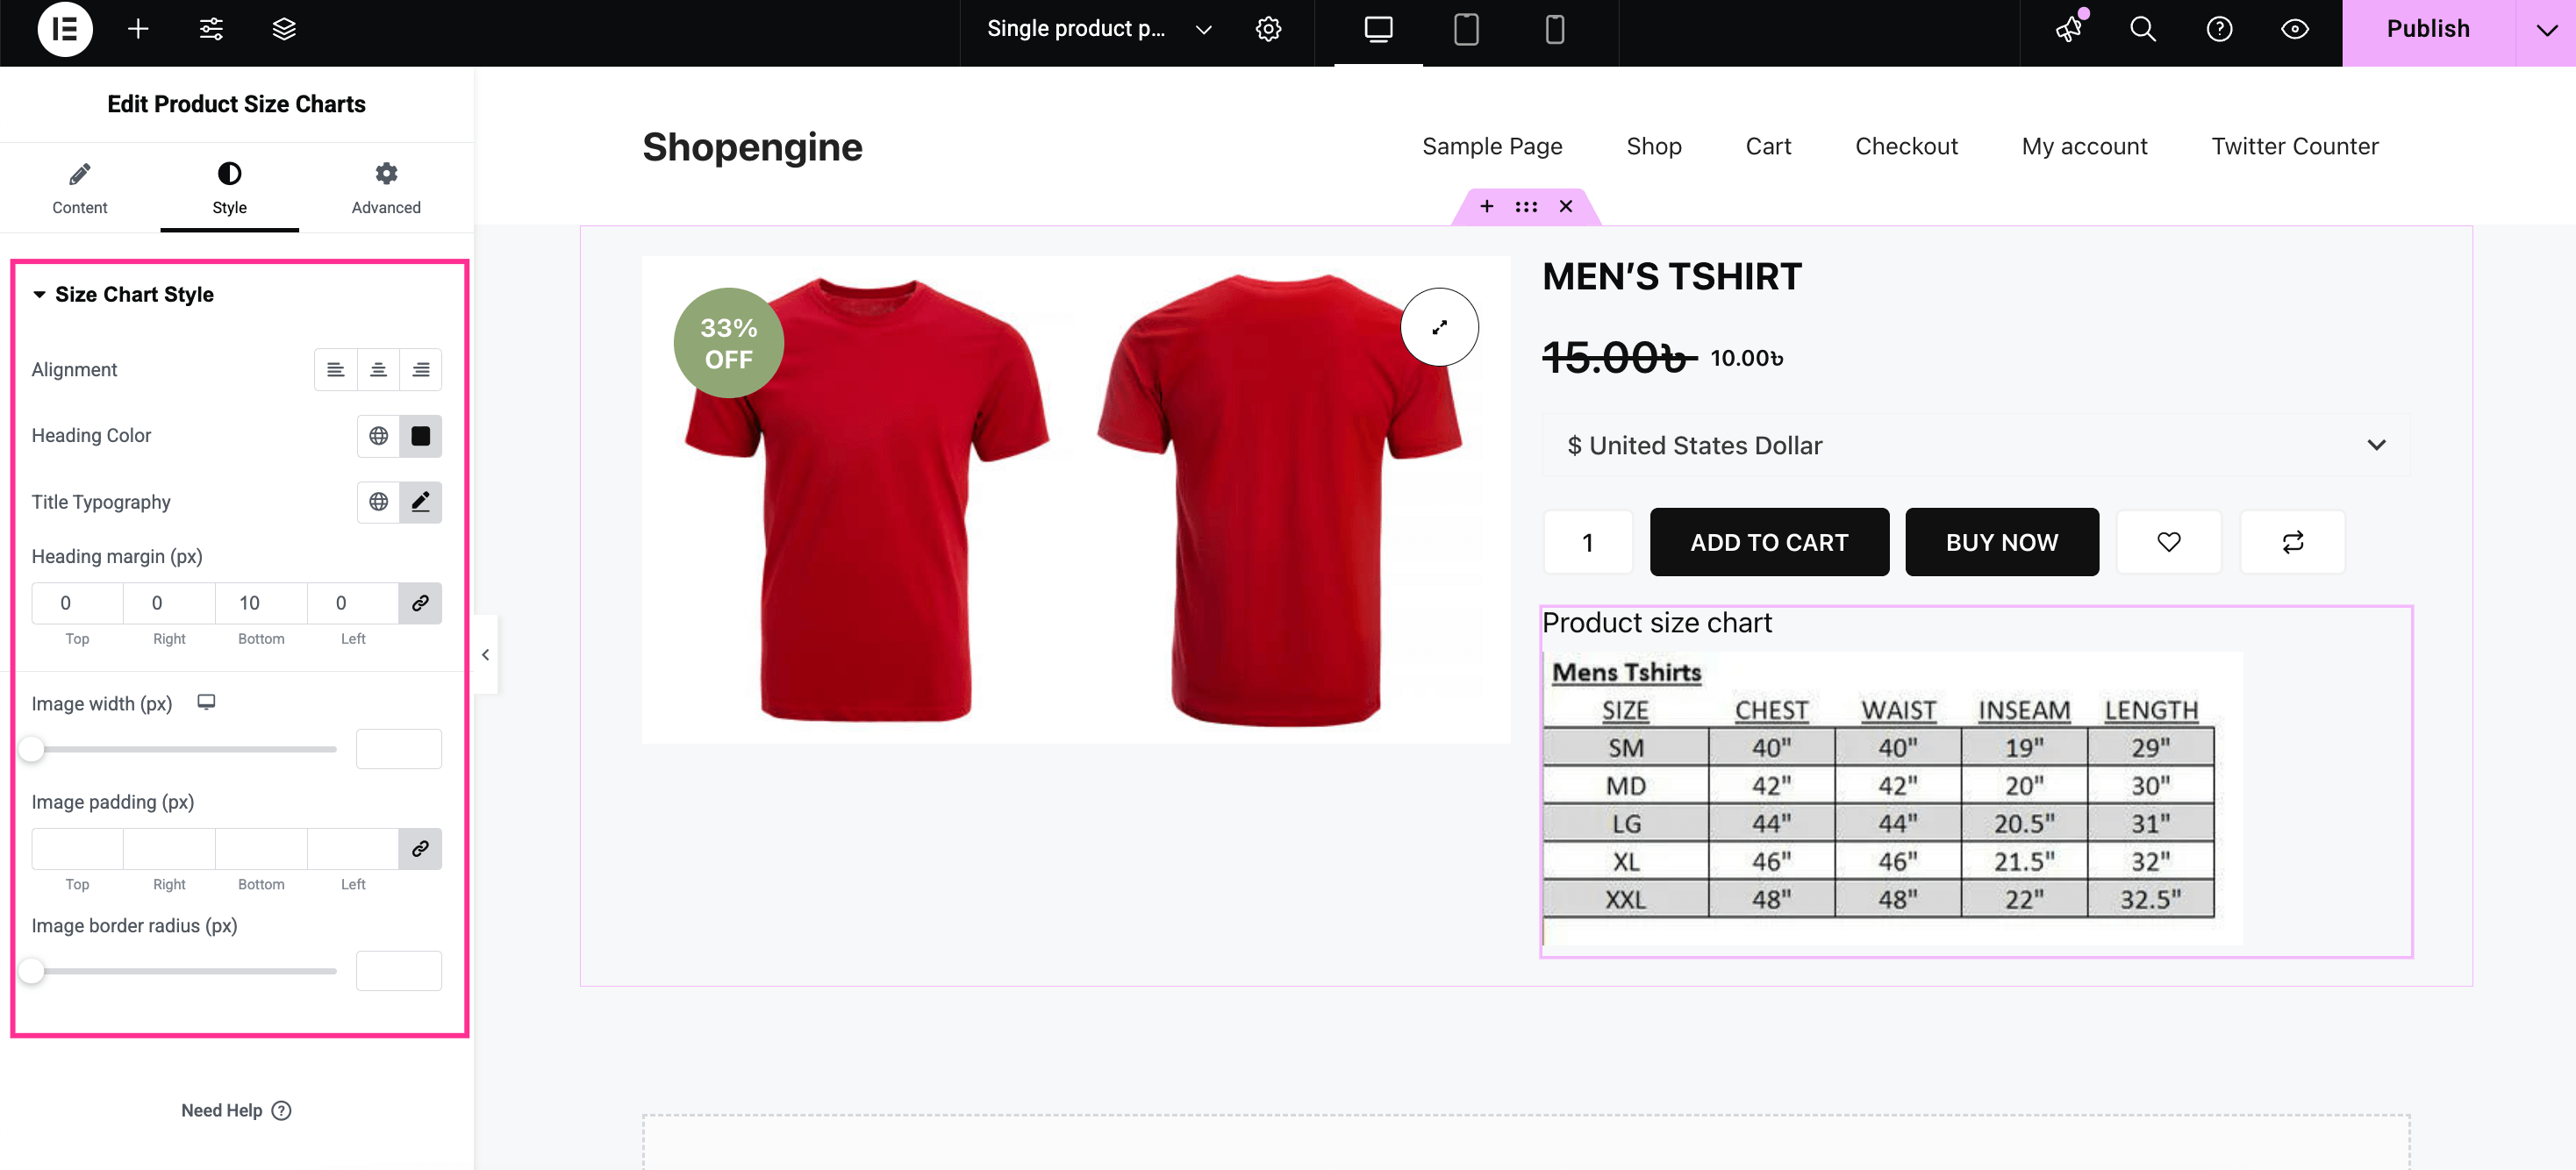
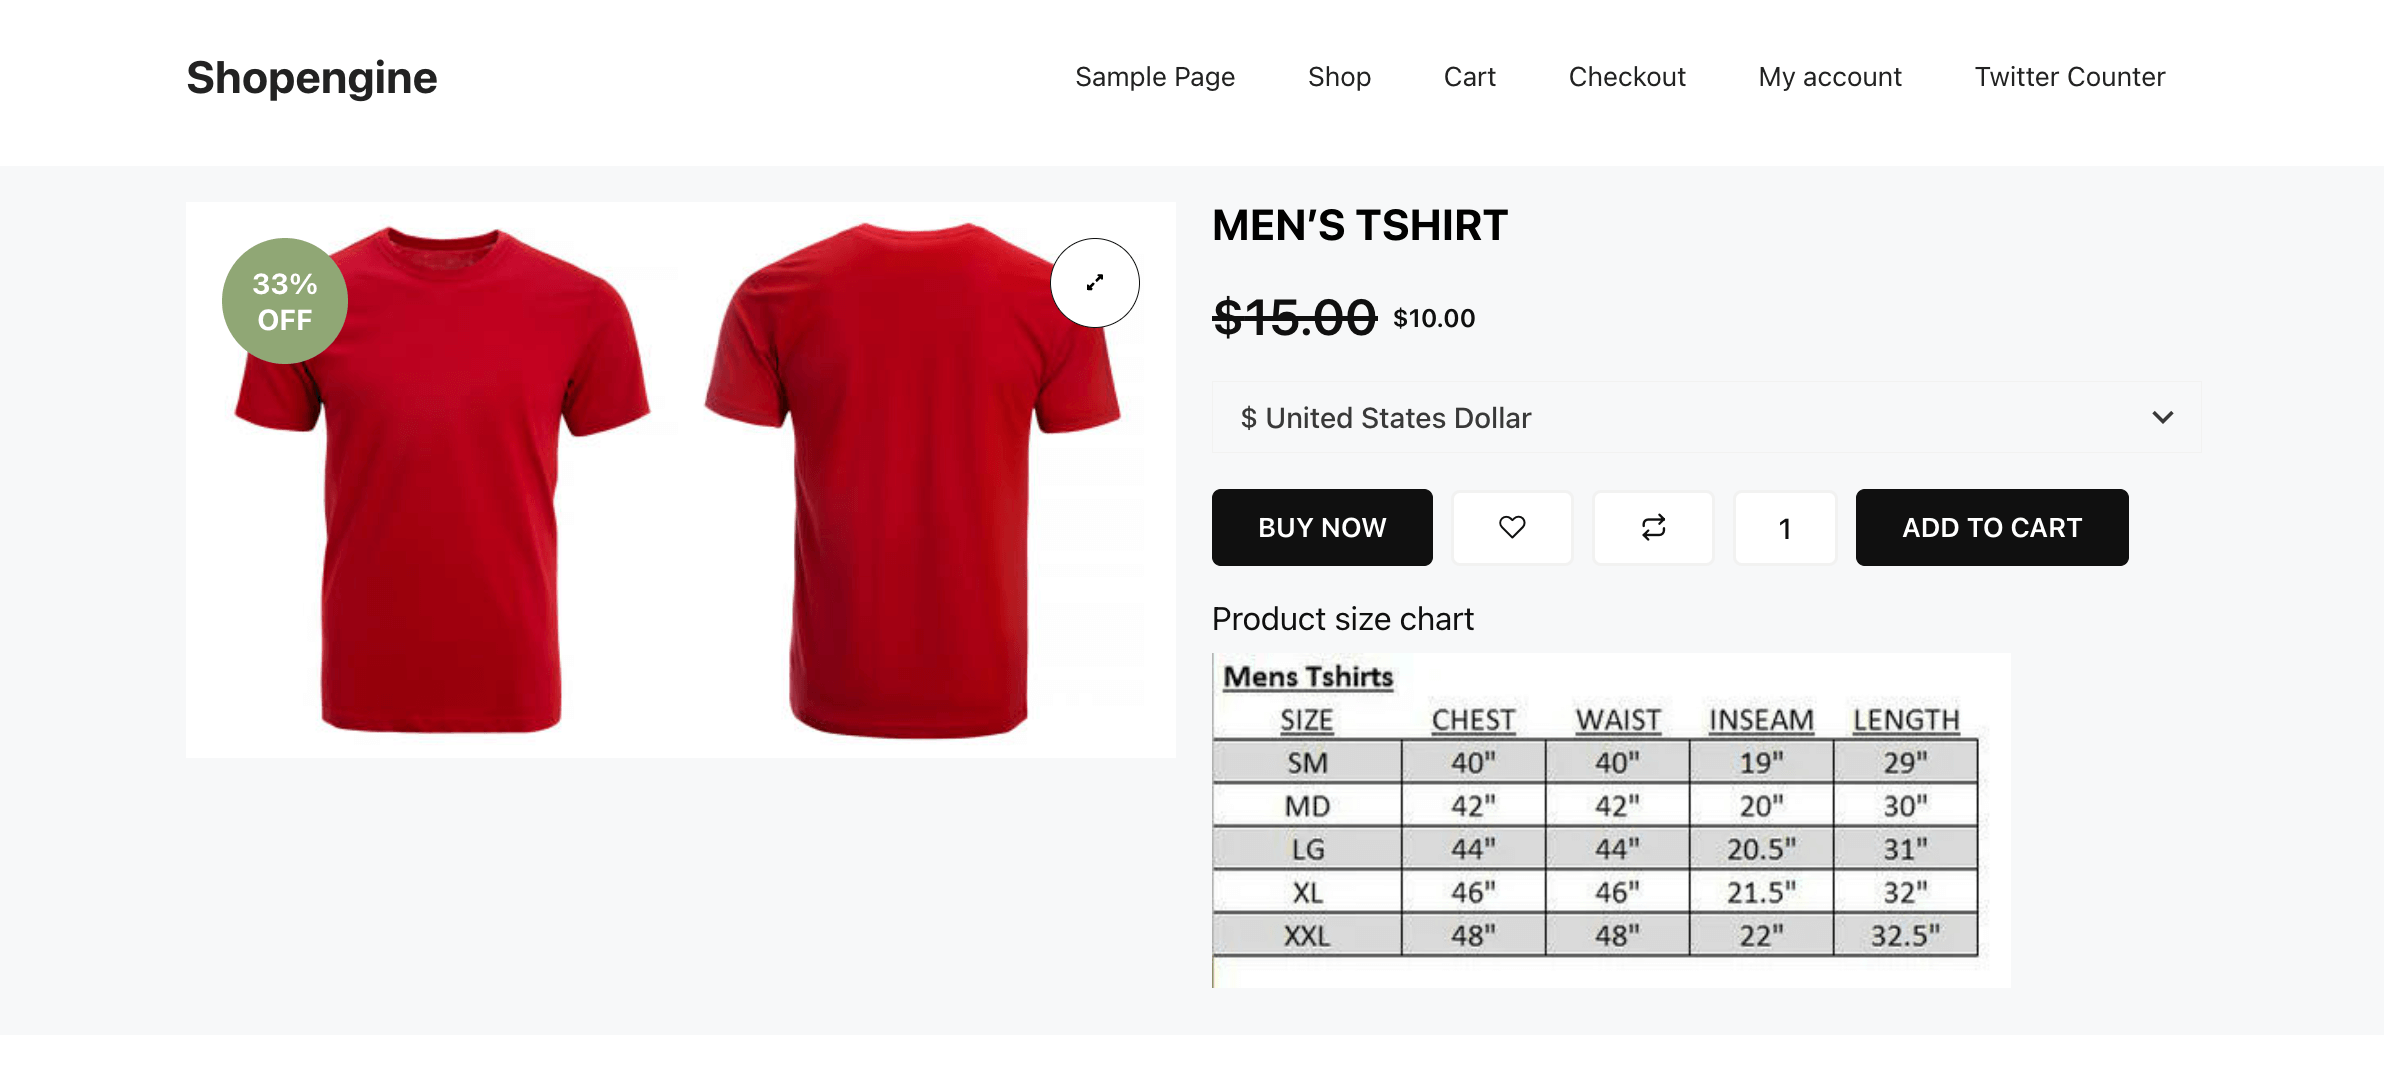
Jetzt kannst du set the view chart as normal or modal. For normal and modal view respectfully a chart image or button will be visible. If you select normal presentation then, set the chart heading oder enter the button label for modal view.
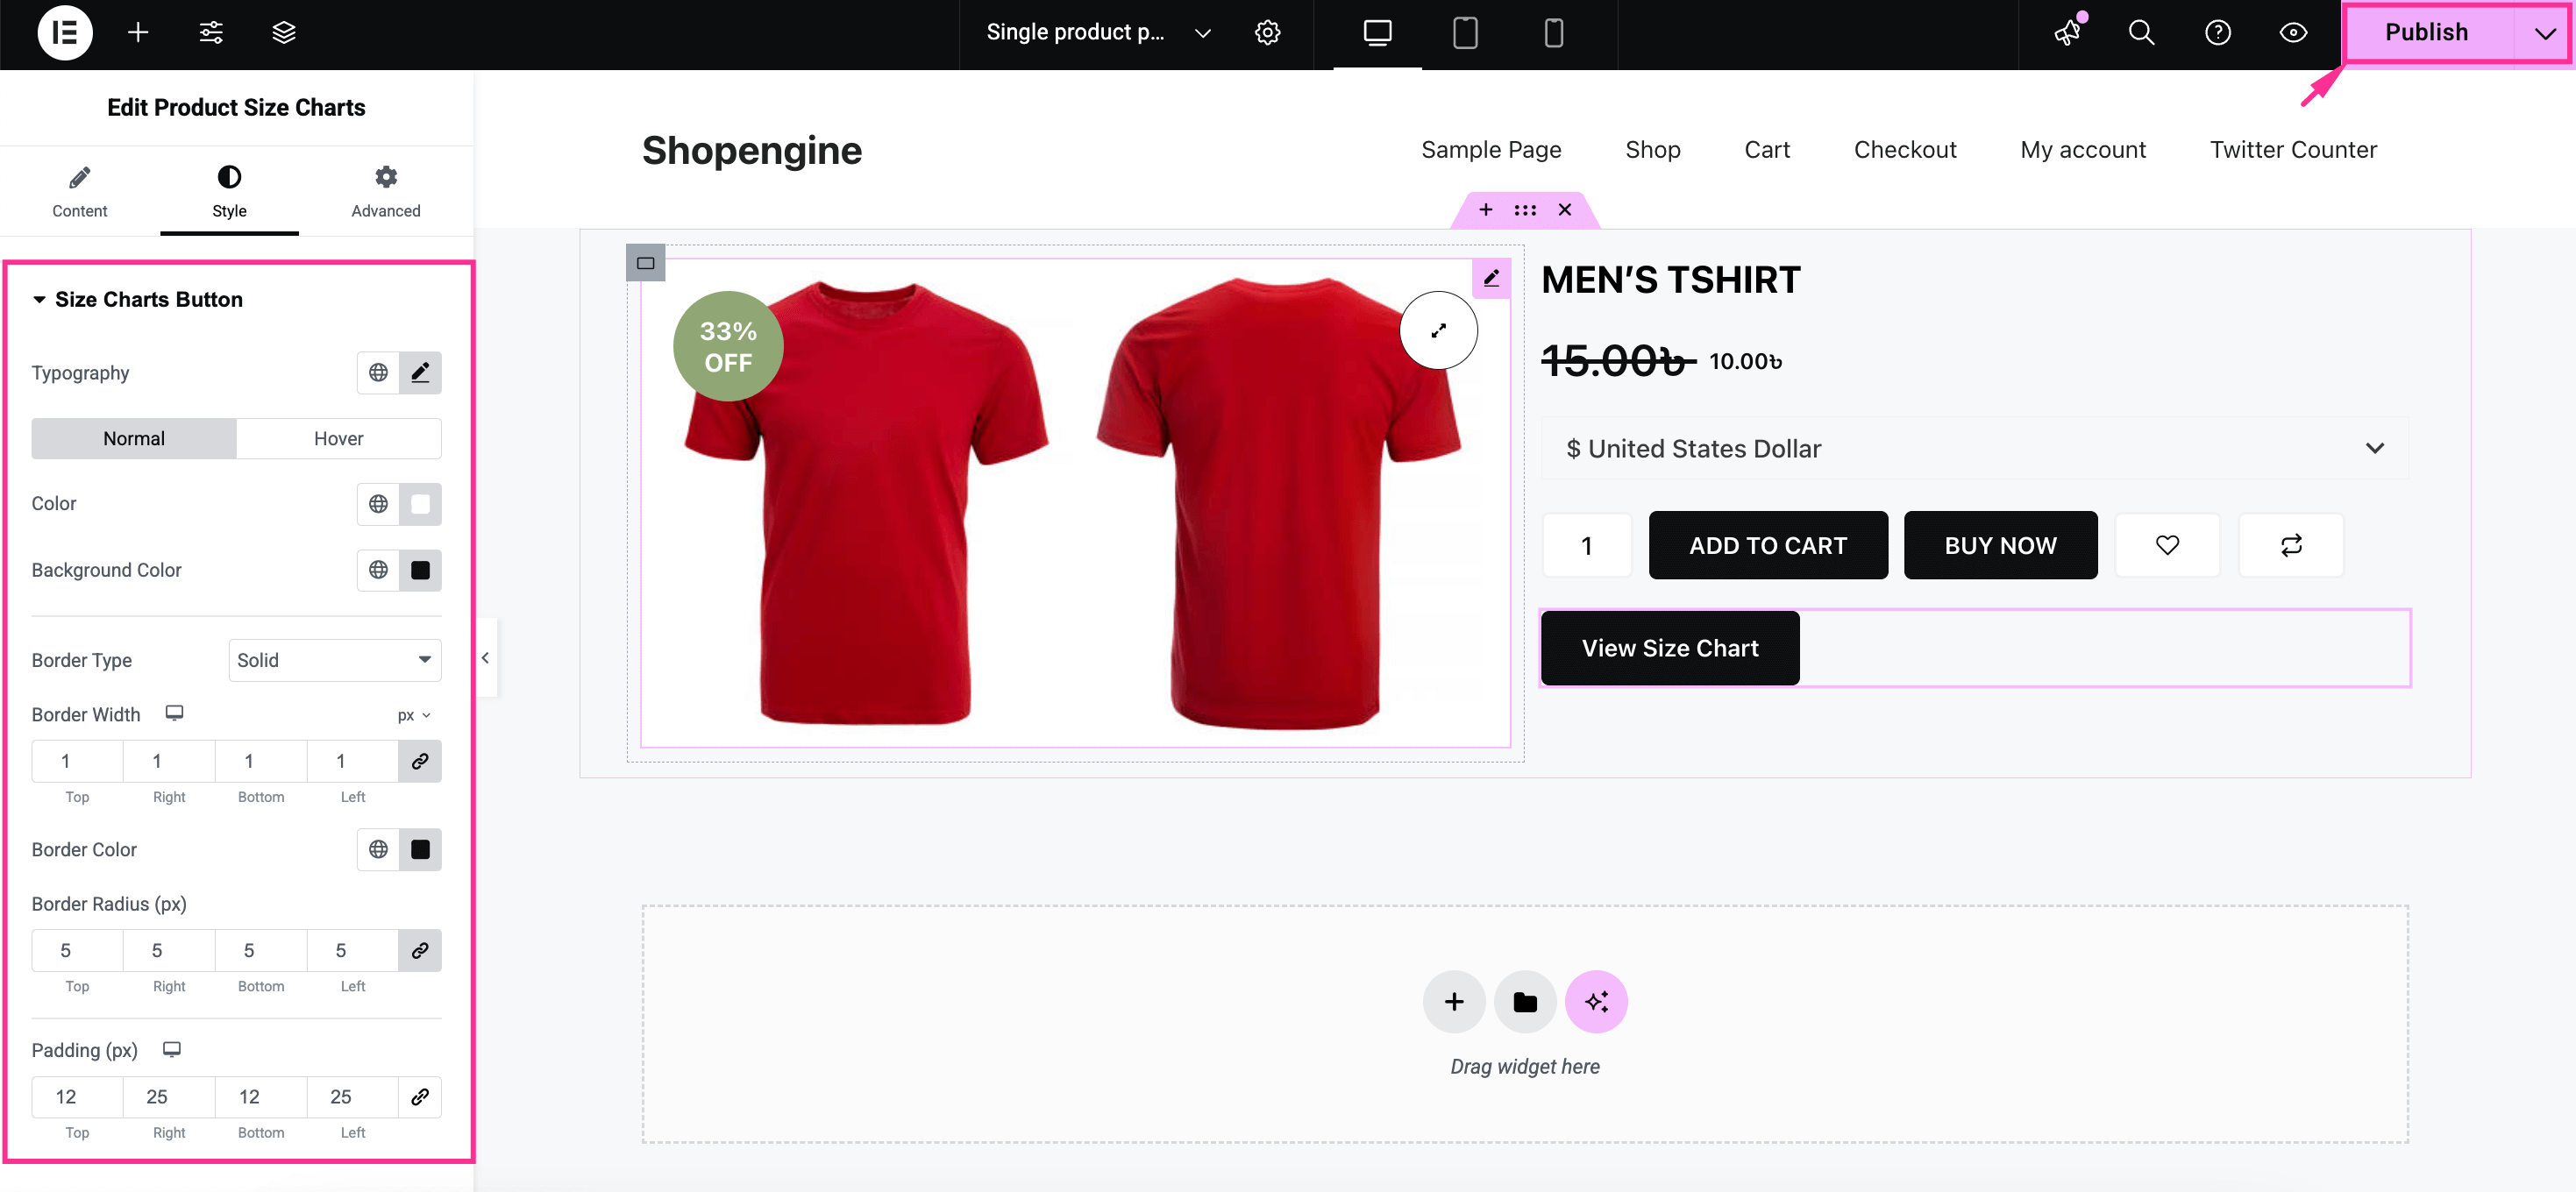
Additionally, you can also customize the product size chart style for a normal view. For example, you can adjust alignment, heading color, title typography, heading margin, image width, image padding, Und image border radius for normal chart presentation.
If you select modal view then, you can customize typography, Farbe, Hintergrundfarbe, Randtyp, border width, Randfarbe, Randradius, Und Polsterung for size charts button and popup.
Finally, after bringing necessary tweaks or adjustments, Klicken Sie auf „Veröffentlichen“. Klicken Sie auf die Schaltfläche, um es zum Leben zu erwecken.
Here is the final look of your product size chart for a modal view:
And, the size chart for the normal view will look something like this:
Best practices for displaying size charts in WooCommerce
You should take strategic approaches while displaying WooCommerce product size charts. With proper presentation, you can connect to more customers and influence their buying decisions.
Let’s explore some quick tips to correctly showcase size charts in your WooCommerce store:
- Add clearly visible size chart: Always use a clear and easy-to-understand size chart for your products.
- Use visuals like tables or diagrams for better understanding: It’s preferred to use charts or diagrams to present sizes which adds clarity.
- Show size charts for different product categories: Add a size chart to each product category (e.g. clothes, shoes, etc.) so that customers can buy products at the right size.
- Proper heading for the size chart: Use an appropriate heading for your size chart that is more visible and noticeable.
- Mobile optimized: Ensure size charts are optimized for mobile devices or small screens.
- Global sizes: Not only local but also mention UK, US, and EU sizes for global buyers.
Bonus-Anleitung:
How to add wishlist to your Woocommerce store
Zusammenfassen
That wraps up the guide on adding size charts in WooCommerce along with the best practices to showcasing them for better store performance and improved shopping experience. Whether you select normal or modal view, ensure that your size chart remains clearly visible, easy to understand, and mobile responsive.
Besides, also make sure to use a friendly and all-in-one solution so that you face less learning curve and enjoy a speed-optimized site. So, integrate size charts now with your WooCommerce products, letting your customers shop with confidence.

Schreibe einen Kommentar