Easily add a stunning button in the block editor with the GutenKit Button Block. You can easily design an interactive button with an icon, text, animation effects, and all the necessary customization options that encourage users to click.
In this documentation, we are going to show you how to use the GutenKit button block in the Gutenberg editor.
How to Use the GutenKit Button Block #
Go to the WordPress dashboard > Add a page or post > Hit the “+” icon at the top of the block editor screen > Search GutenKit Button. Click or drag & drop it to the editor screen.
Now, you will see the GutenKit Button block settings in the right sidebar of the block editor screen.
Step 1: Add Button Text and icon in Gutenberg Builder #
We will start by adding the text and icon. Let’s how to insert them:
Unter dem Content tab,
Inhalt #
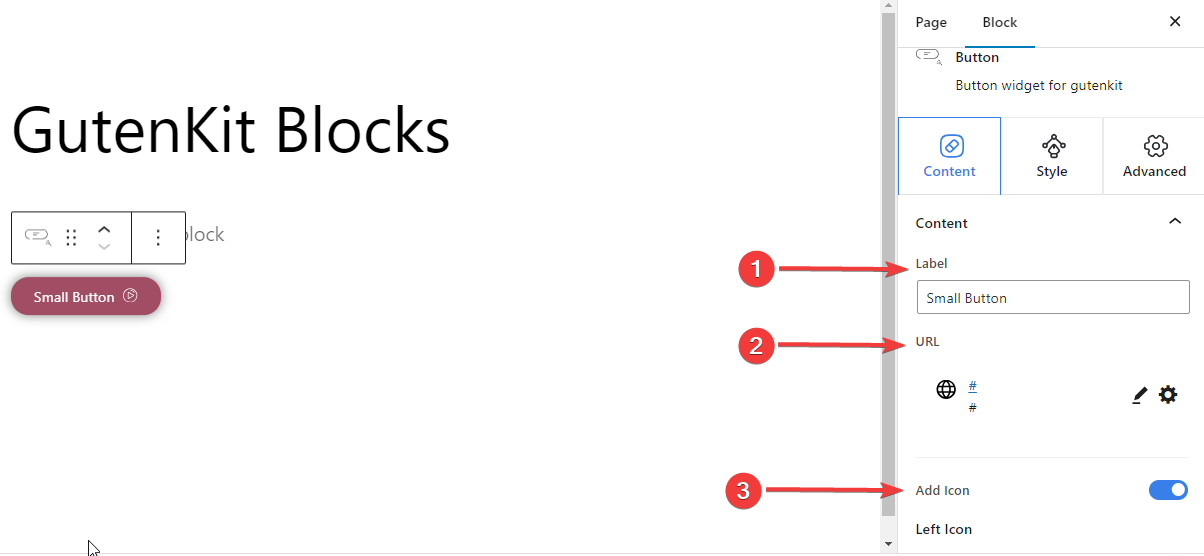

- Etikett: Edit or Add a new label for the button.
- URL: Add the URL that will follow after hitting the button.
- Symbol hinzufügen: Toggle this icon within the button.
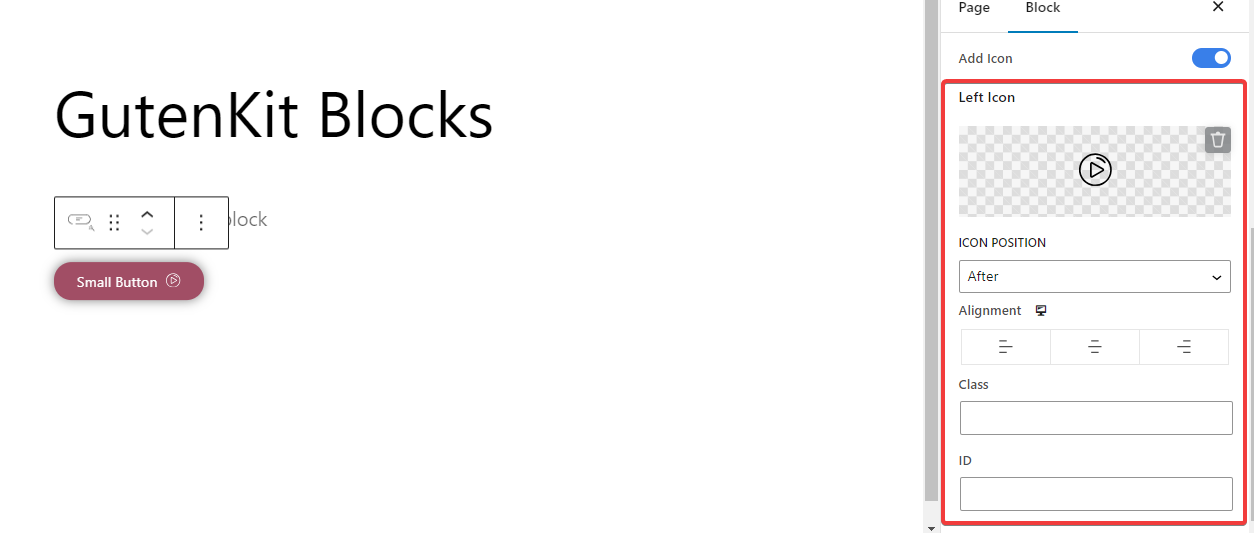

- Left Icon: Select an icon from the library or upload your own one.
- Symbolposition: Show the icon before or after the button text.
- Ausrichtung: Align your button to the left, center, or right.
- Klasse: Give the button class.
- AUSWEIS: Give the button a unique ID.
Step 2: Style the Button Block in Gutenberg Builder #
Moving on to the styling options for the button block. The following settings will help you to customize the style of the button.
Taste: #
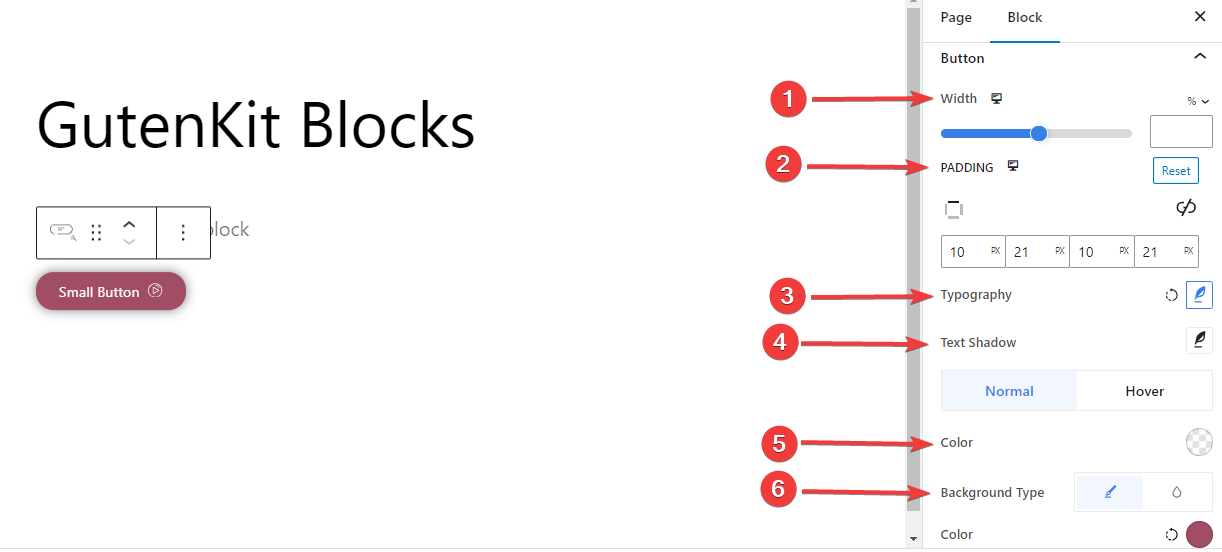

- Breite: Use the bar or enter the value manually for the width of your button.
- Polsterung: Set padding within your button.
- Typografie: Control all the typography options for the button text.
- Textschatten: Provide all the options for the shadow visual effects of button text.
- Farbe: Pick a color for the button text.
- Hintergrundtyp: Add a classic or solid color background.
Grenze #
You can add a border for both normal and hover stages. Clicking any option will reveal the below settings:
- Grenze: Give color to the border and use the slider or enter a value manually for the border size.
- Grenzradius: Define the roundness of the border.
Shadow,
- Box Schatten: Add shadow visual effects to the box and define its color, size, angle, and position.
Symbol,
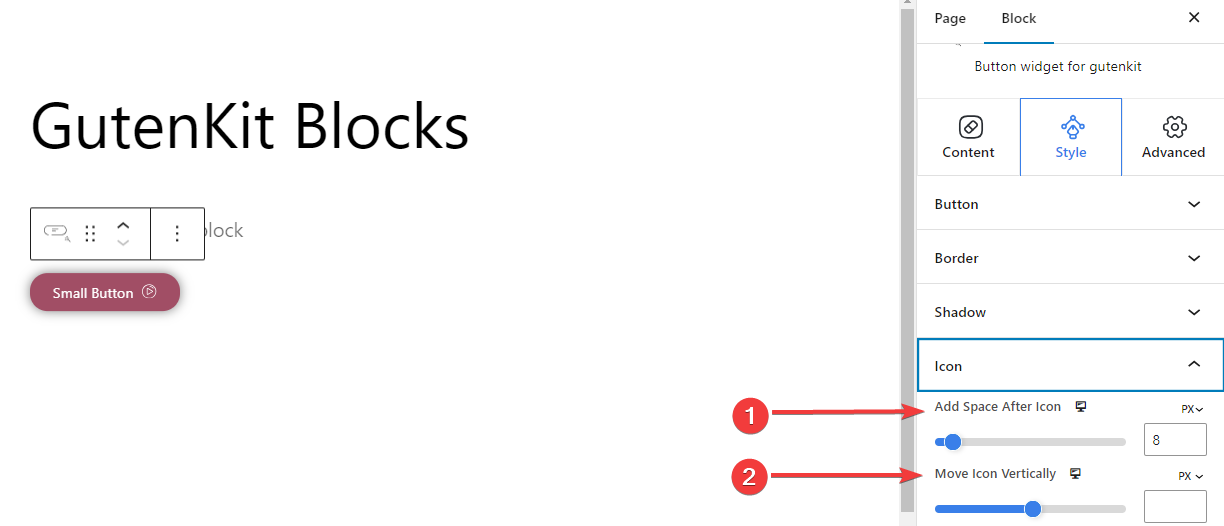

- Add Space After Icon: Add space after the icon to locate it horizontally.
- Move the Icon Vertically: Define the vertical position of the icon.
Step 3: Advanced Settings #
Using the Advanced Settings tab, you can configure the Button block layout, background, border styles, and control its visibility.
Layout: #
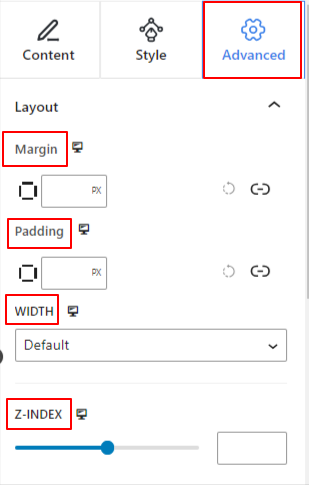

- Marge: Definieren Sie den Raum um das Blocklayout. Dies hilft, Lücken zwischen anderen Blöcken festzulegen.
- Polsterung: Geben Sie einen Wert ein, um den Abstand um den Block innerhalb seines Layouts festzulegen.
- Breite: Abgesehen von der Beibehaltung der Standardlayoutbreite.
- Gesamtbreite: Wenn Sie diese Option auswählen, wird das Layout über die gesamte Bildschirmbreite ausgerichtet.
- Inline (Auto): Beim Anwenden hat es die gleiche Breite wie das Blockelement.
- Brauch: Wenn Sie diese Option wählen, wird ein Schieberegler angezeigt, mit dem Sie den horizontalen Bereich des Blocklayouts definieren können.
- Z-Index: Verwenden Sie den Schieberegler, um die Stapelreihenfolge des Blocks mit anderen Blöcken festzulegen.
Position: #
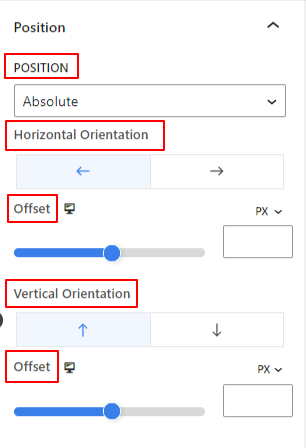

Unter der Dropdown-Liste sehen Sie drei Optionen: Standard, Absolut, Und Fest.
- Absolut: Wenn Sie diese Option auswählen, erhalten Sie eine absolute Position des Blocks, d. h. die Elemente passen in ihren Container.
- Fest: Mit der Option „Feste Position“ passt das Element das gesamte Ansichtsfenster oder den gesamten Bildschirm an.
Sowohl die Option „Absolut“ als auch die Option „Fest“ haben ähnliche Einstellungen wie die folgenden:
- Horizontale Ausrichtung: Wählen Sie die Positionierungsrichtung zwischen links und rechts.
- Versatz: Verwenden Sie den Schieberegler oder geben Sie manuell einen Wert ein, um die horizontale Positionierung des Blocks anzupassen.
- Vertikale Ausrichtung: Wählen Sie die Positionierungsrichtung zwischen nach oben oder nach unten.
- Versatz: Verwenden Sie den Schieberegler oder geben Sie manuell einen Wert ein, um die vertikale Positionierung des Blocks anzupassen.
Sichtweite #
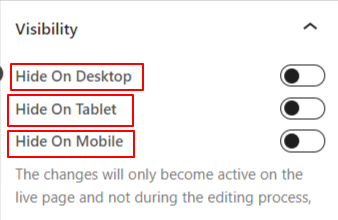

Mit dem Sichtbarkeitsmodul können Sie die Anzeige von Blockdesigns je nach Gerätetyp steuern. Es gibt drei Geräteoptionen (Desktop, Tablet, Mobil) mit einem Umschaltknopf. Aktivieren Sie den Umschaltknopf, um das Blockdesign dieses Geräts auszublenden.
Sie können es jedoch weiterhin in der Editoransicht sehen.
Fortschrittlich: #
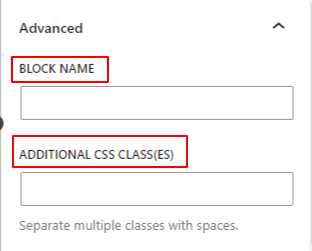

- Blockname: Geben Sie einen Namen ein, um diesen Block beim Verknüpfen oder beim Erstellen eines Skripts zum Stylen des Blocks eindeutig zu identifizieren.
- HTML-Anker: Fügen Sie eine URL hinzu, um auf eine Website-Seite zu verlinken.
- Zusätzliche CSS-Klassen: Weisen Sie dem Block zusätzliche CSS-Klassen zu, mit denen Sie den Block mit benutzerdefiniertem CSS nach Wunsch gestalten können.
Achtung: Sie können mehrere Klassen separat mit Leerzeichen hinzufügen.
Applying the above settings accurately, you will end up with an attractive button on your website. Give yourself a try to add a button to the website.


