


Display Conditions are rules you set in a popup to control exactly where, when, and to whom the popup is shown on a website.
Let’s learn how you can set the condition with the PopupKit easily.
Display Condition with PopupKit #
Create a new campaign or select from existing ones, then proceed to the editor.

Find Display Conditions and expand it.
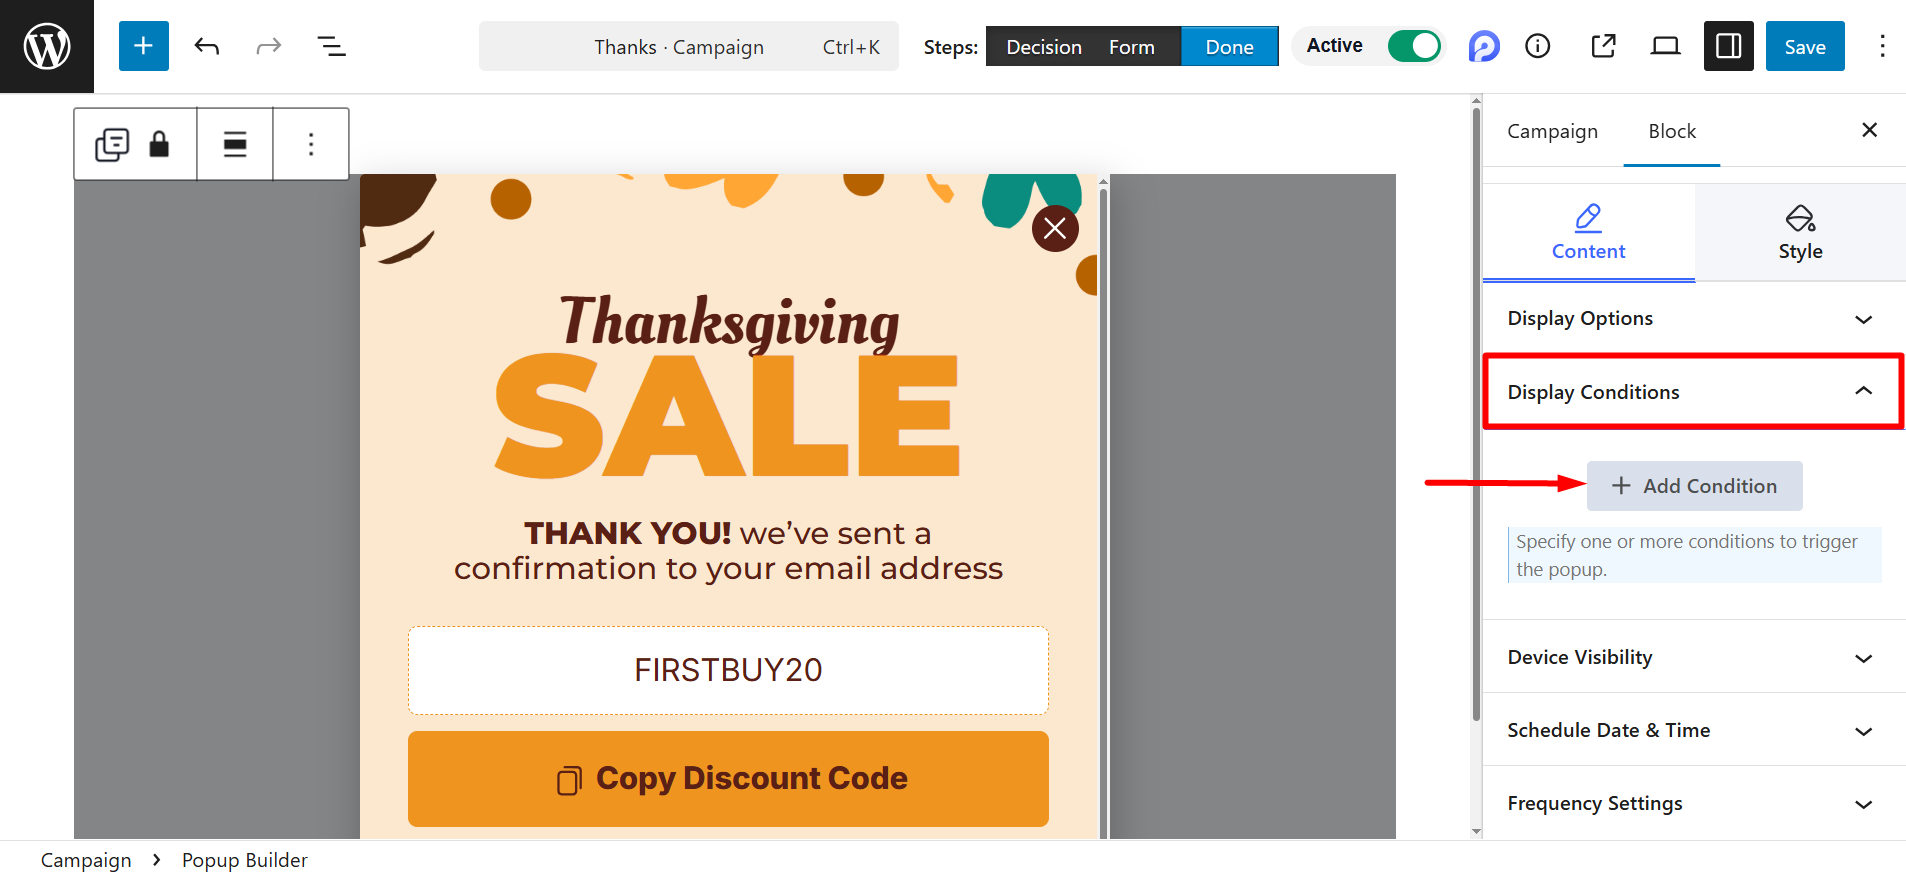
Add Conditions #
You can add conditions like Include and Exclude.
Include: If a visitor matches the Include conditions, the popup can be shown.
Example –
Include → Entire Site → Popup can appear anywhere.
Include → Only on /shop/ → Popup appears only on the shop page.
Exclude:
Exclude has higher priority (it overrides Include).
Example –
Include → Entire Site
Exclude → /checkout/
Popup will show everywhere except checkout.
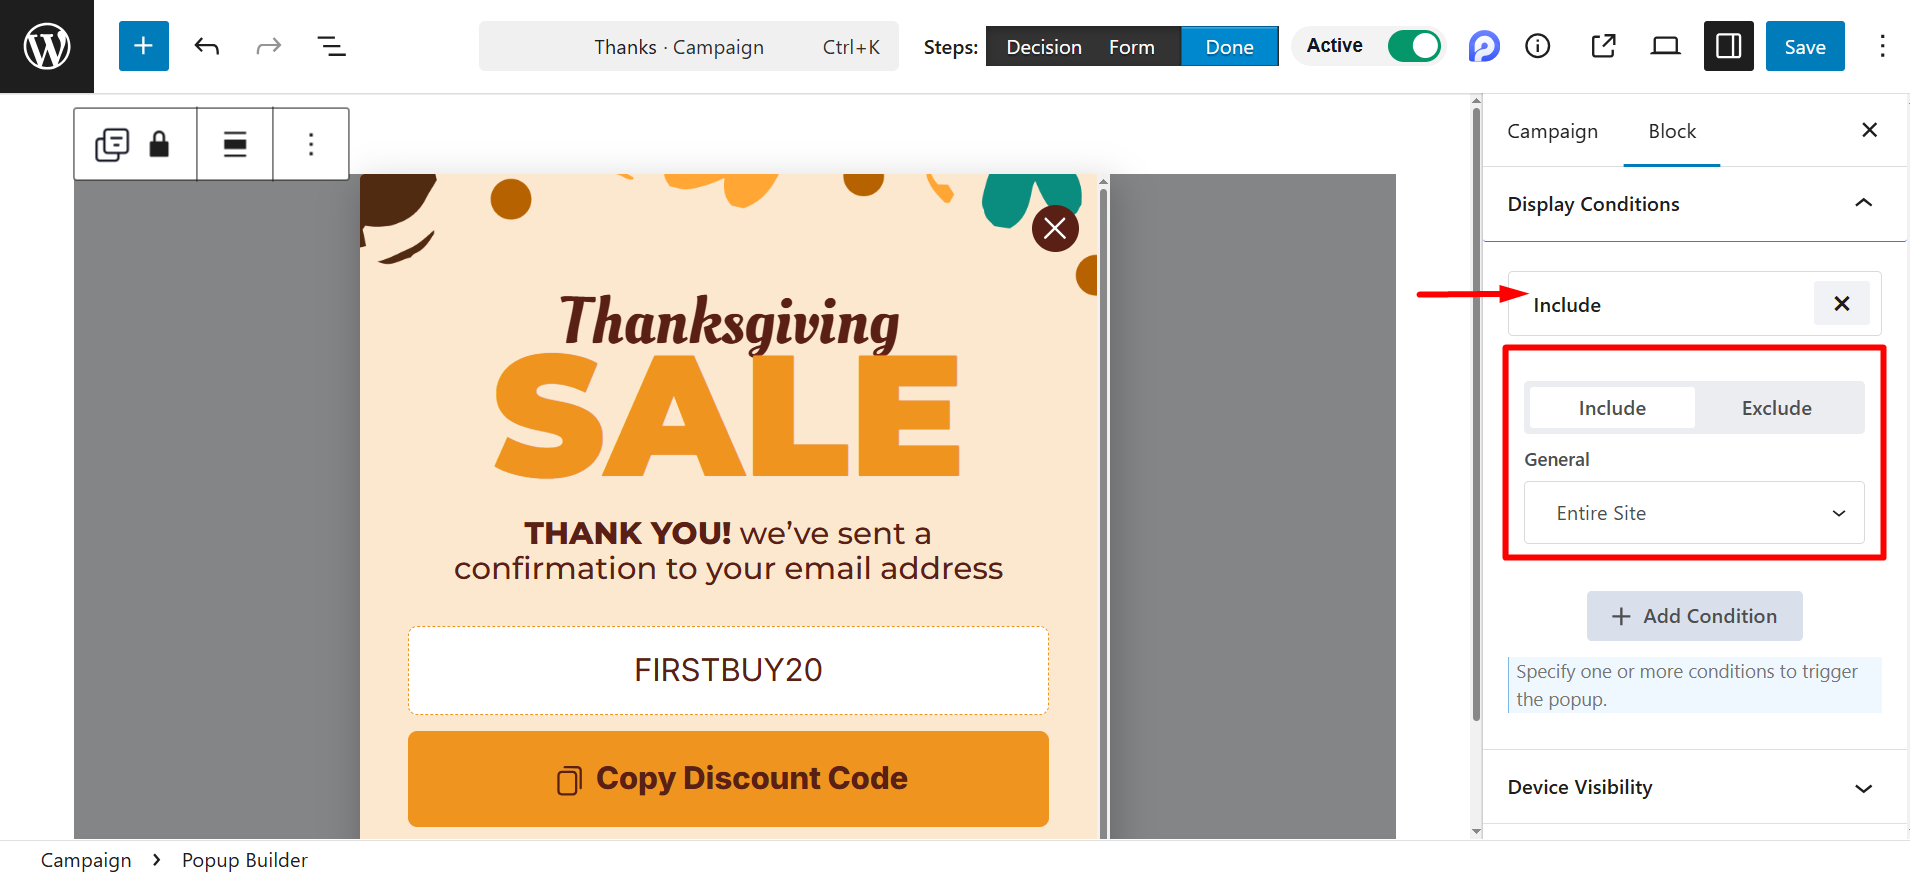
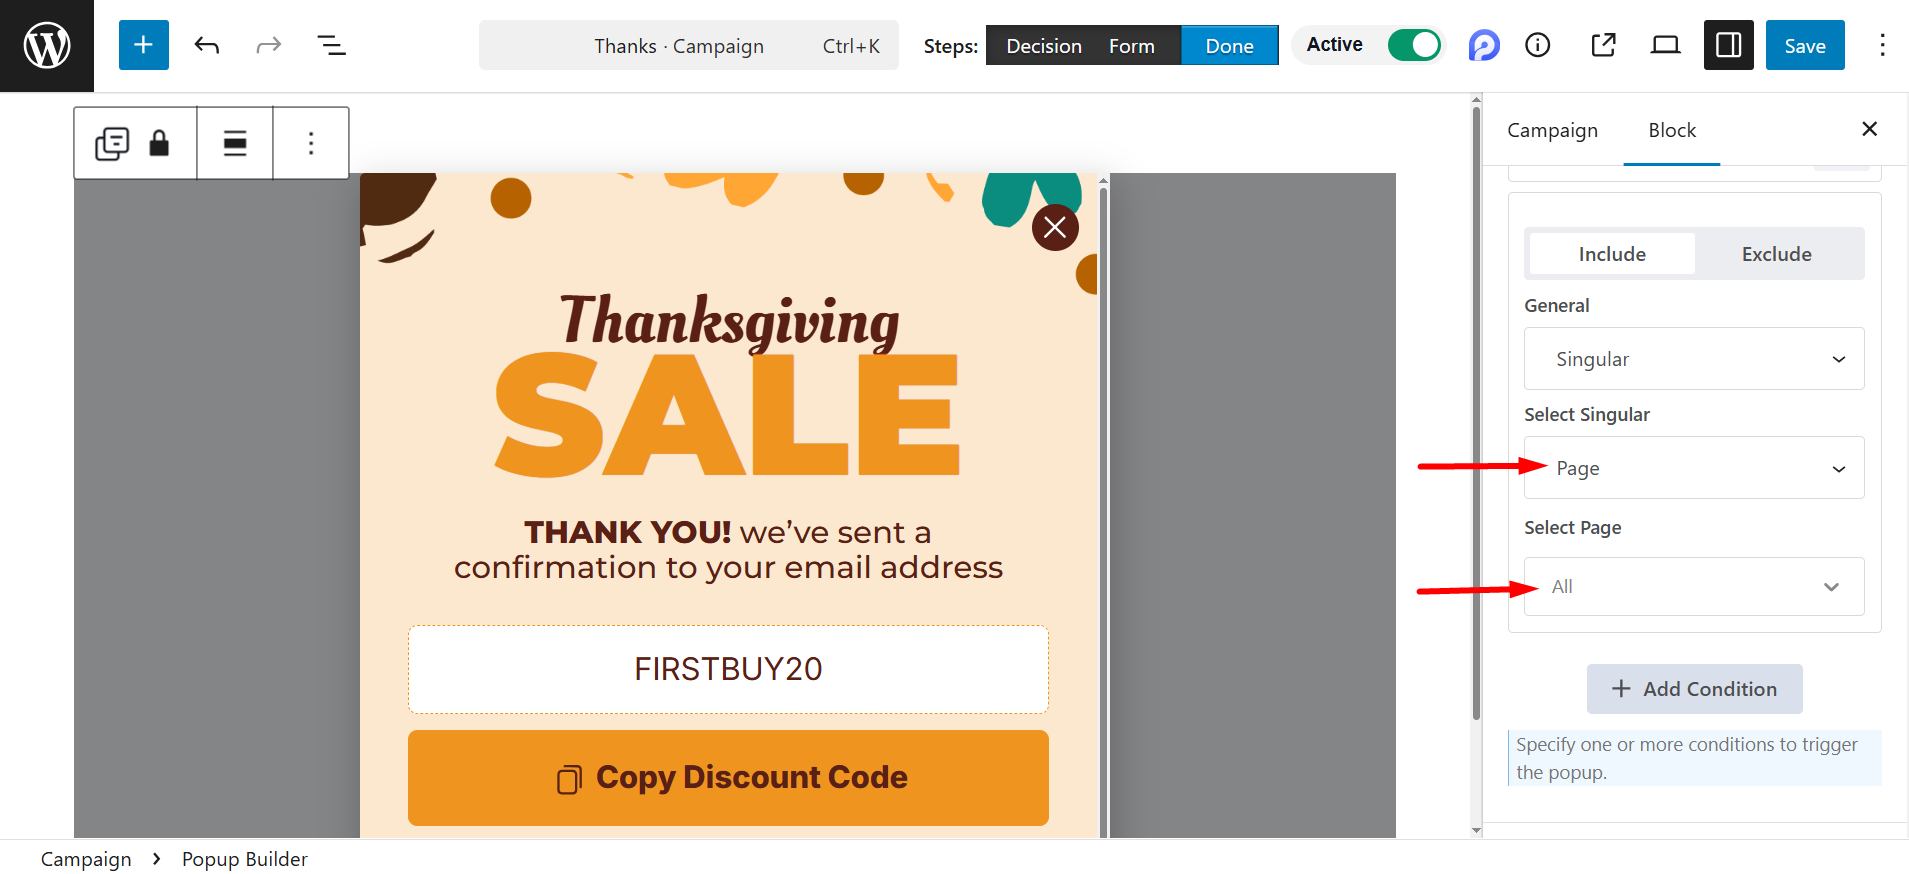
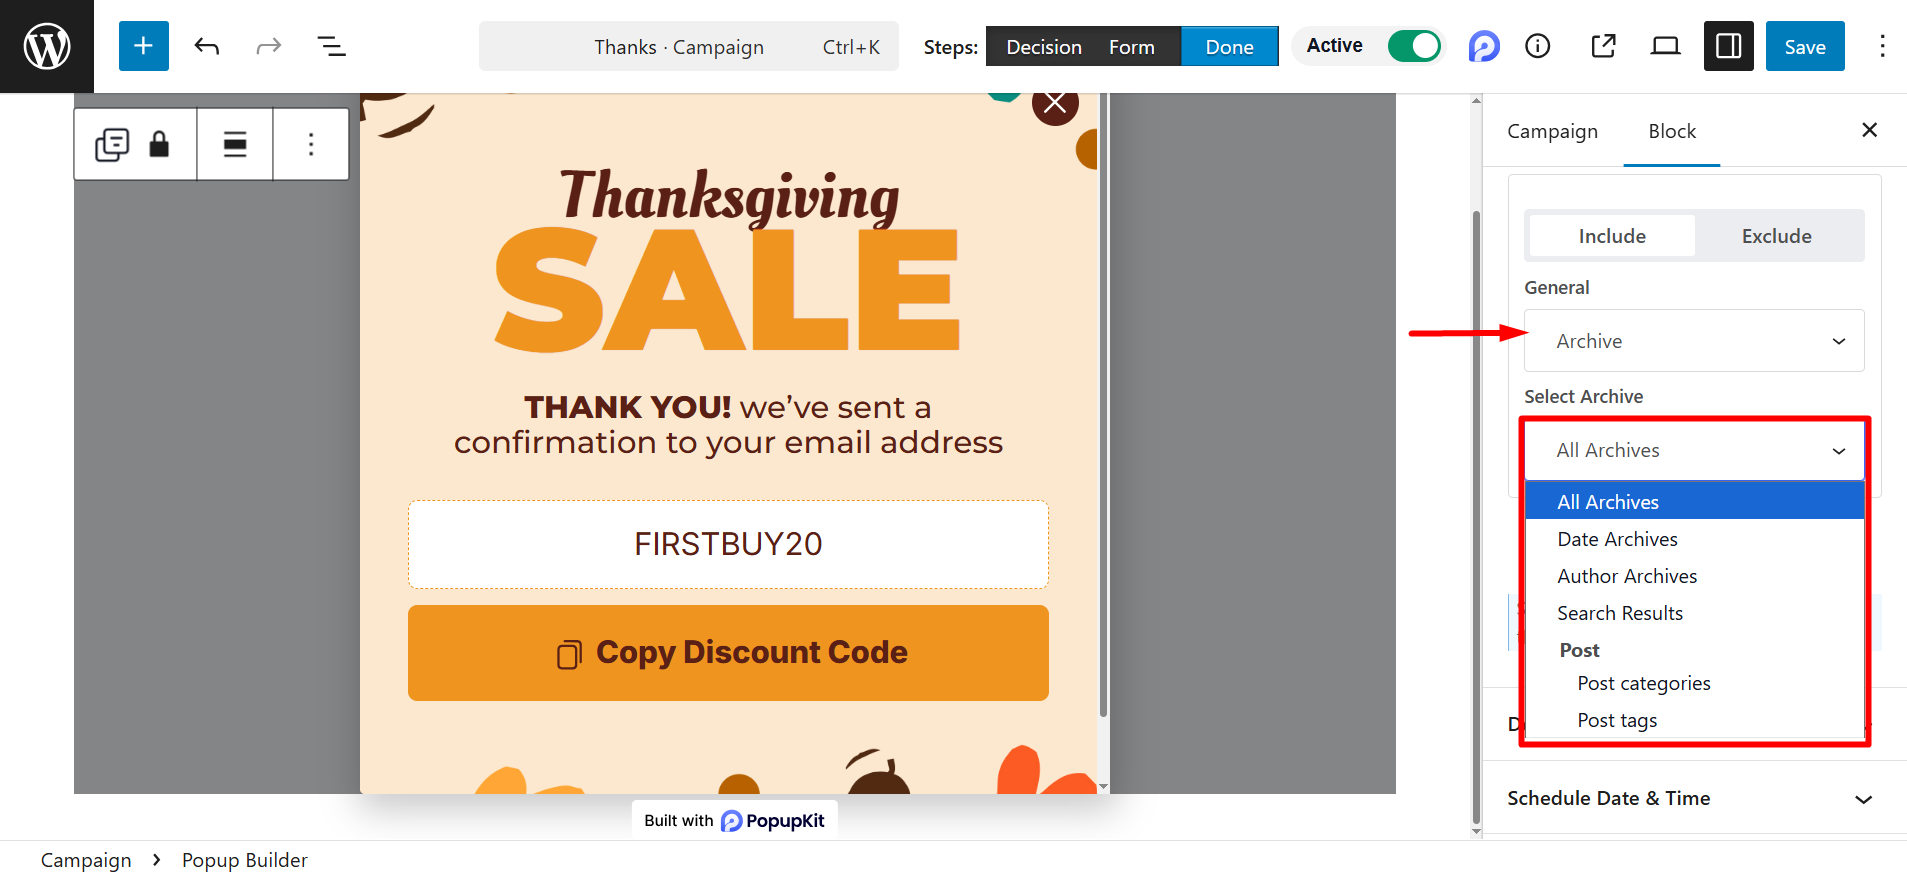
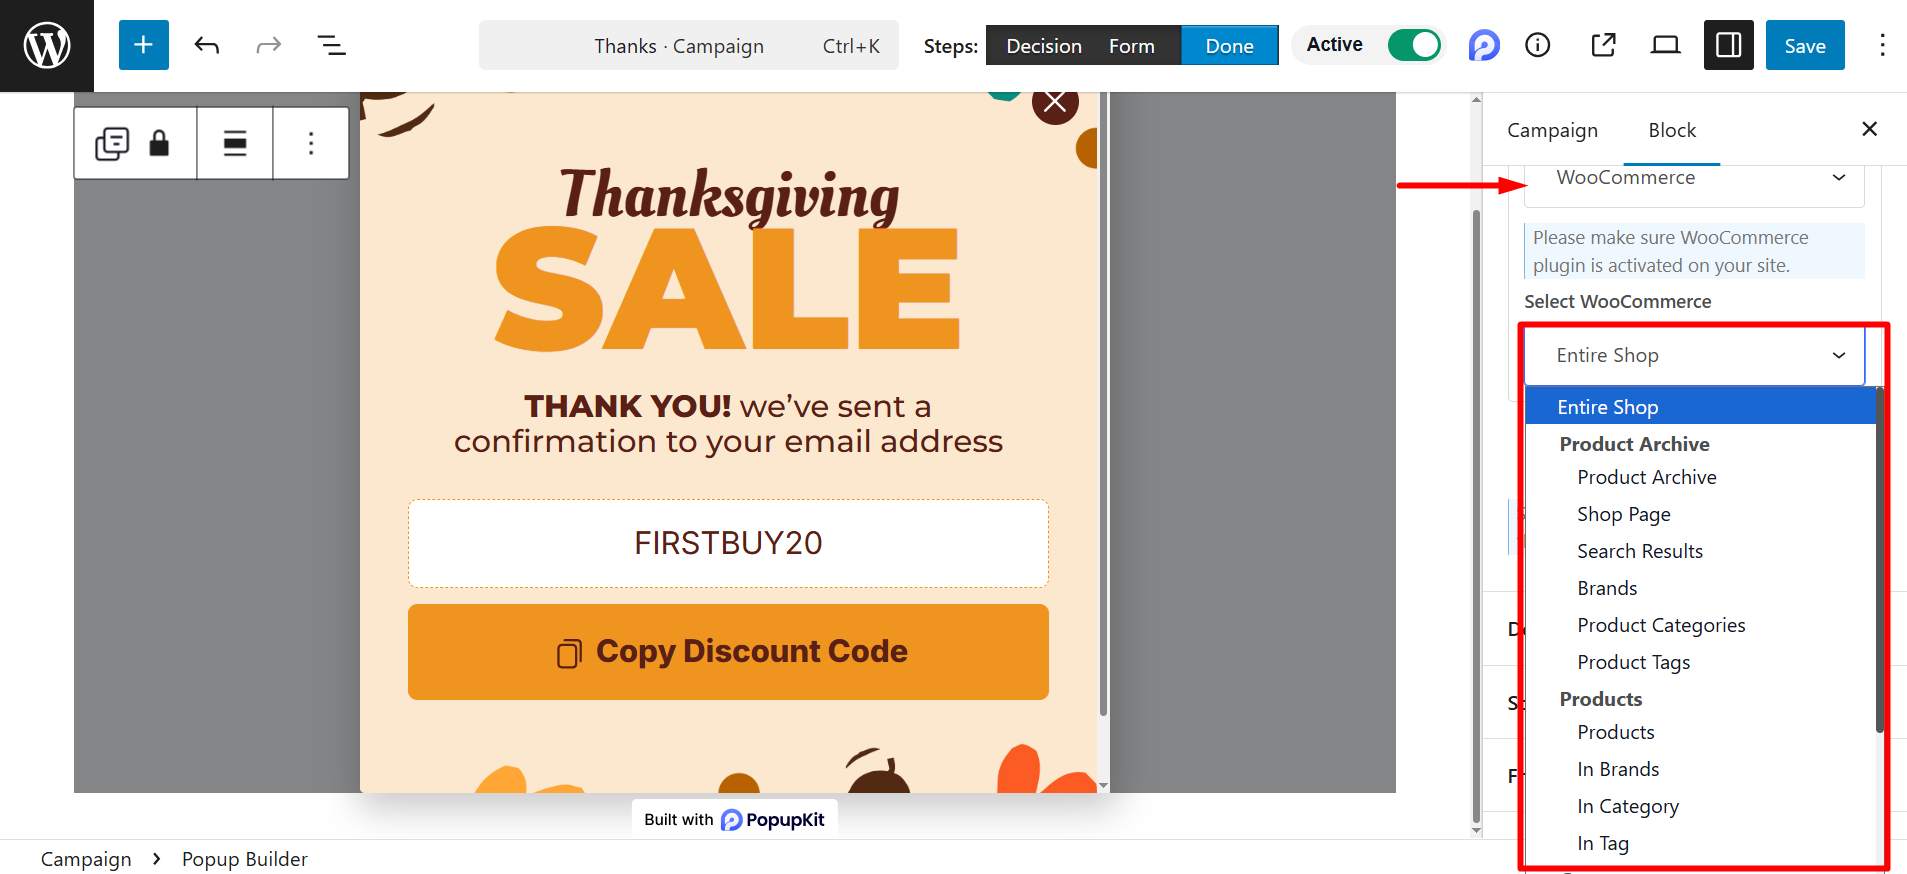
Select General #
Under Allmän option, you have five choices.
- Entire site: Show the popup everywhere on your website.
- Singularis: Show on specific posts, pages, or custom post types. For instance, you want to show the popup only on the ‘Front Page’.
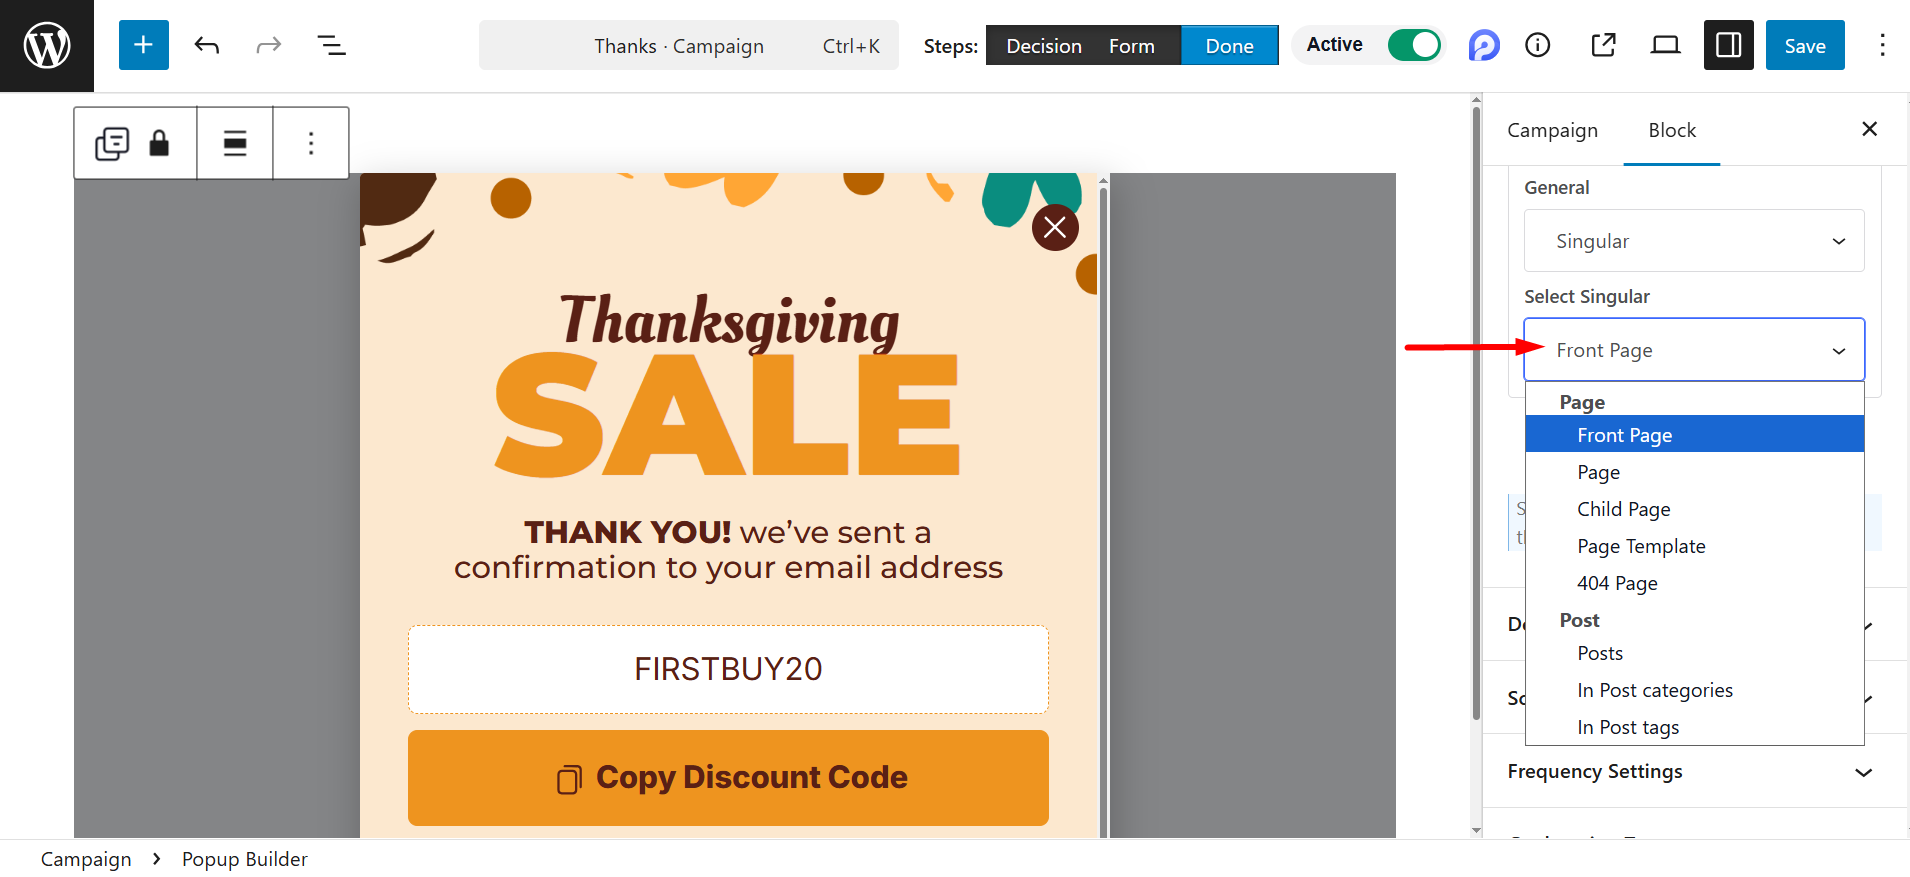
However, for page and post options, you’ll have the advantage of selecting specific pages and posts according to your choices. Like, if you choose Page as singular, då kan du select that particular page from the dropdown menu.
- Arkiv: Show on archive pages like blog category pages, author pages, or tag archives.
- WooCommerce: You can display the popup on shop-related pages, such product archive, shop page, in brands, etc.
However, for this option, you must have the WooCommerce plugin activated on your site.
- Anpassad URL: Show on specific URLs you manually enter.
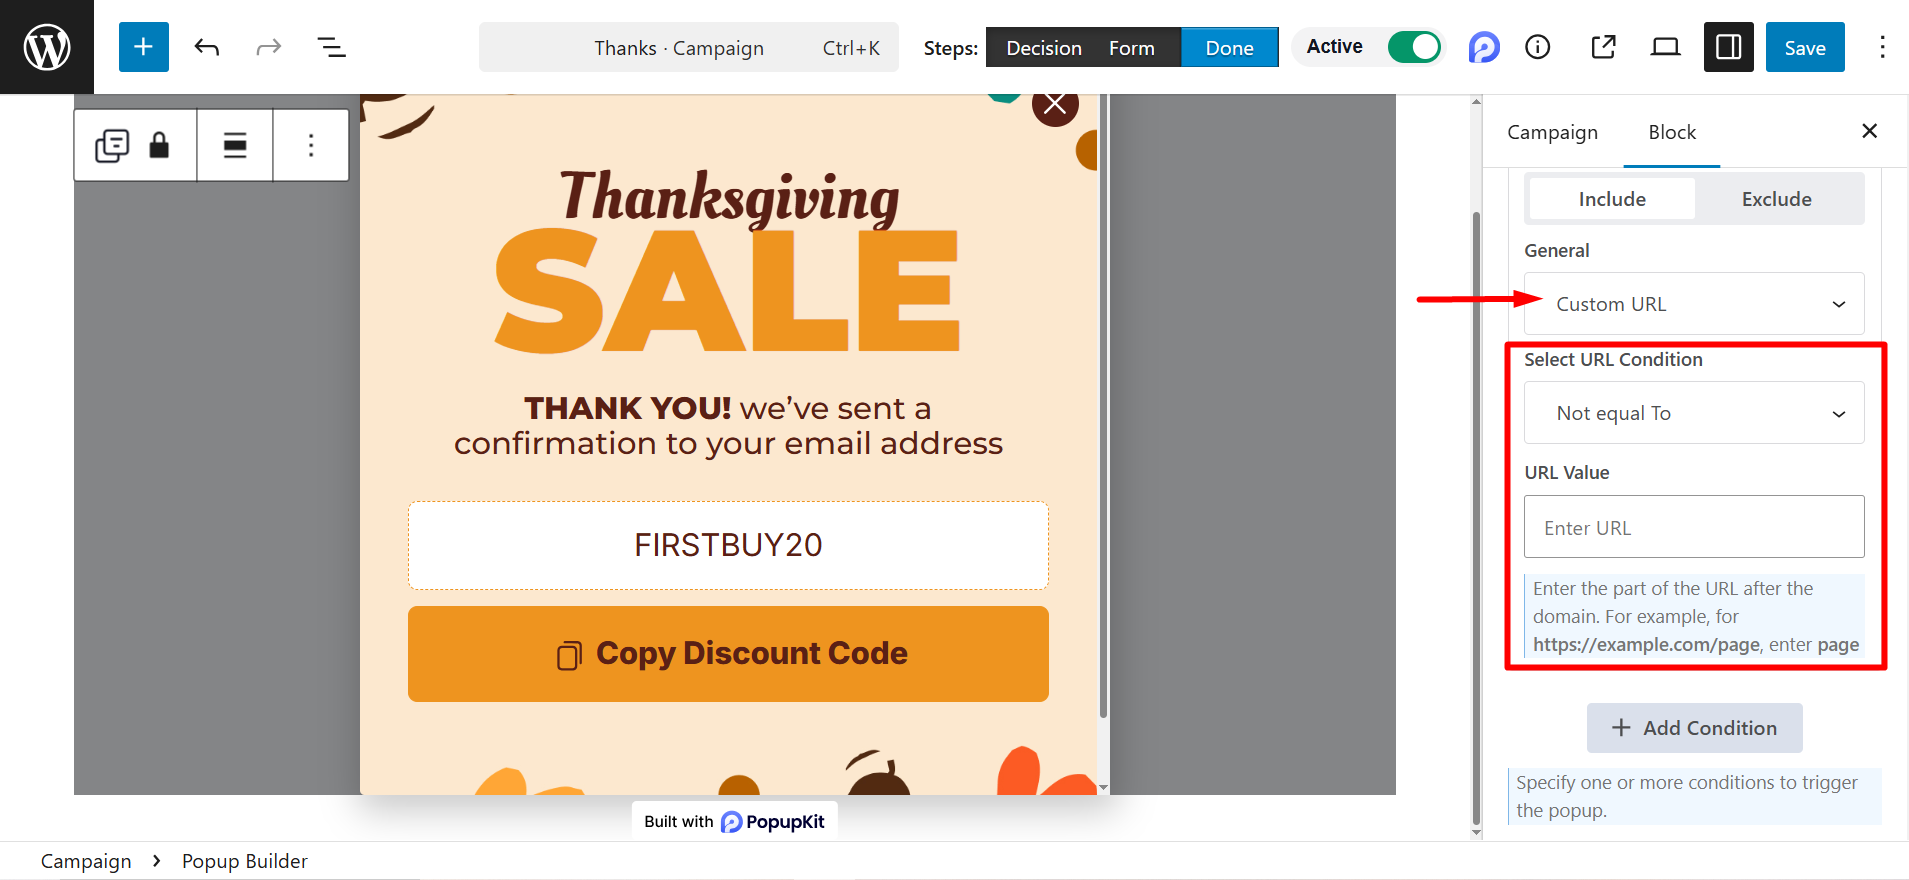
The options here are –
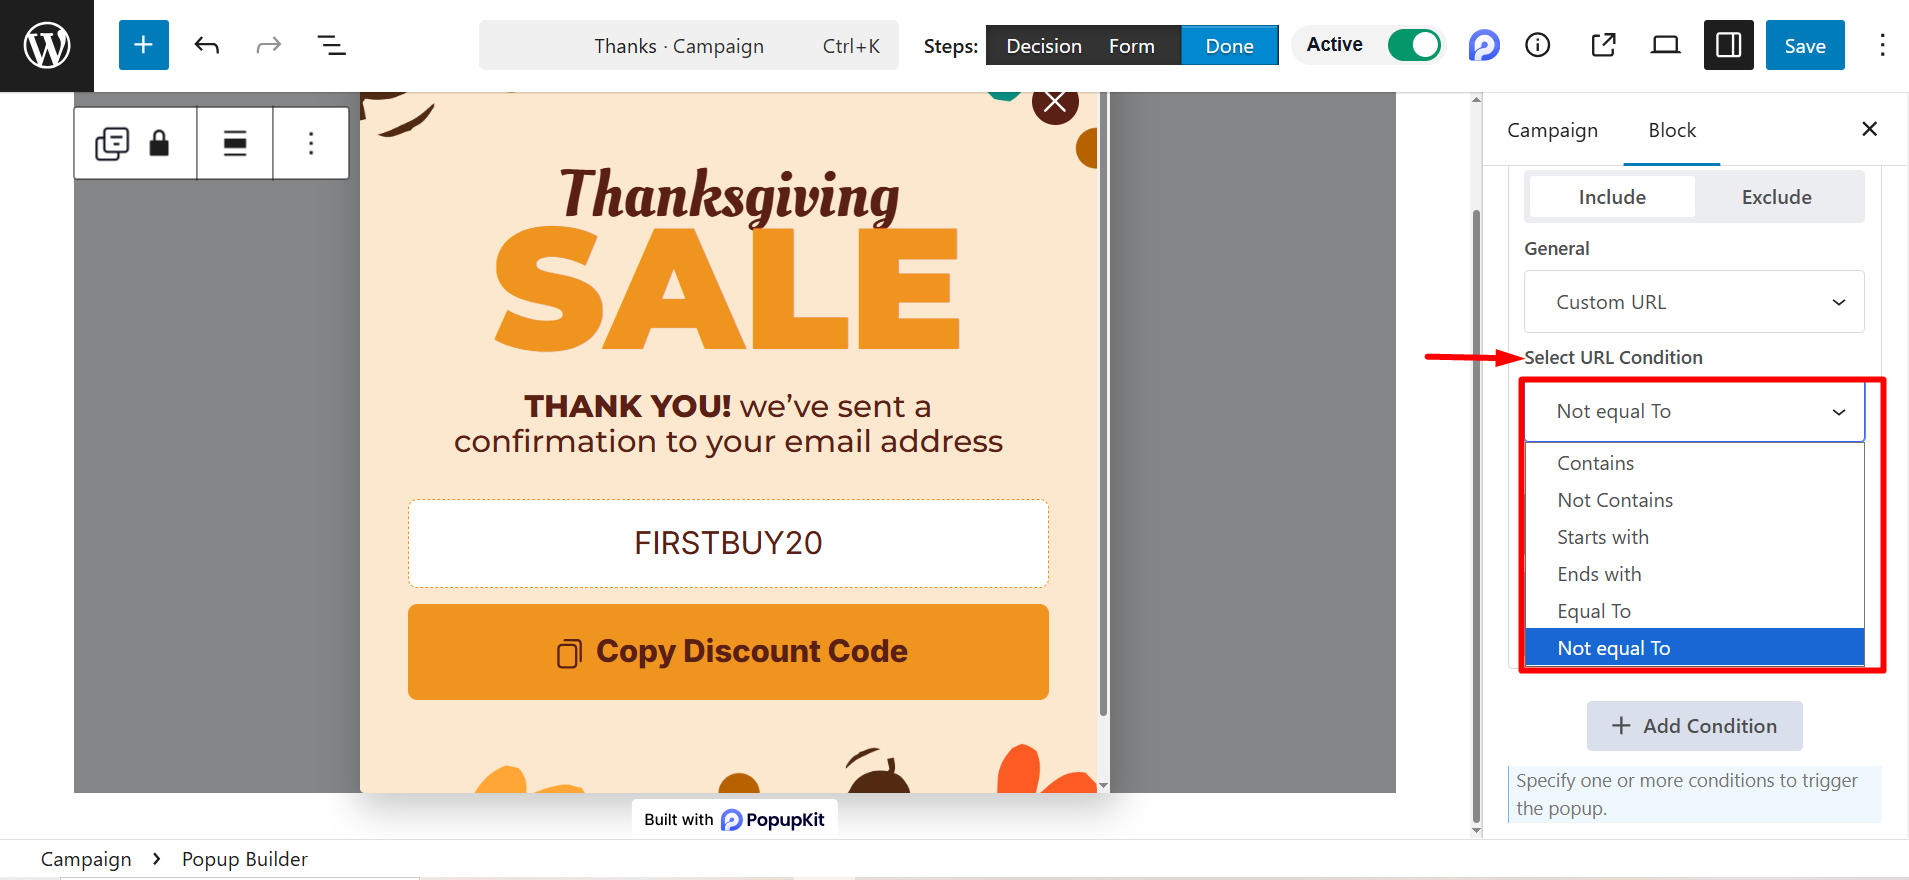
- Select URL Condition: There are a few conditions here:
- Contains – The URL must include the specified text.
- Not Contains – The URL must not include the specified text.
- Starts with – The URL must begin with the specified text.
- Ends with – The URL must end with the specified text.
- Equal To – The URL must be an exact match to the specified text.
- Not equal To – The URL must not be an exact match to the specified text.
- URL Value: Here, you have to insert the part of the URL after the domain. For example, for https://example.com/page, stiga på sida.
That’s all. By using these conditions, you can significantly enhance the user experience and boost conversions.


