


When it comes to presenting information clearly and attractively on your WordPress site, few elements are as powerful as a well-designed list. Whether you’re showcasing features, benefits, steps, or FAQs, lists help users quickly absorb information. But plain bullet points can often look dull and uninspiring. That’s where stylish lists come into play.
In this guide, we’ll explore why stylish lists matter and walk you through three easy methods to create stylish list in WordPress, using Elementor, Gutenberg, and custom CSS.
Quick Overview
Stylish lists help make information on your WordPress site more engaging, readable, and professional compared to plain bullet points. They can boost branding, highlight key points, and improve user experience.
Tools Used: Elementor and ElementsKit
3 methods to create stylish lists in WordPress:
✅ Elementor + ElementsKit (best for beginners) – Use the Stylish List widget to easily create custom lists.
✅ Gutenberg + GutenKit (for native WordPress users) – Add a Stylish List block within the default WordPress editor.
✅ Custom CSS (for advanced users) – Apply your own CSS rules via Appearance → Customize → Additional CSS.
Stylish lists don’t just look good, they improve usability and help content stand out.
Why You Need a Stylish List on Your WordPress Website
A list may seem like a small design element, but its impact is significant. Here’s why upgrading your basic lists to stylish ones is worth the effort:
- Improves Readability: A visually enhanced list makes content easier to scan and digest.
- Grabs Attention: Custom icons, colors, and animations can make key points pop.
- Strengthens Branding: Consistent design across elements like lists helps reinforce your brand’s identity.
- Boosts Engagement: Users are more likely to interact with visually appealing content.
- Elevates Professionalism: Clean, modern lists convey a sense of polish and care.
If you want your content to stand out and keep users engaged, upgrading to stylish lists is a must.
Methods to Create Stylish List in WordPress
Now, let’s dive into three popular and effective methods to create stylish lists on your WordPress website.
Method 1: Use Elementor
If you’re using Elementor as your page builder, you’re lucky. With ElementsKit, you get access to a powerful Stylish List widget that makes it super easy to create eye-catching lists, no coding required.
In your WordPress dashboard, go to ElementsKit and open widgets.
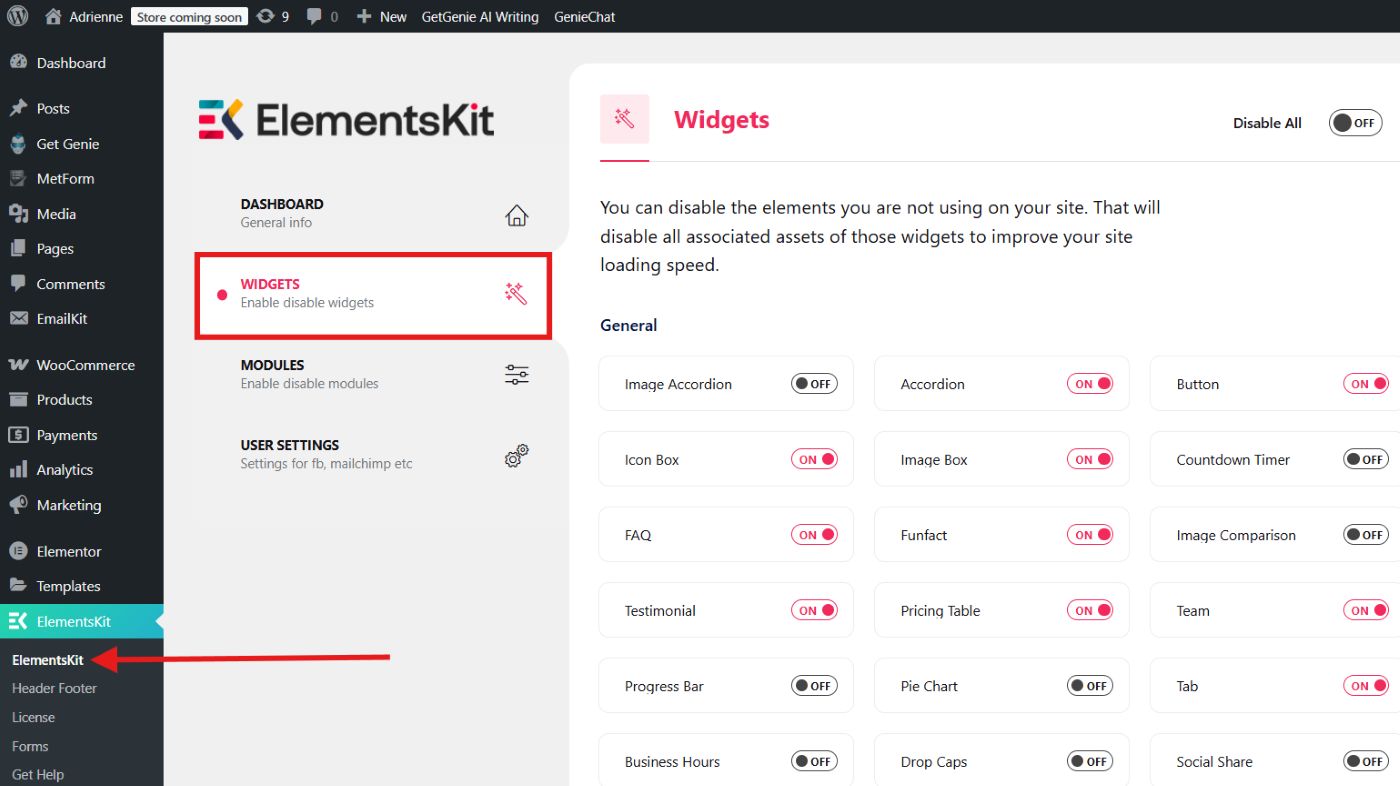
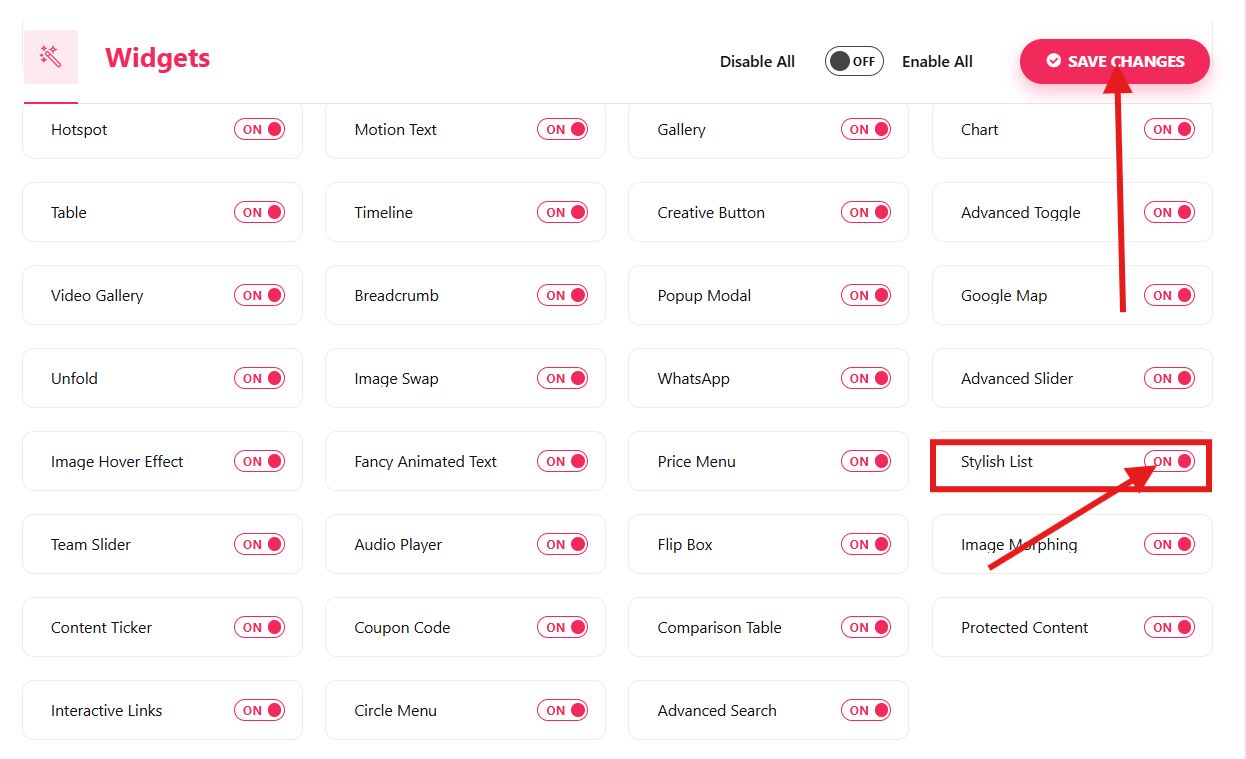
Now, look for the Stylish List widget and enable it. Once enabled, click Spara ändringar.
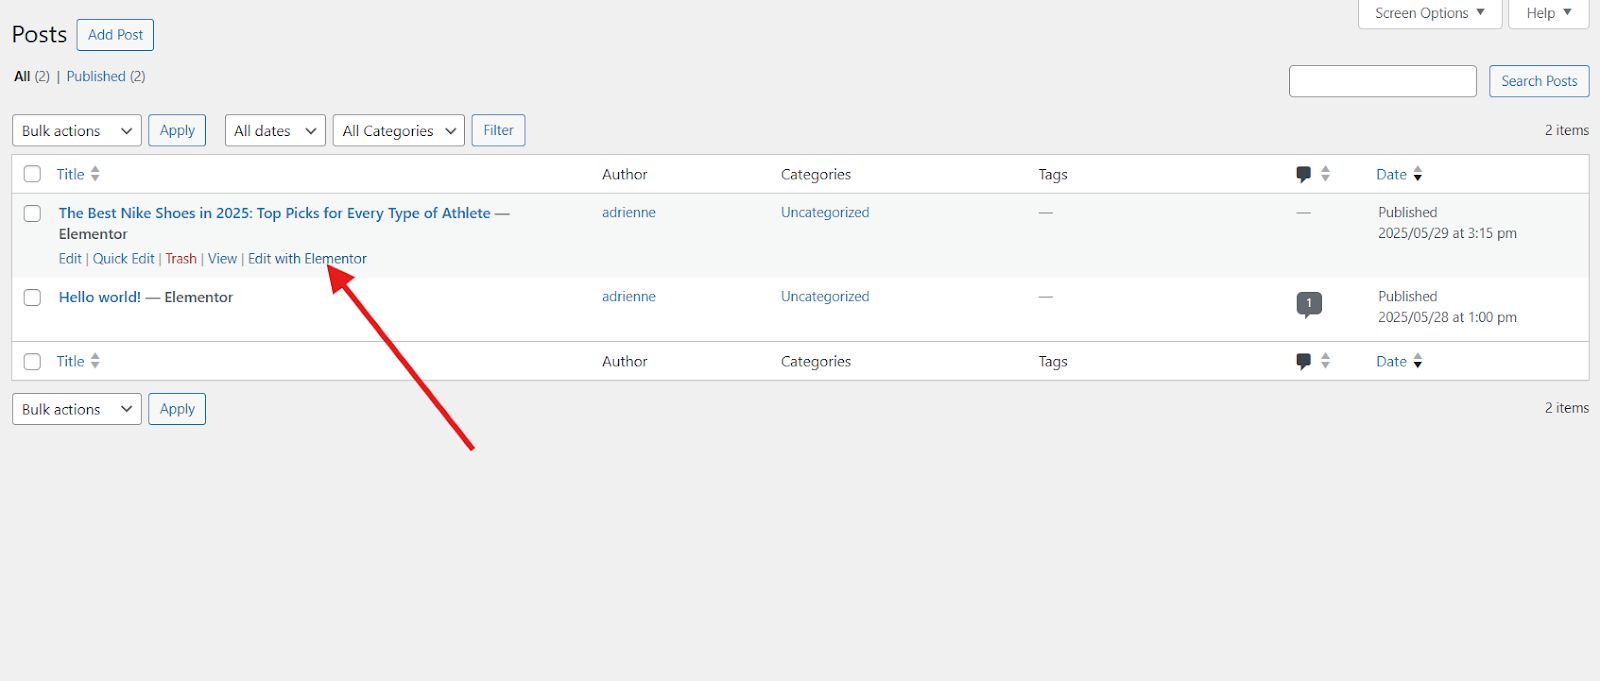
Then, open a page or a post you want to edit with Elementor.
In your Elementor page, search for the Stylish List widget and drag-and-drop it to the section you want to add it to.
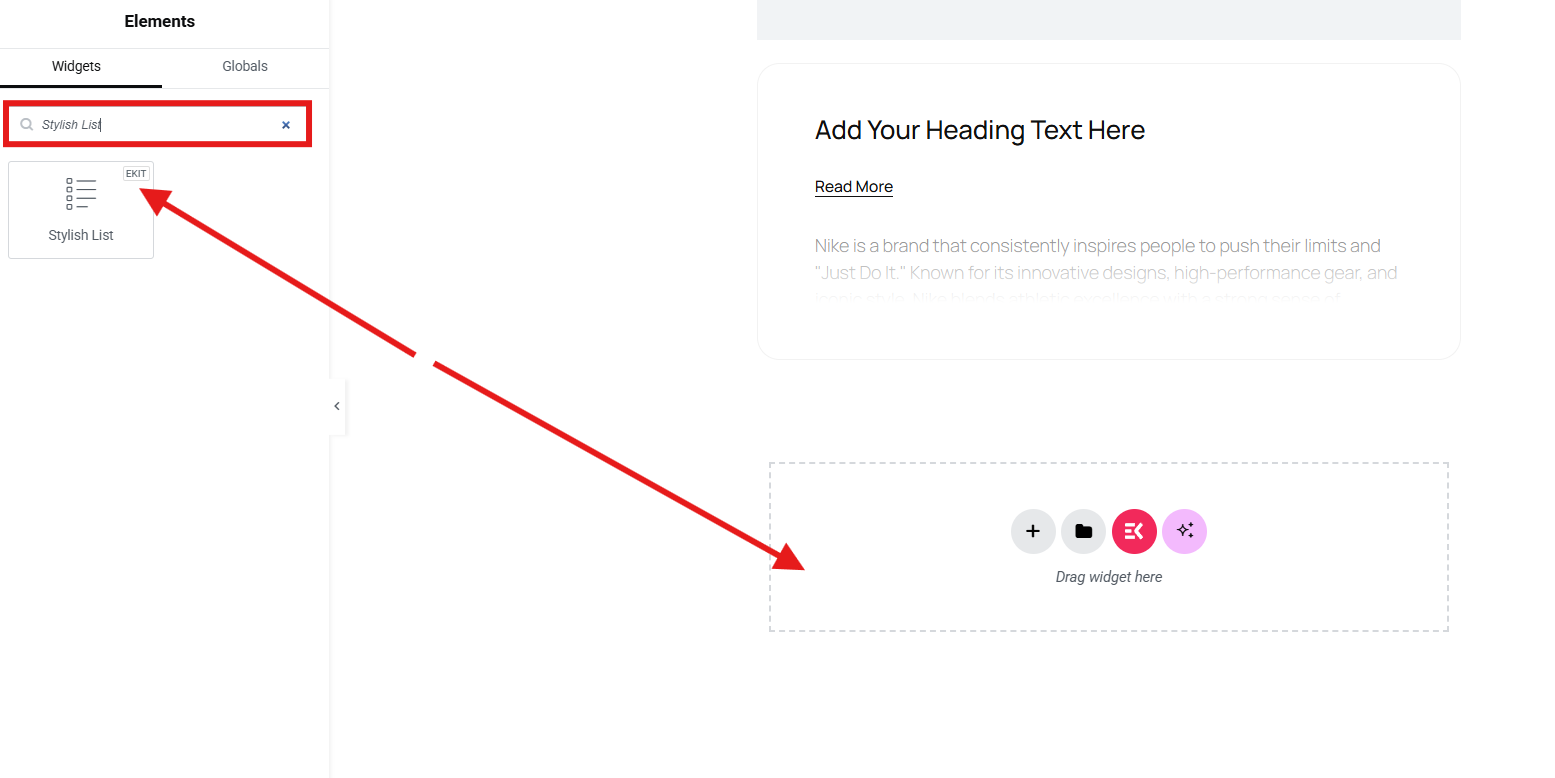
Klicka på redigera icon to open the settings panel and customize your stylish widget.
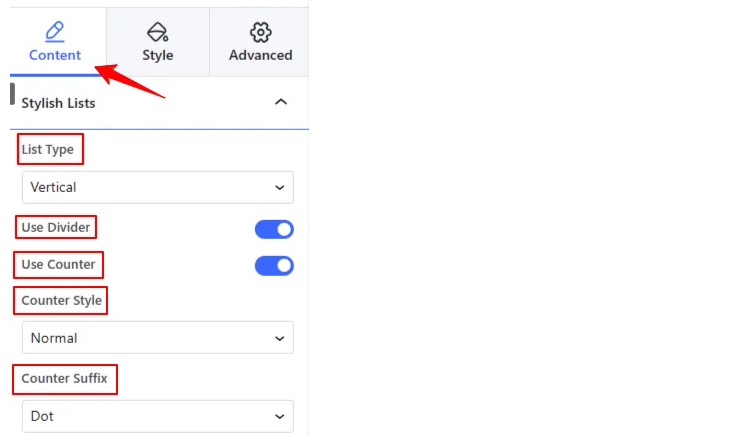
The available options include:
👍 List Type – Choose between a vertical or horizontal list layout.
👍 Use Divider – Toggle on to add a divider, or off to remove it.
👍 Use Counter – Enable this to add numbered counters, then adjust:
- Counter Style – Select from seven styles: Normal, Decimal Leading Zero, Upper Alpha, Lower Alpha, Upper Roman, Lower Roman, or Lower Greek.
- Motsuffix – Choose a dot, bracket, colon, or no suffix at all.
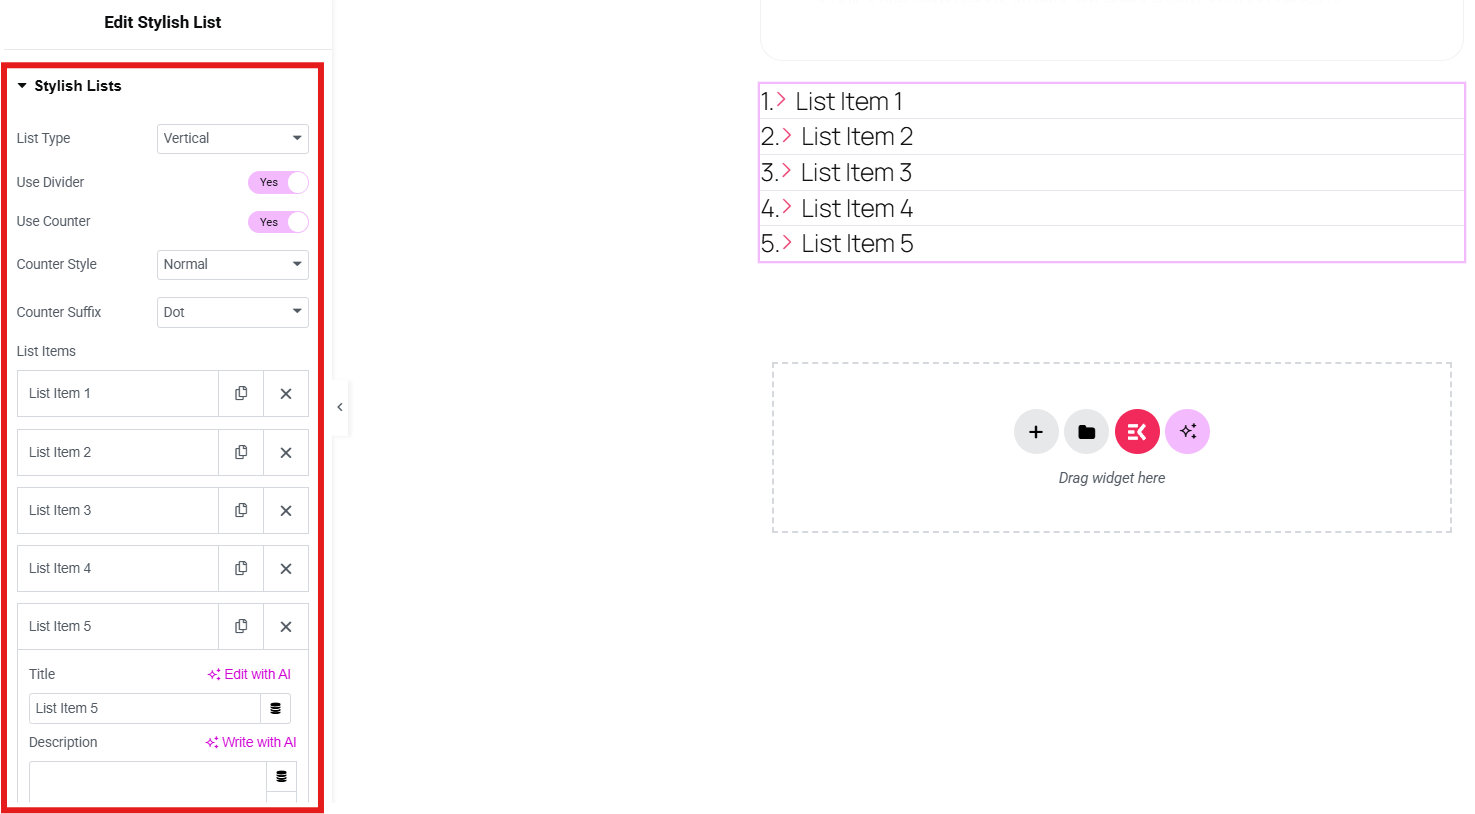
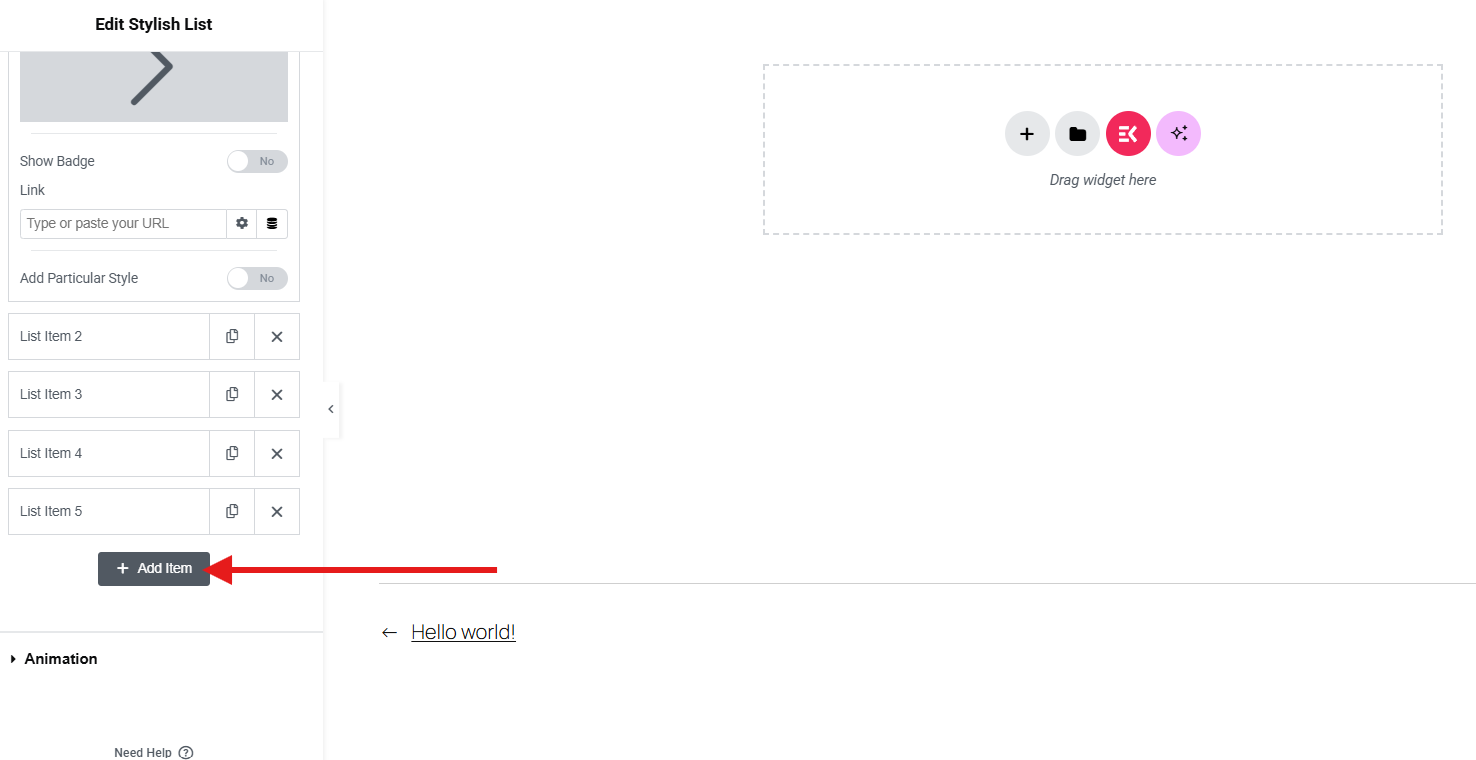
Under “Lista objekt,” you can edit existing items, duplicate them, delete, or add new ones.
If you want to edit an item, simply adjust the available settings on the left side of your screen:
👍 Title – Set the title for the list.
👍 Description – Add a short description for the list.
👍 Media Type – Choose to display either an icon or an image for the item.
👍 Show Badge – Enable this to display a badge on the item. Once enabled, you can configure:
- Märketext
- Text färg
- Bakgrundsfärg
👍 Link – Add a hyperlink to the list item.
👍 Add Particular Style – Toggle this option on to apply custom styling, then adjust:
- Bakgrundsfärg
- Gräns färg
- Ikon Färg
- Ikon bakgrundsfärg

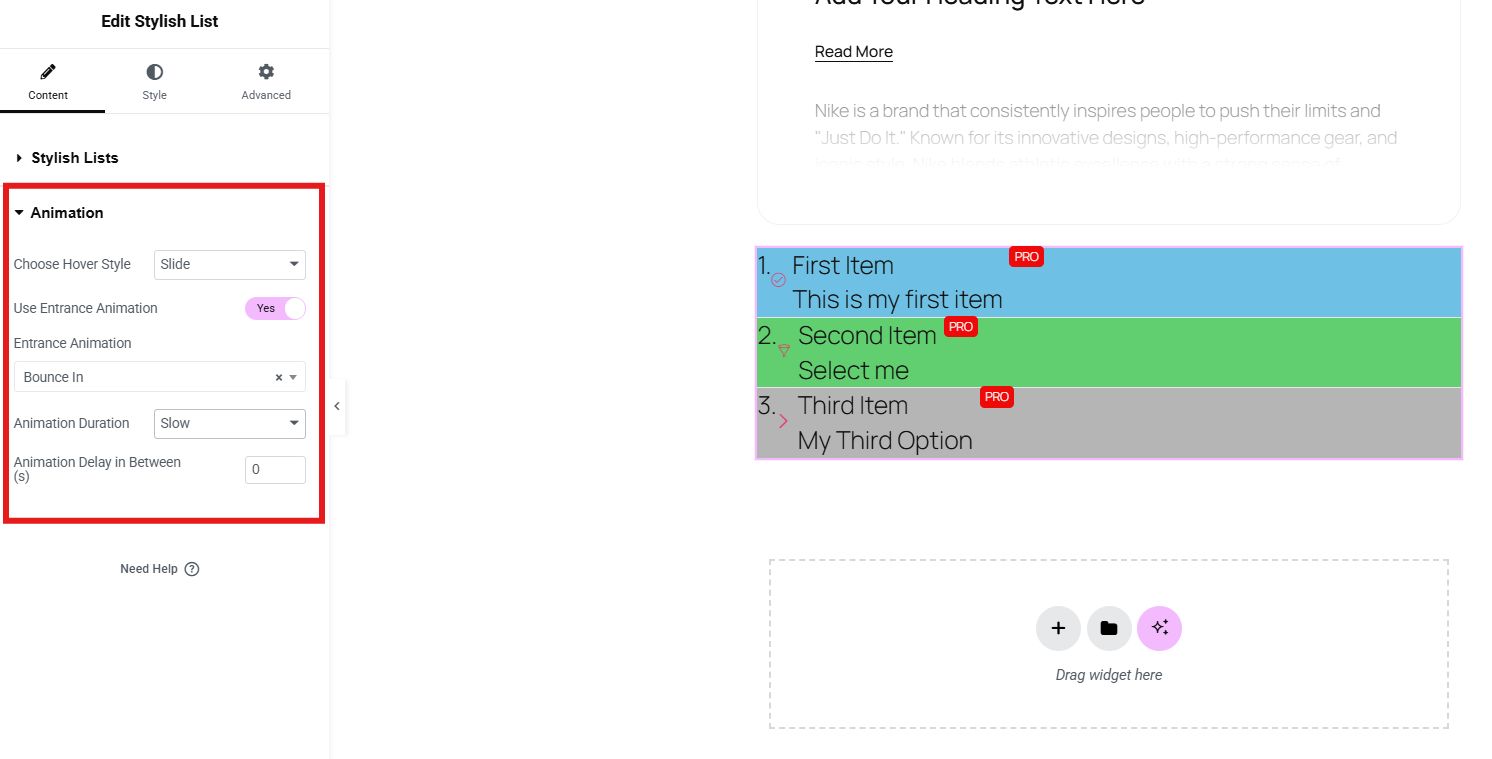
You can also add animation to your list. You can select hover style and turn on the toggle of “Use Entrance Animation”. After that, add Entrance Animation, Animation Duration, Delay in Between.
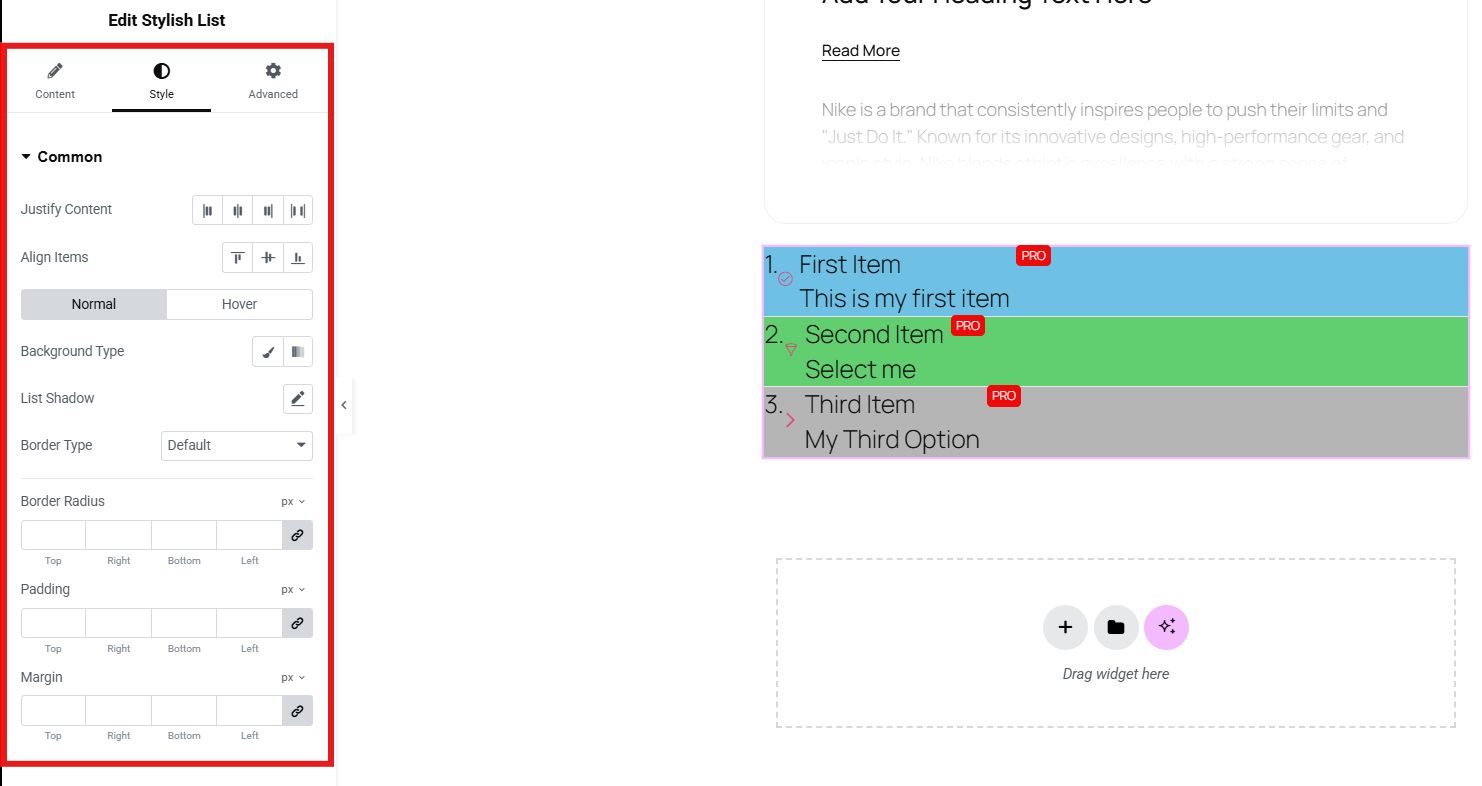
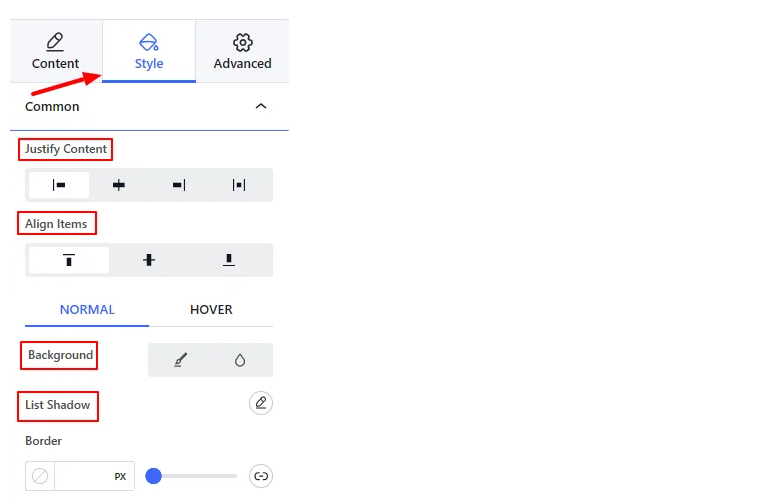
To set the style of your list, the Stilsektion allows you to adjust everything, such as item alignment, padding, background, etc.
Now, if you want to elevate the design of your list, advanced settings will give you full control. You can adjust the layout, add effects, etc.

And finally, click on publish to make your stylish list live.
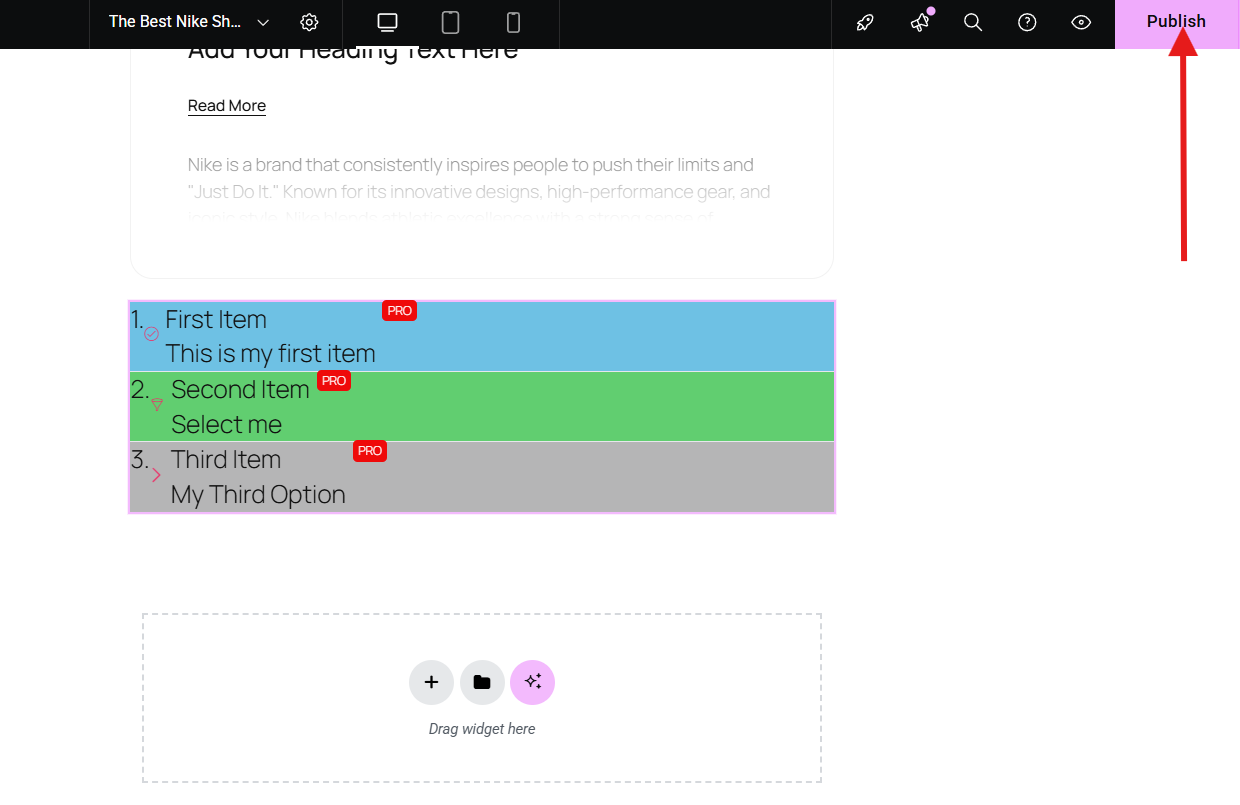
You can also preview your page to see the final appearance of your stylish list in real time.
Why is this method great and most recommended?
It’s fast, beginner-friendly, and offers tons of customization without needing to write a single line of code.

Method 2: Use Built-in WordPress Block Editor (Gutenberg)
If you prefer using the default WordPress editor, Gutenberg offers some decent styling options for lists, especially with group blocks and block styles. You can also use the Gutenberg tool, like GutenKit, to have a stylish list in Gutenberg.
Open a post or page in the WordPress editor. Then choose the section where you want to display your Gutenberg list and add the stylish list block of GutenKit.
You can customize your Gutenberg list by simply adjusting everything through the content, style, and advanced settings. You may select the list type from the vertical and horizontal options. You may enable using a divider and counter, add counter style, etc.
Just like the first method, you can also edit your list items and add your list title, description, media type, icon, etc.

You can also set the animation style of your list. Select your hover style and add an entrance animation, animation speed, and animation delay after enabling the “Use Entrance Animation” option.

Additionally, you can style your list in the style section. You can justify your content, set the alignment of your items, set your background, edit list shadow, and border.
Moreover, you can further enhance your list through the advanced settings. It will allow you to adjust the layout and add more elements to your Gutenberg stylish list.
Lastly, preview your work to see if it needs further adjustment and save or publish it once satisfied.
What makes this method a great option?
You can stay within the native WordPress editor while still enhancing your lists with minimal effort. This method is only applicable for Gutenberg users.
Method 3: Customize Lists with Additional CSS
For more advanced users or those who want full control over the design, Anpassad CSS is a powerful option. You can transform basic HTML lists into sleek, branded elements with a few lines of code.
In your WordPress dashboard, go to Utseende och välj Anpassa. Klicka sedan på Ytterligare CSS.

Paste your CSS code.
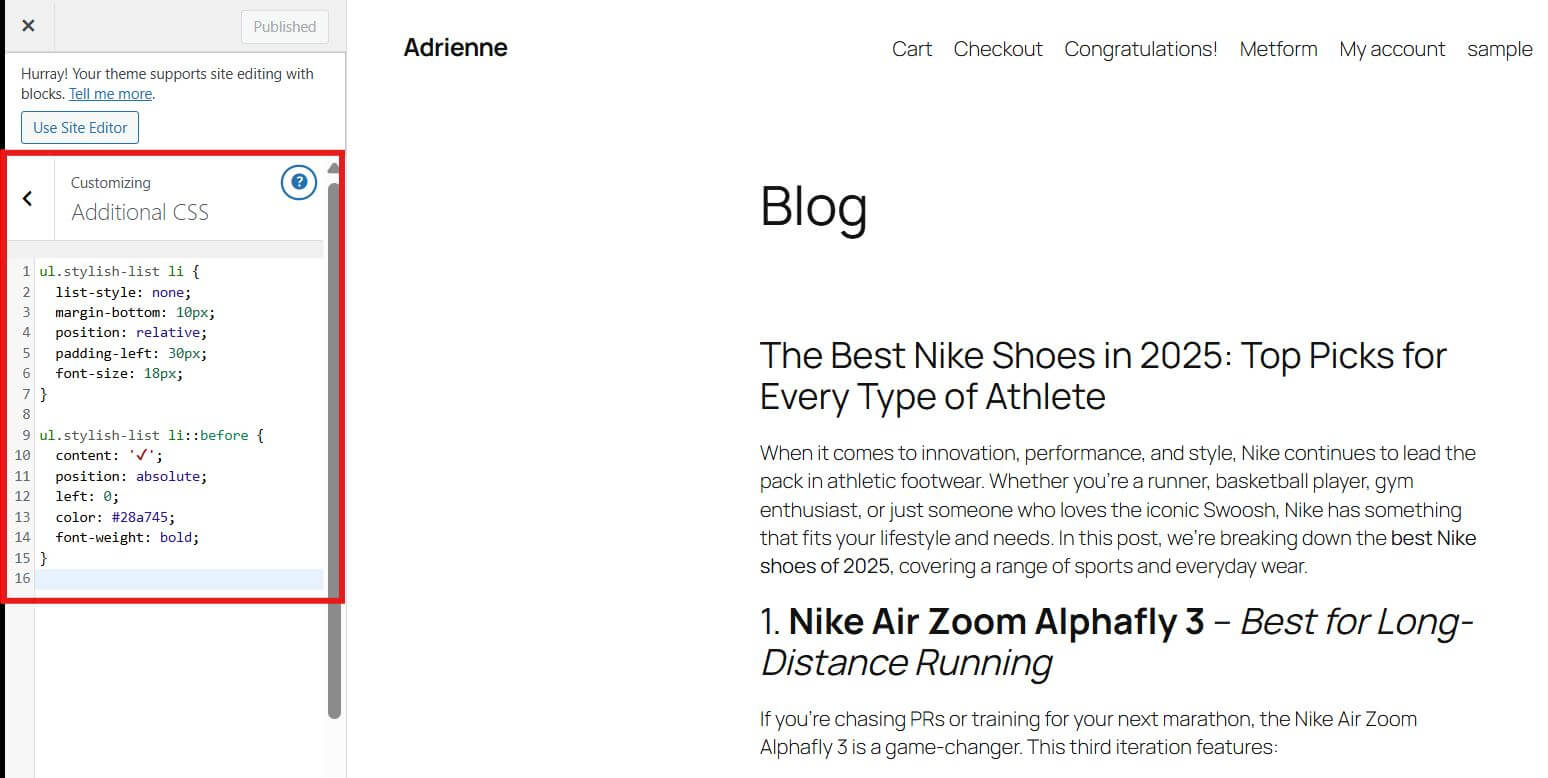
Lastly, apply the corresponding class (stylish-list) to your list block in the post or block editor under Advanced → Additional CSS Class(es)
Why consider this method?
This method does not require plugins. However, this method is only applicable for users who are comfortable with coding.
Slutgiltiga tankar
Creating a stylish list in WordPress doesn’t have to be complicated. Whether you’re a beginner or a seasoned developer, there’s a method that suits your skill level:
- Använda sig av Elementor + ElementsKit for a fast, feature-rich solution.
- Stick with Gutenberg + GutenKit for simplicity and native functionality.
- Go with Anpassad CSS for full design control if you are comfortable with coding.
A stylish list doesn’t just look good. It also improves user experience, highlights key information, and helps your site look more professional.
Start upgrading your lists today and watch your content organized.

Lämna ett svar