


Quick Overview
If you want to add a parallax effect in WordPress without writing code, the fastest and safest method is using ElementsKit med Elementor. This approach lets you create scroll-based, tilt, mouse-move, or CSS animation parallax effects in minutes. You only need to install the plugin, enable the Parallax Effects module, add an image widget, and configure the effect settings. No custom CSS or JavaScript is required. This method works best for hero sections, banners, and visual highlights. Avoid using parallax excessively, especially on mobile, as it can affect performance and readability.
How to add parallax effect in WordPress (7 steps)
Using a WordPress plugin is the simplest way to add parallax effect in minutes. Before you start, keep in mind the following points to avoid UX issues:
- Best for the hero section, banner, and feature blocks, not for the entire site.
- Excessive motion can impact mobile usability. Test before publishing.
- Heavy parallax animations can affect page performance.
- Separately preview on mobile or desktop devices before living.
Here is the in-depth guide to how to add parallax effect in WordPress with a user-friendly plugin, ElementsKit.
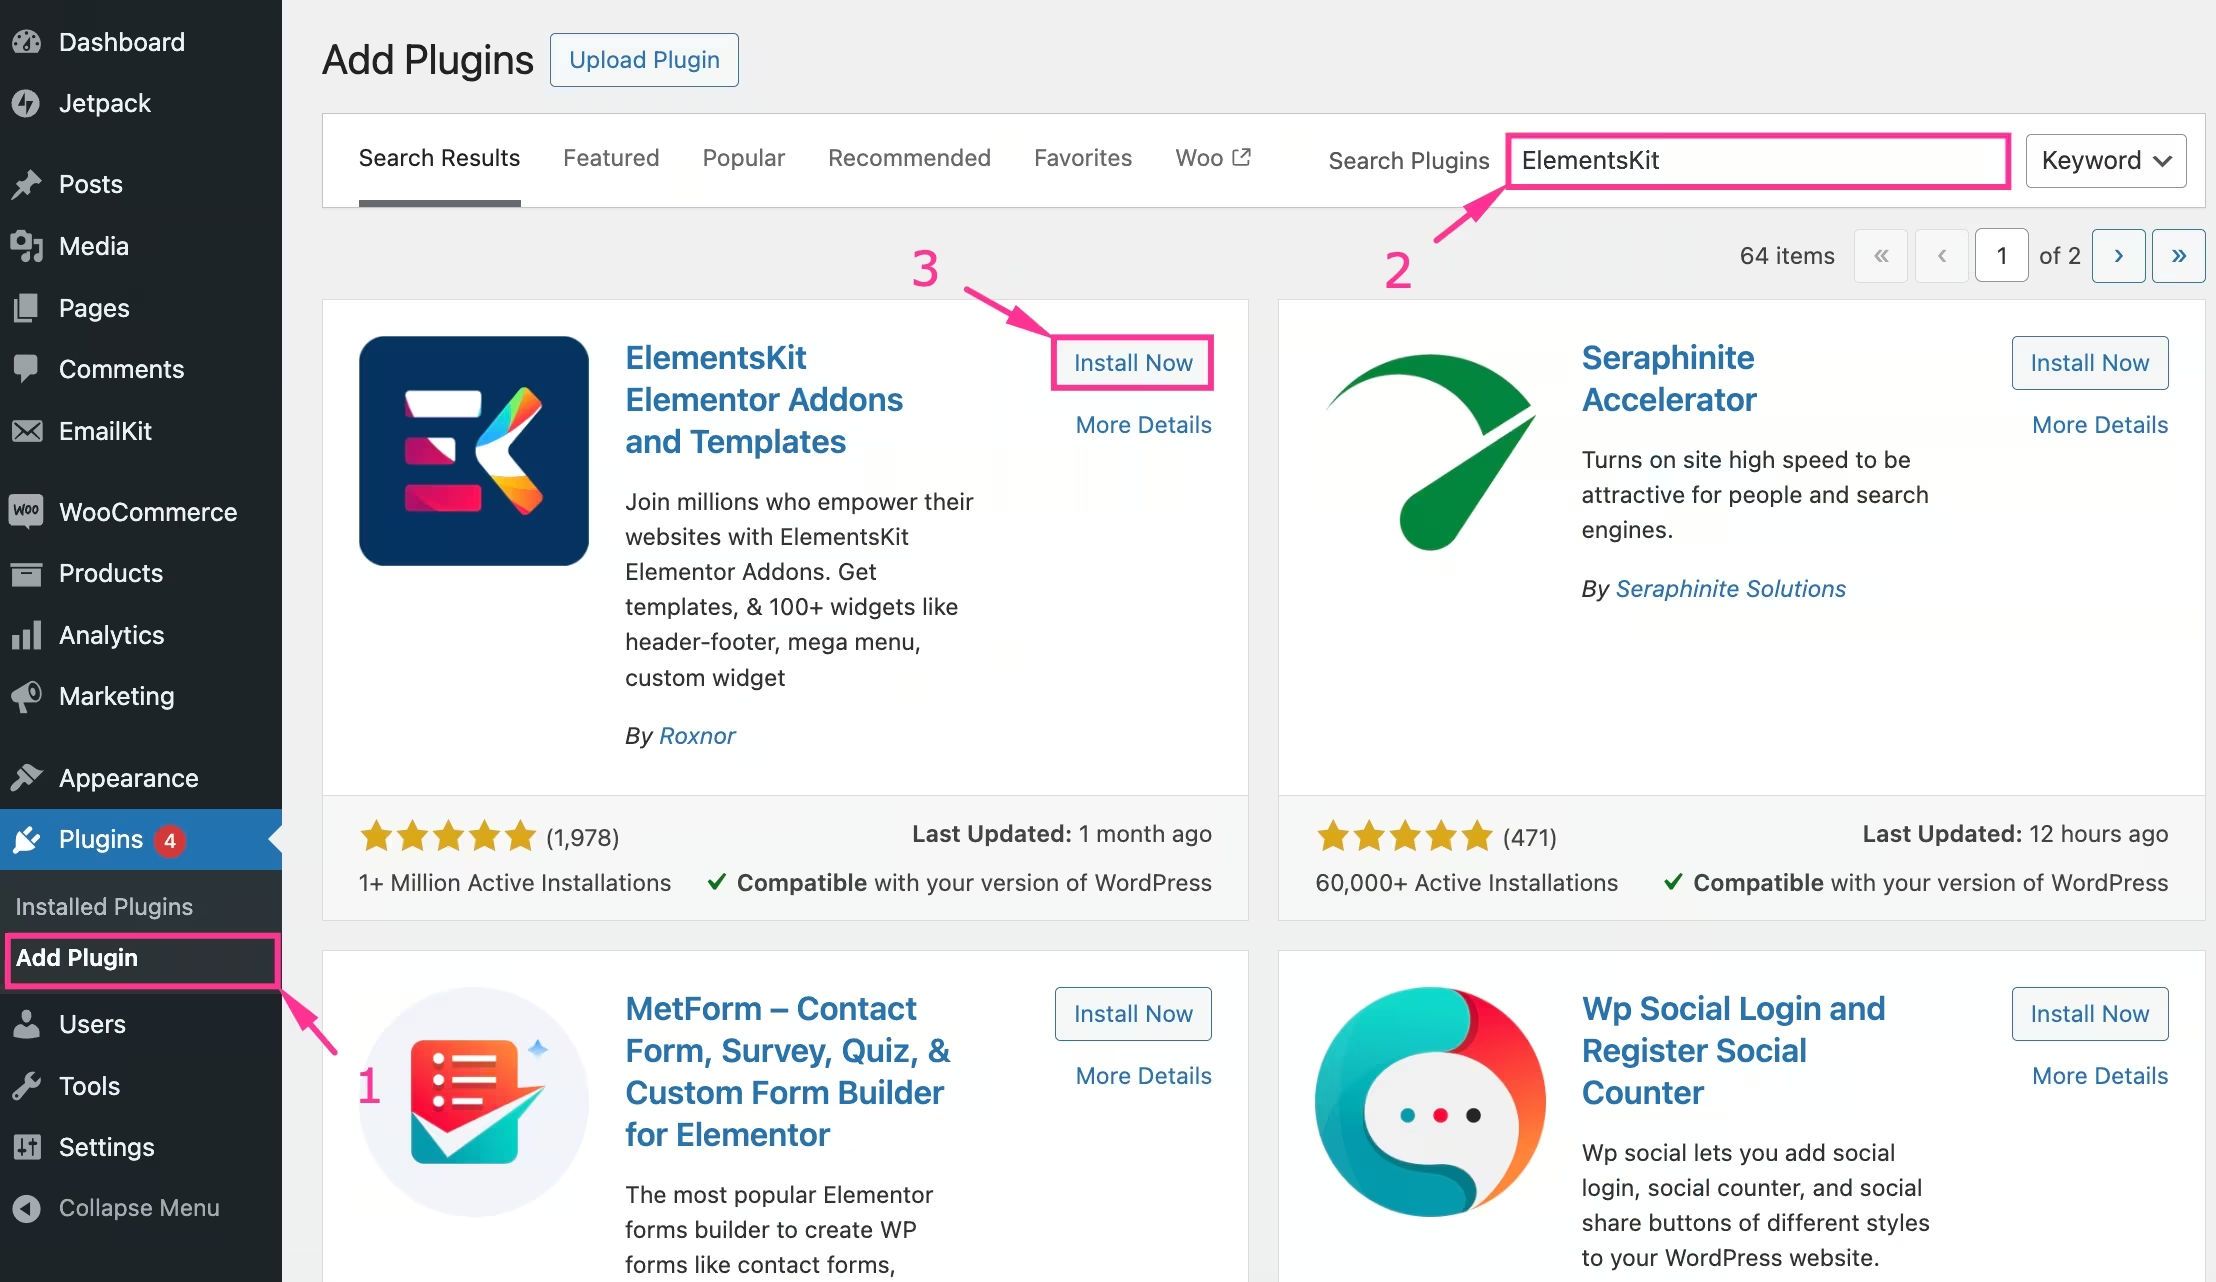
Step 1: Install ElementsKit
First, you have to install and activate ElementsKit Free and Pro on your WordPress website. Besides ElementsKit, keep Elementor installed and activated on your site.
For that, take the following attempts:
- Navigera till Plugins → Add Plugin och search for “ElementsKit”.
- Installera och aktivera ElementsKit.
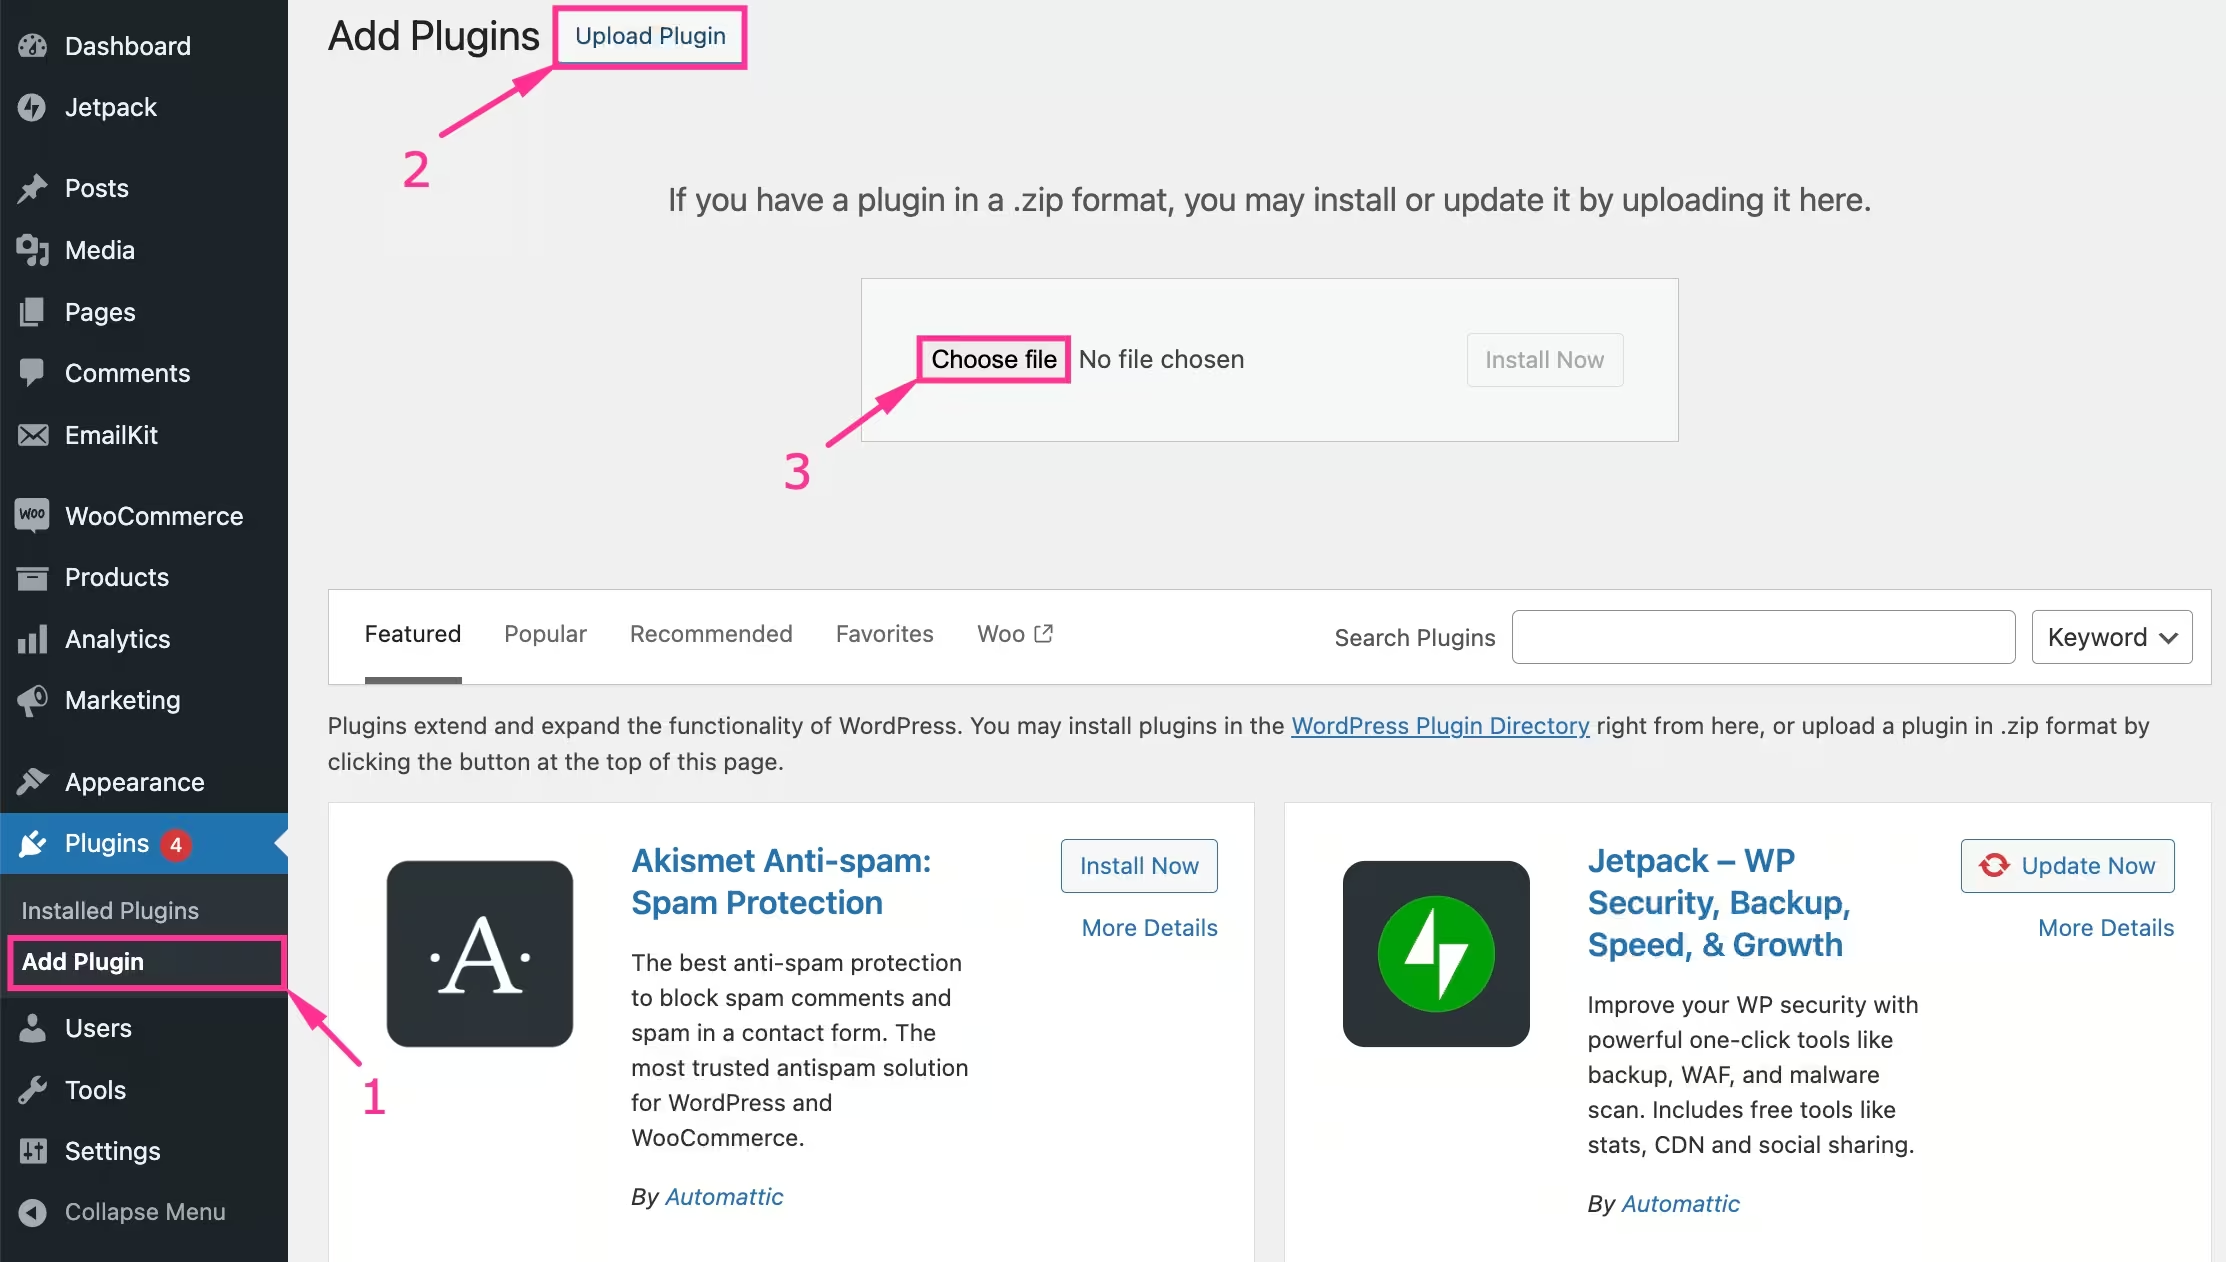
If you use the Ladda upp plugin alternativ:
- Klicka på "Ladda upp plugin" button to install ElementsKit Pro.
- Choose a file from your device and install and activate the plugin.
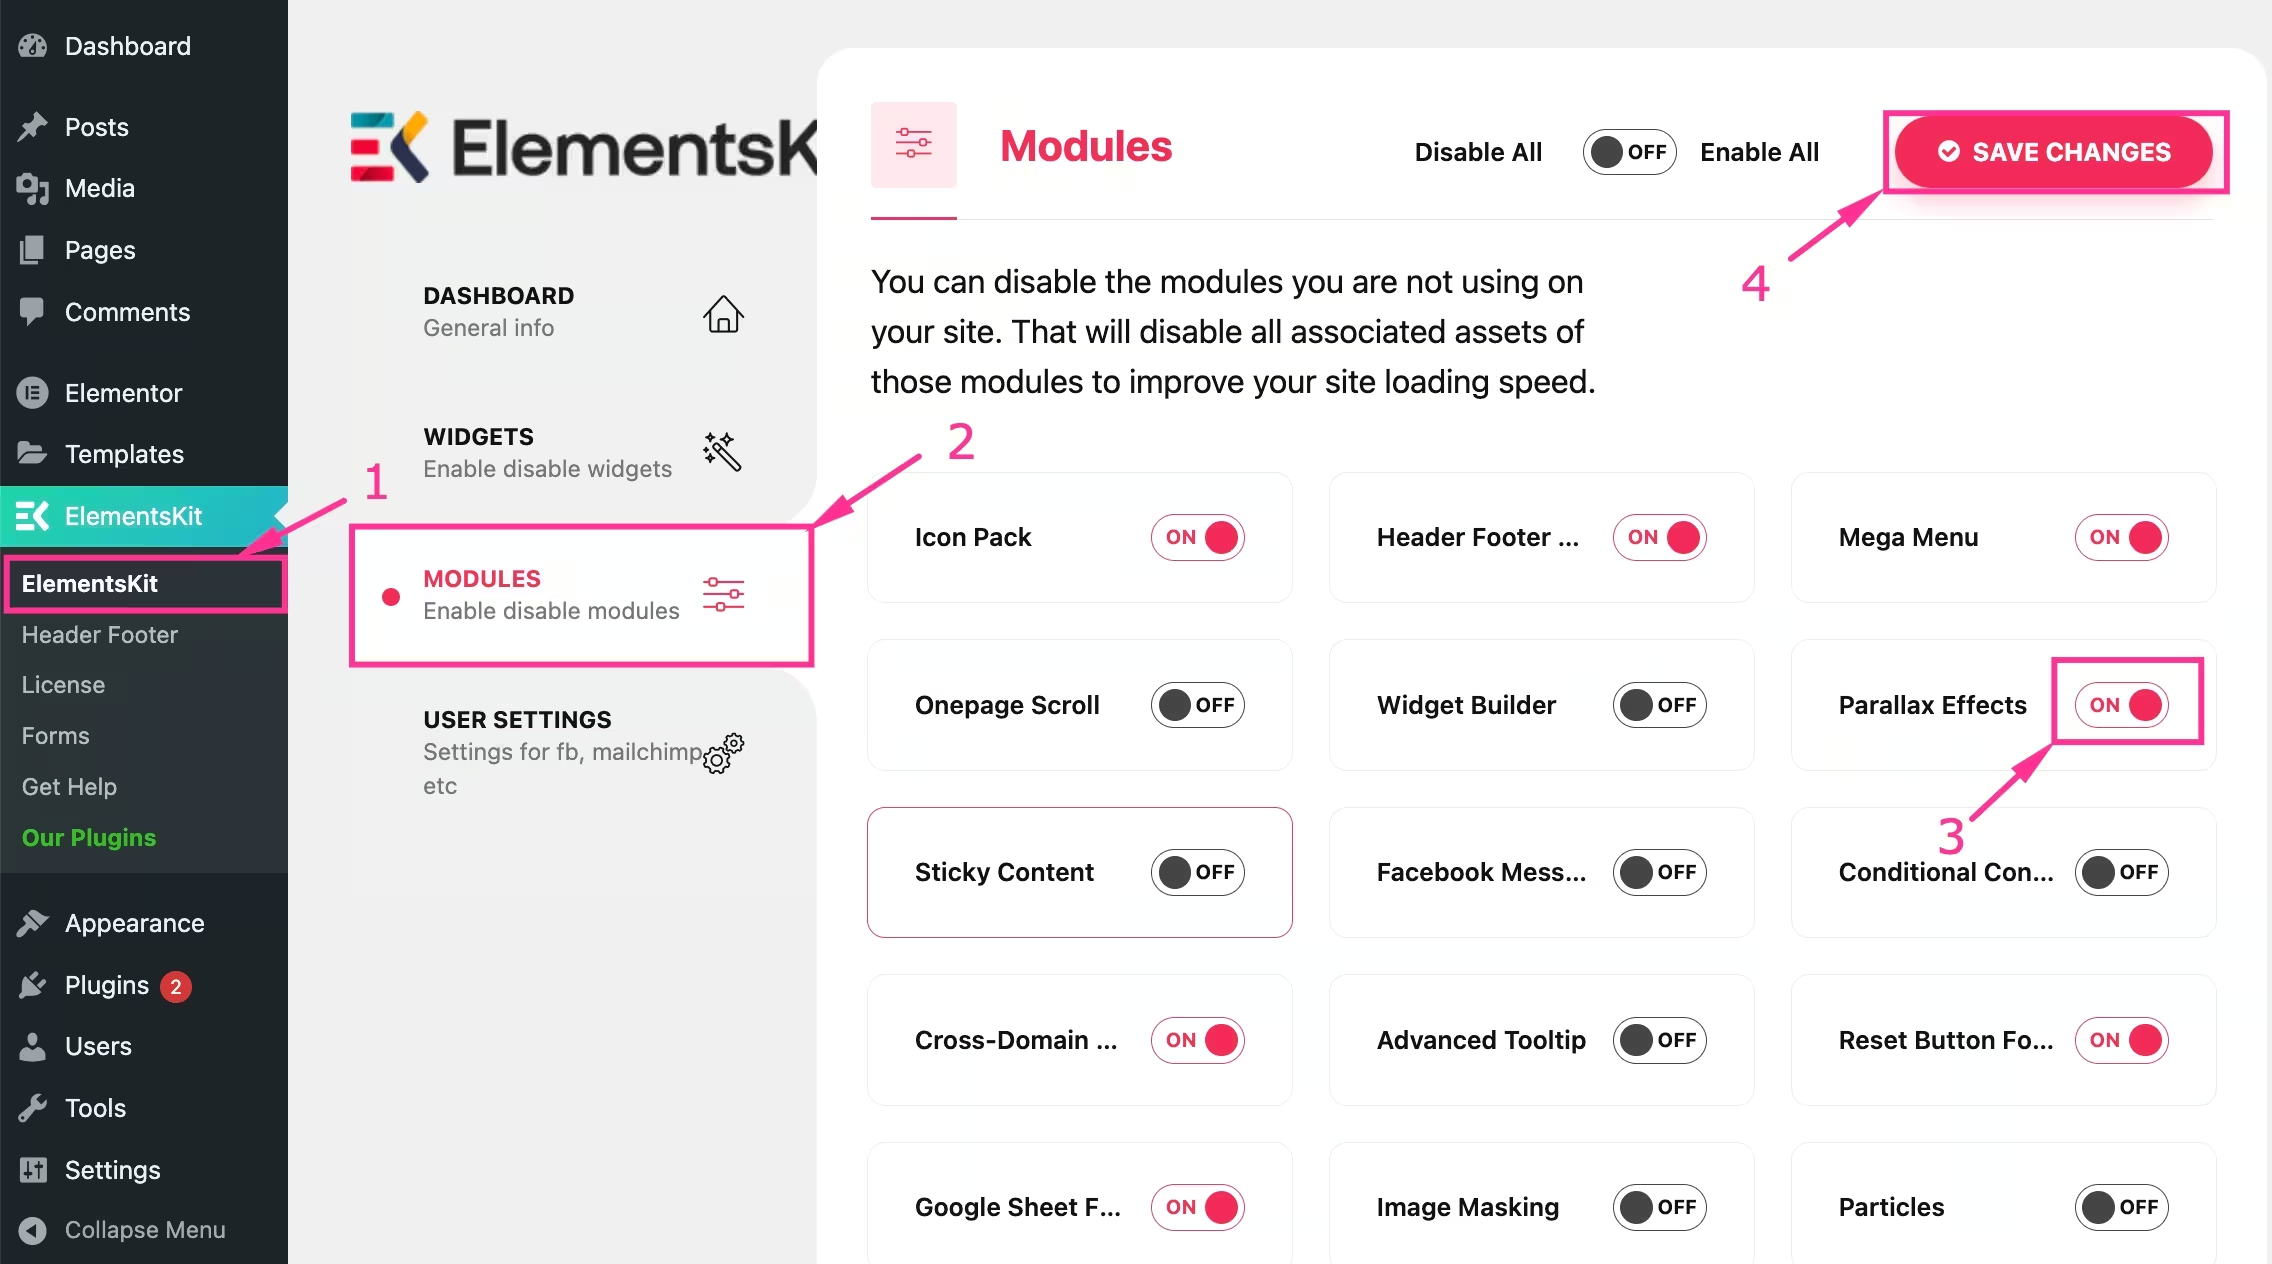
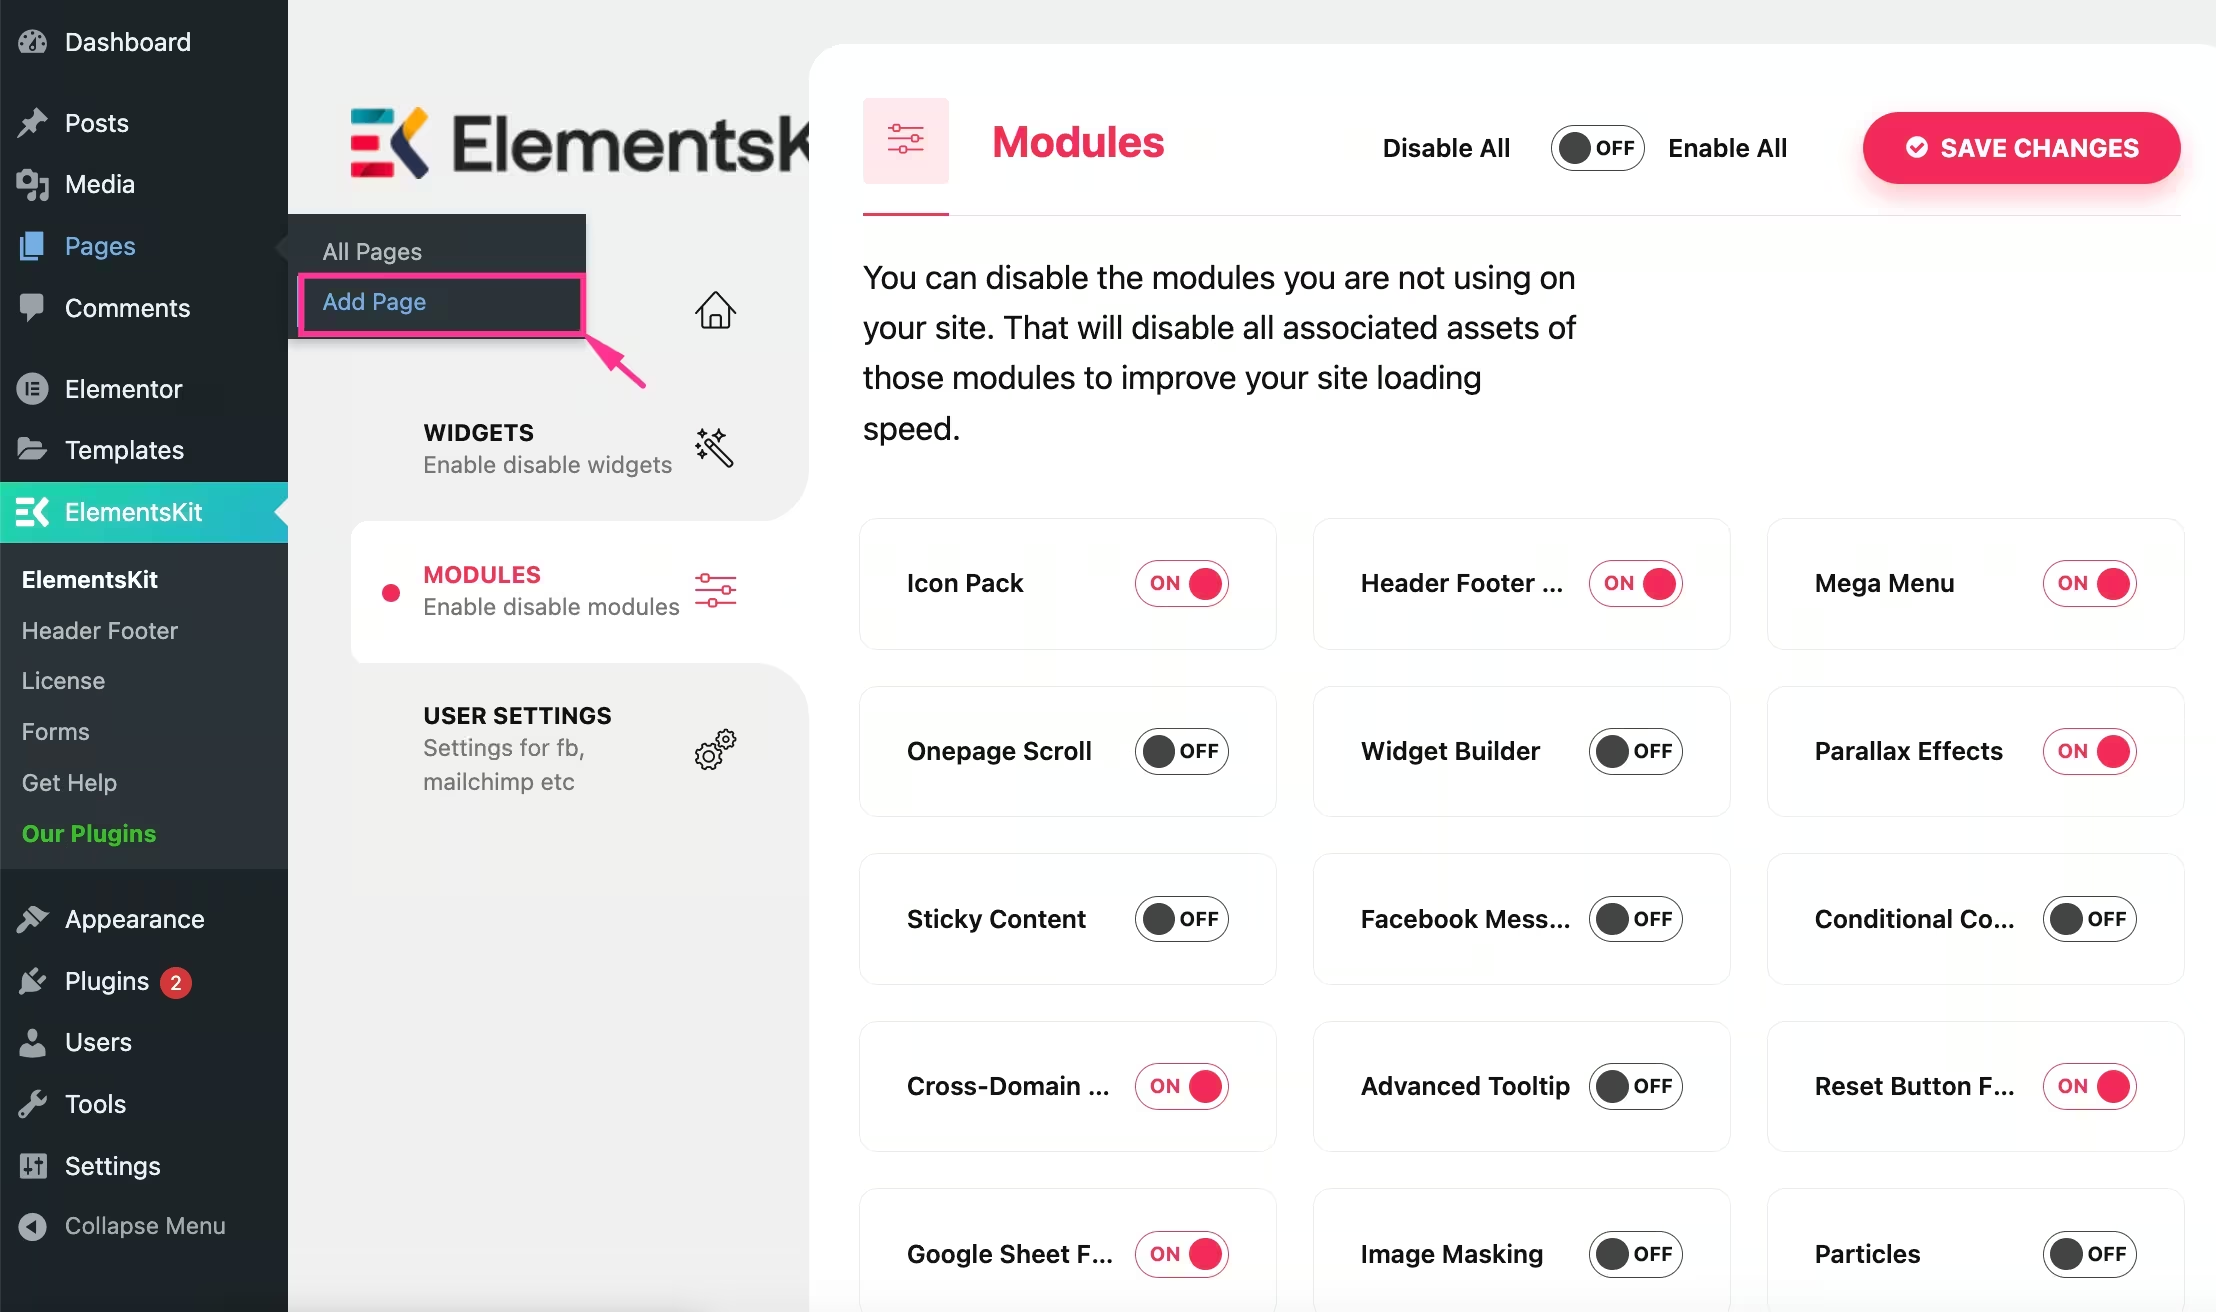
Step 2: Enable the Parallax Effects module
In the second step, enable the Parallax Effects module by:
- Visiting ElementsKit → Moduler.
- Sätta på “Parallax Effects”.
- Click the “Save Changes” knapp.
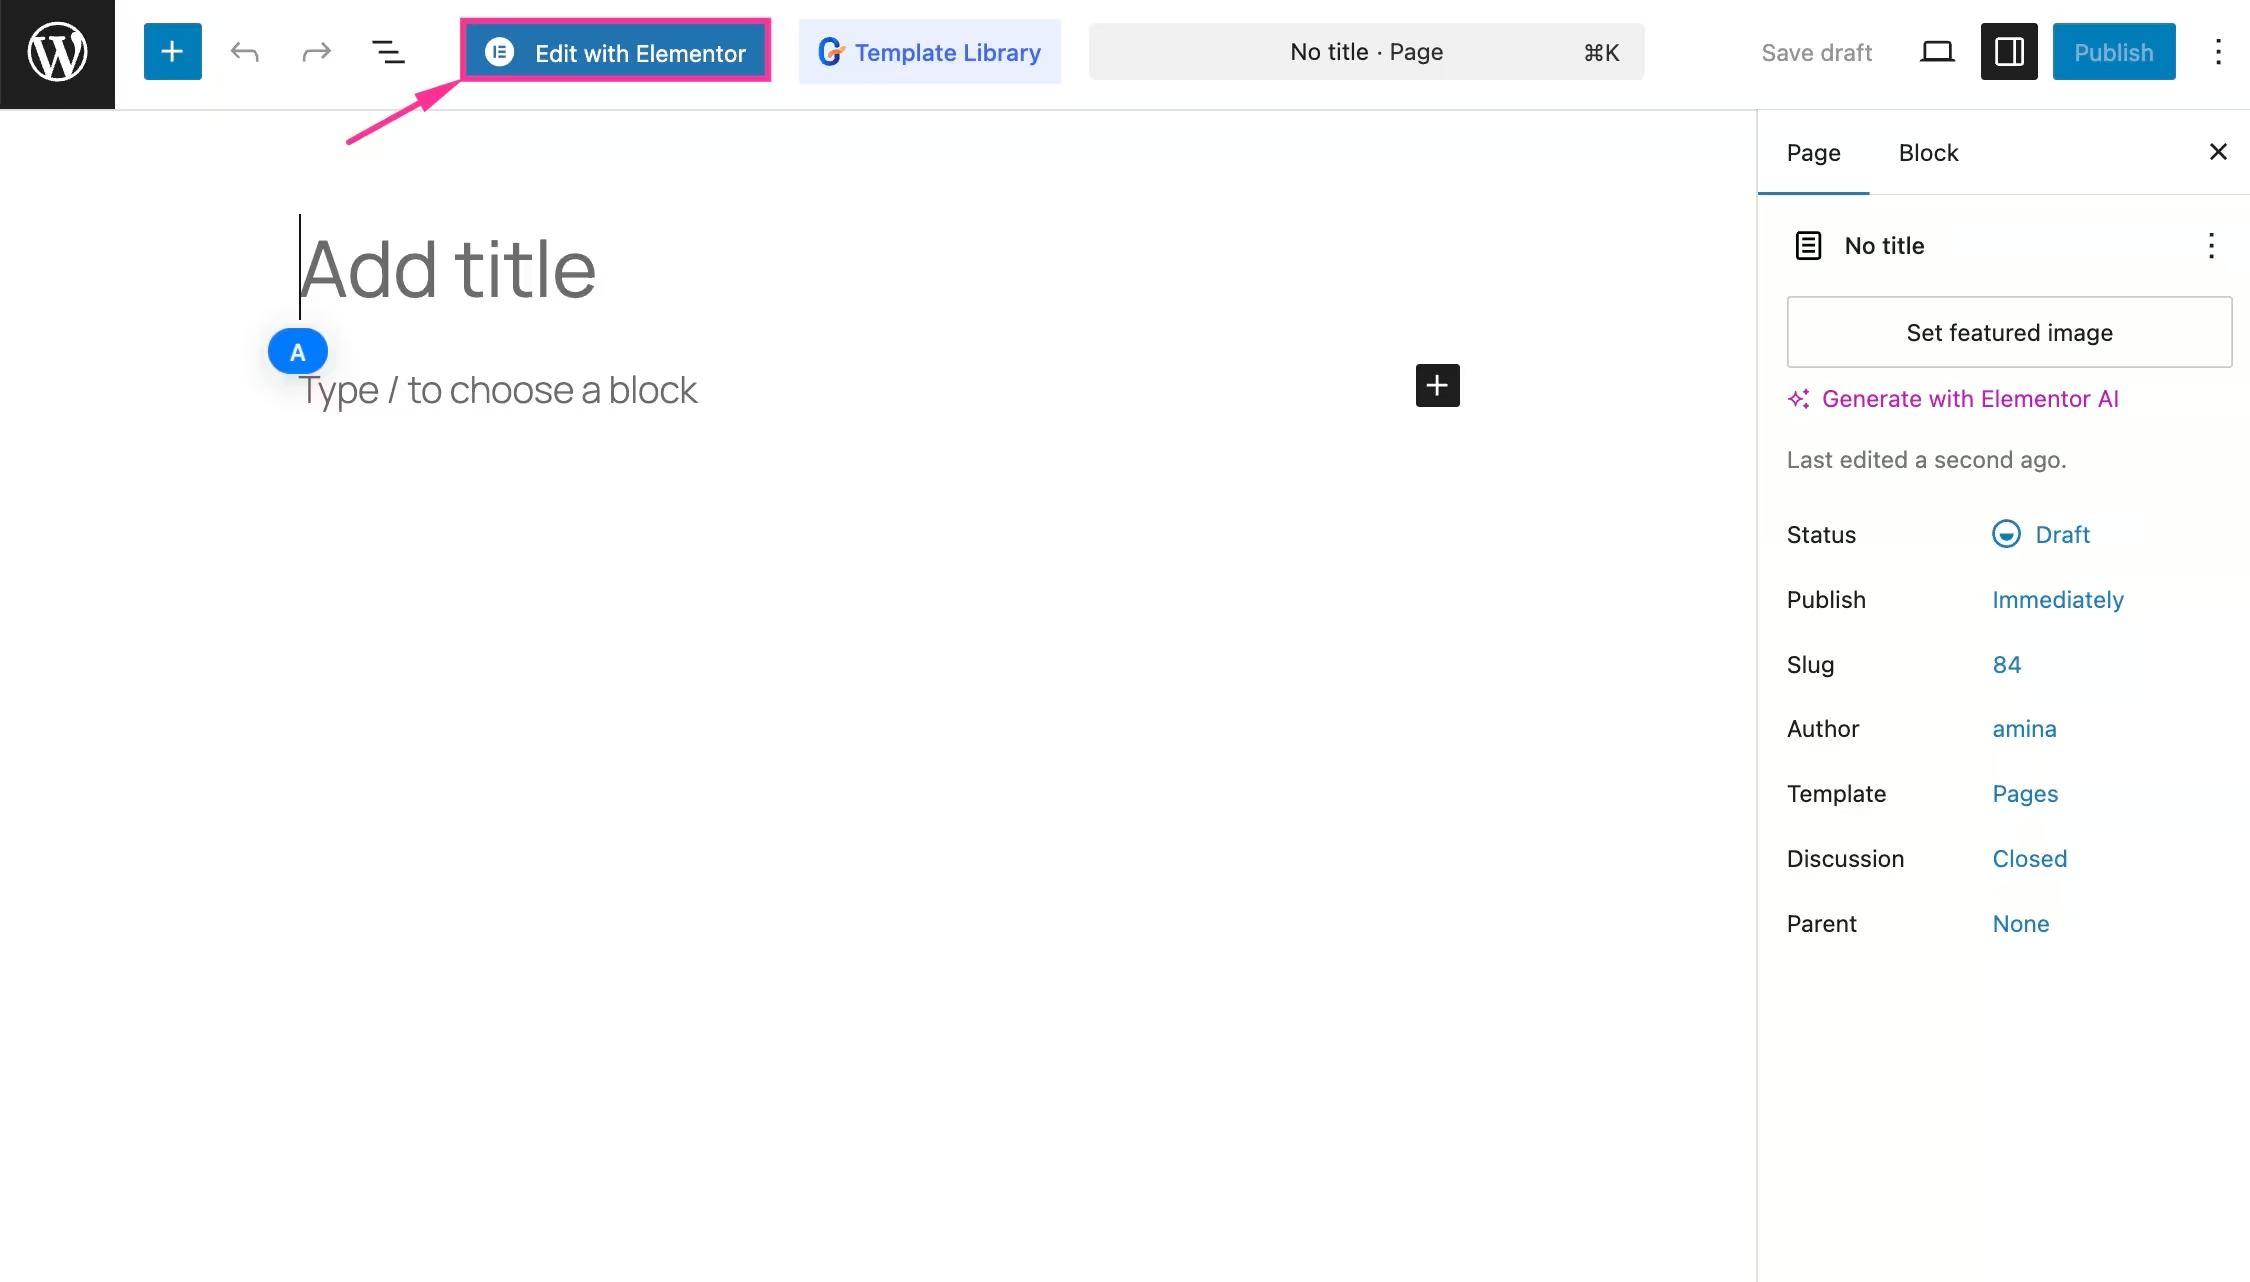
Step 3: Add a new page
Sedan, visit the “Add Page” under the Pages tab to integrate background parallax effects.
Also, tryck på "Redigera med Elementor" button to redirect to the Elementor editor.
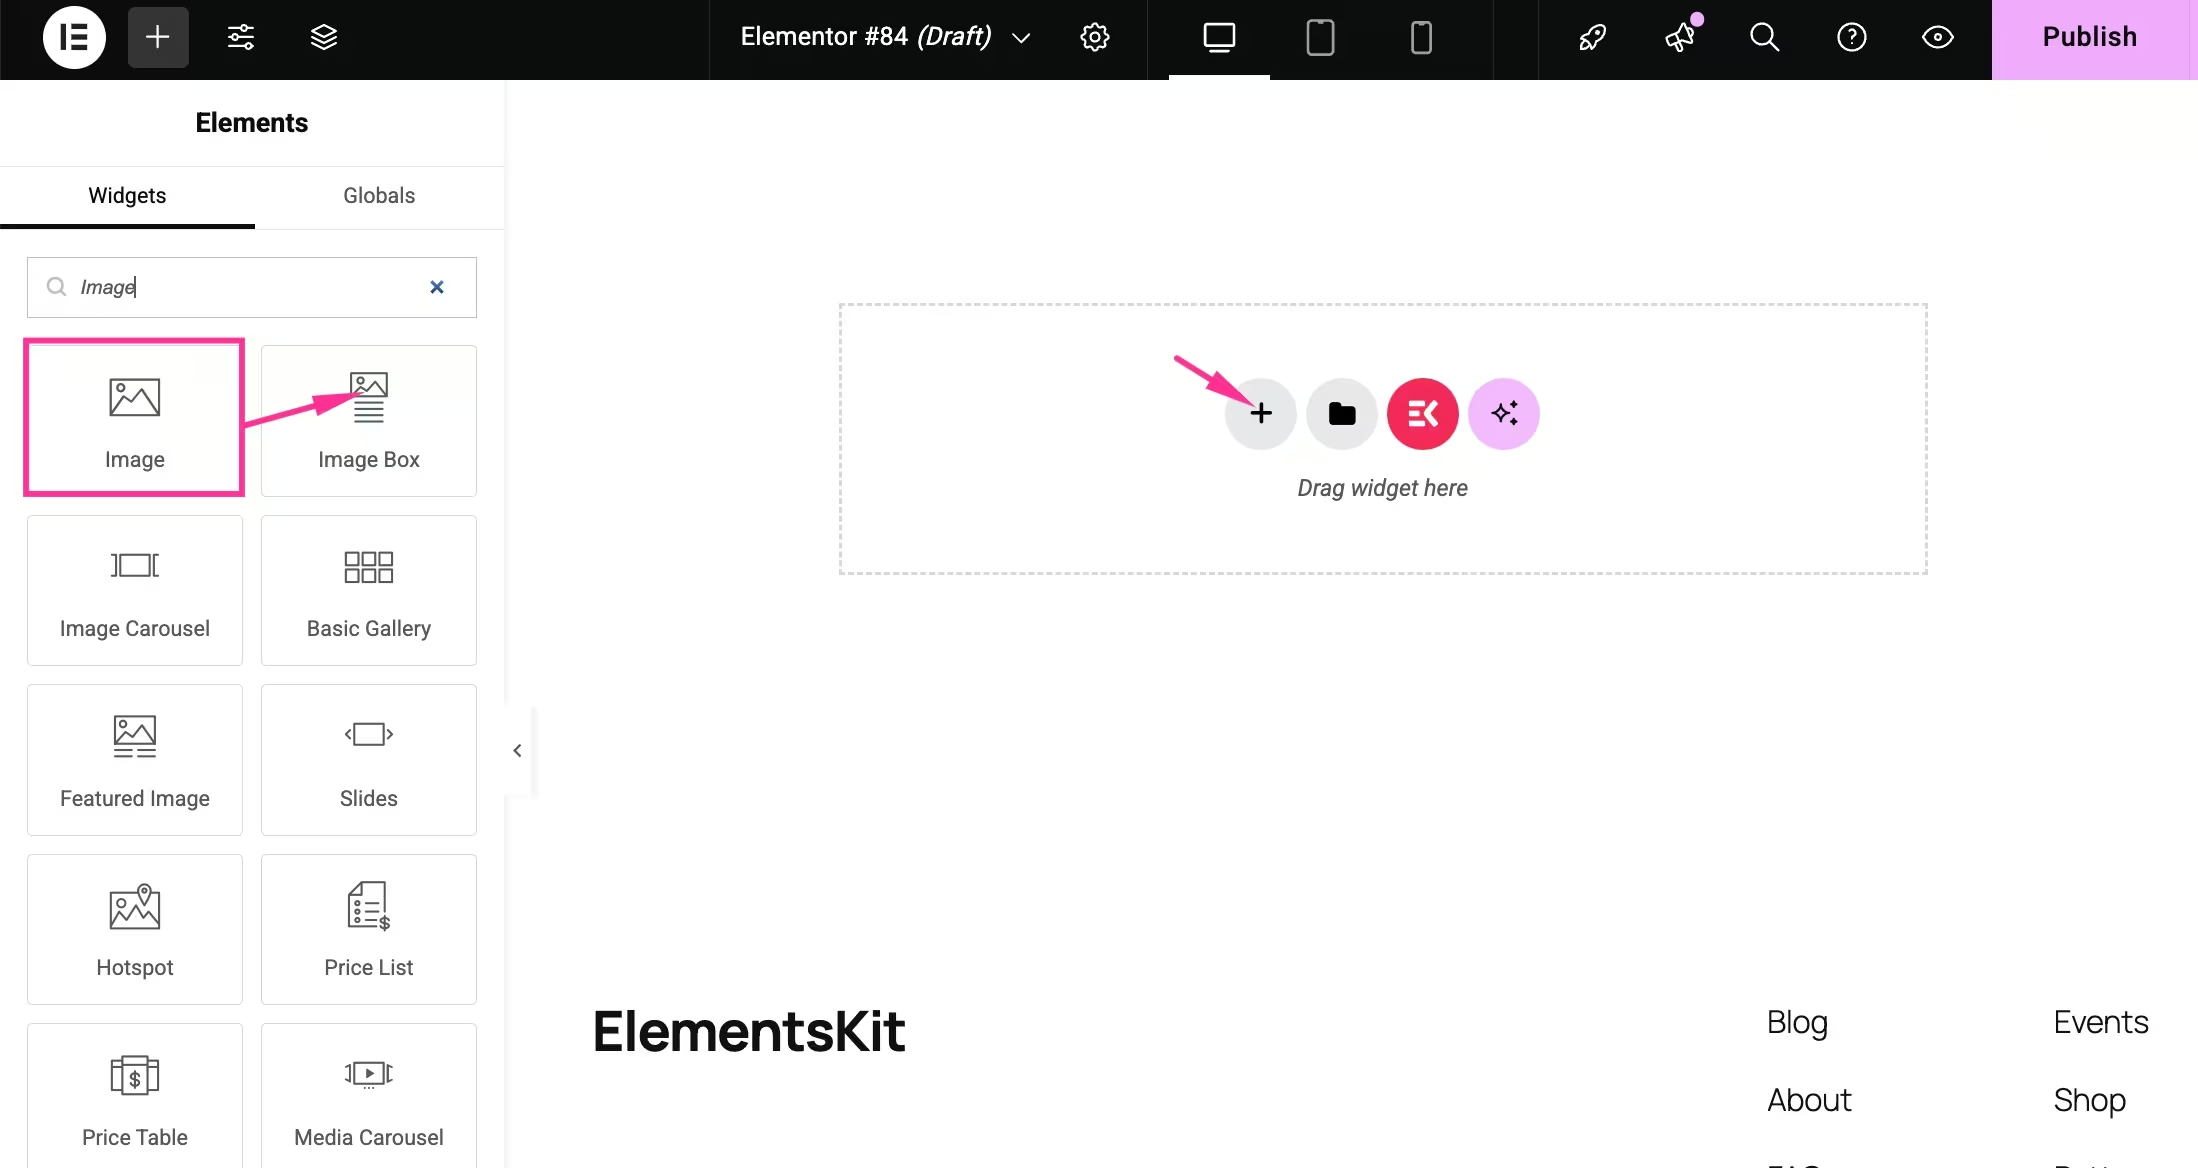
Step 4: Drag-and-drop Image widget
Now, add an Image widget to your page by:
- Searching for the Image widget.
- Dragging-and-dropping to the “+” icon.
Step 5: Upload image
In this step, you have to upload a background and foreground image from your device. For that, you need to follow the steps below:
- Edit the container by clicking the dot sign.
- Visit the “Style” tab och click Background Type.
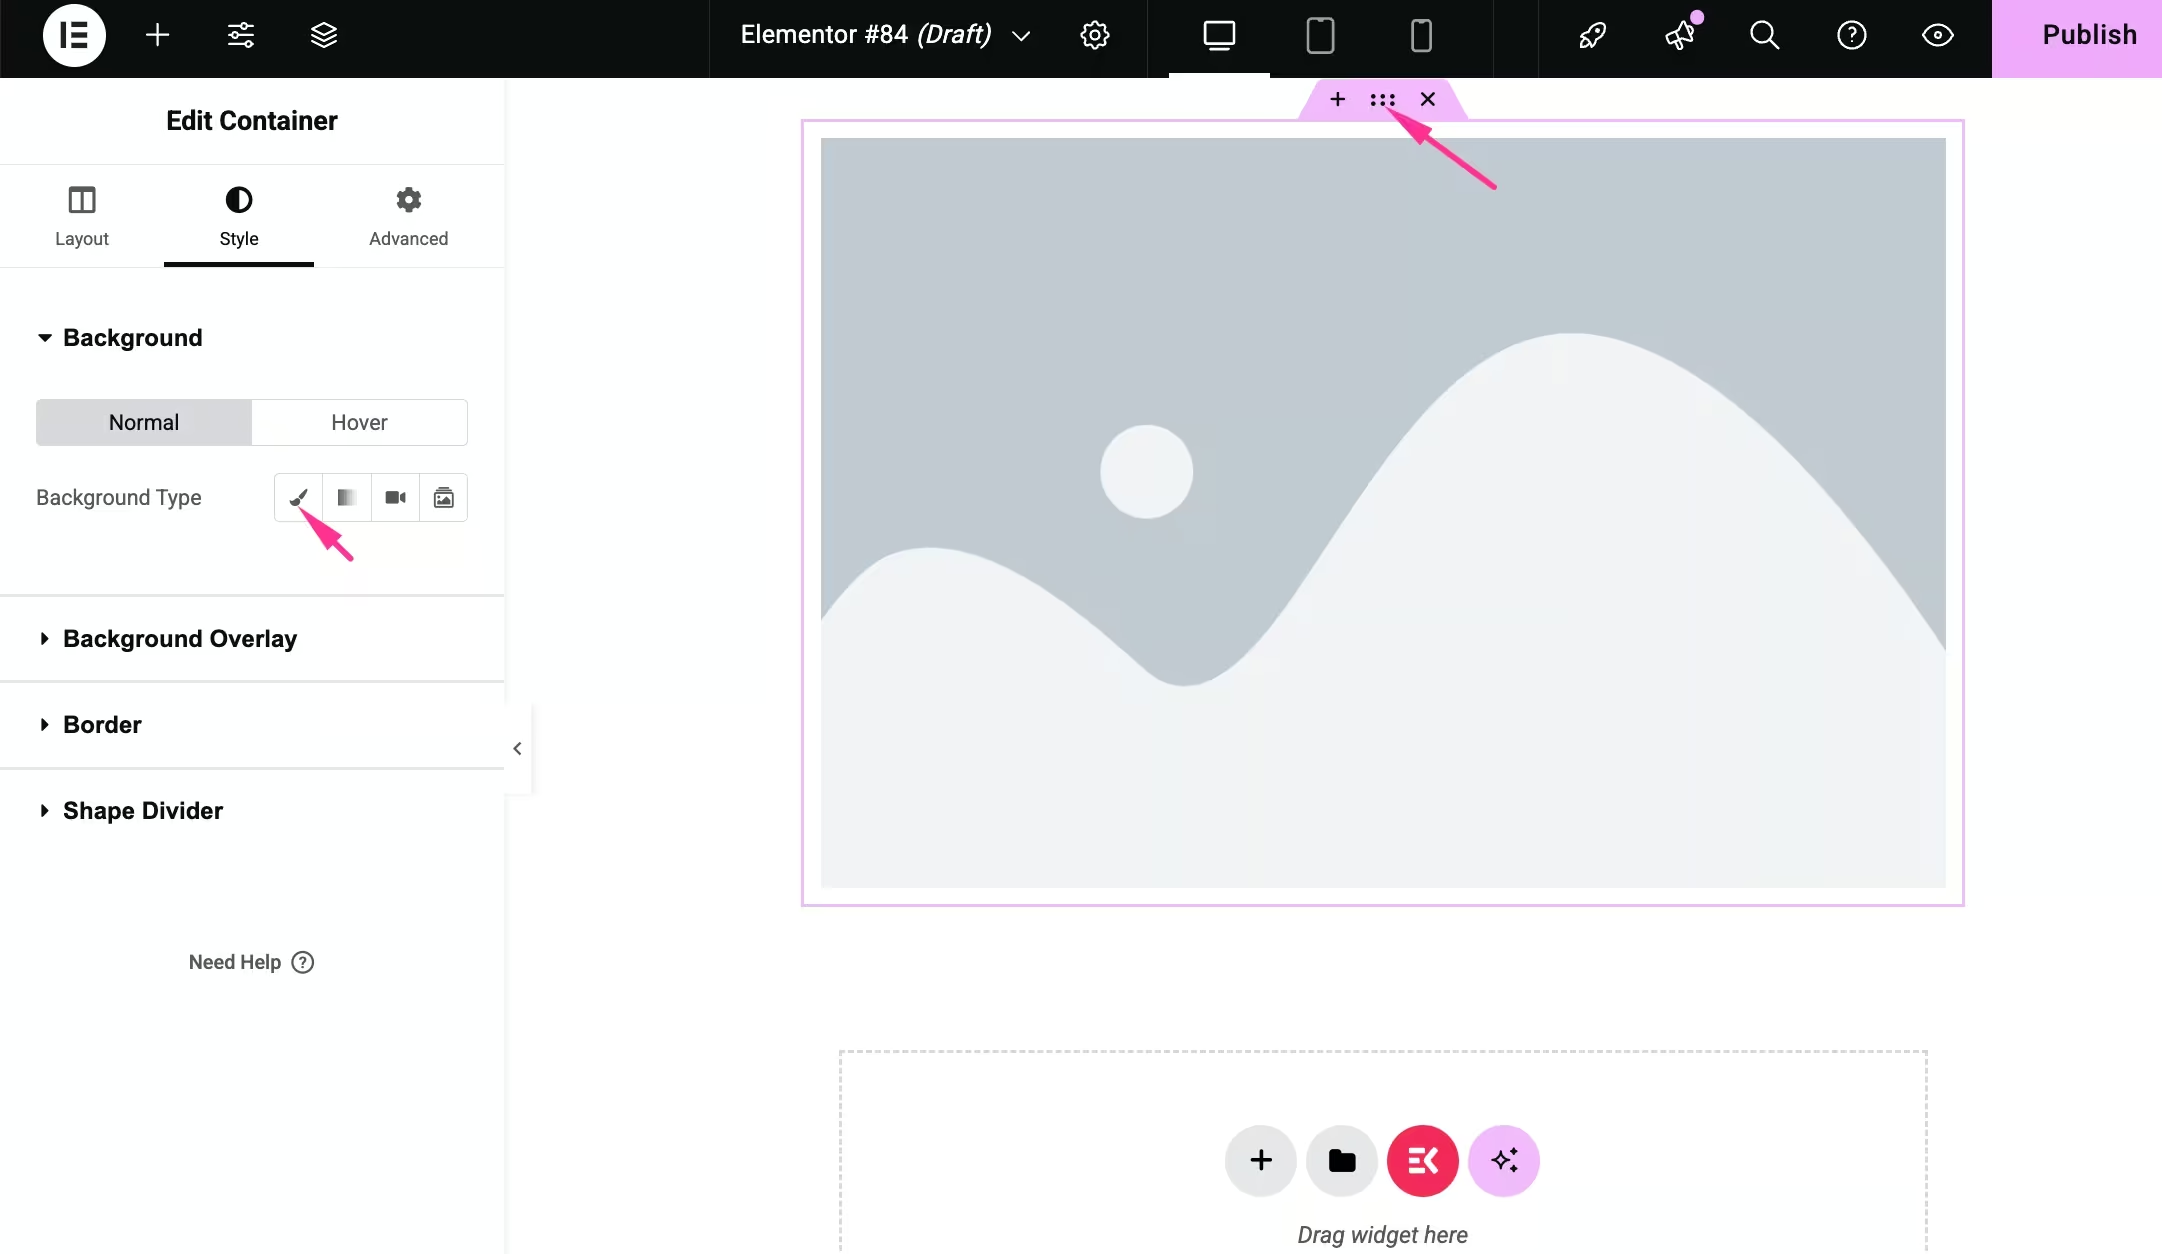
- Insert background image from your device.
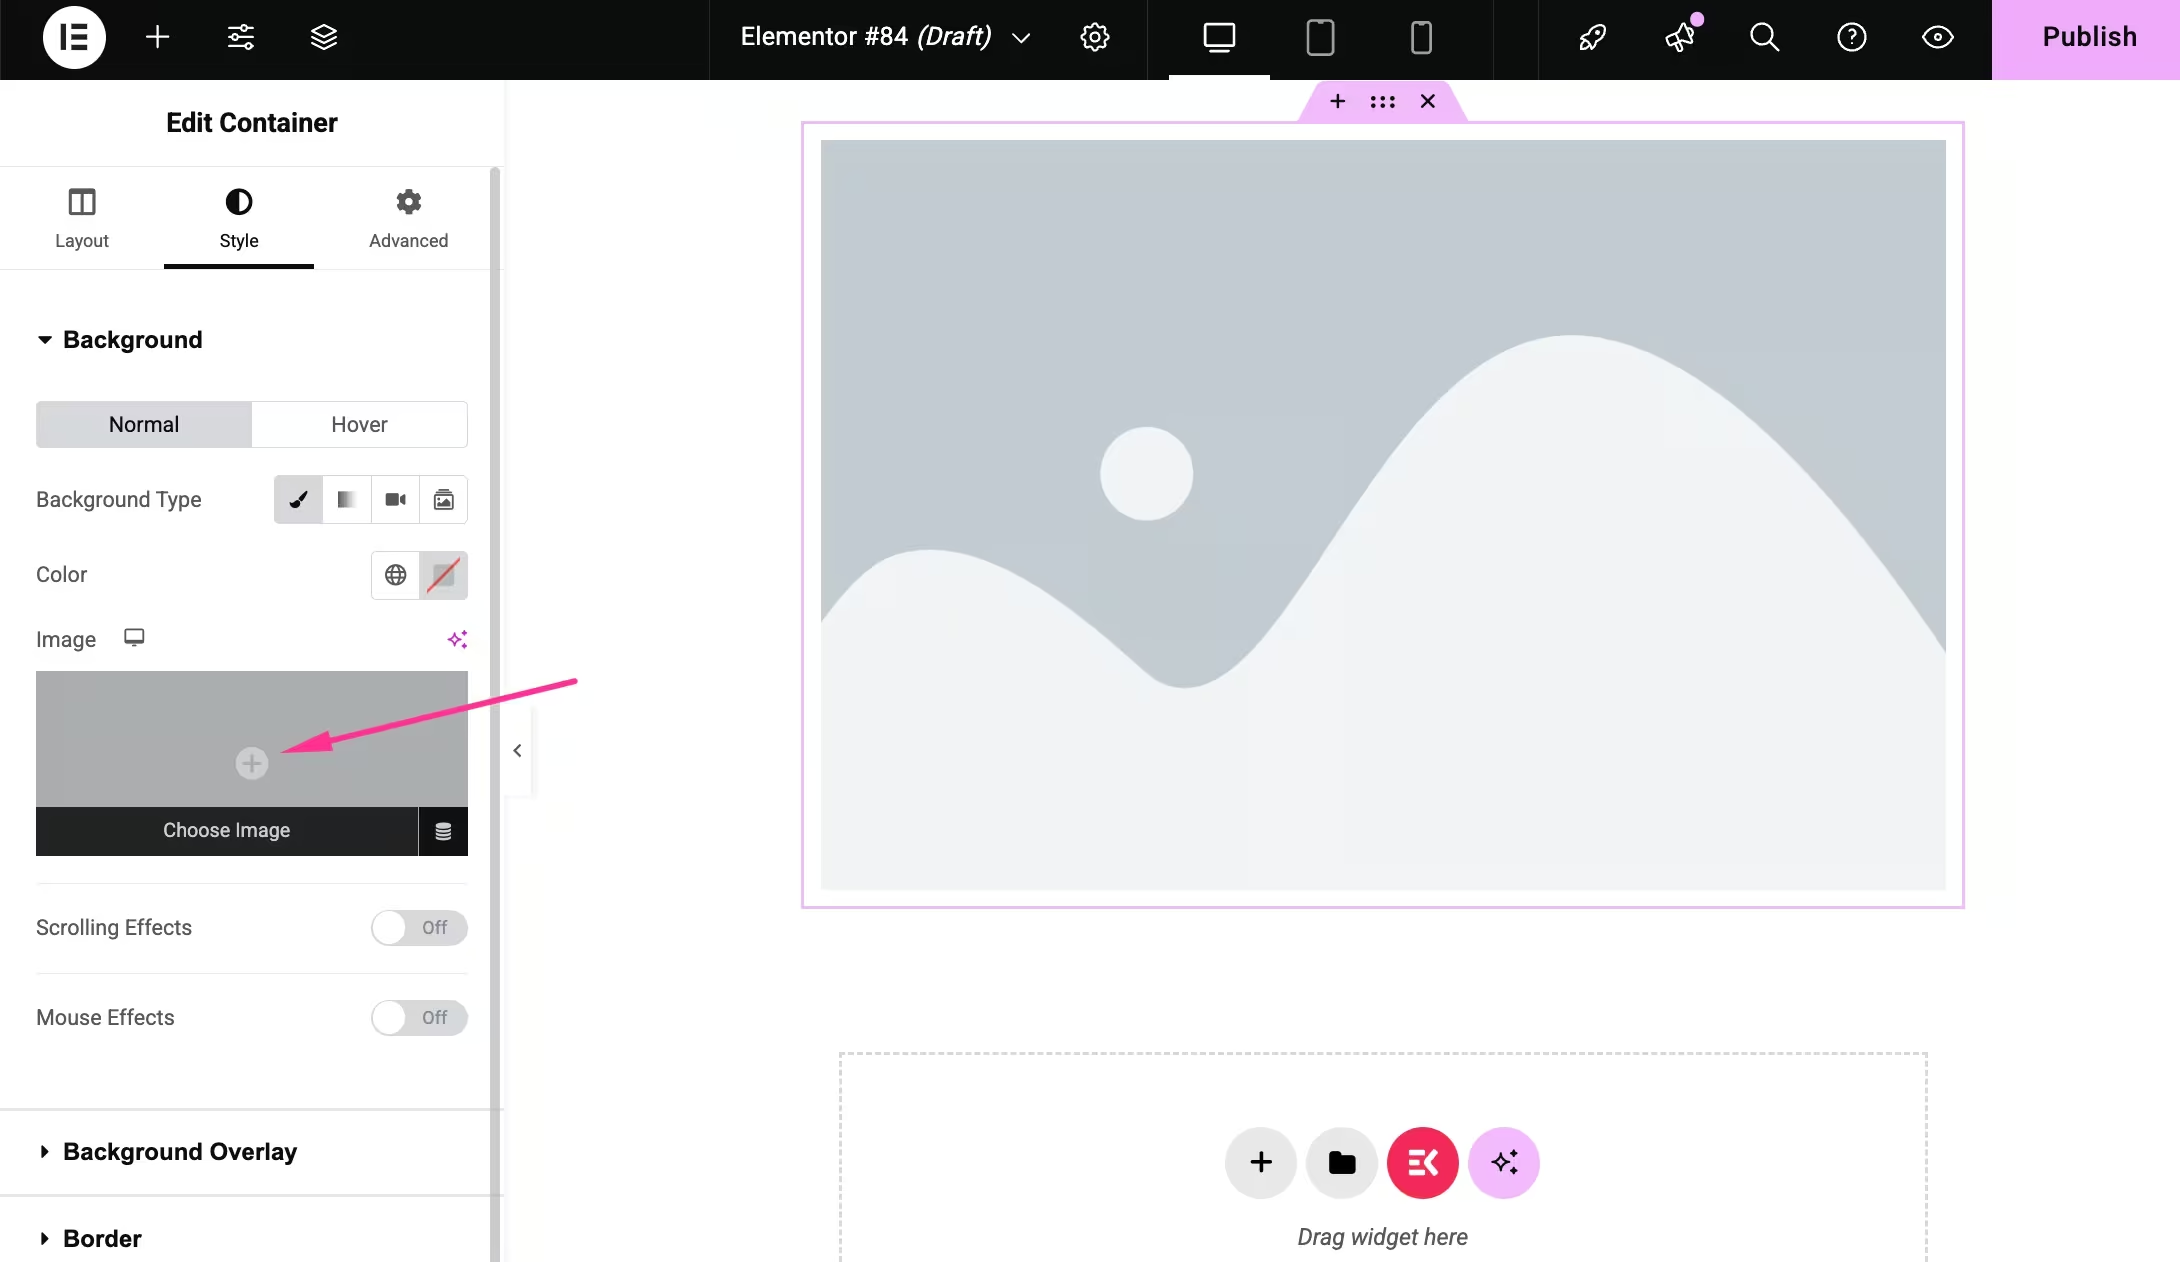
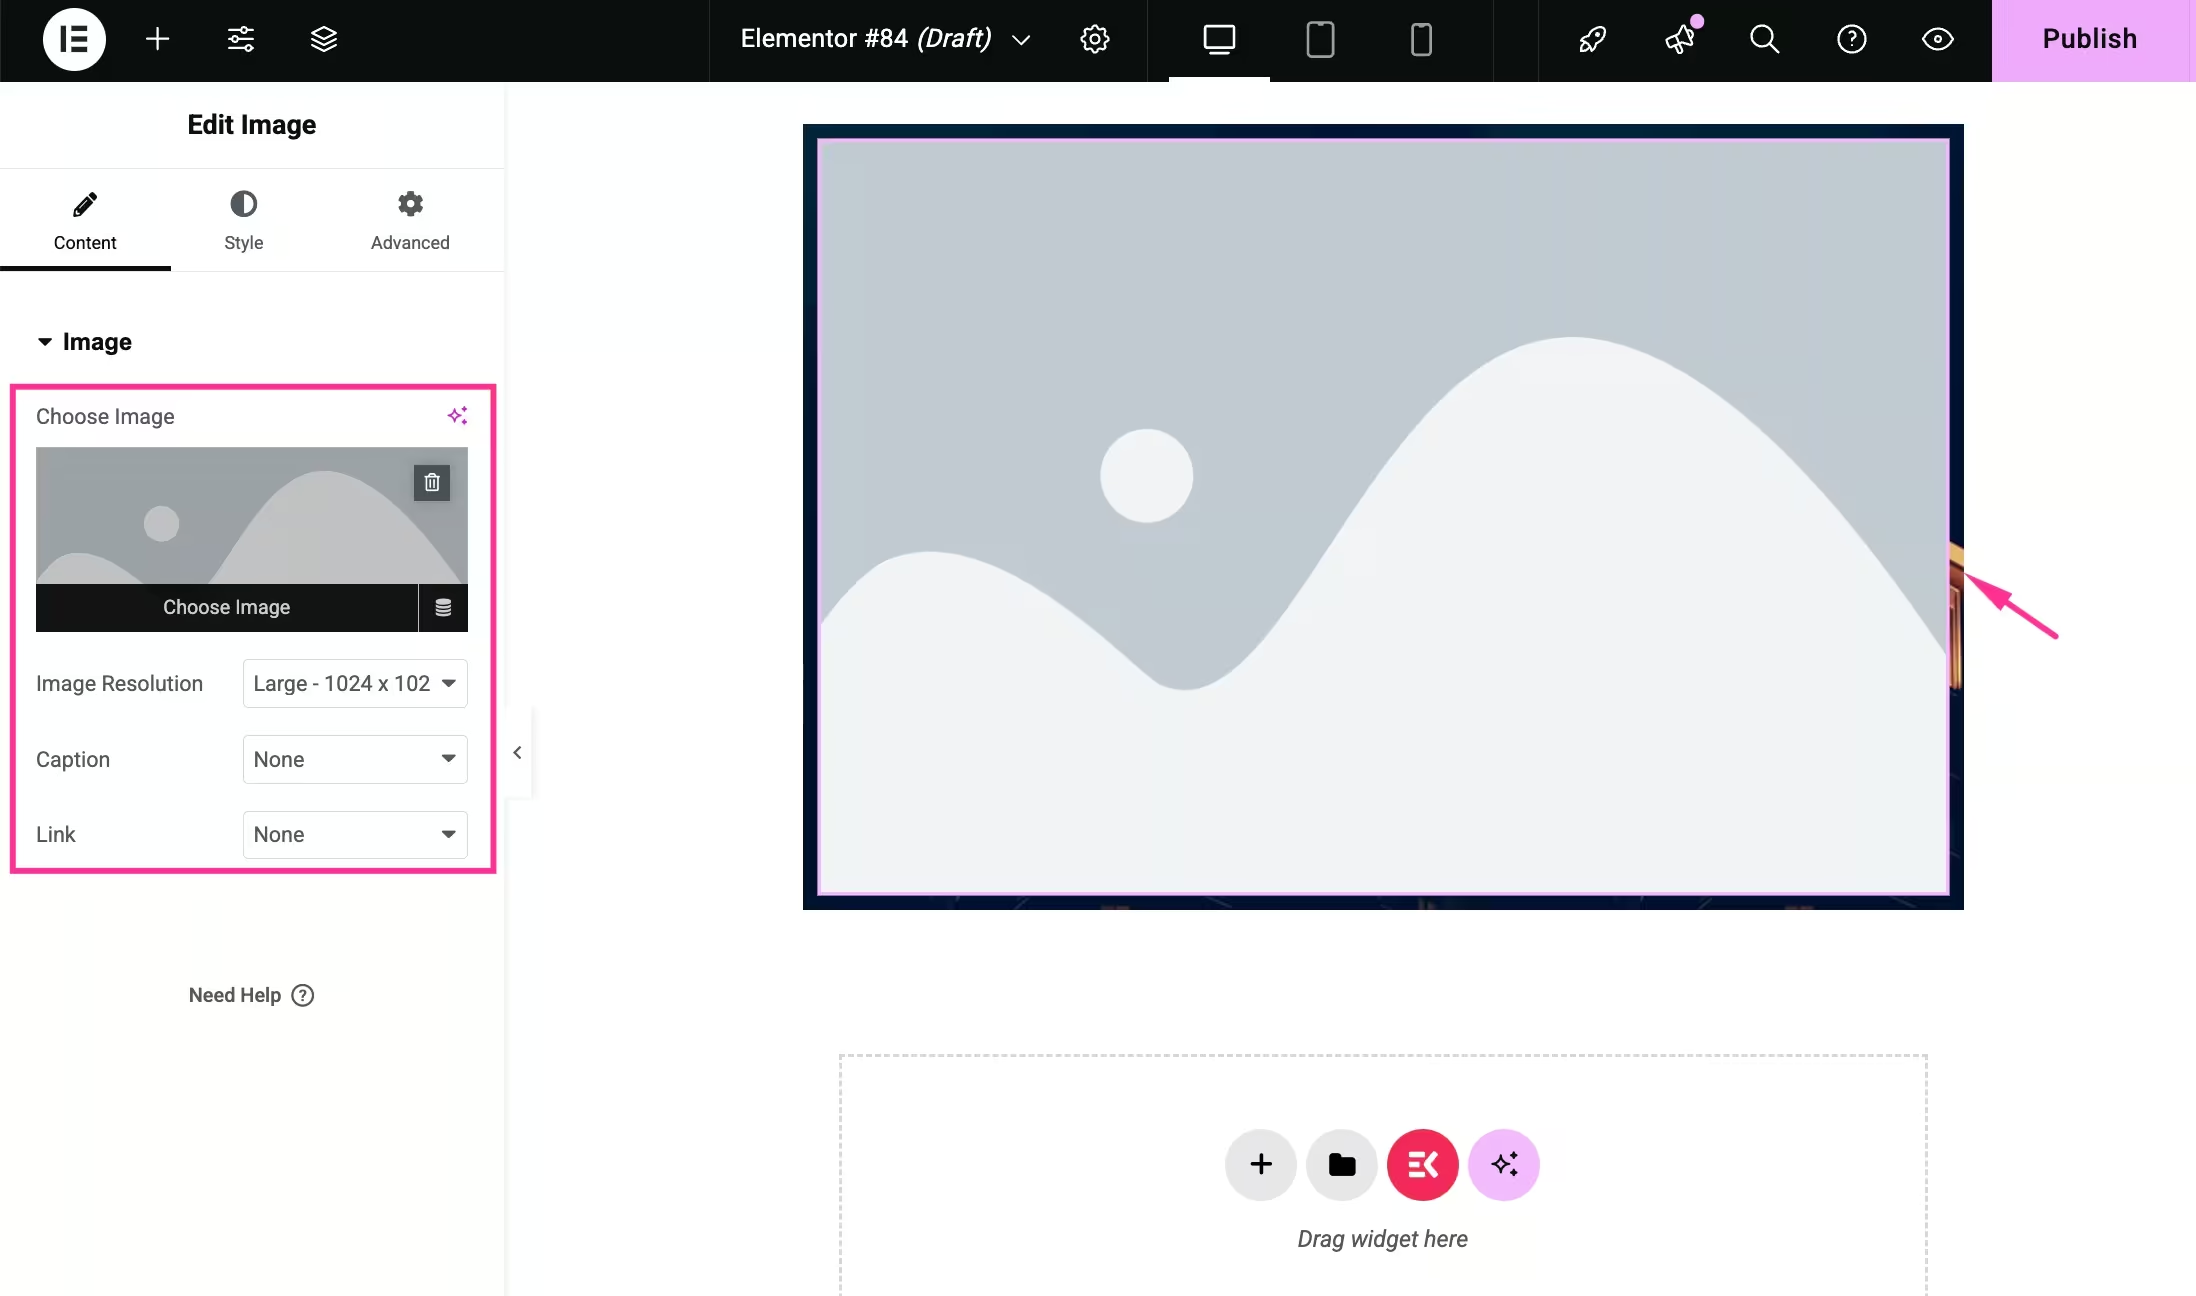
- Select the image on the right side and visit the "Innehåll" flik.
- Upload an image from your device or media library.
- Add Image Resolution, Caption, and Link.
Step 6: Configure parallax effect
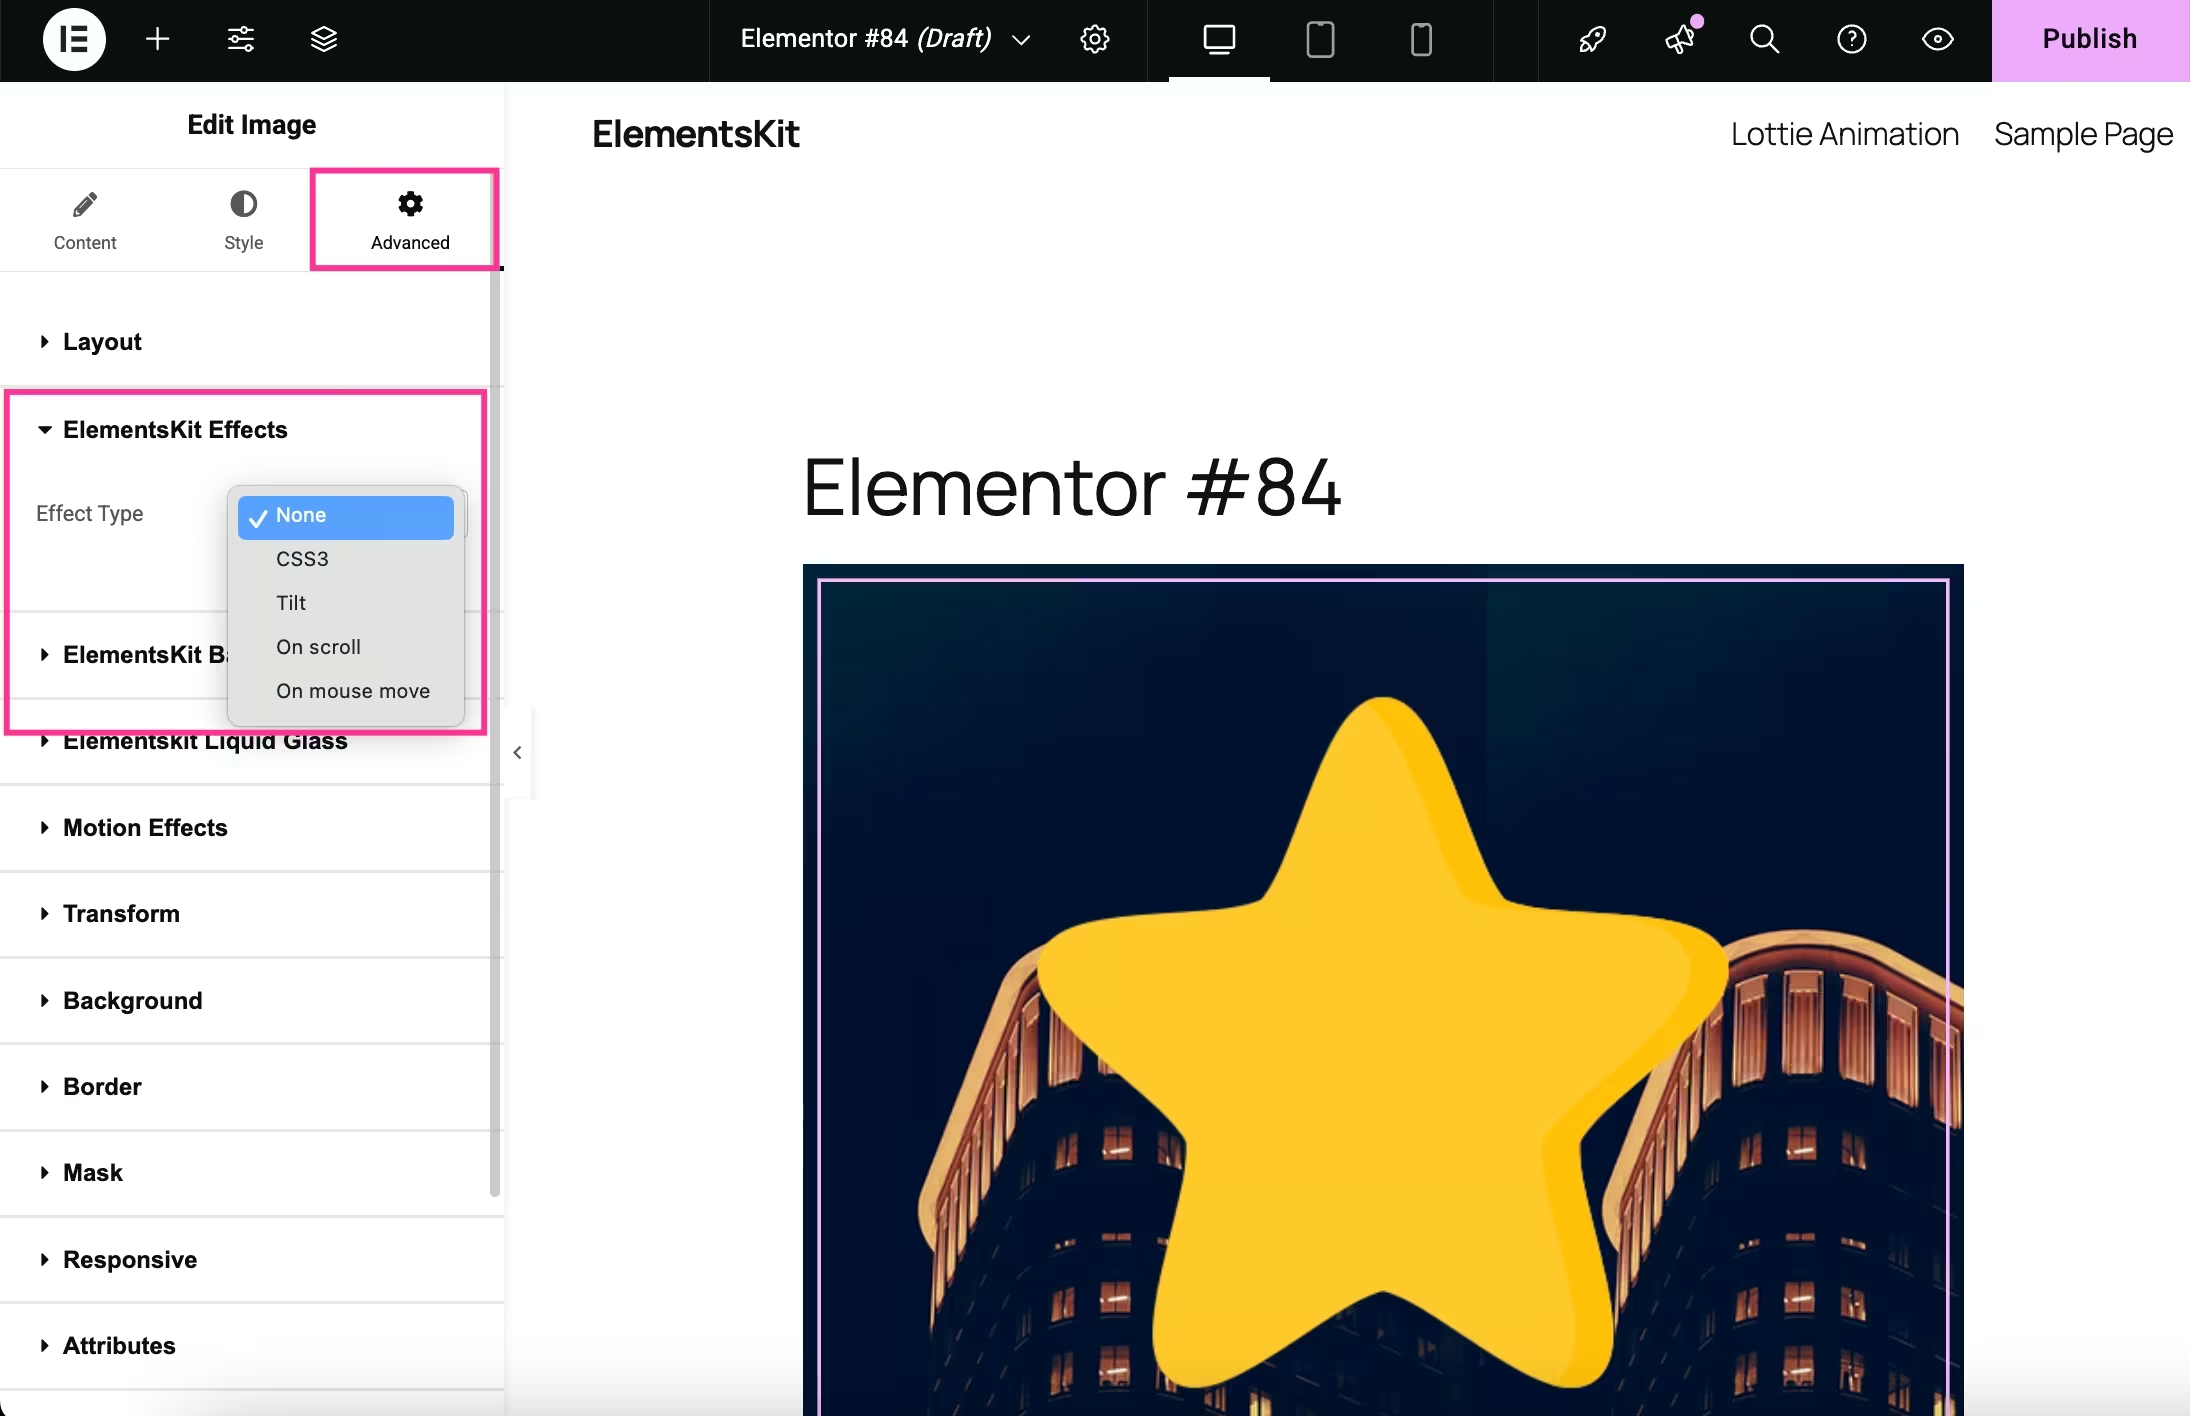
After adding the background and foreground images, you have to add parallax effects by:
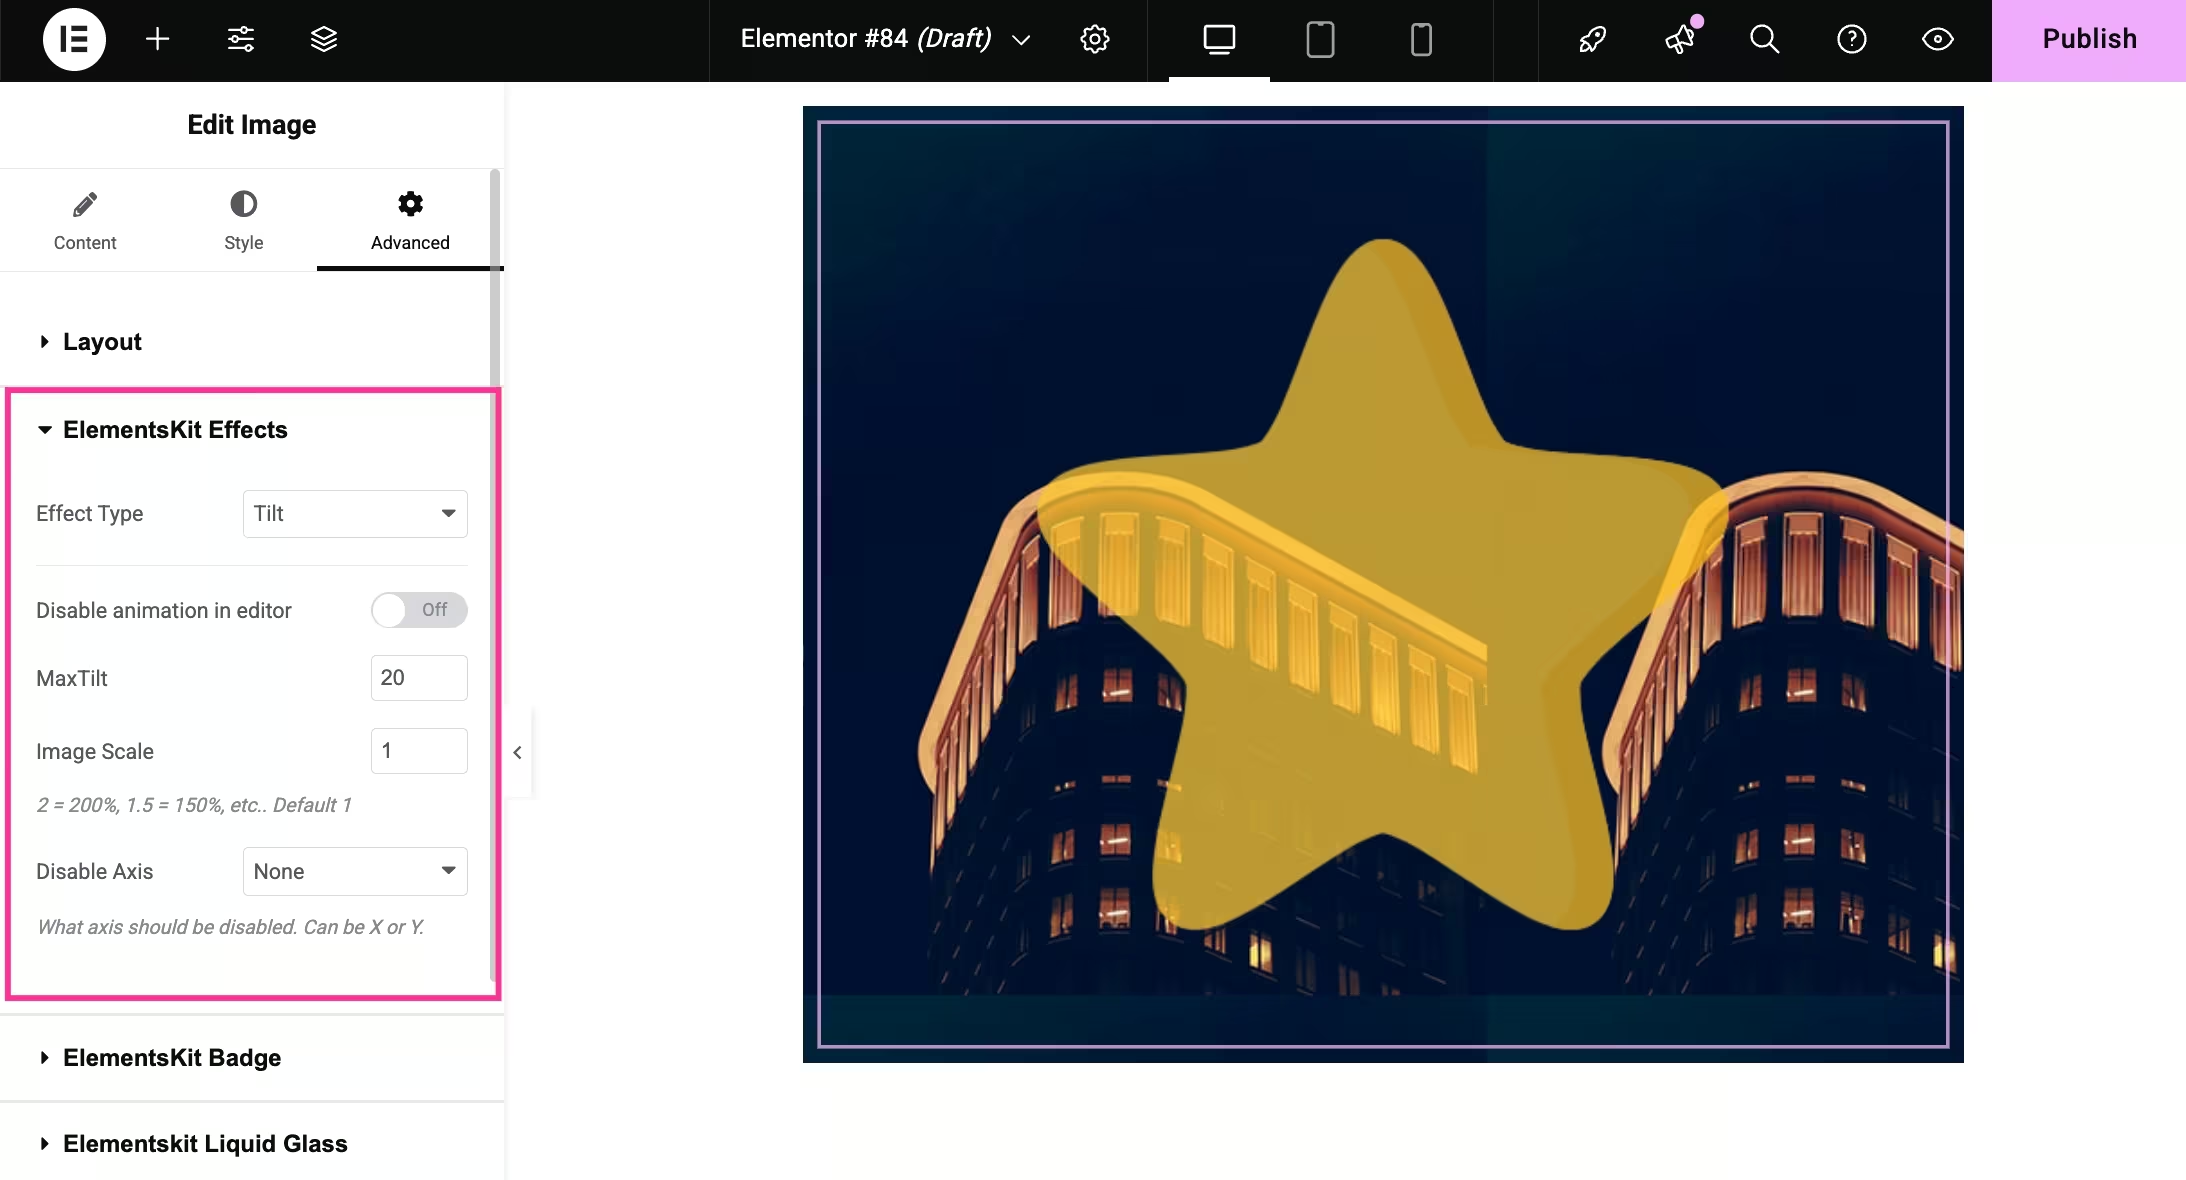
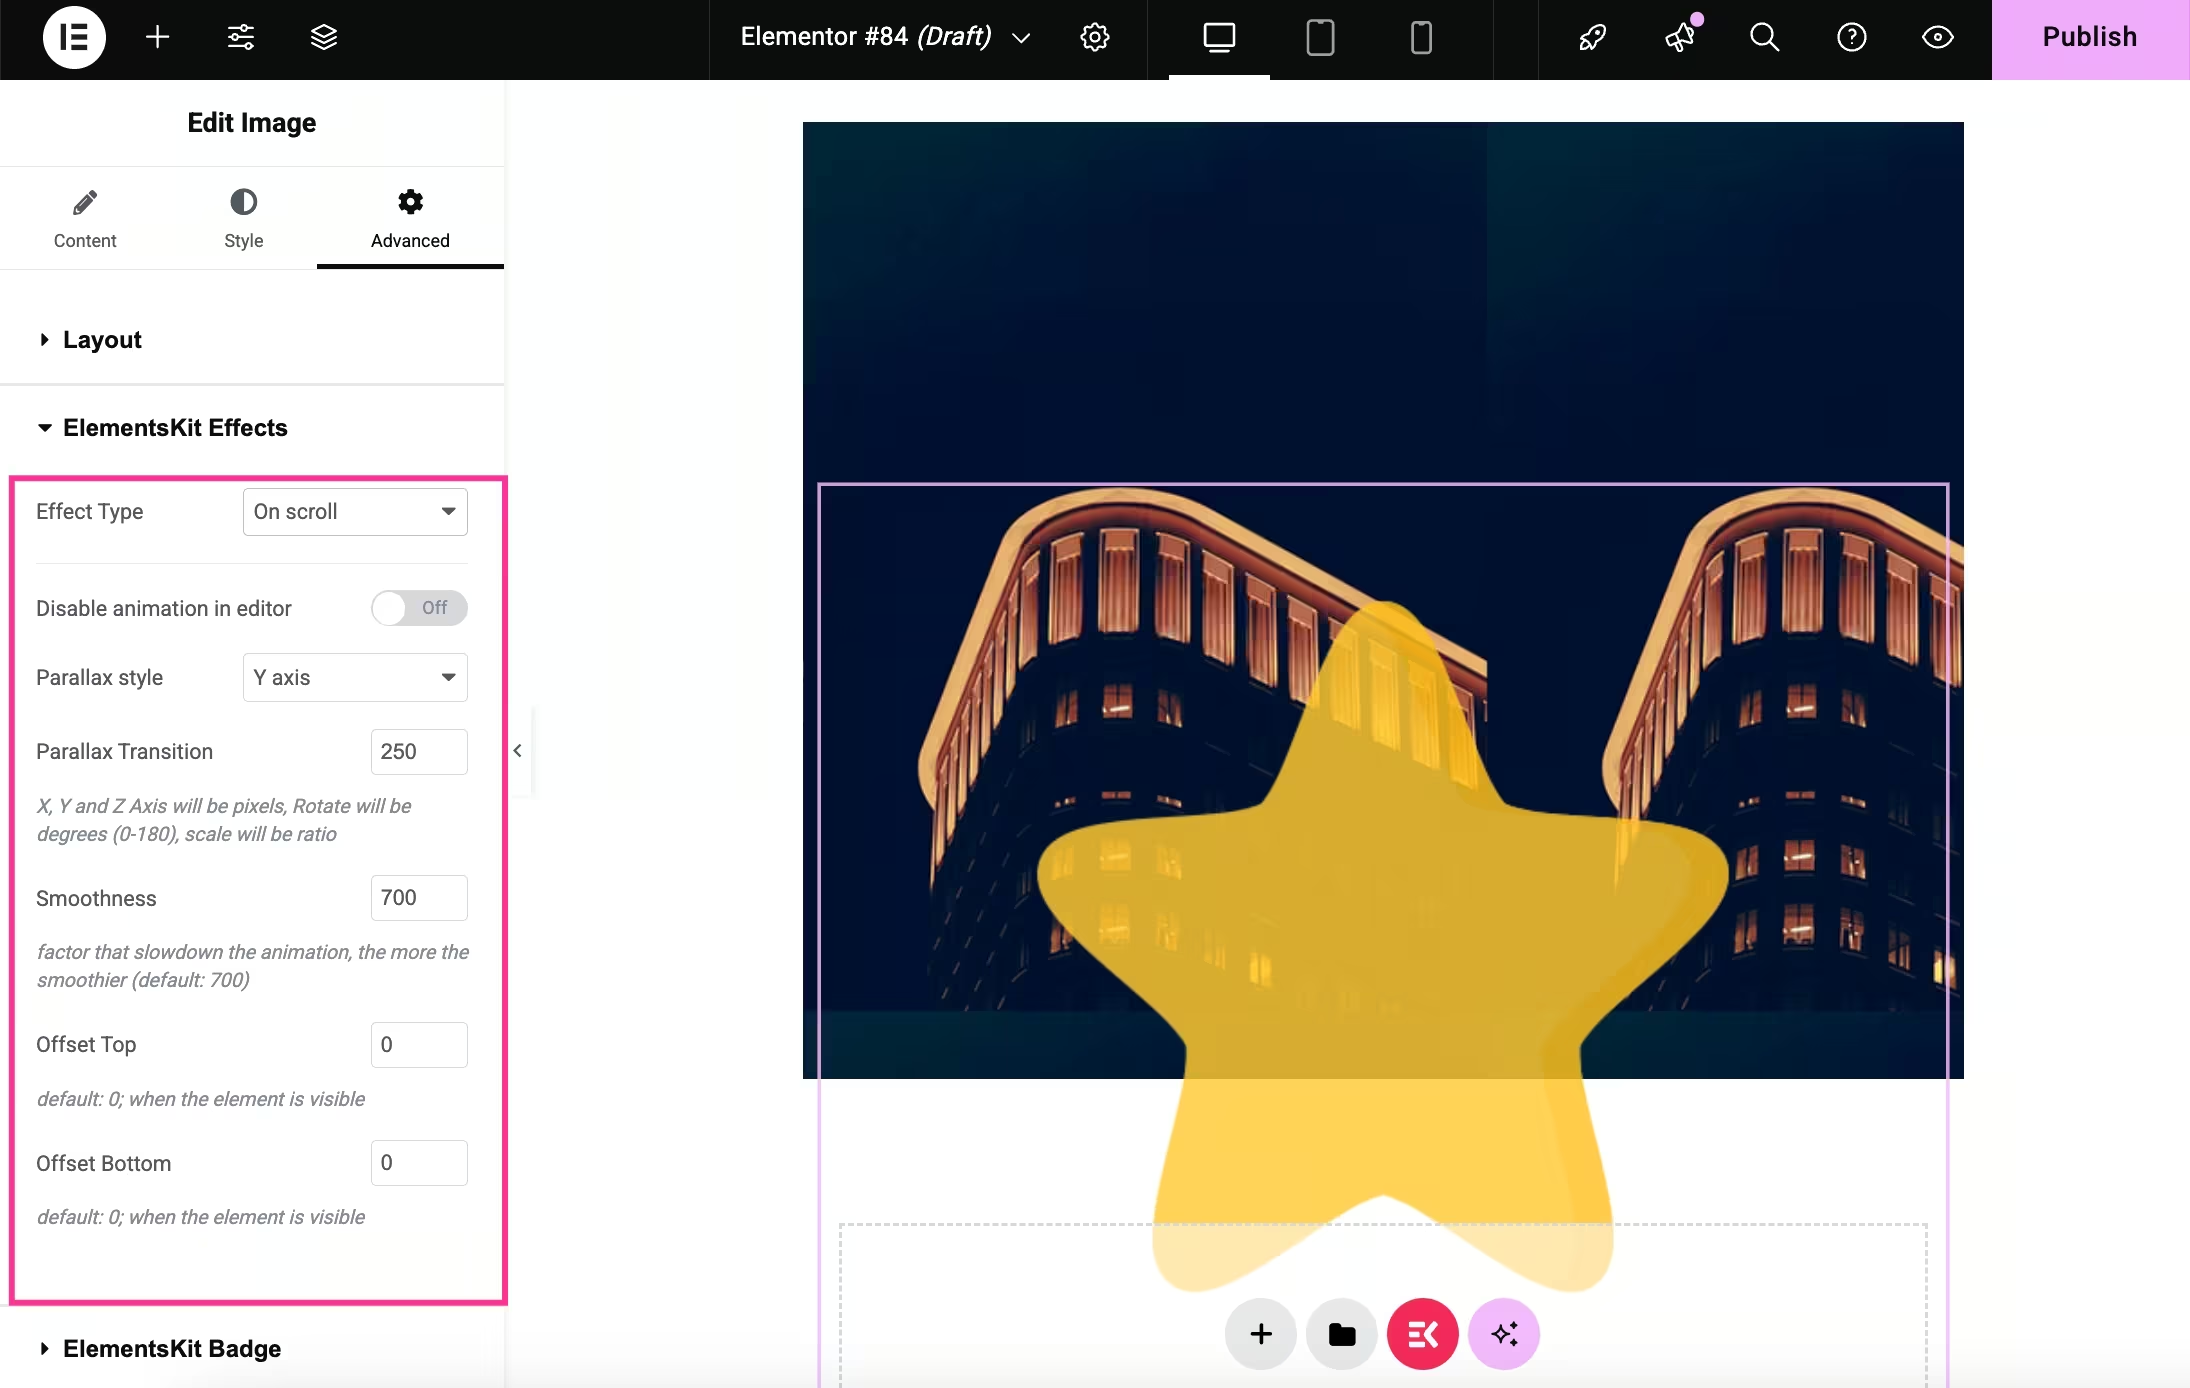
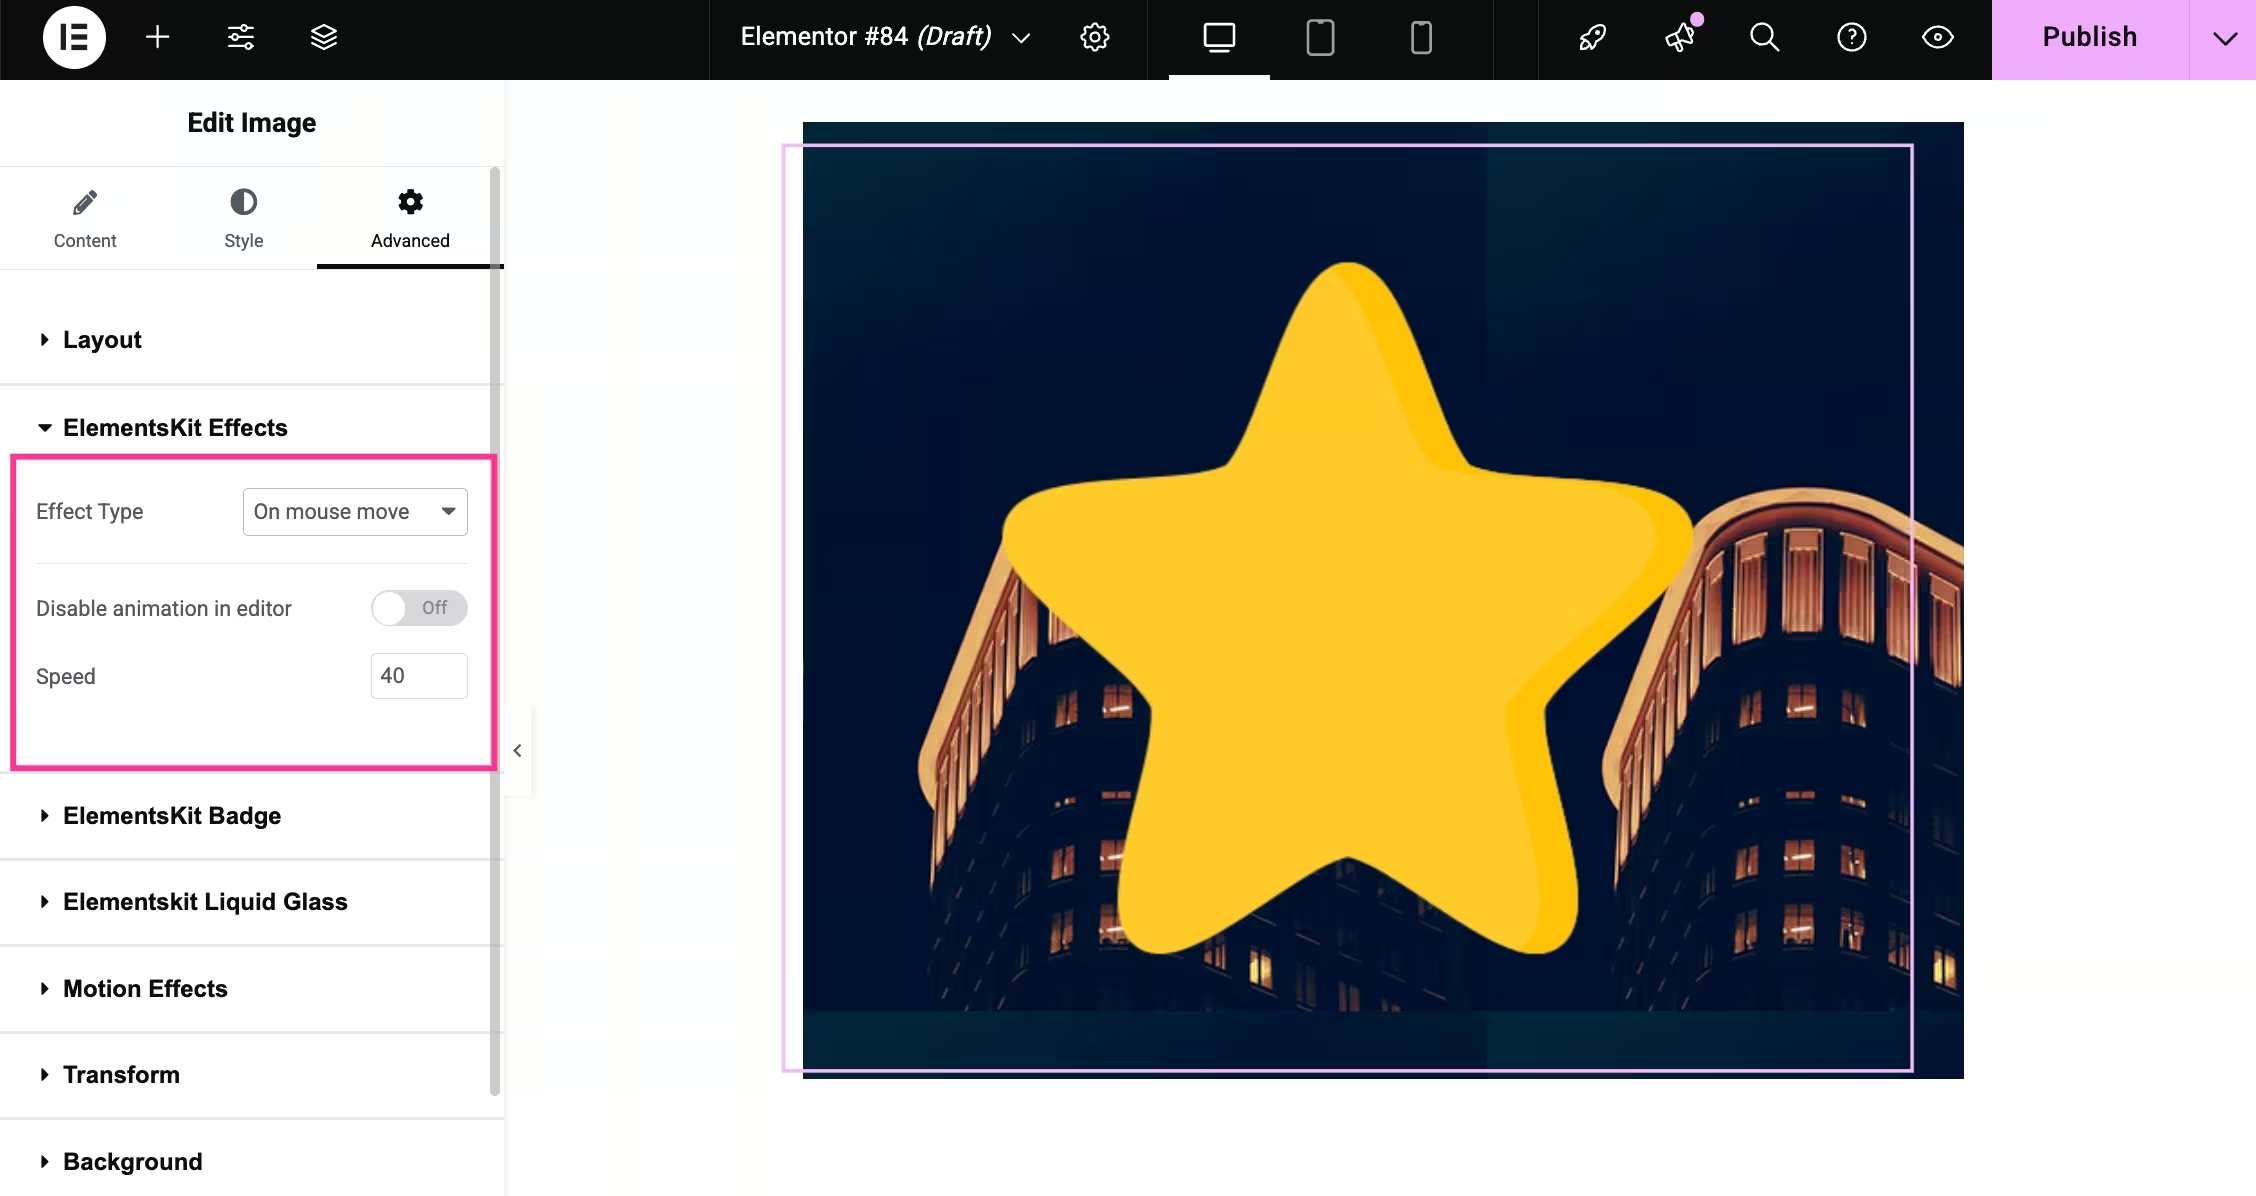
- Navigating to the “Advanced” tab and expanding the “ElementsKit Effects”.
- Selecting the “Effect Type” from the dropdown menu.
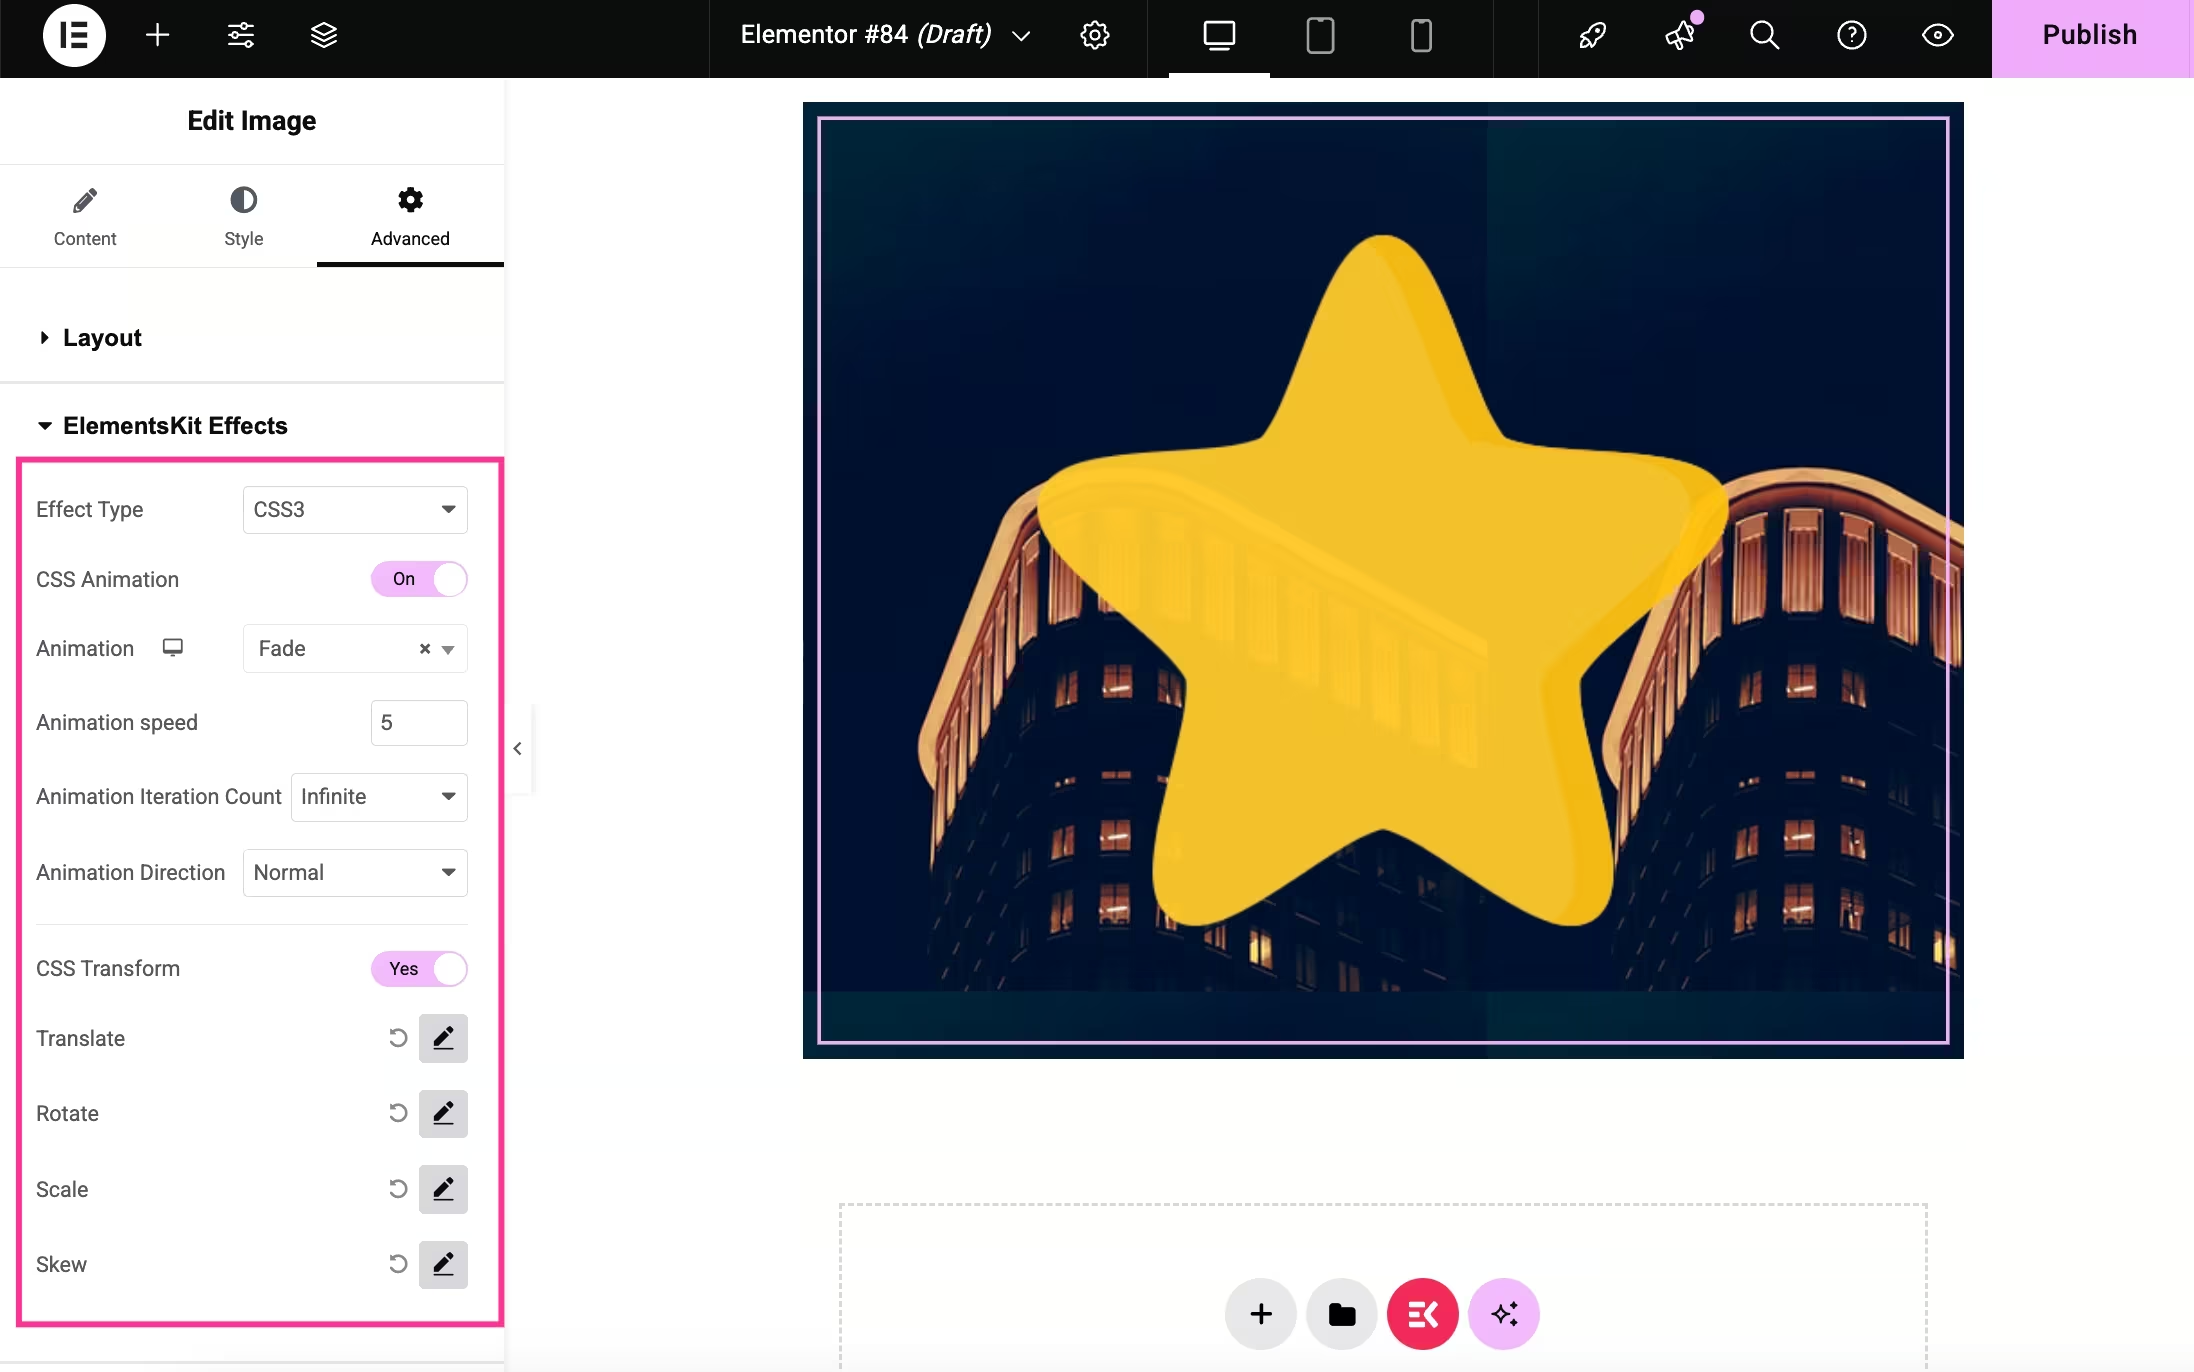
- If you select CSS3 effect, you have to adjust:
- CSS Animation: Turn on the toggle button to add animation.
- Animation: Select from the dropdown menu.
- Animation speed: Add animation speed.
- Animation Iteration Count: Set infinity for the iteration count.
- Animation Direction: Enter animation direction.
- CSS Transform: Enable this option.
- Translate: Adjust Translate.
- Rotera: Set rotate.
- Skala: Set Scale.
- Skew: Add Skew.
- If you select Tilt from the dropdown menu, then you have to adjust:
- Disable animation in editor: Enable it to disable showing in the editor.
- Max Tilt: Set maximum tilt.
- Image Scale: Enter image scale.
- Disable Axis: Choose X or Y axis from the dropdown option.
- After selecting on scroll, you will find the following options:
- Disable animation in editor: Deactivate to let animation be hidden in the editor.
- Parallax style: Add style from the dropdown menu.
- Parallax transition: Set transition.
- Smoothness: Adjust smoothness.
- Offset top: Enter offset top.
- Offset buttom: Add offset buttom.
- For selecting on mouse move, you have to:
- Disable animation in editor: Turn on to hide the animation in the editor.
- Fart: Enter animation speed.
Step 7: Live parallax effect
After completing all adjustments:
- Press the “Publish” button to make your parallax effect live.
- Preview the page on desktop or mobile.
- Adjust speed, offset, and animation if needed.
- Your parallax effect is now added.

Final notes
This is an ideal approach to add a parallax effect if you want an easy setup, visual control inside Elementor, and zero custom code. Custom animation may still be needed for advanced storytelling or animation effects. However, this method is more than enough for most WordPress websites.
Lämna ett svar