


WordPress’s Group Blocks is a powerful tool that allows users to combine multiple blocks into a single container. Think of it as a box that holds other elements, making it easier to manage layouts and apply consistent styling across multiple blocks.
You can easily insert different types of blocks in a layout and arrange them effortlessly. It eliminates the need to do certain customizations separately for each block. The group block can also be turned into a reusable block or a pattern block. This tutorial will focus on more important functionalities of using the WordPress Group block.
In this guide, we’ll learn about what is WordPress Group Block in Gutenberg and how to create Group Block within the block editor. Plus, you’ll know some essential functions of using a Group block.
What is WordPress Group Block in Gutenberg?
The functionality of group blocks in Gutenberg is like a container block where you can put different blocks together and have some global customization benefits within this container. This feature lets you bundle multiple blocks into one block, making your design work easier in the block editor interface.
WordPress users like you and me always want to work faster. Grouping blocks save us from doing redundant customization. You can easily control the customization of multiple blocks at once. This ensures effortless design consistency across the entire website styling and layout.
For example, a blog post article can contain many paragraph blocks. In this case, if you group all those paragraph blocks, you can simultaneously customize their typography, background, spacing, padding, margin, alignment, and much more.
You don’t have to group specific types of blocks. Any two or more Gutenberg blocks, such as images, videos, buttons, sliders, etc., can be converted into a unified block. You can create a full page or post layout and group all the blocks for future reuse, just by copying and pasting in a few clicks.
What is the Advantage of Making Group Blocks in Gutenberg?
O Group block in Gutenberg offers several benefits that improve content organization, design flexibility, and ease of editing. Here are the key advantages:
Better Content Organization: Structure the content formation effortlessly, forgetting repetitive customization and managing layouts without affecting individual elements.
Effortless Styling & Customization: Instead of changing each block individually, you can easily apply styling and customizations, such as colors, margins, and borders, to the entire group.
Simplified Block Management: Group your blocks to move, duplicate, or delete an entire section with just one click. This is beneficial for creating and using reusable layouts like call-to-action sections or testimonials.
Improved Responsiveness: Grouping blocks doesn’t only help to maintain design consistency. Doing this also ensures responsive design and a better user experience on mobile devices.
Achieve Complex Design: It is also an ideal approach for creating complex designs, you can easily add other container blocks inside a group block.
Using Group blocks effectively can streamline your workflow, enhance design consistency, and improve overall page editing efficiency.
How to Add WordPress Group Block in Gutenberg?
Let’s see how to create a group block within your Gutenberg dashboard. You can add a new group block, or you can group some of the existing blocks
There are two main ways to create and use a Group block in WordPress:
Method 1: Manually Adding Blocks to a Group
Gutenberg offers an independent block named “Group”. You can add it like any other Gutenberg block on a page or post. To insert it, hit the “+” icon and search for the “Group” block. Once you see it, click to insert it into the dashboard.
Adding the Group block will load with four different layouts. You can arrange blocks in a container vertically, horizontally, or in a grid. Remember that these layout types will show different block settings in the right sidebar. To add individual blocks like text, images, or columns within this group container, click the “+” icon
Method 2: Grouping Existing Blocks
Another way of adding a Group block to your WordPress website is grouping the existing blocks. Go to a page or post where you have already inserted multiple blocks. Or you can start fresh.
Then, drag the blocks you want to group and click the group icon (follow the image below) in the toolbar. Doing this will turn all blocks into a group.
Further, there is an even better way to group WordPress blocks. Look for the Lista icon, as shown in the image below, from the header menu of your block editor dashboard. When you see it, hit it, and a bar will reveal the list of all blocks you’ve inserted in the dashboard.
Now, hold down the Mudança key and select the blocks you want to group. Then, right-click on your mouse and choose the Group option. Remember, you don’t have to follow any order when selecting your blocks.
Once you’ve successfully grouped your WordPress blocks, you can access its settings for further customization. This is what I’m going to show you in the next part.

Configure WordPress Group Block Settings
Select the group block and go to its settings in the right sidebar. It includes two separate tabs: Configurações & Estilos. Configuring these tabs, you can customize the appearance and functionality of a group block. Here’s a background
O Group block in WordPress provides several settings to help customize its appearance and functionality. These settings can be accessed via the block settings panel in the right sidebar. Here’s a breakdown:
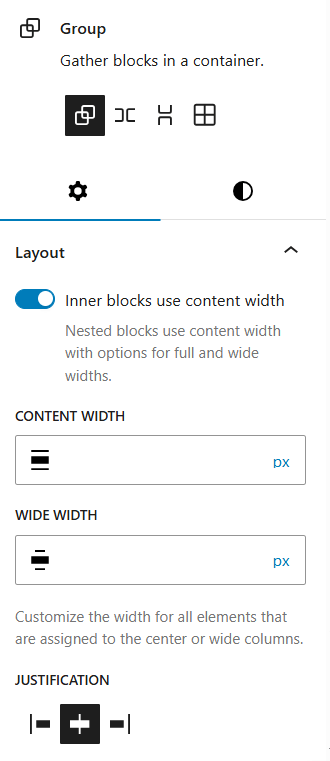
From the Settings tab, you can determine the Content width and Wide width for elements. The elements can be aligned to your preferred position. Further, you can set the block to be sticky, keeping it fixed at the top of the screen while scrolling.
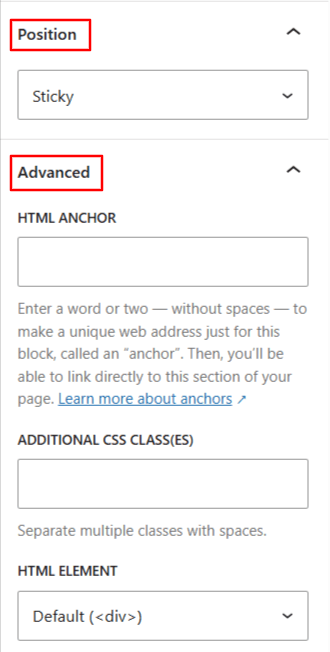
O Avançado option reveals settings for adding custom classes for further styling using CSS and creating an anchor link to jump to this block from another section.
Then, move to the Estilo tab. The first thing you will configure is selecting a style for the appearance of the group block. Then, you can change the background and typography color. Further, an image can be used as background.
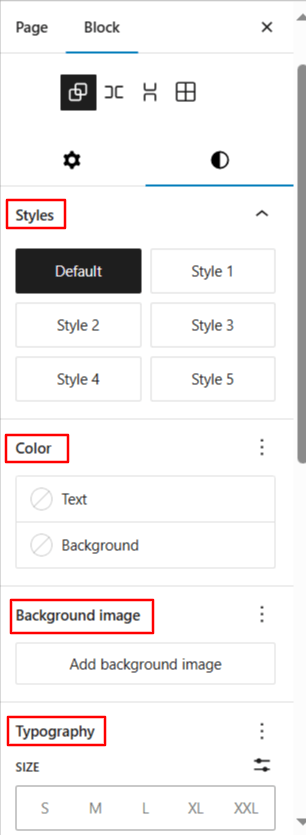
Then, there will be settings to determine text size, spacing between blocks, minimum heights, applying padding & margin, the spacing between blocks, and customizing group block border.
Till now, I’ve discussed how to create the Group Block in your block editor dashboard and explained its settings. Now, let’s dive into some of the various essential functional ways to use the Group block on a WordPress website.
How to Change the Default Inner Block Content Width of a Group Block?
Typically, in default group block settings, the block inside a group inherits the width settings from the theme. It means if you convert the group block to wide width or full width, the inner blocks will remain at the standard width.
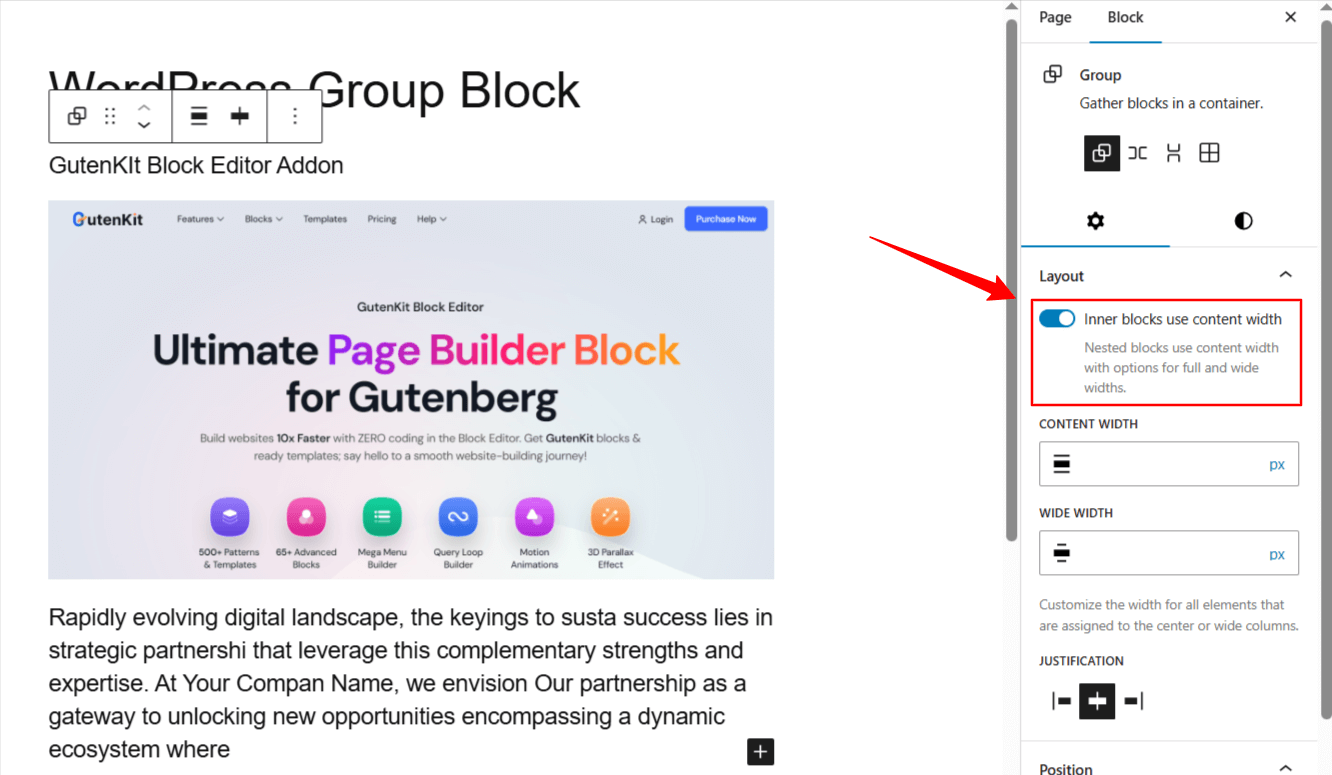
Open the settings of the group block, and you’ll see a toggle button (Inner blocks use content width) is activated. Just disable it. Now, you can extend the inner blocks to match the full width of the Group.
How to Add a New Block to an Existing WordPress Group Block
You can also add a new block to a group block that you’ve already created. To do this, select the group block. If you aren’t able to do it within the dashboard, find the group block from the list view. As you select the group block, you can see the + ícone.
Acerte o "+” icon, and you can insert any block in an existing WordPress group block as you regularly do.
How to Make a Group Block Sticky?
To make the entire group block sticky, enter the group block settings, navigate to the Configurações tab, and scroll down to the Posição option. From the dropdown, choose the Pegajoso option. Doing this, your created group block can change to sticky.
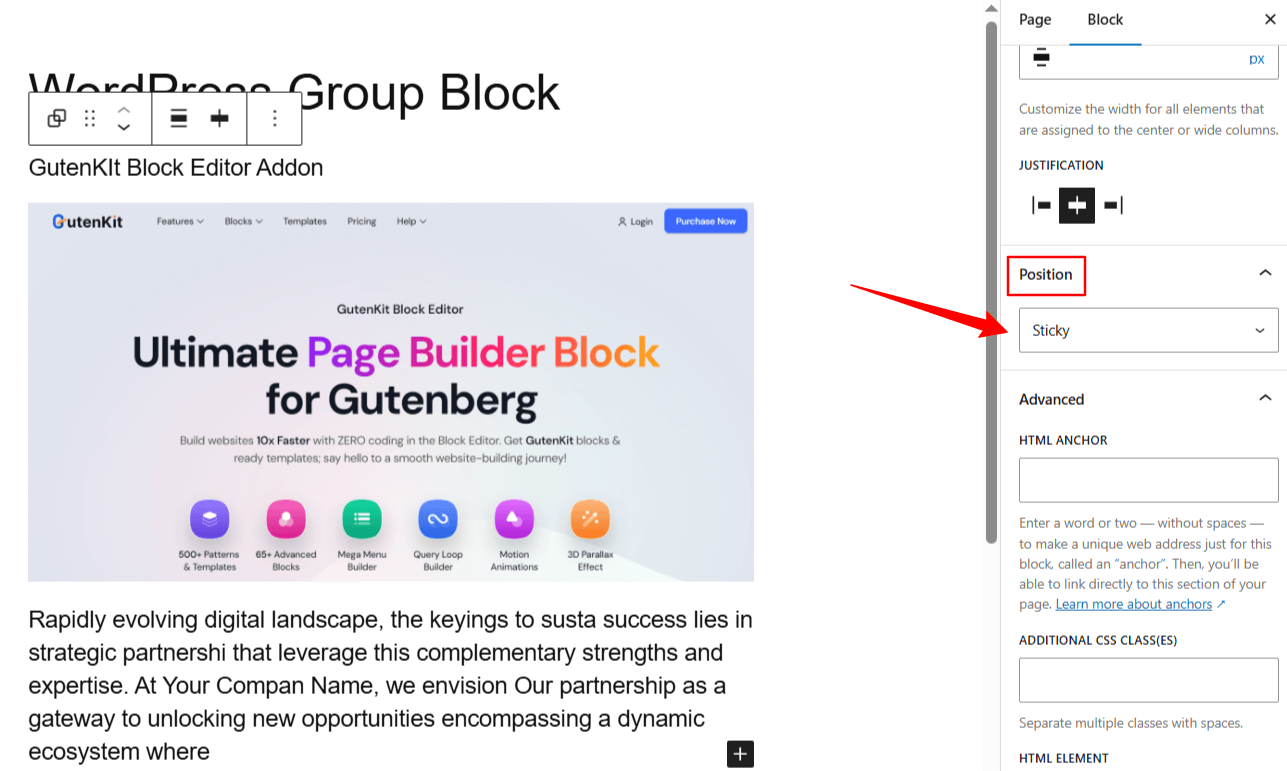
It’s recommended that a background color be applied to prevent transparency issues and disable the “Inner blocks’ use content width” option. Also, preview it on the front end before making the group block live in the sticky format.
How to Turn a Group Block into a Reusable Block or Pattern?
Select the group block or access it through the Lista option. From the toolbar of the group block, click the three-dot icon. It will reveal different options. Choose the “Create Pattern” ou “Create Reusable Block” opção.
You’ll see a popup with the settings for entering the name and category of the reusable block or pattern. After doing this, hit the “Save” option. This will allow you to insert the same Group block across multiple pages or posts without recreating it.
How to Select an Individual Block in a Group Block and Make Changes?
You can access every block settings within a group block, but the challenge is that users find it hard to select every individual block and configure its settings from the live editor dashboard.
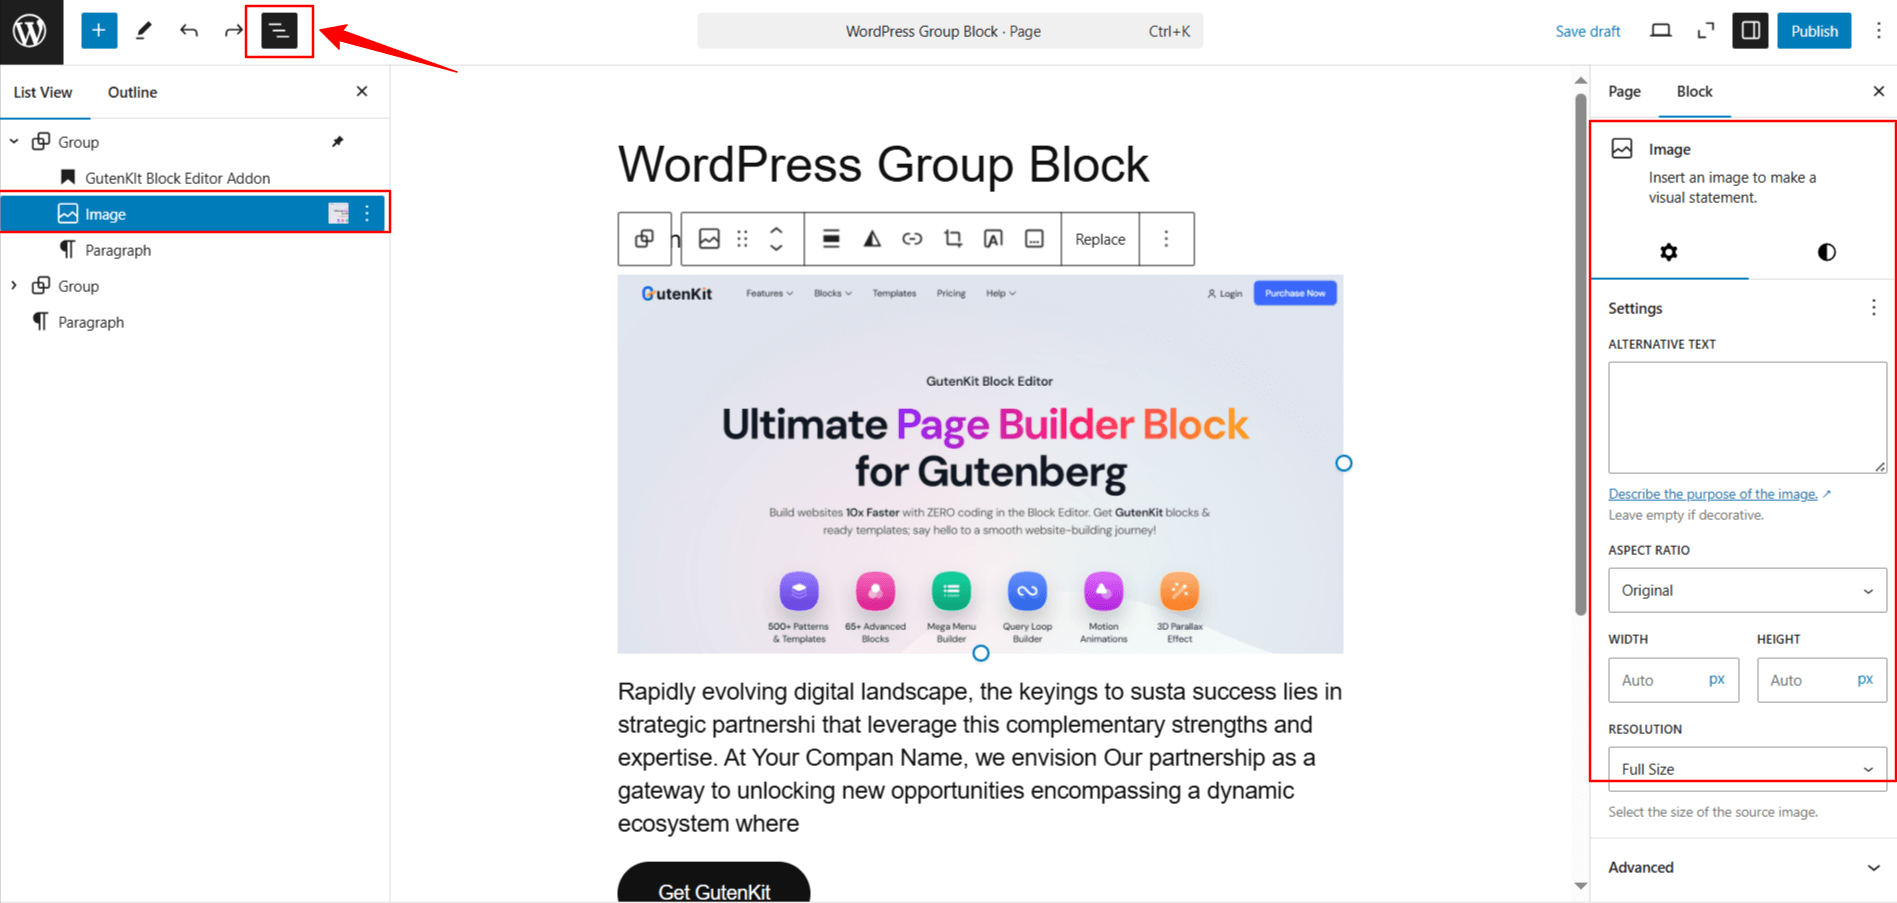
One easy way to do this is to open the Lista option. Look for the Lista option from the header area of a web page. And, click on the block you want to access and change the settings for.
✅ Guia de bônus: How to create a blog website in Gutenberg.
How to Create Gutenberg Group Block Using a Plugin?
Making a Group block using a Gutenberg-based plugin is more flexible. For example, the GutenKit page builder plugin for the block editor introduces an advanced way to group your blocks within the block editor interface.
If you’ve the GutenKit plugin installed on your website, it will automatically bundle your website into the GutenKit container block. Therefore, you will have more advanced functions and customizations to group WordPress blocks.
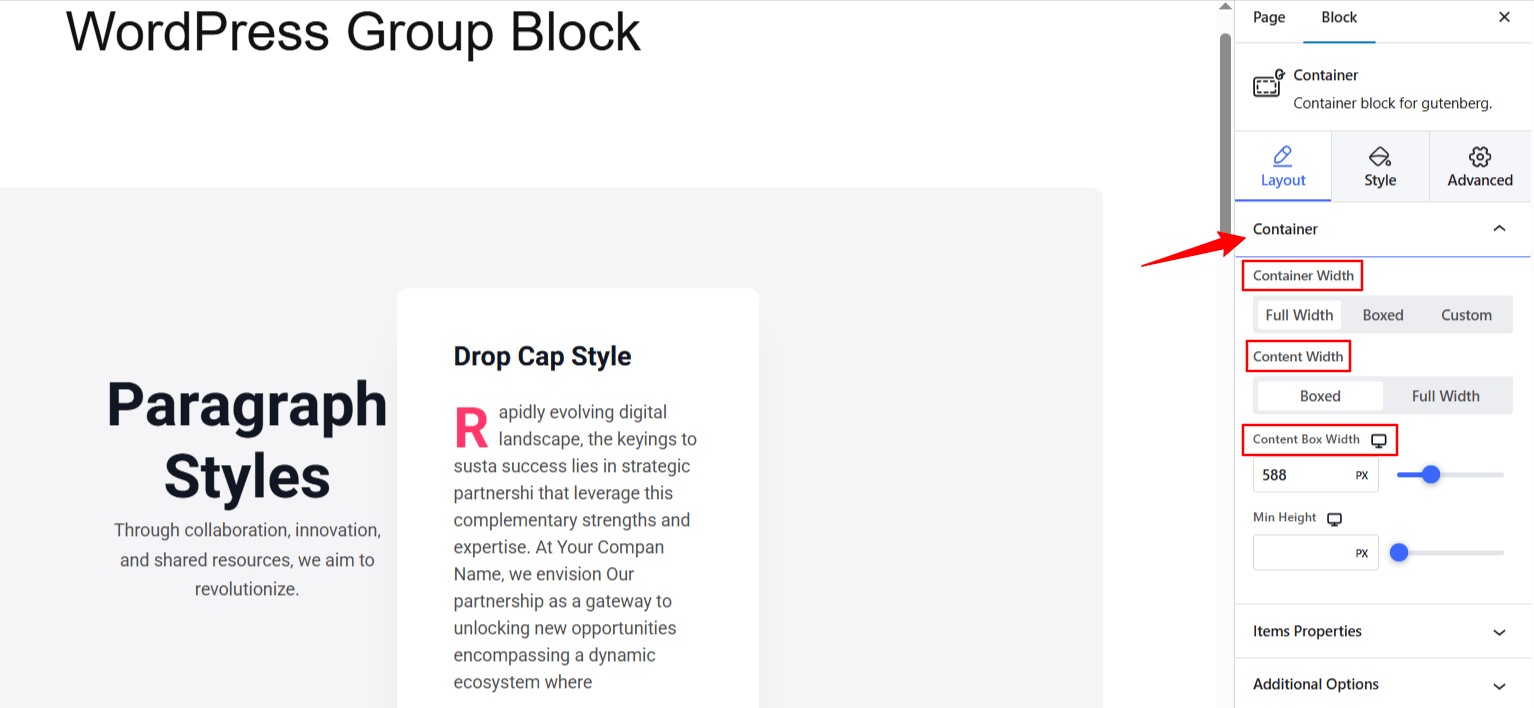
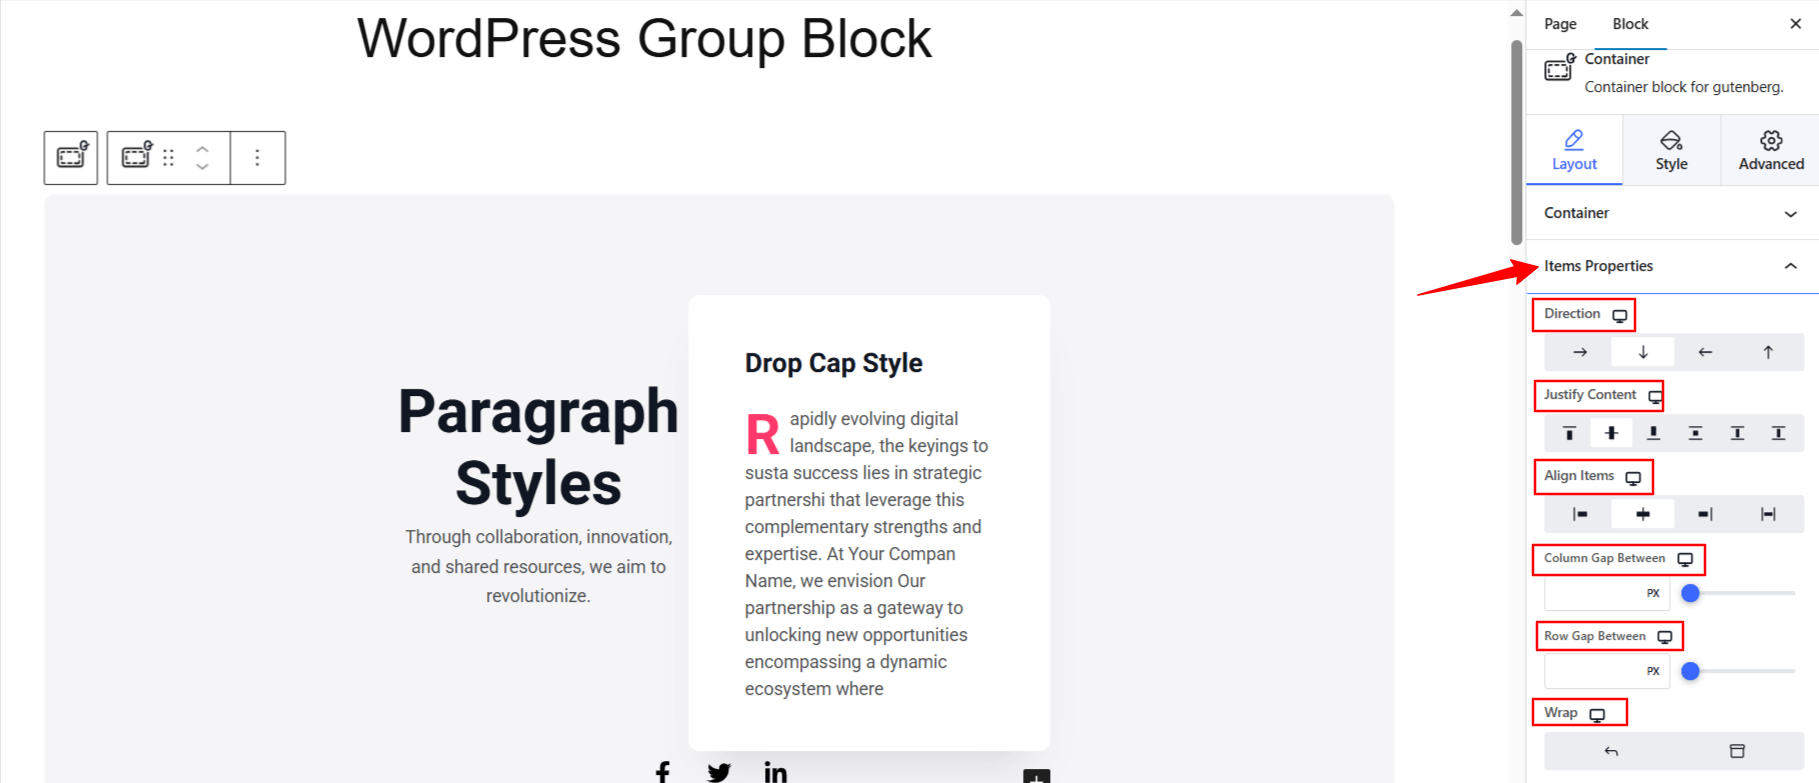
The GutenKit Container block helps users to structure responsive and animated layouts. You can adjust the container in your preferred way with settings like Largura do contêiner e Largura do conteúdo. O Item Properties option empowers you to play with the elements within the container by setting its direction, alignment, column gaps, and wrap functions.
Further, you are not limited to native styling features like adding color to background and text. Rather, GutenKit allows the user to add different background types, such as gradient, video, parallax, etc. You can also add an overlay effect to the background. Further, for border styling, GutenKit is available with the box shadow effects.
Do you need to select the same type of block for creating a Group block?
Conclusão!
Now, you know what the WordPress group block is and how you can use it in different ways on your Gutenberg website. Anyone without coding knowledge can easily add and manage a group block. However, to get the most out of the WordPress group block functionality, I recommend using a plugin like Gutenkit.
This way, you can enrich your website with exceptional layouts that maintain a consistent design throughout your website.
Deixe um comentário