


Customer relationship, engagement, and sales highly depend on sending on-time follow-up emails. Besides, these automated WooCommerce follow-up emails can cut off hours of manual work and effort. Also, they can create a sense of urgency among customers and speed up purchasing decisions.
That’s why, utilizing automated follow-up emails in WooCommerce businesses is crucial for keeping your sales upward. However, setting up these emails is simpler than you think with the right solution.
In this blog, we’ll show exactly the easiest way to set up automated follow-up emails in WooCommerce using EmailKit, a no-code email customizer.
Setting up Automated WooCommerce follow-up emails
Since default WooCommerce follow-up emails are generic and plain, you have to look for other ways to customize these emails. Here, the alternative options are coding or using a WooCommerce follow-up email plugin.
As coding is not easy to adapt for all, in this blog, we’ll highlight the step-by-step guide of setting automated WooCommerce follow-up emails with a friendly Personalizador de e-mail WooCommerce, EmailKit.
Now, let’s dive into the process below and learn how EmailKit simplifies automated follow-up email customization and setup:
Step 1: Edit follow-up emails with EmailKit.
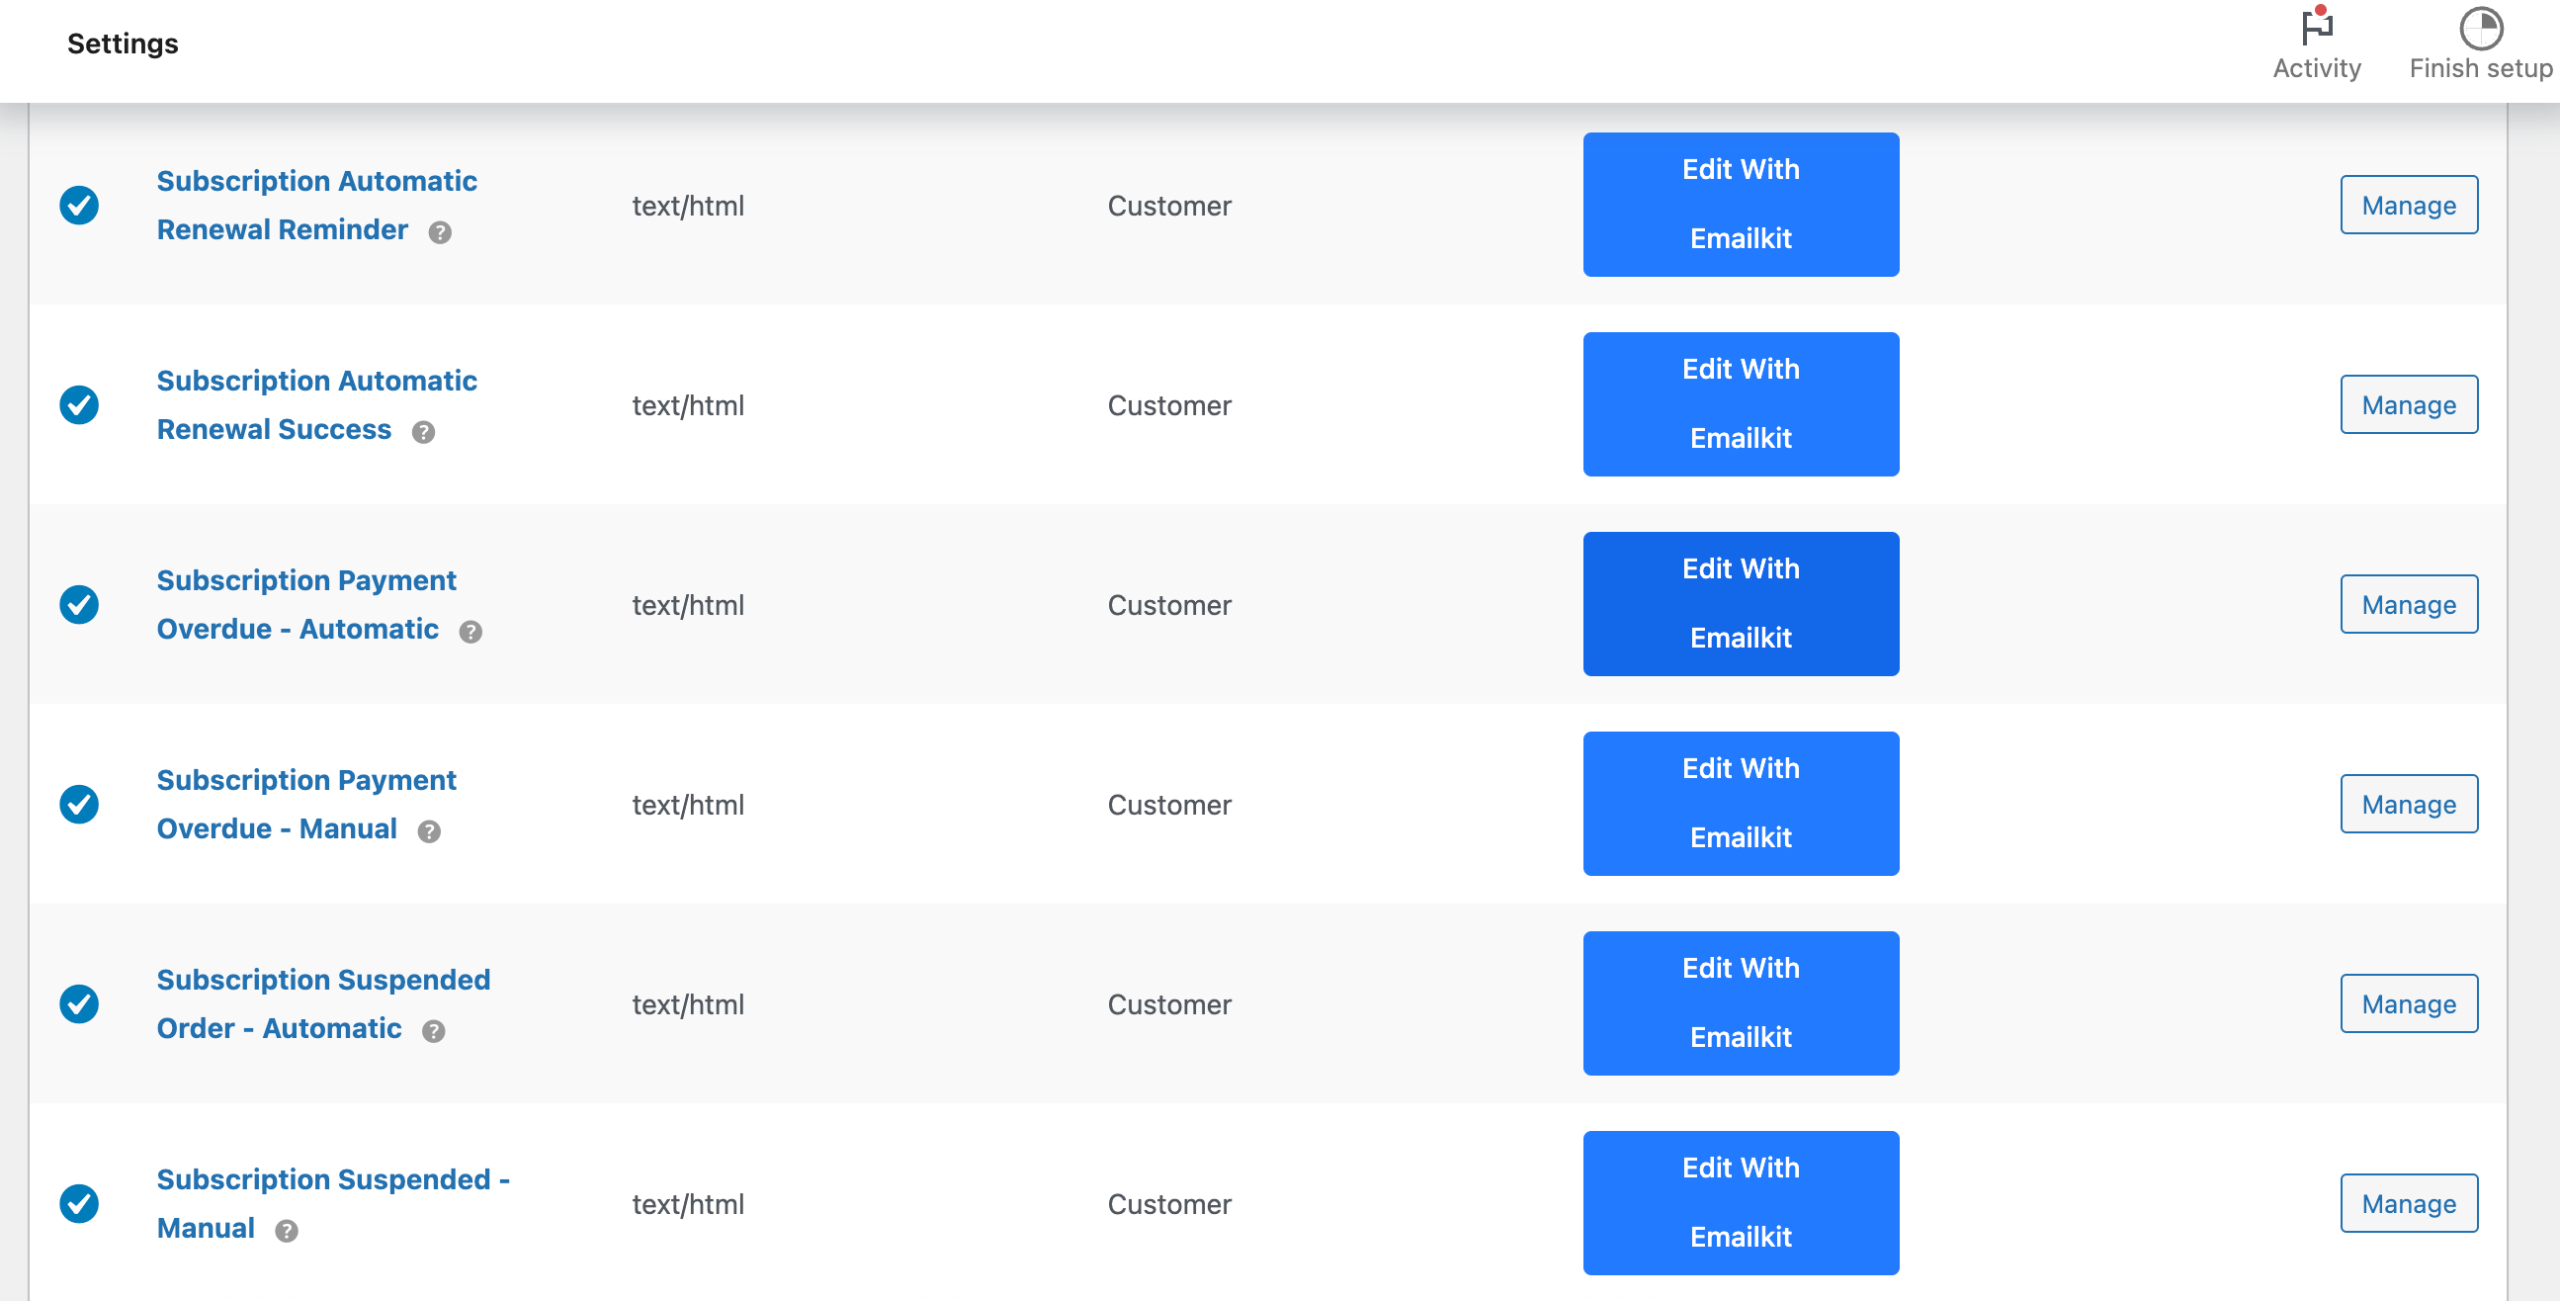
You can seamlessly customize all emails with EmailKit that comes from the WooCommerce third-party integration. For example, these WooCommerce addons will provide subscription renewal, subscription payment overdue like automated follow-up emails, which can be further customized with EmailKit.
You just have to visit WooCommerce >> Configurações e press the Emails tab. There you will find all the WooCommerce emails. Now, pressione o botão “Editar com EmailKit” button for the Subscription renewal reminder email. If you don’t have EmailKit installed on your site, then it will install EmailKit and redirect you to the plugin editor.n renewal remainder email. If you don’t have EmailKit installed on your site then, it will install EmailKit and redirect you to the plugin editor.
Step 2: Customize follow-up emails with built-in elements.
In the second step, you need to customize your follow-up emails with built-in elements. So, after redirecting to the EmailKit editor, you will find all the General and WooCommerce elements on the left side.
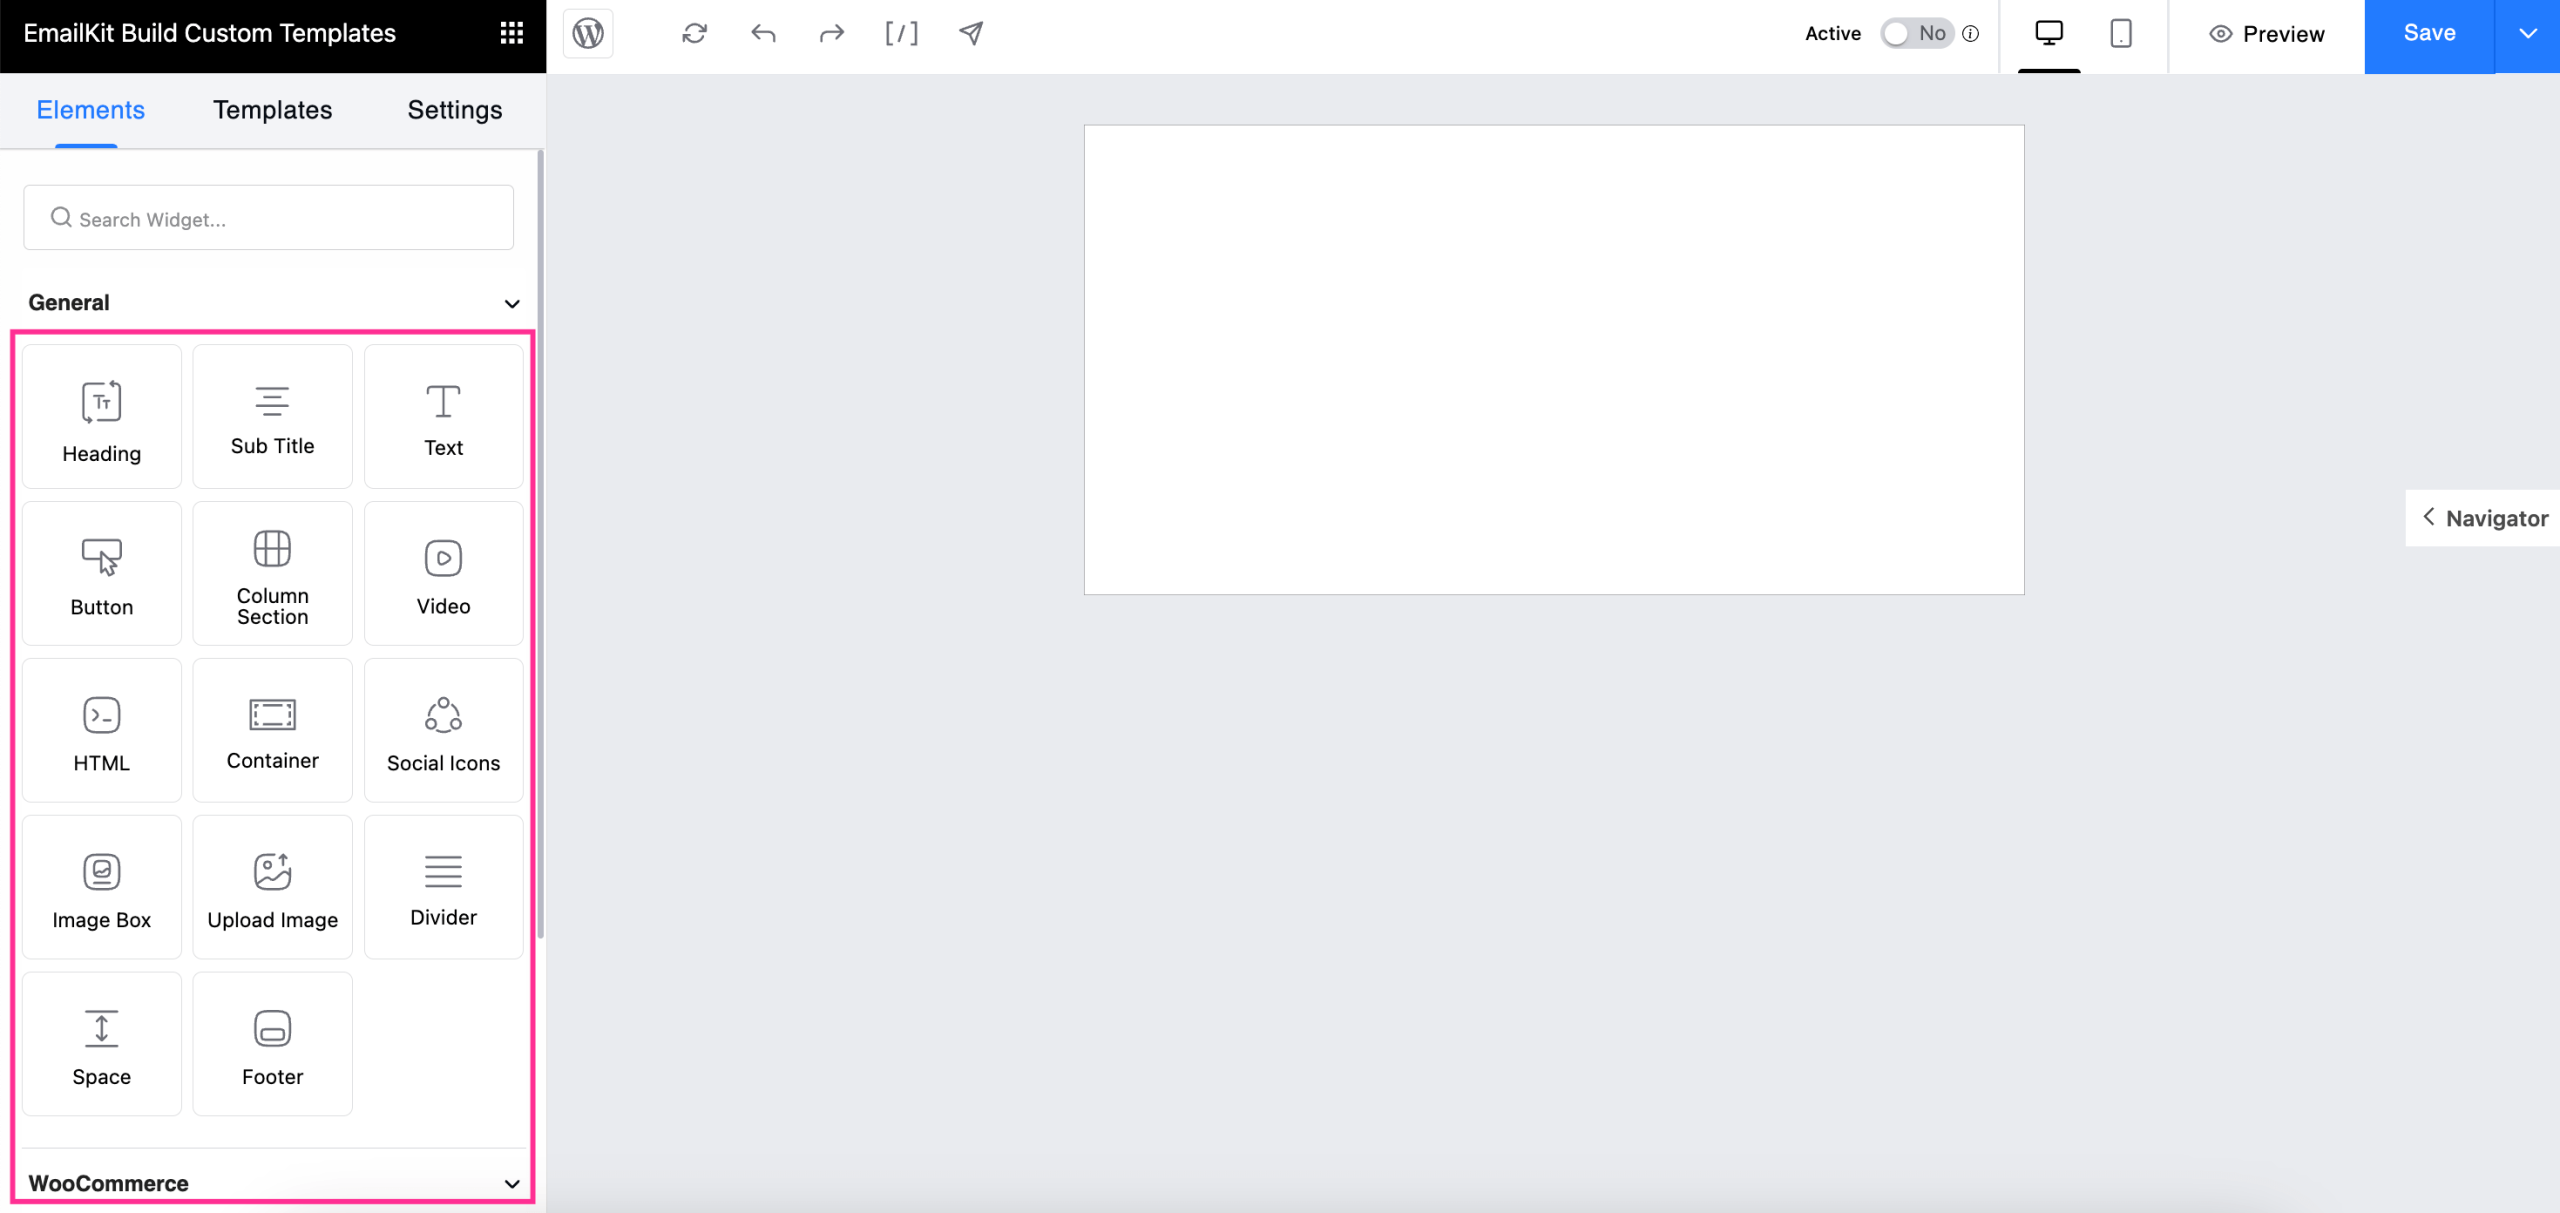
From there, arrastar e soltar Subtitle, Customer Note, Button, and other required elements on your email template just like the GIF below.
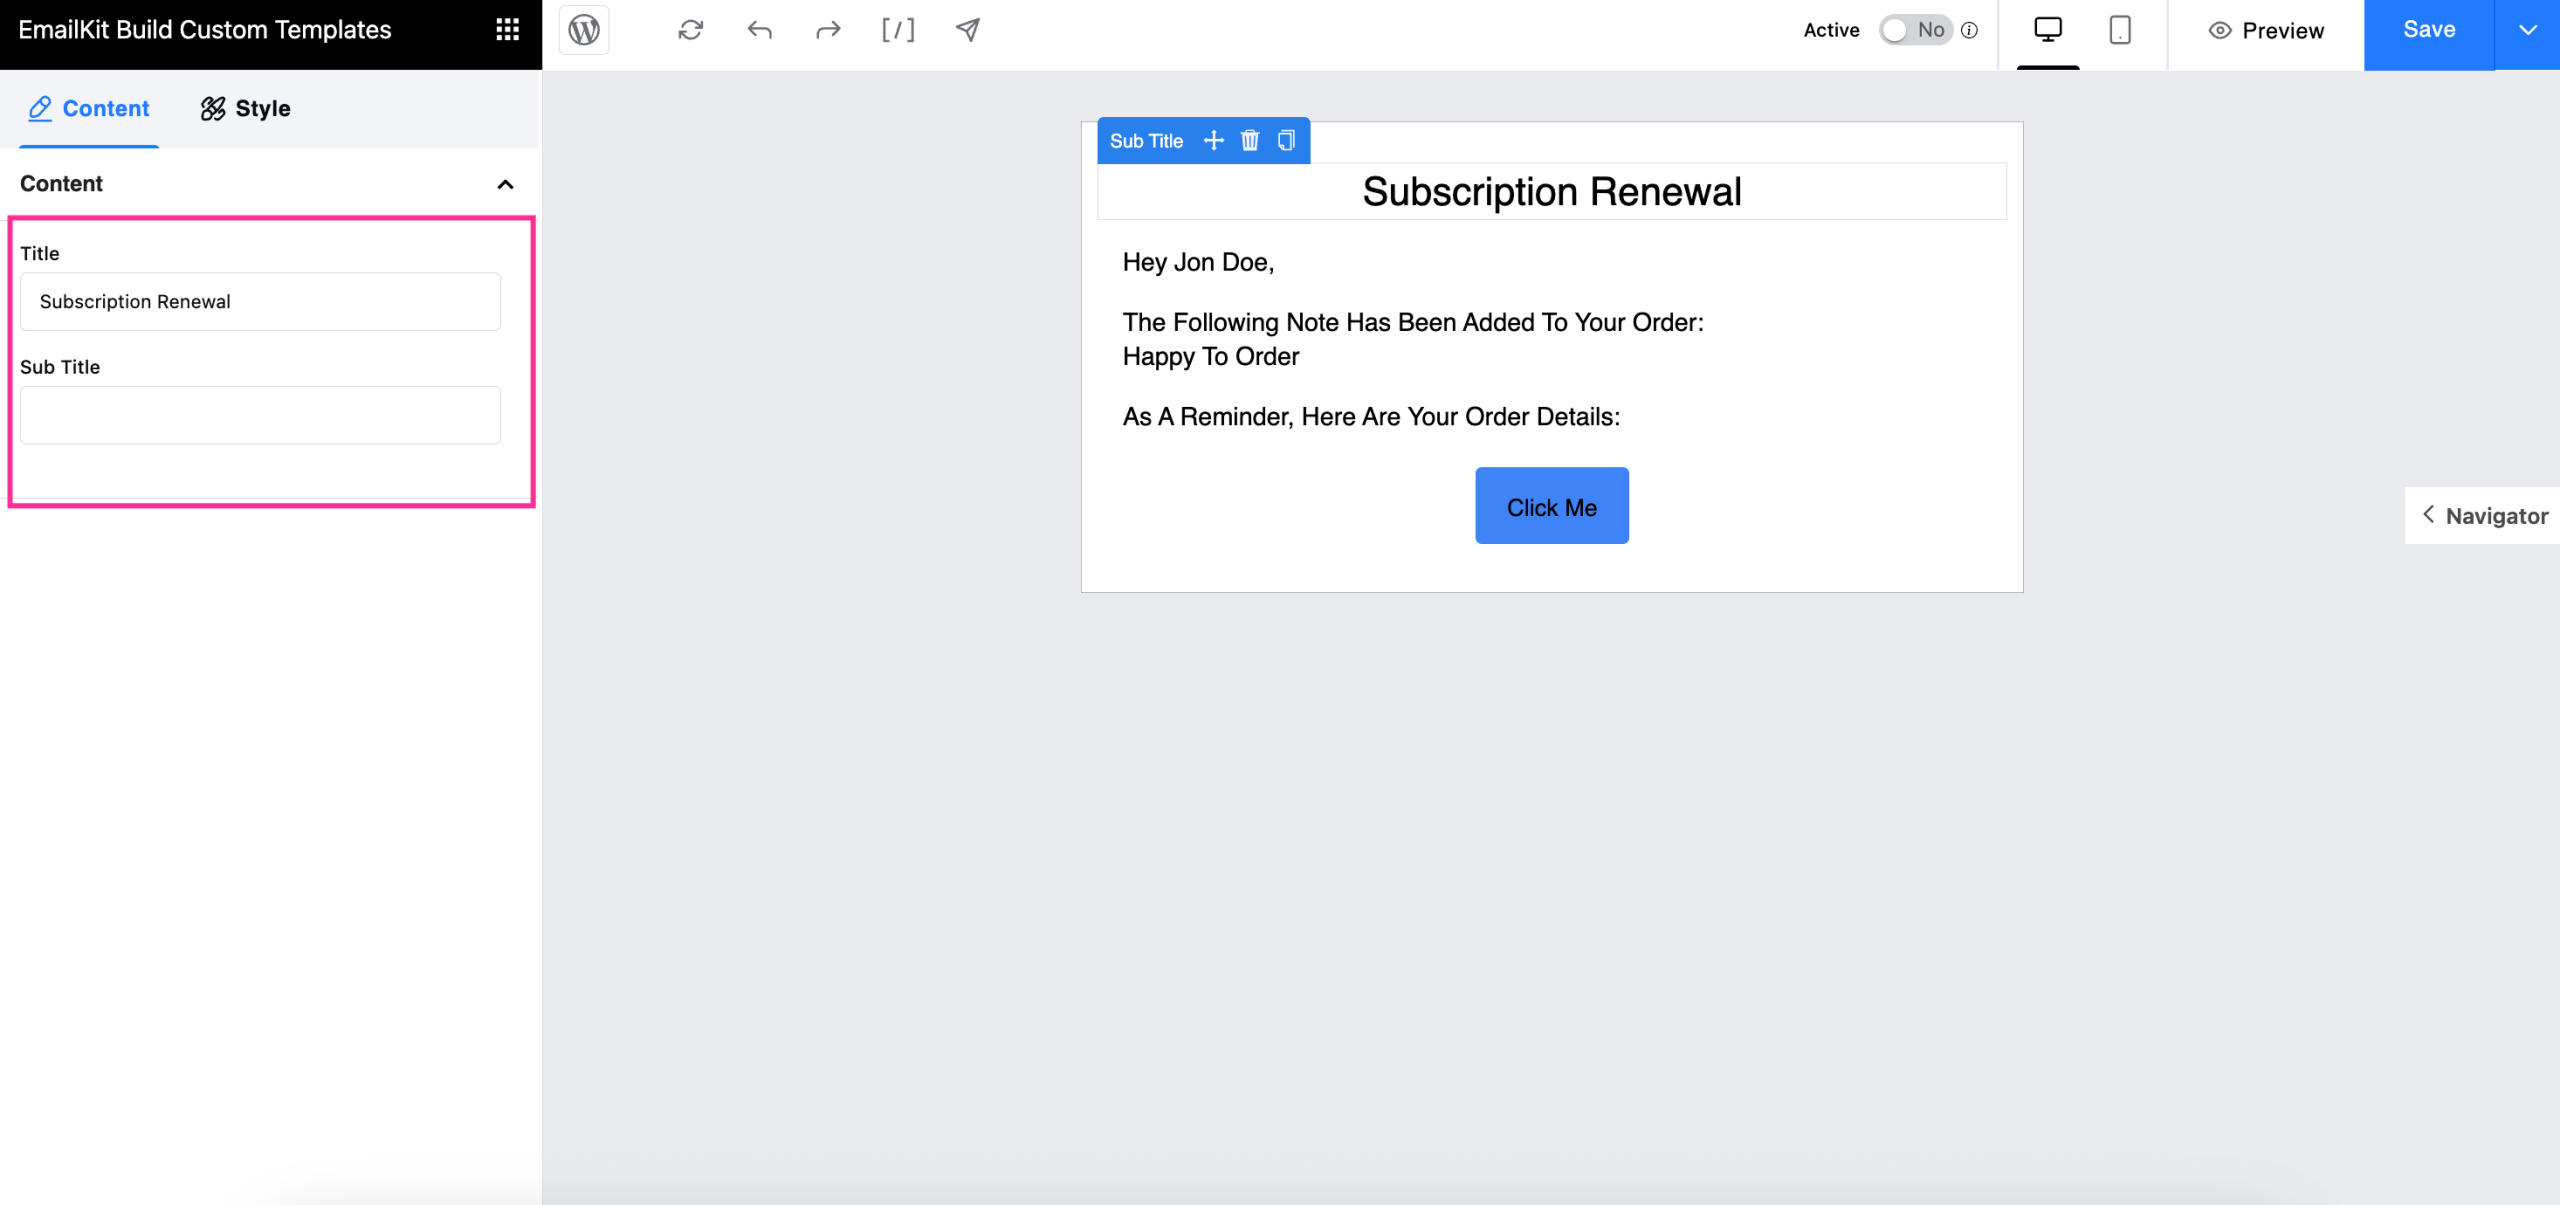
After adding all the elements using this WooCommerce follow-up email plugin, customize the content of each email field or element by pressing it. All the content customization options will be visible on the left side with a single click.
For example, if you click the Subtitle field, then you can edit the content of Title e Legenda for this field.
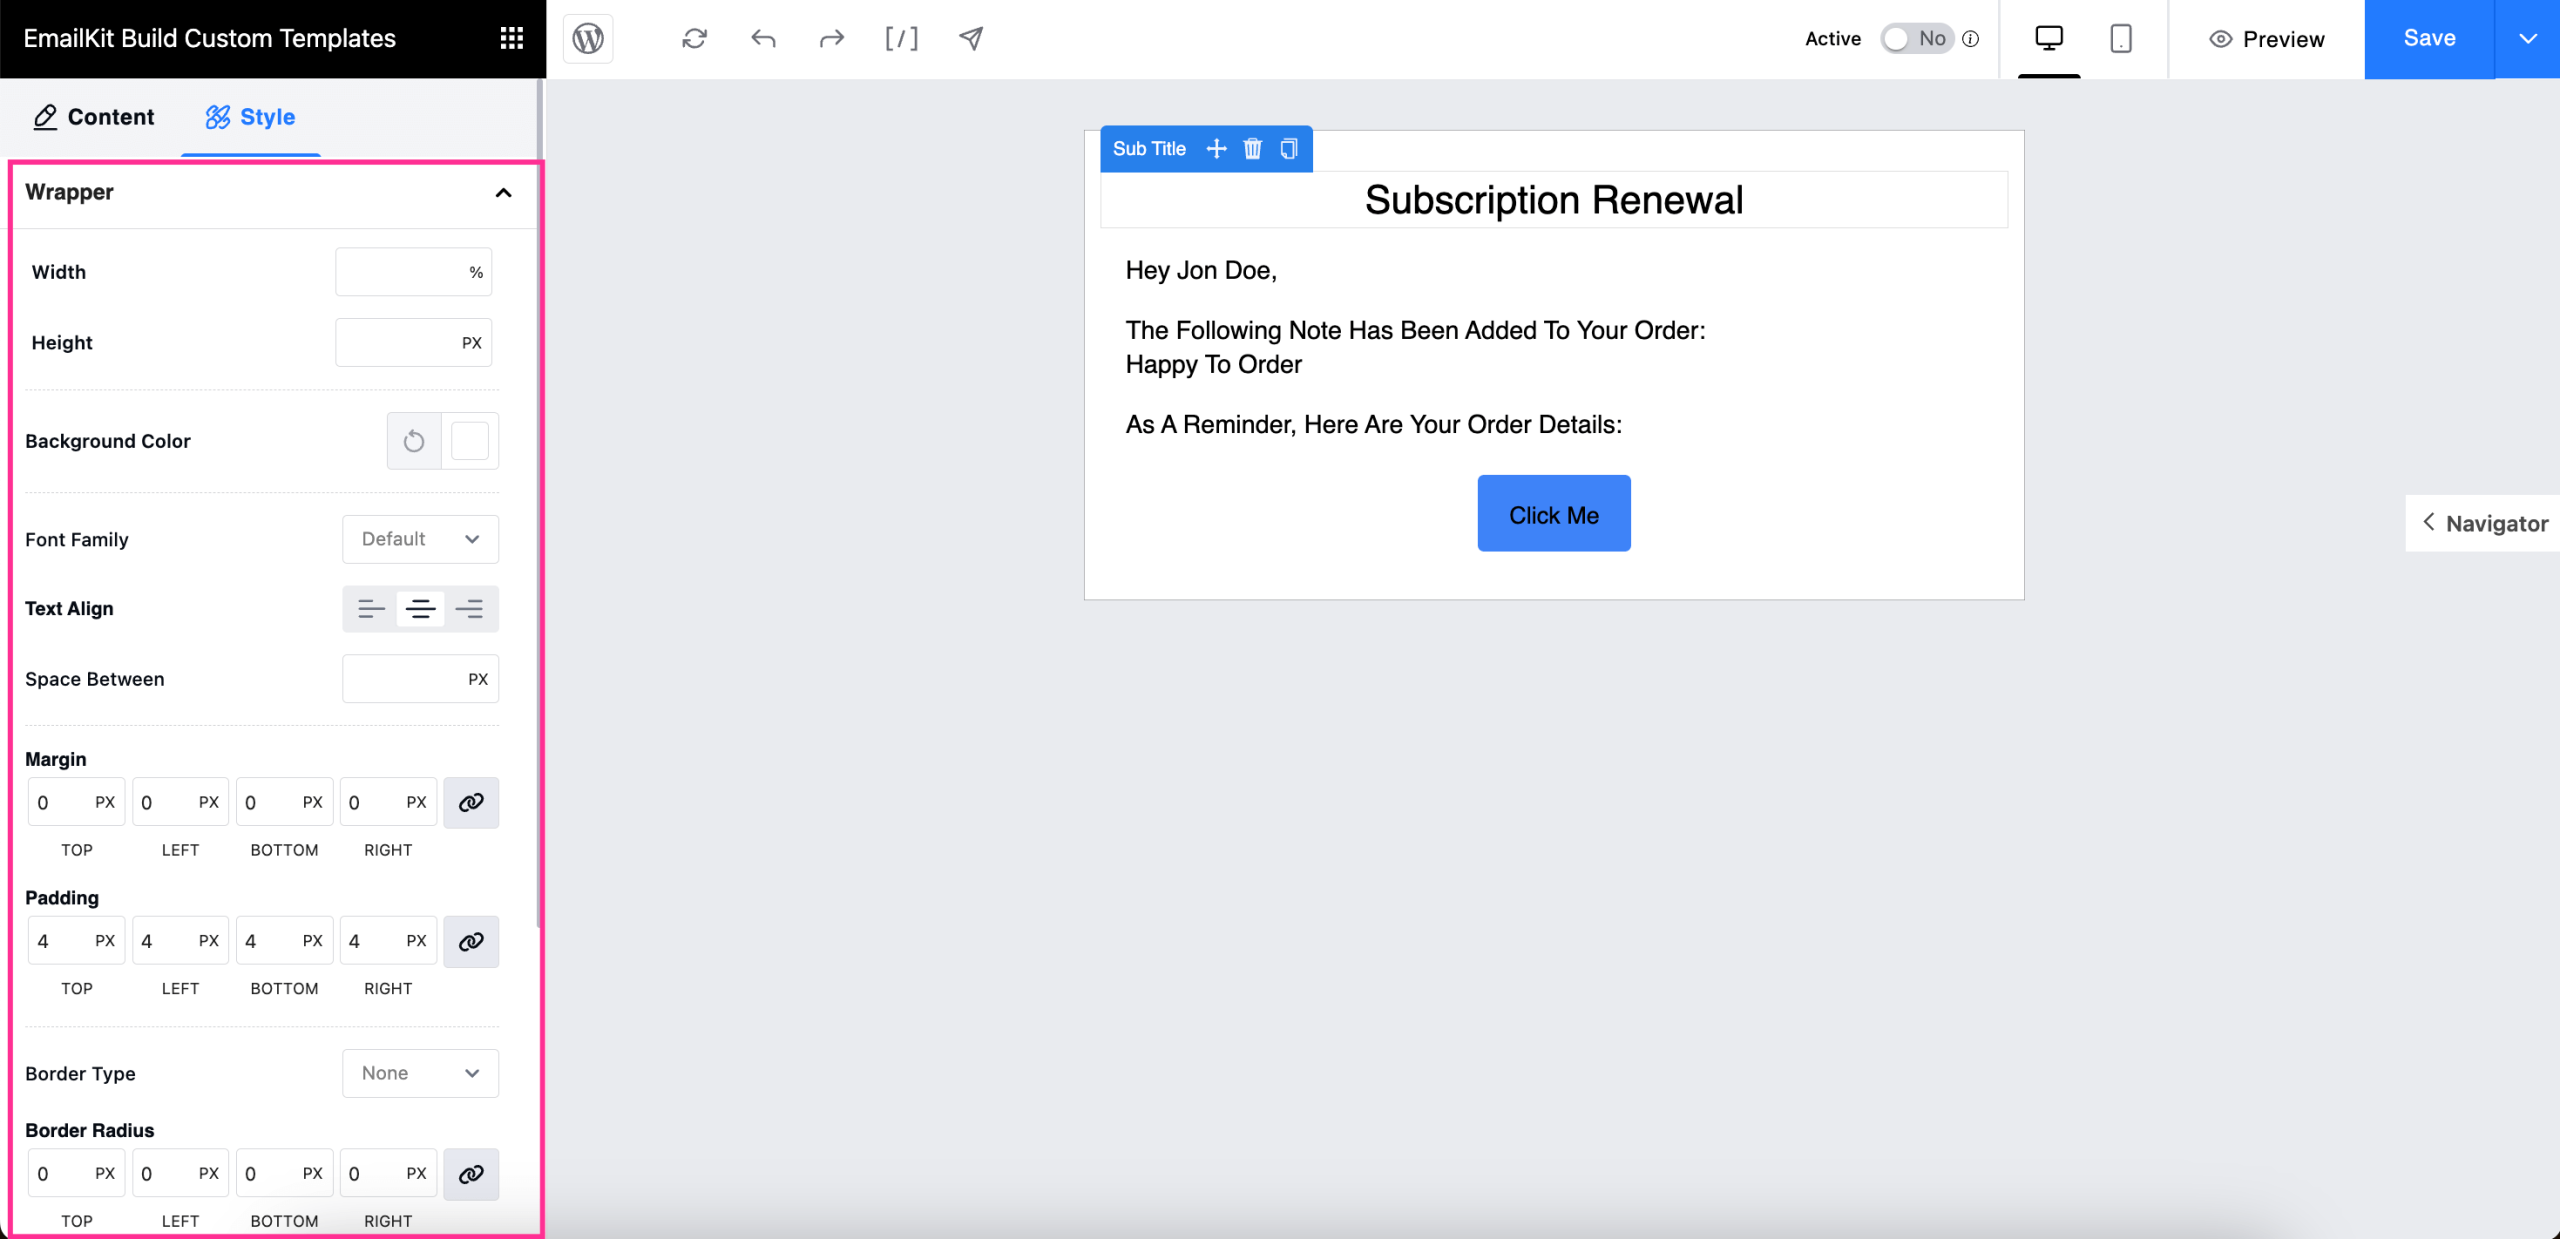
Next to the Content tab, you will find Aba Estilo which will allow you to alter Width, Altura, Cor de fundo, Família de fontes, Alinhamento de texto, Espaço entre, Margem, Preenchimento, etc. for your Sub Title field.
Now, following the similar process customize other email elements for crafting branded WooCommerce follow-up emails.
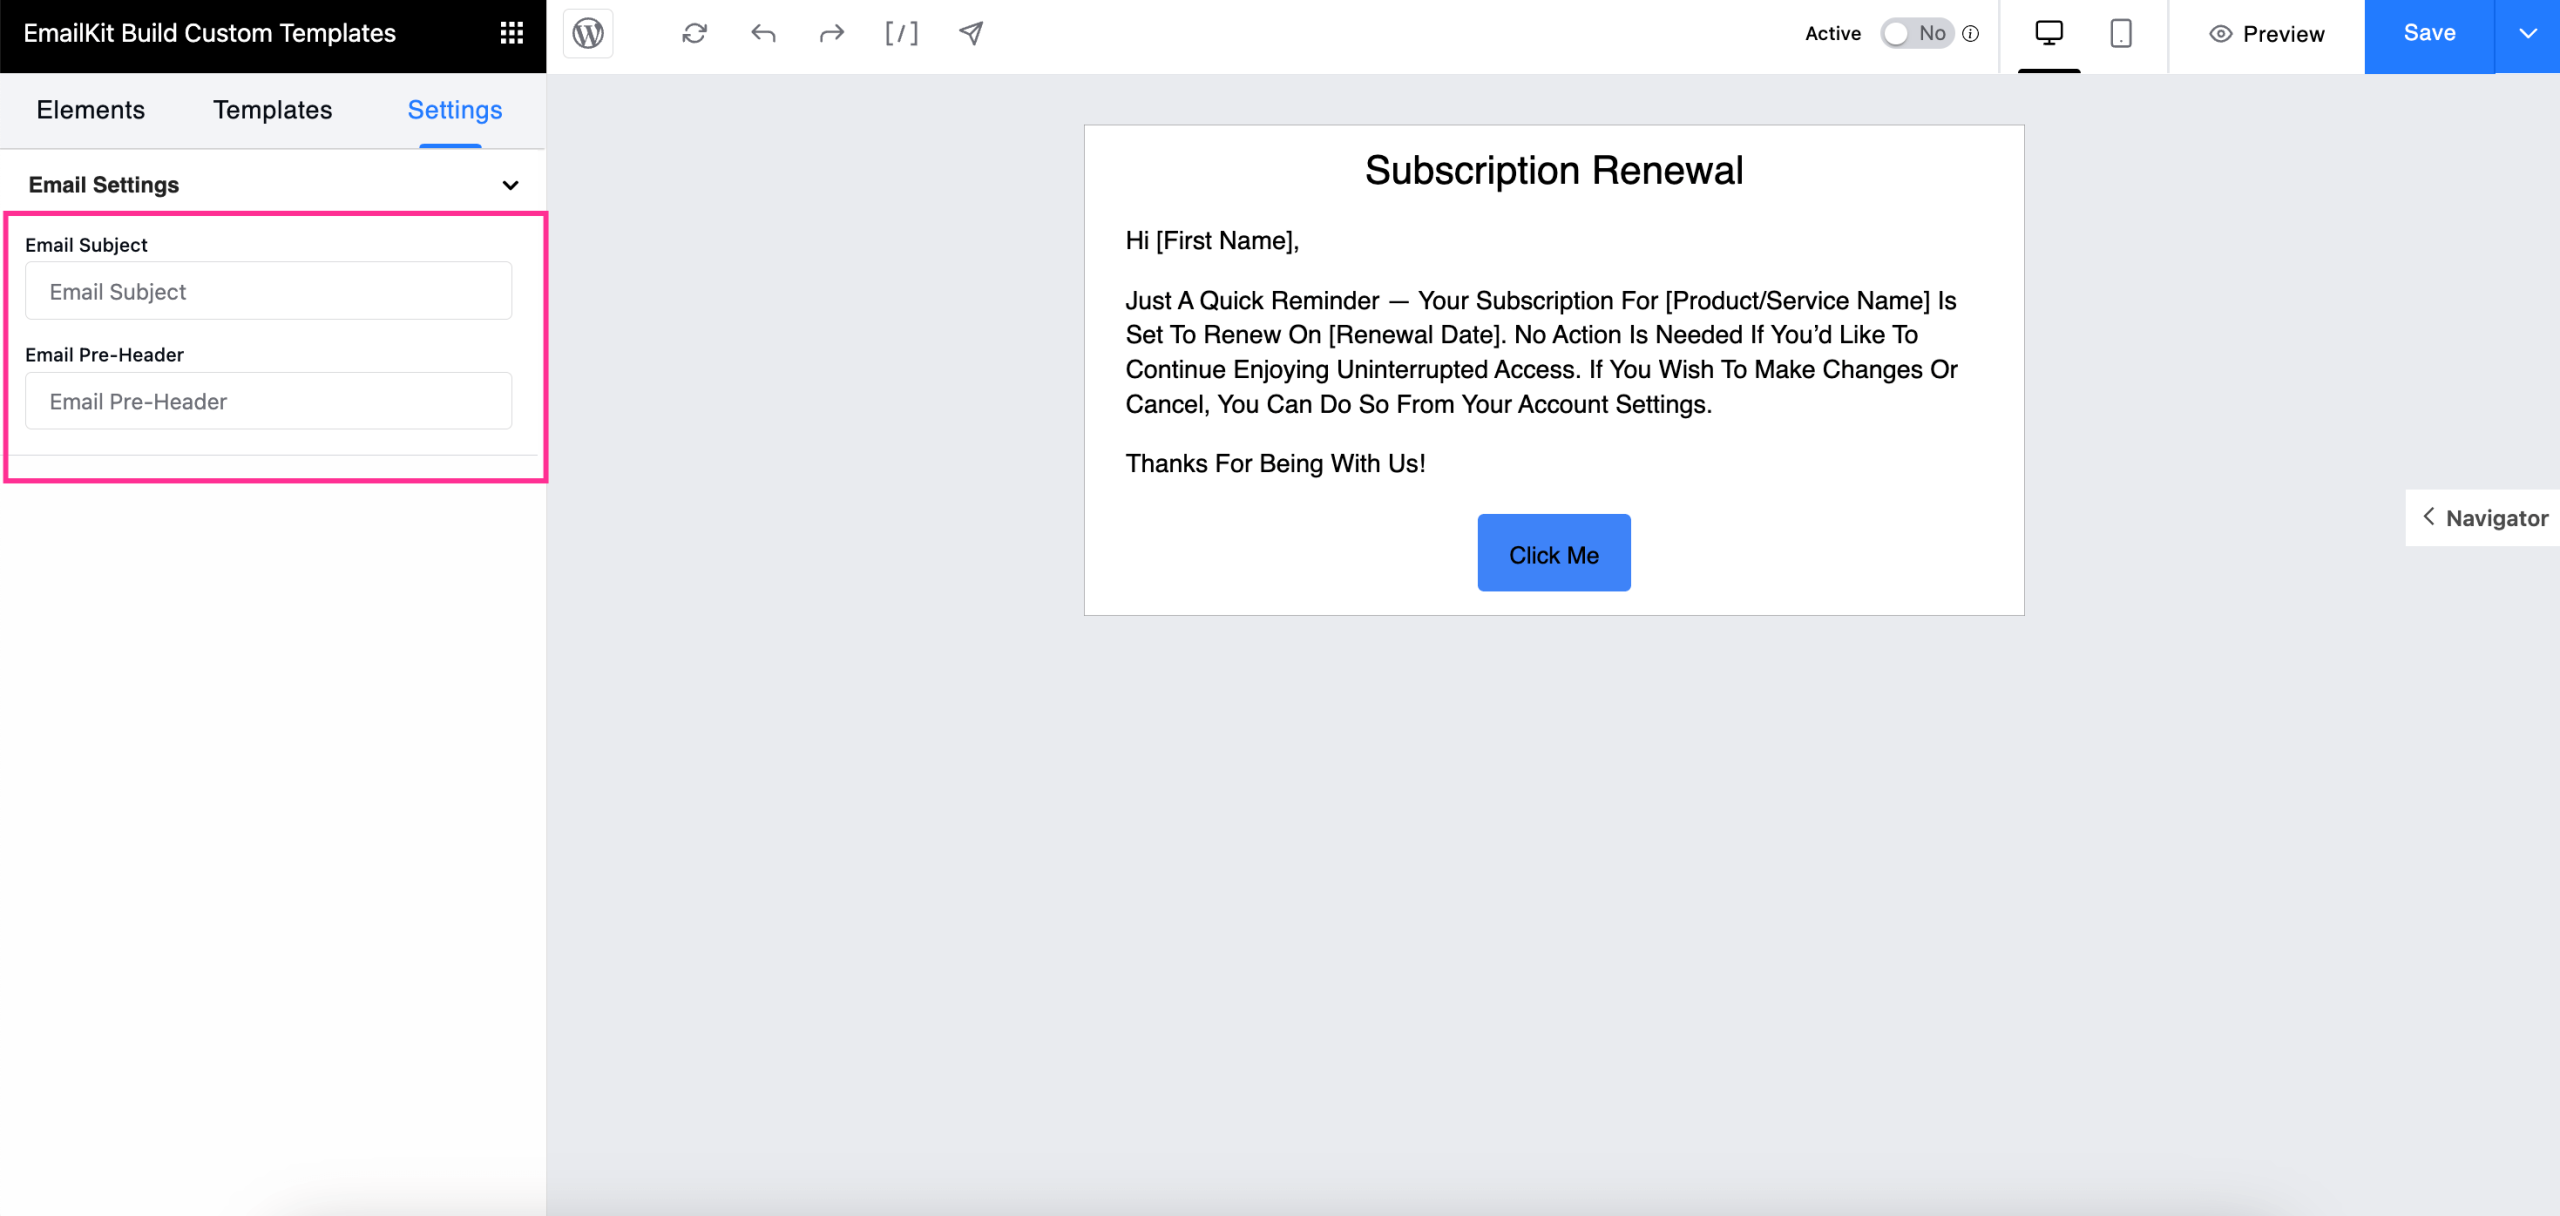
Novamente, você pode set Email Subject e Pre-Header from the Settings tab.
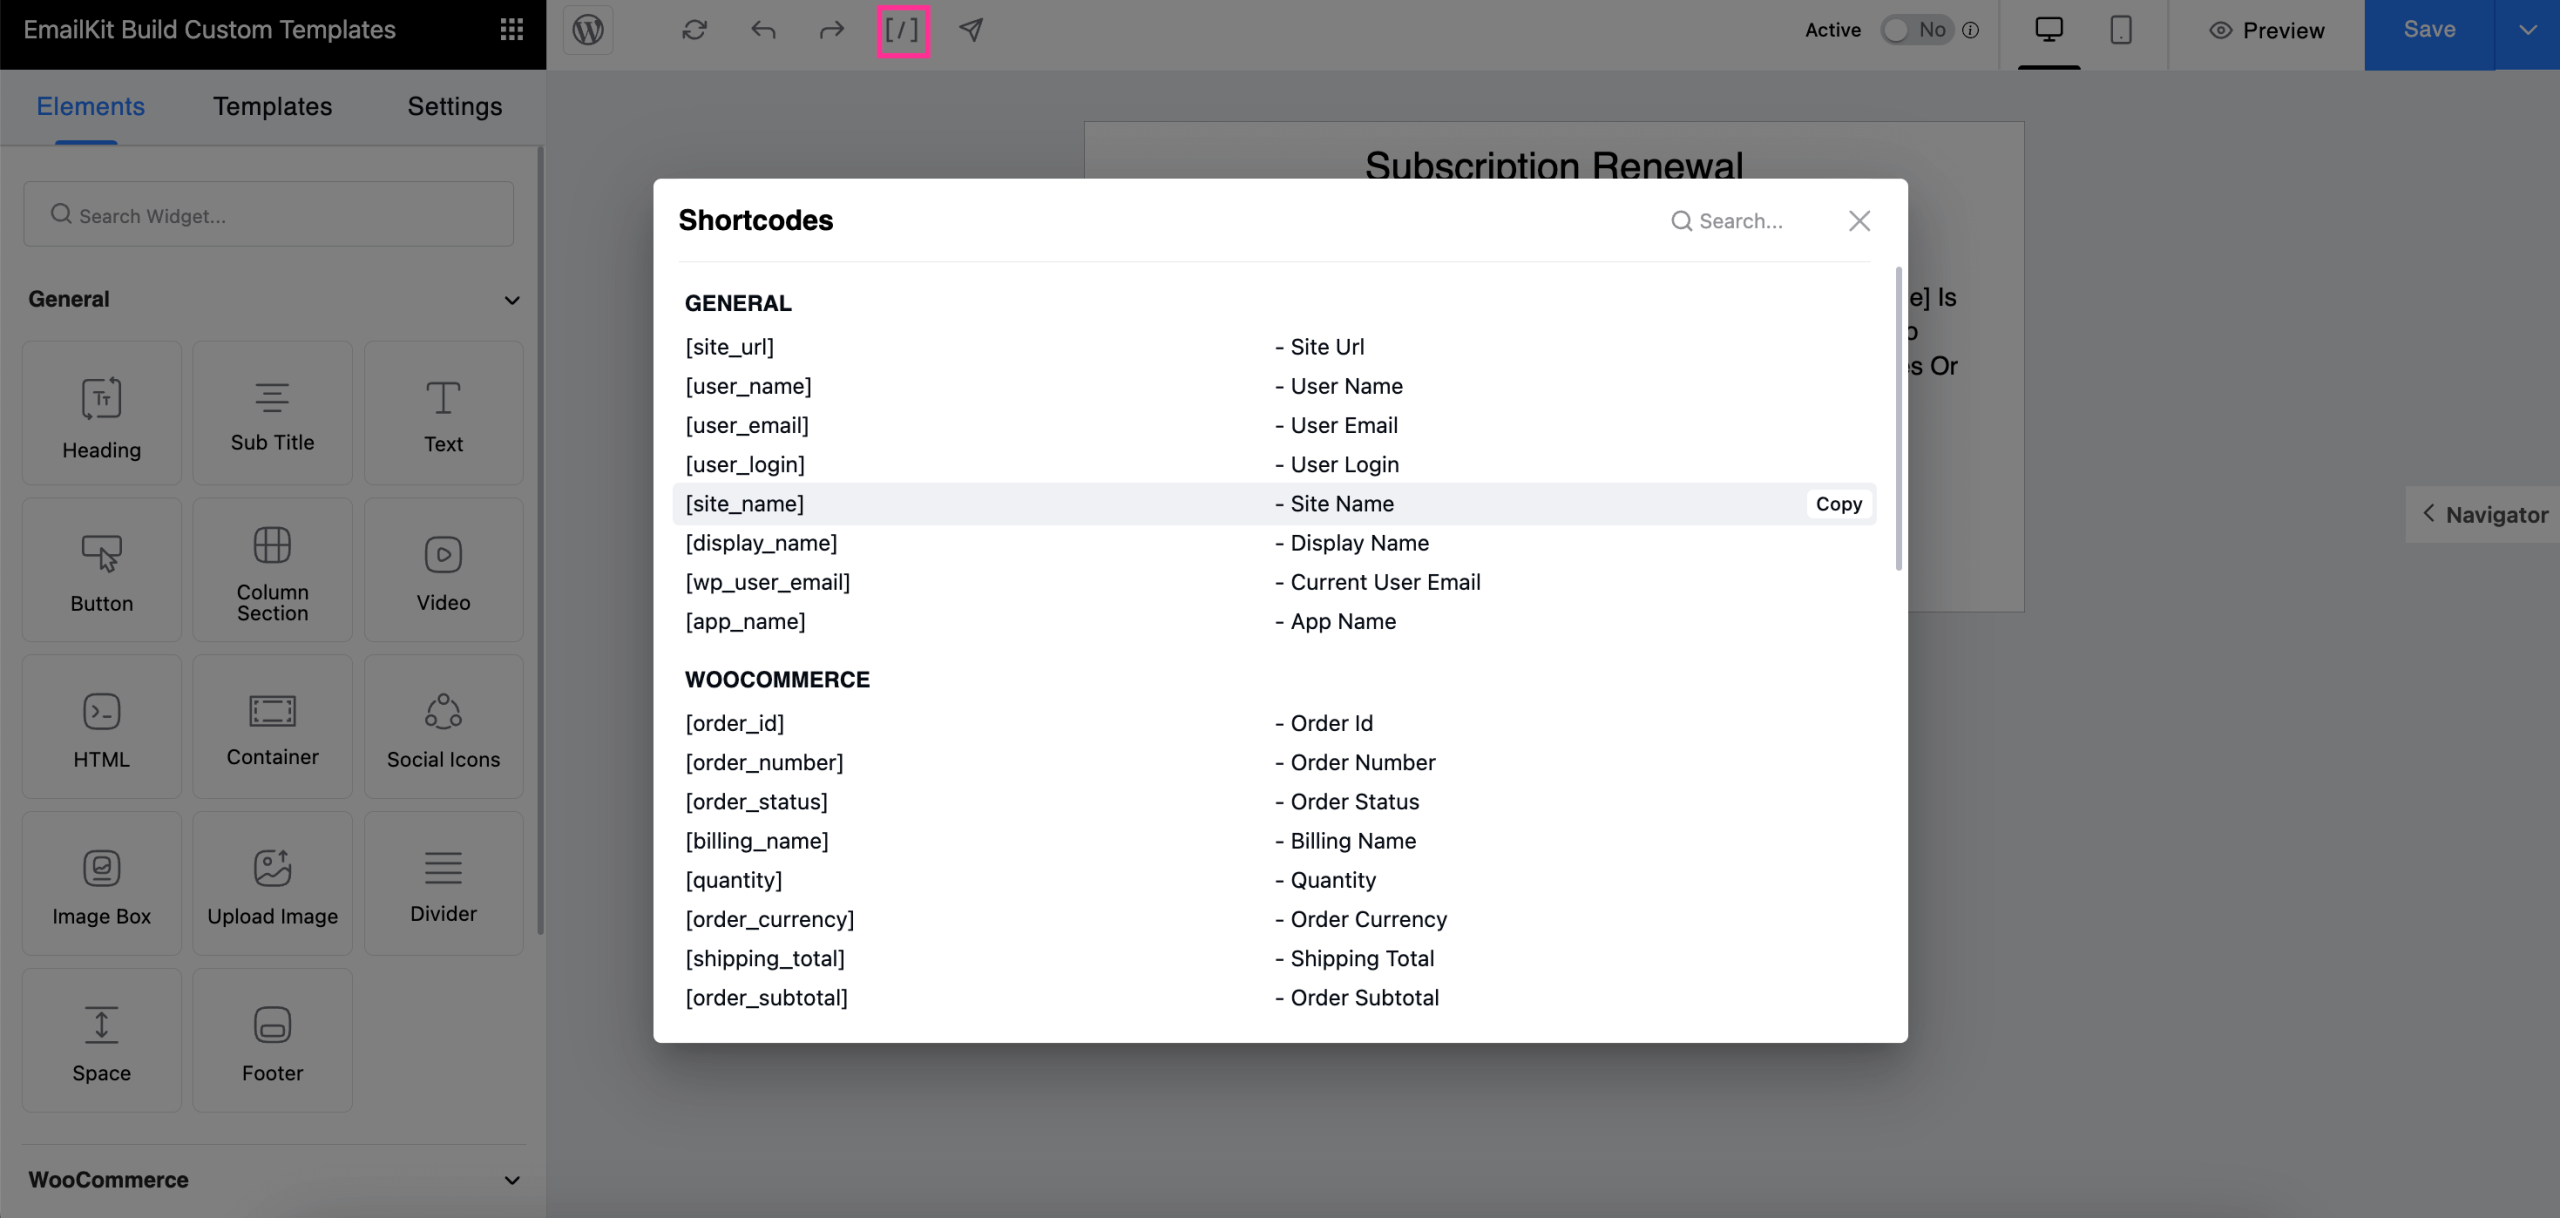
Step 3: Add email fields with shortcodes.
Besides dragging and dropping, you can also add General and WooCommerce email elements with shortcodes. For that, click the shortcode field or [eu] and a tab mentioning all shortcodes will pop up. From here, you can copy the shortcode e adicionar it to your email template.
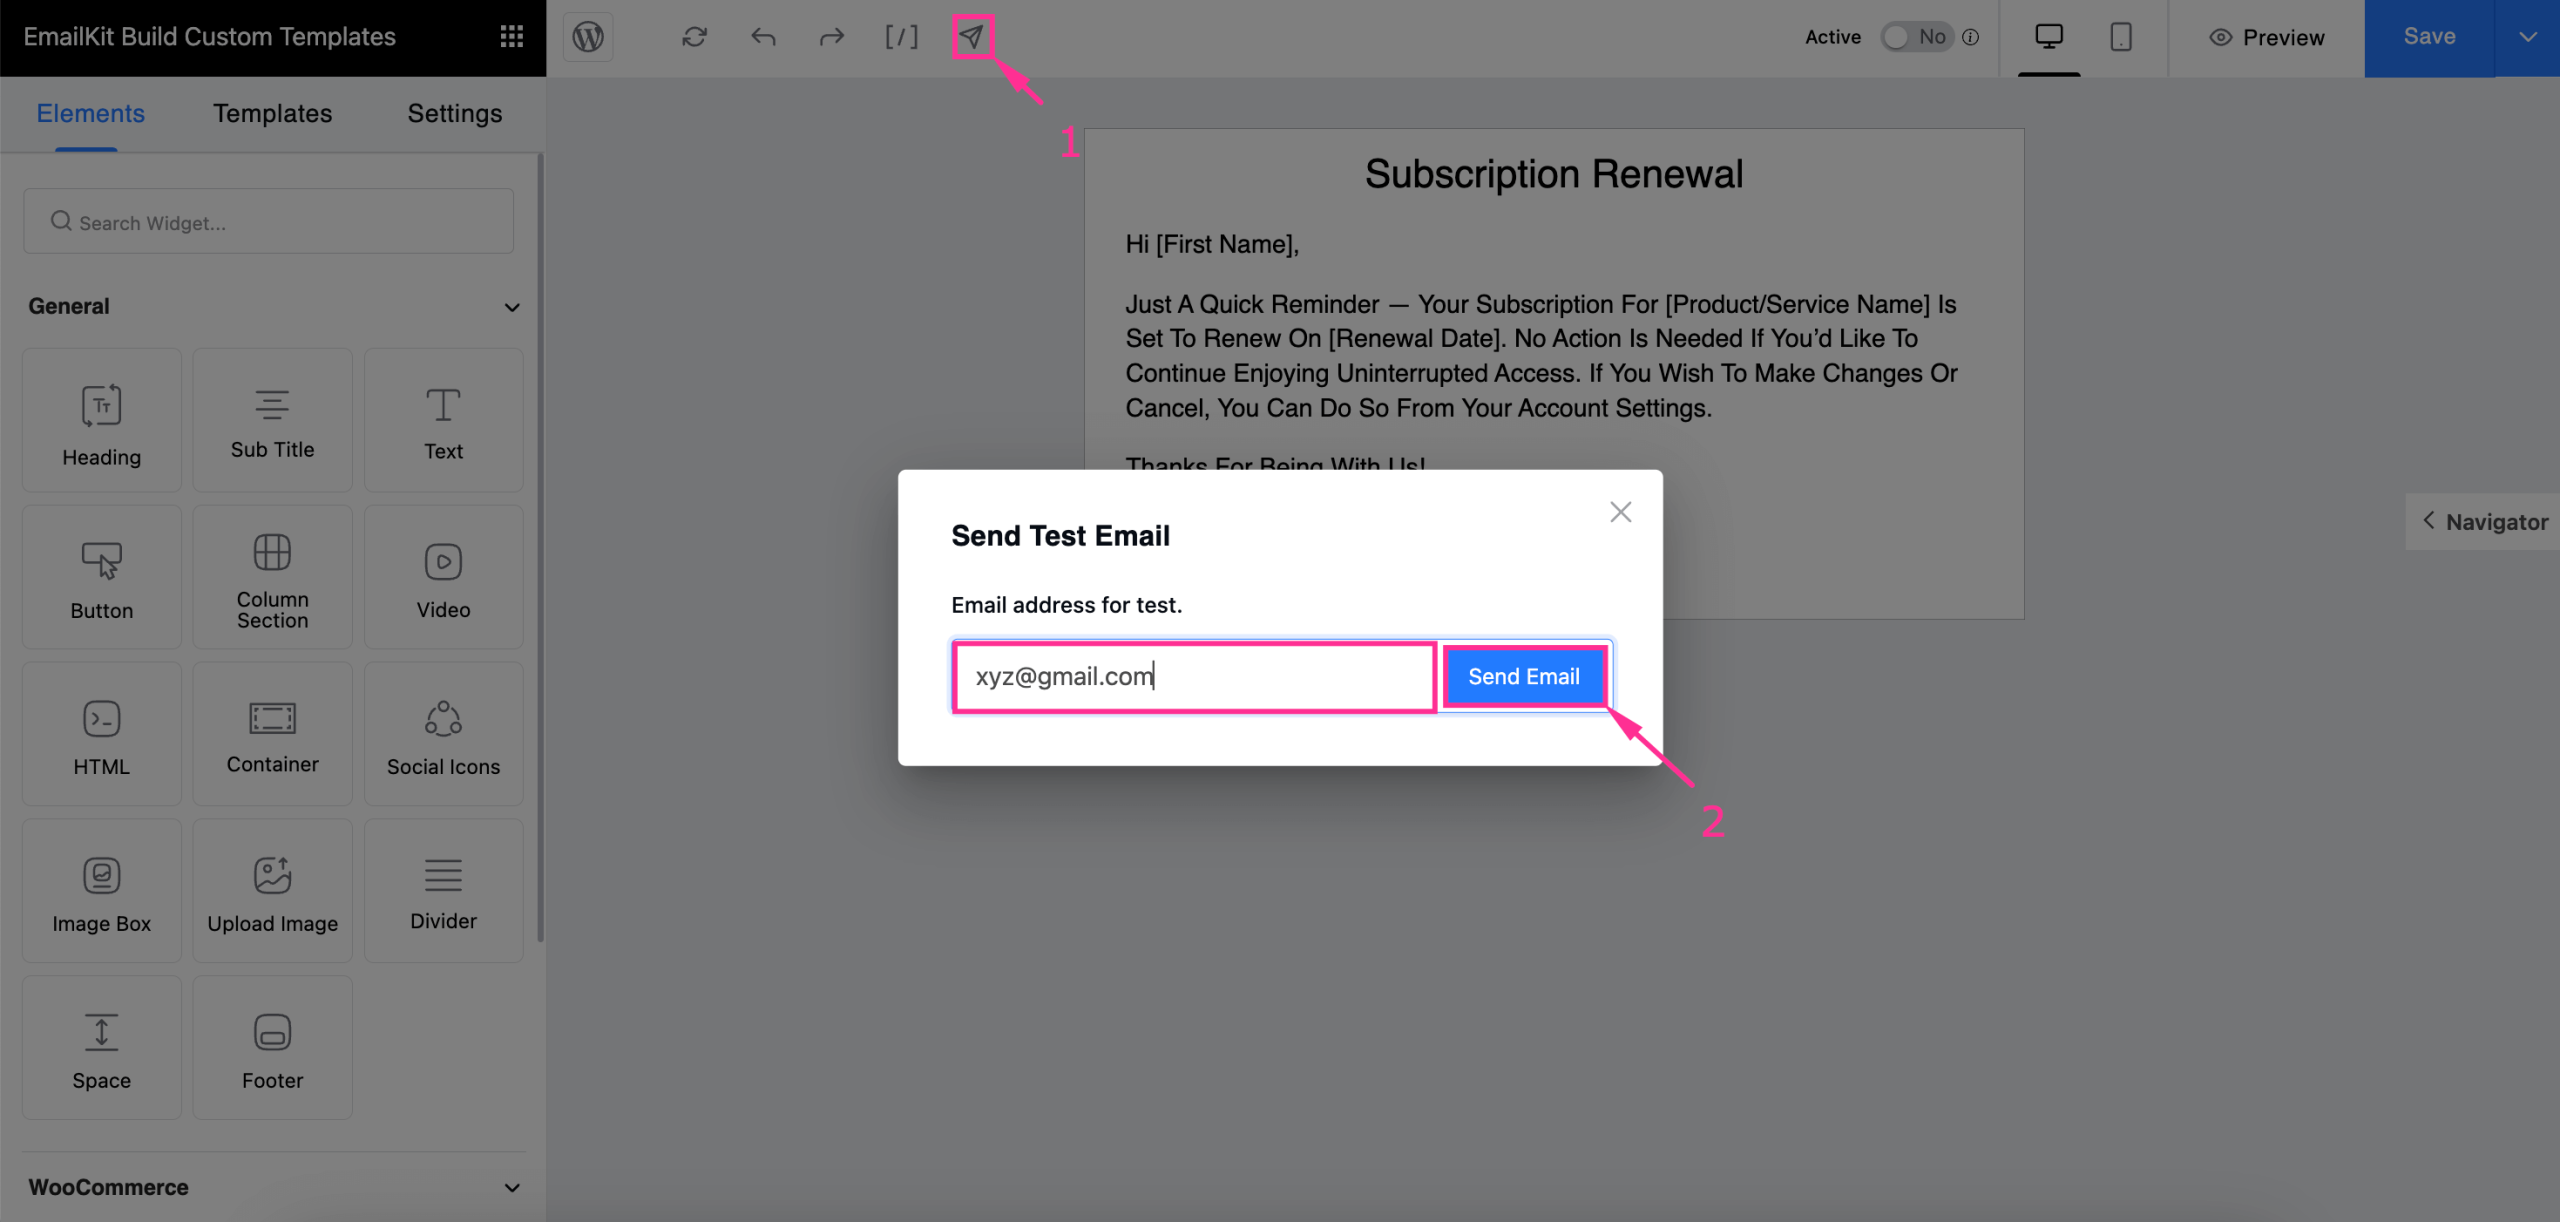
Step 4: Test and preview follow-up emails in WooCommerce.
In the fourth step, you need to test and preview to see how your follow-up emails look on the frontend. First to send the test email, hit the arrow. After pressing the arrow, a tab for entering a test email will be visible.
Agora, enter an email that you want to use for sending a test email. After entering the email address, pressione o botão “Enviar e-mail” button. Thus, you will receive a test email on that address.
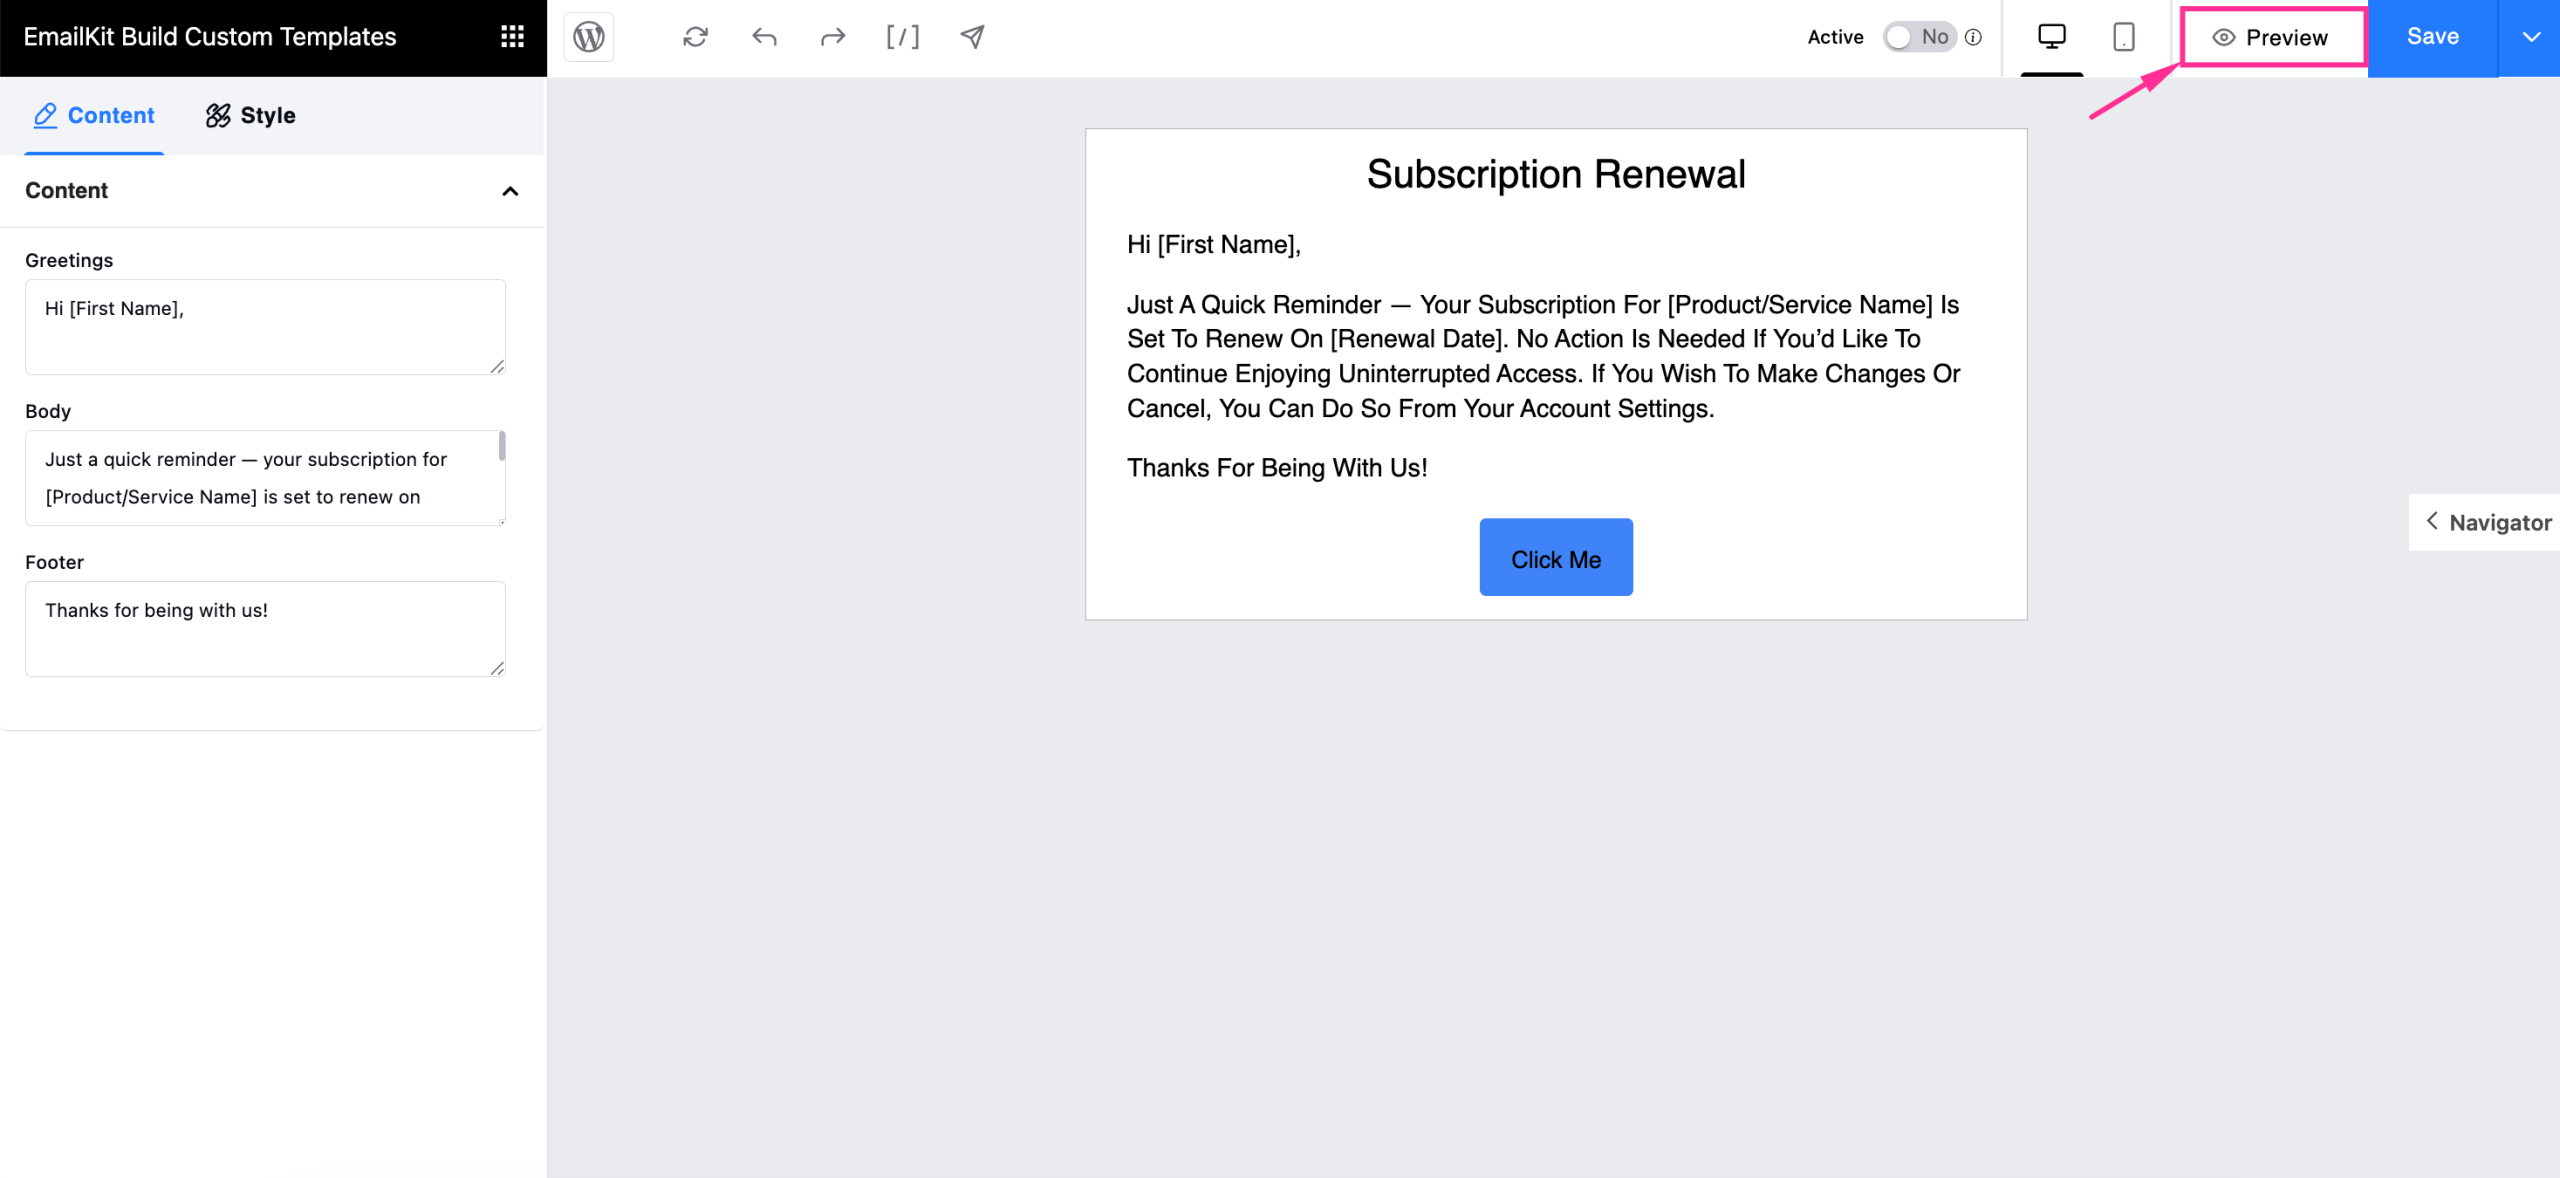
Again, you can preview to check how it appears on the frontend by pressing the Preview button following the image below.
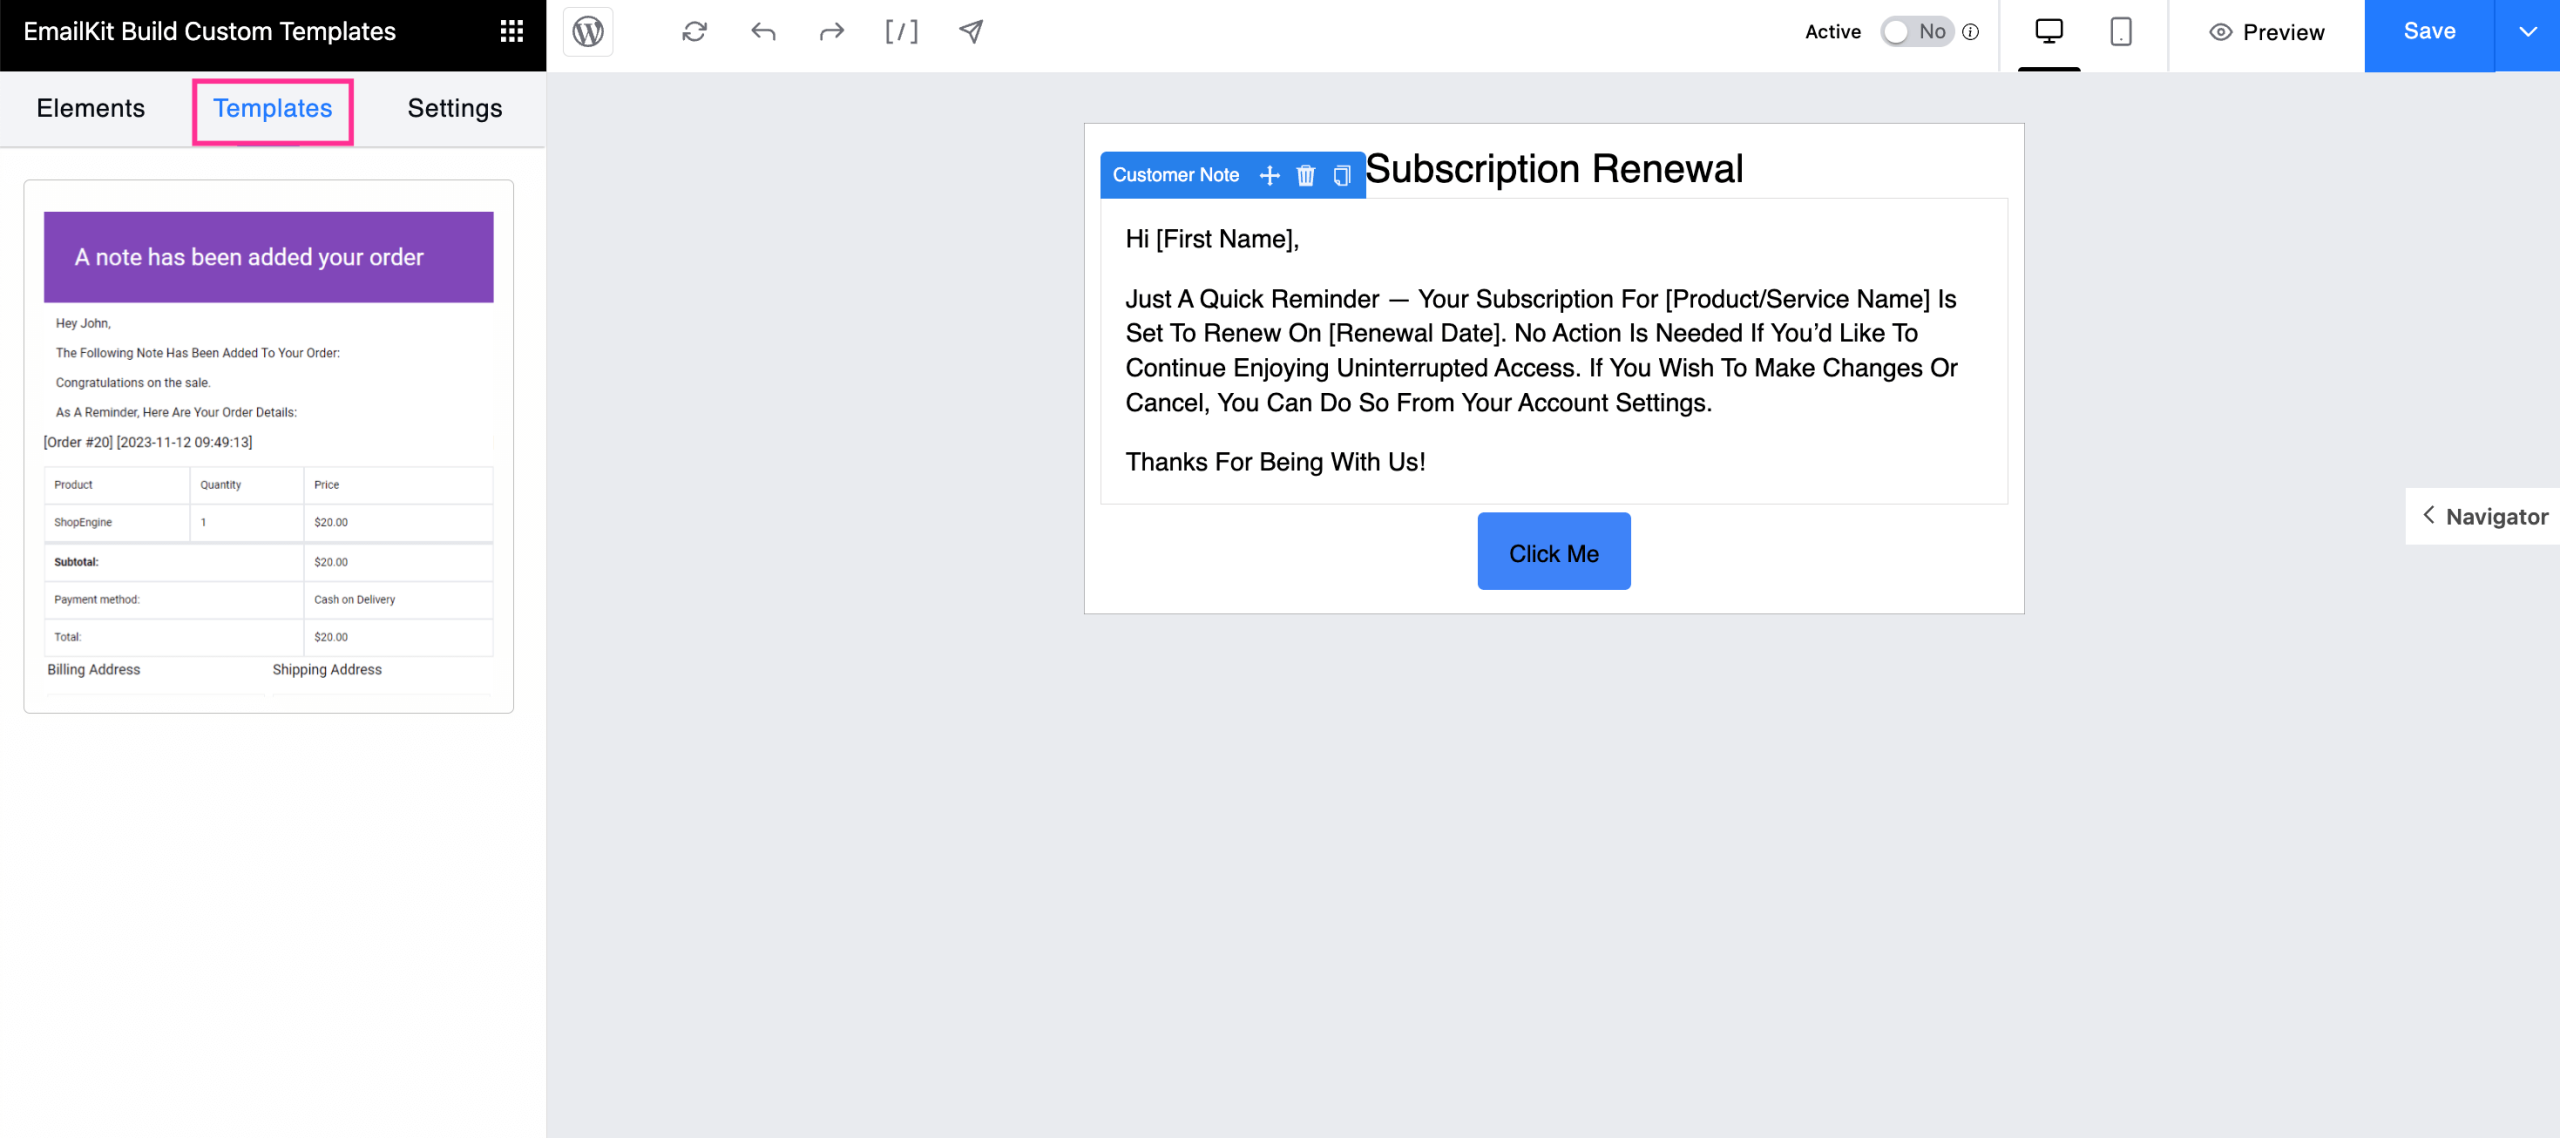
Step 5: Save custom follow-up emails.
In the last step, you need to save custom WooCommerce follow-up emails by pressing the “Save” button. This will store your subscription renewal email for future use which you will find in the Templates tab.
Why run automated follow-up emails on your WooCommerce site?
An automated follow-up email adds significant value to your brand by gradually increasing trust, customer satisfaction, and user experience. Additionally, these automated follow-up emails impact sales and revenue besides improving overall user experience.
Statistics also state the same, your 80% sales need follow-up emails to convert. Here are more reasons to consider running follow-up emails on your WooCommerce site:
- Automated follow-up emails increase repeated orders e reduce the abandoned cart rate.
- These emails simplify workflow by minimizing repetitive tasks.
- They help to nurture leads and convert them into potential customers.
- Both time and effort can be saved by setting up these automated follow-up emails.
- You can proactively coletar feedback de seus clientes.
- Automated follow-up emails deliver a strong brand identity with a personalized shopping experience.
- Customers are more likely to connect with your brand with these personalized and automated follow-up emails.
- These emails improve customers’ satisfaction and boost their engagement.
⭐ Also, check out how to customize WooCommerce emails with shortcodes.
Perguntas frequentes
How to automate follow-up emails in WooCommerce?
You can use WooCommerce automation tools to automate follow-up emails. There are many email automation software in the market that can simplify your automated email sending workflow and bring great results from your campaign.
How to write a follow-up email for a purchase order?
Your follow-up emails for purchase order should start with greetings and then let customers know about the discounts or benefits they can avail if the order is done within certain period.
When should you follow-up on an email?
Follow-up emails should be sent after 3-5 working days. This is the standard time of sending follow-up emails. So, you should keep this time limit in mind while sending follow-up emails.
Empacotando
Converting prospects into customers is not a simple task. It takes a lot to attract, educate, and convert them. Running automated emails plays a crucial role in achieving this goal. Since you have already gone through the complete process, setting these up won’t be a big challenge.
All you need to do is adopt a user-friendly solution like Kit de e-mail and start sending customized automated follow-up emails for increased sales, enhanced customer relationships, and improved brand credibility.

Deixe um comentário