


Feature boxes with icons are one of the easiest ways to highlight services, cechy, Lub benefits on your WordPress website. They not only improve the design of your site but also make important information more visually appealing and easier for your visitors to digest.
In this guide, we’ll walk you through what feature boxes with icons are, why you should use them, and how to add feature boxes with icons in WordPress using Elementor.
Quick Overview
Feature boxes combine an icon, a headline, and a short description to present information quickly and attractively.
Tools Used: Elementor and ElementsKit
Steps To Do:
✅ Enable icon box widget
✅ Open a page and add a feature box with an icon
✅ Customize your feature box with icon
✅ Preview and publish
What are feature boxes with icons in WordPress?
Feature boxes with icons are content blocks that combine text with a simple icon or graphic to convey a message quickly and effectively. You’ll often see them on homepages or landing pages, where businesses use them to:
- Showcase services (e.g., “Fast Delivery,” “24/7 Support”)
- Highlight benefits (e.g., “User-Friendly,” “Secure Payments”)
- Guide users toward key actions (e.g., “Sign Up,” “Get Started”)
In most cases, a feature box includes an Ikona, A headline, and a short description. The combination of visuals and text makes it easier for visitors to scan your content and understand what you offer at a glance.
Why add feature boxes with icons in WordPress?
Adding feature boxes with icons to your WordPress site can make a significant difference. Here’s why:
- Improves readability – Icons break up blocks of text, making information easier to scan.
- Boosts design appeal – Feature boxes create a professional and polished look for your site.
- Increases engagement – Visitors are more likely to interact with visually attractive elements.
- Highlights key points – You can use them to direct attention to your most important features or services.
- Mobile-friendly – Well-designed feature boxes adapt beautifully to smaller screens.
In short, they enhance both the visual design I doświadczenie użytkownika of your WordPress website.
How to add feature boxes with icons using Elementor
Let’s walk through the process of adding feature boxes with icons in WordPress. For this tutorial, we’ll assume you’re using a page builder like Elementor paired with ElementsKit as an Elementor add-on to add feature boxes with icons. This combo makes the process straightforward.
But let’s take a look at why you should choose ElementsKit:
- ElementsKit is an all-in-one Elementor addon that features powerful widgets, including the icon box widget.
- Offers extensive design control, including icon shape and position, multiple hover effects, adjustable padding, margins, I shadows. Also, you can set typografia, kolor, I gradients.
- Integrates with custom SVG uploads to easily add any type of icons.
- Feature boxes are automatically responsive, ensuring icons and texts look great and work well in all screen sizes.
Here’s a step-by-step guide:
Step 1: Enable icon box widget
In your WordPress dashboard, go to ElementsKit and select Widgets. Then look for the Icon Box widget and toggle it to on. After that, save changes.
Step 2: Open a page and add a feature box with an icon
Choose the page where you want to add feature boxes. This could be your homepage, a services page, or even a landing page. Click Edytuj za pomocą Elementora to open the page builder interface.
Once in the editor field, search for the icon box. Make sure that it has an EKit badge. Drag it and drag to the center.
After you add the widget in the editor field, configure the icon box settings:
- Wybierz typ ikony
- Włącz opcję dodawania ikony
- Ikona nagłówka
- Dodaj lub edytuj tytuł
- Dodaj opis edycji
Now, in adding an icon, you have 2 options, either you can select an icon from the icon library or upload an SVG.
For example, you want to add an icon from the icon library. Simply click on the icon library to view different icons. But in this tutorial, we’ll use the icon from the Pakiet ikon ElementsKit.
After you decide what icon you prefer to use, click on the insert button.
Step 3: Customize your feature box with icon
It’s about time to customize your design. You can change the icon size, color, alignment, and even add hover effects using the style and advanced settings sections.
In the style section, you can change the container box layout to normal or hover, change the background type, padding, etc. Also, you can change the layout of your content, such as the padding, spacing, color, typography, etc.
Moreover, you can set the color of your icon as well as add a background overlay. You can enable image overlay or just an overlay.
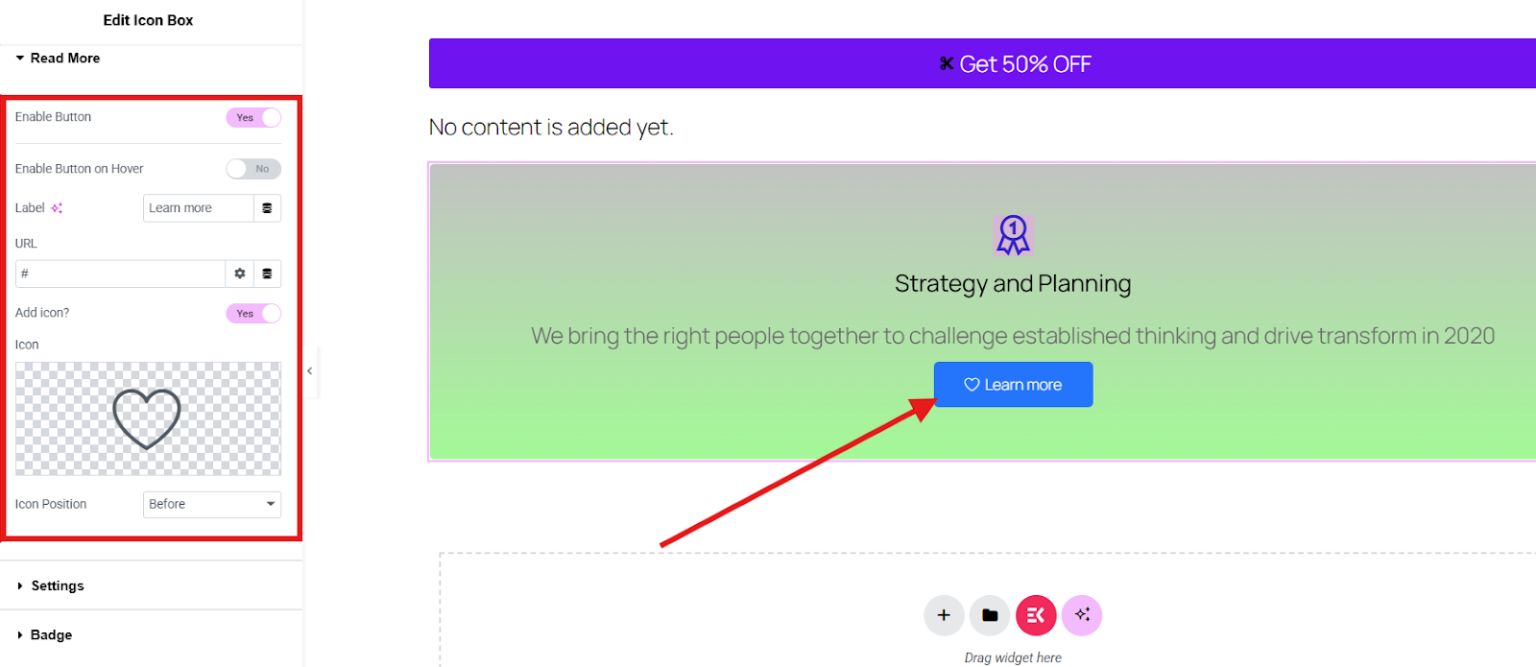
If you want to display lengthy information, you can still do it by enabling the read more button. Open, read more, and enable the button. You can also enable the button on hover and change the button text. Additionally, you can add an icon to your read more box by choosing an icon from the icon library or uploading your own icon.
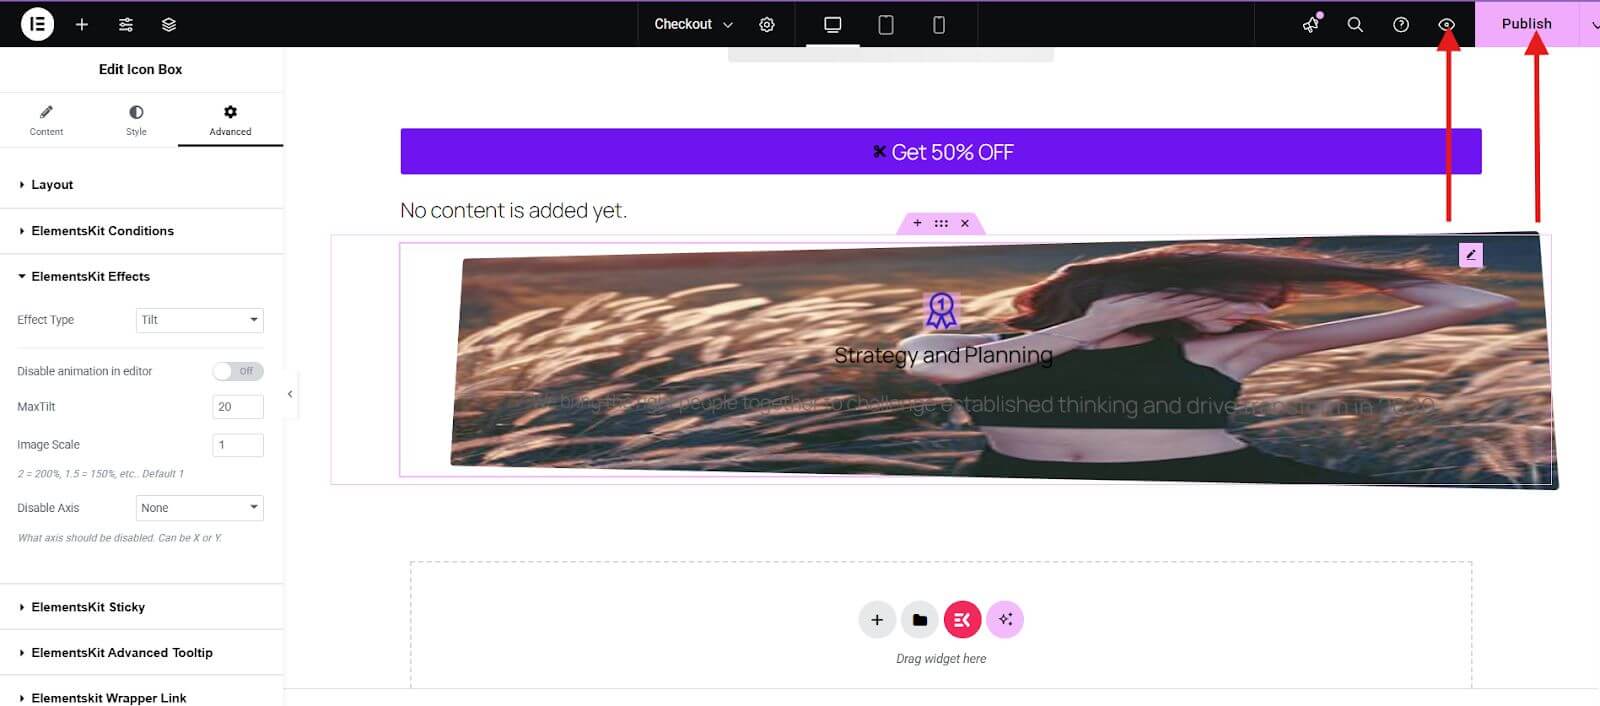
The advanced settings section allows you to level up the appearance of your icon box. Proceed to the advanced settings section and enhance the layout of your icon box, add effects, morfizm szkła, motion effects, elevate background, etc.
For instance, you want to add effects to your icon box. Simply open the ElementsKit effects and choose the effect type from the options:
- CSS3
- Nachylenie
- On scroll
- On mouse move
Just play with the style and advanced settings until you are satisfied with the appearance of your icon box.
Step 4: Preview and publish
Once your feature boxes are ready, click the Zapowiedź button to see how they look on desktop and mobile. If everything looks good, hit Publikować (or Aktualizacja if editing an existing page) to make your changes live.
Często zadawane pytania
Q1: Do you need Elementor pro to add feature boxes with iIcons?
No. The free version of Elementor includes the Icon Box widget, which is enough for basic feature boxes. Elementor Pro, however, gives you more design options and advanced customization.
Q2: Can you use custom icons instead of the default ones?
Yes. Elementor allows you to upload custom SVG icons, so you’re not limited to the built-in library.
Q3: How many feature boxes should you use on a page?
It depends on your content. Generally, three to six feature boxes work best for most designs. Too many can overwhelm users.
Q4: Will feature boxes slow down your Website?
If optimized properly, no. Elementor’s icons are lightweight, and using SVGs helps keep your site fast.

What do you think?
Adding feature boxes with icons is a simple yet powerful way to improve your WordPress website’s design and usability. Whether you’re showcasing services, highlighting benefits, or just making your pages more engaging, feature boxes can make a big difference.
Have you tried adding feature boxes with Elementor yet? Share your experience in the comments below. I’d love to hear your thoughts!

Dodaj komentarz