


This documentation will guide you through the process of integrating Drip z Wyskakujący zestaw. By connecting Drip, you can leverage its powerful E-commerce Revenue Engine to tag, segment, and automate marketing workflows for every lead captured via your WordPress popups.
How to Integrate PoupKit with Drip #
Before you move into our step-by-step process of connecting Drip with PopupKit, this integration feature is part of PopupKit Pro.
So, get the PopupKit Pro version first.
Step 1: Get Drip API Token and Account ID #
To authorize the connection, you will need two pieces of information from your Drip account: your API Token and your Account ID (Optional).
Notatka: In our tutorial, we didn’t need to use the Account ID to connect PopupKit and Drip. But, we’re still showing how to navigate to Account Key since sometimes developers use it to pinpoint exactly which “store” or “account” the data should be sent to within the Drip system, especially if a user has multiple sub-accounts.
- Zaloguj sie dla Twojej Drip account. At first, we need to find our Account ID
- Find Account ID: For this, navigate to Settings > Account.
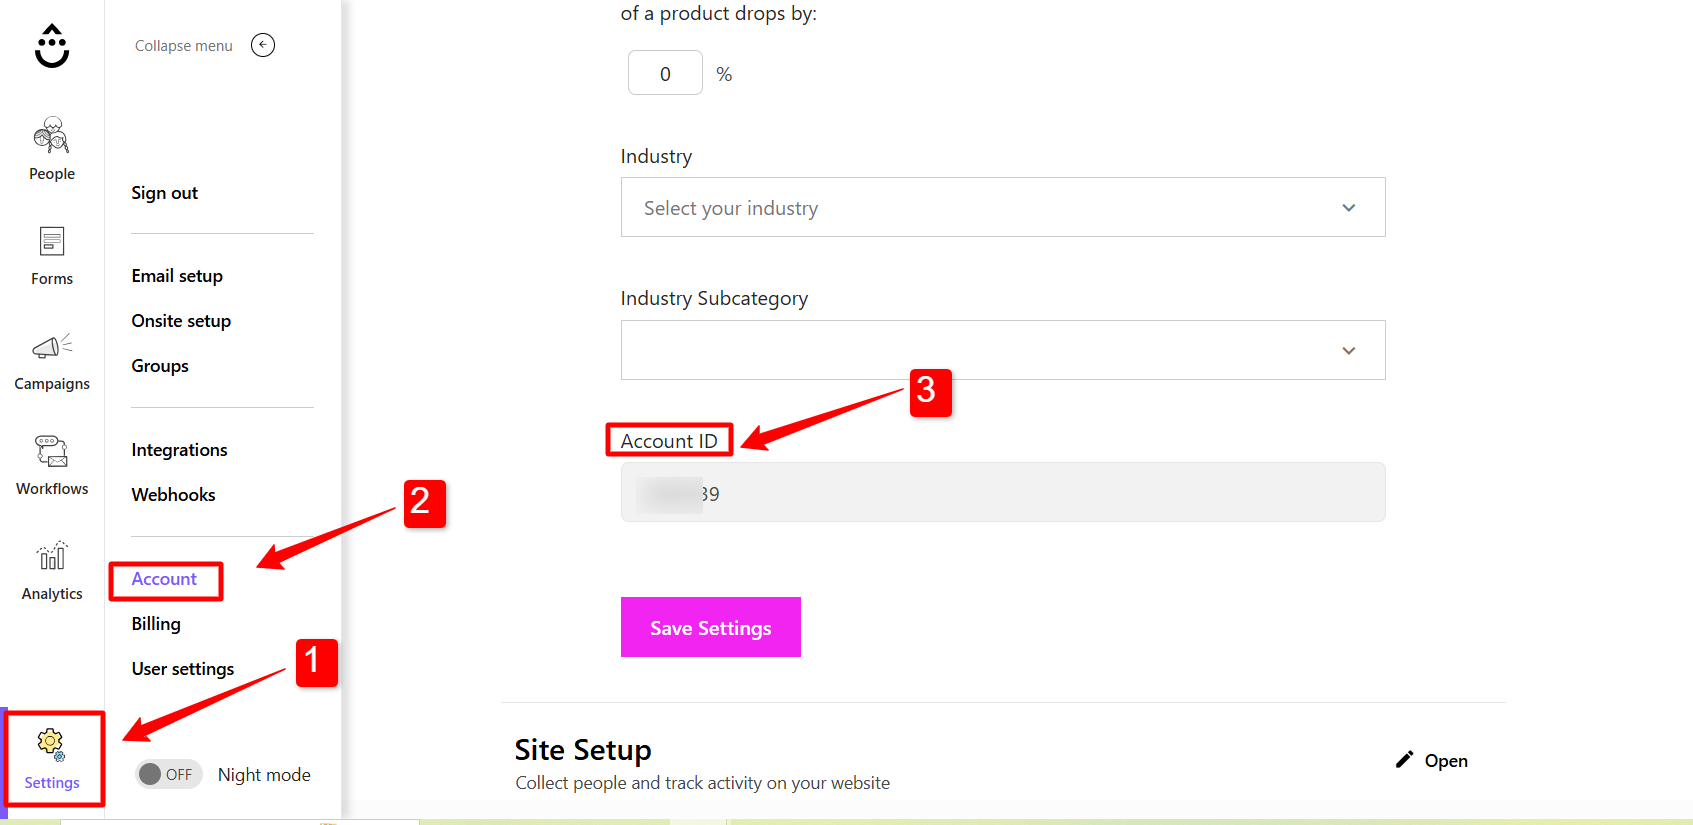
- Look for the General Info section. Your Account ID (a 7-digit number) will be listed there. Copy it. We need this ID for generating API Token.
Find API Token:
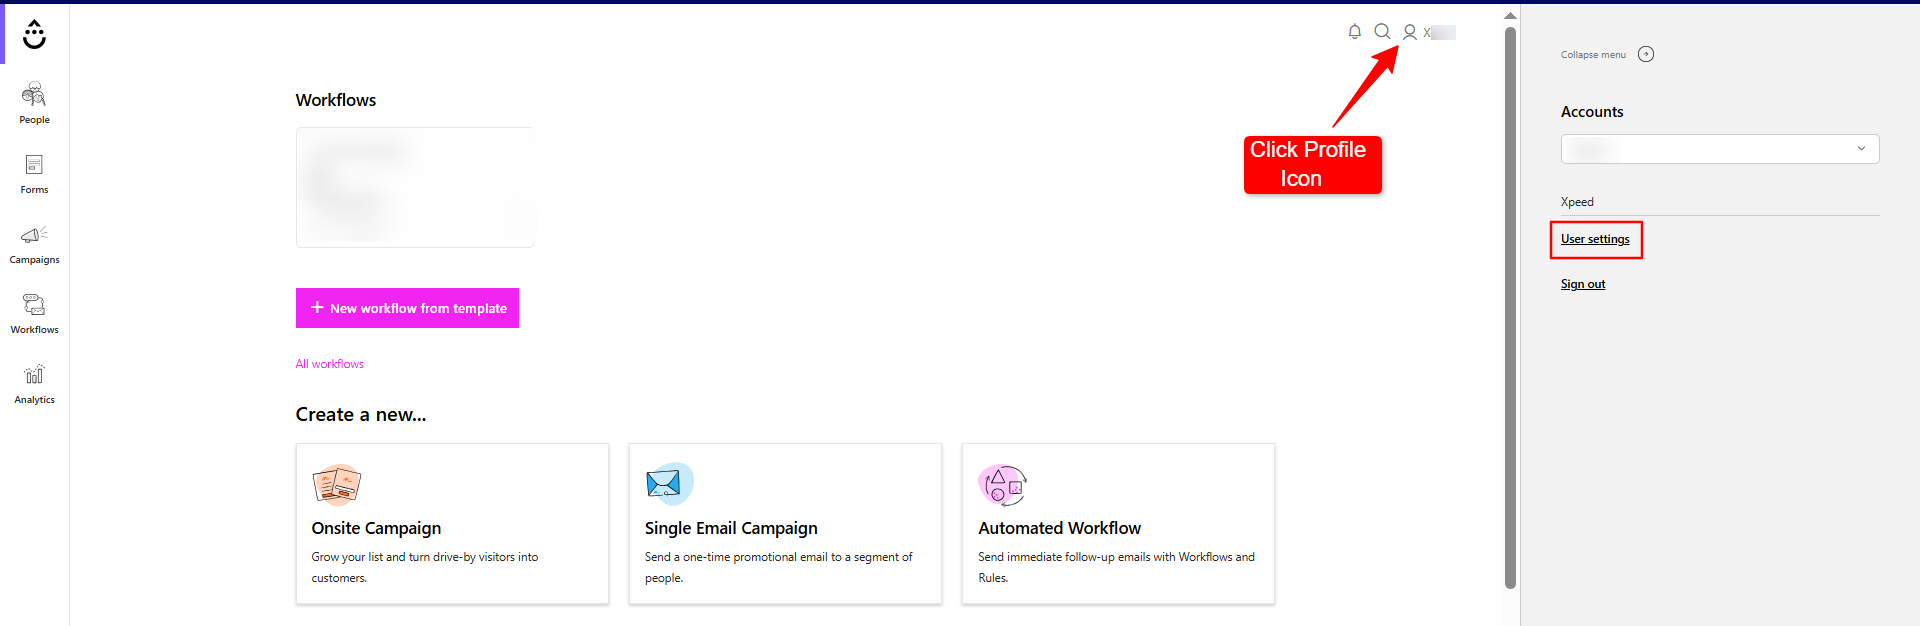
Click on your Profile icon in the bottom-left corner and select User Settings.
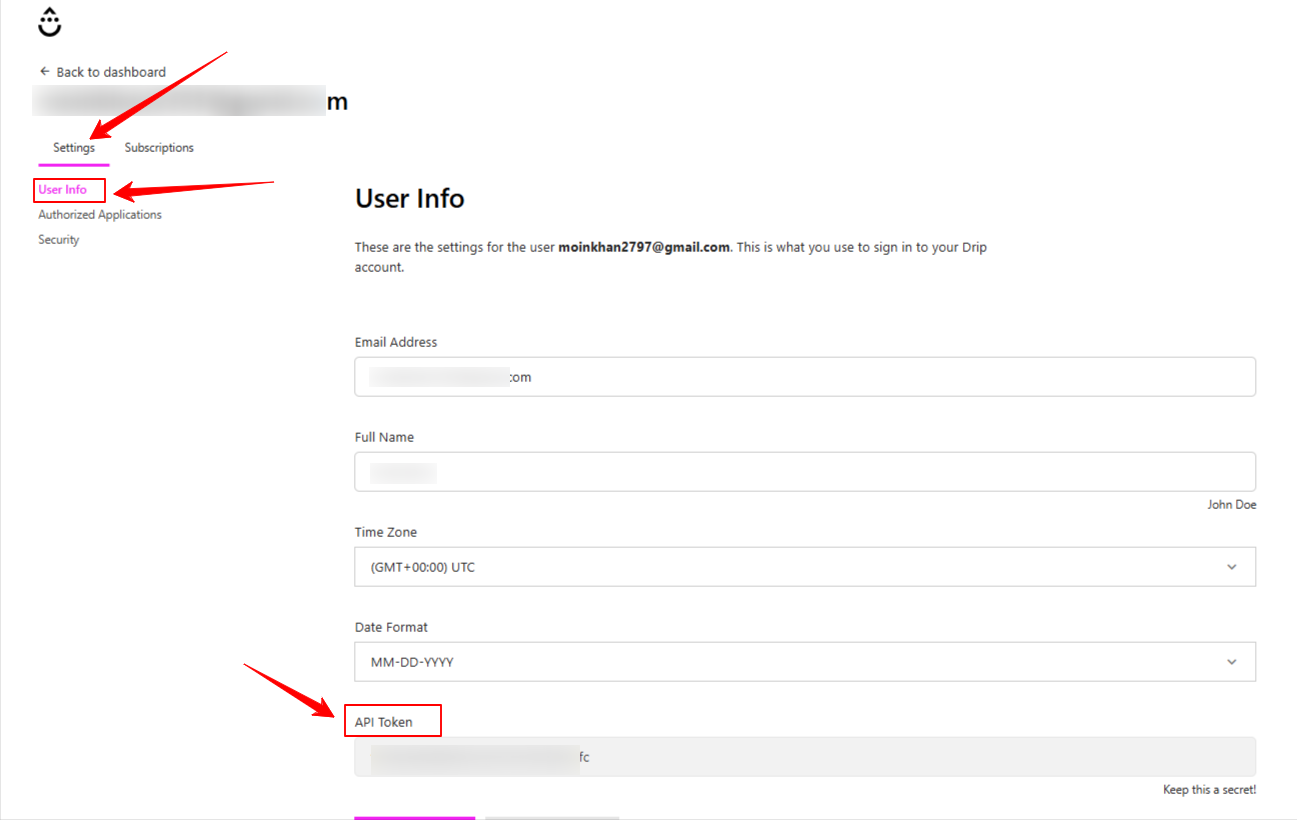
- Scroll down to the API Token Sekcja.
- Copy your unique API Token.
Now, you’ve the API Token for the Drip integration. Let’s append it to PopupKit.
Step 2: Add Drip Credentials to PopupKit Settings #
Once you have your credentials, you need to link them to the PopupKit plugin on your WordPress site:
- Z twojego Panel WordPressa, go to PopupKit > Integrations.
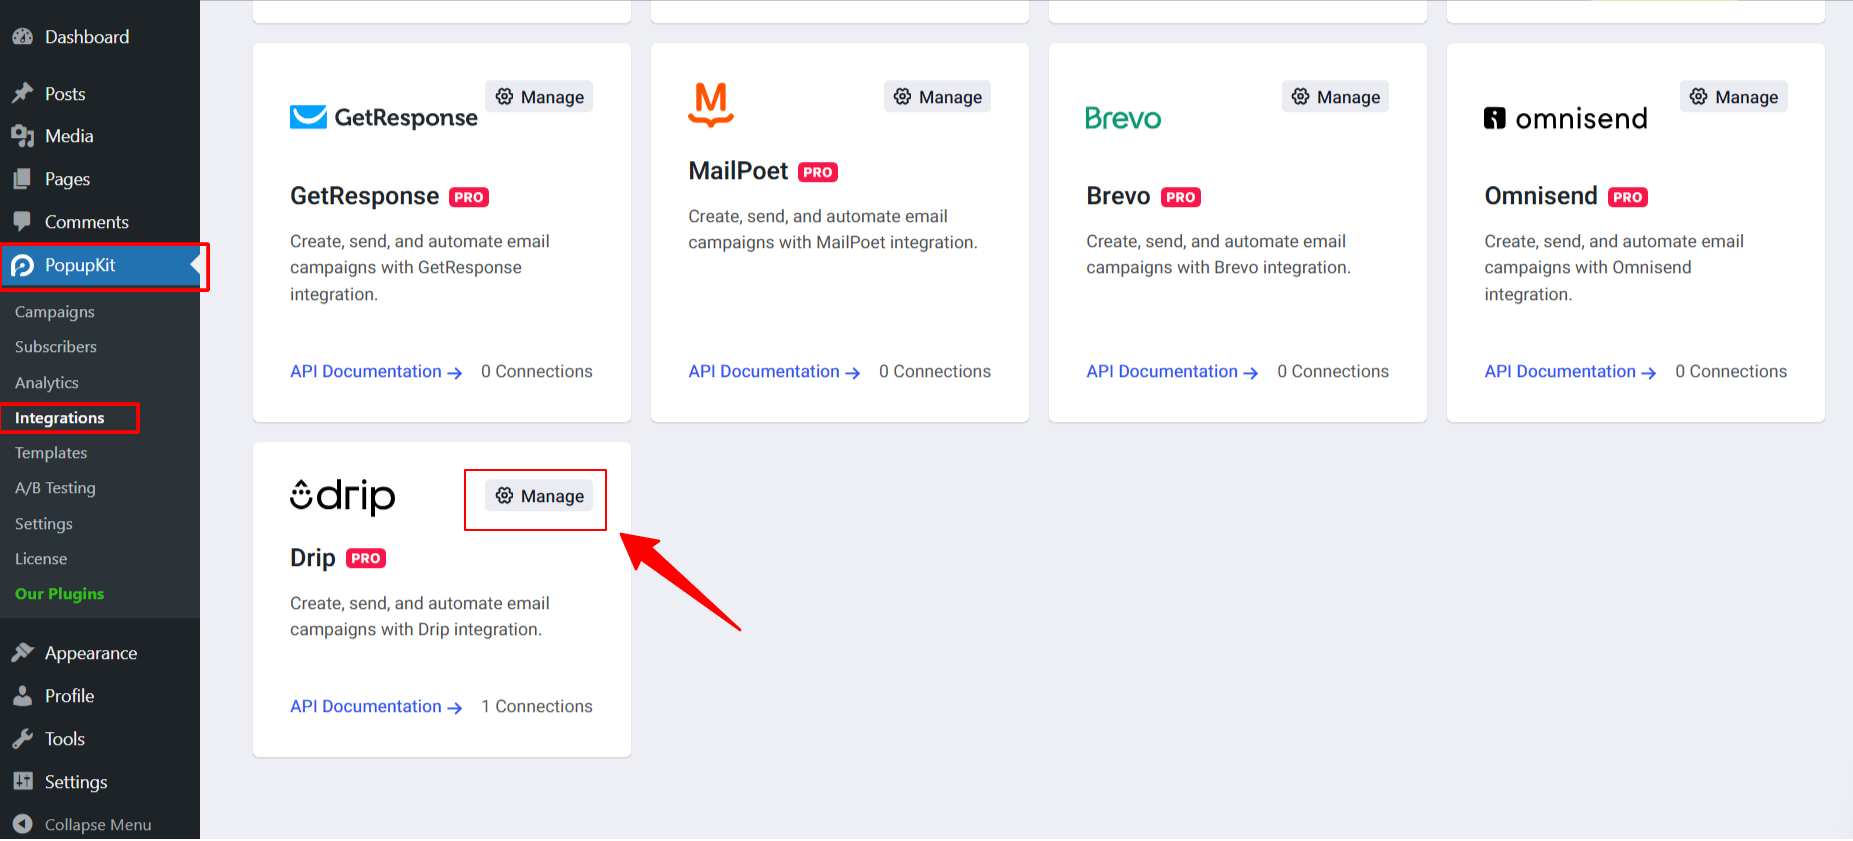
- Znajdować Drip in the list of marketing providers.
- Kliknij na “Manage” option. And, it will open up a popup to attach your Drip Account Name & API Token.
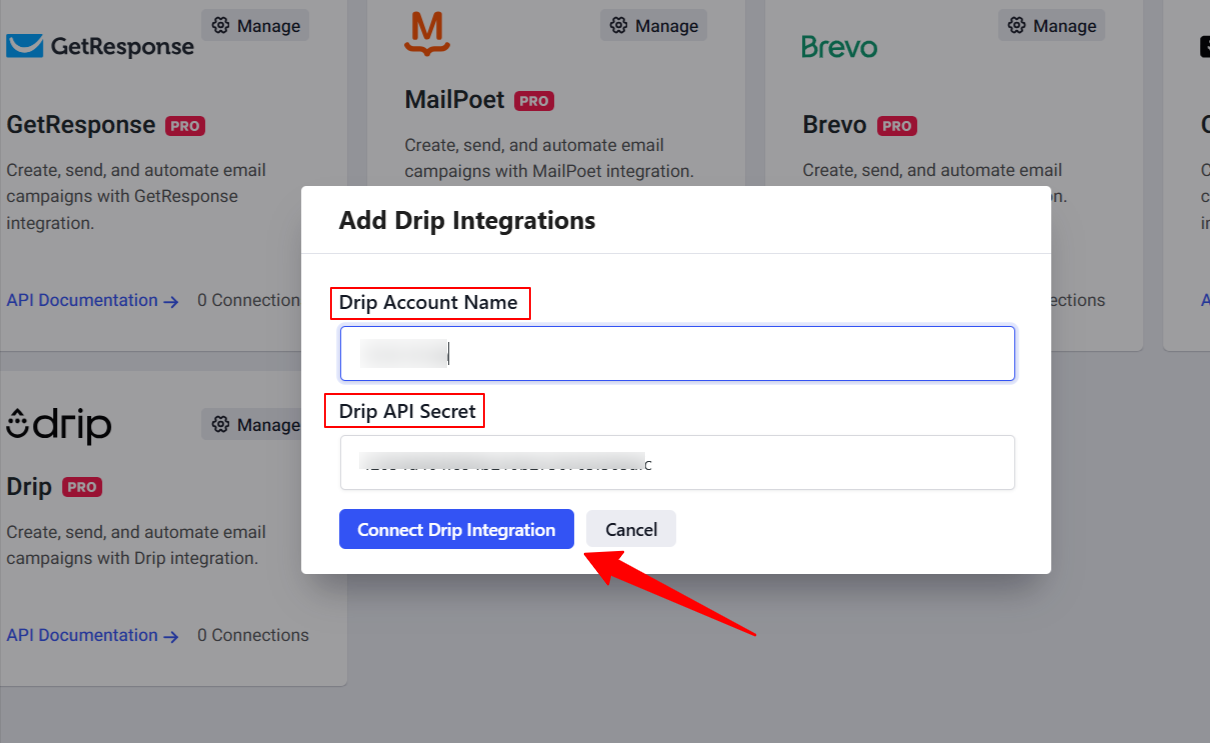
- Paste your Account ID I API Token into the respective fields.
- Then, click Connect Drip Integration to authenticate the connection.
Step 3: Configure Drip in the PopupKit Editor #
After the API Token adding setup is complete, you can configure how a specific popup interacts with your Drip account: let’s see how to do it on the PopupKit editor:
- Nawigować do WordPress Dashboard > PopupKit > Campaigns i kliknij Edytować on your desired popup. But, your popup needs to have a Form block.
- Inside the editor, click on the Formularz block within your popup design.
- On the right-hand settings panel, locate the Integracje Sekcja.
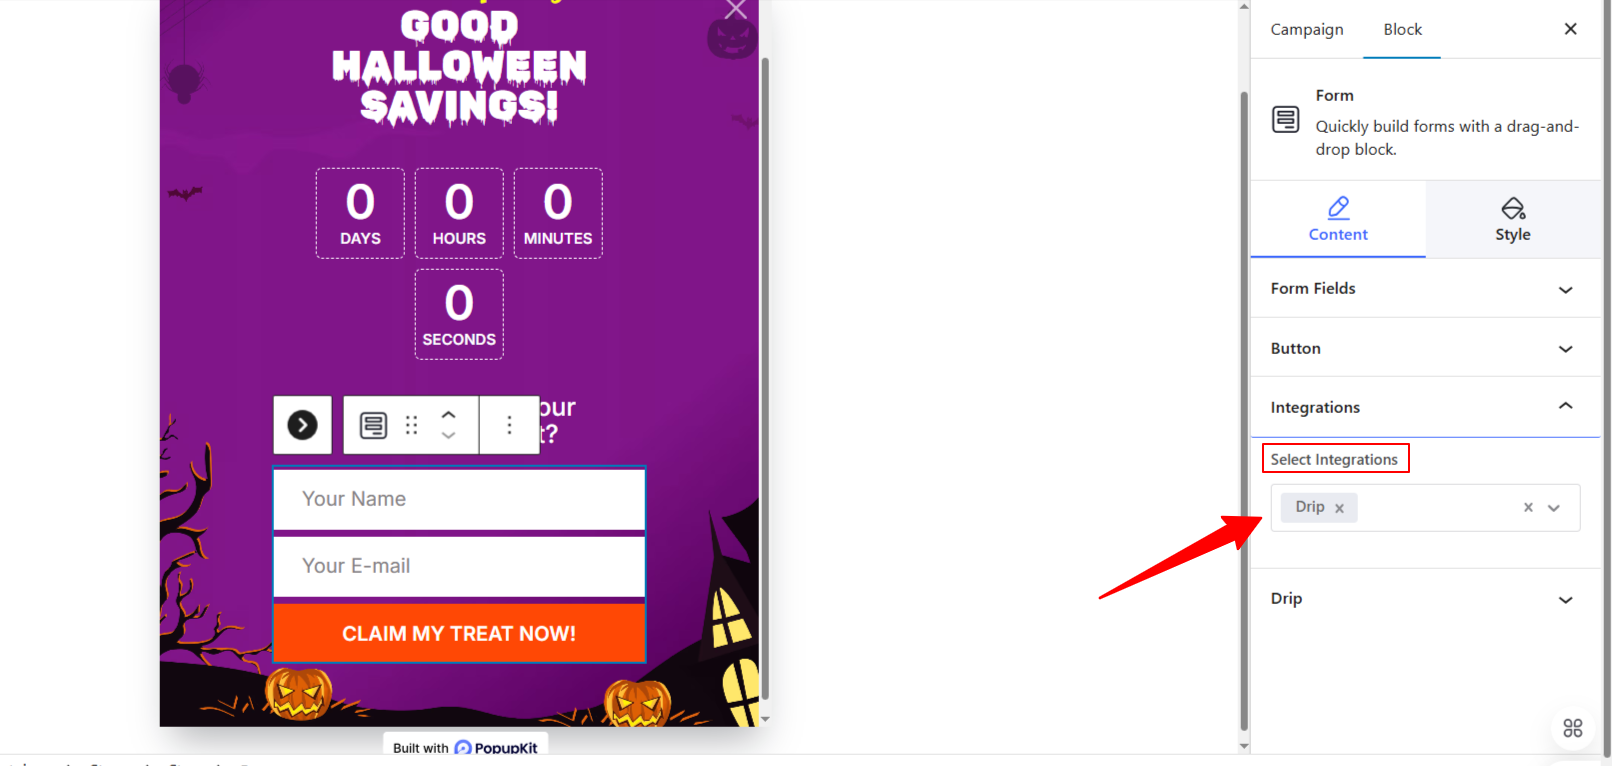
- Wybierać Drip from the “Select Integrations” dropdown.
- Wybierz swój Konto z listy.
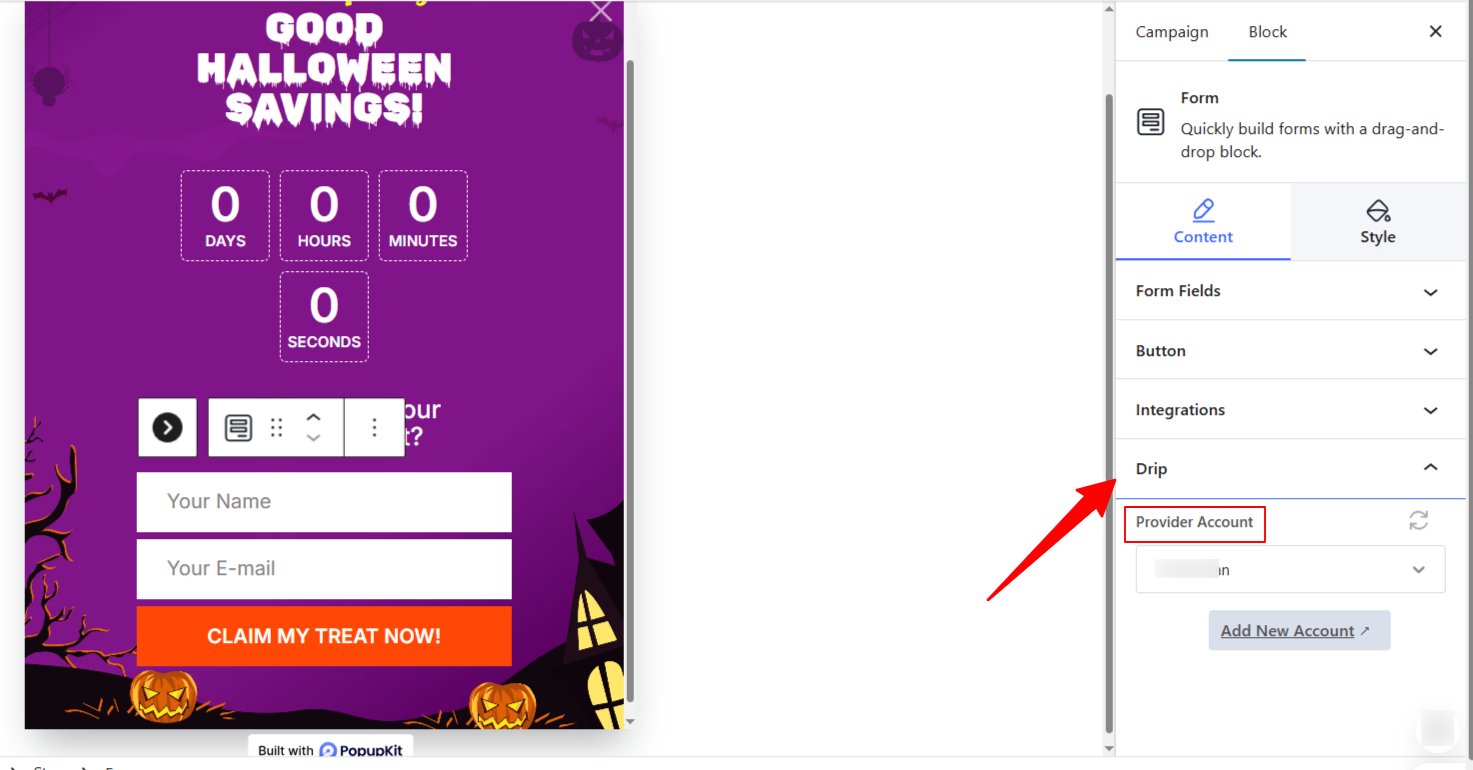
Once you’re done with other setups, publish your popup campaign. And, from now on, you’ll find PopupKit leads to your Drip account, no manual hazards.
Your PopupKit integration with Drip is now live! New subscribers will be automatically added to your Drip account, tagged for segmentation, and ready for your automated journeys.


