Blok sekcji zespołu GutenKit prezentuje cały zespół/grupę/organizację w sposób zwięzły i dekoracyjny w dowolnym miejscu witryny (używany głównie na stronie about/team, a także na stronie głównej). Możesz nawet dodać wyskakujące okienko, aby podać więcej informacji o konkretnym członku. Ten blok Gutenberga jest wyposażony w wszechstronne opcje stylizacji.
Dowiedzmy się, jak utworzyć sekcję zespołu na swojej witrynie Gutenberg.
Jak utworzyć sekcję zespołu na stronie internetowej Gutenberg. #
Krok 1: Dodaj blok zespołu GutenKit #
Zaloguj się do pulpitu WordPress,
- Iść do Strony > Dodaj nową stronę lub rozpocznij edycję istniejącej strony za pomocą edytora bloków.
- Spójrz na "+” ikonę na górze ekranu edytora. Kliknij ją.
- Pojawi się menu bloku, wyszukaj „Zespół GutenKit”.
- Kiedy go zobaczysz, kliknij go lub przeciągnij i upuść na ekranie edytora bloków.
Krok 2: Dodaj informacje o członku zespołu #
Treść członka zespołu: #
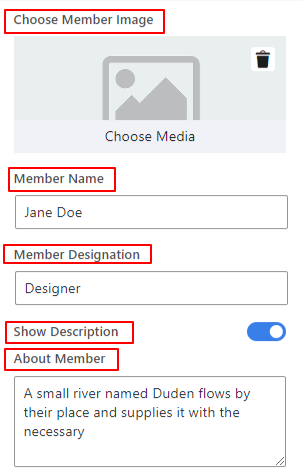

- Wybierz Styl:Dostępnych jest ponad 11 stylów układu dla członków zespołu.
- Wybierz obraz członka: Kliknij ikonę „+”, aby przesłać obraz członka zespołu z biblioteki multimediów lub urządzenia.
- Rozmiar obrazu: Wybierz rozmiar obrazu z listy rozwijanej tego pola.
- Nazwa członka: Wpisz nazwę członka swojego zespołu.
- Oznaczenie członka:Wpisz nazwę członka swojego zespołu.
- Pokaż opis: Włącz ten przycisk przełączający, aby wyświetlić opis członka zespołu.
- O członku:Napisz krótki opis członka swojego zespołu.
Krok 3: Wstaw profile mediów społecznościowych #
Poniższe ustawienia umożliwiają osadzenie profili mediów społecznościowych członków Twojego zespołu w witrynie Gutenberg.
Profile społecznościowe: #
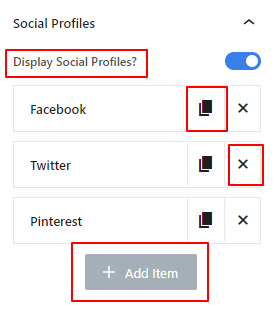

- Wyświetl profile społecznościowe: Wstaw profil społecznościowy członka zespołu. Wyłącz przycisk przełączania, aby nie wyświetlać żadnych profili społecznościowych. Ten blok automatycznie ładuje się z trzema elementami profilu społecznościowego.
Możesz dodać dodatkowe elementy klikając „:+ Dodaj element” lub naciśnij przycisk „X”, aby usunąć jeden. Możesz również skopiować już dostosowany element za pomocą „Przedmiot klonowania" przycisk.
Następnie kliknij na dowolny element, aby otworzyć ustawienia:
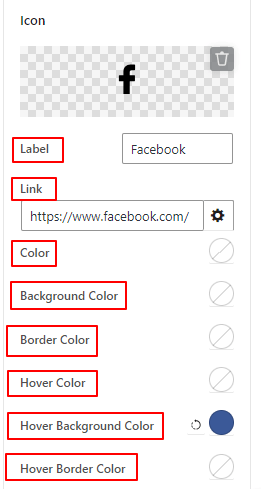

- Etykieta:Wprowadź nazwę kanału mediów społecznościowych.
- Połączyć: Osadź link swojego profilu społecznościowego.
- Otwórz w nowej karcie: Zaznacz to pole, aby otworzyć witrynę mediów społecznościowych w nowej karcie przeglądarki.
- Kolor: Wybierz kolor ikony mediów społecznościowych.
- Kolor tła: Wybierz kolor tła ikony mediów społecznościowych.
- Kolor najechania & Kolor tła po najechaniu kursorem: Użyj tych dwóch ustawień, aby dodać kolor do ikony mediów społecznościowych i tła.
Krok 4: Dodaj wyskakujące okienko #
Tutaj możesz włączyć wyskakujące okienko, które wyświetli więcej szczegółów na temat członka zespołu.
Wyskakujące okienko: #
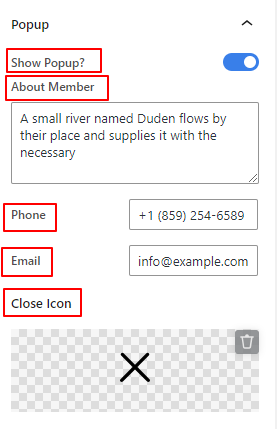

- Pokaż wyskakujące okienko: Włącz ten przycisk, aby wyświetlić dodatkowe informacje o członku zespołu w wyskakującym okienku, gdy użytkownik kliknie na wizerunek członka zespołu.
- O członku:Napisz krótką notkę biograficzną o członku zespołu.
- Telefon: Dodaj numer telefonu członka zespołu.
- E-mail:Wprowadź adres e-mail członka zespołu.
- Zamknij ikonę: Dodaj ikonę z biblioteki lub prześlij własną, aby zamknąć okno podręczne.
Krok 5: Styl zawartości tekstowej #
Treść: #
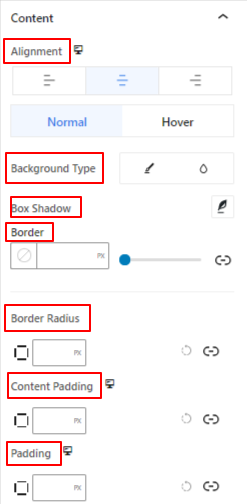

- Wyrównanie: Umieść profil zespołu po lewej, na środku lub po prawej stronie.
- Typ tła: Wybierz pomiędzy jednolitym kolorem a tłem gradientowym
- Pudełko Cień:Uwielbiaj sekcję członków zespołu, stosując efekty cienia.
- Granica & Promień granicy:Te ustawienia umożliwiają kontrolę koloru, szerokości, stylu, zaokrąglenia itp. obramowania.
- Dopełnienie treści: Dodaj spacje wokół obszaru zawartości.
- Wyściółka: Dodaj spacje wokół profilu zespołu.
Obraz: #
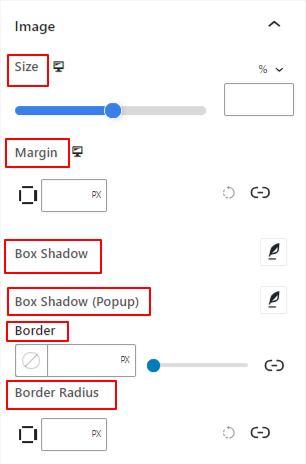

- Rozmiar: Użyj suwaka lub podaj wartość niestandardową, aby dostosować rozmiar obrazu.
- Margines: Kontroluj przestrzeń wokół wizerunku członka swojego zespołu.
- Pudełko Cień: Dodaj efekty cienia wokół obrazu.
- Cień pudełka (wyskakujące okienko):Dodaj animację cienia pola do wyskakującego okienka z informacją o członku zespołu.
- Granica: Użyj tego obszaru ustawień, aby określić szerokość, kolor i styl obramowania.
- Promień granicy: Dostosuj zaokrąglenie obramowania.
Zobaczysz te same opcje ustawień dla Nazwa, Przeznaczenie, I Opis.
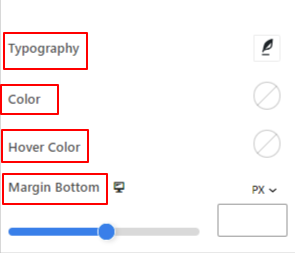

- Typografia: Uzyskaj wszystkie elementy sterujące związane z typografią, takie jak rodzina czcionek, rozmiar, grubość, przekształcenie, styl, zdobienie, odstępy między literami, odstępy między wyrazami i wiele innych.
- Kolor: Dodaj preferowany kolor tekstu.
- Kolor najechania: Wybierz kolor, po najechaniu kursorem na tekst.
- Margines dolny: Dostosuj odstęp między poniższymi typami treści. Na przykład zdefiniuj odstęp między oznaczeniem a opisem.
Profile społecznościowe: #
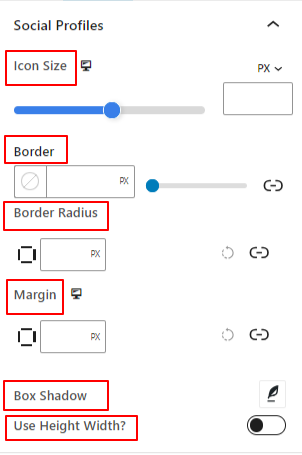

- Rozmiar ikony: Użyj tego suwaka, aby dostosować rozmiar ikony mediów społecznościowych.
- Promień granicy:Ustaw promień obramowania ikon społecznościowych.
- Margines:Określ lukę między ikonami mediów społecznościowych.
- Użyj opcji Wysokość Szerokość: Włącz ten przycisk, aby kontrolować wysokość i szerokość ikony mediów społecznościowych.
Okno dialogowe: #
W tym obszarze ustawień otrzymasz wszystkie funkcje do stylizacji wyskakującego okienka. Tutaj wybierzesz typ tła. I dostosujesz Nazwę, Stanowisko, Opis, Telefon i E-mail.
Ikona zamknięcia okna pop-up: #
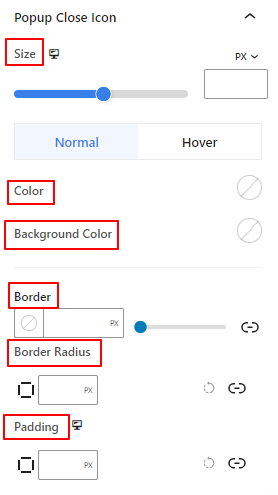

Użyj tego obszaru ustawień, aby dostosować rozmiar ikony zamykania, jej kolor, kolor tła, odstęp i wszystkie ustawienia obramowania.
Krok 6: Ustawienia zaawansowane #
Na karcie Ustawienia zaawansowane możesz skonfigurować układ bloku Sekcji zespołu, tło, style obramowania i kontrolować jego widoczność.
Układ, #
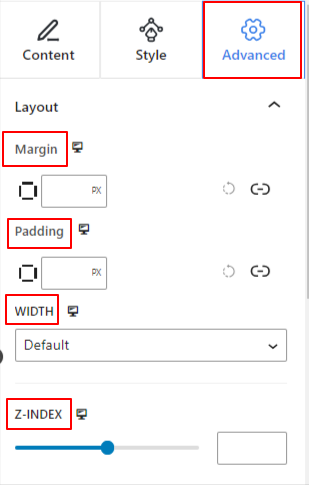

- Margines: Określ przestrzeń wokół układu blokowego. Pomaga ustawić odstęp między innym blokiem.
- Wyściółka: Wprowadź wartość, aby ustawić przestrzeń wokół bloku w jego układzie.
- Szerokość: Oprócz zachowania domyślnej szerokości układu.
- Pełna szerokość: wybranie tej opcji spowoduje, że układ będzie obejmował całą szerokość ekranu.
- W linii (automatycznie): Po zastosowaniu będzie miał taką samą szerokość jak element blokowy.
- Zwyczaj: Wybranie tej opcji spowoduje wyświetlenie suwaka umożliwiającego zdefiniowanie poziomej przestrzeni układu bloku.
- Indeks Z: Użyj suwaka, aby określić kolejność stosu bloku z innymi blokami.
Pozycja: #
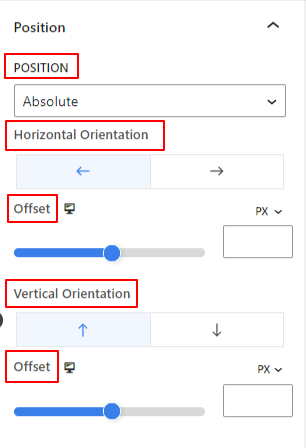

W menu rozwijanym zobaczysz trzy opcje: Domyślny, Absolutny, I Naprawił.
- Absolutny: Wybranie tej opcji zapewni Ci absolutną pozycję bloku, co oznacza, że elementy będą pasować do ich pojemnika.
- Naprawił: Opcja Stała pozycja pozwoli elementowi zmieścić się w całej rzutni lub ekranie.
Obie opcje, Absolutna i Stała, mają podobne ustawienia, jak poniżej:
- Orientacja pozioma: Wybierz kierunek pozycjonowania pomiędzy lewą i prawą stroną.
- Zrównoważyć: Użyj suwaka lub wprowadź wartość ręcznie, aby dostosować poziome położenie bloku.
- Orientacja pionowa: Wybierz kierunek pozycjonowania w górę lub w dół.
- Zrównoważyć: Użyj suwaka lub wprowadź wartość ręcznie, aby dostosować pionowe położenie bloku.
Tło: #
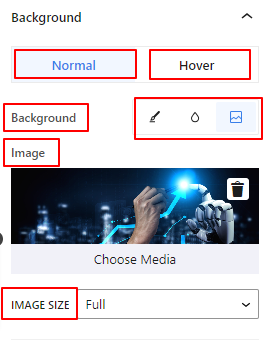

- Tło: wybierz opcję tła pomiędzy jednolitym kolorem, gradientem lub obrazem.
W opcji Najedź:
- Obraz: Jeśli wybierzesz opcję obrazu, pojawią się następujące opcje:
- Obraz: wybierz obraz z biblioteki multimediów lub prześlij własny.
- Rozmiar obrazue: Wybierz rozmiar obrazu pomiędzy Miniaturą, Średnim, Dużym lub Pełnym.
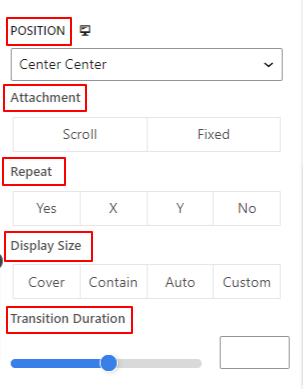

- Pozycja: Wybierz położenie 10 różnych opcji.
- Załącznik: Określ relację stałego lub przewijanego obrazu tła z resztą ekranu przeglądarki.
- Powtarzać: wybierz opcję, aby ustawić sposób powtarzania obrazów tła.
- Rozmiar wyświetlacza: Wybierz rozmiar wyświetlacza spośród czterech różnych opcji.
- Czas trwania przejścia: Użyj suwaka, aby dostosować przejście tła ze stanu normalnego do stanu najechania.
Granica: #
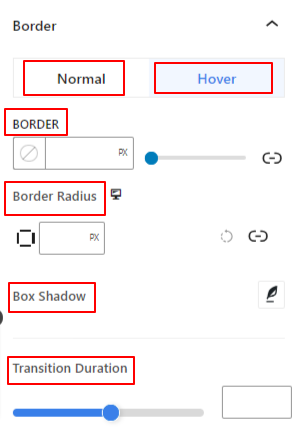

- Granica: w ramach tej opcji ustawień dostępne są opcje ustawień obramowania, takie jak szerokość, styl i kolor.
- Promień granicy: Ustaw okrągłość obramowania, wprowadzając wartość.
- Pudełko Cień: Uzyskaj wszystkie ustawienia, takie jak kolor, poziomo/pionowo, rozmycie, rozproszenie i inne, aby nadać obramowaniu efekty cienia.
W opcji najechania:
- Czas trwania przejścia: Możesz dodać wartość ręcznie lub użyć suwaka, aby ustawić czas zmiany projektu obramowania w stanie najechania.
Widoczność: #
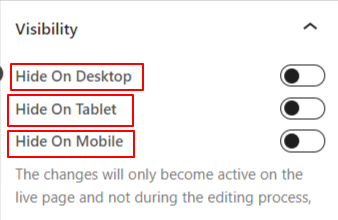

Moduł widoczności pozwala kontrolować wyświetlanie projektów bloków w zależności od typu urządzenia. Dostępne będą trzy opcje urządzeń (komputer stacjonarny, tablet, telefon komórkowy) z przyciskiem przełączania. Włącz przycisk przełączania, aby ukryć projekt blokowy tego urządzenia.
Jednak nadal możesz to zobaczyć w widoku edytora.
Zaawansowany: #
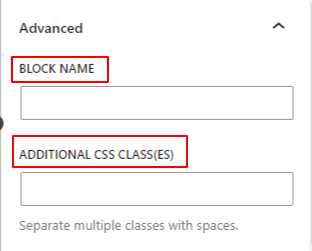

- Nazwa bloku: Nadaj nazwę, która będzie jednoznacznie identyfikowała ten blok podczas łączenia lub tworzenia skryptów stylizujących blok.
- Kotwica HTML: Dodaj adres URL, aby połączyć stronę internetową.
- Dodatkowe klasy CSS: Przypisz dodatkowe klasy CSS do bloku, co pozwoli Ci stylizować blok według własnego uznania za pomocą niestandardowego CSS.
Uwaga: Możesz dodać wiele klas oddzielnie ze spacjami.
To wszystko! Powyższe ustawienia ułatwiają skonfigurowanie niesamowitej sekcji zespołu na Twojej stronie WordPress przy użyciu edytora bloków Gutenberg.


