가격 메뉴는 거의 모든 관심 있는 사람이 제품을 확인할 때 보는 매우 일반적이지만 필수적인 것입니다. 매력적으로 디자인된 ElementsKit을 사용하면 WordPress 웹사이트에서 서비스, 제품, 품목에 대한 가격 메뉴를 만들 수 있습니다. 이 가격 메뉴 위젯은 사용자 정의가 간편한 필수 옵션이 가득합니다.
ElementsKit 가격 메뉴 위젯을 사용하는 간단한 과정을 알려드리겠습니다. 아래 단계를 따르세요.
WordPress에 가격 메뉴 추가 #
대시보드로 이동 -> 페이지 선택 또는 만들기 -> ElementsKit으로 편집 클릭 -> ElementsKit 가격 메뉴 위젯 검색 -> 위젯 끌어서 놓기
콘텐츠 섹션 #
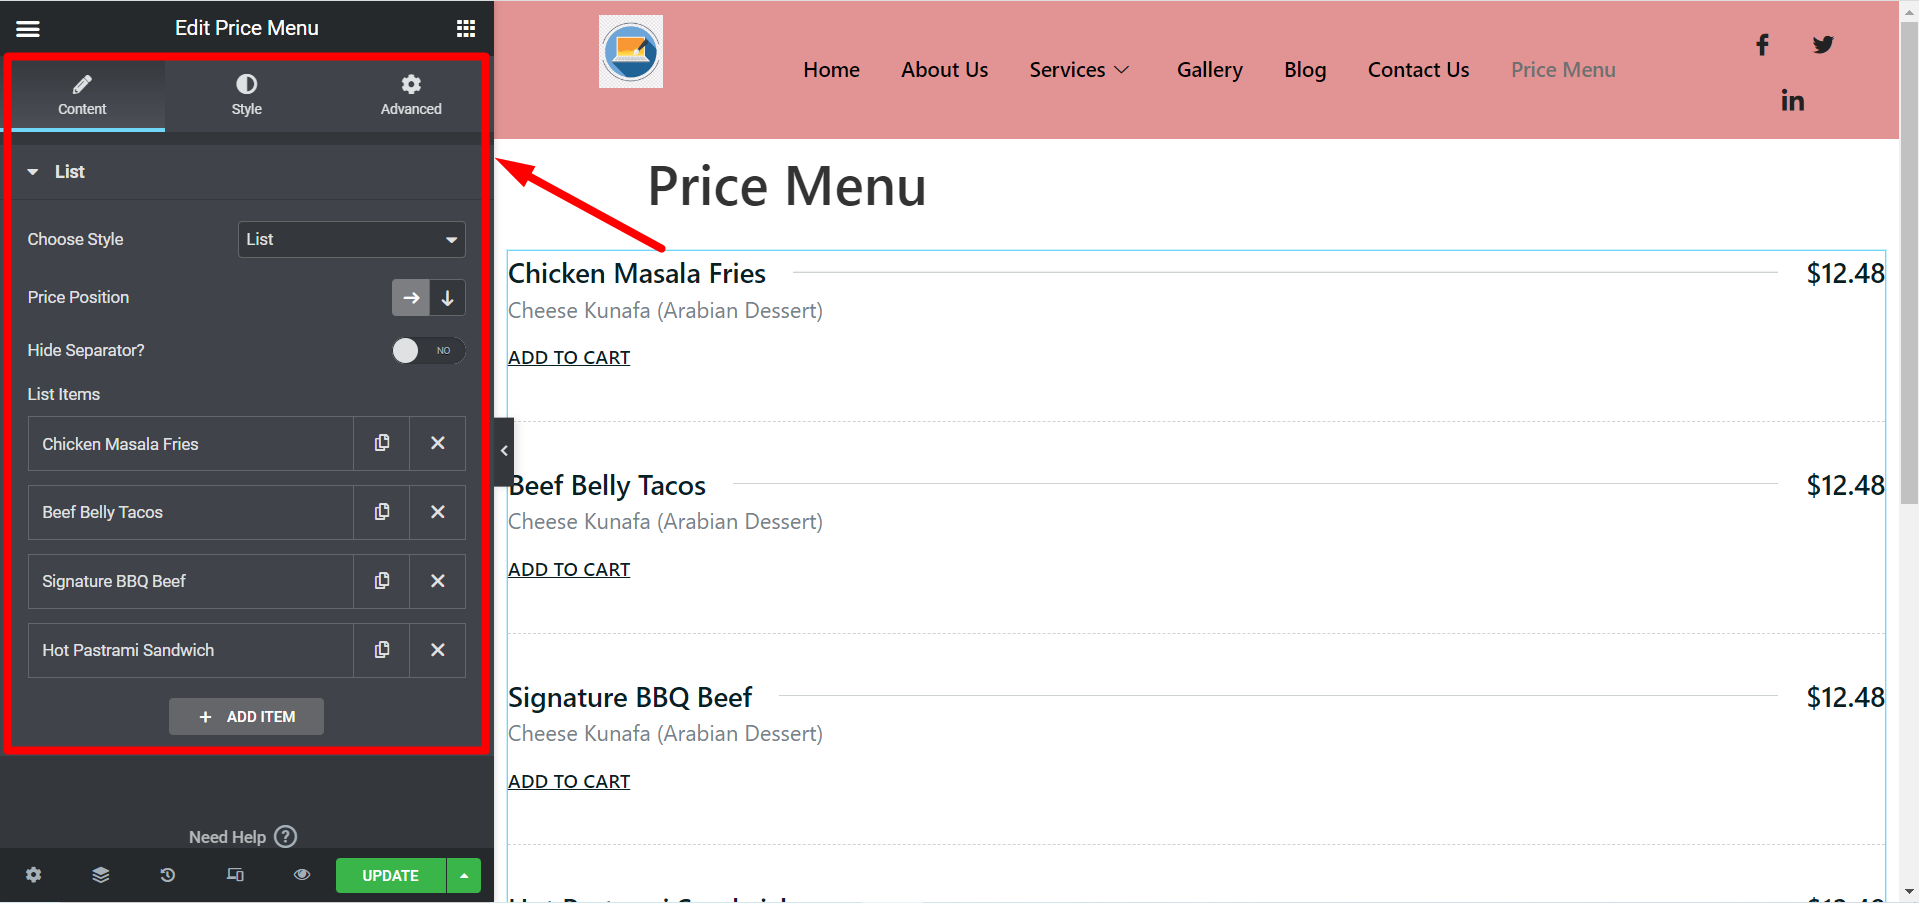
당신은 볼 것이다 목록 옵션 콘텐츠 섹션에는 다음이 포함됩니다.
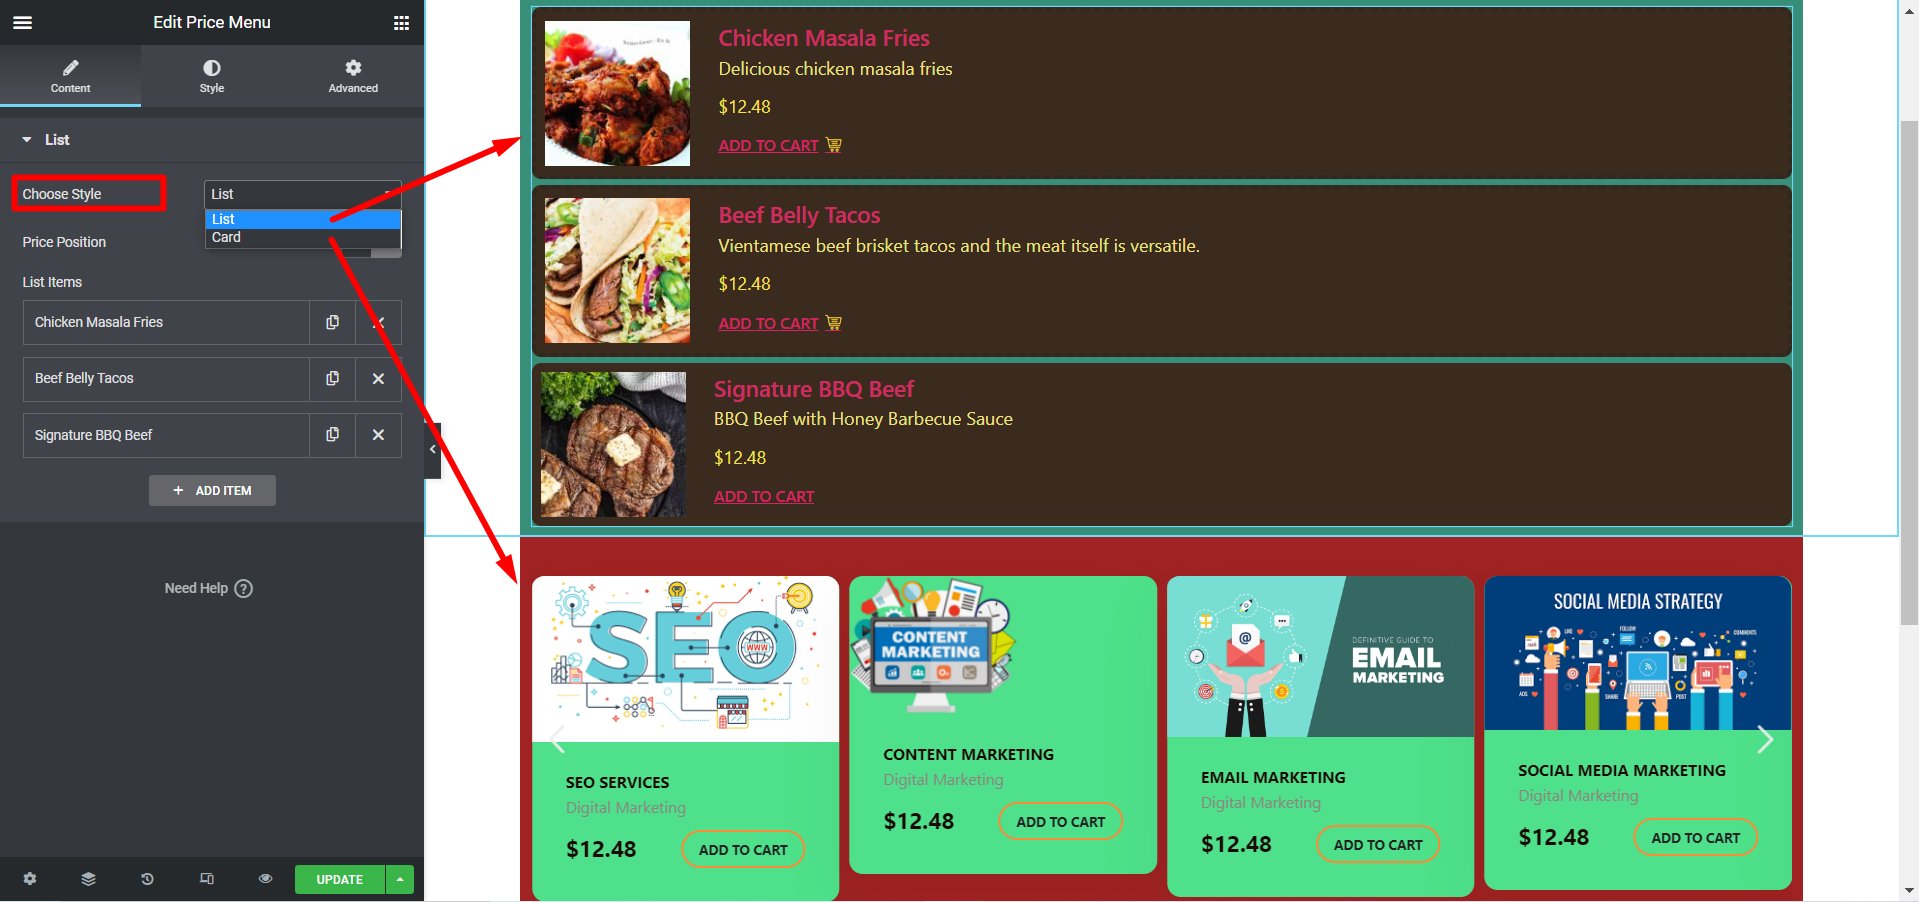
- 스타일 선택– 메뉴를 표시할 수 있습니다 목록 또는 카드 스타일.
당신이 선택하면 메뉴 스타일로 목록 만들기 그러면 당신이 볼 필드는 다음과 같습니다.
- 가격 위치– 가격의 위치 조정 오른쪽 또는 아래쪽.
- 구분 기호를 숨기시겠습니까?– 당신이 원하는 경우 숨기기 (예) 또는 보여주다 (아니요) 분리 기호.
- 목록 항목– 여기에 귀하의 제품 또는 서비스 목록을 추가하세요.
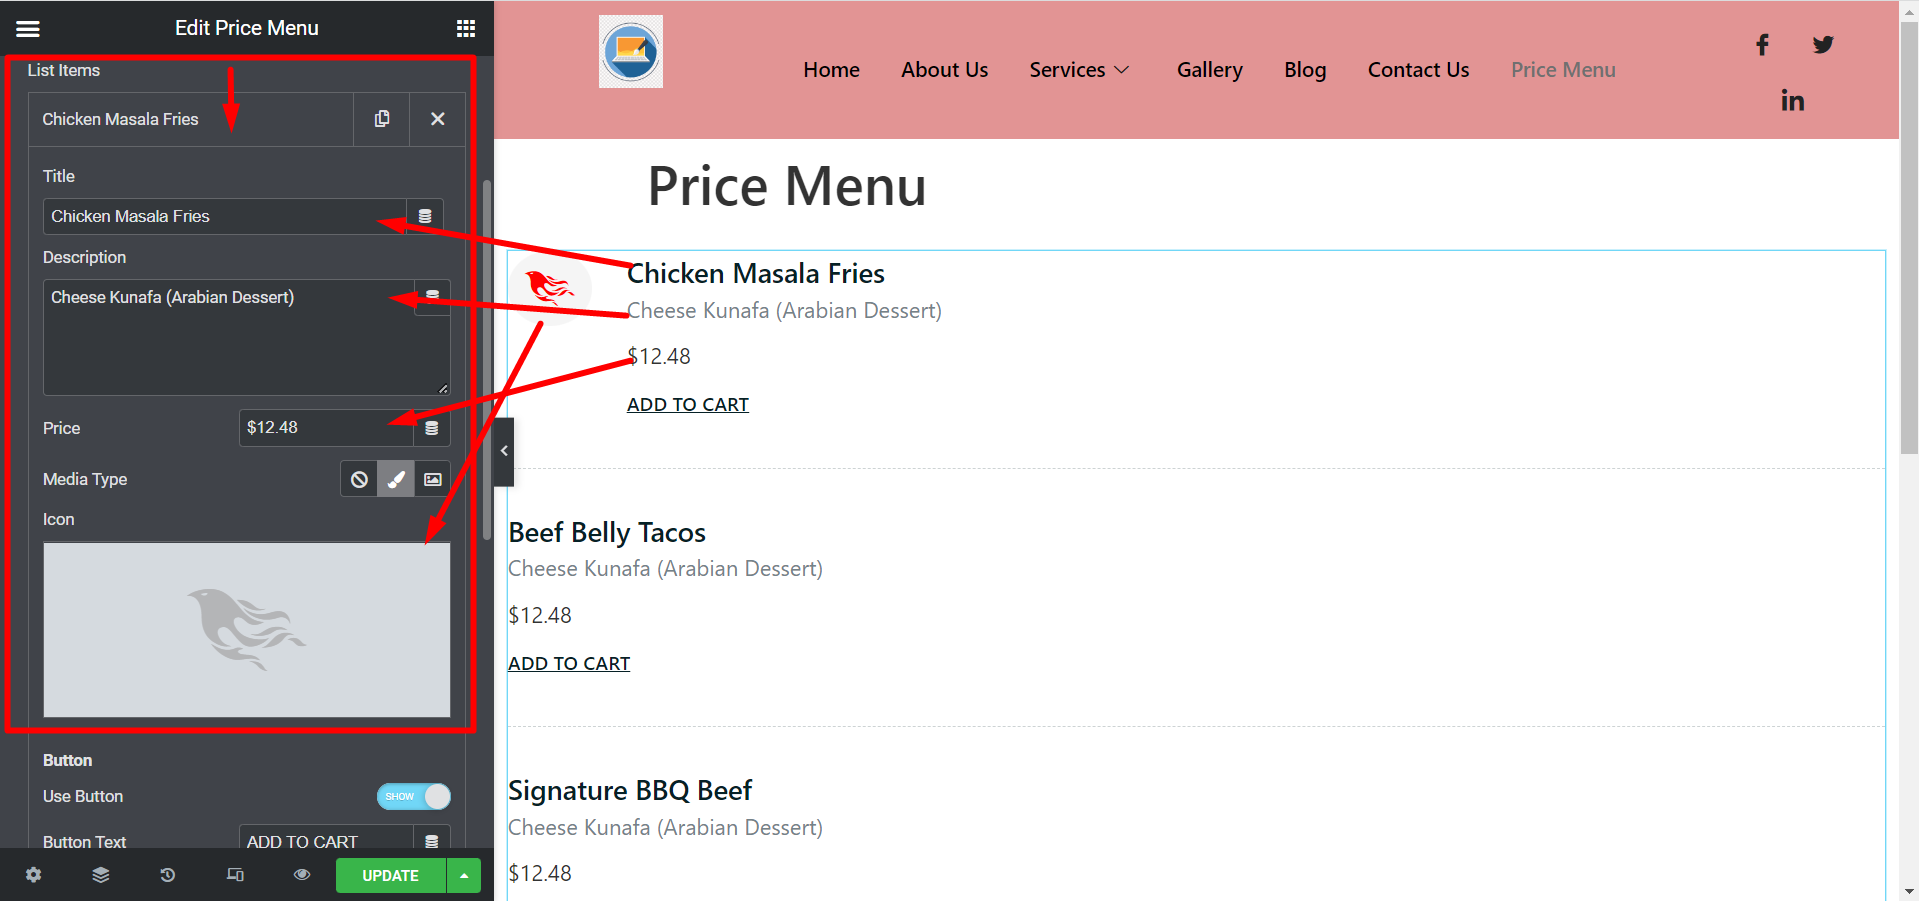
항목을 확장하면 다음 필드가 표시됩니다.
- 제목- 쓰다 이름 품목이나 서비스의.
- 설명- 을 추가하다 관련 설명 여기.
- 가격- 제품을 추가하세요 가격 및 통화 기호.
- 미디어 유형- 당신은 선택할 수 있습니다 제품의 아이콘 또는 이미지, 또는 단순히 없음 옵션.
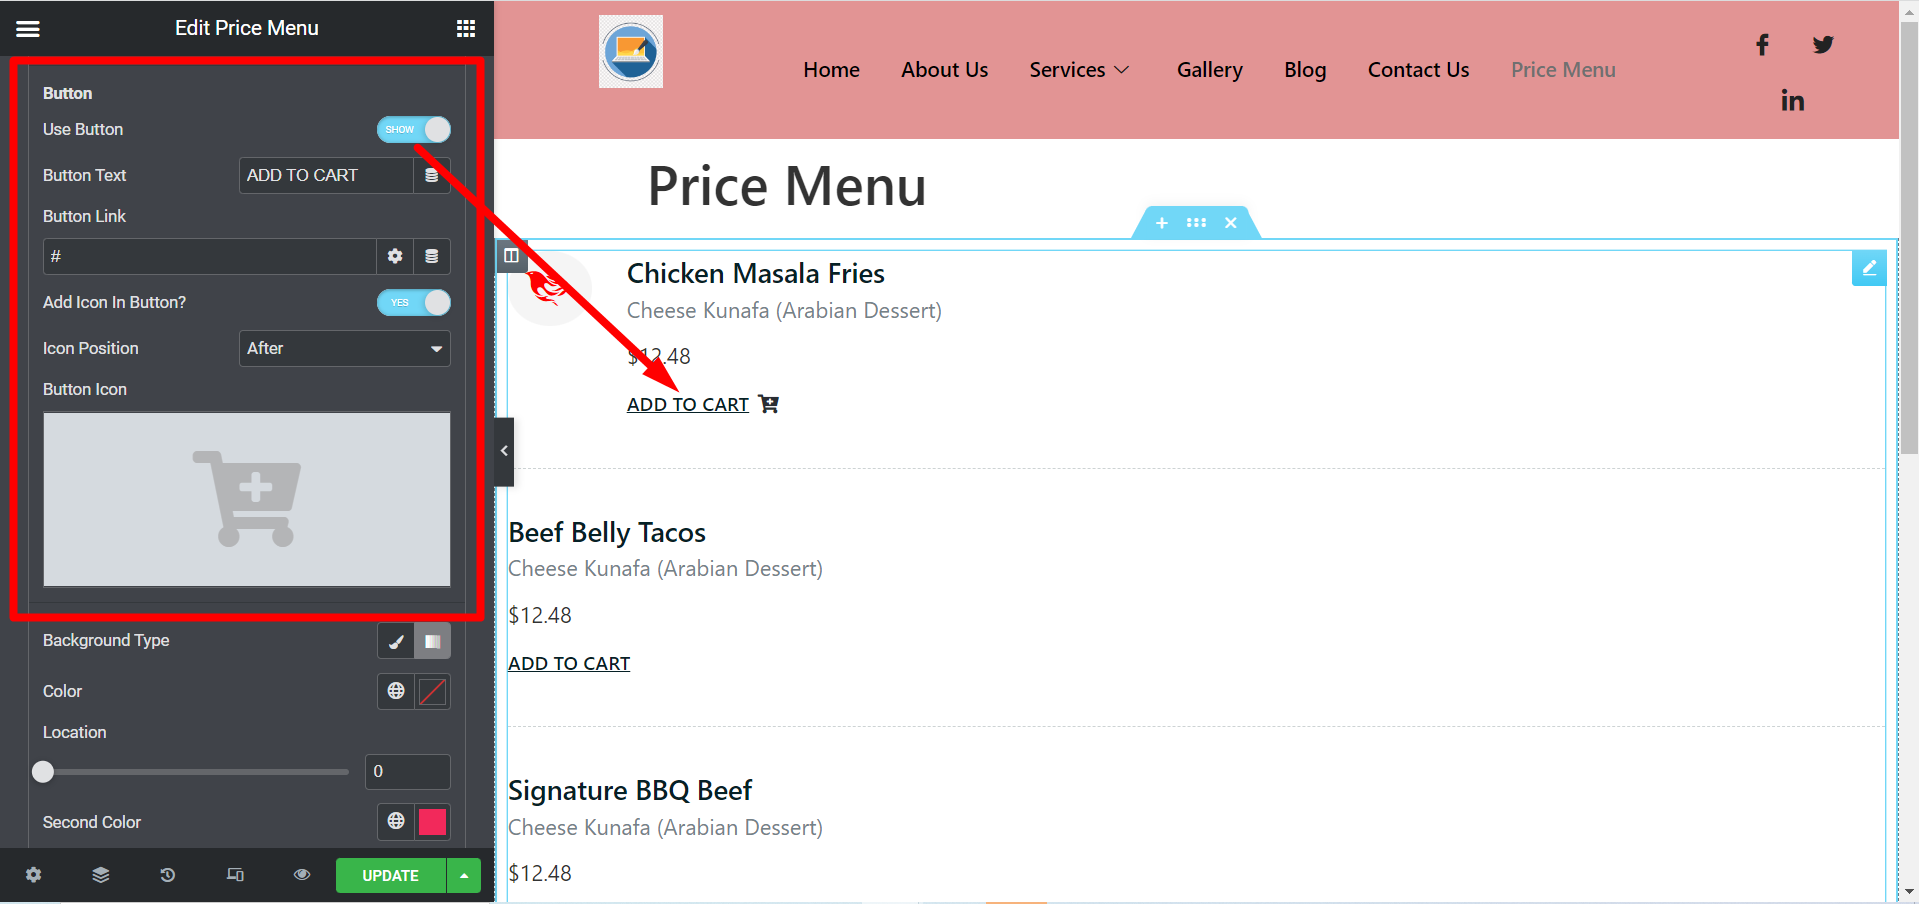
단추:
- 버튼 사용- 다음은 옵션입니다 버튼을 추가하다 필요하다면 말이죠.
- 버튼 텍스트- 세트 버튼 텍스트 이 분야를 사용하여.
- 버튼 링크- 당신이 원한다면 이 버튼을 통해 사용자를 리디렉션합니다. 그러면 해당 링크를 추가하세요.
- 버튼에 아이콘 추가?- 아이콘을 추가하려면 옵션을 토글합니다. 여기에는 두 가지 옵션이 표시됩니다.
- 아이콘 위치- 옵션은 다음과 같습니다 이후와 이전.
- 버튼 아이콘- 에서 추가할 수 있습니다 아이콘 라이브러리 또는 SVG 업로드 귀하의 선택에 따라.
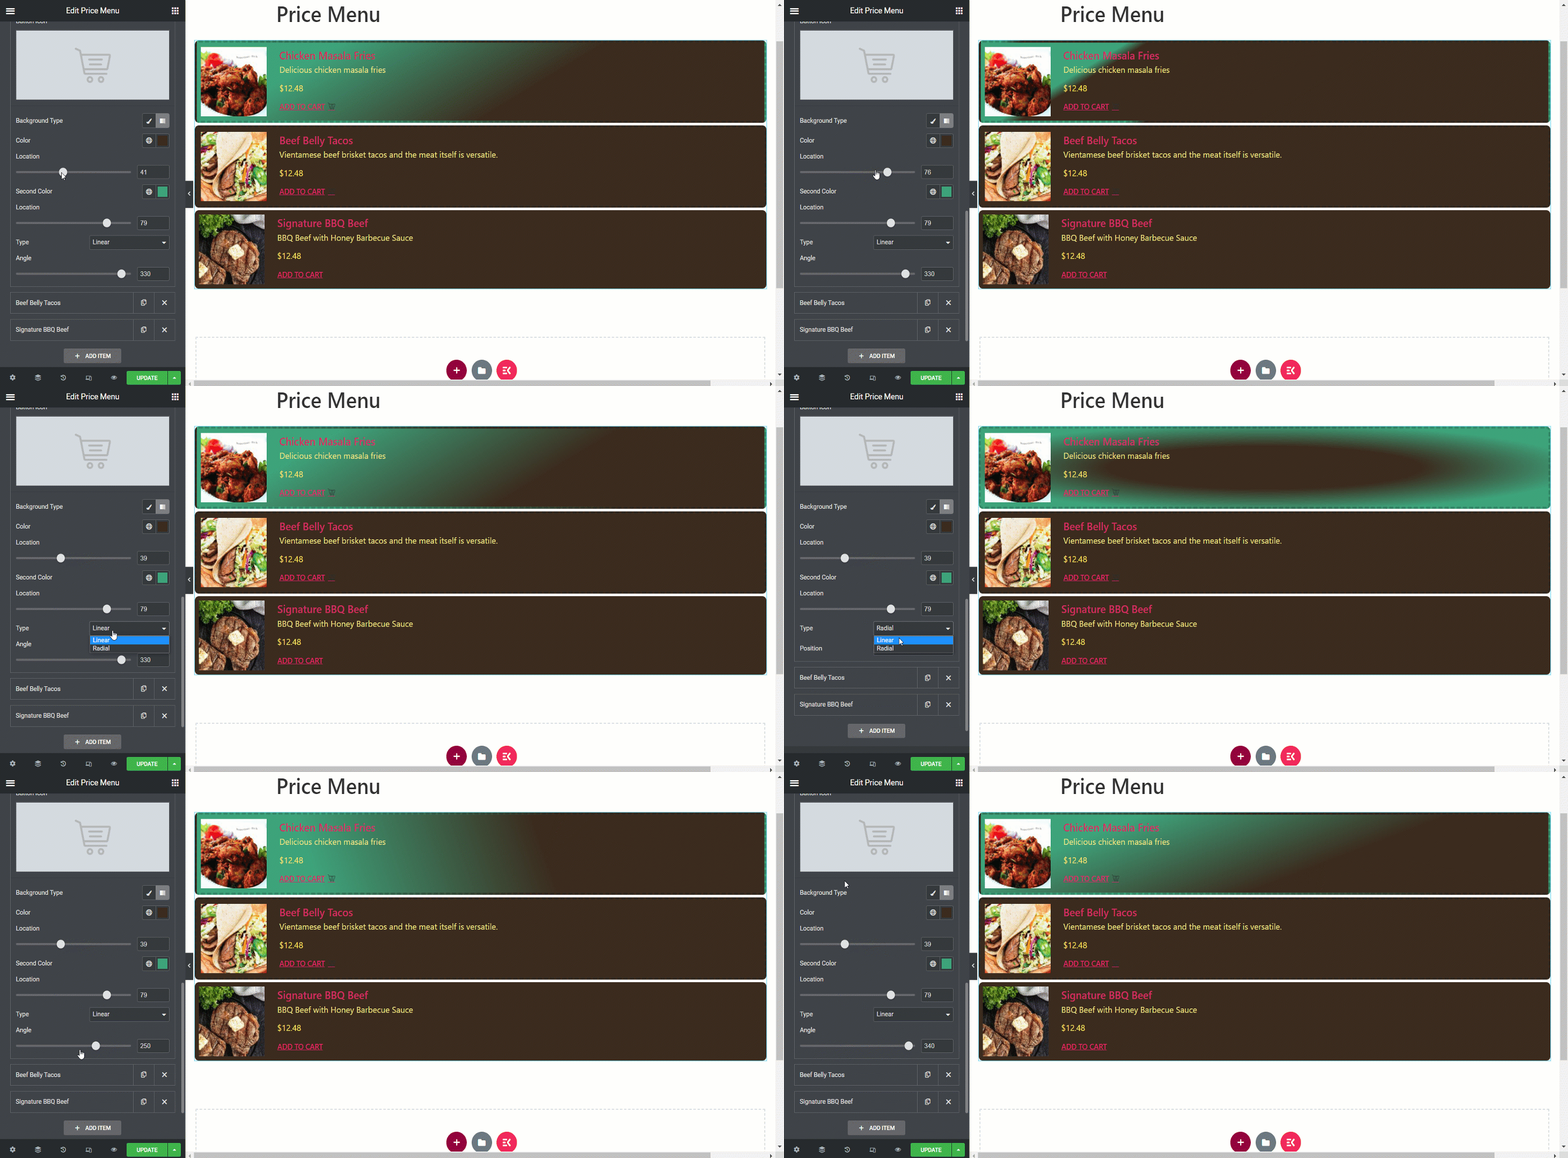
- 배경 유형- 클릭하여 클래식 옵션으로 배경색을 선택할 수 있습니다, 선택할 수 있는 또 다른 옵션이 있습니다. 그라데이션 섹션의 두 번째 색상입니다. 원하시면 색상을 설정하지 않으셔도 됩니다.
- 위치- 색상을 선택한 경우 두 위치 막대에서 색상 위치를 조정합니다.
- 유형- 색상의 종류는 다음과 같습니다 선형 및 방사형.
- 각도- 사용 색상 조정 바 자신의 선호도에 맞게 모양을 설정하세요.
스타일 섹션 #
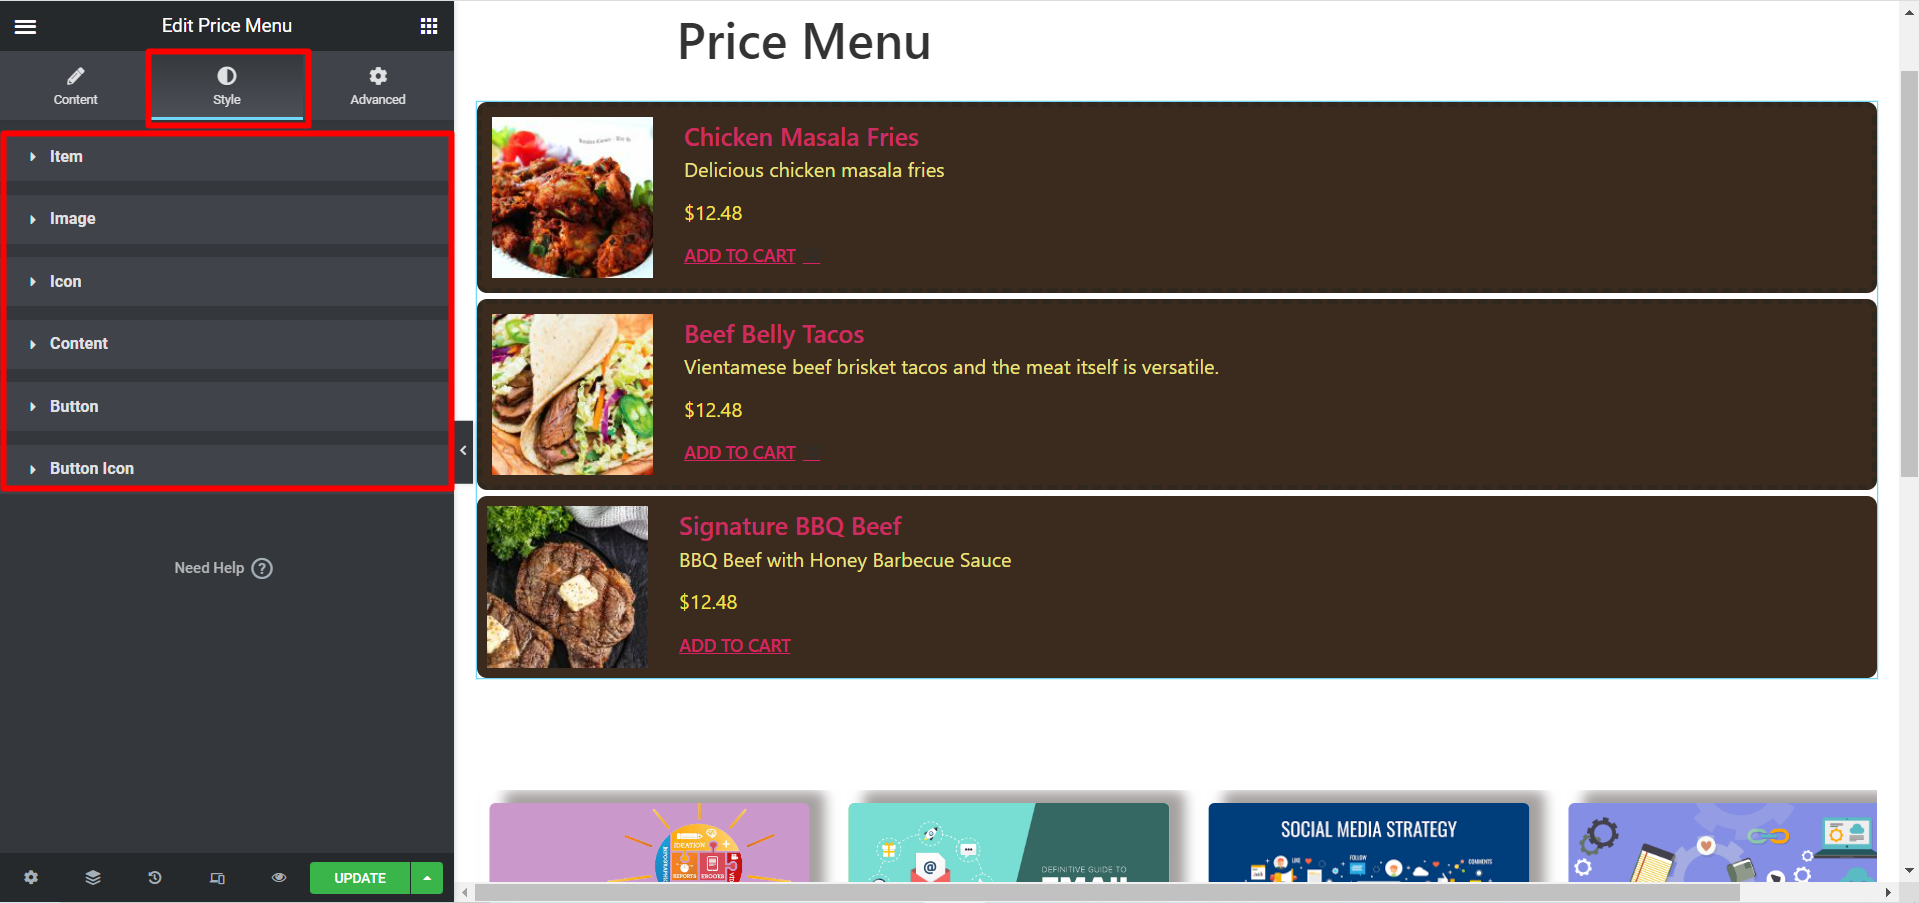
- 목- 여기에서 가격 메뉴의 정렬, 간격, 테두리 유형, 반경 등을 조정할 수 있습니다.
- 영상- 제품 이미지를 추가하면 여기에서 스타일을 지정할 수 있습니다.
- 상- 이 옵션을 사용하여 설정한 아이콘을 디자인합니다.
- 콘텐츠- 이 부분에서는 제목, 설명, 가격 및 기타 콘텐츠의 스타일을 지정할 수 있습니다.
- 단추- 버튼을 설정했다면 필요에 맞게 버튼을 사용자 정의하세요.
- 버튼 아이콘- 여기에서 아이콘 색상, 크기 및 간격을 조정하세요.
이제 당신이 선택한다면 카드 스타일, 그러면 여기의 필드는 다음과 같습니다.
- 슬라이더 활성화- 슬라이더를 전환합니다 표시/숨기기
- 행당 항목- 행당 표시할 항목 번호를 설정하세요.
슬라이더 설정 #
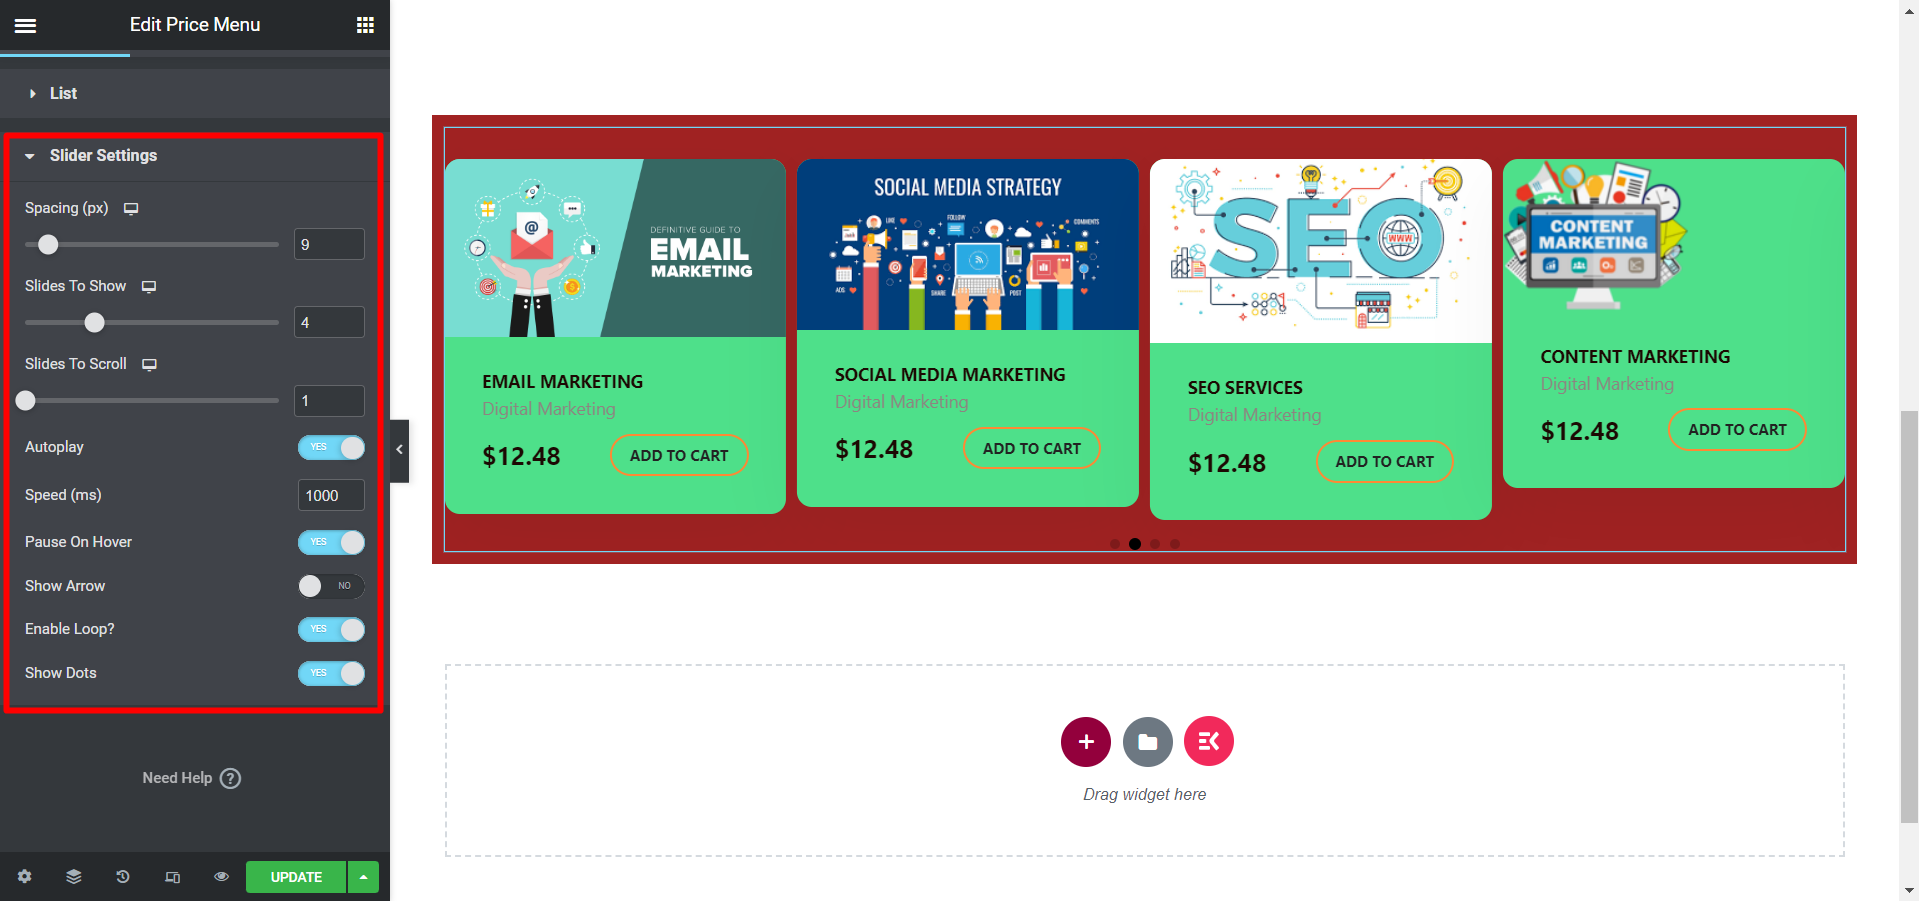
다시 말해서, 슬라이더를 표시하려면 다음을 얻습니다. 슬라이더 설정 옵션-
여기에서 간격(px), 표시 및 스크롤할 슬라이드, 자동 재생, 속도(ms), 호버 시 일시 정지, 화살표 표시, 루프 활성화 및 점 삽입을 조정할 수 있습니다.
더욱이, 스타일 섹션 다른 스타일링 옵션과 함께 조정 옵션이 표시됩니다. 화살표와 점.
업데이트 및 최종 보기 #
사용자 정의를 완료한 후 업데이트를 클릭하면 가격 메뉴가 추가되었습니다. 샘플 사용자 정의는 다음과 같습니다.
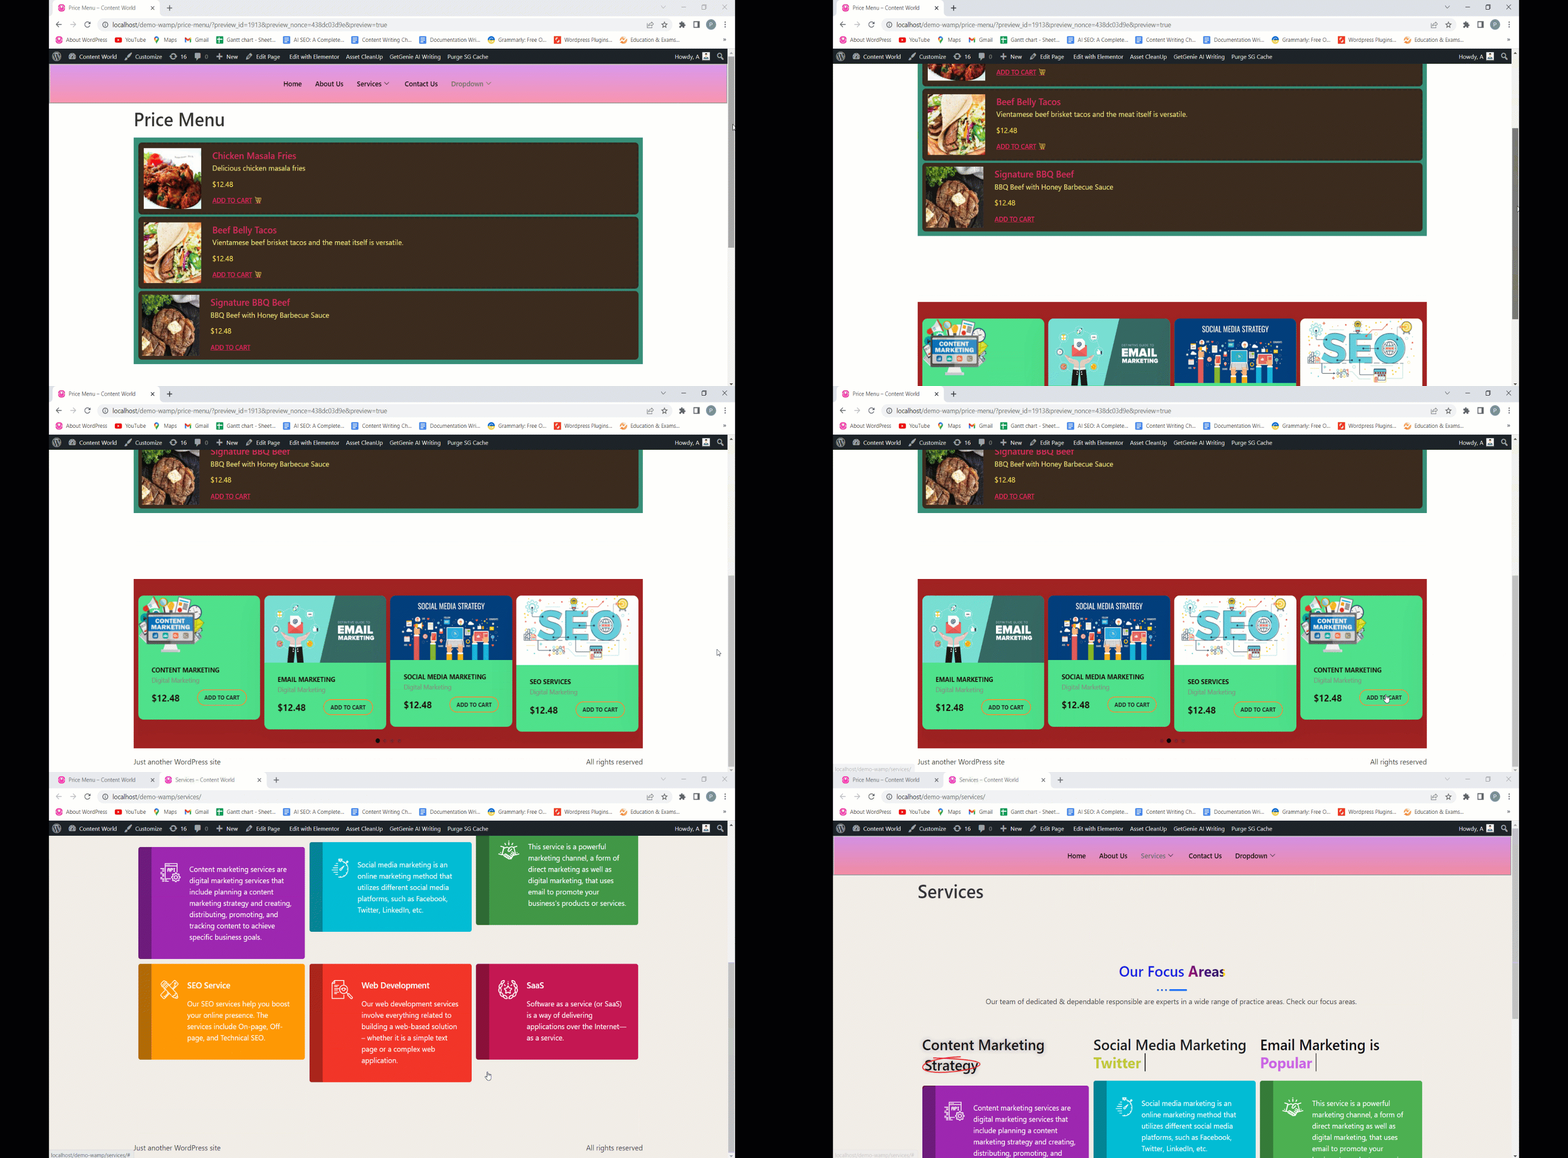
이 강력한 위젯을 사용하여 가격 메뉴를 추가하여 사이트의 기능을 향상시키세요. 빠르고 효율적입니다.


