


Automation removes the stress of running email campaigns for you. With PopupKit and Mailchimp, you can automate this process smoothly. Instead of manually collecting and uploading emails, this integration helps you grow your list in real time.
We’ll show you how to set up PopupKit, connect it with Mailchimp, and create automated workflows that welcome new subscribers. Ready to automate your email marketing? Let’s begin by setting up PopupKit with Mailchimp.
Quick Overview
By integrating 팝업킷 ~와 함께 메일침프 you can build a email list in real-time and trigger automated campaigns instantly. The core steps are:
- Locate the Mailchimp integration in PopupKit.
- Generate and paste your Mailchimp API Key for authorization.
- Design your popup and link it to your chosen Mailchimp subscriber list.
It’s quick and tension-free.
What is Email Marketing?
Email marketing is a digital strategy where a business sends commercial messages. It sends promotional emails or newsletters directly to a list of subscribers. The strategy helps to build relationships, drive sales, and keep customers informed.
For example, you may send an automated email to the customers who left items in their online cart. You can offer them a 10% discount to encourage them to complete the purchase.
How to Automate Email Marketing with PopupKit
We start by setting up your foundation with WordPress and PopupKit.
전제 조건:
We’ve covered the basics, now, let’s dive straight into the action! It’s time to start the step-by-step setup.
STEP 1: Locate Mailchimp Integrations in PopupKit
- Find PopupKit from your dashboard
- Click on the Integrations section
- Find MailChimp
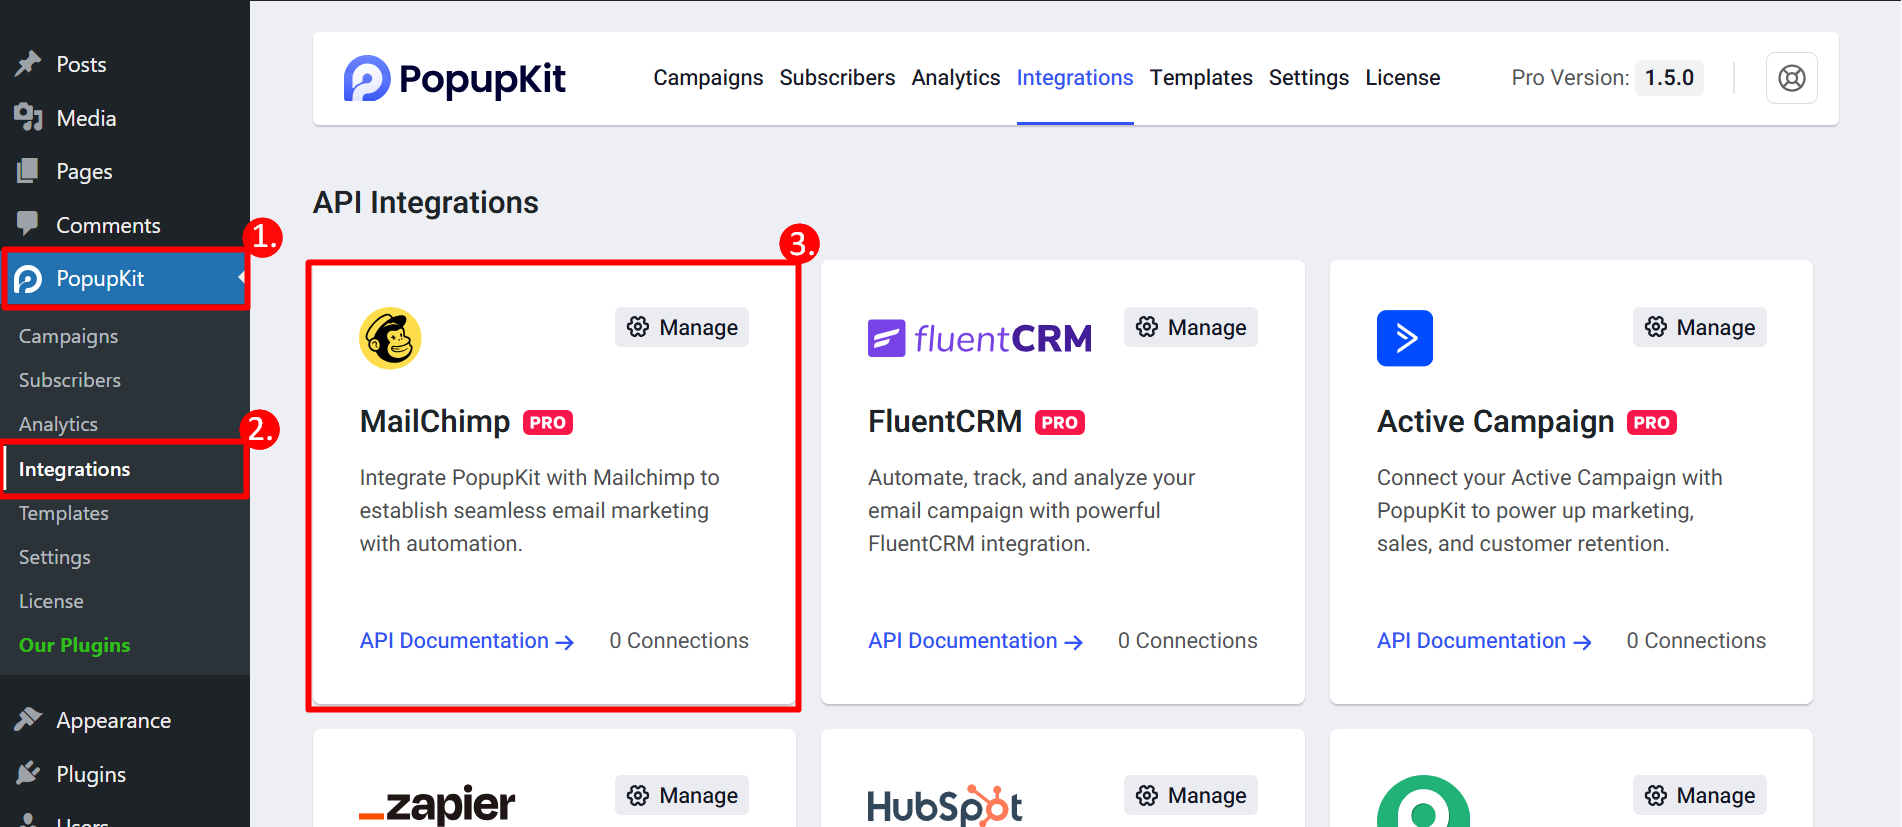
Select Mailchimp from the list of supported platforms. Now, click on the Manage button.
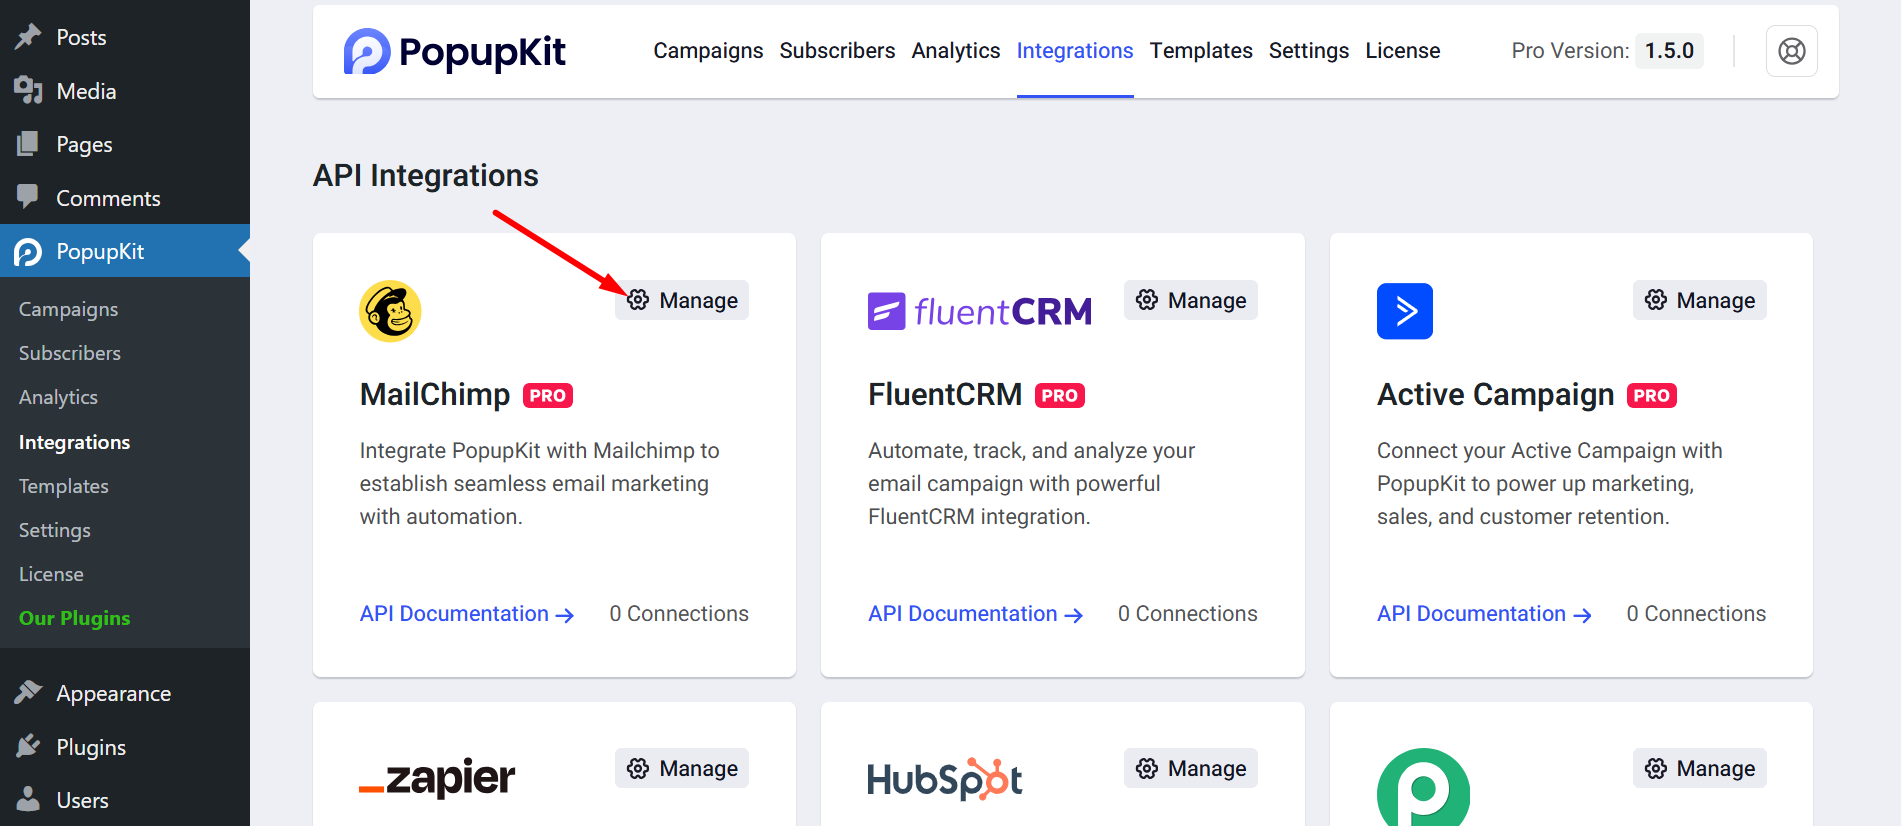
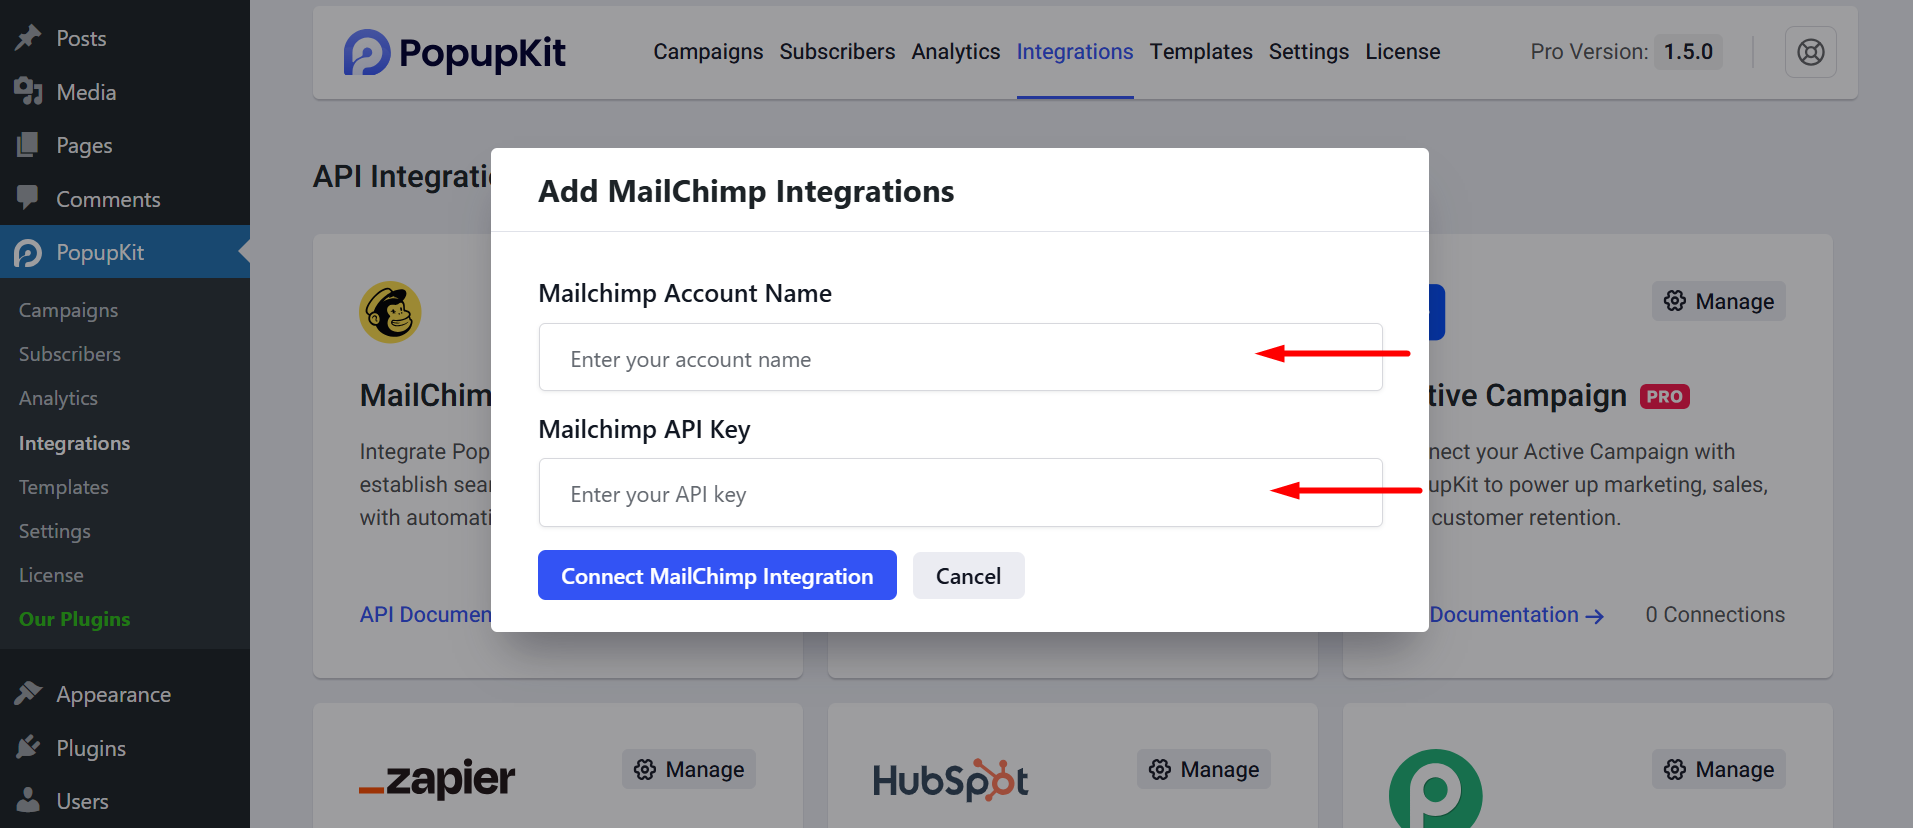
Here, you have to provide integration details such as Account name and API key.
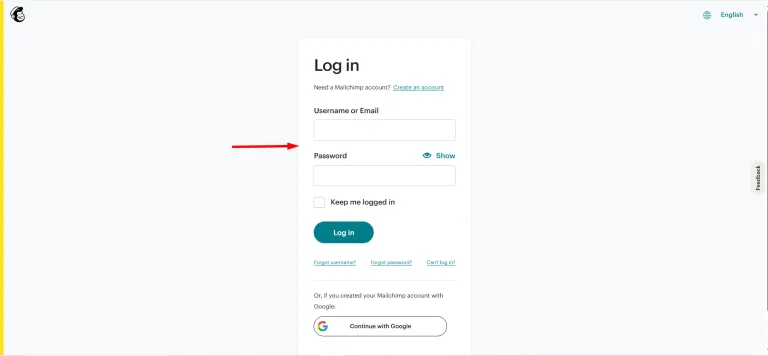
STEP 2: Generate API Key
Log in to your Mailchimp account and authorize the connection.
Choose the Mailchimp list where you want to collect your new leads.
- Click on the profile
- Choose Account & Billing
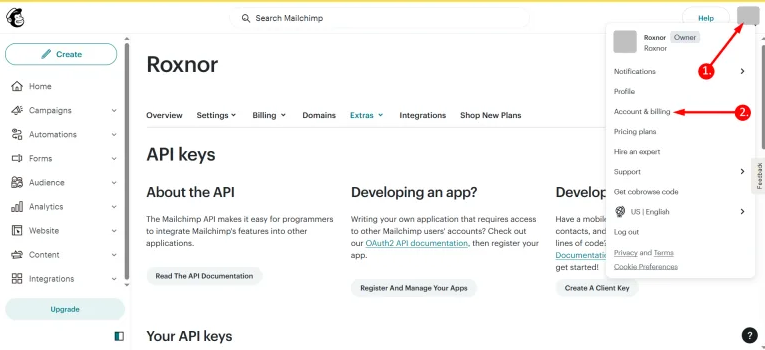
확장 Extras menu 그리고 click on API keys.
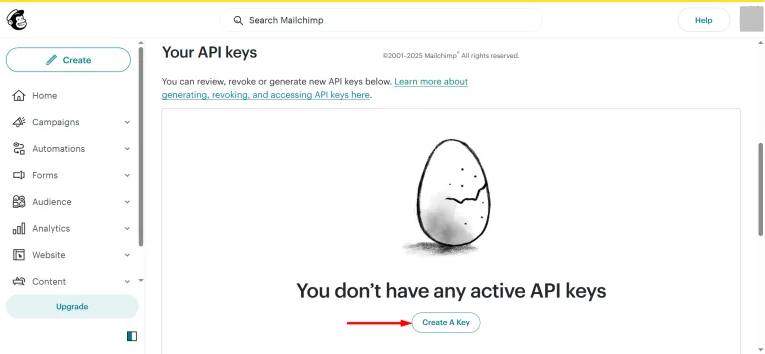
다음을 클릭하세요. Create a Key button to generate the access key.
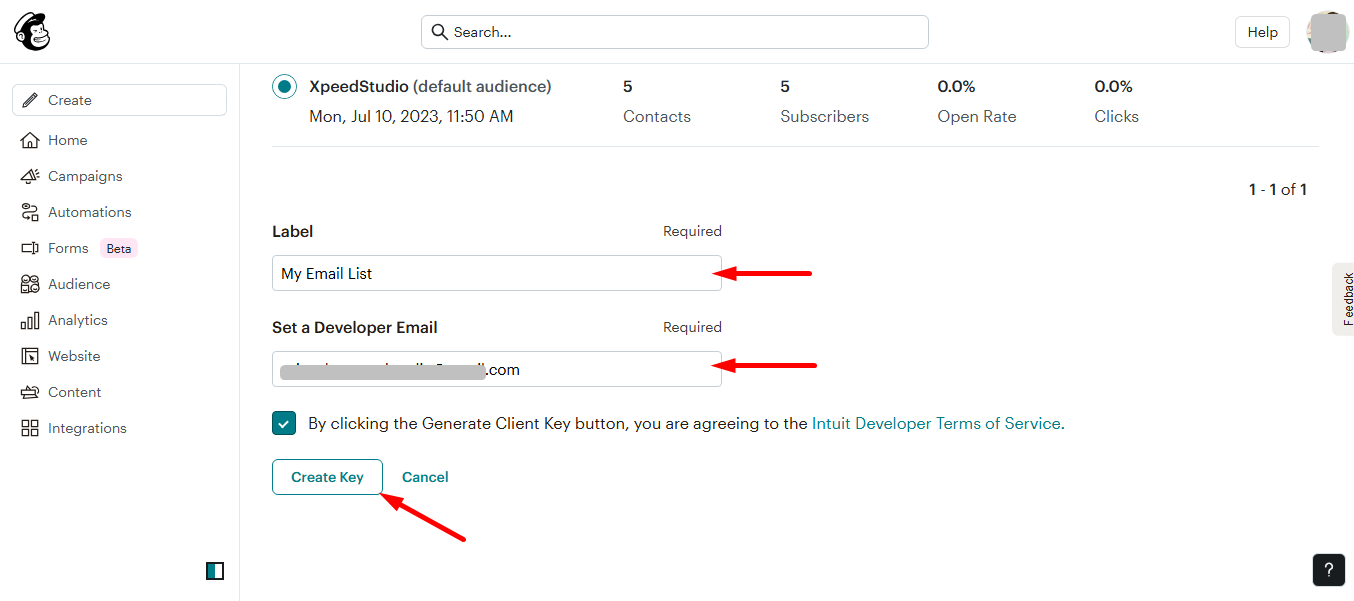
Here, you have to provide a Label name and the Developer Email. Then press the Create Key 단추.
귀하의 API key name in the designated field. Once named, click the Generate Key button to instantly create the credential.
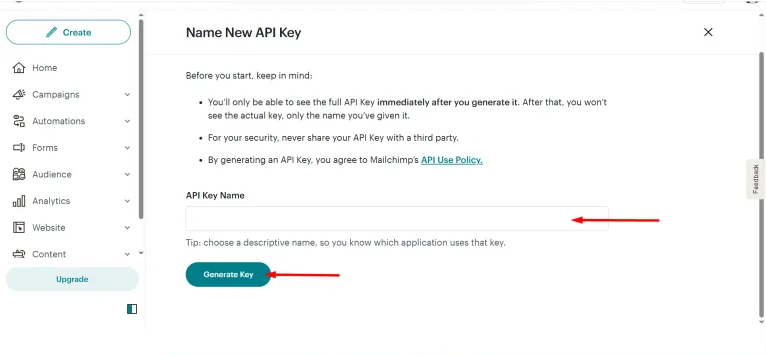
Your unique key is now available. Be sure to copy it to your clipboard right away, and then 딸깍 하는 소리 완료 to complete the process.
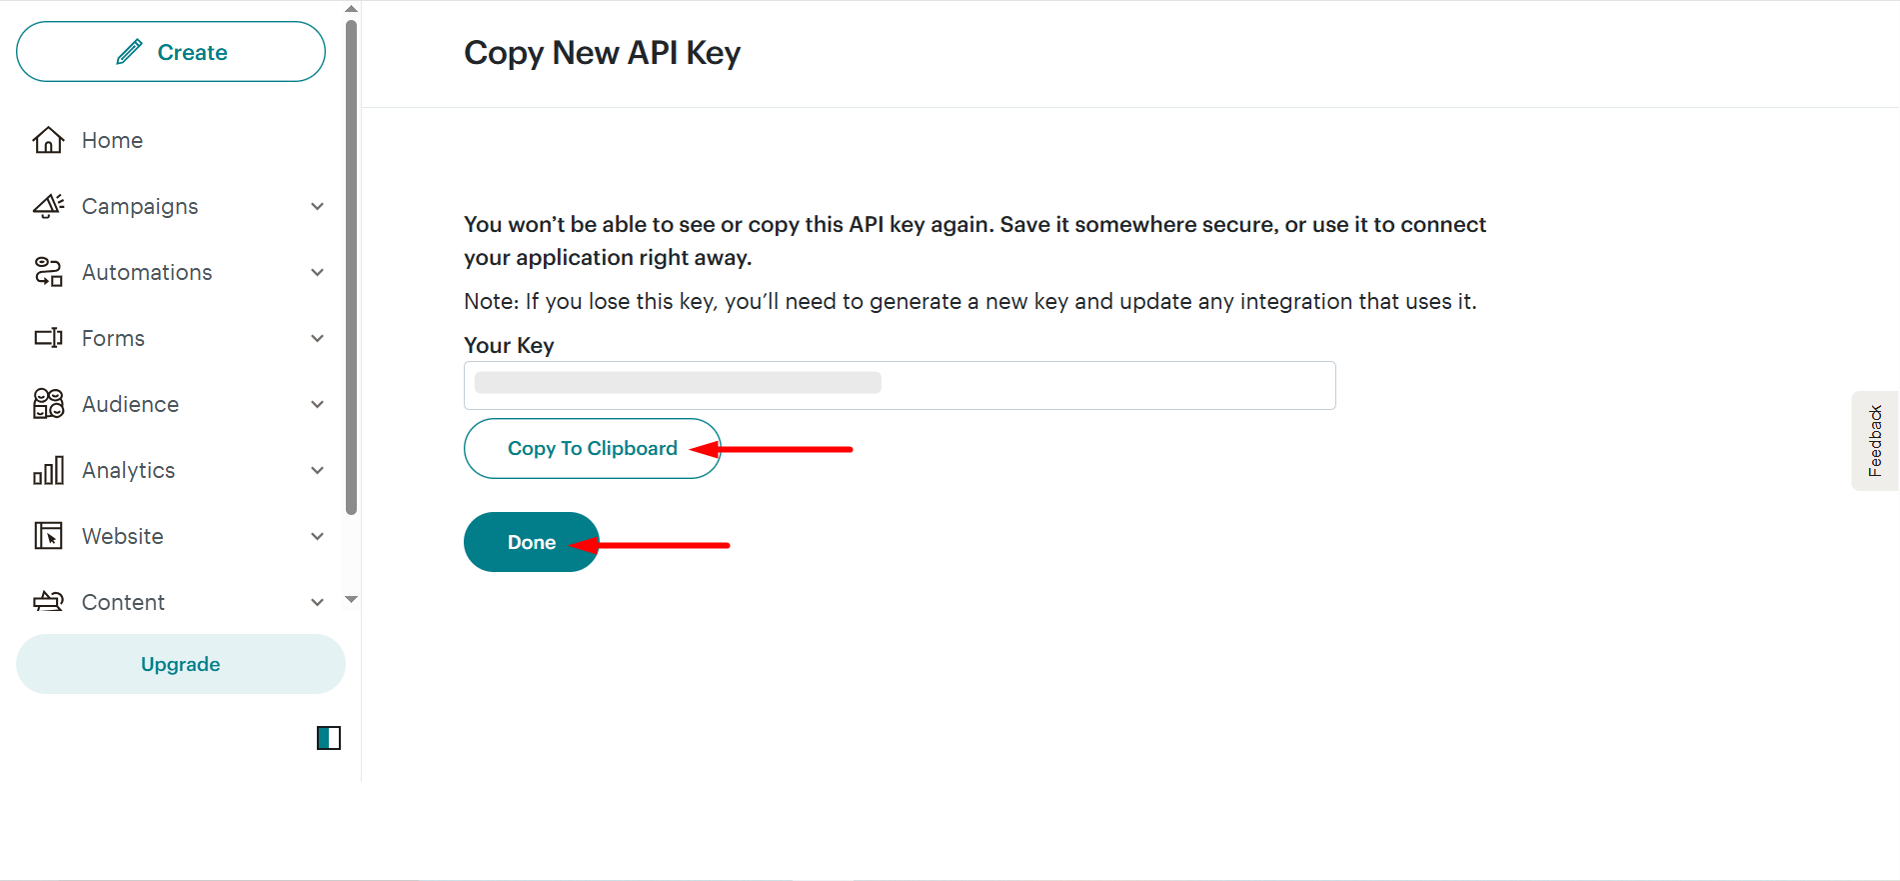
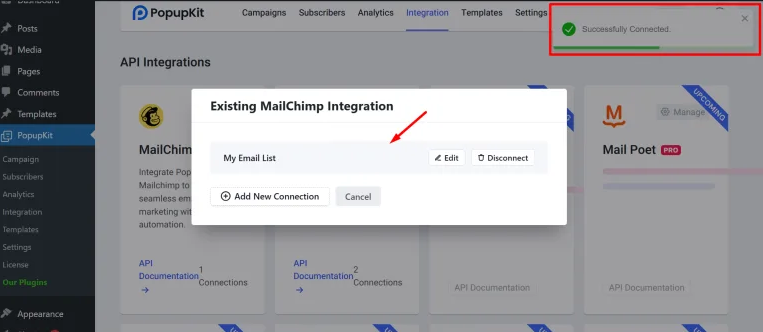
Now, return to step 1, paste the copied key along with the account name, and proceed to connect the Mailchimp integration.

Mailchimp connection established. Your account is now fully integrated and ready to use.
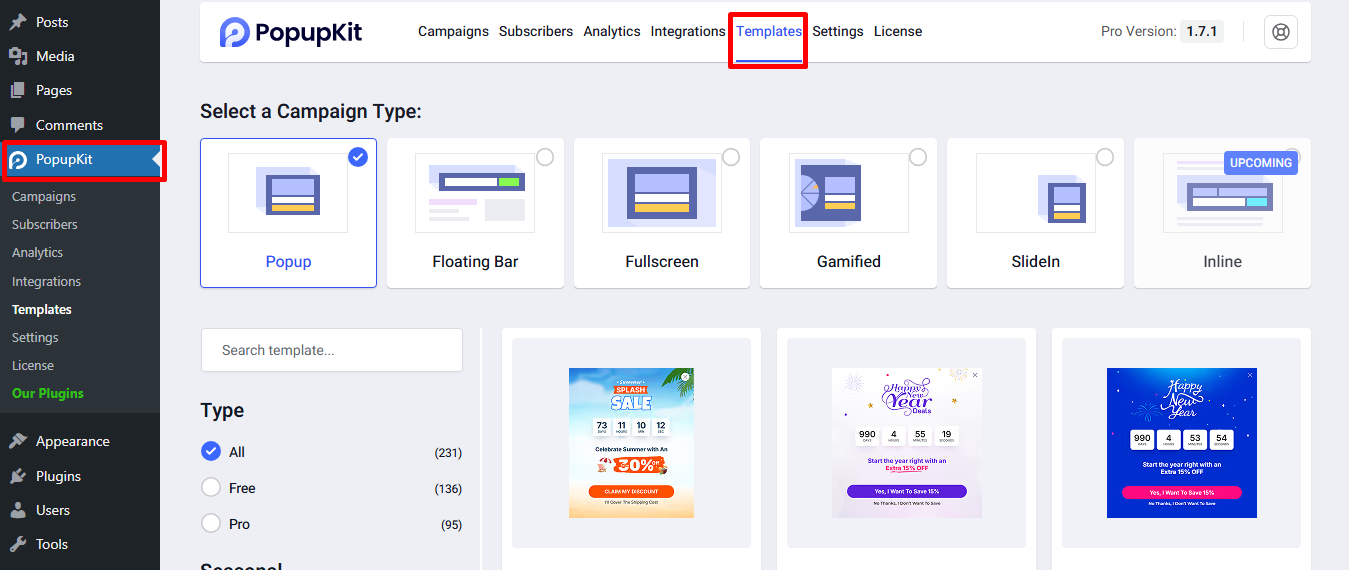
STEP 3: Start Building Your Popup
Now comes the fun part, designing your popup! Just pick a ready-made template that matches your campaign vibe by navigating to PopopKit > Templates, and you’re good to go.
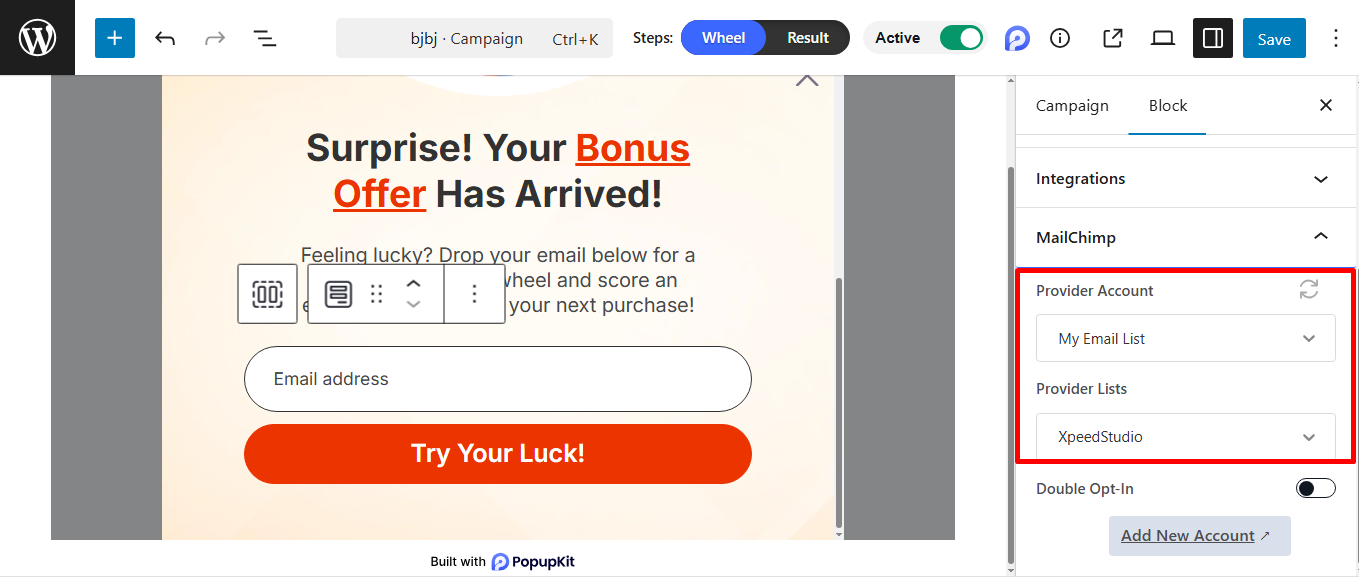
After selecting your popup template, head over to the editor for the final touches. Under 통합, choose MailChimp.
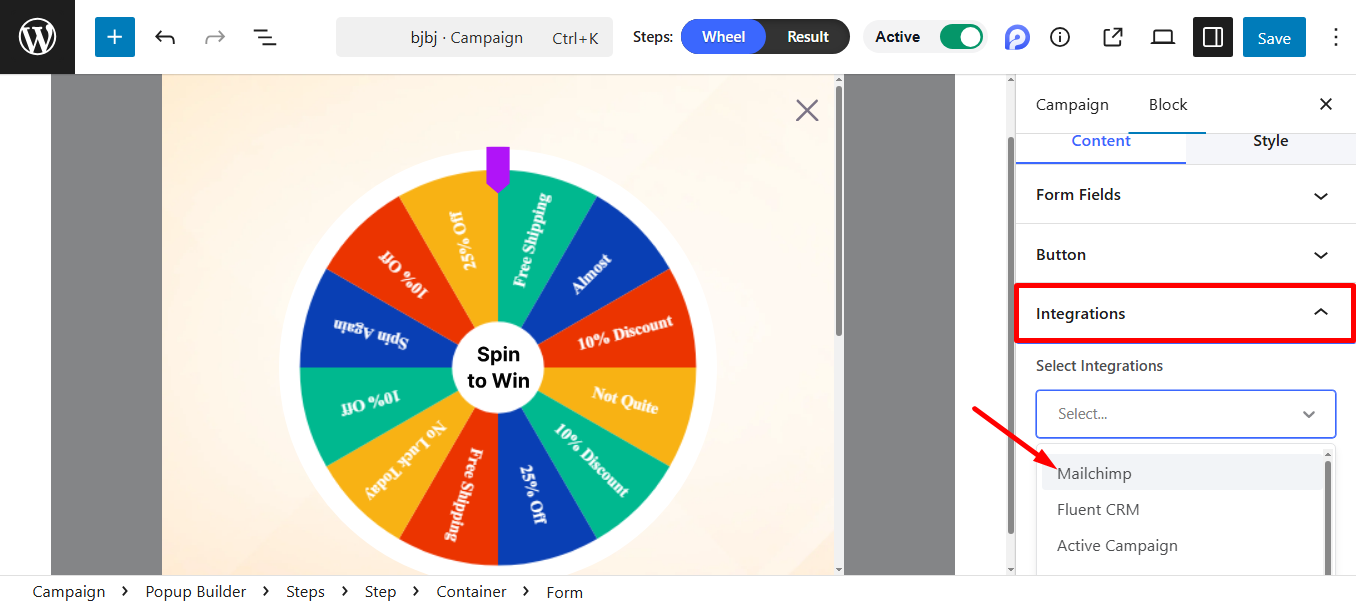
To connect your form with MailChimp, select your Provider Account from the dropdown menu, which authenticates your connection. Once your account is selected, the Provider Lists dropdown will populate; select the specific list.
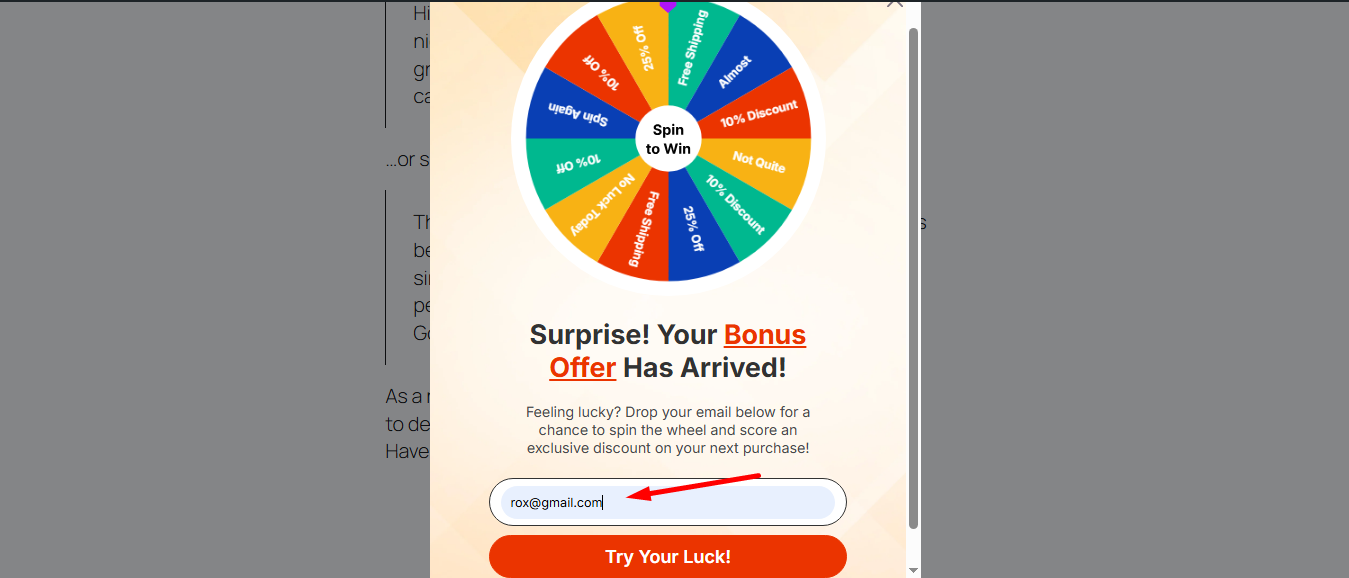
Save the changes and launch your popup. Next, you just have to fill in the form with a test email.
Now, simply check your Subscribers’ list in PopupKit, and the email address should appear there.
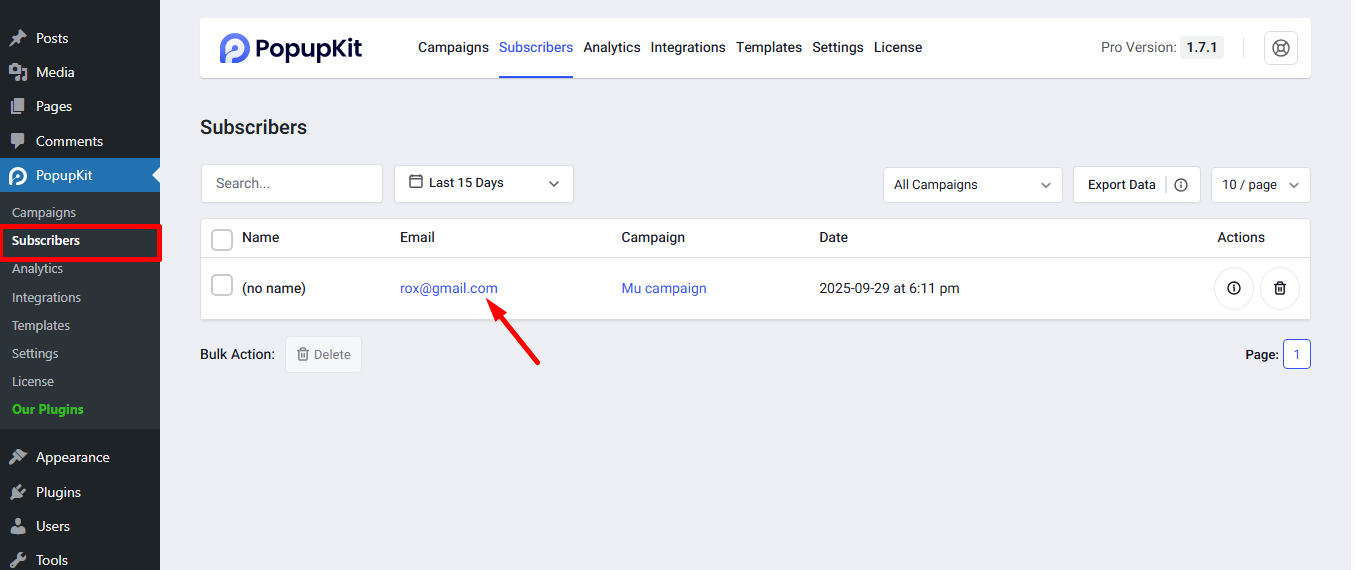
That successfully completes the setup! Your Mailchimp integration is fully operational.
자주 묻는 질문
The moment a visitor submits the PopupKit form, their email is instantly synchronized with the Mailchimp list you selected. From there, any automated Welcome Series or Customer Journey you’ve set up in Mailchimp will immediately be triggered, making your follow-up instantaneous.
Yes! While the guide shows selecting a main list, you can use PopupKit’s form fields to let users select their preferences e.g., Daily or Weekly news. This data, if correctly mapped, will segment users into different Groups in your single Mailchimp Audience, allowing for super-targeted automated campaigns.
First, double-check that you copied the entire key and no extra spaces were included. If it still fails, log back into Mailchimp, go to the API Keys section, and verify the key has not been accidentally revoked or disabled. If the key appears valid, try generating a new, unique API key specifically for the PopupKit integration and use that new one.
결론
As you’ve just learned, integrating PopupKit with Mailchimp creates a seamless system for growth. You can now fully automate your lead collection and email marketing process in just a few quick steps. Visitors who engage with your popups are instantly added to your list. It allows you to easily nurture those leads with targeted campaigns and scale your business efficiently.
답글 남기기