


The ElementsKit Liquid Glass module lets you effortlessly bring the modern, Apple-inspired Liquid Glass interface to your Elementor website. And, it requires no coding efforts. You have full control over the intensity of the glass’s optical properties while maintaining a smooth, fluid aesthetic.
This Elementor liquid glass addon also includes a variety of preset Liquid Glass layouts, making it easy to establish visual hierarchy and create harmony across your UX elements.
Let’s see how to create liquid glass effects in Elementor with the ElementsKit Liquid Glass Module.
How to add Liquid Glass Effect on Elementor Websites? #
Before getting to the main part, you need to know that the ElementsKit Glass module is a part of its pro version. So, make sure you have activated the ElementsKit Pro version. Then proceed to the first step:
Step 1: Activate ElementsKit Liquid Glass Effect Module #
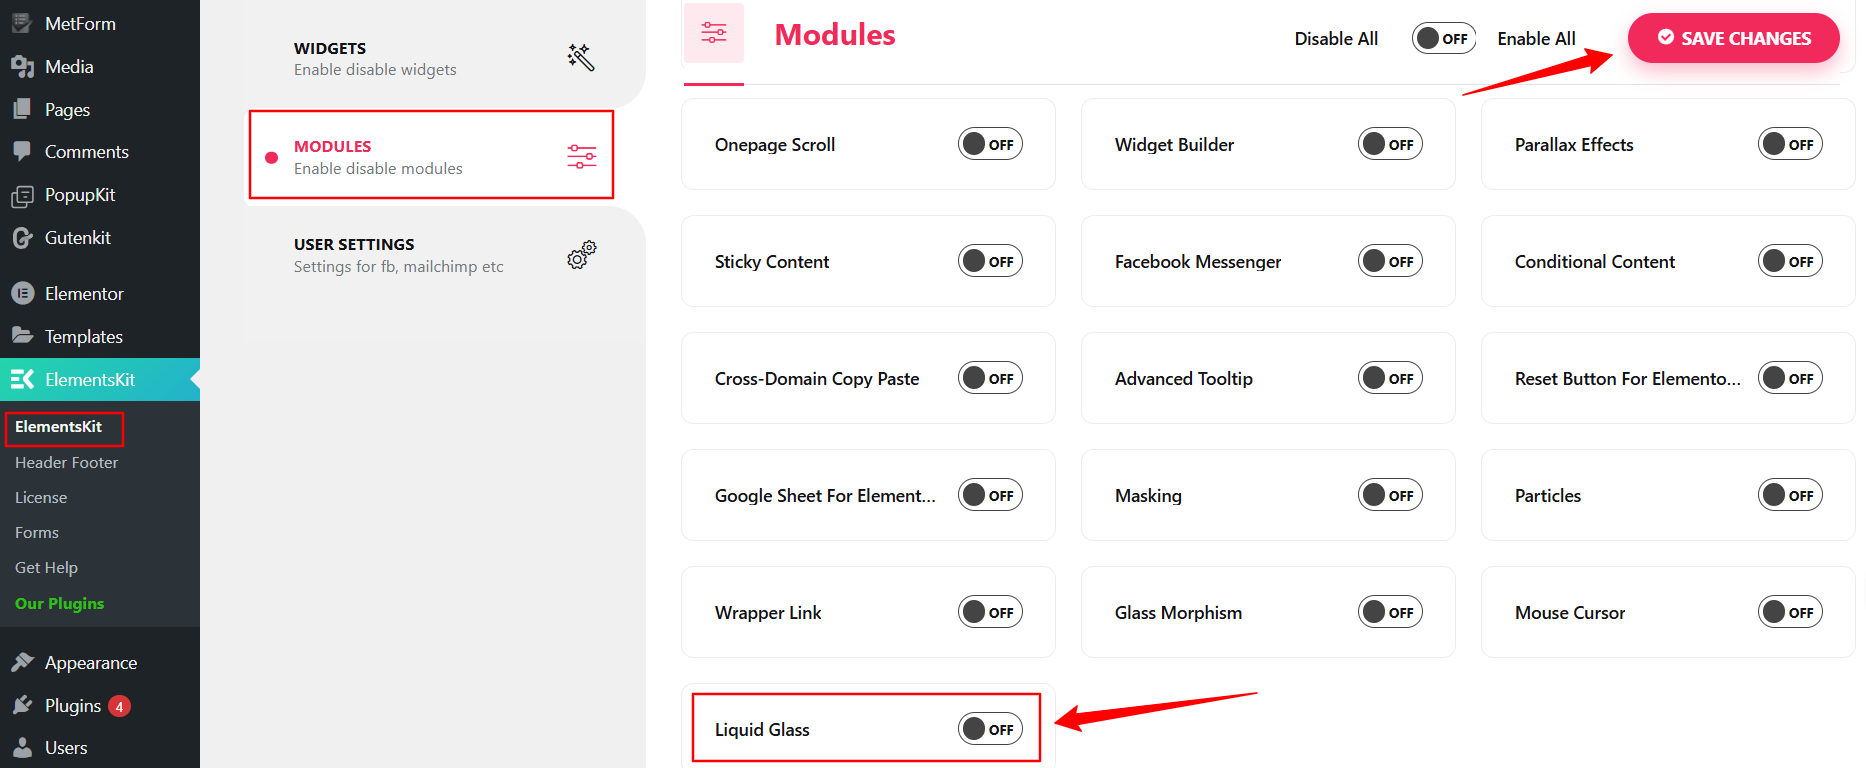
WordPress 대시보드에서 다음으로 이동합니다. ElementsKit > Modules. And, look for the Liquid Glass module and activate it. Then, hit the save changes button at the top right.
Doing this will enable the liquid glass effects to any widgets of ElementsKit, Elementor, or even on third-party addons. No matter what kind of widgets you are using: containers, buttons, headings, images, videos, galleries, accordions, tabs, sliders, etc.
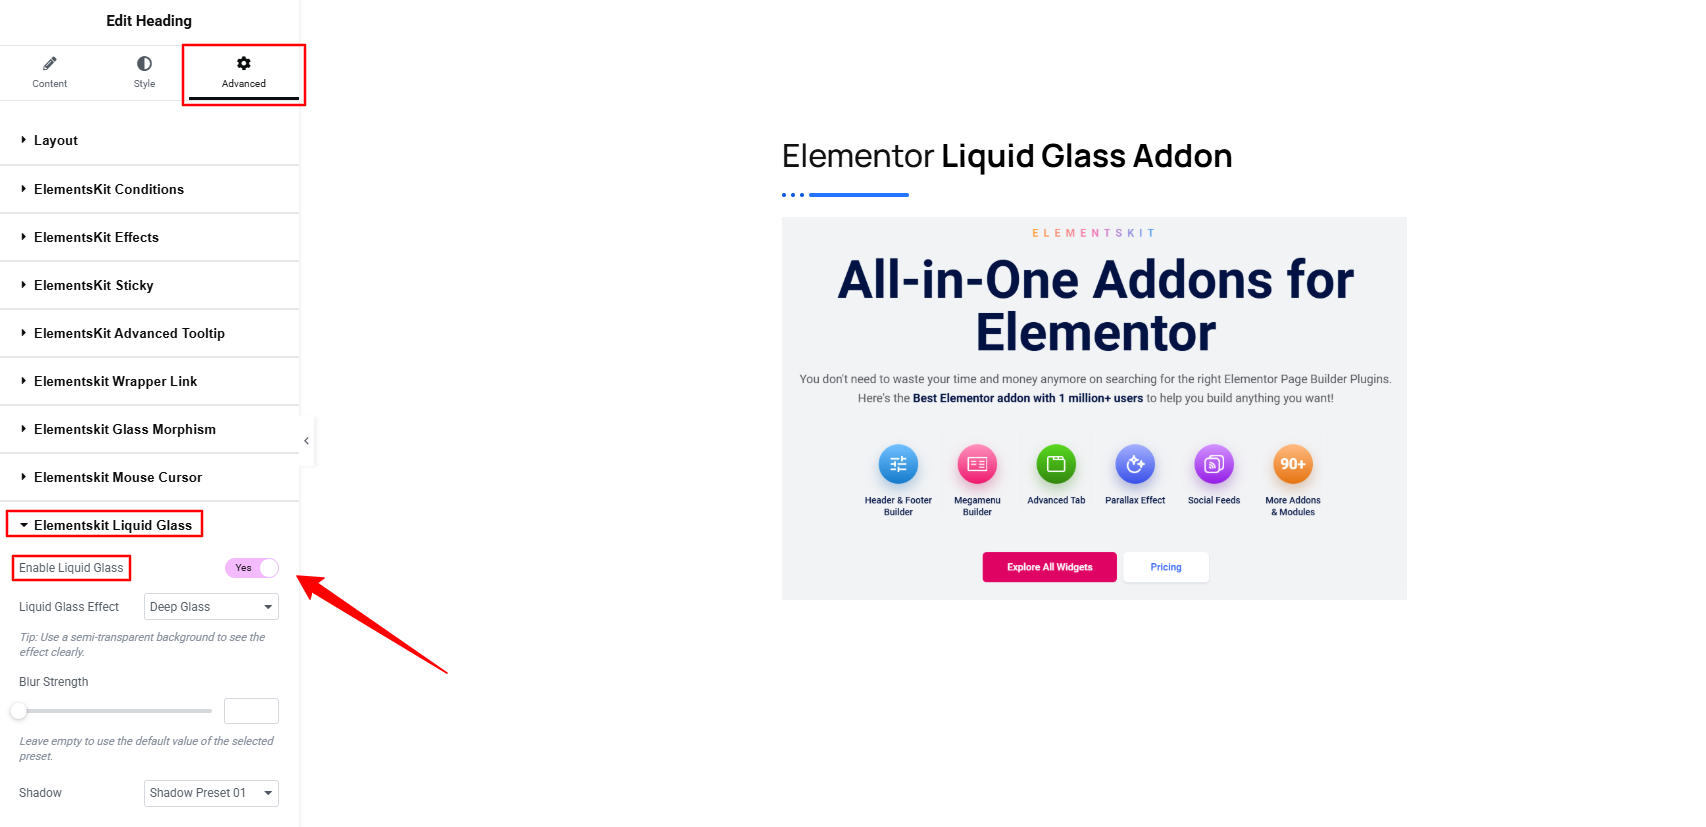
로 이동 고급 탭 of the widget you’re using and scroll down; you’ll see the Liquid Glass module. Enter this option and activate the toggle button. Enabling this option will reveal some Liquid Glass effect functionalities.
Here, the first thing you need to select is a liquid glass effect.
Step 2: Select a Liquid Glass Effect #
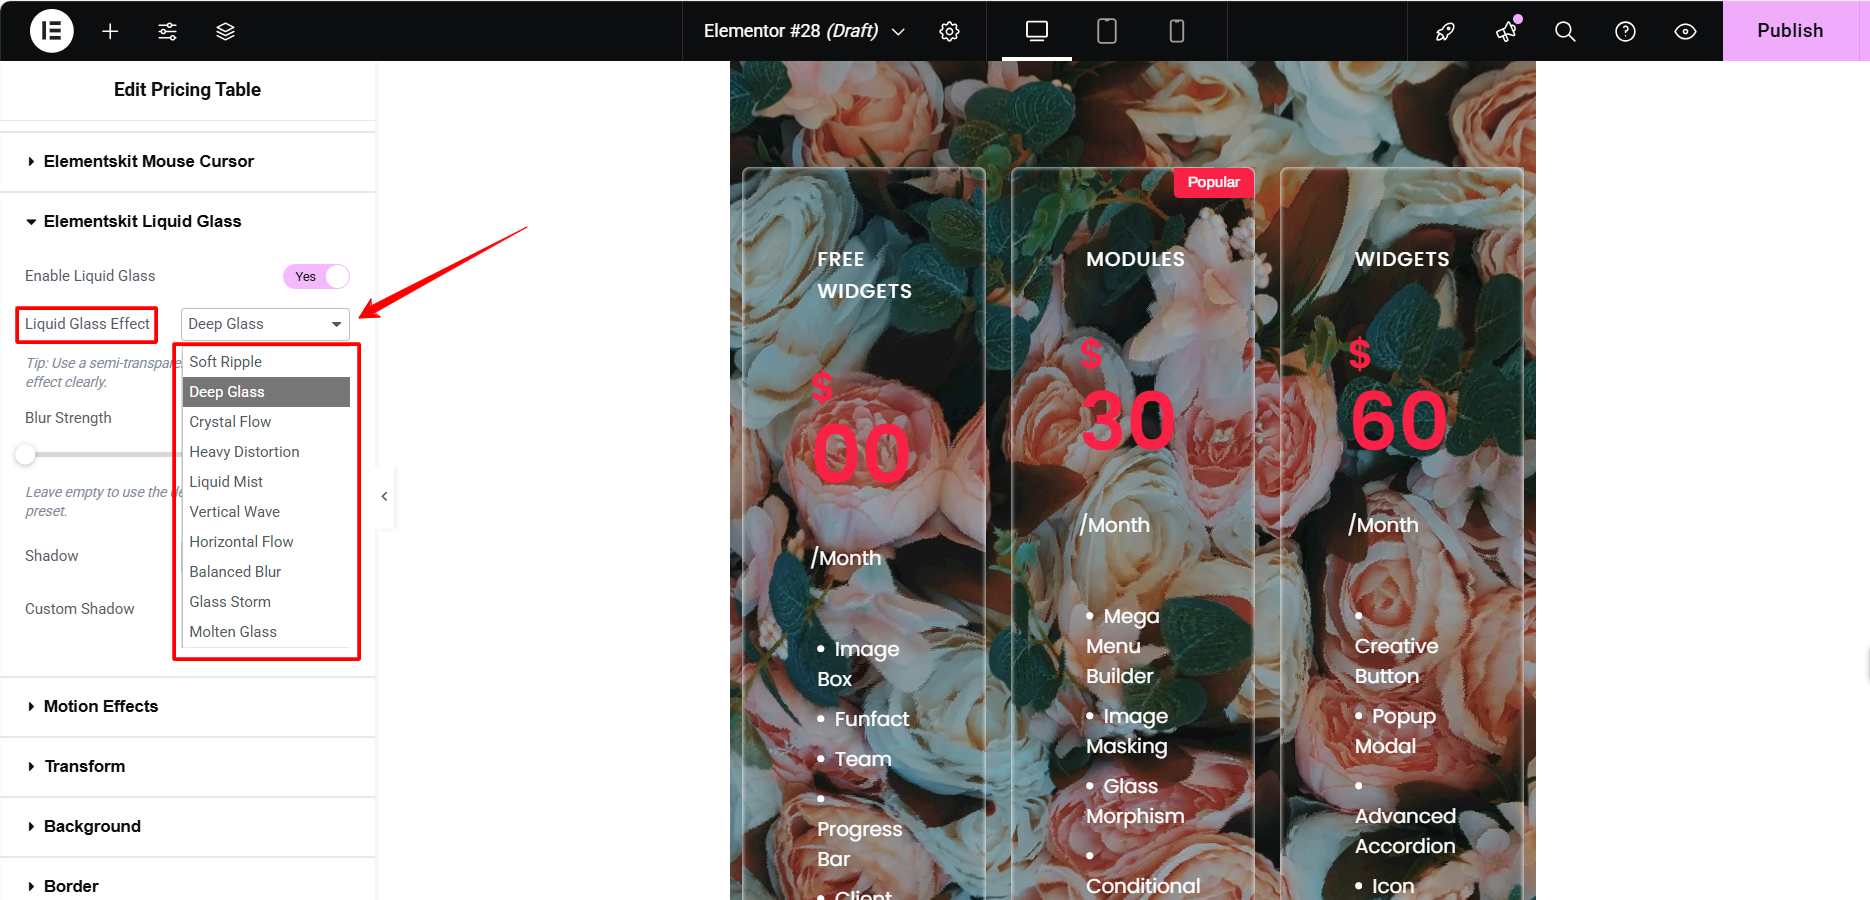
Come to the dropdown, you’ll see many glass effects to choose from. Like Deep Glass, Crystal Flow, Heavy Distortion, Liquid Mist, Vertical Wave, Horizontal Flow, Glass Storm, Molten Glass, etc. By using these liquid glass effects, you will be able to blend smooth glass with a sense of transparency and fluidity.
And, these effects are like readymade presets; after applying one, you are ready to go. But you can still set the blur strength and add a shadow effect if you want.
Step 3: Set the Blur Strength #
The blur strength feature of this Elementor liquid glass addon lets you control the transparency and softness of the glass effect. Simply adjust the slider or enter a specific numeric value to define the desired blur intensity.
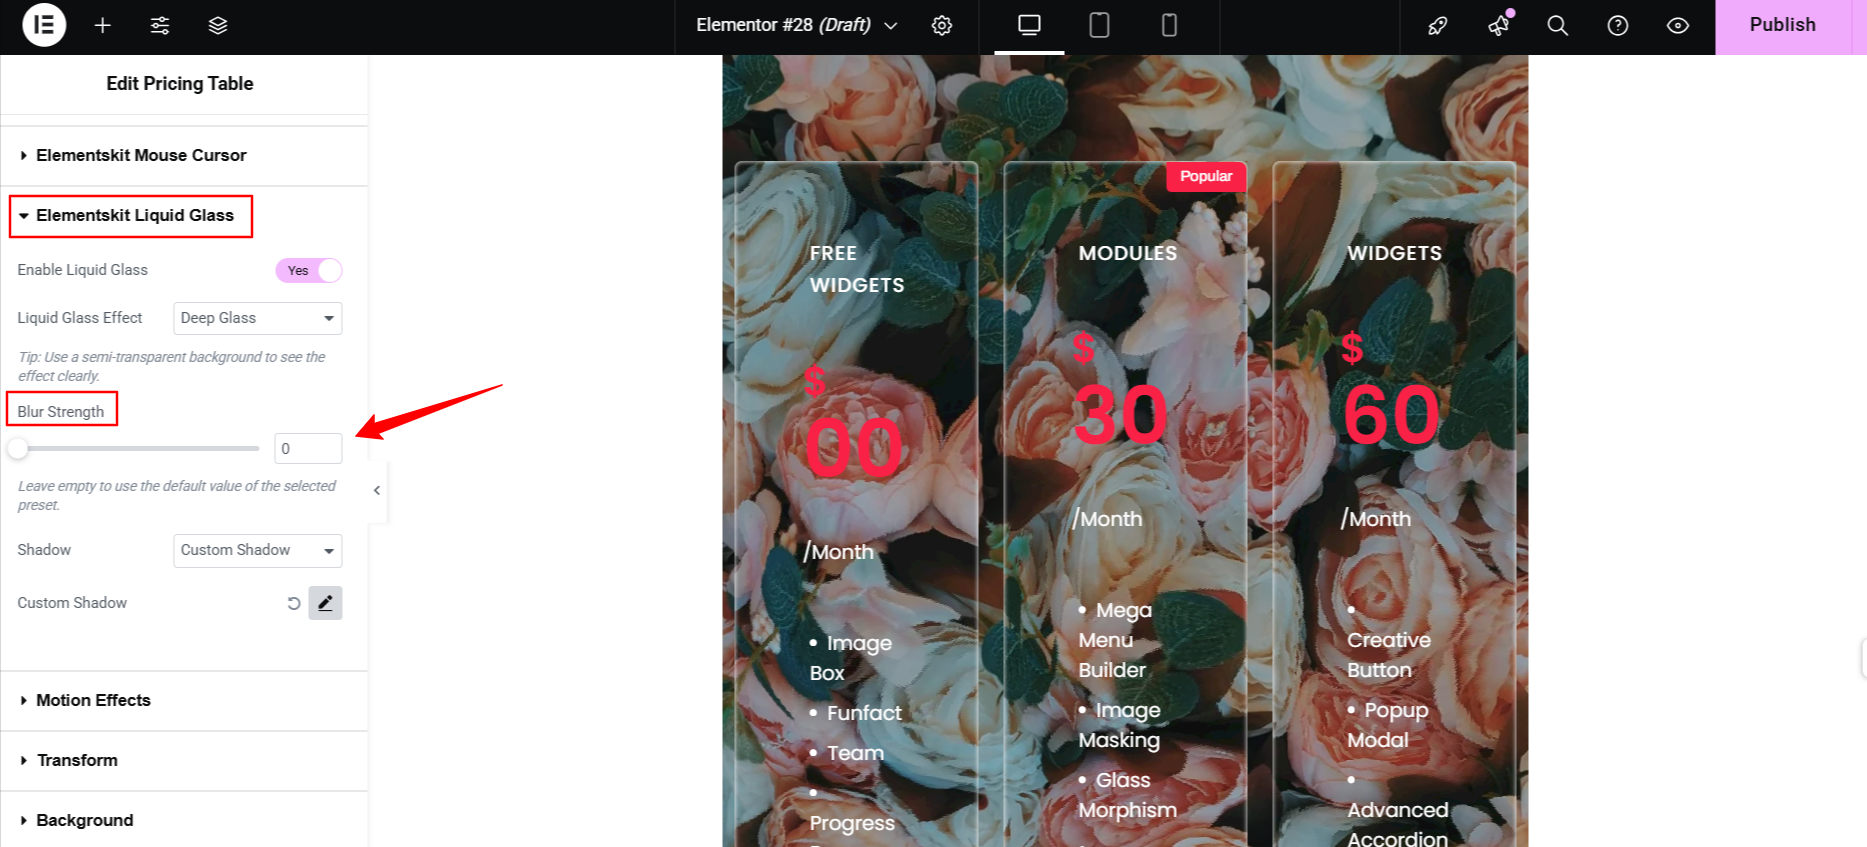
A higher value increases the gloss and opacity of the glass layer, making the underlying elements less visible.
Whereas, reducing the blur value softens the glass layer. As a result, the elements beneath the panel appear more clearly.
Step 4: Choose A Shadow Effect #
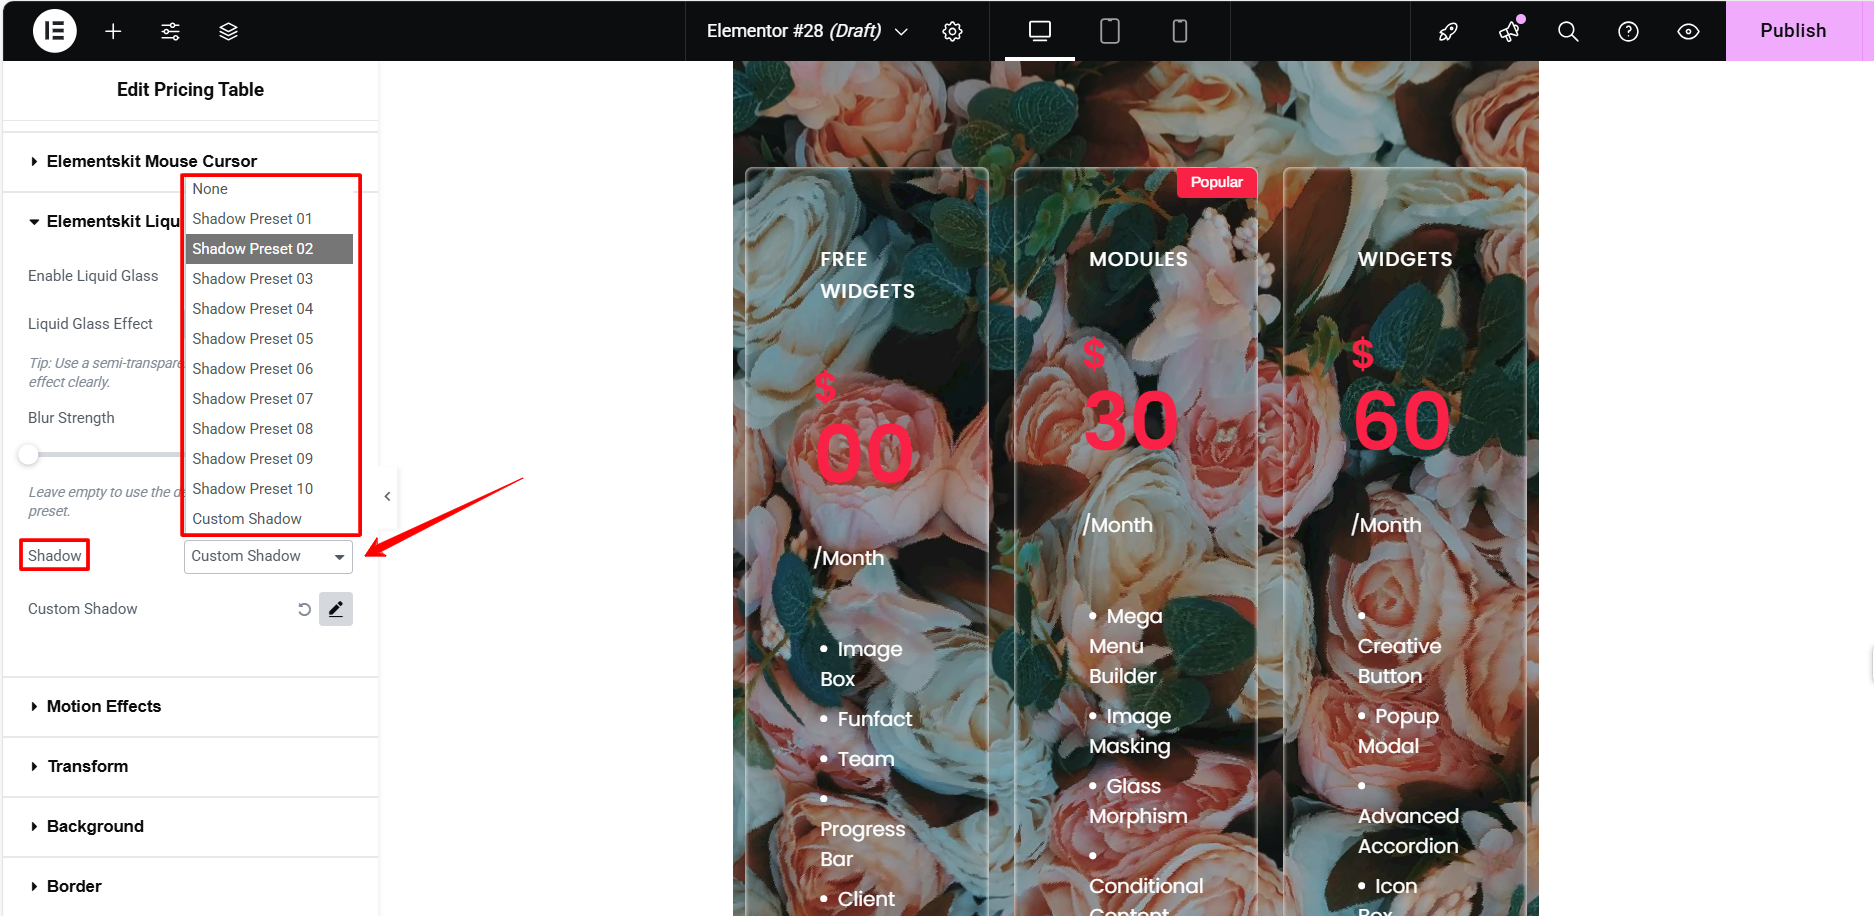
ElementsKit liquid glass module offers more than 10 presets of shadow effects. Further, you can create your own custom shadow effect. Selecting the right shadow effect perfectly complements the liquid glass appearance.
Step 5: Fine-Tune & Check Preview #
Now, just fine-tune other aspects of your design. You can add different scrolling animations to bring out a more appealing look for your web design. And, once all done, you must check the preview before publishing or making your design live
Here’s the preview of our design:

Now, you know how to add the liquid glass effect with any Elementor widgets and containers. It doesn’t take any expertise with the ElementsKit Liquid Glass addon.
Moreover, you can add an attractive Glassmorphism interface to your Elementor website with just a few clicks. Here is the no-code method of applying glassmorphism effect.
Quick Recap
Let’s recap what we covered in this tutorial on adding Liquid Glass effects in WordPress:
Tools Used: Elementor (Free Version) & ElementsKit 요소 애드온
✅ Install and activate the ElementsKit Liquid Glass Module,
✅ Then, start editing the page or post where you want to apply the liquid glass effect.
✅ Enable the liquid glass toggle button.
✅ Choose an Apple-inspired liquid glass preset.
✅ Adjust the blur strength to determine the density of liquid glass effects.
✅ Choose a pre-made shadow effect to influence the liquid glass showcasing.
And, this was the easiest way to add the trendy liquid glass effect to your site.


