


그만큼 ElementsKit Facebook Feed widget connects your WordPress site with Facebook using the official Graph API, allowing you to automatically display page posts inside Elementor.
How to Use ElementsKit Facebook Feed widget #
- Create an App – Go to Meta for Developers and create a Facebook app to enable API access.
- Generate Access Token – Create a valid Graph API token to securely fetch your page data.
- Add Token in Widget – Paste the token inside the Facebook Feed widget settings in Elementor.
- Customize & Publish – Adjust layout and display options, then publish to show posts automatically
비디오 가이드를 시청하세요:
Follow the detailed steps:
Facebook API 키 생성 #
시작하기
Access your WordPress dashboard and go to ElementsKit 플러그인.
딸깍 하는 소리 ElementsKit 그리고 가다 위젯
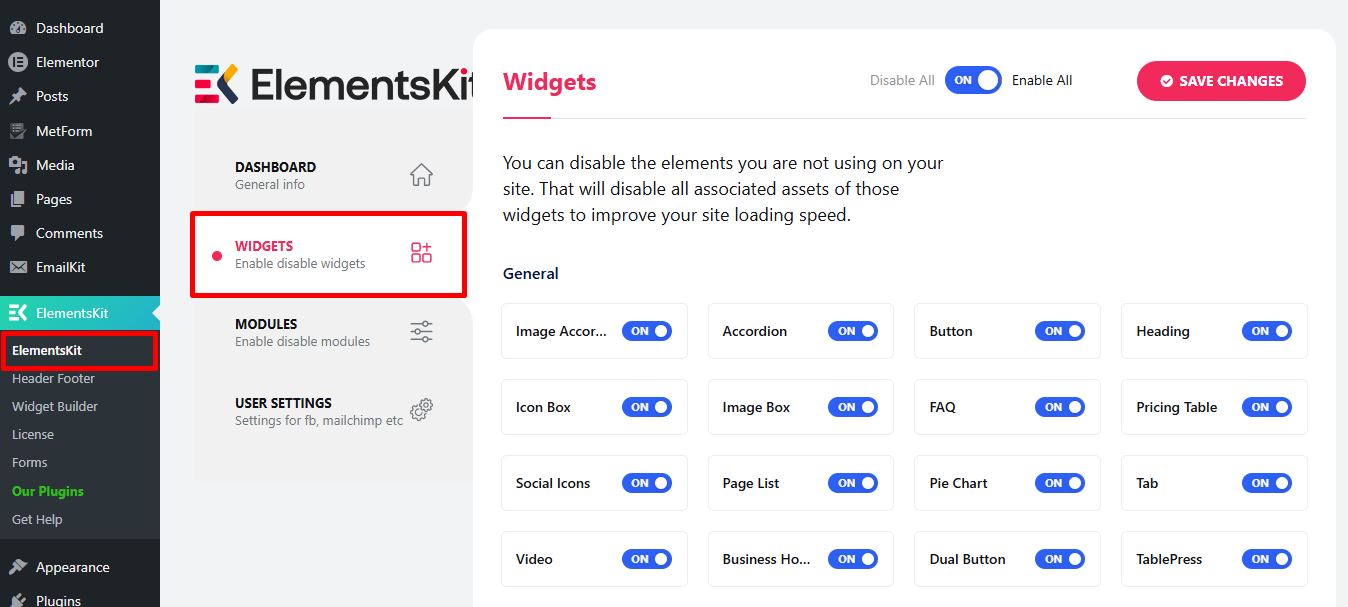
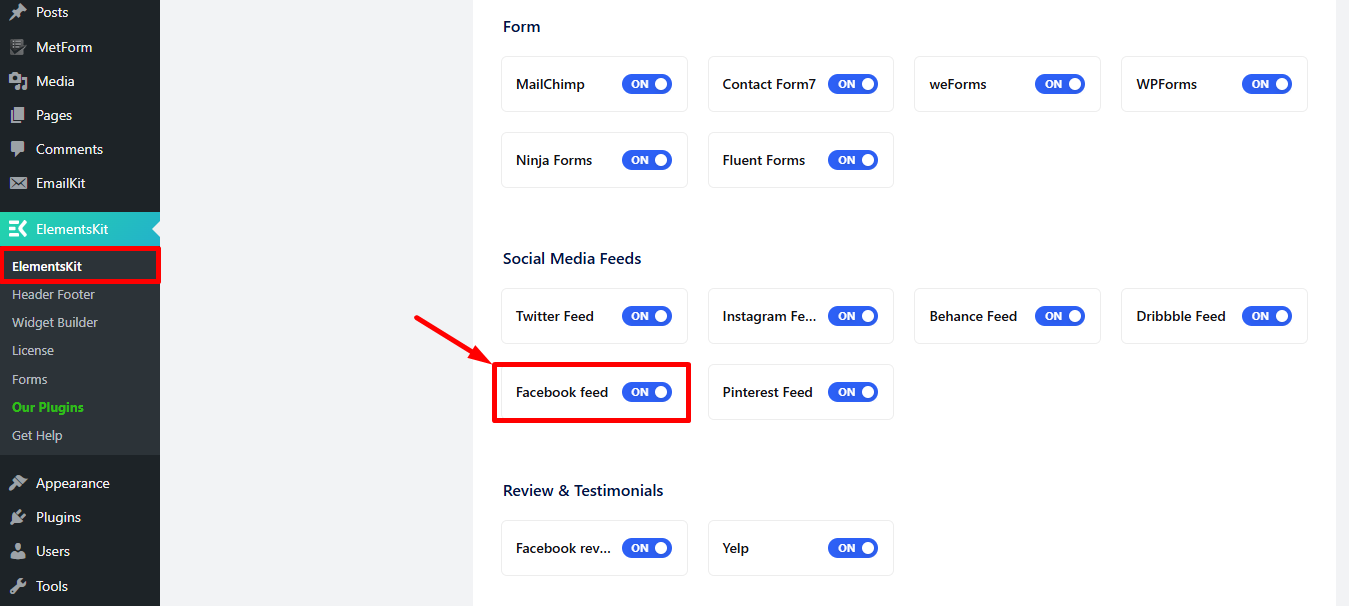
Scroll down and find 페이스북 피드 > toggle it to 켜다.
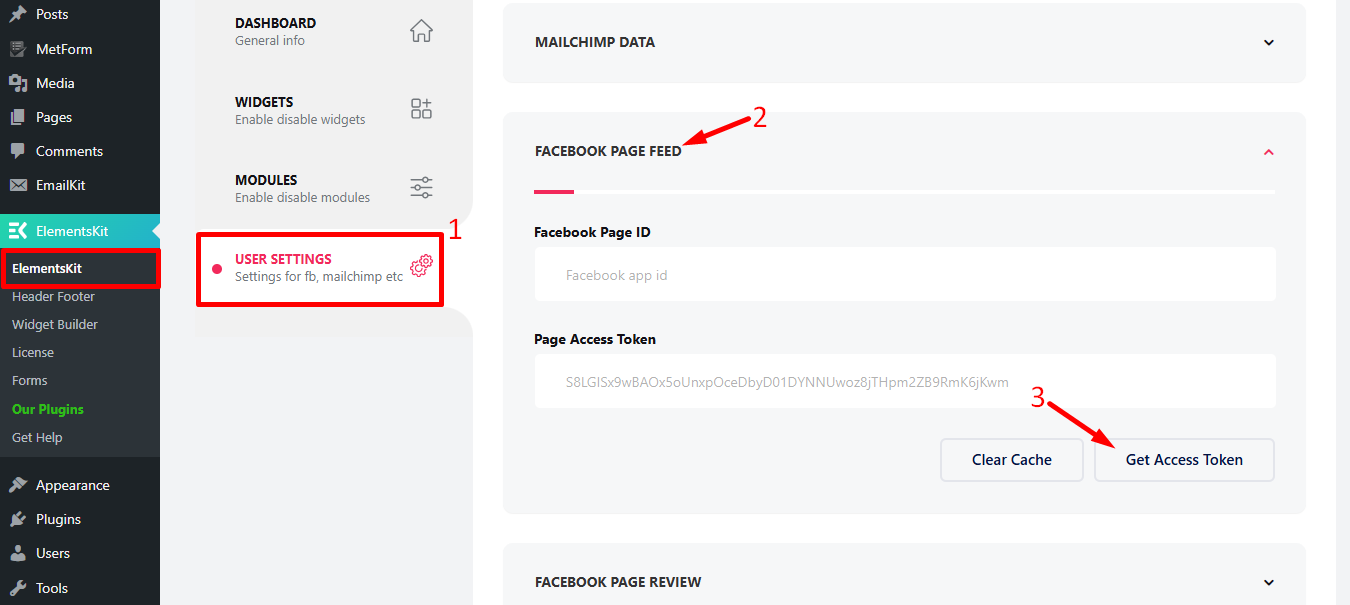
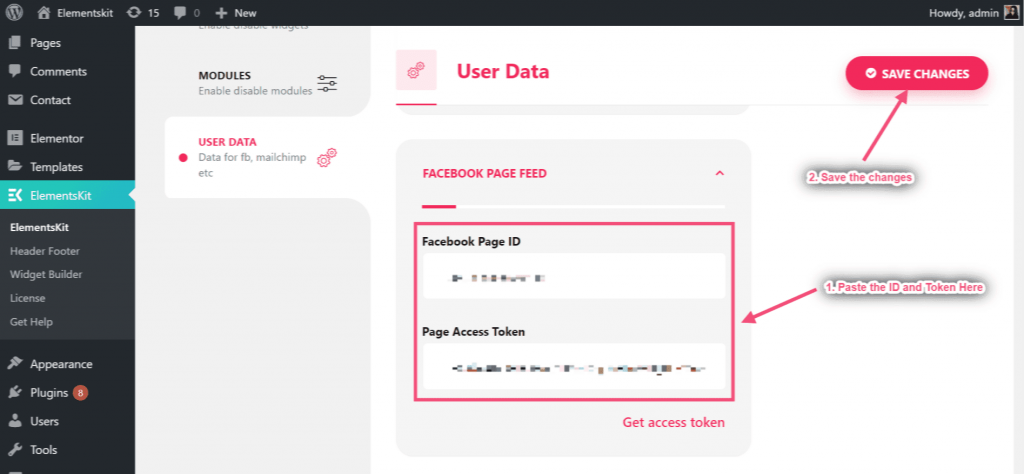
이동 USER SETTINGS from ElementsKit
Enpand FACEBOOK PAGE FEED
클릭 액세스 토큰 받기 액세스 토큰을 얻으려면
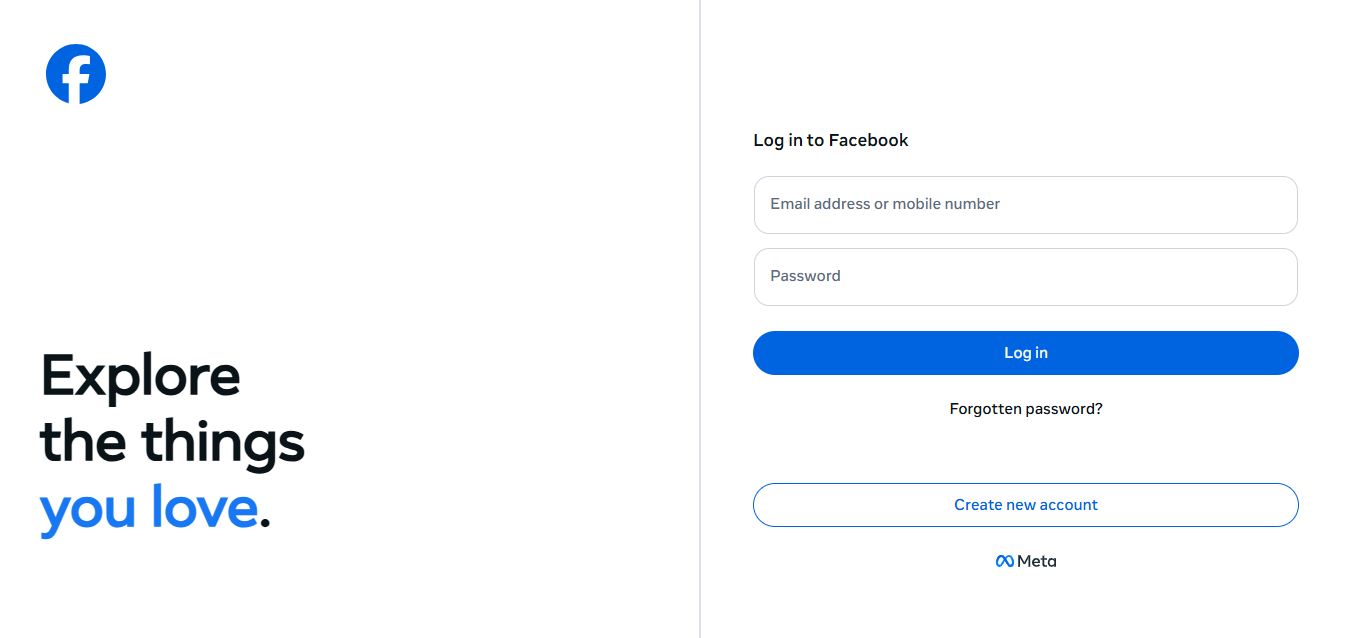
You’ll be redirected to Facebook log in page, log in now.
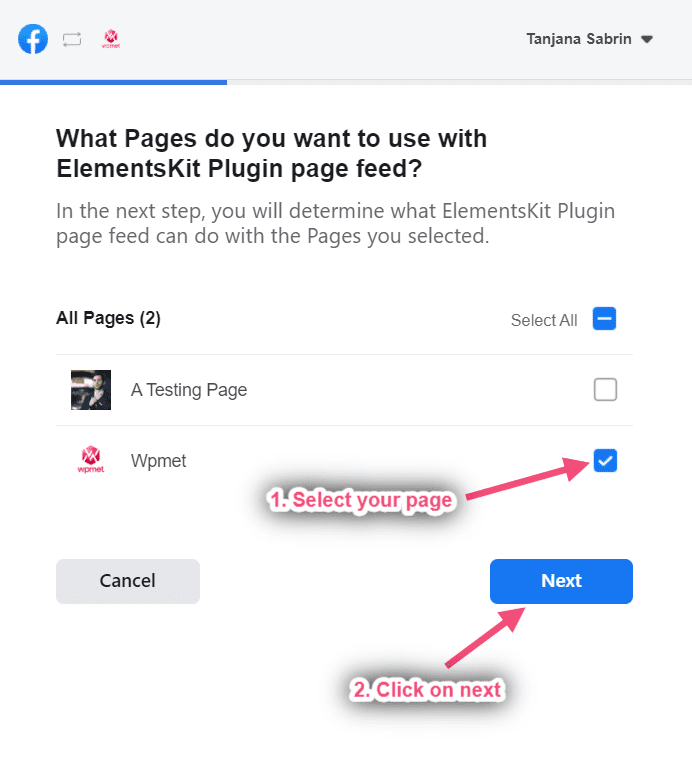
단계=>4: 페이지 선택 => 클릭 다음
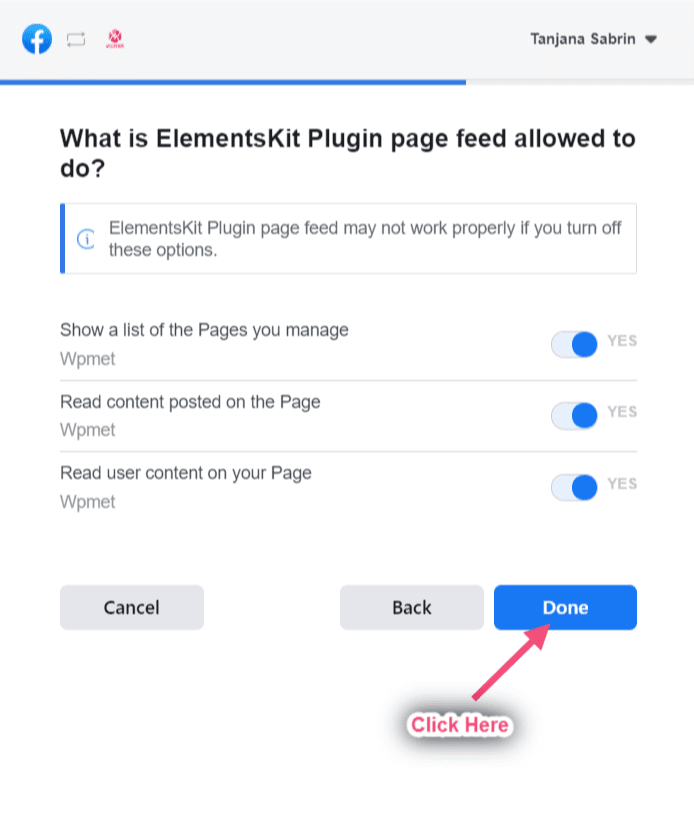
단계=>5: 클릭 완료
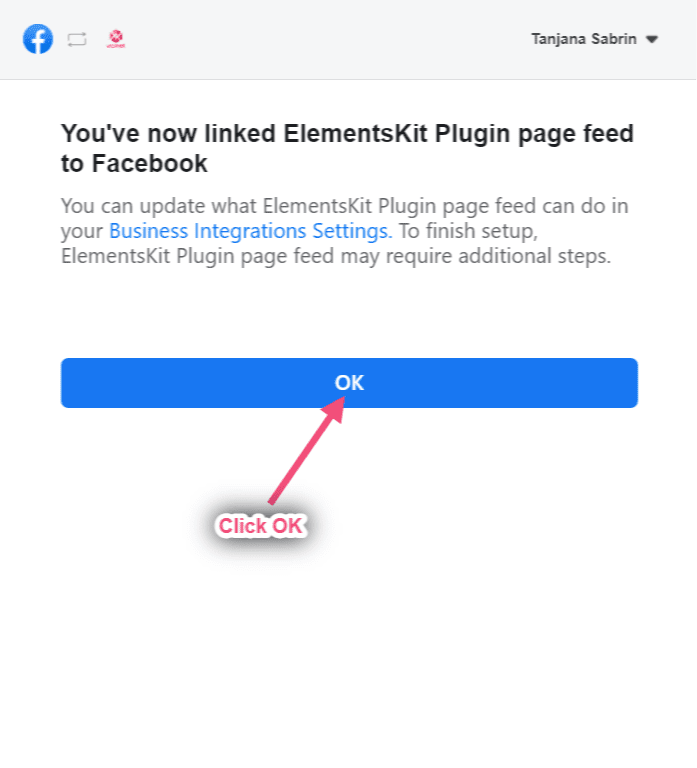
단계=>6: 클릭 좋아요
단계=>7: 이제 페이지 ID와 액세스 토큰을 받게 됩니다. 단지 둘 다 복사
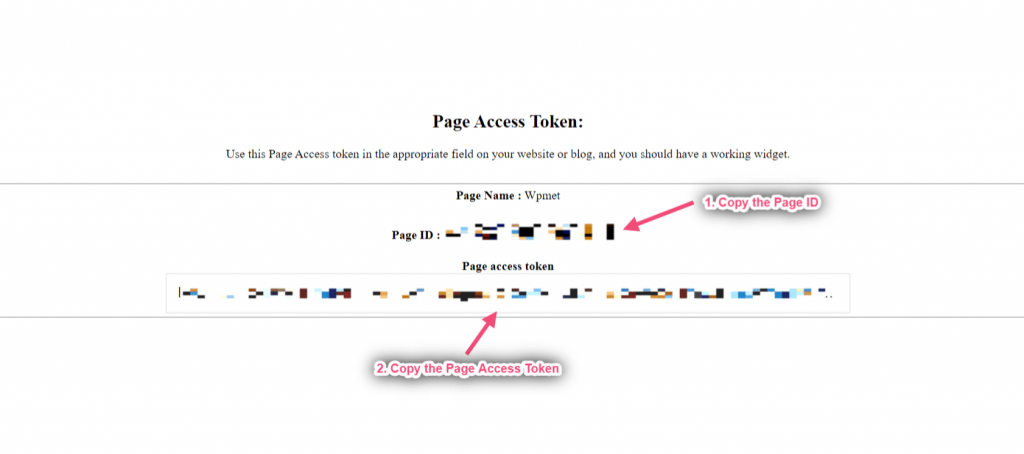
단계=>8: 이제 다음으로 이동하세요. 페이스북 페이지 피드=> 페이지 ID 제공=> 페이지 액세스 토큰=> 변경 사항을 저장하다
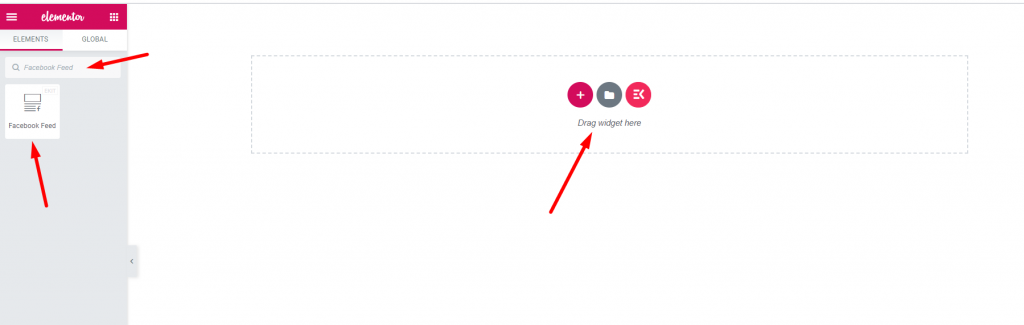
단계=>9: 이동 엘레멘터=> 검색 페이스북 피드=> 그냥 필드를 드래그 앤 드롭하세요.
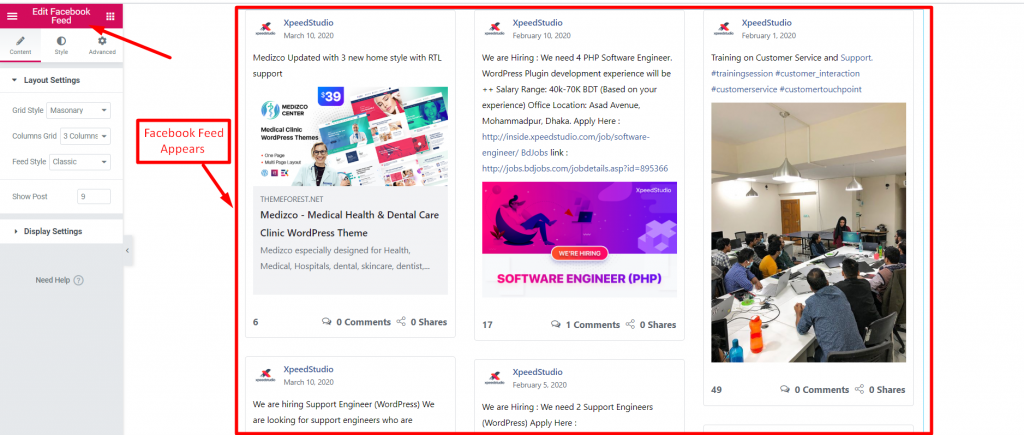
이제 Facebook 게시물을 Facebook 피드 위젯에 표시할 수 있습니다.
기능 #
내용물 #
레이아웃 설정 #
단계=>1: 이동 강요=> 검색 페이스북 피드=> 그냥 필드를 드래그 앤 드롭하세요.
단계=>2: 클릭 레이아웃 설정=> 선택 그리드 스타일 목록, 그리드 또는 벽돌
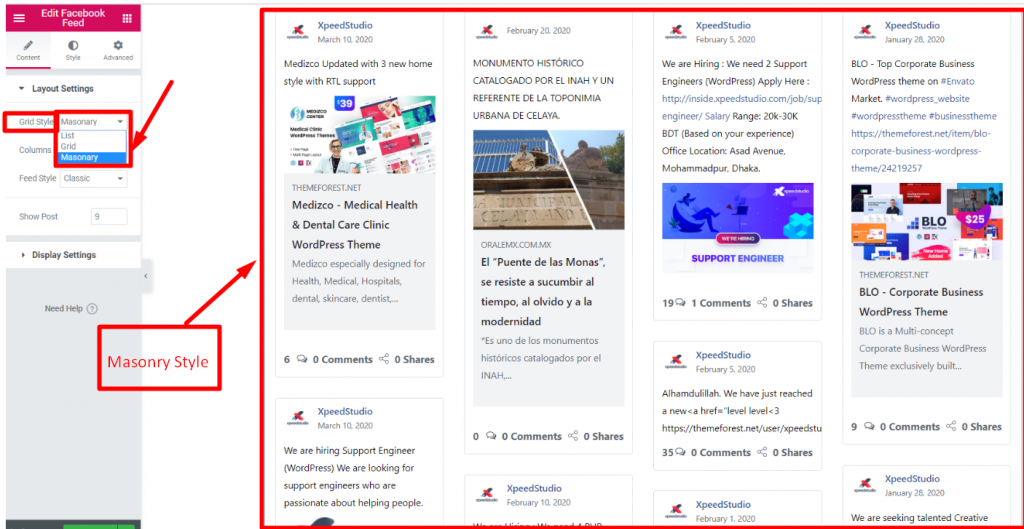
단계=>3: 선택하세요 기둥 그리드 1,2,3 또는 4 그림을 표시하기 위해 선택하려는 열 수를 의미합니다.

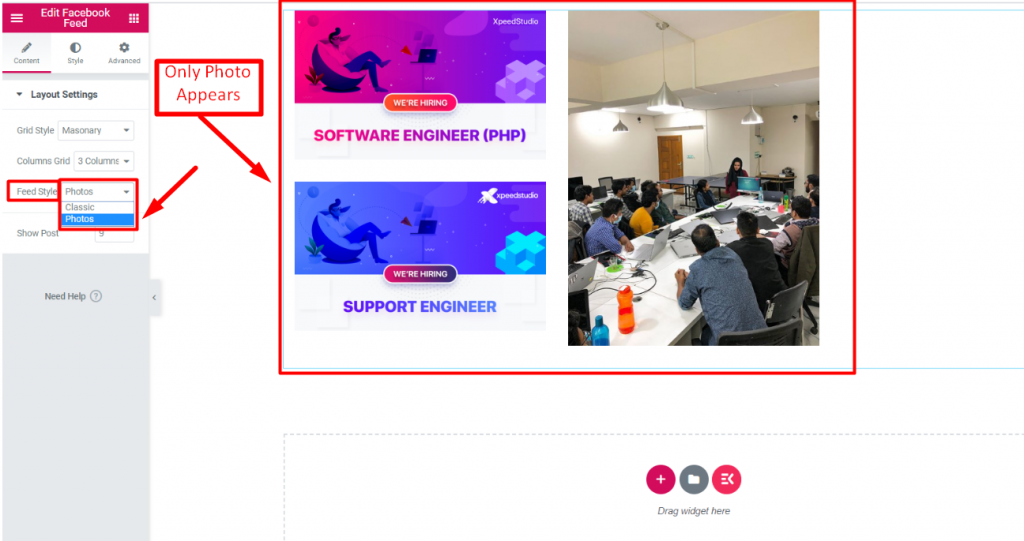
단계=>4: 선택하다 피드 스타일 권위 있는 또는 사진
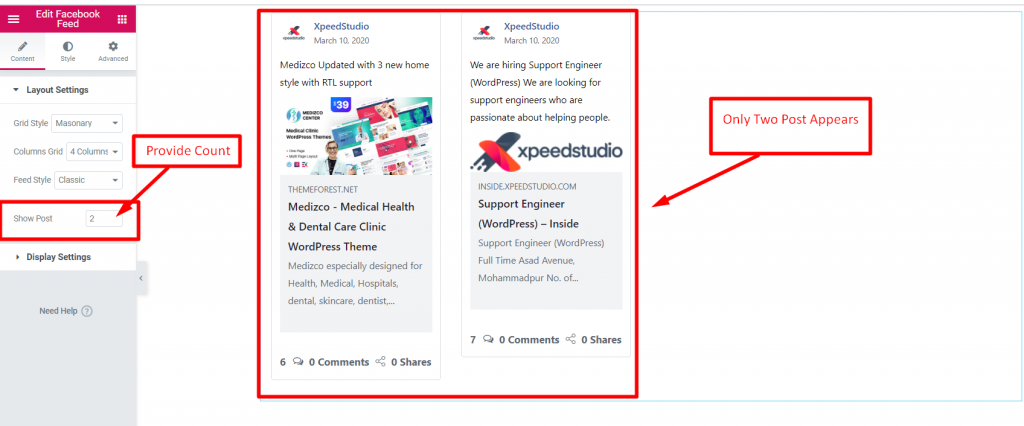
단계=>5: 제공하다 카운트 값 ~의 얼마나 많은 게시물 당신은 표시하고 싶어
화면 설정 #
단계=>1: 작성자 표시 활성화 보여주기 위해 작가 정보 귀하의 게시물에

단계=>2: 작성자 설정=> 선택 프로필 이미지만, 이름만 또는 둘 다

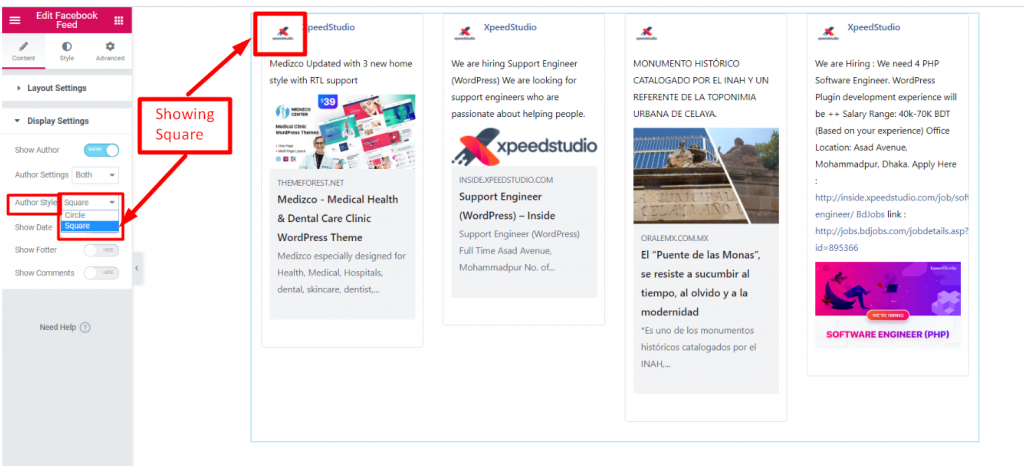
단계=>3: 썸네일 스타일을 선택하세요 원형 또는 사각형
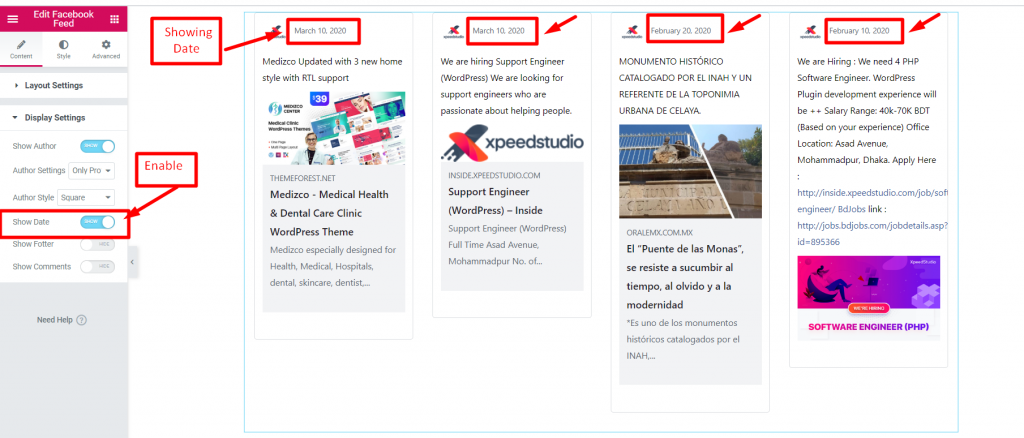
단계=>4: 공연 날짜 활성화 게시물 업로드 날짜를 제공하기 위해
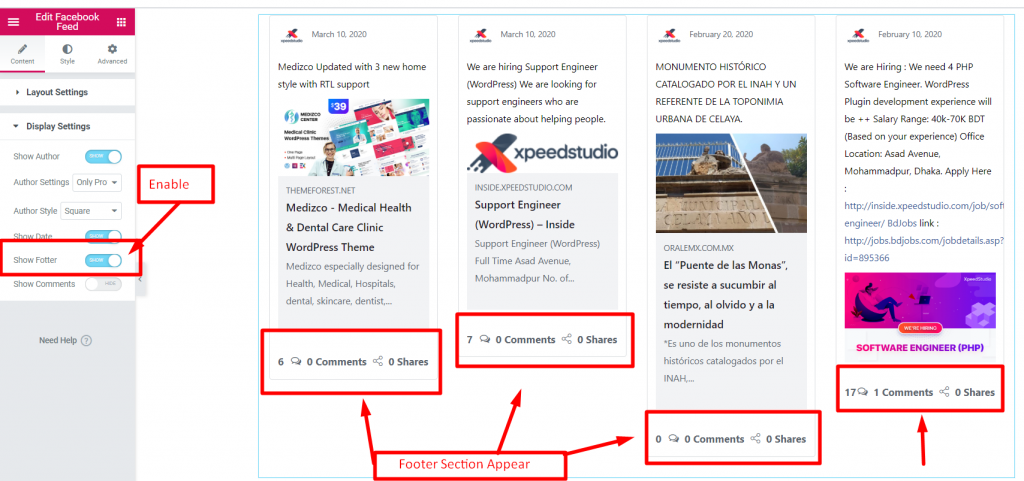
단계=>5: 바닥글 표시 활성화 바닥글 섹션을 표시하려면
단계=>6: 댓글 상자 활성화 게시물에 대한 사용자의 댓글과 반응을 보여주기 위해


