인증 통합

MetForm has Auth integration that allow you to connect your WordPress forms with third-party apps. This lets you safely transfer information between multiple platforms with proper authentication and conditional access.

Quick Overview
This documentation will guide you to integrate MetForm with Auth for data security and authentication. The free version of MetForm comes with this feature. But, you will need Elementor free as MetForm supports its drag-and-drop interface.

Tools needed: Elementor (free) & MetForm (free).

Now, you have to add a login form and enable Auth login with necessary settings. Similarly, add a registration form and enable Auth registration by providing required info. Finally, submit data and your all entries will be stored All Users tab under Users.

How to integrate MetForm with Auth #

Here is the four step tutorial to integrate MetForm with Auth:

Step 1: Create a Login form #

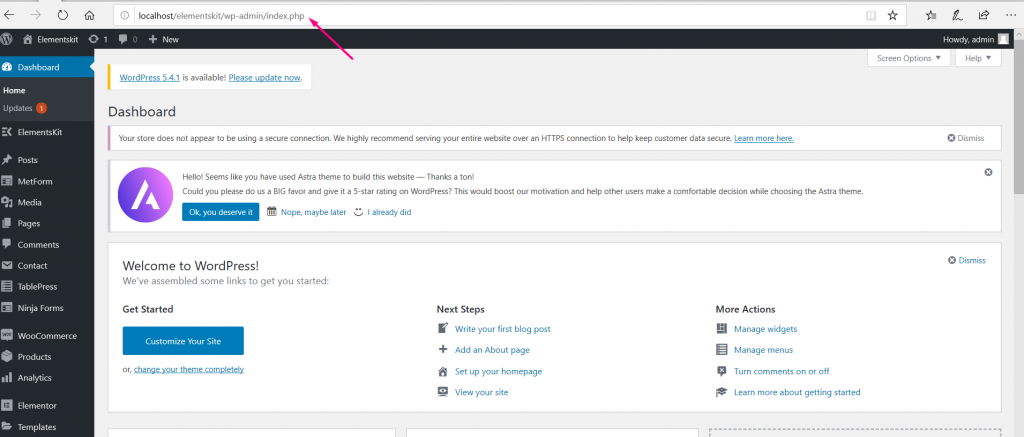
First, you need to add a login form with MetForm. For that, visit your WordPress dashboard and navigate to MetForm >> Forms. Then, press the “Add New Form” button and a form creation tab will popup.
From there, you can create a new form with a blank template.

Start with a blank template

You need to enter the form name, and click the “import” button. Then you will be taken to the Elementor editor.

Enter a form name and click import

Step 2: Enable Auth Login #

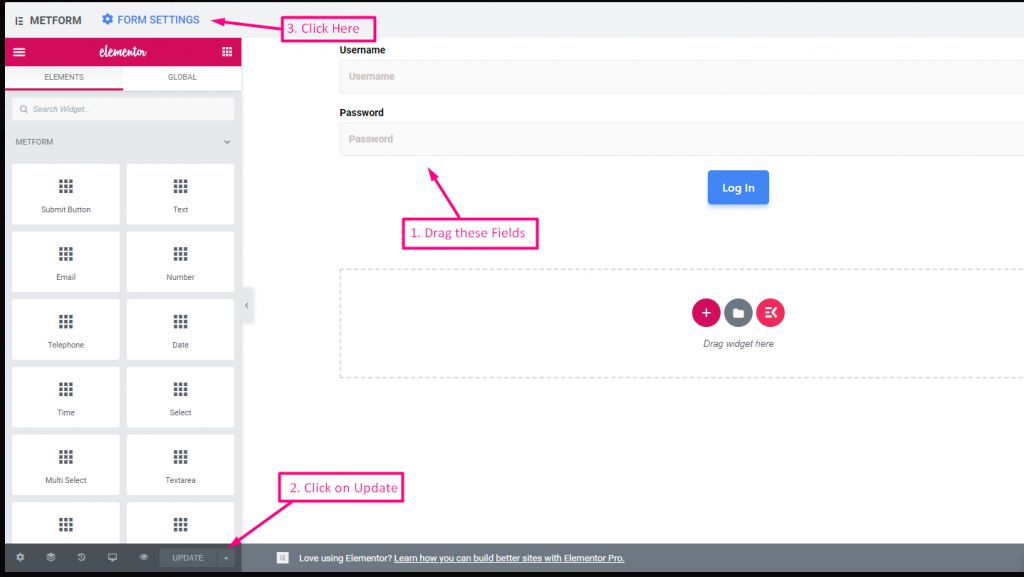
In the Elementor editor, we dragged and dropped the necessary widgets to build the login form –

  • A Text field widget for the Username
  • A Password widget for the Password
  • A Submit Button widget for Login, then customized each one as shown in the image.
Drag and drop necessary widgets and customize them to make a login form

이제 다음으로 이동하세요. All Forms 그리고 click on your form to enable Auth option.

Go to All forms and click on your form to enable auth option

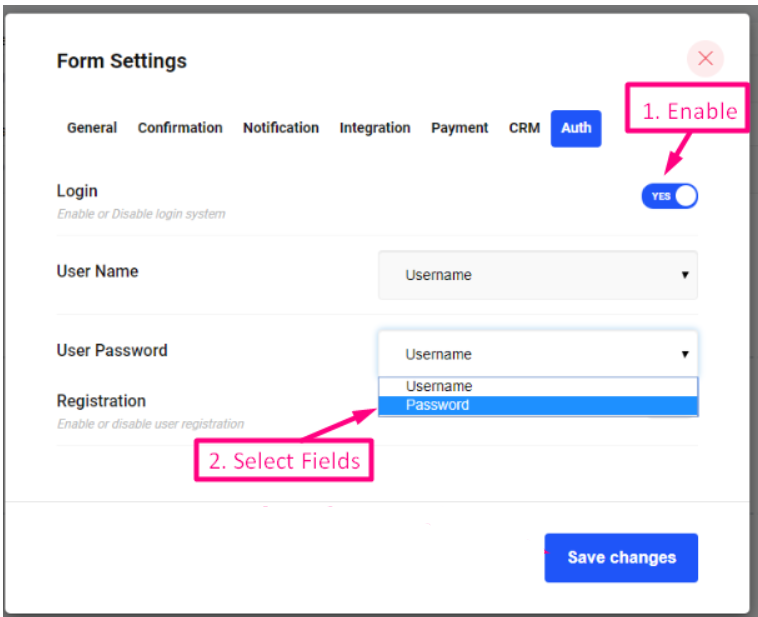
Go to the Auth tab and turn on the toggle to enable the Login option.

Go to Auth tab and enable Login option

Then, navigate to the Auth tab from the popup window and take the following attempts:

  • 로그인 시스템을 표시하려면 로그인을 활성화하세요.
  • 사용자 이름 양식 필드 선택
  • 사용자 비밀번호 양식 필드 선택
Select username and passwords from the drop downs and click
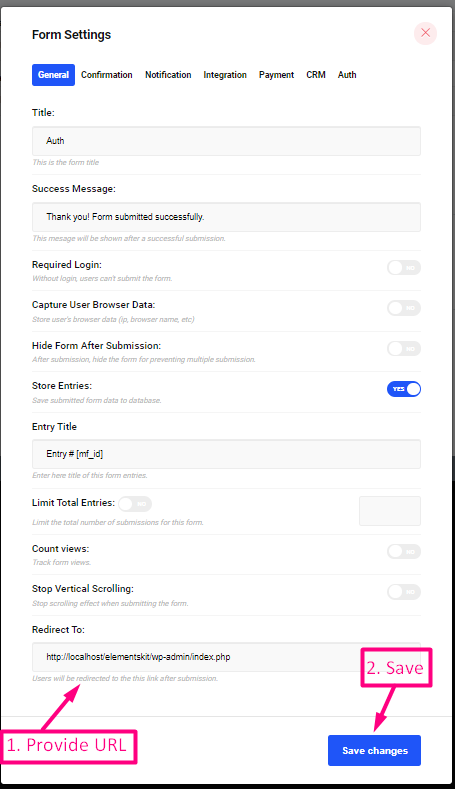
  1. 이동 일반 탭=> 제공 리디렉션 URL 로그인하려는 곳
  2. 완료된 것, 변경 사항을 저장하다
Provide Redirect URL in which you want to Log In
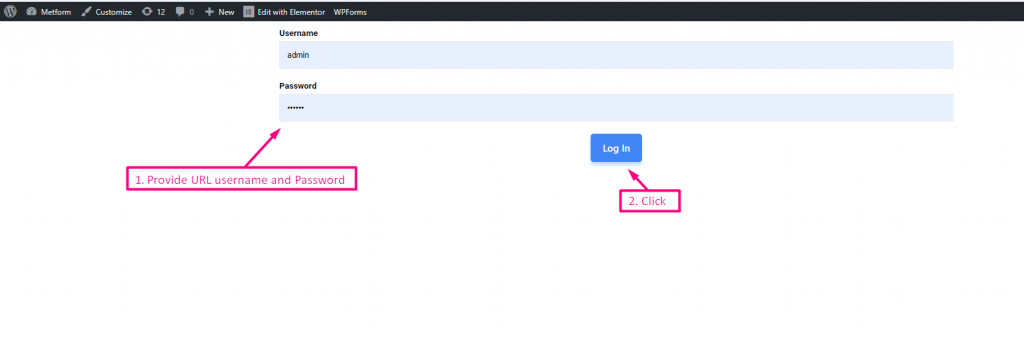
  • Now Log In with your Username and Password on the frontend.
  • Then, logged in to 리디렉션 URL 관리 패널 제공.
Auth Login with MetForm

Step 3: Create a register form #

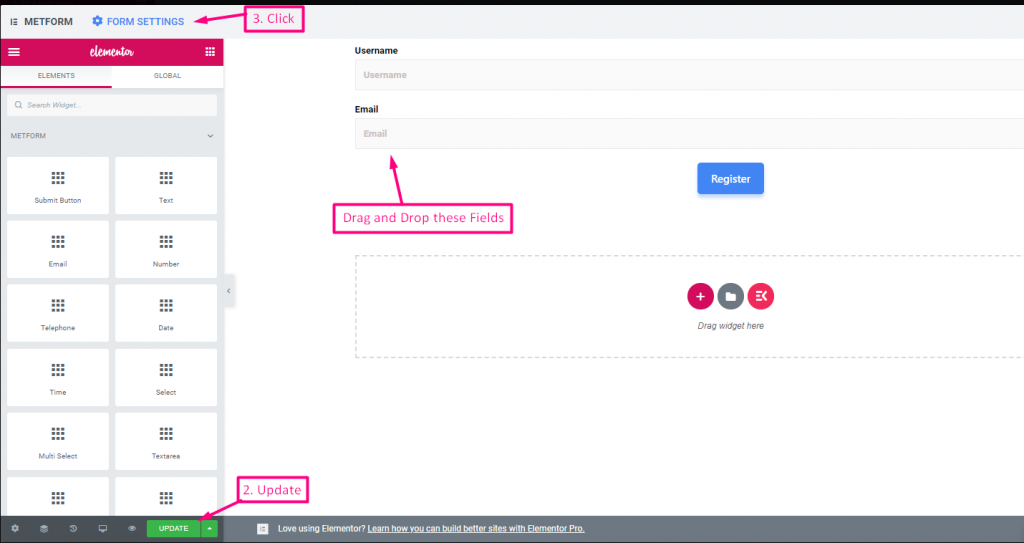
Similar to the login form, add registration form by taking the following attempts:

  • 등록을 위한 드래그 앤 드롭 필드
  • Click on Publish
Drag and drop the necessary fields to create a register form and click publish

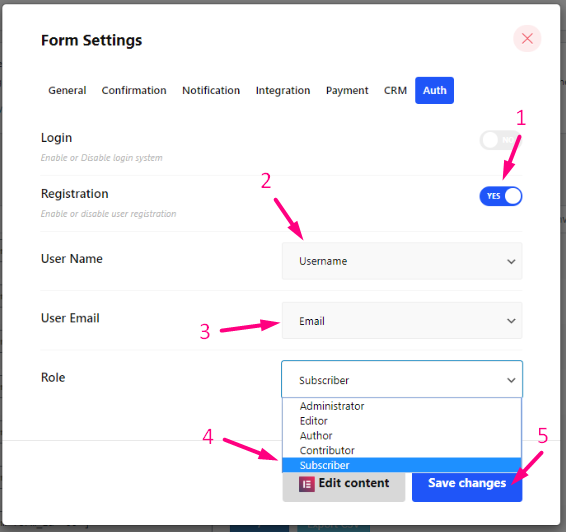
Now, Go to form Settings, navigate to the Auth tab from the popup window and:

  • 사용자 등록 시스템을 표시하려면 등록을 활성화하세요.
  • 사용자 이름 양식 필드 선택
  • 이메일 양식 필드 선택
  • 다음을 의미하는 역할을 선택하세요. 등록을 위한 사용자 유형을 선택할 수 있습니다
  • 완료된 것, 변경 사항을 저장하다
Go to auth in the form settings and enable register button and select necessary options

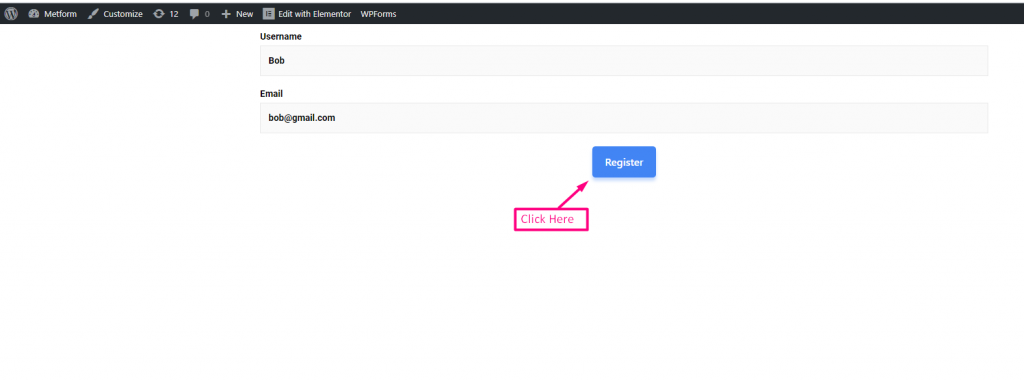
당신의 등록 양식=> 클릭하세요 등록하다 and your data will be stored in WordPress.

Fill up the register form and submit

Step 4: Check submitted entries. #

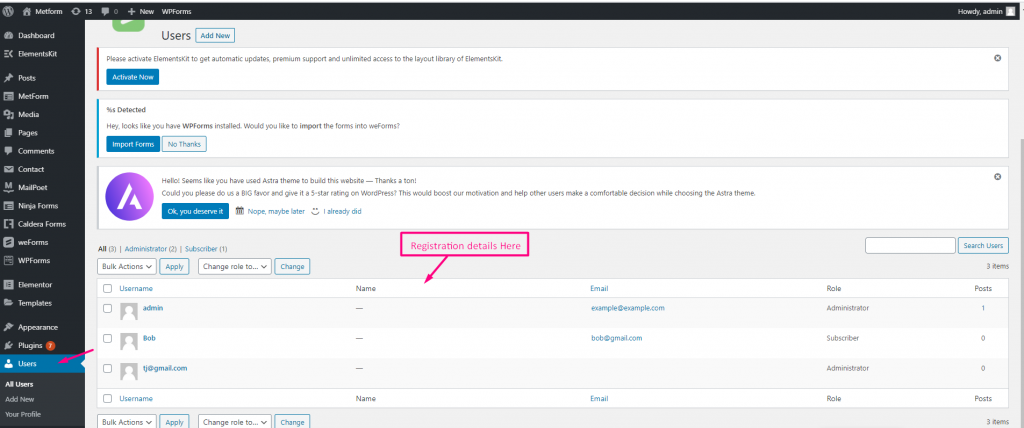
Now to check submitted entries on the backend, go to 사용자=> 모든 사용자들=> Role이 등록된 계정 목록을 볼 수 있습니다..

Go to form entries and check your submitted register form's entries

당신의 감정은 무엇입니까?

Updated on 8월 23, 2026