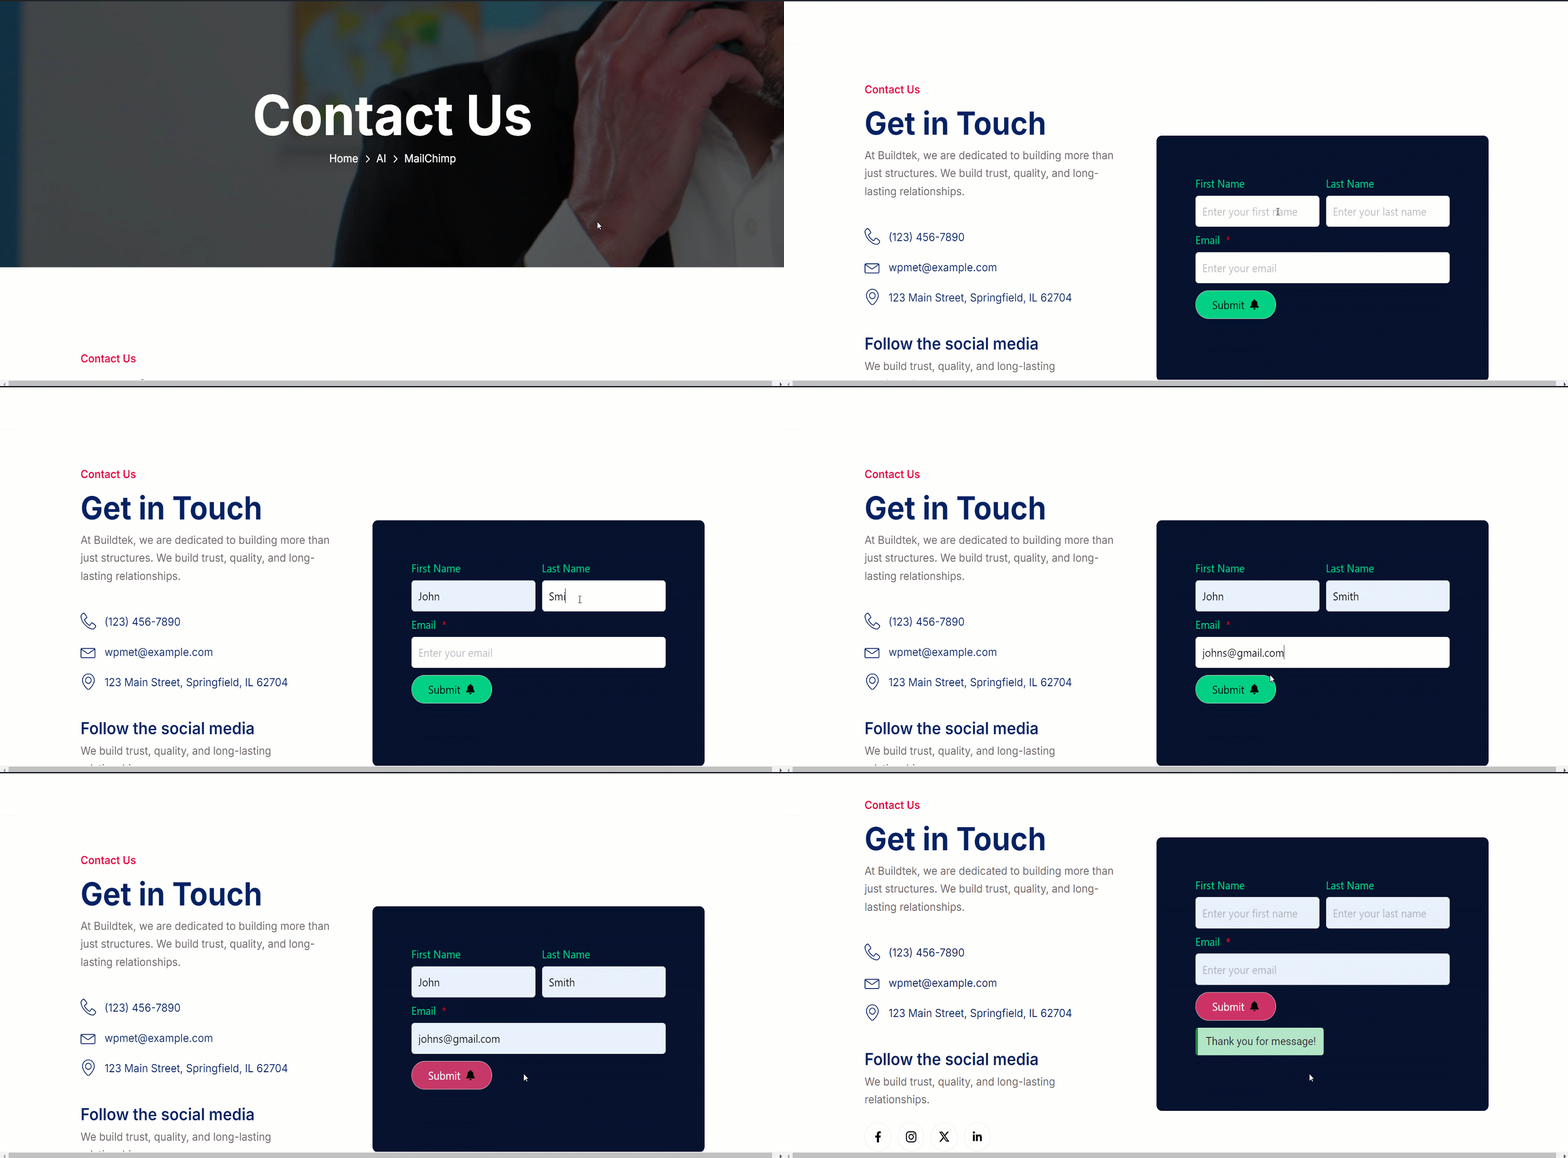
GutenKit Mailchimpは ブロック that helps you to create easy signup forms for engaging email campaigns. このブロックを使用すると、テキスト、画像、ボタン、その他の要素を含めることができます。
ドキュメントを確認し、GutenKit Mailchimp ブロックの使用方法を学習します。
Mailchimpの使い方 #
プロセスを簡単な手順で示しました。
ステップ1: ブロックを有効にする #
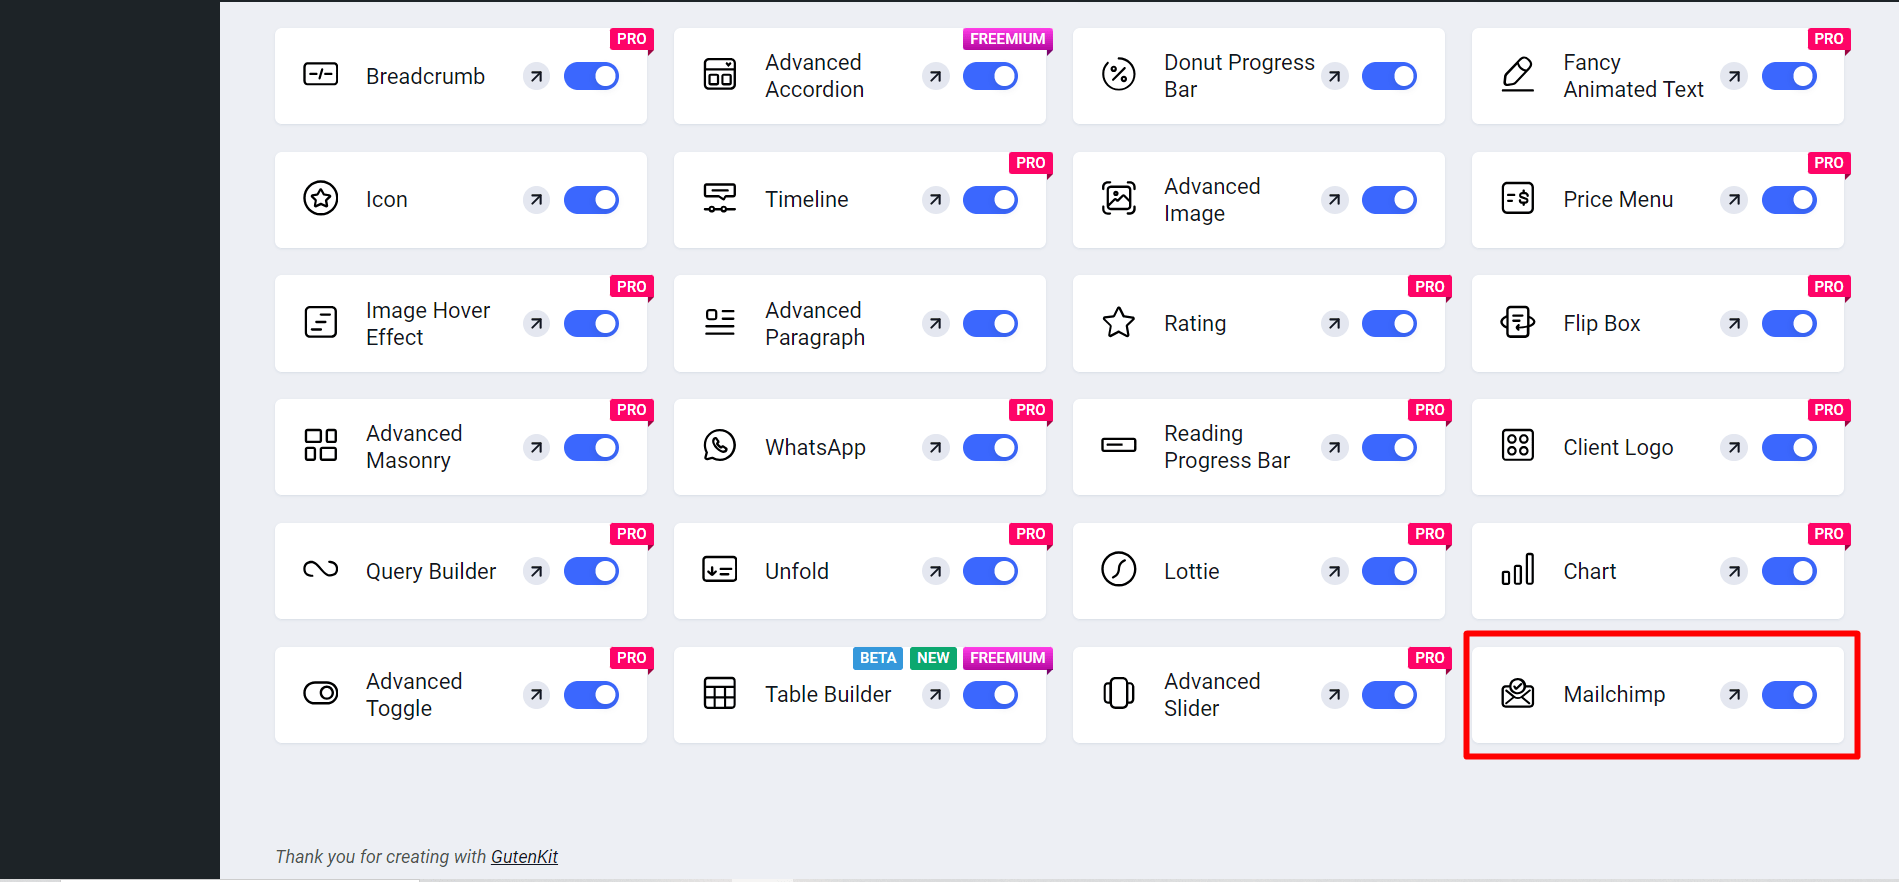
WordPressダッシュボードへのアクセス > GutenKitへ移動 > モジュール > Mailchimpを探す > ボタンを切り替えてオンにします
今、
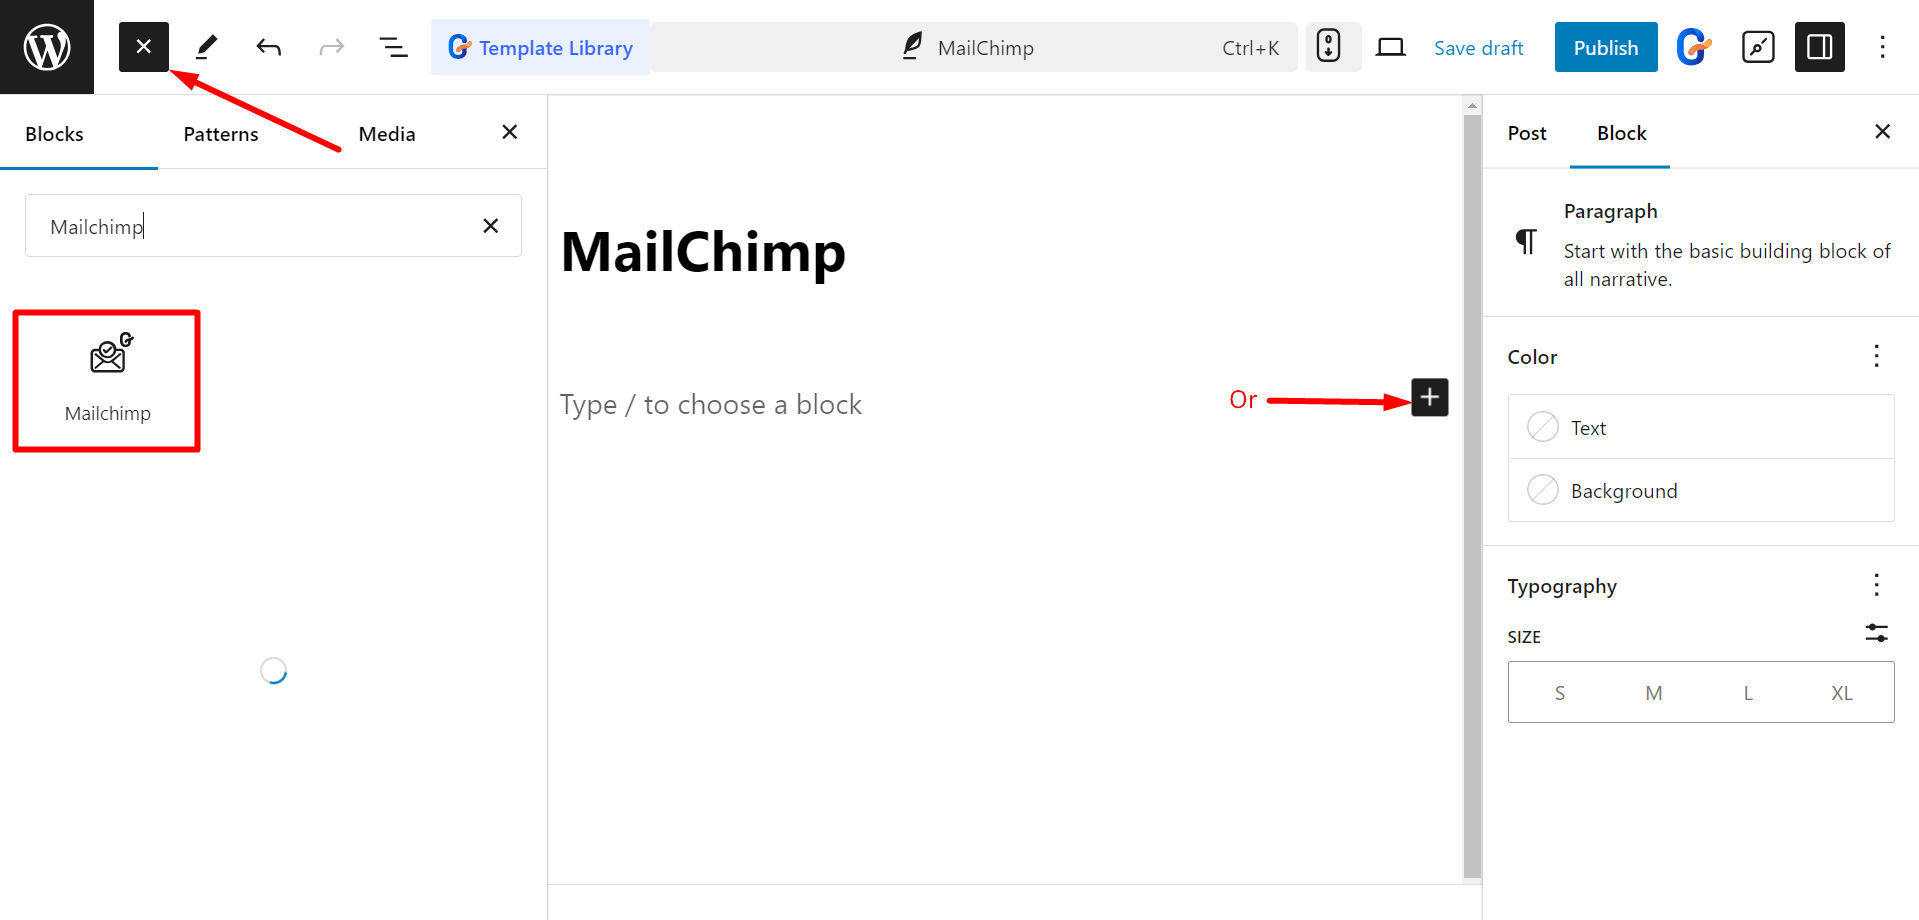
- 探す ページ/投稿 > 新しいページ/投稿を追加 または、ブロック エディターを使用して既存のページの編集を開始します。
- 「+エディター画面の右側または上部にある「 」アイコンをクリックします。
- ブロックメニューが表示されるので、「メールチンパンジー”。
- 表示されたらクリックするか、ブロックエディター画面にドラッグ&ドロップします。
コンテンツ部分の編集 #
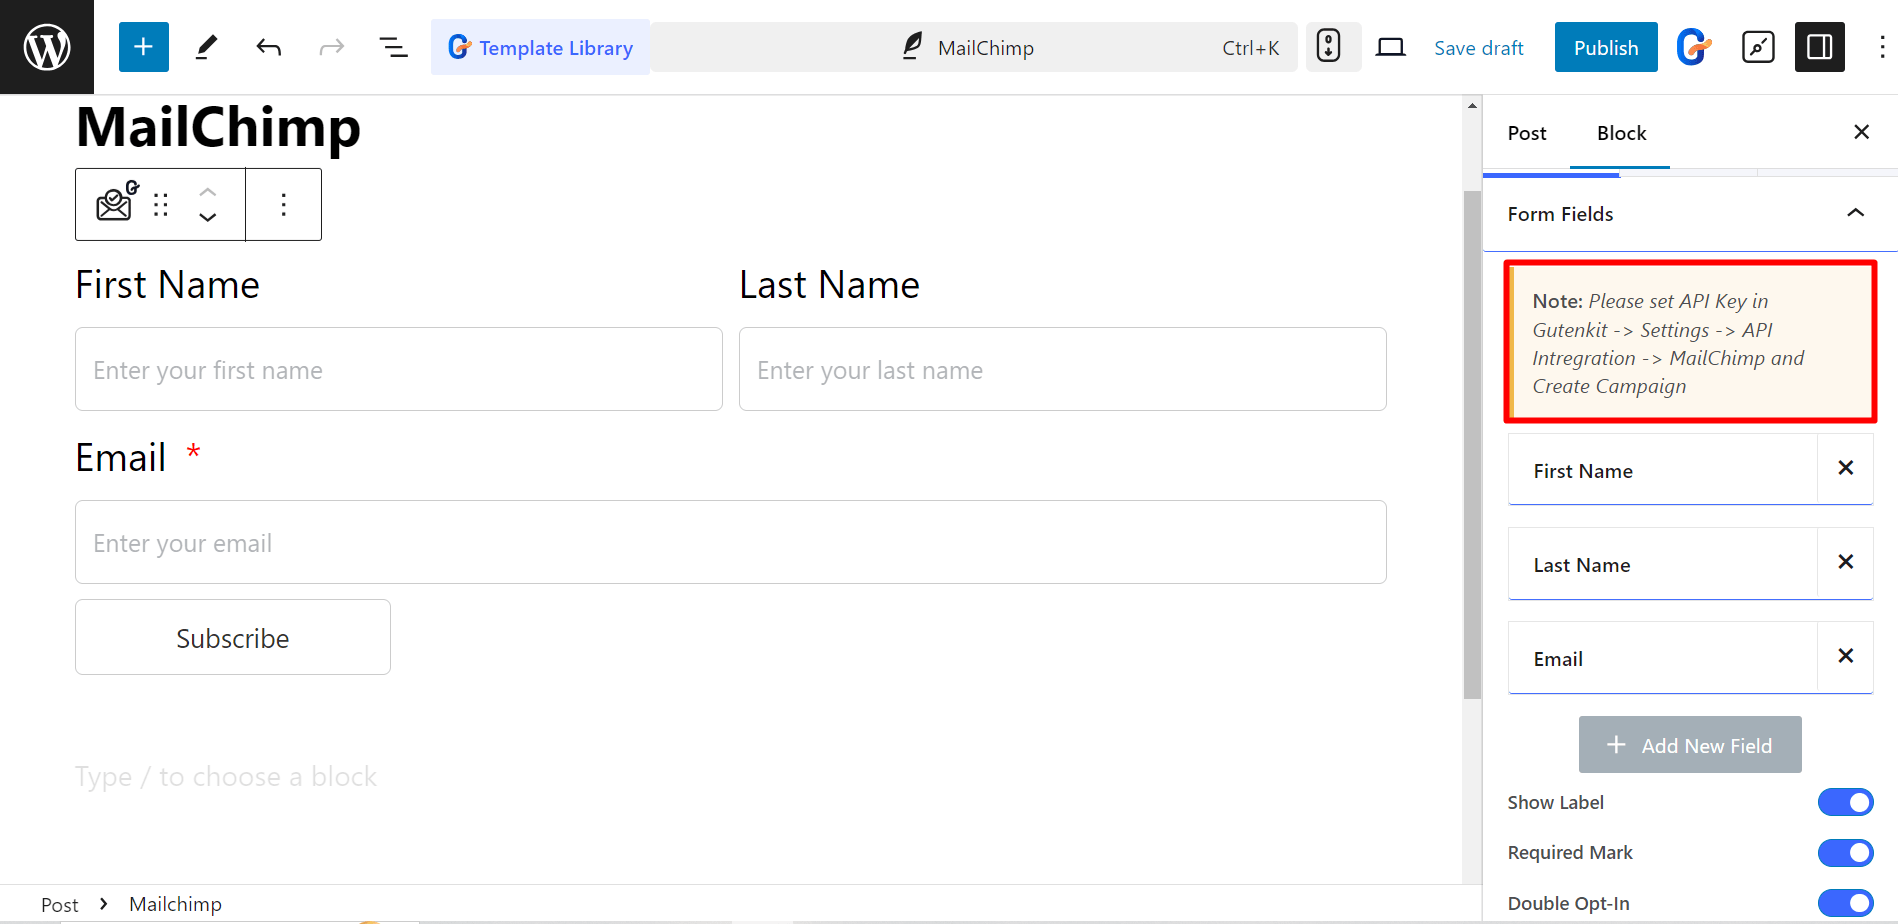
ここで編集できます フォームフィールドとボタン.
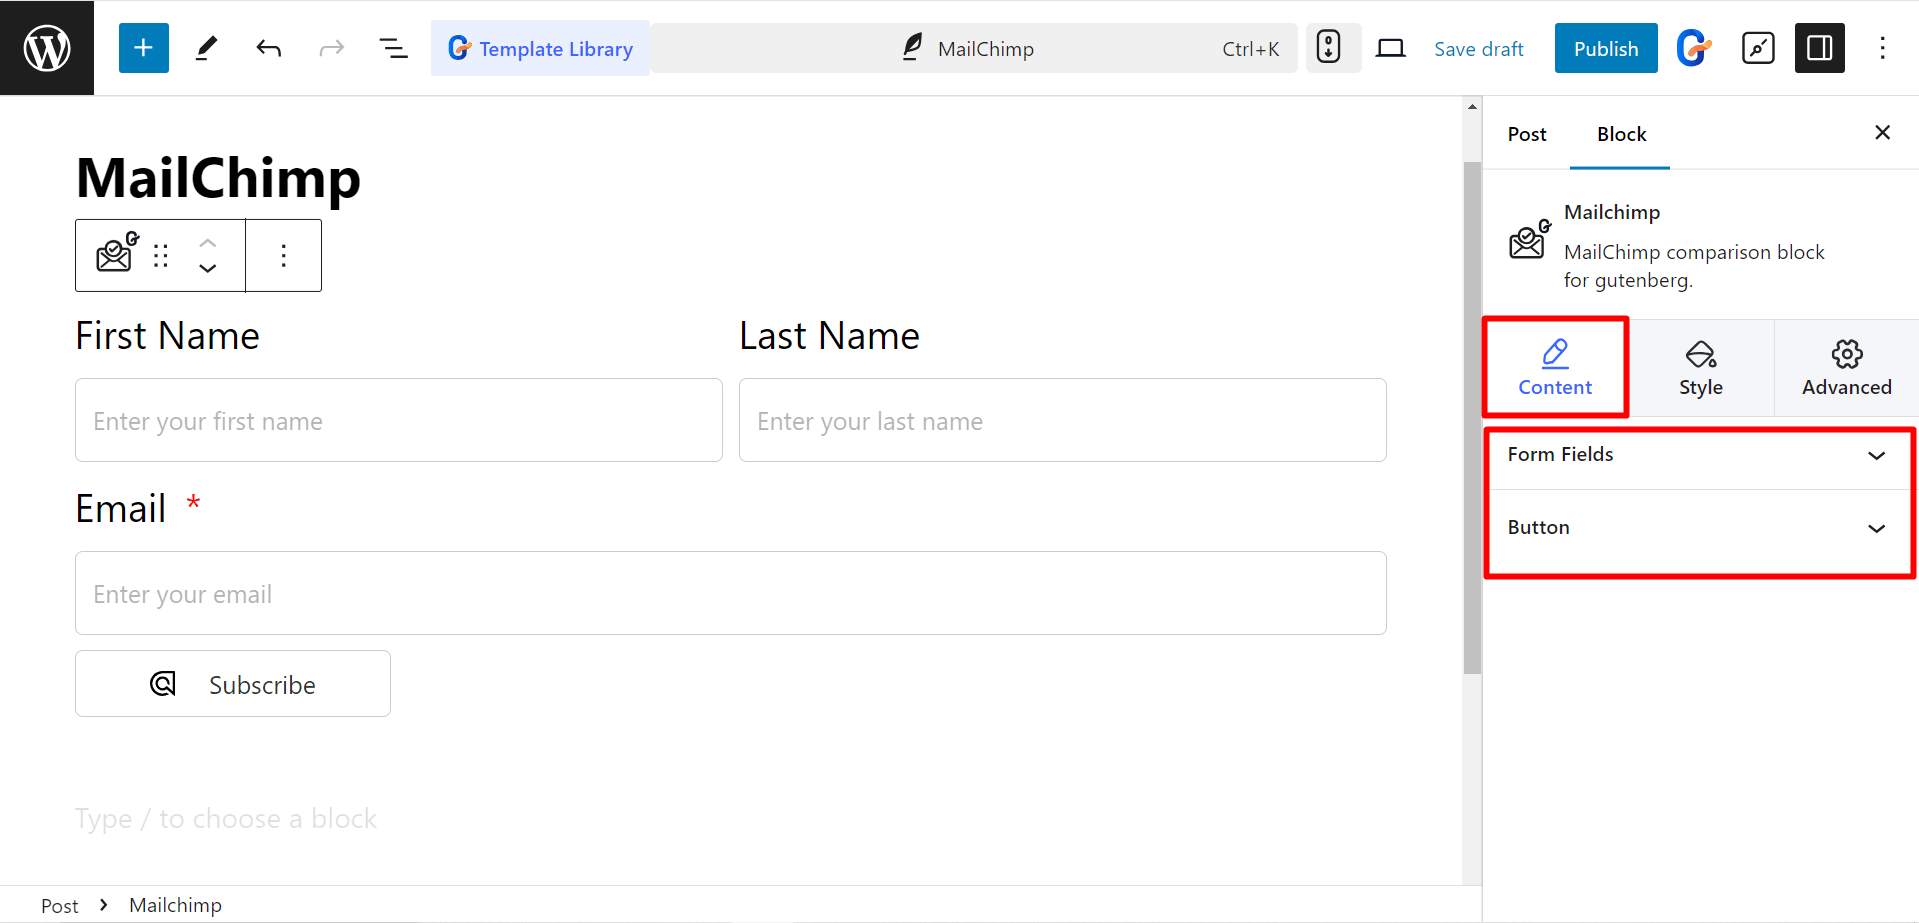
あなたが フォームフィールドを展開、電子メール マーケティング キャンペーンを実行するために API キーを追加するように指示するメモが表示されます。
ステップ2: APIキーを生成する #
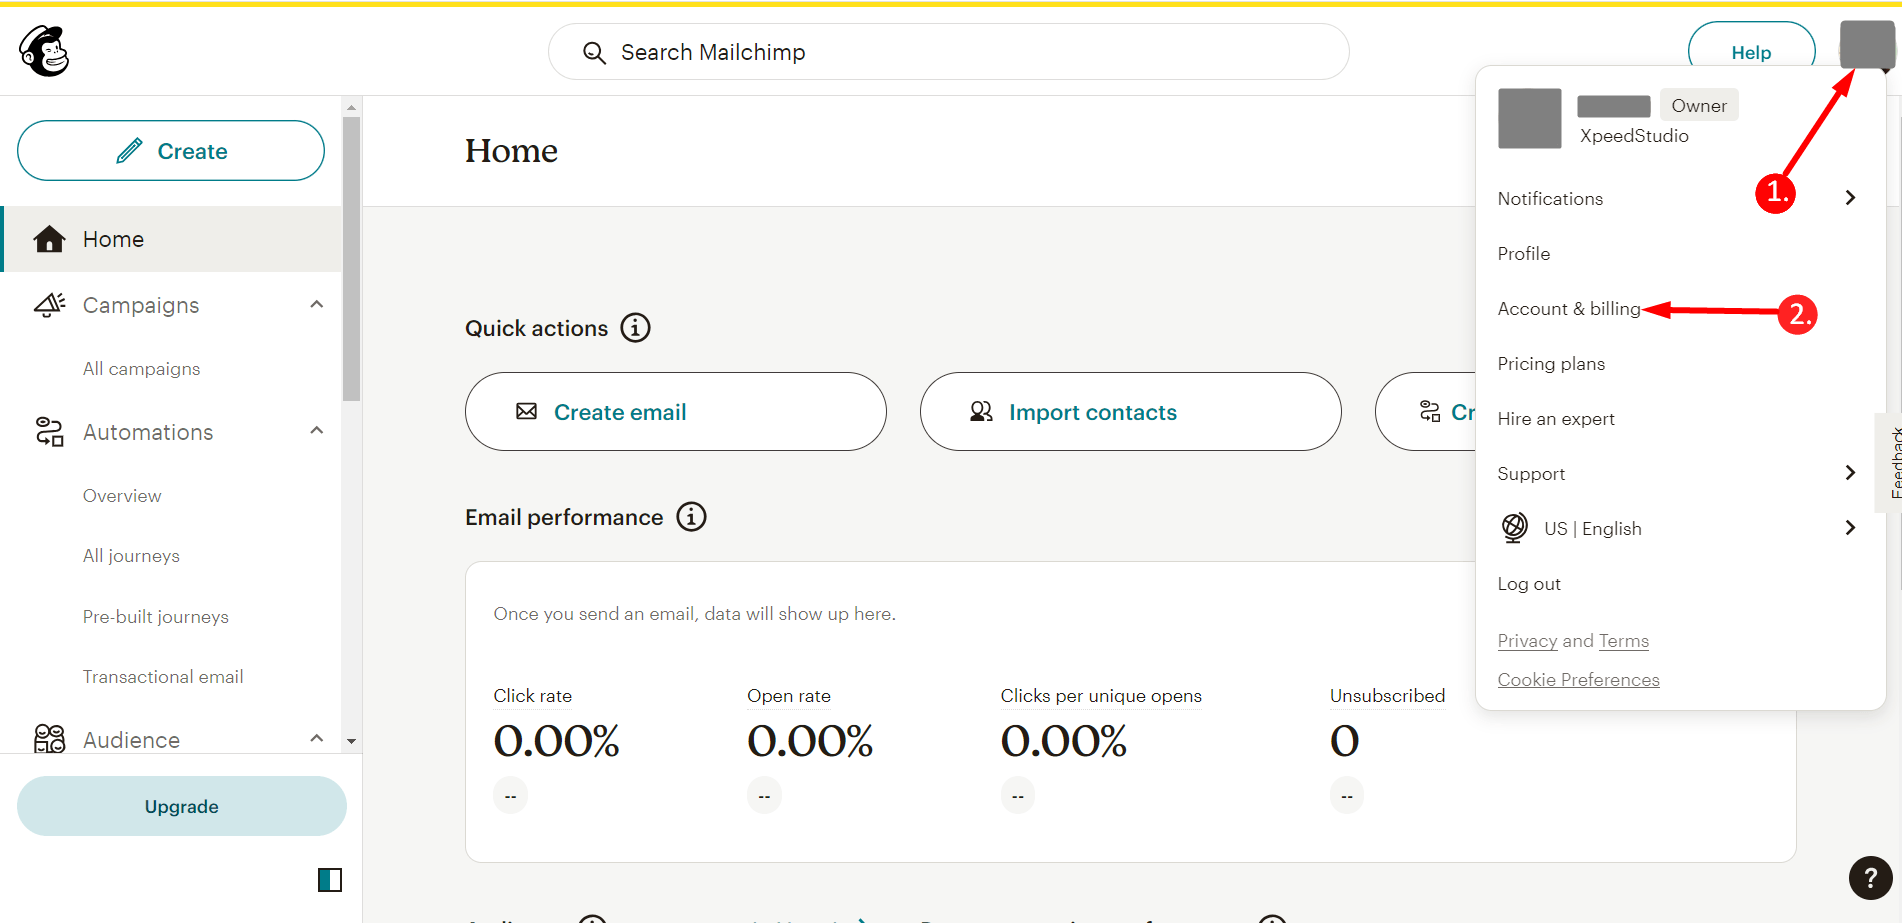
ぜひ、 Mailchimp サイト アカウントにログインしてください。その後、
1. プロフィールをクリック
2. アカウントと請求へ進む
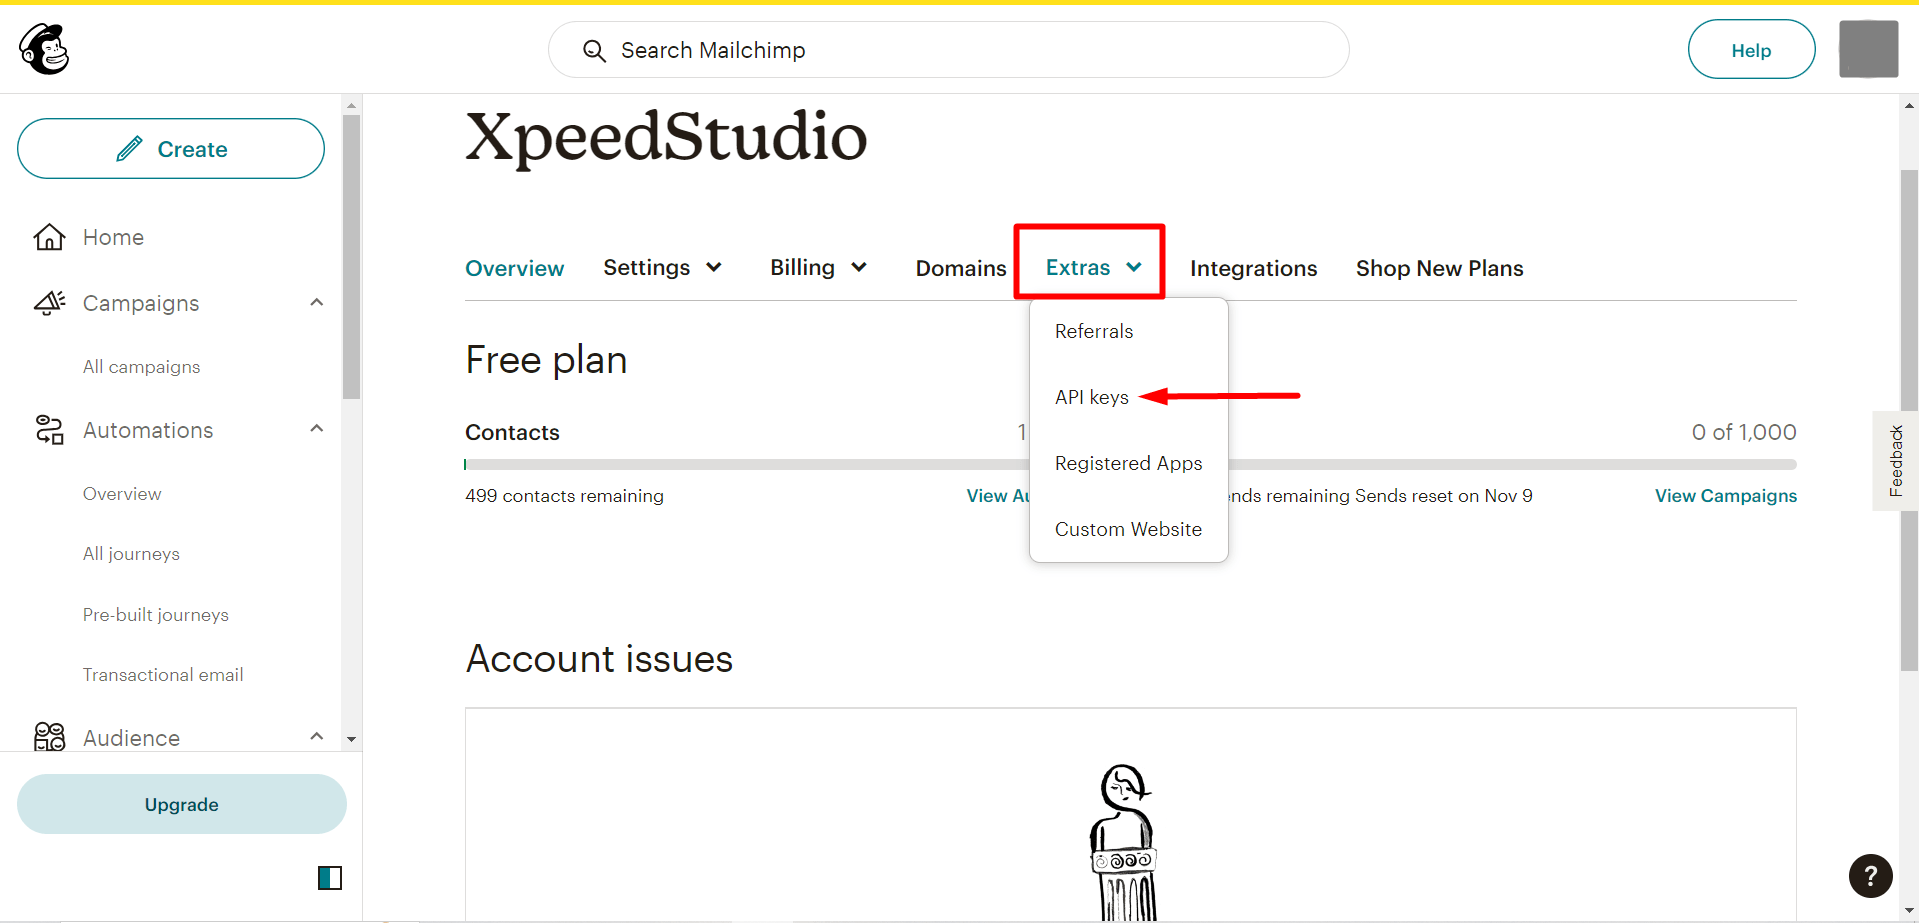
Extras を見つけて、API キーをクリックします。
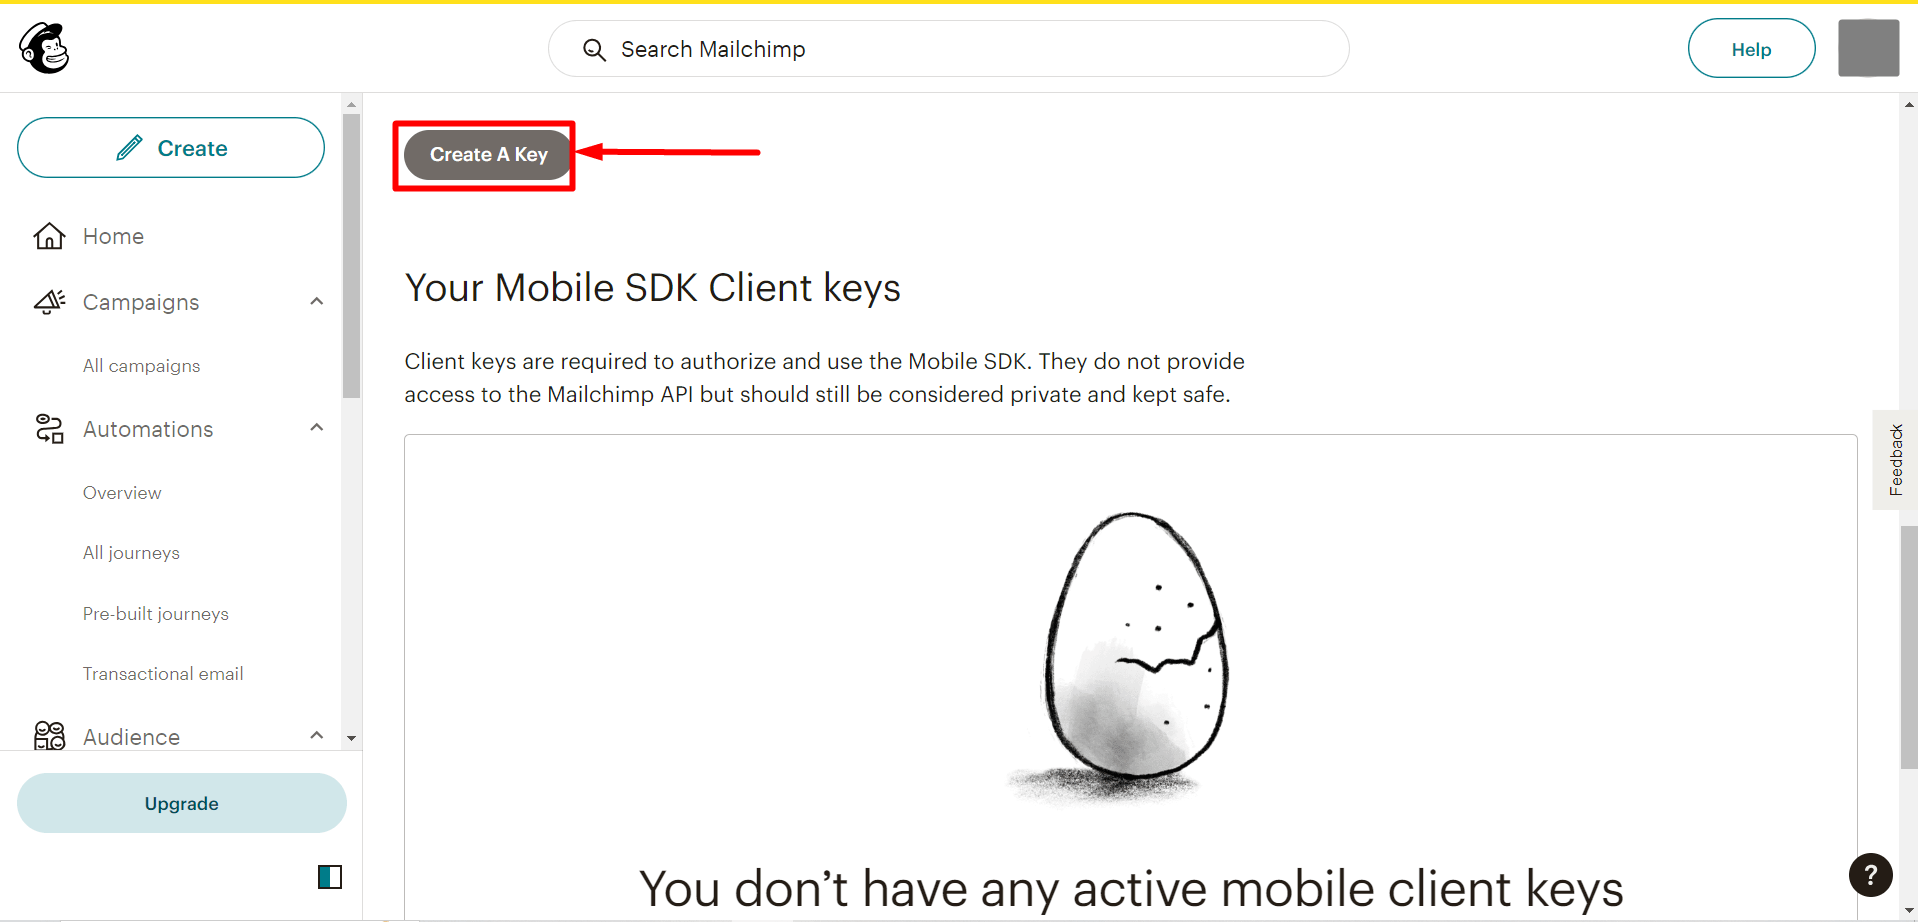
次、 クリックして APIキー作成ボタン API キーを生成します。
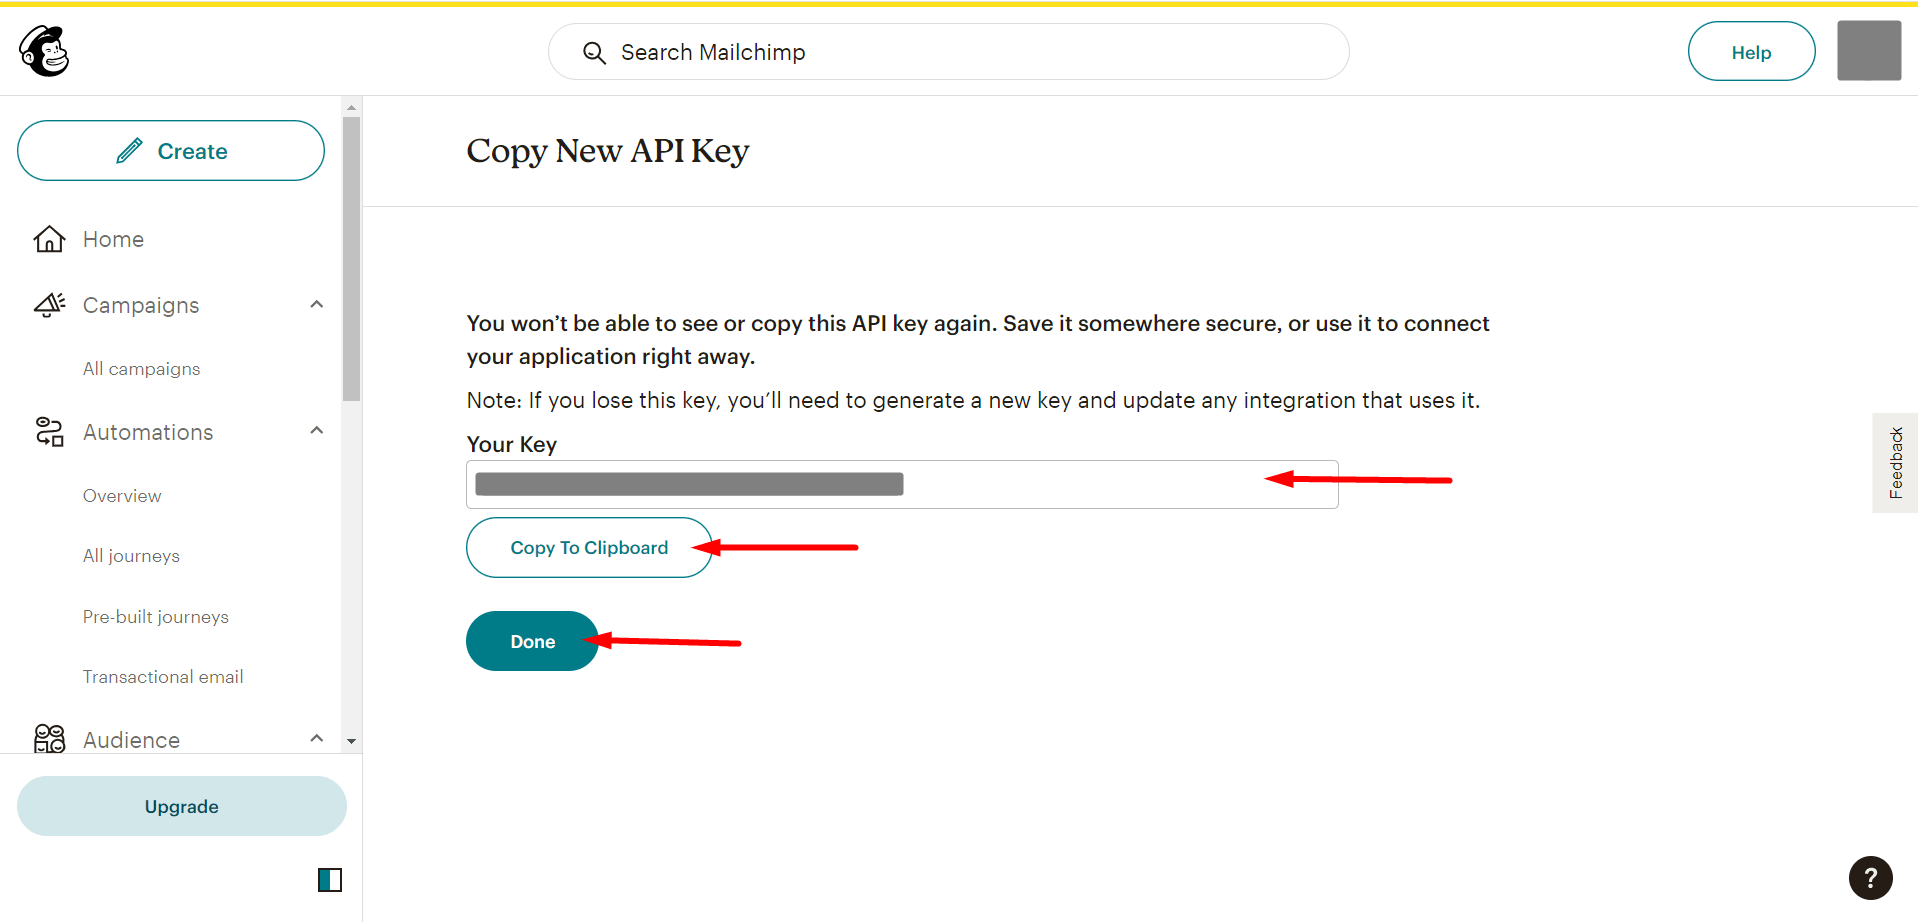
生成されたAPIキーをコピーし、「完了」ボタンをクリックします。
Now, you have to go to your WordPress dashboard:
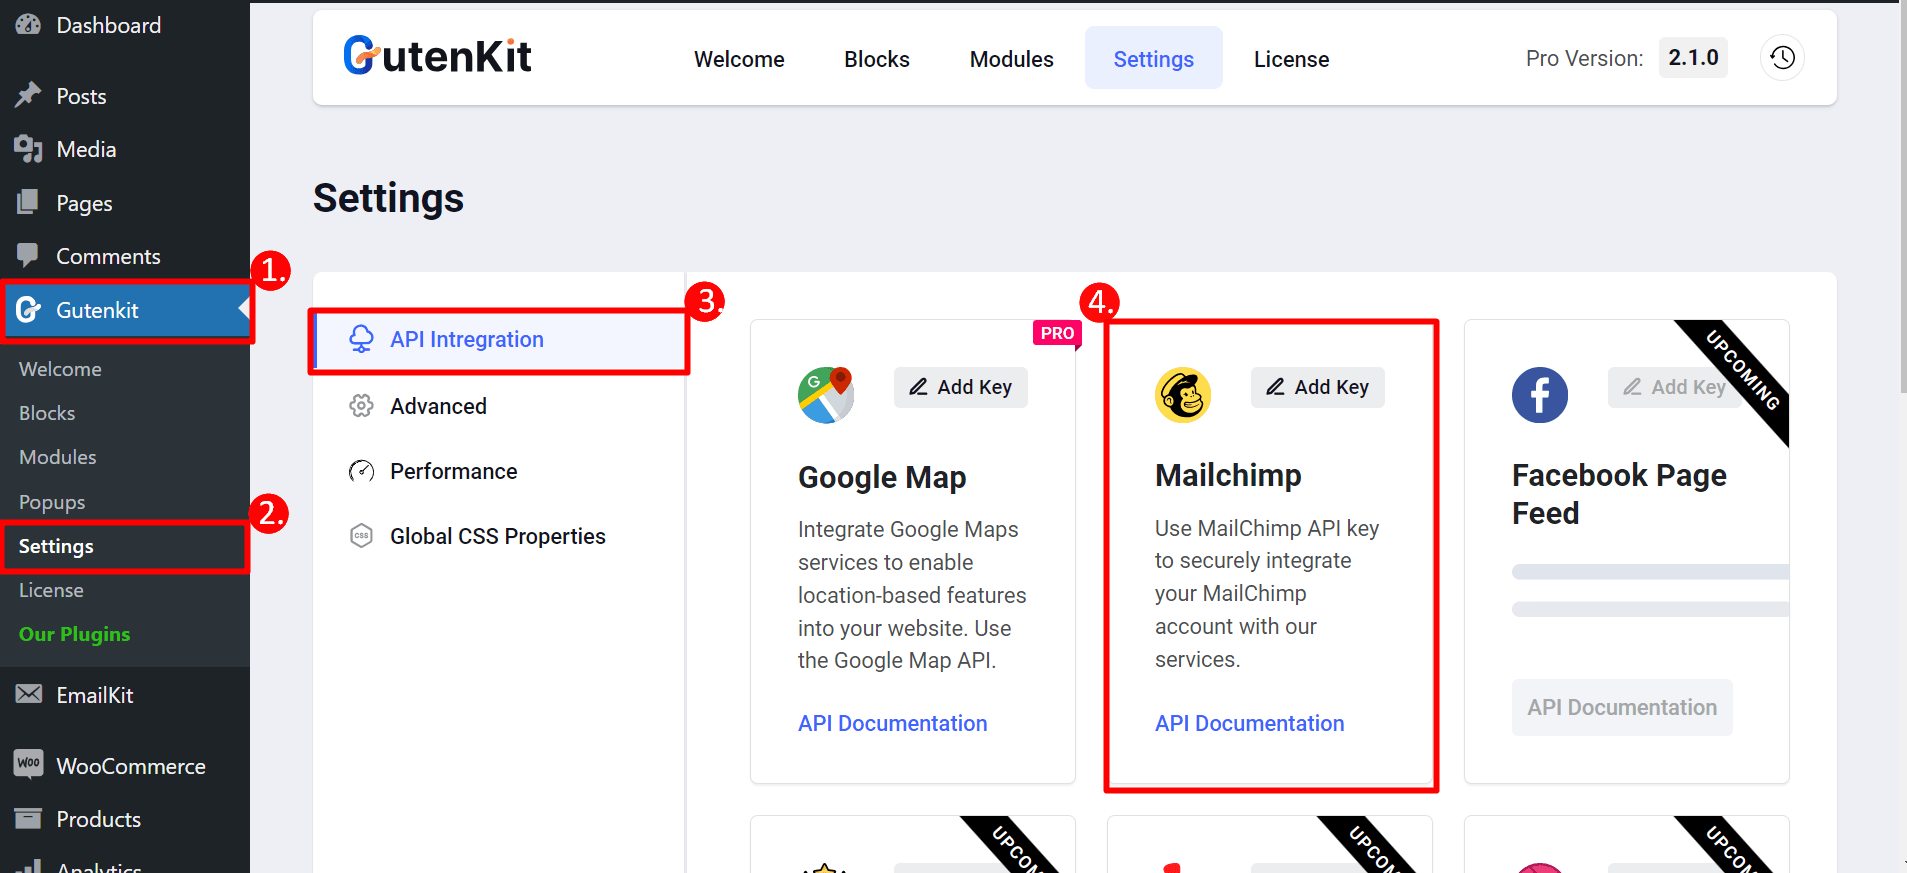
- GutenKitを探す
- 設定
- API統合
- Mailchimpを見つけて、キーの追加オプションを押してコピーしたAPIキーを貼り付けます。
ステップ3: ページに戻る #
これで、ドロップダウン メニューからフォームを選択できます。
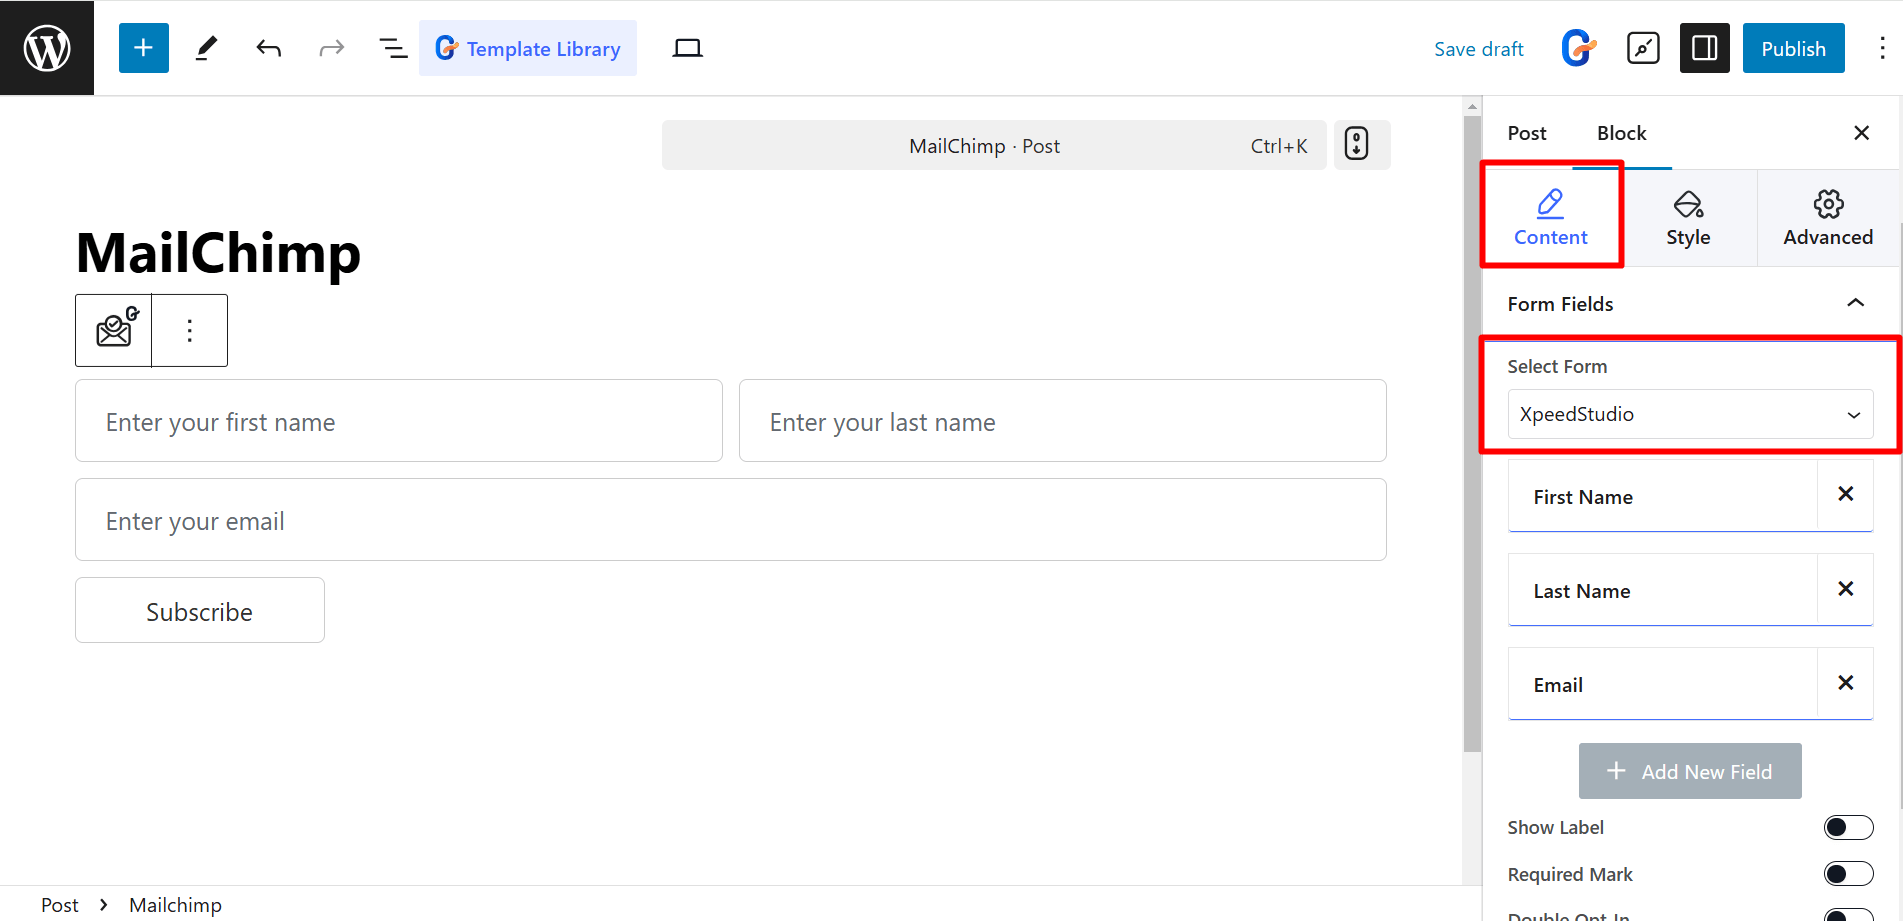
コンテンツ部分では、 フォームフィールド は:
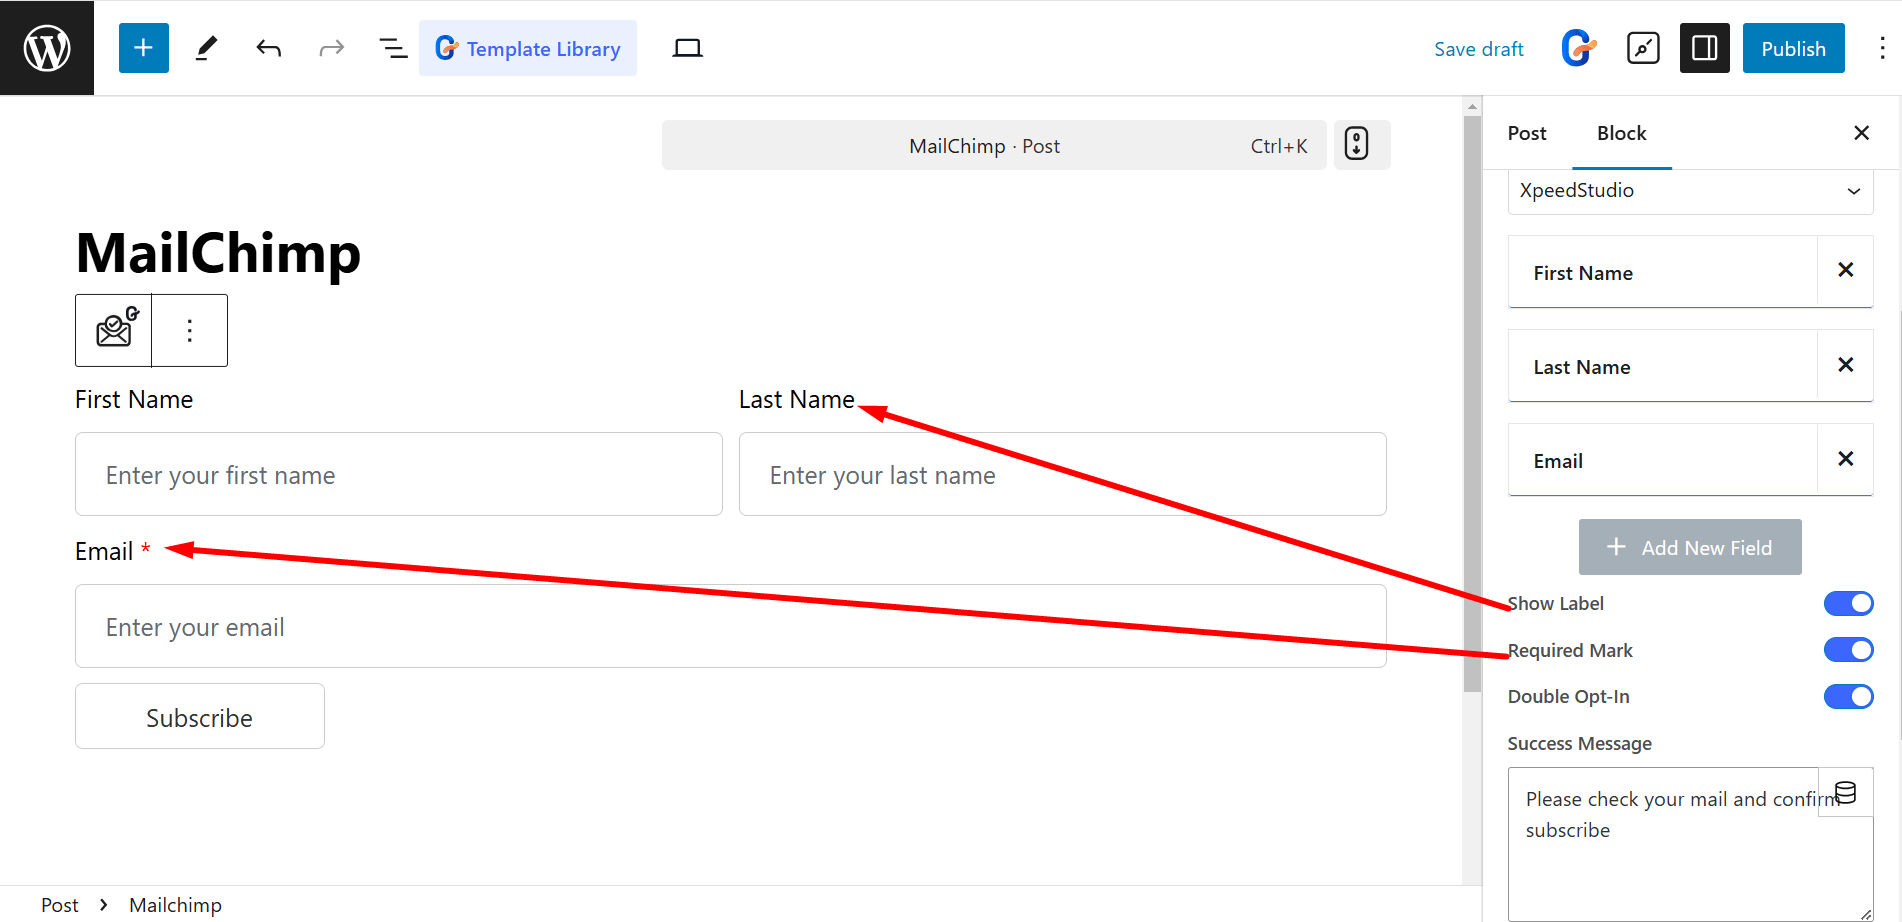
- アイテム – 必要に応じて、名、姓、電子メールなどの項目を追加します。
- ラベルを表示 – 入力フィールドの上にラベル名を表示します。
- 必須マーク – 必須フィールドを示します。
- ダブルオプトイン – サインアップには確認メールが必要です。
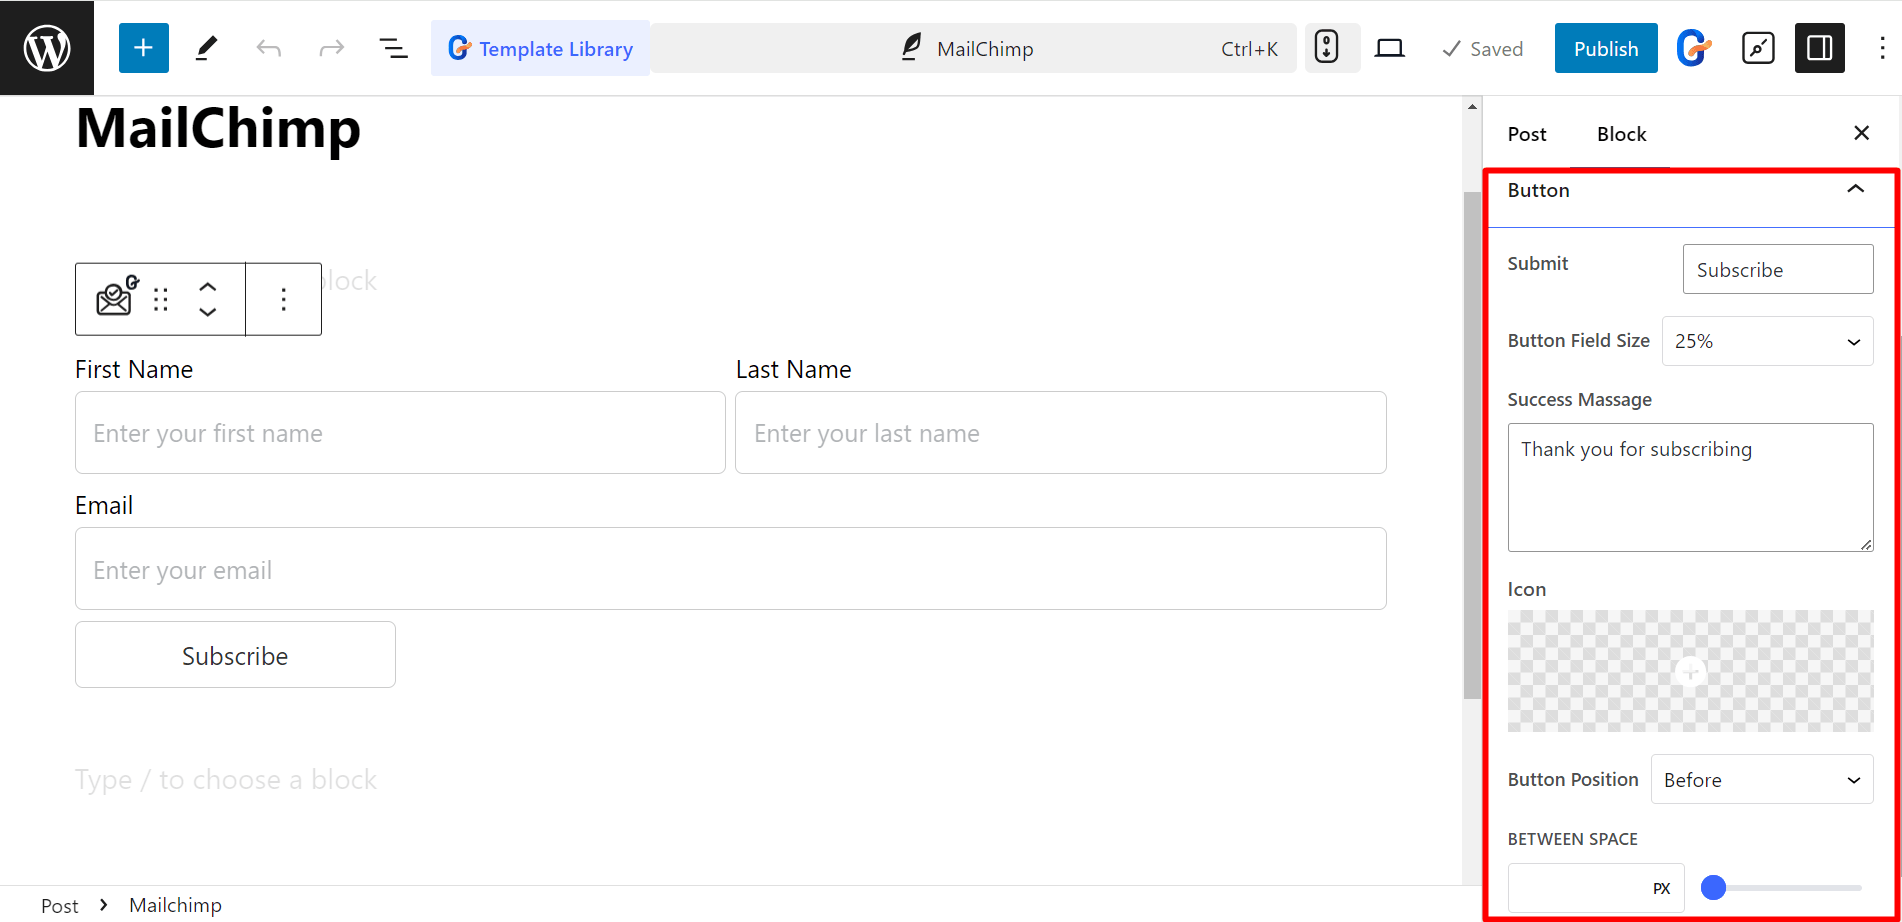
ボタン内のコントロールは次のとおりです。
- 提出する: フォームの送信をトリガーする内容をフィールドに入力します。
- ボタンフィールドのサイズ: ボタン フィールドのサイズを制御します (デフォルト、20%、50%、100% など)。
- 成功メッセージ: 送信が成功するとメッセージが表示されます。
- アイコン: ライブラリからボタンにアイコンを追加するか、SVG をアップロードできます。
- ボタン 位置: アイコンの配置(テキストの前または後)を決定します。
- 宇宙の間 – ボタンのテキストとアイコン間の間隔を調整します。
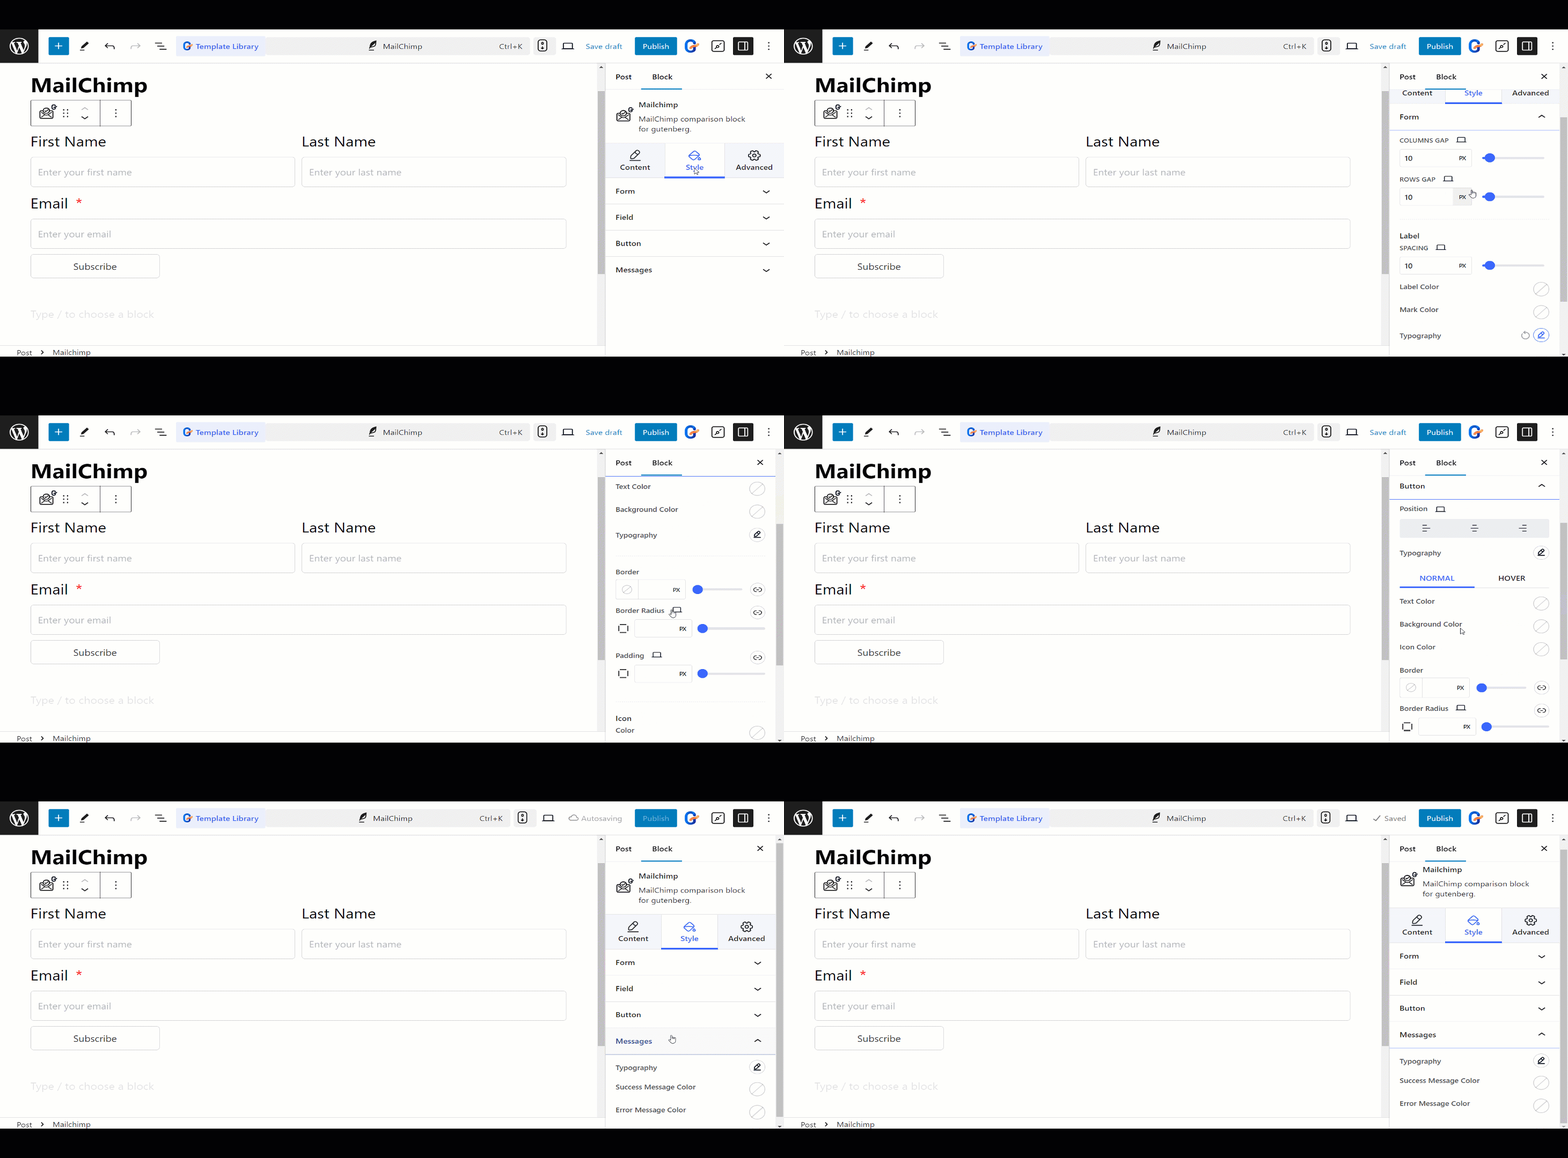
Mailchimpフォームのスタイル設定 #
- 形状 - 列間隔、行間隔、ラベル、色などを調整してフォームのスタイルを設定できます。
- 分野 - フィールドでは、テキストと背景の色、書体、境界線、パディングなどを変更できます。
- ボタン - ここでは、ボタンの位置、テキストと背景の色、アイコンの色、余白、パディングなどを設定できます。
- メッセージ – メッセージをきれいに書くために、書体、成功メッセージの色、エラーメッセージの色などを変更できます。
フォームはこのように機能します
