Visitors often land on a website and want to find the exact type of information they are looking for. For that, your website should offer such options. For instance, users might want to sort the posts based on some parameters.
In such cases, a custom query loop could be helpful.
The good thing is, now you can create and integrate a query loop within the Gutenberg interface.
どうやって?
This blog post will tell you everything in detail.
What is a query loop?
Query loop for WordPress is a feature that allows the users to see a particular type of list based on their priority. For example, it could be a list of pages, posts, custom posts, images, etc. Users can set the rules to show the list.
Depending on the users’ requirements, these queries could be based on authors, tags, categories, post types, and more.
Whatever the rule is, the posts of pages need to appear based on a single command.
Why do you need a custom query in WordPress?
It is needless to say that you need to give the best experience to your visitors. Query loop is one of the key tools that engages the audience by helping them find the right information.
When you help your audience, they tend to stay on your website for longer and visit multiple pages.
Not only that! If the audience engages more with your webpages, there is a high chance that your site will perform better in terms of SEO.
How to integrate custom queries in WordPress site?
You just need the GutenKit Blocks plugin for WordPress to integrate the best UX friendly query loop. Here I have shared the entire process in the simplest way.
Step 1: Install Query loop block plugin
Start by installing the Query block plugin. For this, go to your WordPress website’s dashboard and hover to plugin. Select add new and you will get the option to search for plugins.
Type Gutenkit and hit the search button.
Gutenkit plugin will appear. プラグインをインストールして有効化する.
Once you activate the plugin, choose a plan for the plugin and the initial pricing starts at $39. Choose the plan that best suits you.
Alternatively, you can directly choose a plan from Gutenkit
Step 2: Enable the Query Builder:
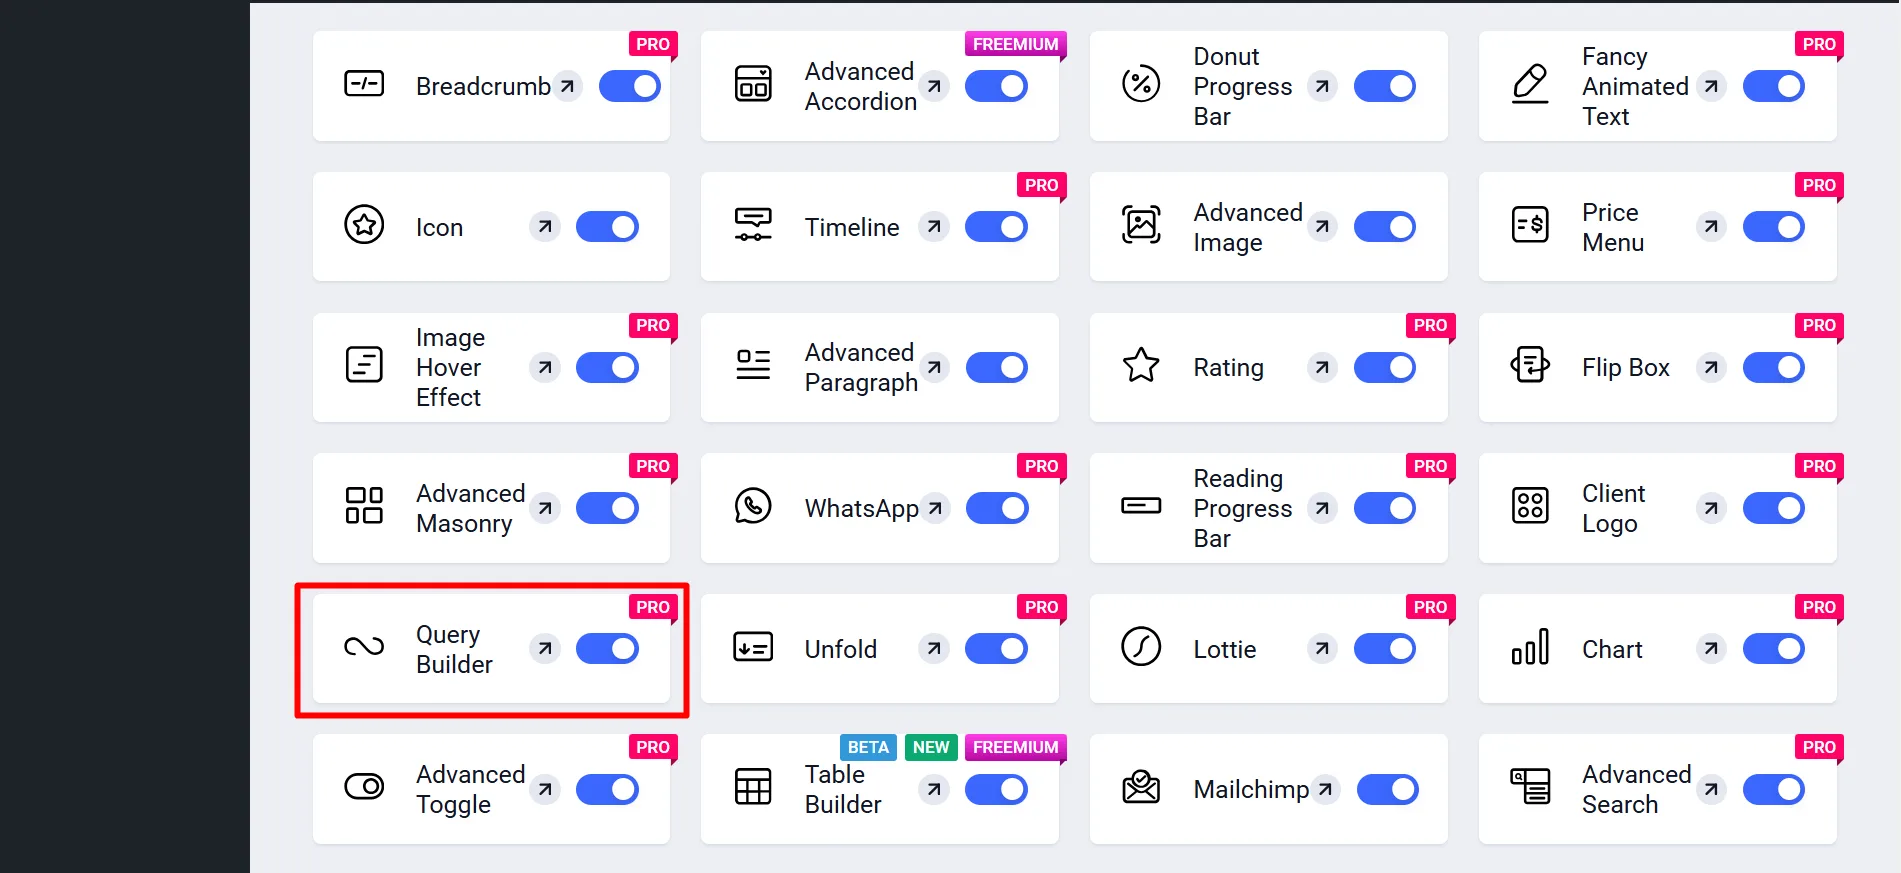
WordPressダッシュボードから、 GutenKit → Blocks → Locate Query Builder → Turn it ON.
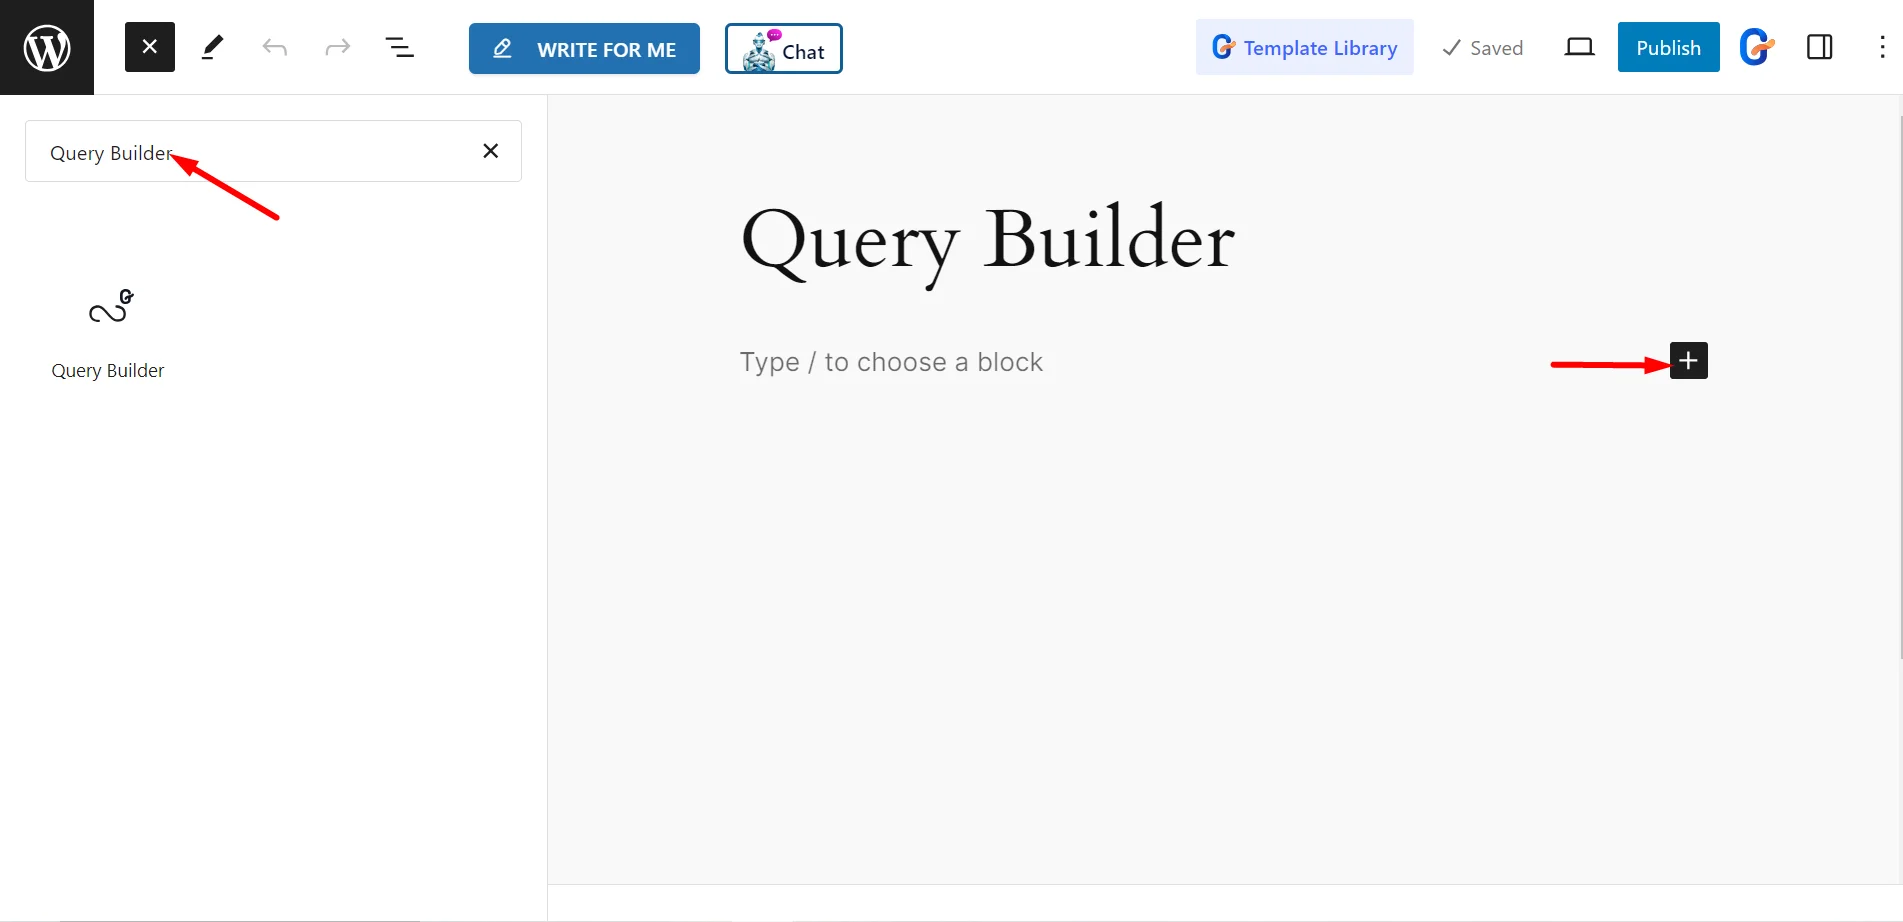
Open the page or post where you want to use the Query Builder. Search for the GutenKit Query Builder block and click or drag it into your content area.
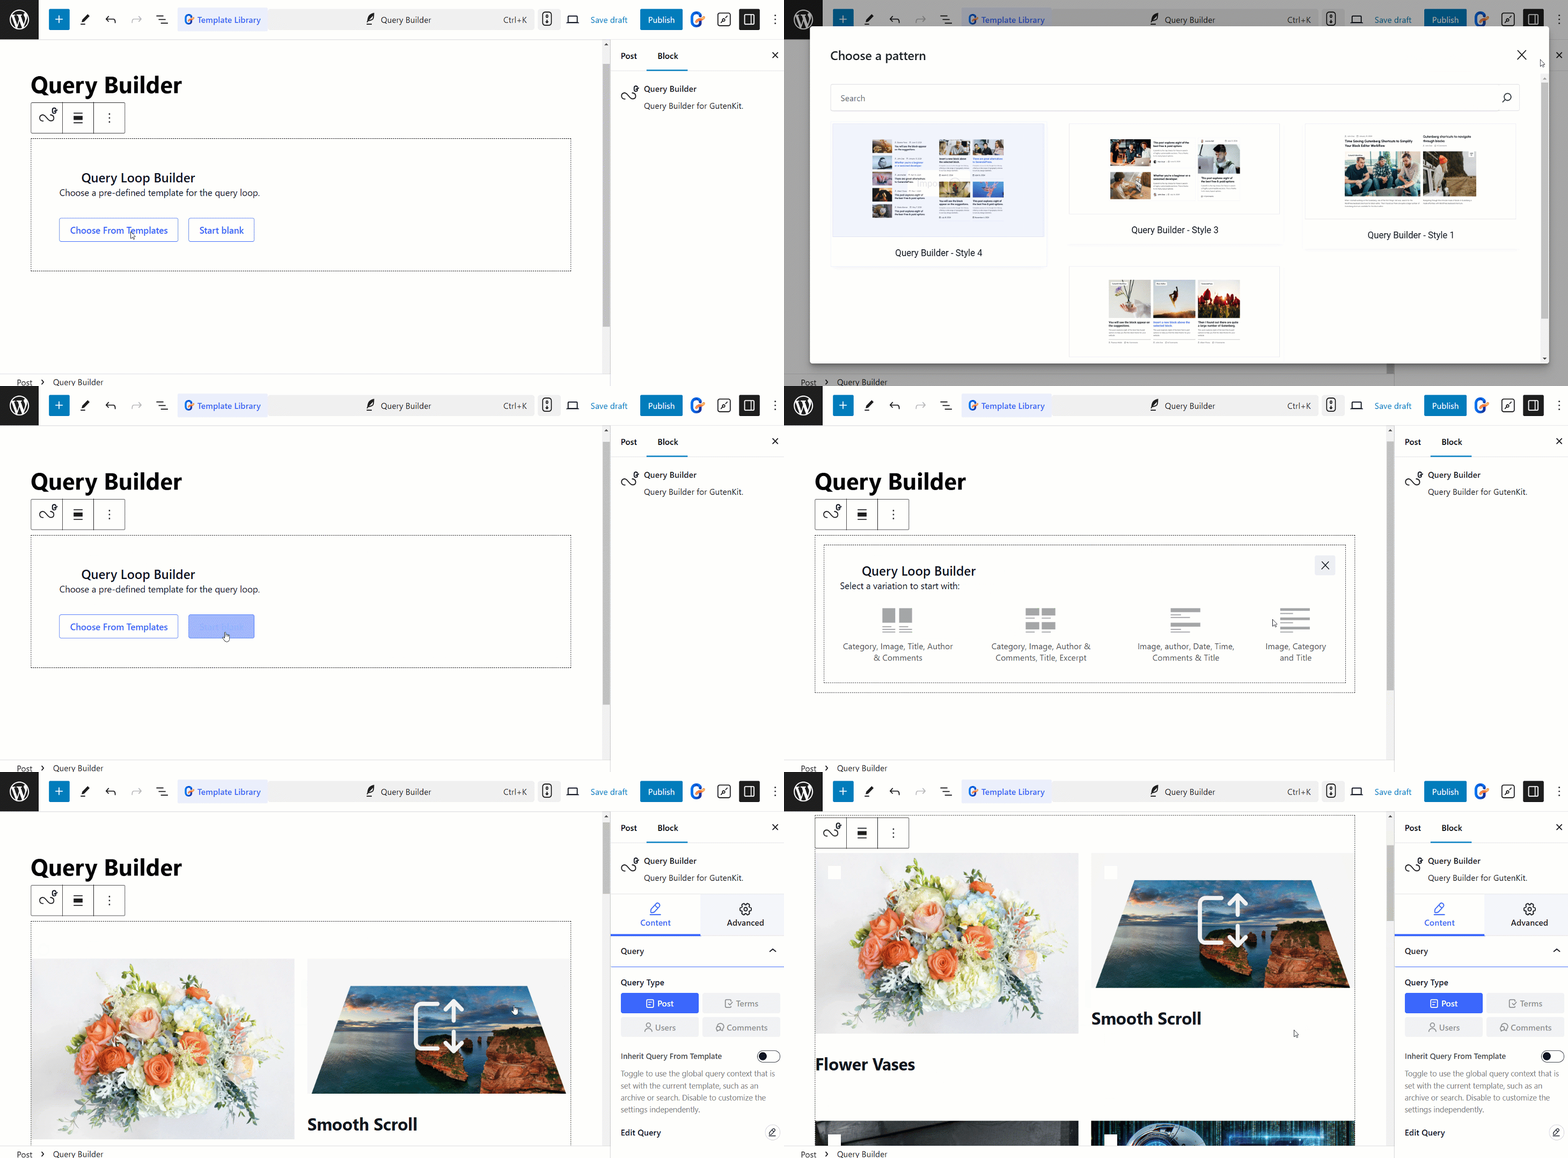
Step 3: Choose a Template
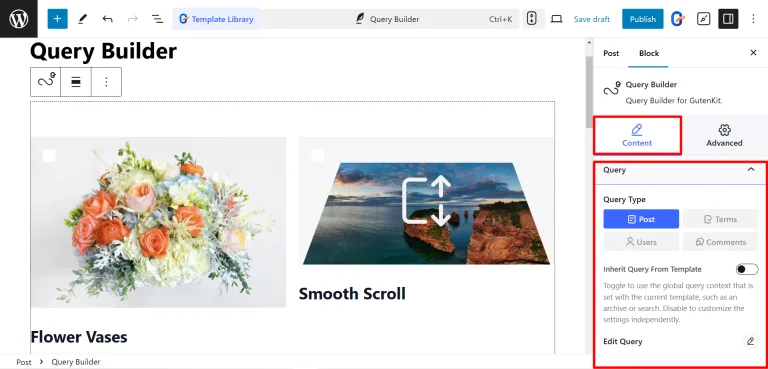
Select a predefined or blank template for your query loop from the available variations. After choosing the template, expand the Query tab to configure.
In the Query type selection, set the post type. For instance, you choose posts to show them in a query loop.
Step 4: Enable the query loop
Now you want to show the Query loop all over the website, right? To use the global query context or disable it to customize independently.
Customizing the Query loop template
If you choose a ready template, creating and integrating the Query loop might be not enough. To get more from this, customize the template in the following style.
In the Content section, you can customize several layout options. You can choose a layout type such as Grid, Slider, Flex, or Block. For Grid layouts, select from Auto, Manual, or Masonry and adjust the minimum column width and height.
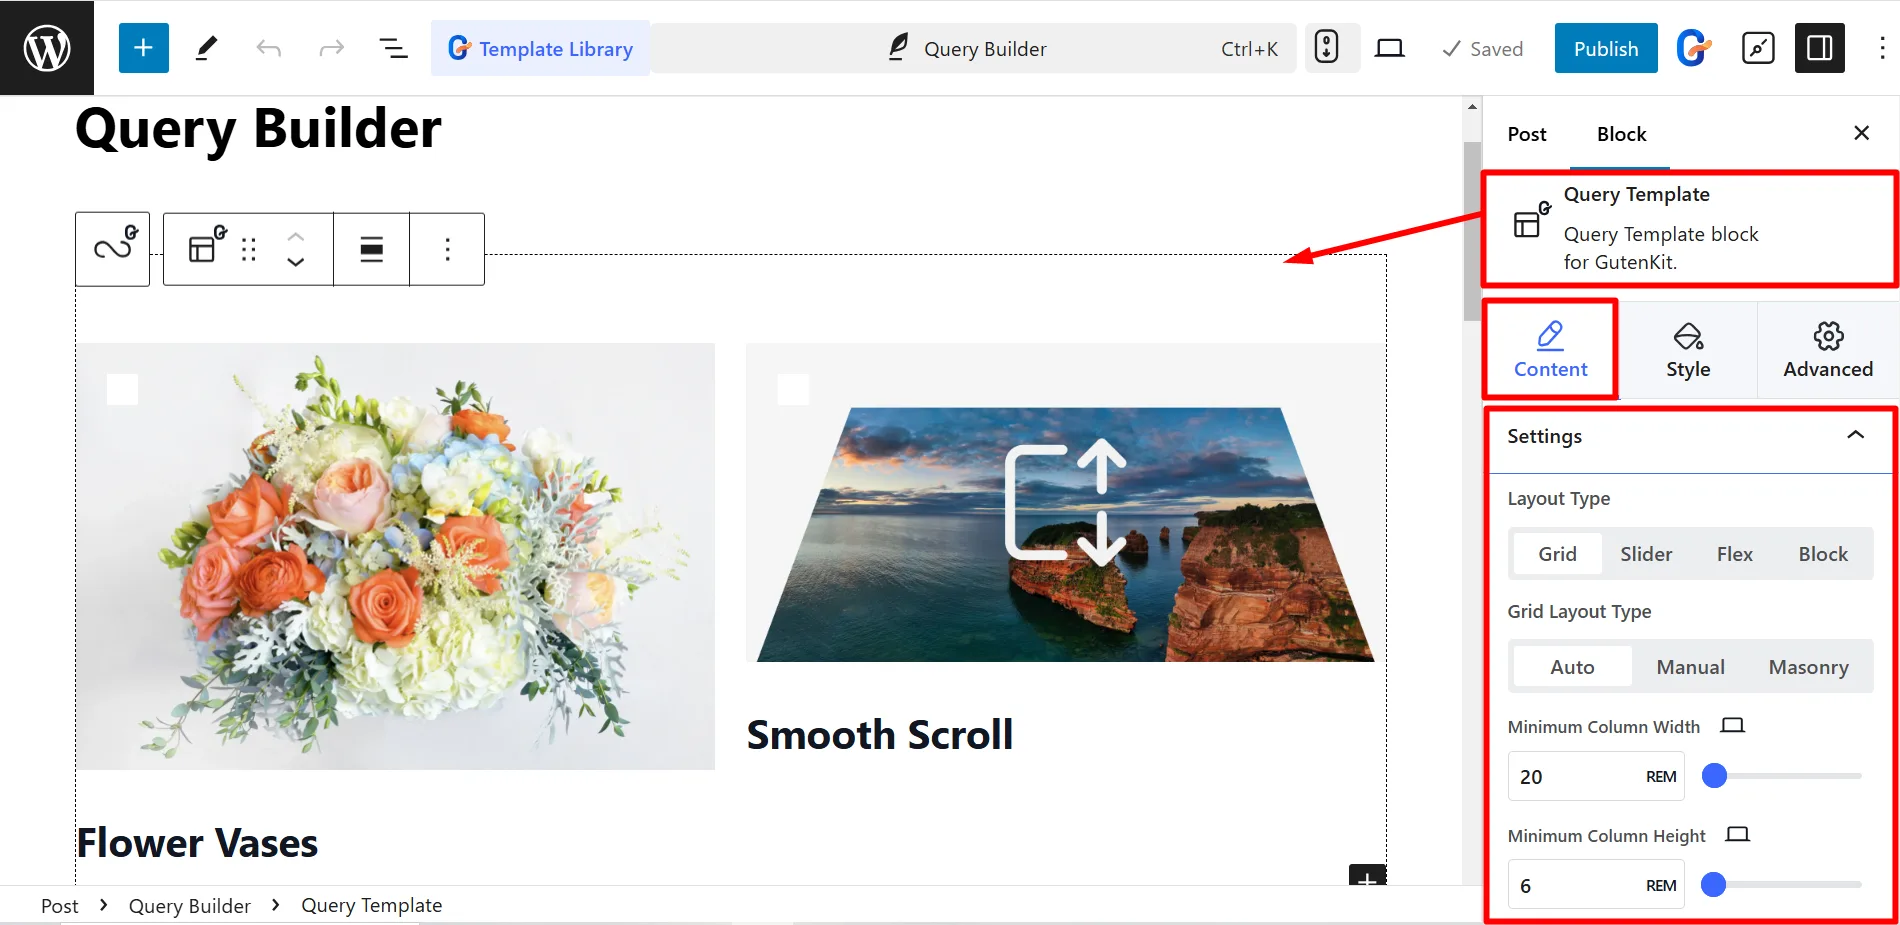
You can also modify the row and column gaps to control spacing.
The Style section lets you fine-tune the appearance of your query loop. Adjust padding, background type, border, border radius, and box shadow to match your preferred design.
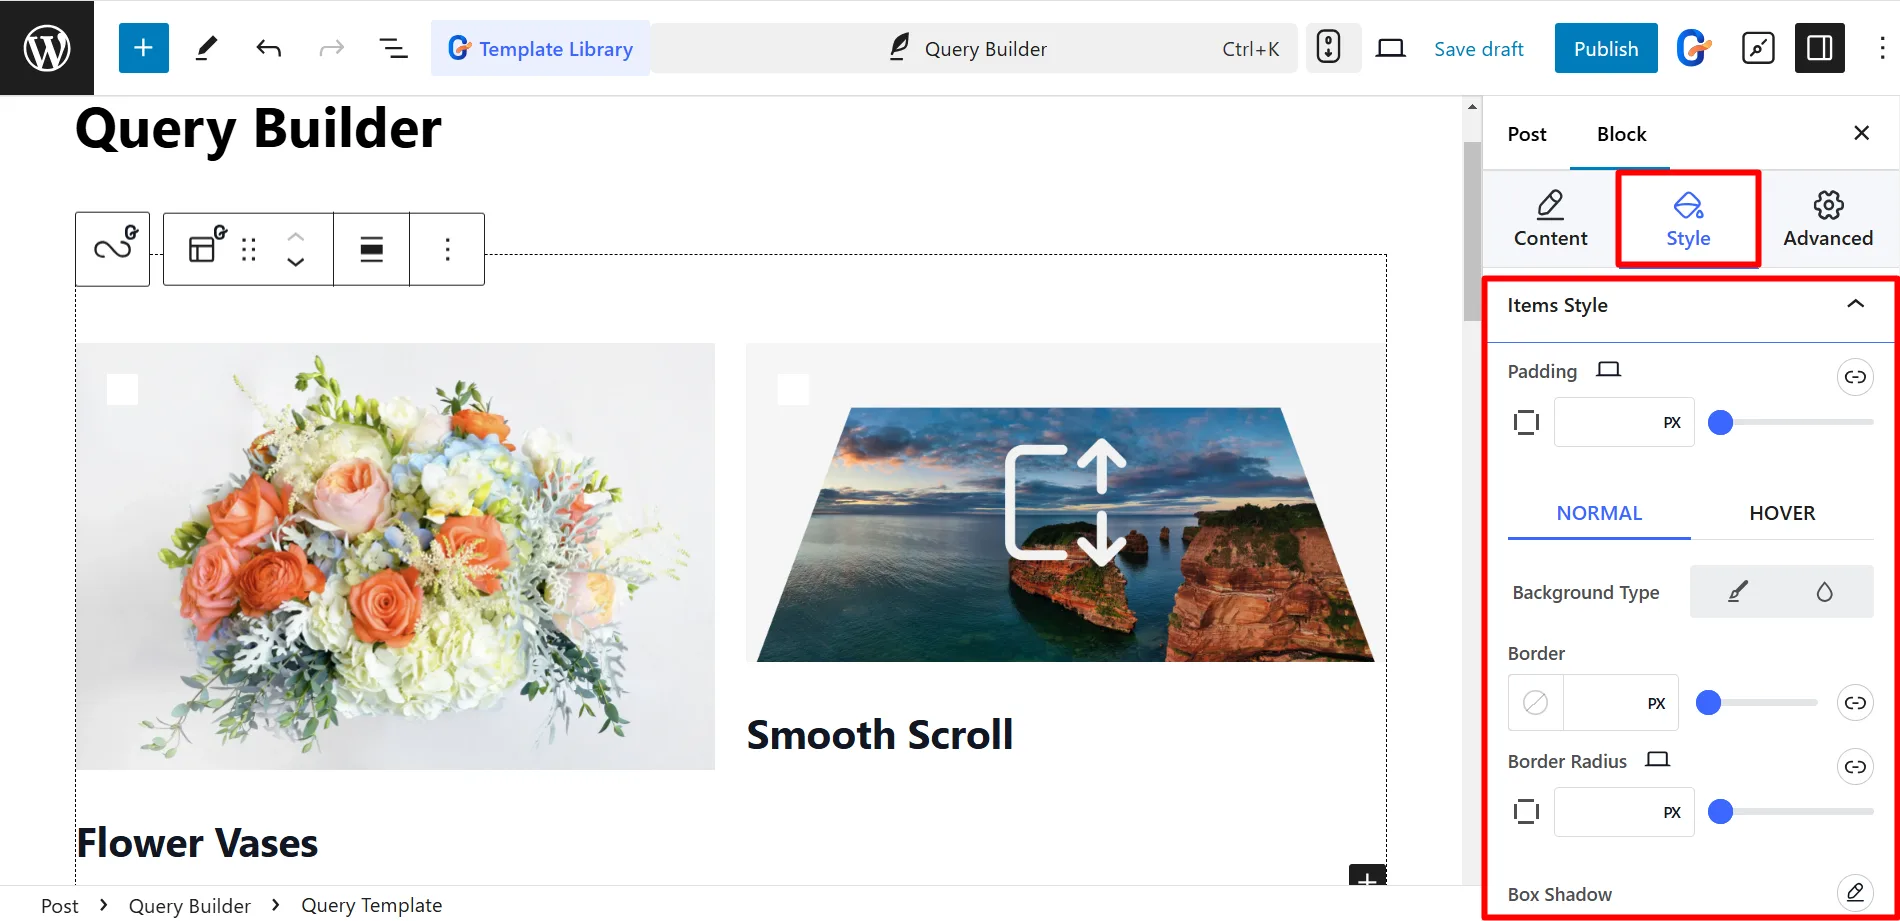
A Query Loop template also allows editing images, excerpts, titles, and dates, and even adding extra content.
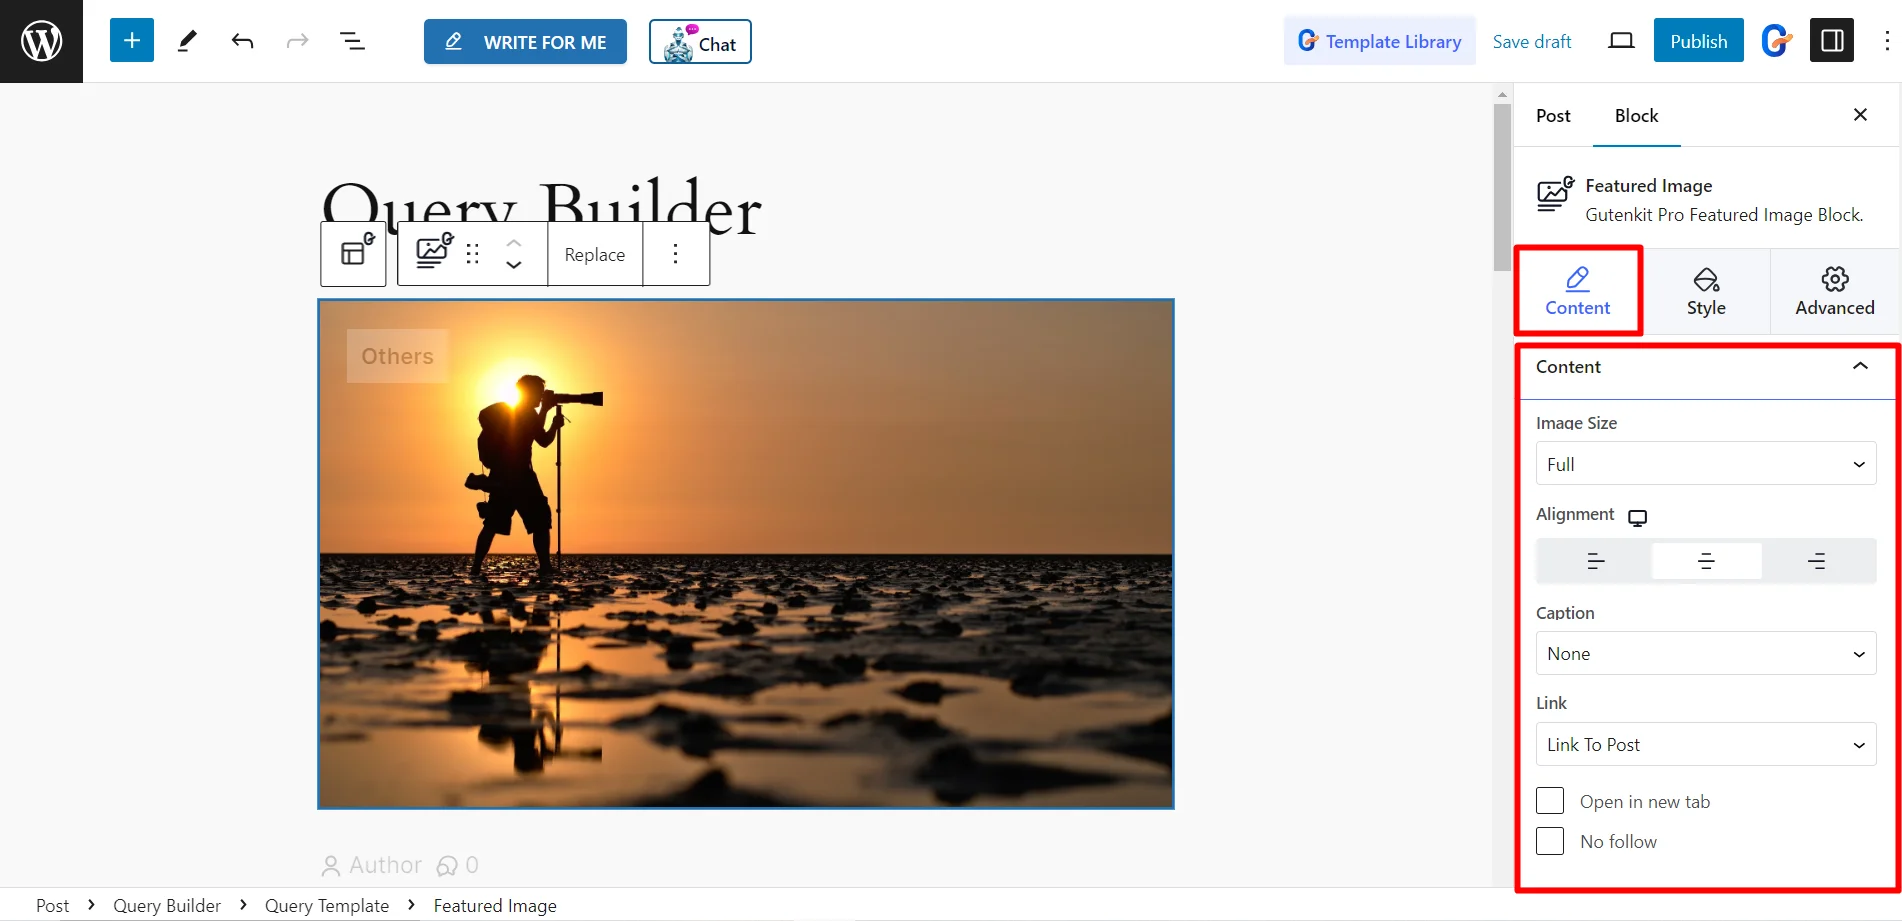
For the featured image, you can set its size, alignment, and caption. Link options include linking to the post, adding a custom URL, or linking to the media file with a lightbox option.
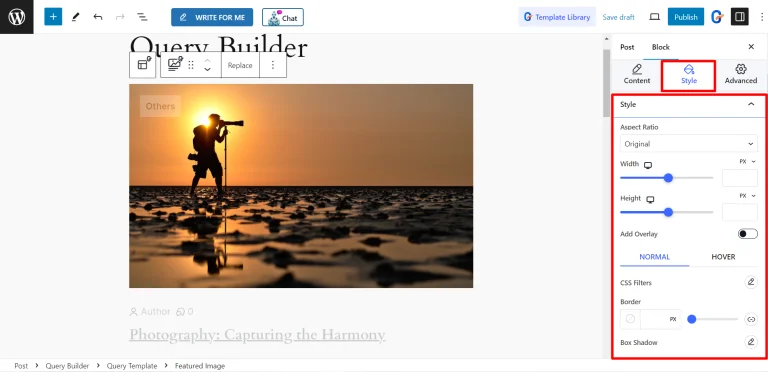
Style adjustments include aspect ratio, width, height, overlay, CSS filters, border, box shadow, and border radius.
The post title has options for adding custom text before or after it, setting a fallback title, and controlling its HTML tag and maximum length. You can style the title’s color, background, typography, and even apply blend modes for creative effects.
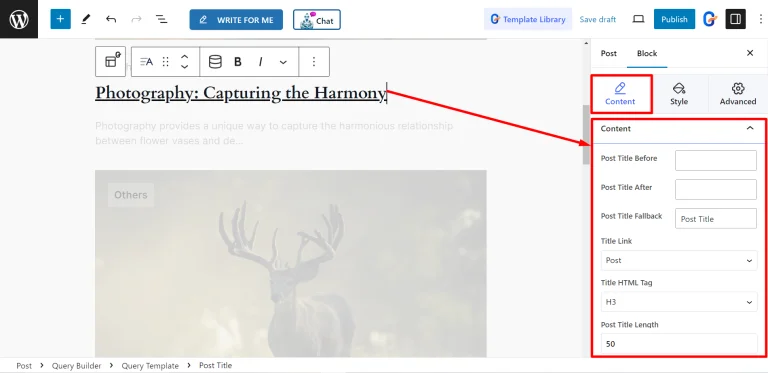
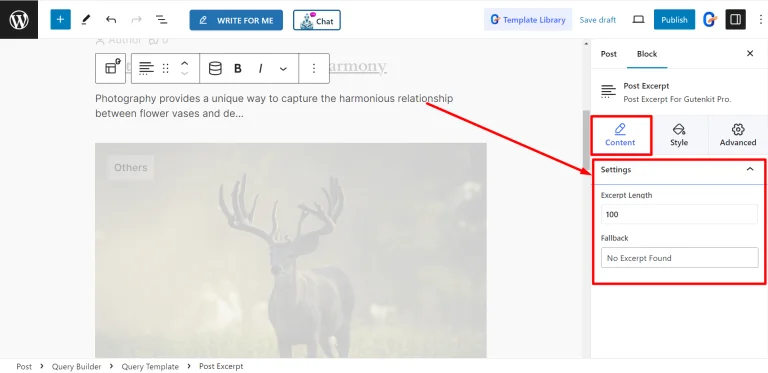
If you want, you can adjust the post excerpt length and set a fallback option. In this option, the style settings allow changes to the alignment, color, and typography of the excerpt.
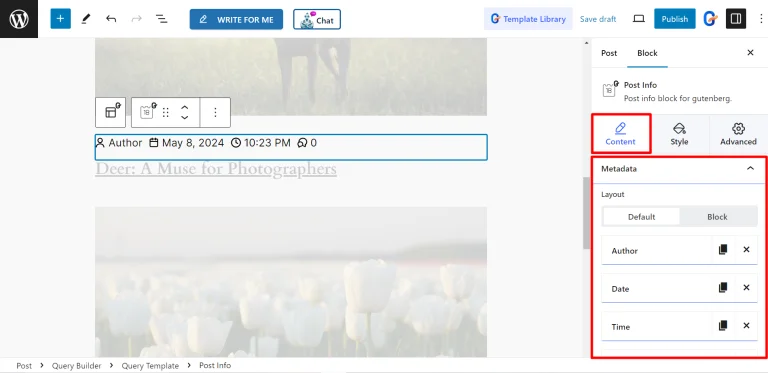
For post info, you can update metadata such as author, date, time, comments, terms, and custom fields. Each metadata element offers specific customization options, including adding icons, before text, and links. Terms like categories and tags can be customized to display multiple values.
Pagination settings allow you to choose between number-based or previous/next types. Number pagination includes options to truncate controls for cleaner navigation, while the previous/next type lets you style text and icons for better usability.
Filtering queries
Now let’s say you want to make it easy for your readers to filter the queries. For this, turn off template inherit. You will get the option “Edit”. Choose that and you will get a variety of filtering options for the queries.
For instance, you can set filters with Posts, Taxonomy query, Meta query, Author, Comments, Status, Order, Pagination, and more.
The best part—all of these have more customization options to get the perfection for the filtering.
Check out the following video to learn it with more details.
よくある質問
Want to know more about advanced Query loop in WordPress? Check out the following questions and answers.
What is the Query Loop in WordPress?
The Query Loop in WordPress is a feature that dynamically displays lists of content, such as posts, pages, or custom posts, based on specific rules like categories, tags, or authors.
How do I use the Query Loop block?
Install a plugin like GutenKit, add the Query Loop block in Gutenberg, and set rules to display content. Adjust parameters like post type, categories, or tags for the desired list.
What are the benefits of using the Query Loop in WordPress?
The Query Loop helps users find relevant information easily, improves audience engagement, increases time spent on your site, and boosts SEO by making content discovery seamless.
Can I customize the layout of a Query Loop?
Yes, you can fully customize the Query Loop’s layout using Gutenberg settings or plugins like GutenKit to ensure it matches your website’s design and user needs.
What types of content can be displayed using the Query Loop?
You can display posts, pages, custom posts, media files, and other WordPress content types based on categories, tags, authors, or custom parameters.
まとめ
So, if you really care about your audience and make them satisfied with a good UX, integrate the Query loop. It won’t take more than an hour to complete the entire process. Moreover, you can do that with zero coding knowledge.

コメントを残す