


Quick Overview
To make an element sticky in WordPress, you need a responsive sticky plugin that allows you to “lock” sections or widgets during scrolling. Using the ElementsKit Sticky Content module for Elementor, you can fix headers, sidebars, or call-to-action buttons to specific positions without manual CSS.
Quick Solution for Sticky Element:
✅ Enable Module: に行く ElementsKit > Modules > スティッキーなコンテンツ and toggle it の上.
✅ Select Element: Open your page in Elementor and click the セクション または ウィジェット you want to fix.
✅ Activate: に行く Advanced > ElementsKit Sticky そして選択します Sticky: Top.
✅ Save: Update the page and preview to check that the sticky version is working properly.
How to Make an Element Sticky in Website Page Using ElementsKit?
The easiest method of making an element sticky in your web page is using a drag-and-drop website builder. For this, we opt for Elementor and ElementsKit to apply the sticky functionality on a WordPress website.
Let’s see a real workaround for making a specific element sticky on a website.
前提条件: Since we’re following a code-free way, we need to take the support of Elementor builder. (Free version is enough)
Step 1: Install & Activate ElementsKit Plugin
First, you need to have the ElementsKit Elementor addon installed on your site.
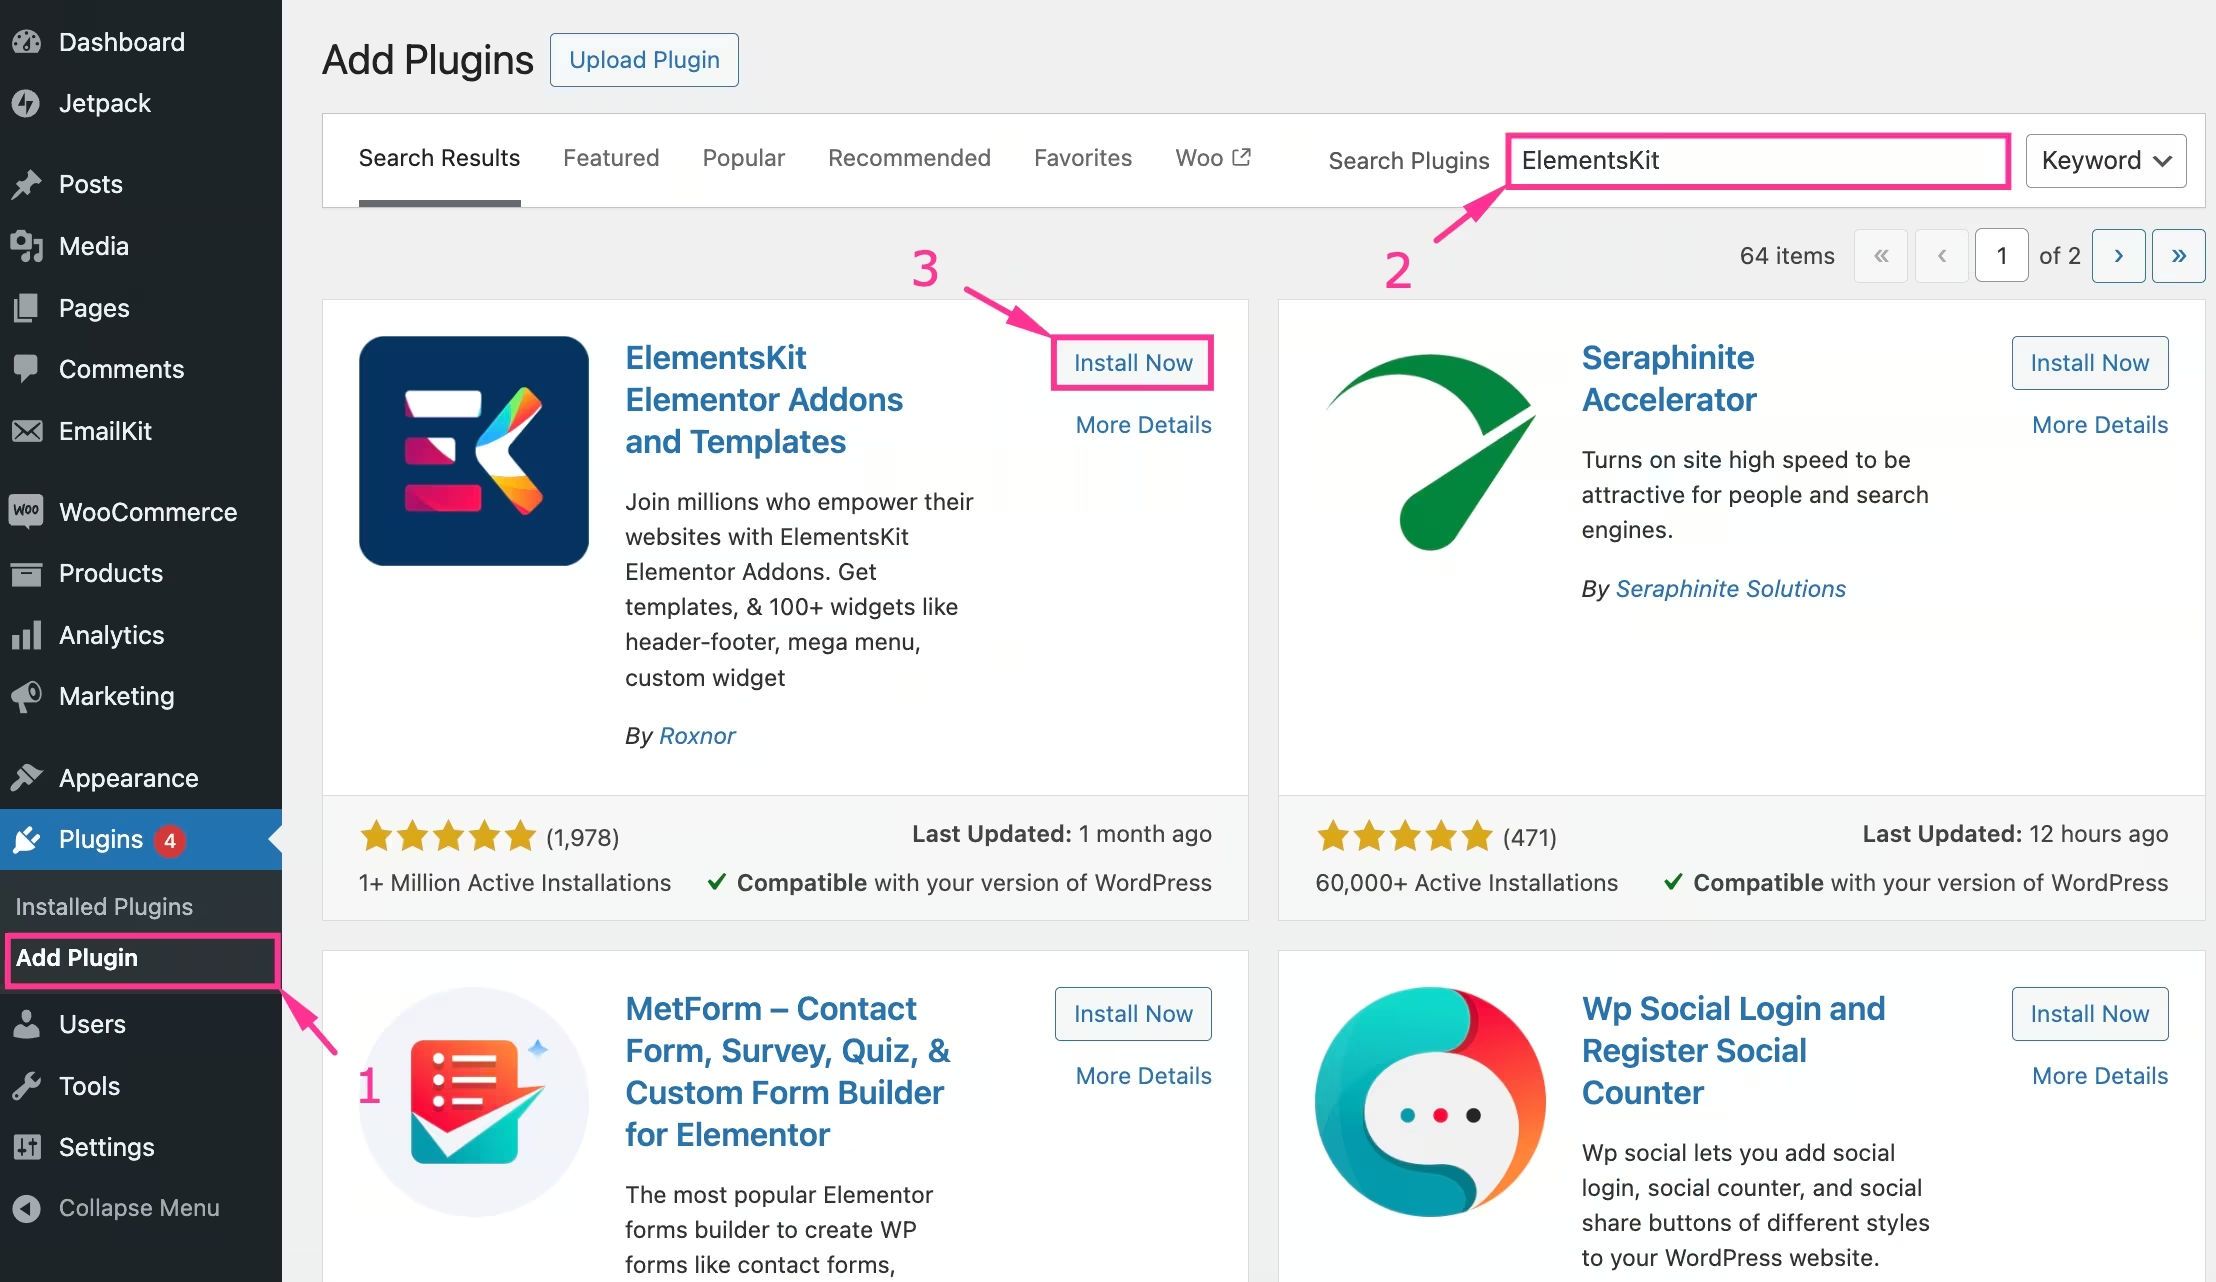
- あなたの WordPress ダッシュボード, follow Plugins > Add Plugin, and search for “ElementsKit”.
- Once it appears, install and activate.
Now, the sticky feature is available in ElementsKit as a module. It applies to any Elementor native or third-party widget, column, section, etc. This advantage gives you the freedom to make anything sticky on your website, without any coding.
So, activate this module first:
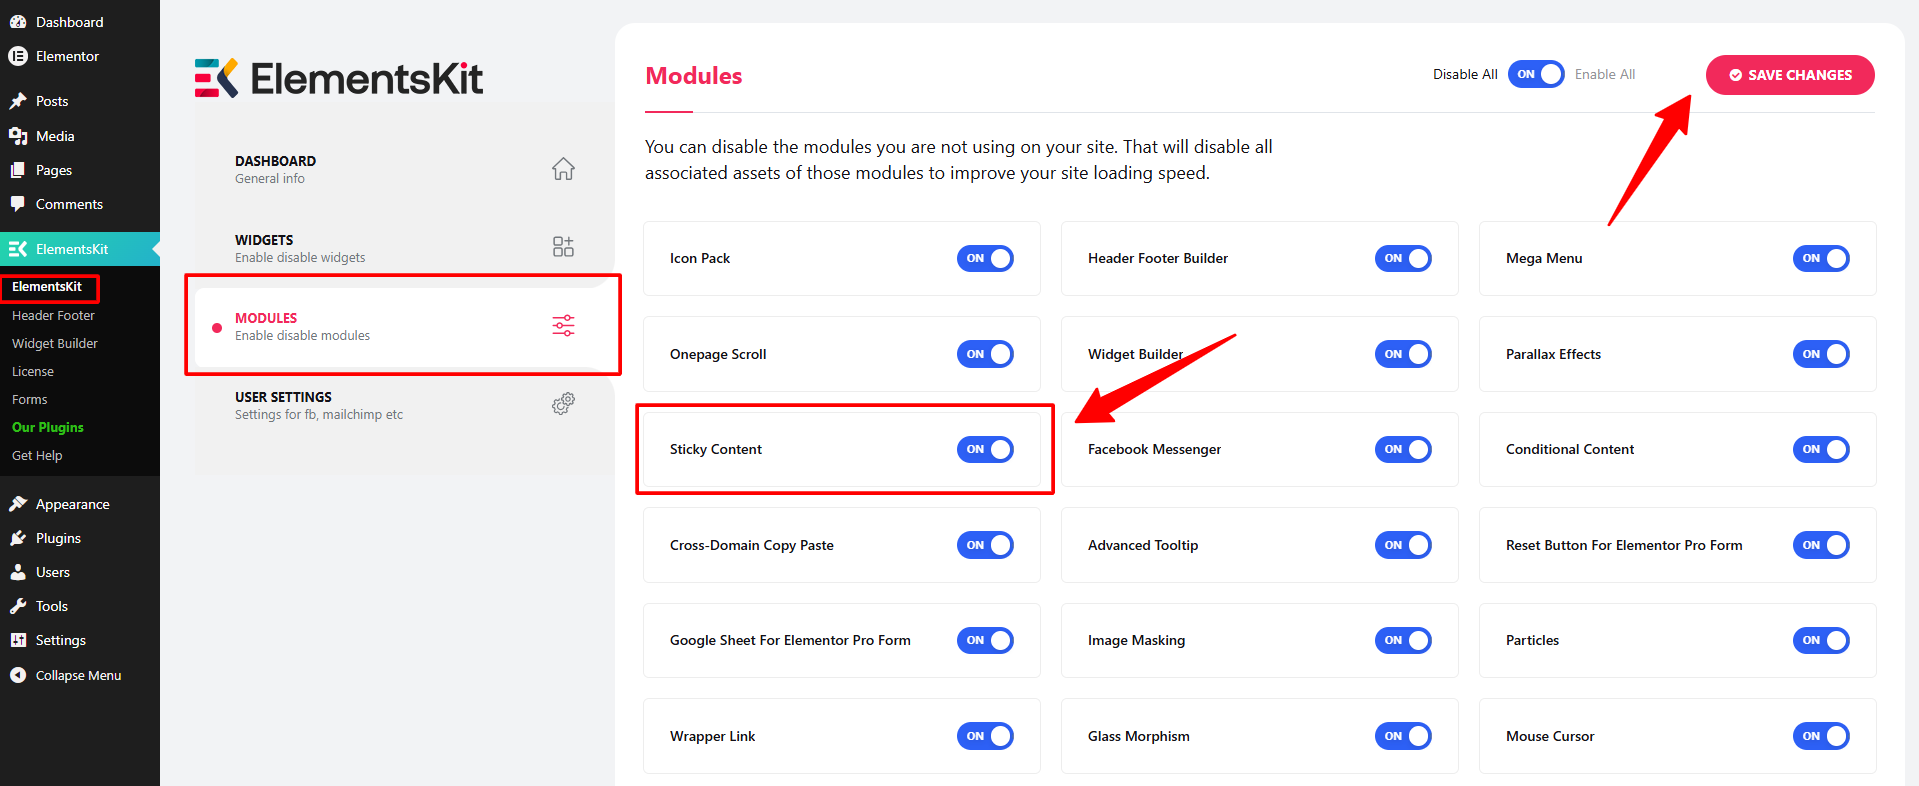
- Navigate to your WordPress Dashboard.
- に行く ElementsKit > モジュール.
- 探す スティッキーコンテンツモジュール, toggle the switch to の上, and click 変更内容を保存.
Step 2: Select the Element to Make Sticky
Now, go to an existing page or create a new one and start editing in the Elementor editor. In this tutorial, we’re applying the sticky effect to a widget element.
So, enter the widget settings and make the following changes:
- に行きます 詳細設定タブ.
- を展開します。 ElementsKit スティッキー menu.
- Sticky Type: Choose from 上, 底, カラム、 または 上にスクロールすると表示.
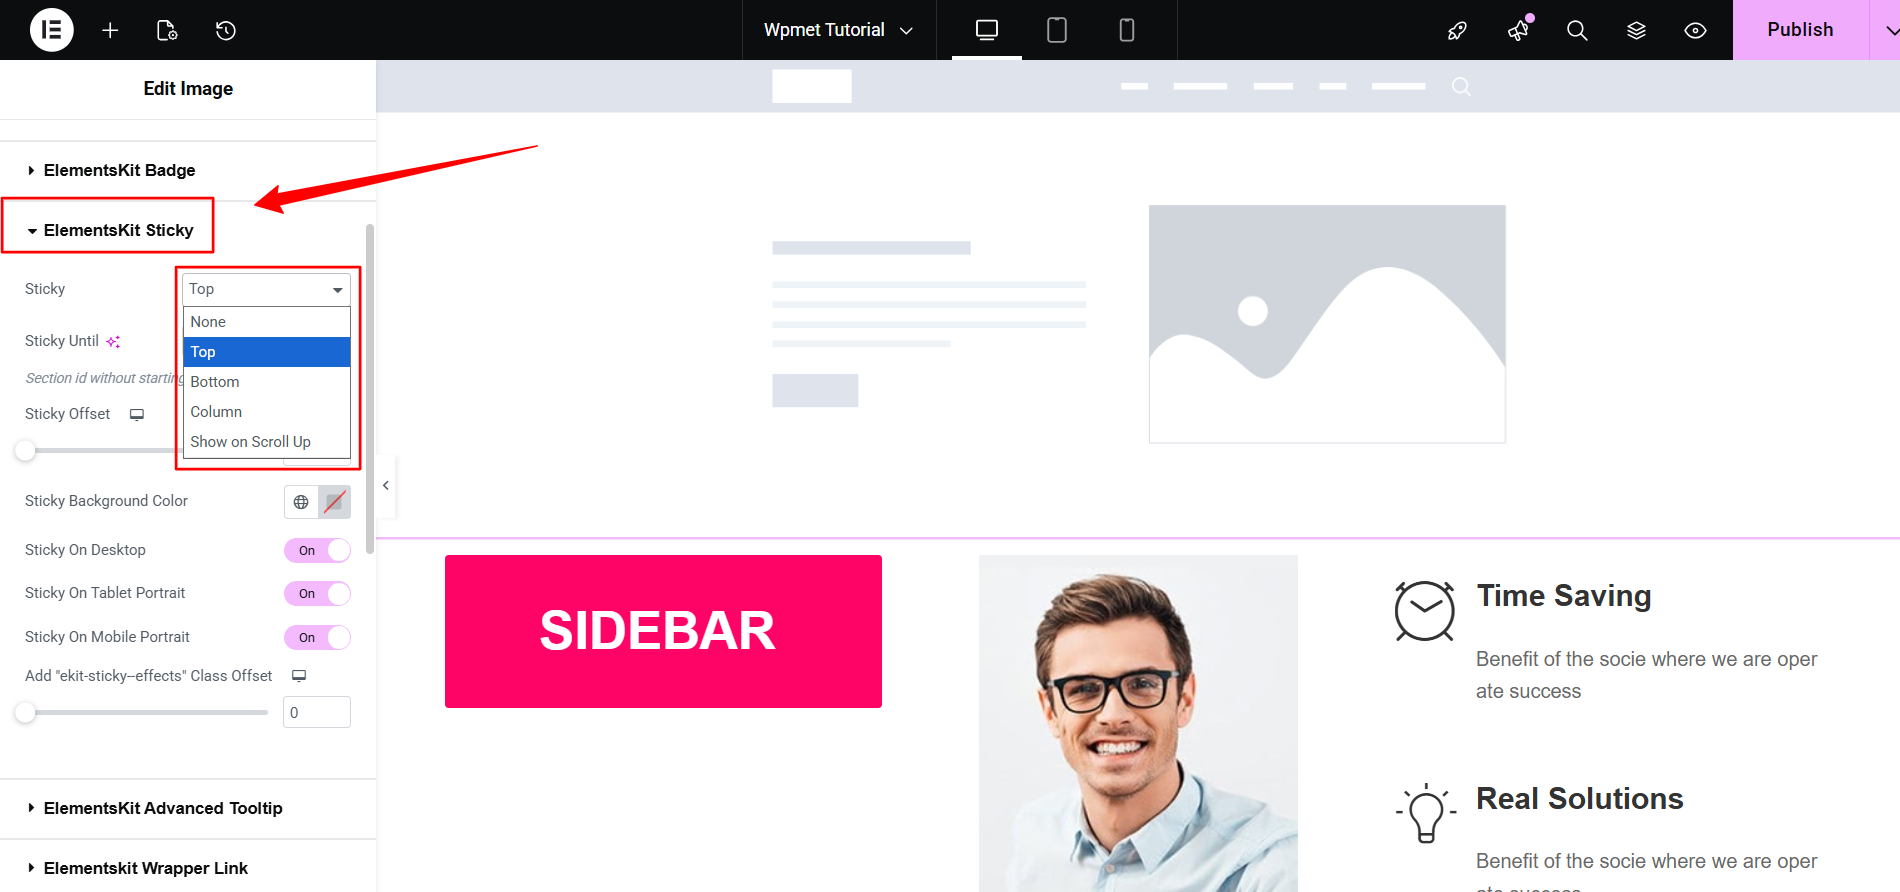
- 上: Best for navigation headers.
- Bottom: Best for “Buy Now” bars or cookie notices.
- カラム: Best for keeping a sidebar visible while the main content scrolls.
- Show on Scroll Up: Best for making any section sticky when the user scrolls up.
Step 3: Fine-Tune Sticky Behavior
To ensure a professional look, adjust these specific settings:

- スティッキーになるまで: If you want the element to stop sticking at a certain point (e.g., before reaching the footer), enter the CSSID like “footer-section” of that target section here.
- スティッキー オフセット: Enter a pixel value (e.g., 50px) to leave space between the element and the edge of the browser.
- Sticky Background Color: Choose a color that triggers only when the element starts sticking (prevents transparency issues on scroll).
- Add “Ekit-sticky-effects” Class Offset: Use this slider to determine when the sticky effects will take action after scrolling.
Step 4: Device Visibility Control
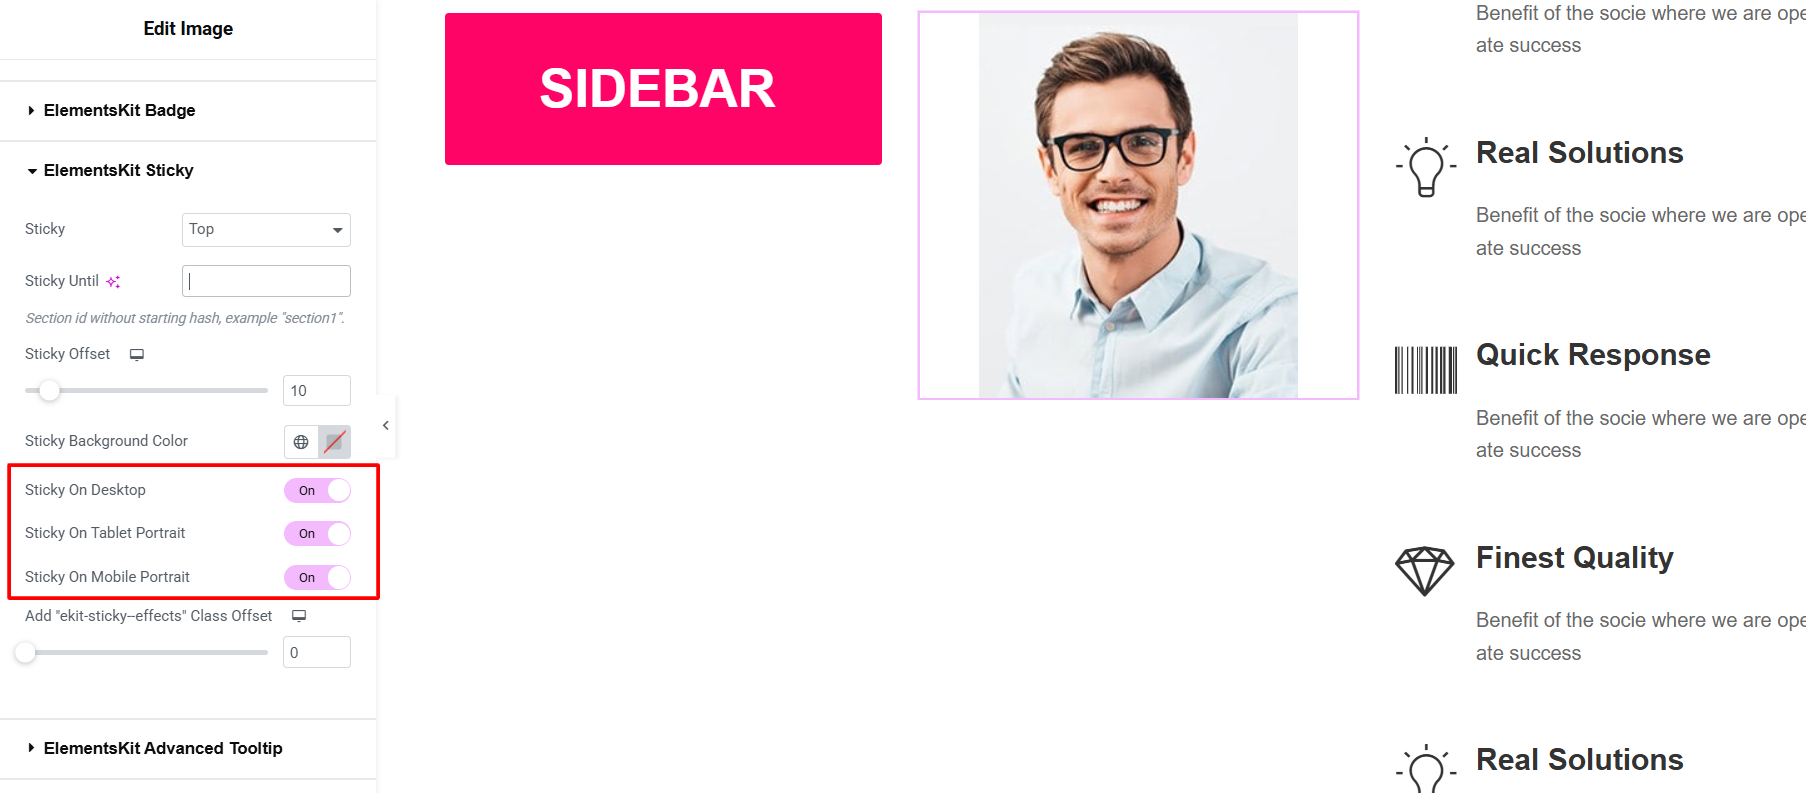
Here’s a crucial thing: not every sticky element works on mobile. So, ElementsKit allows setting any element sticky based on device types. You just need to toggle your preferred device types to show or hide the sticky functionality.
Step 5: Save & Preview Your Design
Once configured, use Elementor’s Responsive Mode to verify the sticky effect on Desktop, Tablet, and Mobile.
If the background appears transparent while sticking, ensure you have set a Sticky Background Color in the module settings to maintain readability against page content.
Now, you can also play the video to watch the real workaround on applying the sticky function to an website element ⬇️
So, now you know how to make an element sticky on your web page. ElementsKit allows WordPress users to apply sticky function with versatile features.
よくある質問
How to Make a Sticky Header on WordPress Website?
Can I Make an Element Sticky Only Within a Specific Section?
Why is My Sticky Element Overlapping Other Content?

コメントを残す