


Using basic, plain text links is fine. But what happens when you follow this traditional method in content-heavy pages? Visitors will struggle to find it, and even if they‘ve noticed a hyperlink text, it won’t be attractive to them.
Things worsen when multiple links are inserted in a narrow area. No one will load their browser with many tabs. So, what to do in this dynamic web world? Simply, direct them to the most relevant pages. Consider creating a snap view of the targeted link page; this will help visitors know where they are actually going.
This is where next-gen hyperlinks evolve to hold visitors’ attention for a long time. Meet the ElementsKit Interactive Link widget to redefine boring text links elegantly and engagingly to guide users, showcase content, and improve the site’s visual appeal.
You can design interactive sections that respond to user actions with extensive animations & revealing effects.
In this step-by-step guide, we’ll show you exactly how to create an interactive link section in Elementor. And, you don’t need to deal with any code or hire any professional designers.
Interactive Linking vs. Traditional Text Hyperlinking (Quick Overview)
Traditional text hyperlinking is simple, underlined or colored text that redirects users when clicked. This method is:
- Visually boring and old-fashioned.
- Doesn’t guide attention interactively.
- Don’t provide any preview or engagement before the click.
- And it is easily overlooked on content-heavy pages.
So here, interactive linking works. It’s not just functional but also very exciting. You can dramatically enhance user experience through:
- Visual previews that hint at what’s behind each link.
- Responsive effects like image transitions, animations, or text motion on hover or scroll.
- Increased engagement, holding attention longer—perfect for showcasing products or portfolios.
- Stronger brand identity with modern storytelling using scroll-triggered reveals or mood-based visuals.
And, there’s a no-code way to design interactive link sections in Elementor.
Tool Used: ElementsKit, Elementor (Free version), & WordPress.
What are Interactive Links in Web Design?
Interactive links redefined traditional hyperlinks by incorporating animations and visual transformations triggered by visitor actions, such as hover, scroll, or click. Instead of just simple navigation, you can create visually rich and interactive elements. These include curved scrollable wheels, large slanted typography, hover-triggered image transitions, and background changes when clicking on different options.
Let’s clarify with an example: imagine a restaurant website’s food menu section. The food items are listed in elegant typography at the center, and as you hover over each one, images of the corresponding dish appear on both sides.
Here’s a visual of it:
Overall, interactive link design helps you create a more engaging user experience. It gives users a clear visual cue of what to expect before they even click on a link. So, if you want to create such signature design moments on your WordPress website, we’ve come out with a code-free way to design a super-attractive web section.
And, before we get to the main part, we’re using Elementor Page Builder as a prominent choice. For this, the free version is enough. But you need to take the support of an Elementor addon, since Elementor doesn’t support it by default.
ElementsKit is the only addon in Elementor and even across the entire WordPress ecosystem that introduces this interactive linking functionality. And, you can still design through a drag-and-drop interface.
Let’s see how:
How to Create Interactive Links Sections in Elementor?
The interactive link functionality is available as an Elementor widget in the ElementsKit. And, you’ve to purchase the pro version to activate this feature.
And, once you’ve finished installing and activating the ElementsKit pro version, log in to your WordPress dashboard and follow the step-by-step process below:
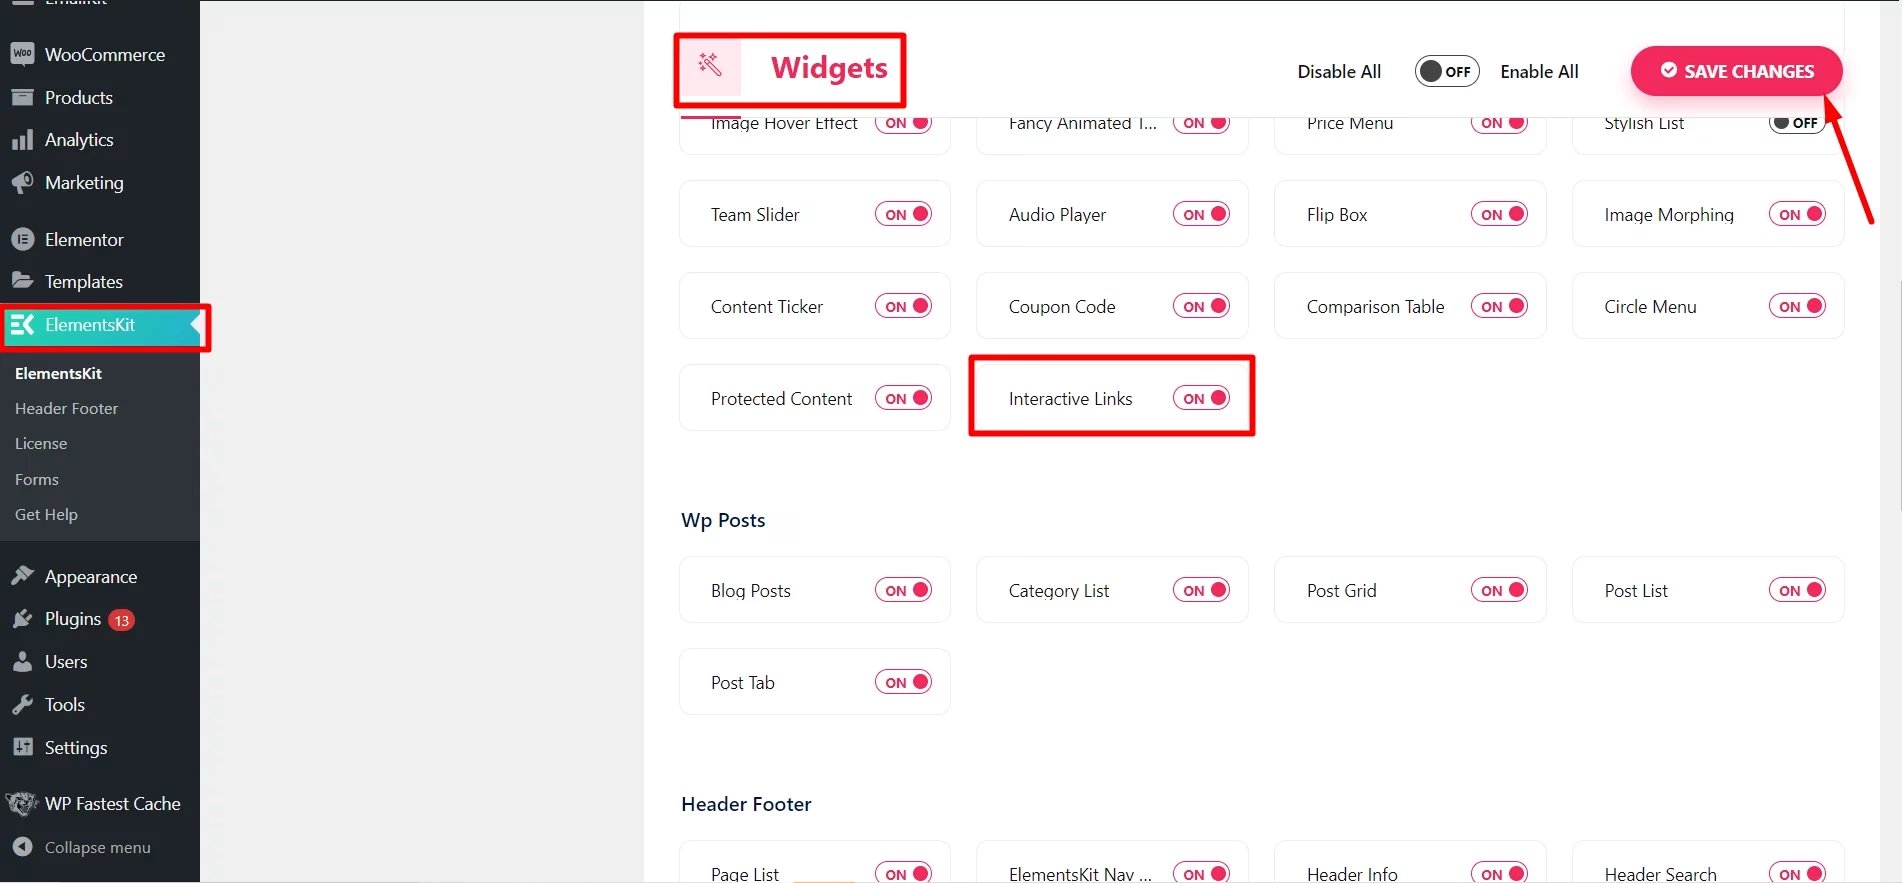
Step 1: Activate ElementsKit Interactive Link Widget
As you land in your WordPress dashboard, navigate to ElementsKit > Widgets and look for the Interactive Link widget. Once you see it, enable the toggle button next to it. Then hit the 変更内容を保存 button at the top right of your screen, and you’re ready to use the ElemensKit Interactive Link widget.
To use it, add a page or post where you want to design an interactive link section. When the page or post loads on your screen, click on the “Elementorで編集する” option. Doing this will open the Elementor builder interface.
From here, start by adding a widget. On the right sidebar, use the search option and find the ElementsKit Intractive Link widget. As you’ll see, drag and drop it to your preferred section.
Step 2: Configure Interactive Link Section
After you added the ElementsKit Interactive Link widget, enter the widget settings and navigate to the コンテンツ tab. The first thing you’ll do is choose a style between Foreground & 背景 for your interactive link section.
If you want to display the visual above the text or align it with the text, choose the Foreground option. However, if you want some background transitions, then go for the latter option. Then, you need to configure some other options as stated below:
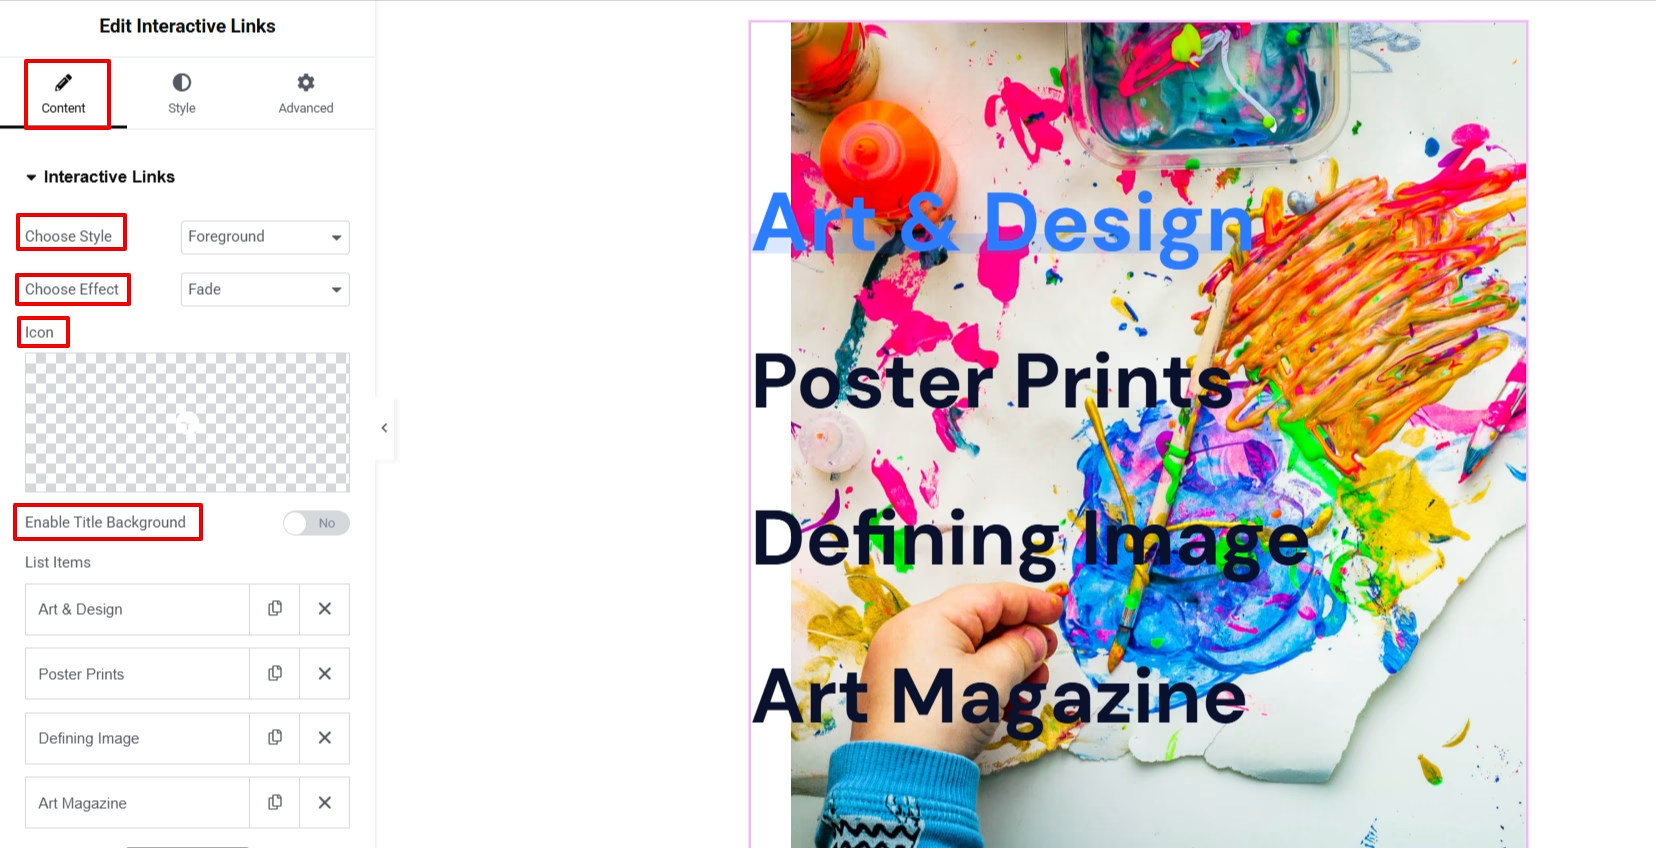
- 効果を選択: Select a revealing effect from Fade, Slider, Zoom In, Zoom Out, Rotate, and Blur. These effects allow you to define how you want to respond to visitor actions. Go for one that syncs well with your visual elements. A good combination can captivate your visitors’ attention and keep their eyes glued to your content.
- アイコン: You can also add an icon with interactive link items. Choose from the built-in ElementsKit icon library or upload your own custom icon from your device. And, what we like most in this widget setting is that you can position the icon before or after the text, and even set it to appear only on hover for a more dynamic effect.
- Enable Title Background: You can also set a background to your listed interactive link items.
Step 3: Add List Item
At this stage of the Elementor interactive link section tutorial, you’ll learn how to add an item to the interactive link section. Generally, the ElementsKit Interactive Link widget loads with three items. You can add a new one by clicking the “新しく追加する” button or delete an existing one with the “バツ" ボタン。
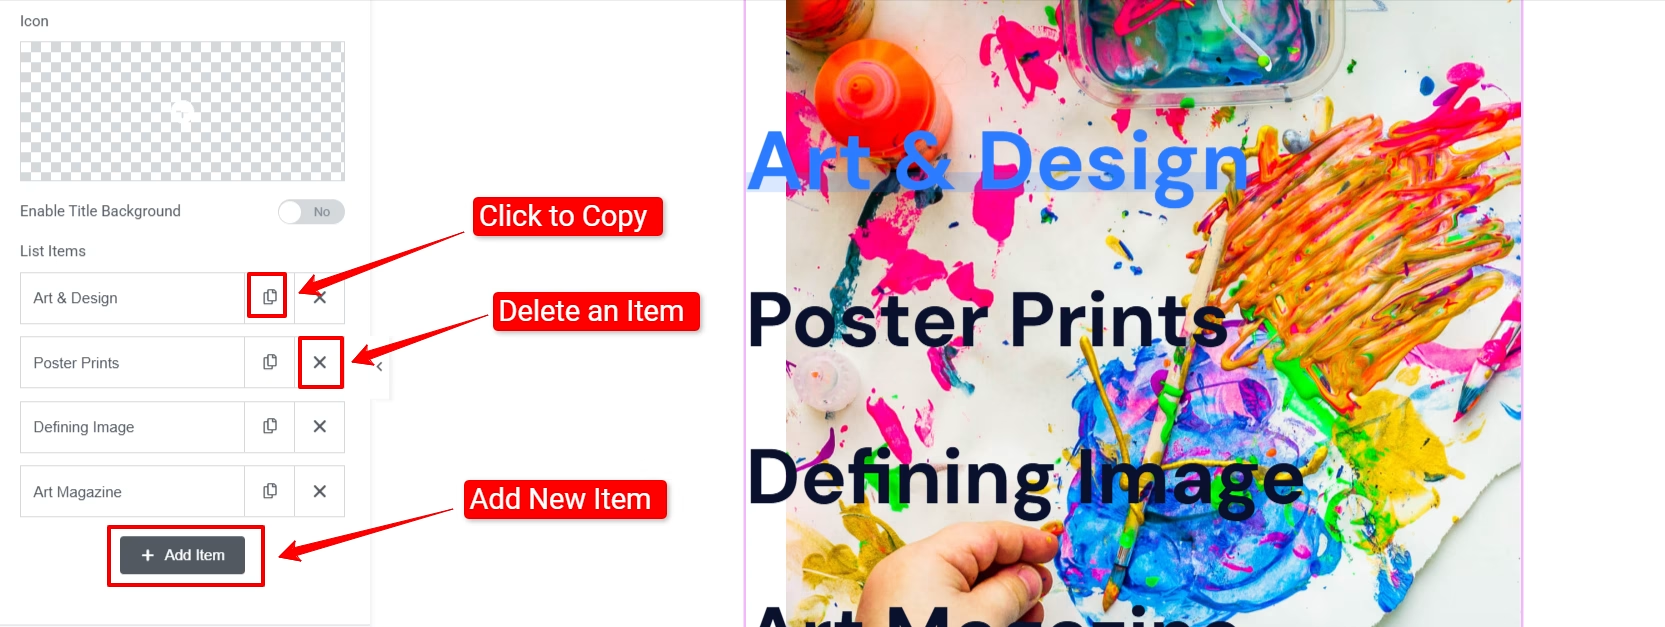
But what is really useful here in this widget is that it saves your time by allowing you to copy an item. Now, let’s see how to configure each list item:

Click an item to reveal its settings. Here, you can add a title, subtitle, link, and image. If you have chosen the Foreground style in step 2, you need to set the direction and offset of the image.
Step 4: Customize Interactive Link Section
In this part of our tutorial blog, we’ll focus on the styling of the interactive link section. You can customize almost every part of this widget. Here are the available styling options:
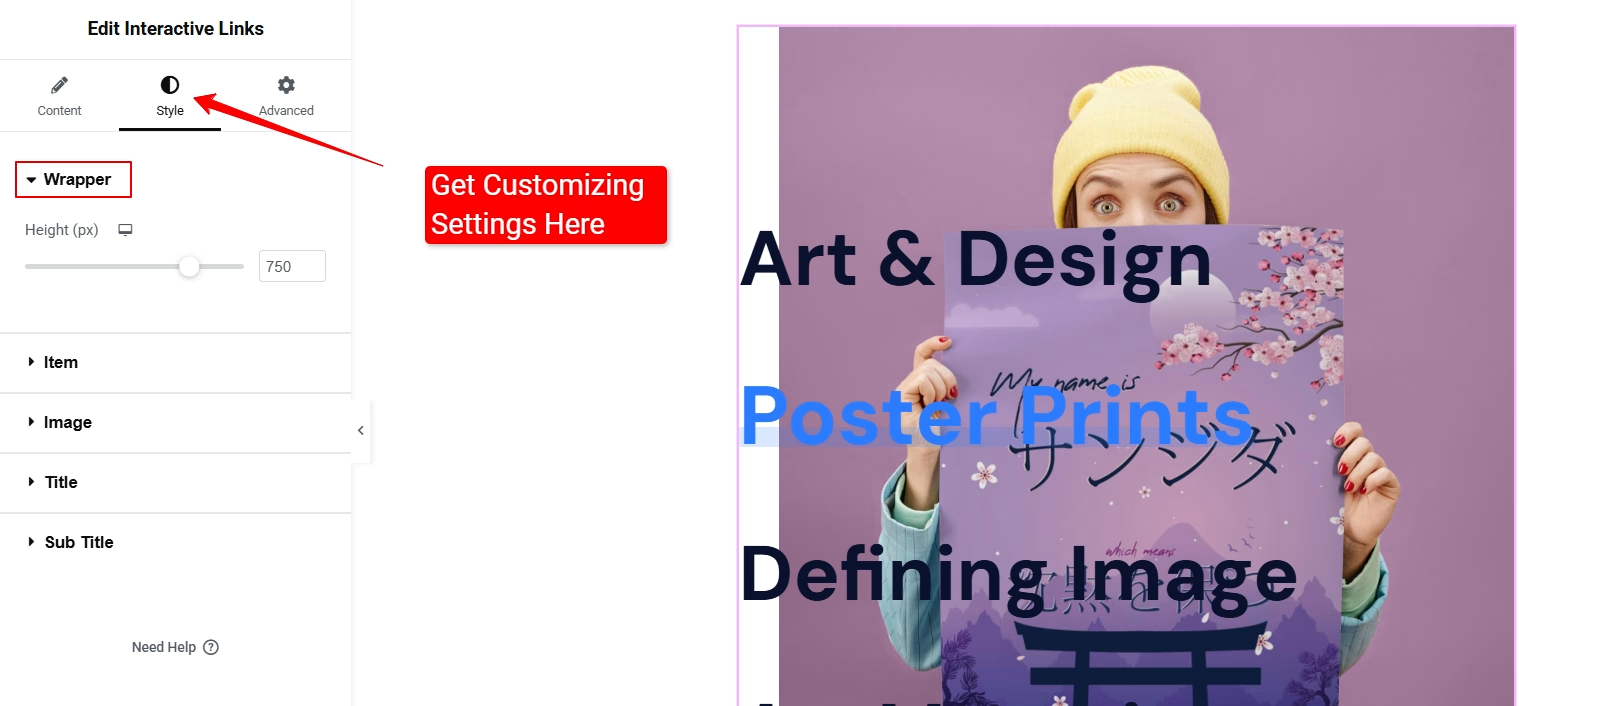
- ラッパー: Using this slider, you can adjust the height of the interactive link section. You can also manually add a numeric value.
- アイテム: You can customize the appearance of the listed items. If you enter this option, you’ll see controls like コンテンツの両端揃え & アイテムを整列する to horizontally and vertically align your items. Plus, you can define the text alignment as well.
Further, you can set the gap between items and the width. Then, you can choose to set background types, border, hover animation, padding, and margin. This Elementor widget comes with a range of hover animations, including Shrink, Plus, Bounce, Grow, Float, Hang, Skew, Wobble, Buzz, 等
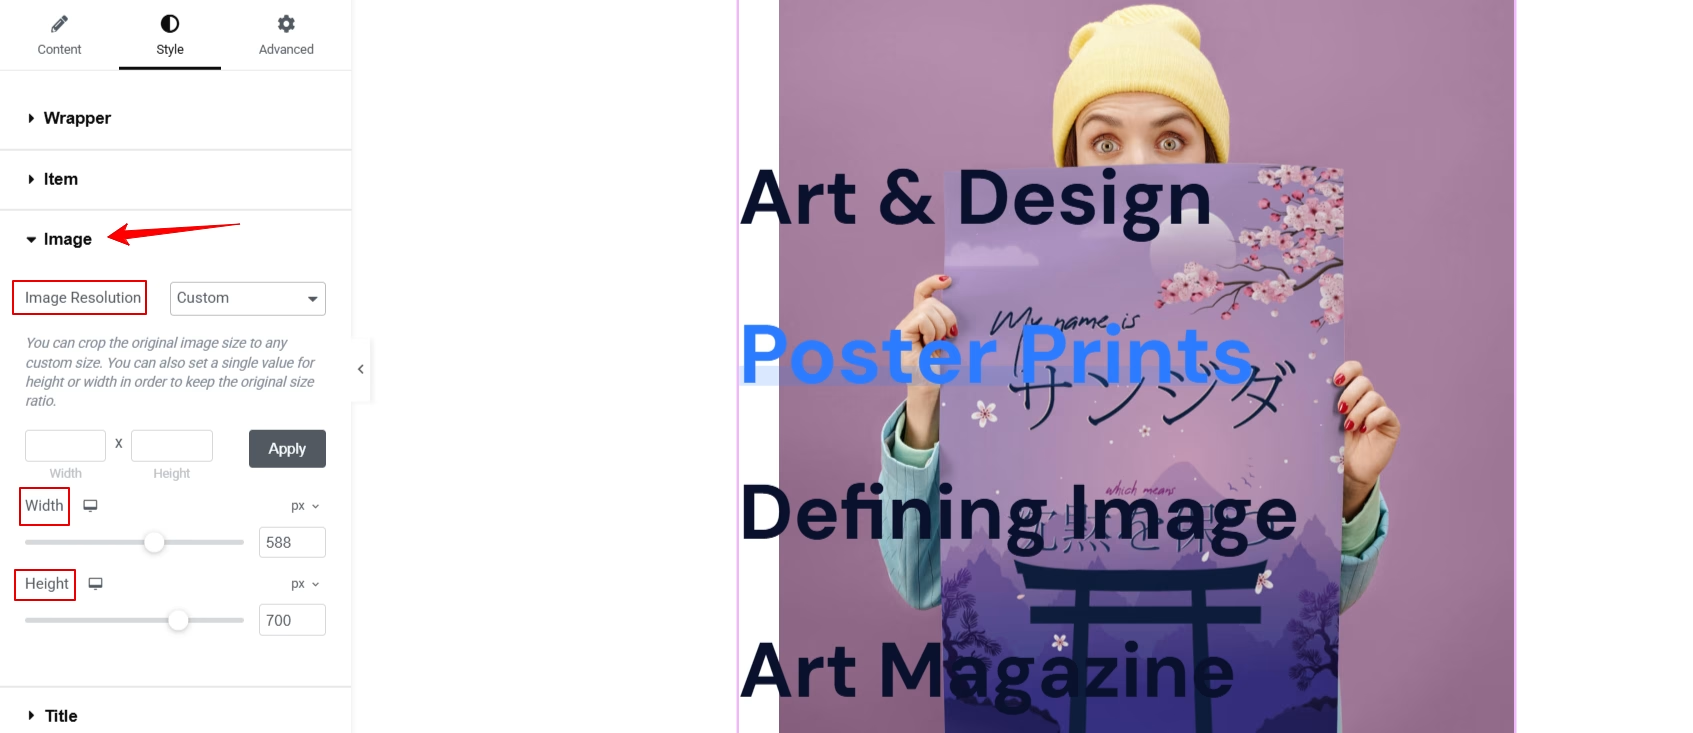
- 画像: It looks fancy to reveal images with a hover-triggered way, but getting the perfect resolution for optimum showcasing isn’t easy. And, to ease this process, ElementsKit comes with various presets of image resolutions. Or, you can choose to decide on a custom resolution.
- Title & Subtitle: You can also customize the text part of the interactive section in your own way. Add color and adjust typographical adjustments for both normal and hover states. Therefore, you can elegantly turn your typography into a different color on hovering. And, modern typographical control, like Text Stroke, is also available with this Elementor Interactive link addon.
- アイコン: You will see the icon customization settings in the スタイル tab if you have chosen to see an icon from the コンテンツ tab. Here, you’ve a chance to set the color & size of the icon and define the space between the icon and text.
That’s the customization part of the ElementsKit interactive link widget. You can give the perfect, elegant look to the entire interactive link section that matches your brand style.
Step 5: Preview & Live Your Design
In this final step, preview your interactive link section before publishing. Make sure each link works and all visual effects appear as expected. Actually, it’s a regular practice for any web design pattern.
Here’s the preview of our design:
まとめ!
Now, you know how to design an interactive link section on your WordPress website. And, using ElementsKit makes the entire process beginner-friendly without any coding or professional design. Its Interactive Link widget gives you the power to turn static links into rich, animated experiences.
And, this design approach doesn’t just apply to simplified navigation; it applies to any type of design you’re trying to create, such as portfolios, products, categories, etc. So go ahead, experiment, customize, and create web interactions that provide an engaging experience.

コメントを残す