


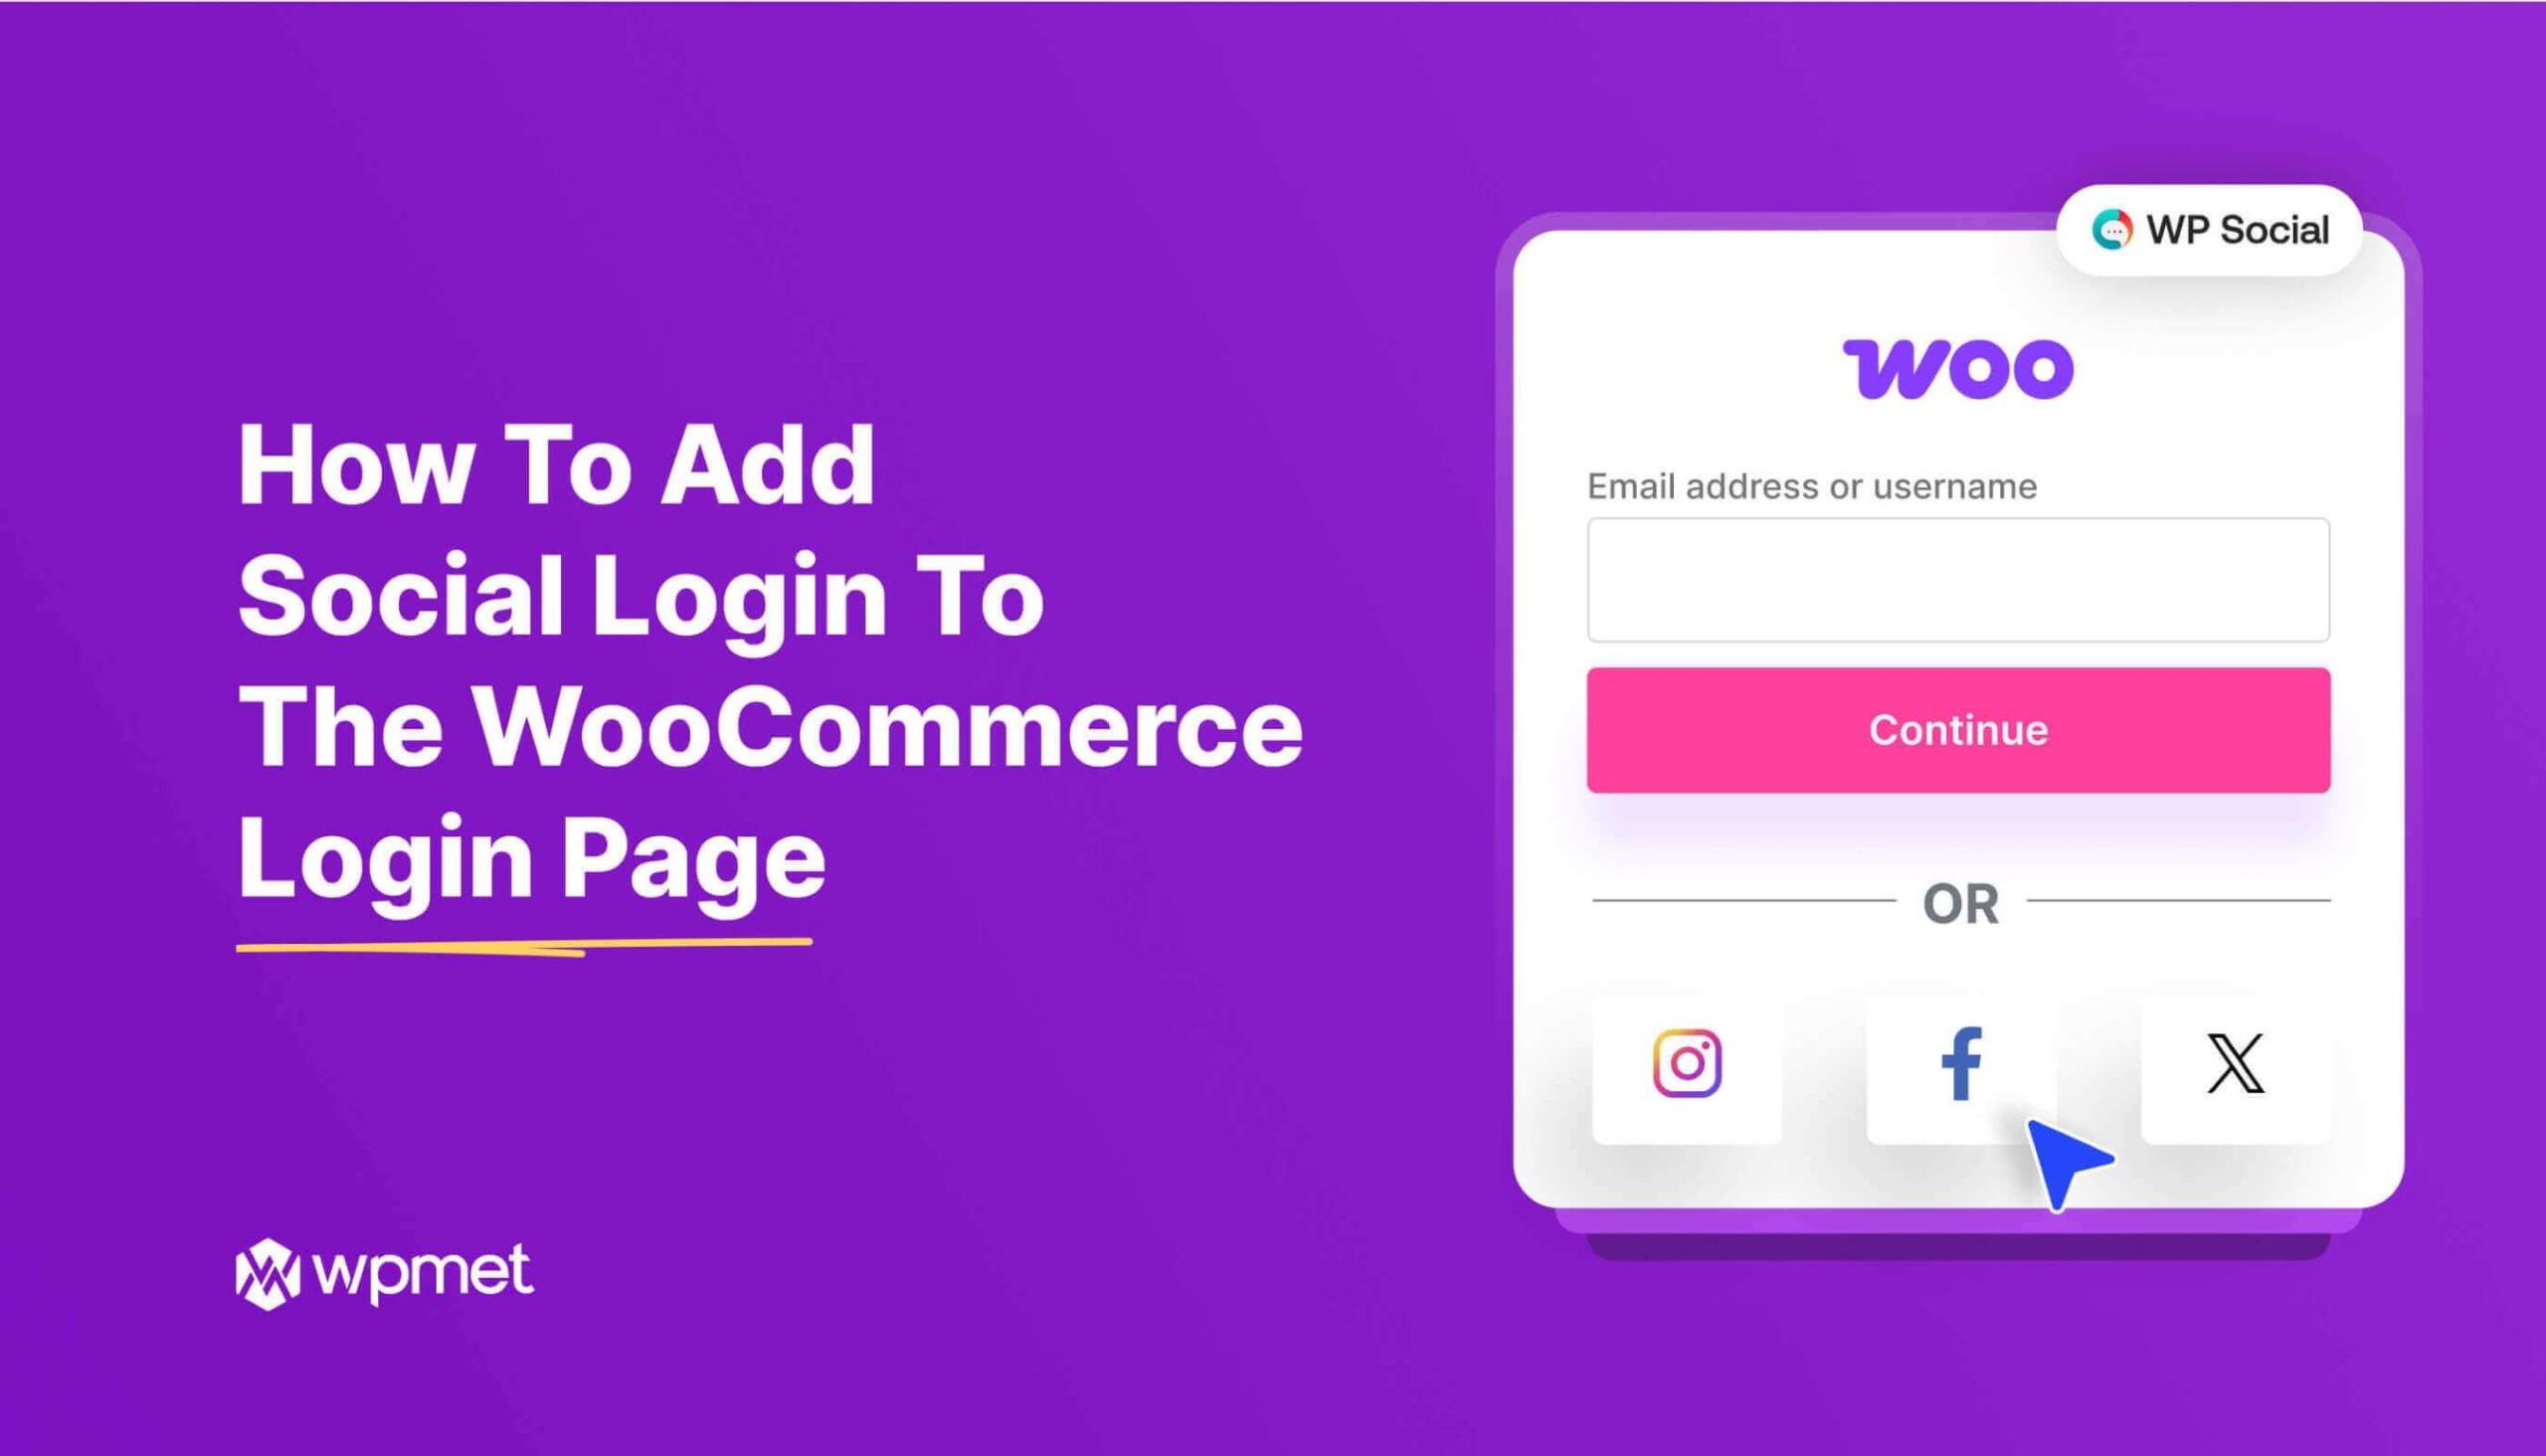
Running an online store with WooCommerce means constantly looking for ways to improve user experience. One of the most effective ways to make the shopping journey smoother is by adding ソーシャルログイン to your WooCommerce login page.
Shoppers love convenience, quick, secure, and hassle-free login. And social login offers just that. In this post, we’ll dive into what social login is, why you should consider adding it to your WooCommerce store, and how to add social login to the WooCommerce login page using WP Social.
Quick Overview
The blog explains how adding ソーシャルログイン to a ウーコマース store enhances user experience by allowing customers to log in using their social media accounts like Google or Facebook.
Tools Used: WPソーシャル
Step to do:
✅ Install and Activate WP Social
✅ Configure Social Login Providers
✅ Test the Setup
With WP Social, setup is straightforward, and results are immediate.
What is Social Login?
Social login is a feature that allows users to sign up or log in to a website using their existing social media or third-party accounts. Instead of filling out a registration form or remembering multiple usernames and passwords, customers can simply click a button and log in with platforms like Facebook, Google, Twitter (X), LinkedIn, and GitHub.
This process not only saves time but also builds trust since users are logging in through platforms they already know and use daily.
Reasons Why You Need to Have a Social Login to the WooCommerce Login Page
Adding social login to your WooCommerce store isn’t just a convenience, it can directly impact your sales and customer satisfaction. Here’s why:
- Faster Checkout Process
Customers who log in quickly are less likely to abandon their cart. Social login removes friction, speeding up the path to purchase. - ユーザーエクスペリエンスの向上
No one likes creating yet another account. Offering social login simplifies onboarding and makes your store more user-friendly. - Reduced Forgotten Password Issues
Resetting passwords can frustrate customers. Social login eliminates this common pain point. - Higher Registration Rates
Shoppers who might skip creating an account are more likely to register if it only takes one click. - More Reliable Data
Since social platforms validate user information, you often get more accurate customer details, such as verified email addresses.
Steps on How to Add Social Login to the WooCommerce Login Page
The easiest way to add social login to your WooCommerce store is by using a plugin. For this guide, we’ll use WPソーシャル, a popular and reliable plugin designed specifically for WordPress and WooCommerce integration.
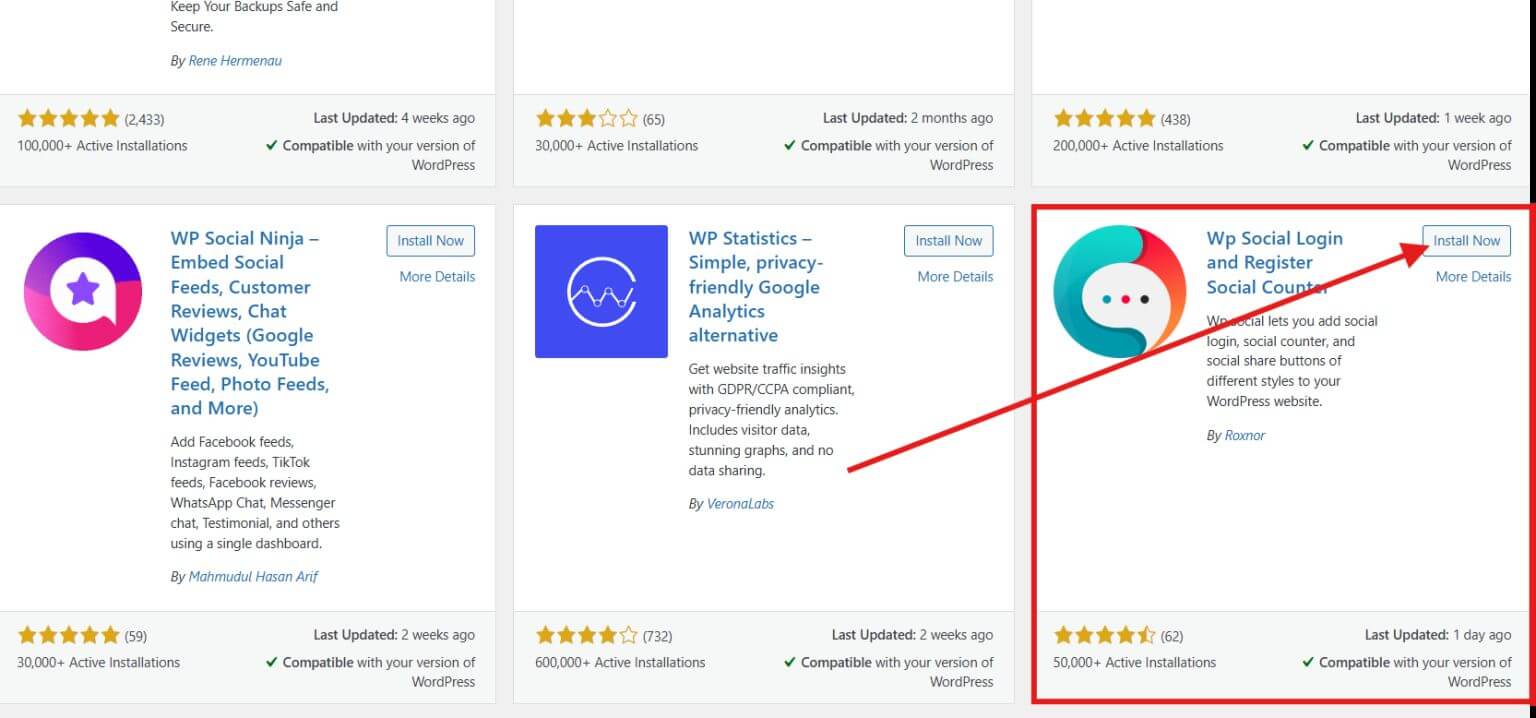
Step 1: Install and Activate WP Social
Go to your WordPress dashboard and open the plugin to add WP Social. Install the plugin and activate it.
Step 2: Configure Social Login Providers
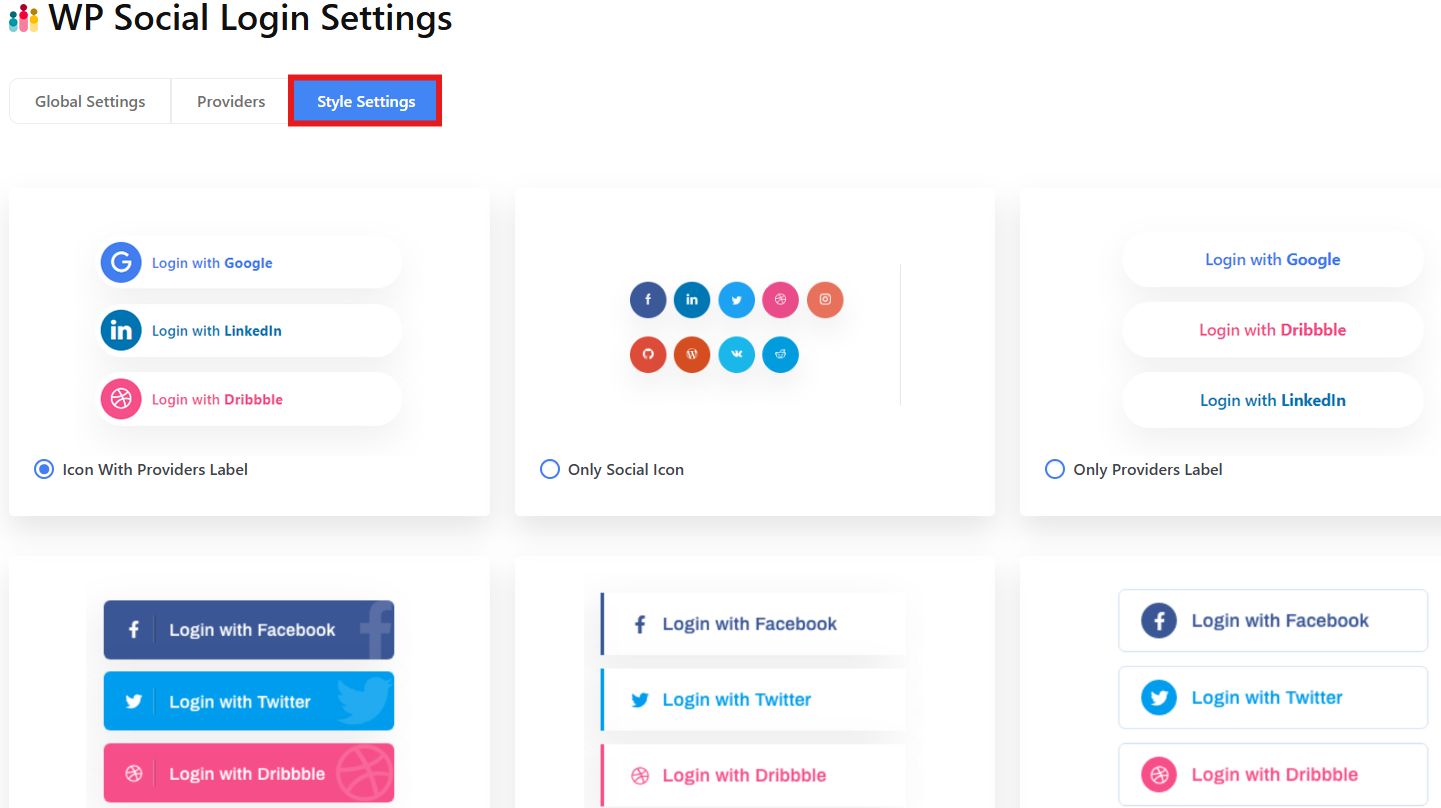
After activation, go to WPソーシャル そして ソーシャルログイン. First, configure the style settings of your login buttons.
Next, enable the social providers. Choose the social provider you want to use the login credentials to log in to your WooCommerce and open the settings to set up the login.
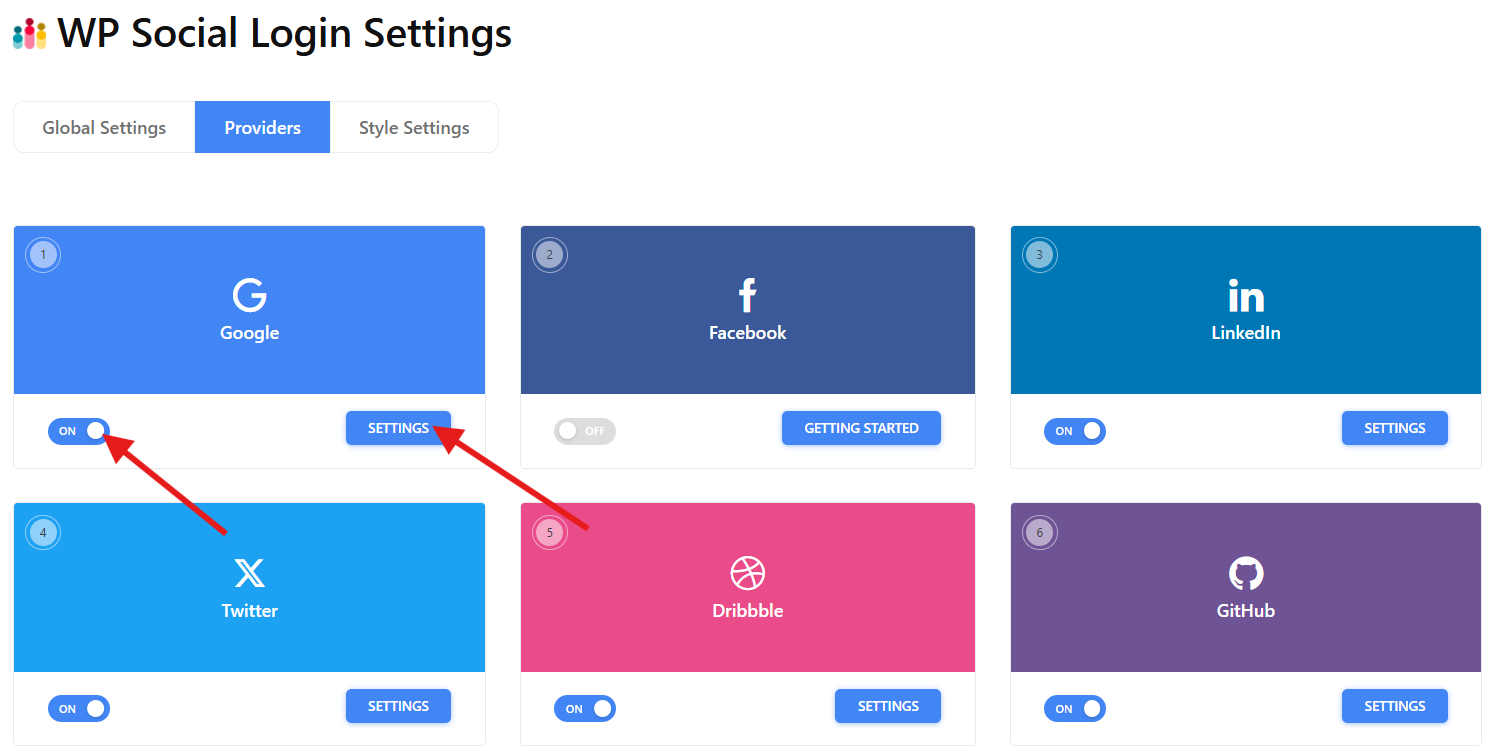
For instance, you want to use your Google login. When you open the settings, a new pop up window will appear where you will need to set up the settings and buttons.
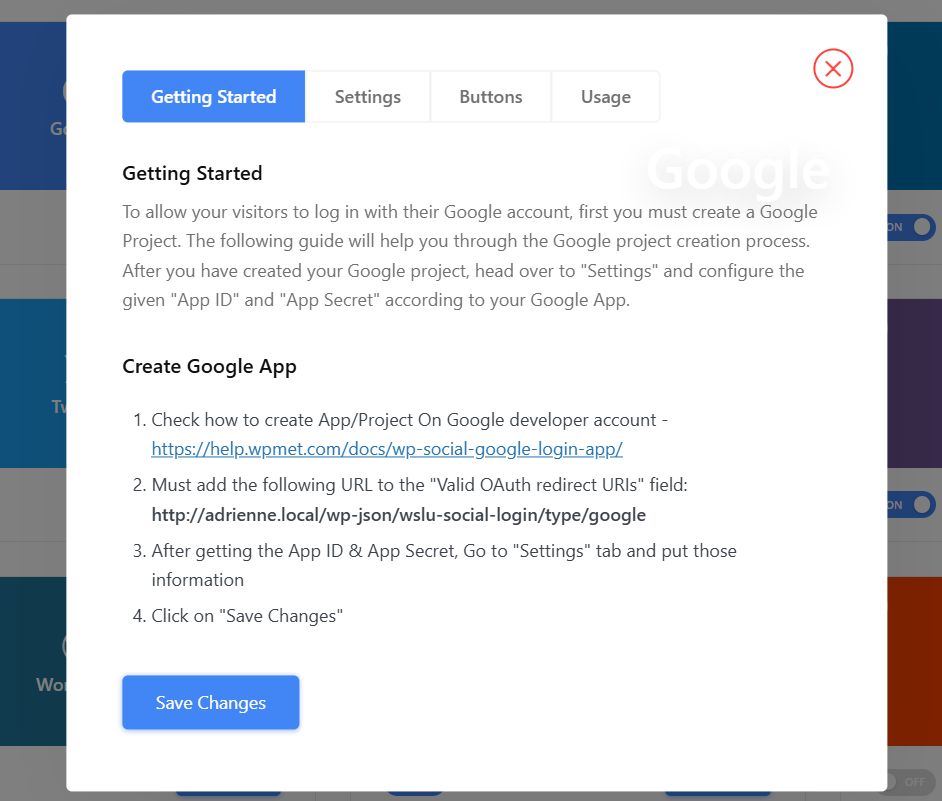
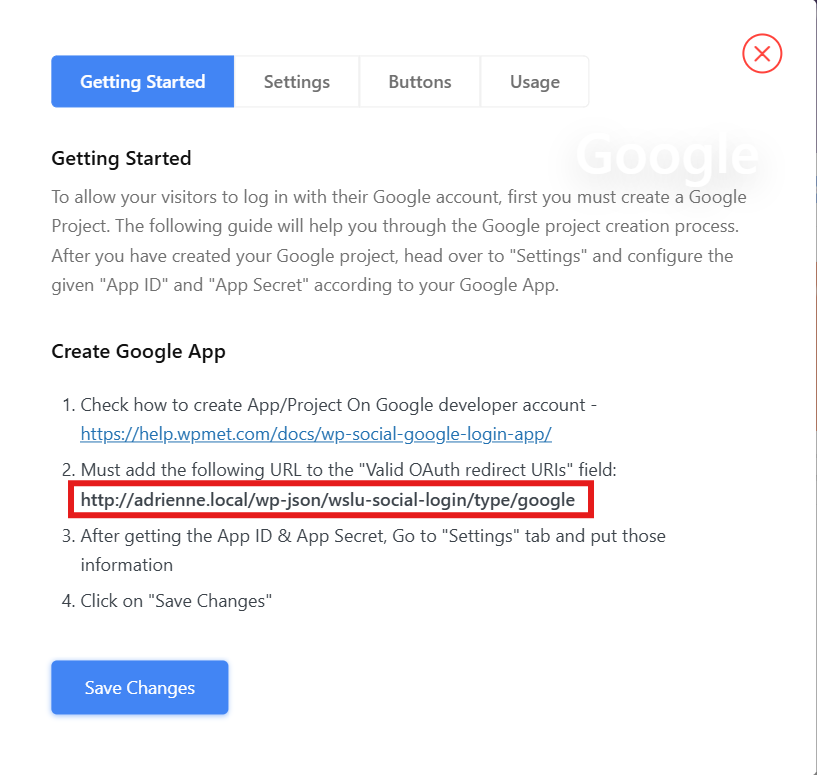
To complete the setup, create your Google App to get your App ID and App Secret, which are needed to set up the settings. This will allow your visitors to log in with their Google account.
Log in to your Google account through Google Cloud and create your project. After you create your project, you’ll end up in your project dashboard. Open the OAuth consent screen and select the user type.
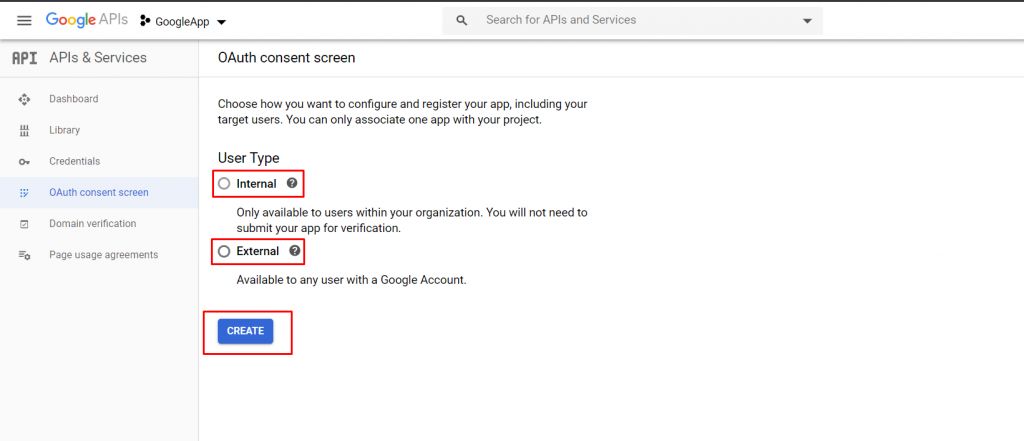
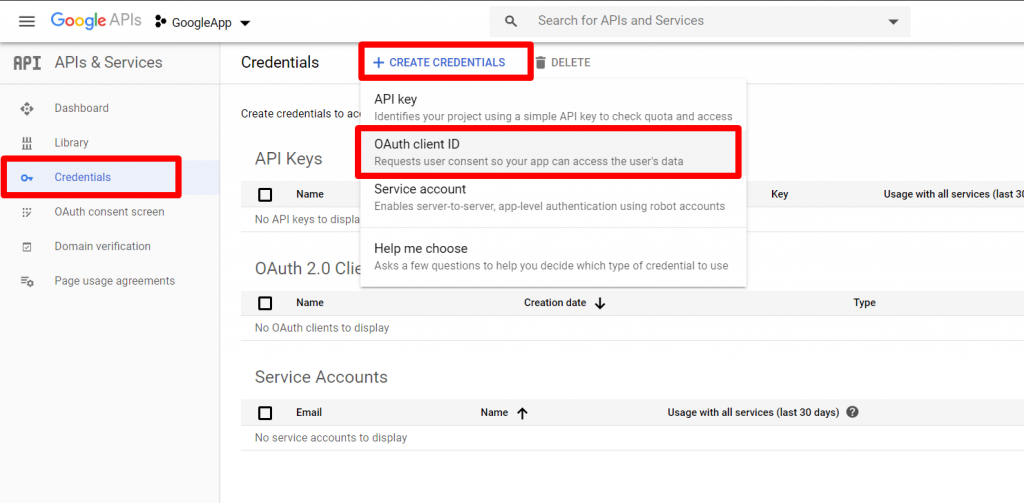
Then enter your app information, app domain, and developer contact information. After that, create credentials and select OAuth client ID.
Select web application as application type and add the authorized redirect URL.
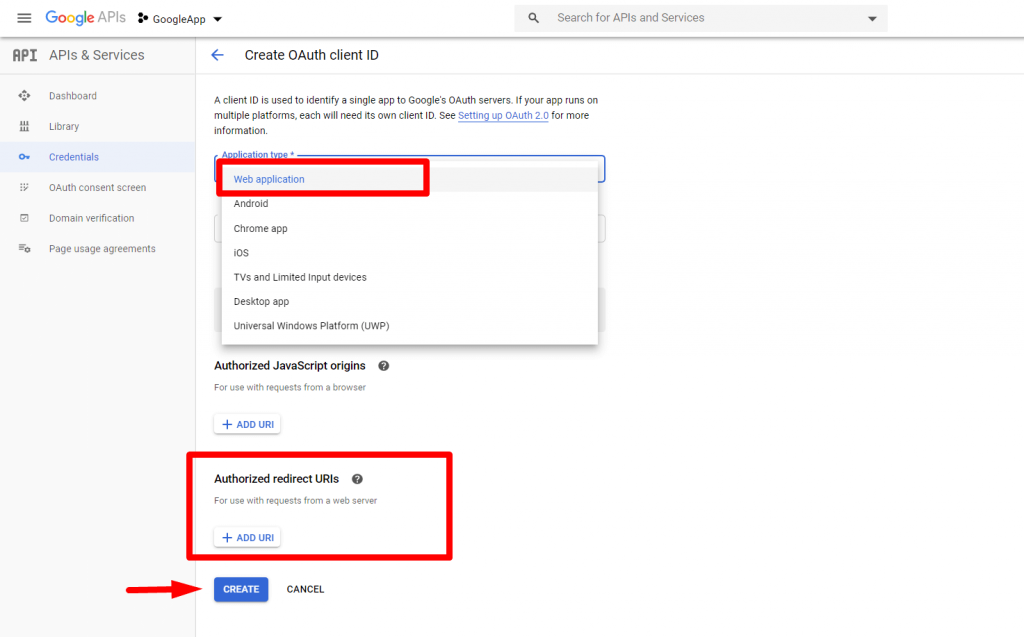
You can get your authorized redirect URL from the provider’s settings in WP Social.
After you created your OAuth client, get the client ID and client secret.
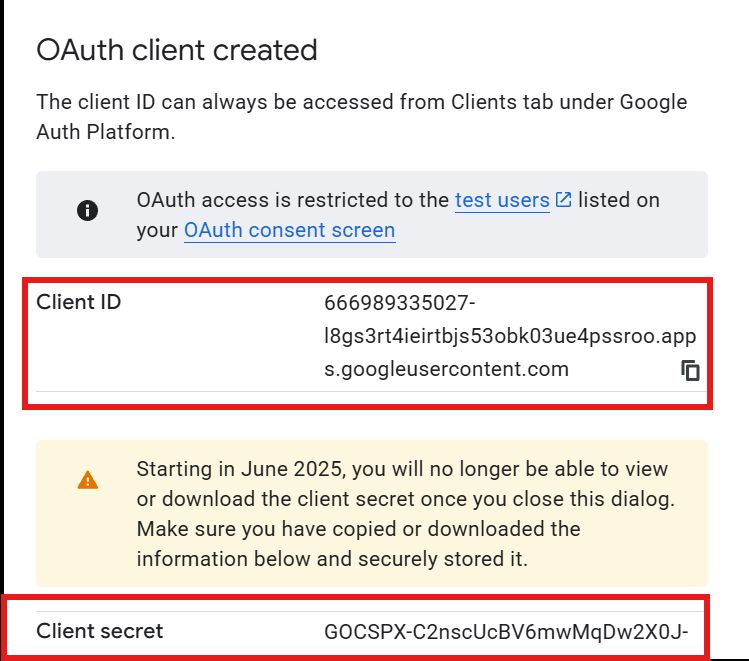
Go back to WP Social Login and enter the client ID and client secret in the settings tab.
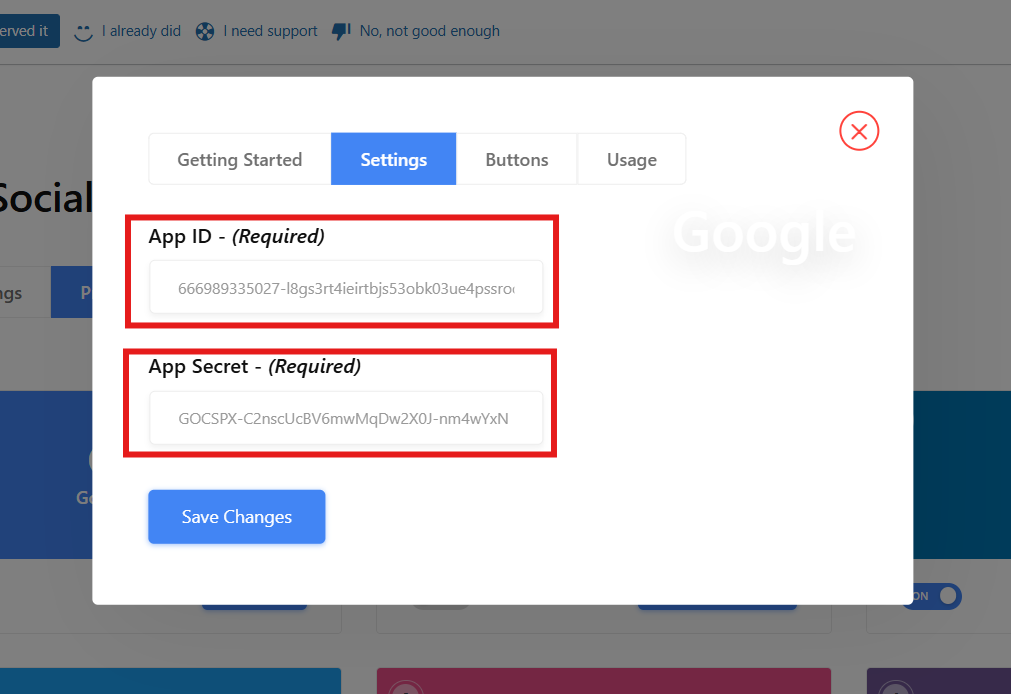
In the buttons tab, assign your login and logout label texts.

Don’t forget to save the changes you made.
Then, under Global Settings, enable the Show button on the WooCommerce login page. You can choose from the WooCommerce login form start, the WooCommerce login form middle, and the WooCommerce login form end, where you want to show the button.
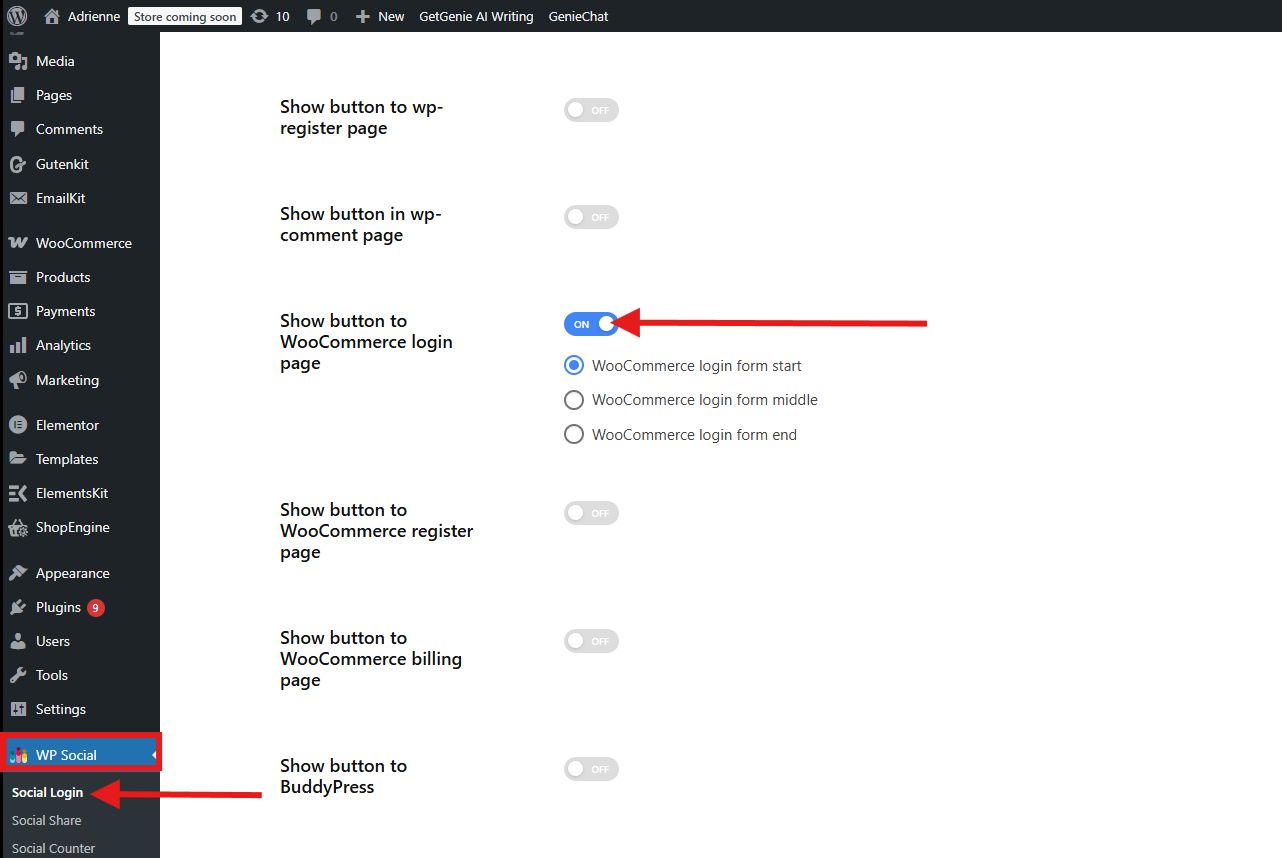
Lastly, save the changes.
Step 3: Test the Setup
To see if the social login is set up correctly, log out of your account and visit the WooCommerce login page. Check if the social login buttons appear. Try logging in with a social account to confirm it works properly.
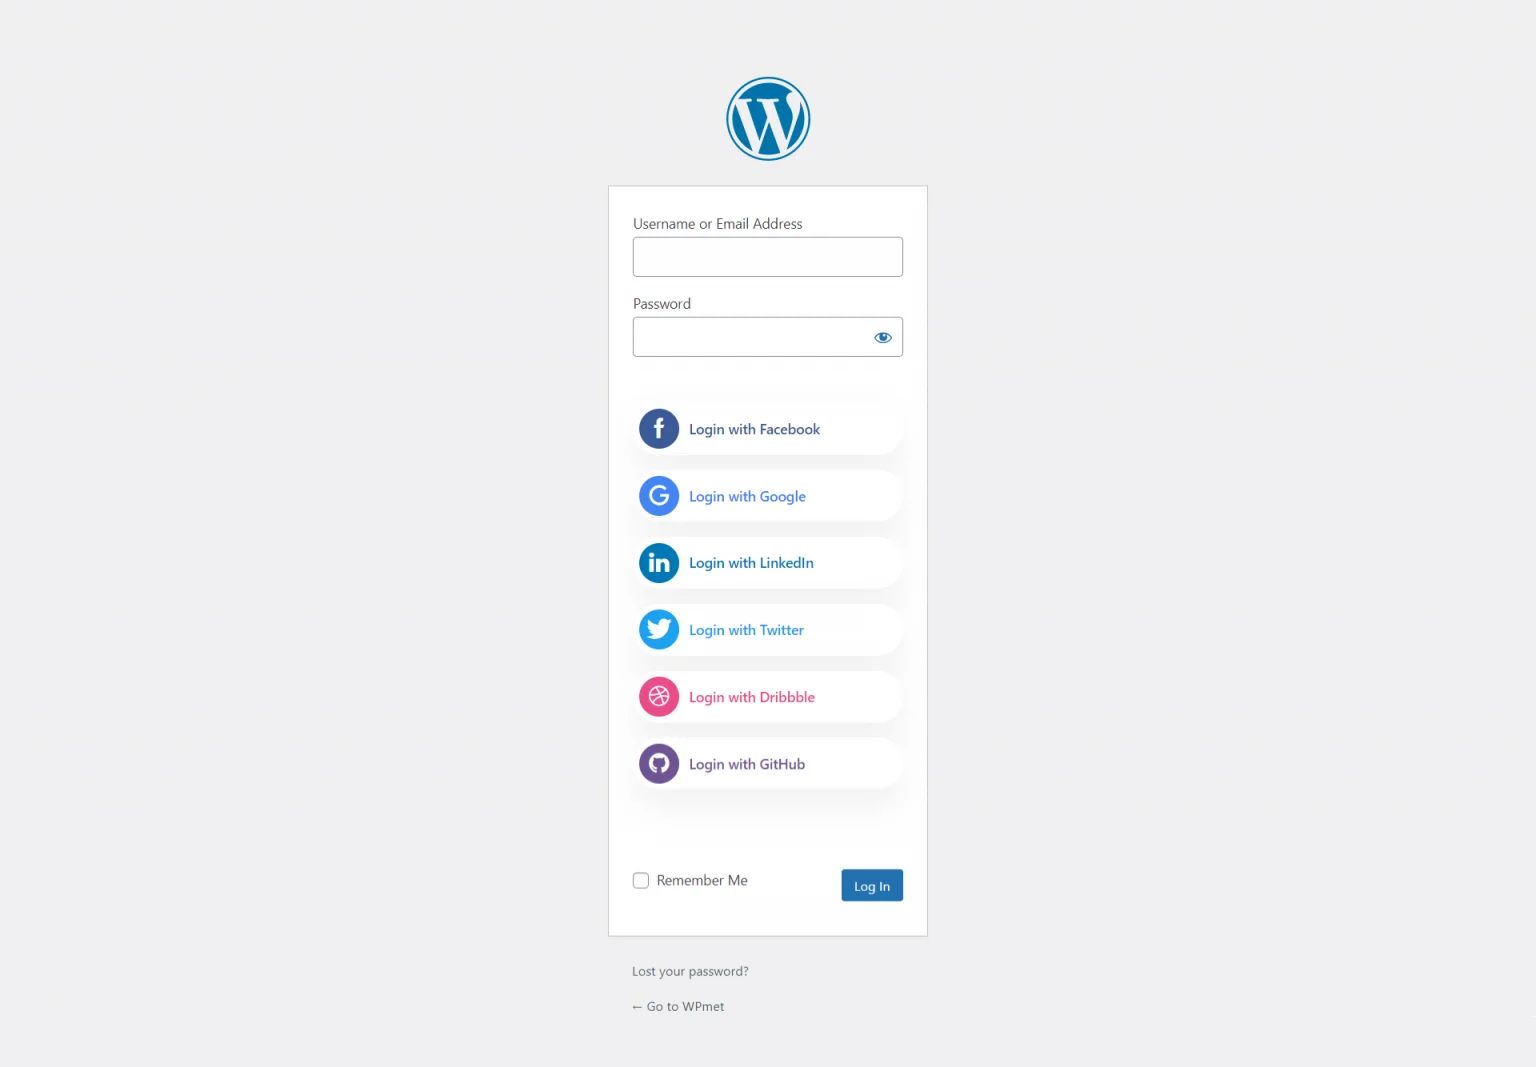
That’s it! Your WooCommerce store now has social login enabled.
Why Choose WP Social Plugin for Adding Social Login to WooCommerce?
WP Social stands out as one of the most reliable and user-friendly solutions. Here’s why it’s a great choice:
1. WP Social works smoothly with WooCommerce. It doesn’t require coding skills or manual configurations.
2. WP Social supports popular platforms such as フェイスブック, Google, Twitter, LinkedIn, and more. It gives the customers the freedom to log in using their preferred social login.
3. It uses OAuth protocols to ensure sensitive customer data stays protected while giving easy access.

よくある質問
1. Is Social Login Secure?
Yes. Social login uses OAuth and other secure authentication protocols, ensuring that login credentials remain protected.
2. Do Customers Still Have the Option to Log in Traditionally?
Absolutely. You can keep the default WooCommerce login form alongside social login buttons.
3. Does WP Social Work with All Themes?
Yes. WP Social is designed to work effortlessly with most WordPress and WooCommerce themes.
4. Can You Enable Social Login Only on the Checkout Page?
Yes, you can choose specific locations where social login appears, such as checkout, login, or registration pages.
5. Is WP Social Free?
WP Social offers both a free version with essential features and a pro version with advanced customization and more login providers.
👉 チェックする add social media icons on WordPress site.
Your Thoughts
Adding social login to your WooCommerce login page is a simple upgrade that can lead to happier customers, faster checkouts, and fewer abandoned carts. With the right plugin like WP Social, the setup process is simple, and the benefits are immediate.
Have you wondered how it works? Try it now and be amazed by the impactful outcome within your WooCommerce store!
コメントを残す