


First impressions always matter, and on websites, visuals can convince more than words. Using flat or plain visuals can fade your visitors’ excitement and let them leave your site without further scrolling.
That’s where Image Morphing comes in handy. Using a morphing effect can instantly grab your visitors’ attention and encourage them to stay longer on your site.
And the best part is, in WordPress, you can add morphing effects in minutes with a few clicks. No coding skill required at all. So, let’s dive in to learn how to add image morphing effects to WordPress with a user-friendly plugin, ElementsKit.
Quick Overview
This tutorial will guide you through the no-code solution to add image morphing effects to WordPress with ElementsKit. Its Image Morphing widget will let you add morphing effect in a drag-and-drop interface. Besides installing and activating ElementsKit, you have to install Elementor first.
Tools Used: エレメンター (free) & ElementsKit (free & pro)
Here are the steps to follow to add image morphing effects to WordPress:
✅ Activate Image Morphing widget.
✅ Integrate morphing effect.
✅ Customize morphing content.
✅ Style image morphing.
What is image morphing in WordPress?
Image morphing is a visual effect that provides a flawless transition to your WordPress images by changing their animation or effect. The core purpose of adding a morphing effect is to boost engagement by increasing visual appearance.
Why integrate image morphing in WordPress?
You can’t beat your competitors by being one in the market. For keeping a sustainable growth in the online platform, you need to give focus to your website appearance, along with adopting different business strategies. Image morphing effortlessly helps you to do that without coding.
Here are more benefits of integrating the morphing effect in WordPress:
- Morphing effect adds modern animation for increasing engagement.
- This opens up branding opportunities and lets you maintain a professional look あなたのサイトのために。
- Average time on site will be improved by integrating the morphing effect.
- It looks great on any screen size since the morphing effect built with an optimized plugin is デバイス応答型.
- WordPress image morphing will strengthen your branding.
- It will help to increase conversion or sales with attractive animations.
- Morphing effect will help you to nicely narrate the product journey with enhanced storytelling opportunities.
⭐️ Check how to create stylish list in WordPress.
Guide to add image morphing in WordPress
Before diving into the main process, you have to download and setup some plugins for integrating image morphing in WordPress. Here are the prerequisite solutions for this guide:
- Elementor (free): Page builder
- ElementsKit (free & pro): WordPress image morphing plugin

After installation and set up, follow the steps below to learn how to add morphing effects in WordPress with ElementsKit:
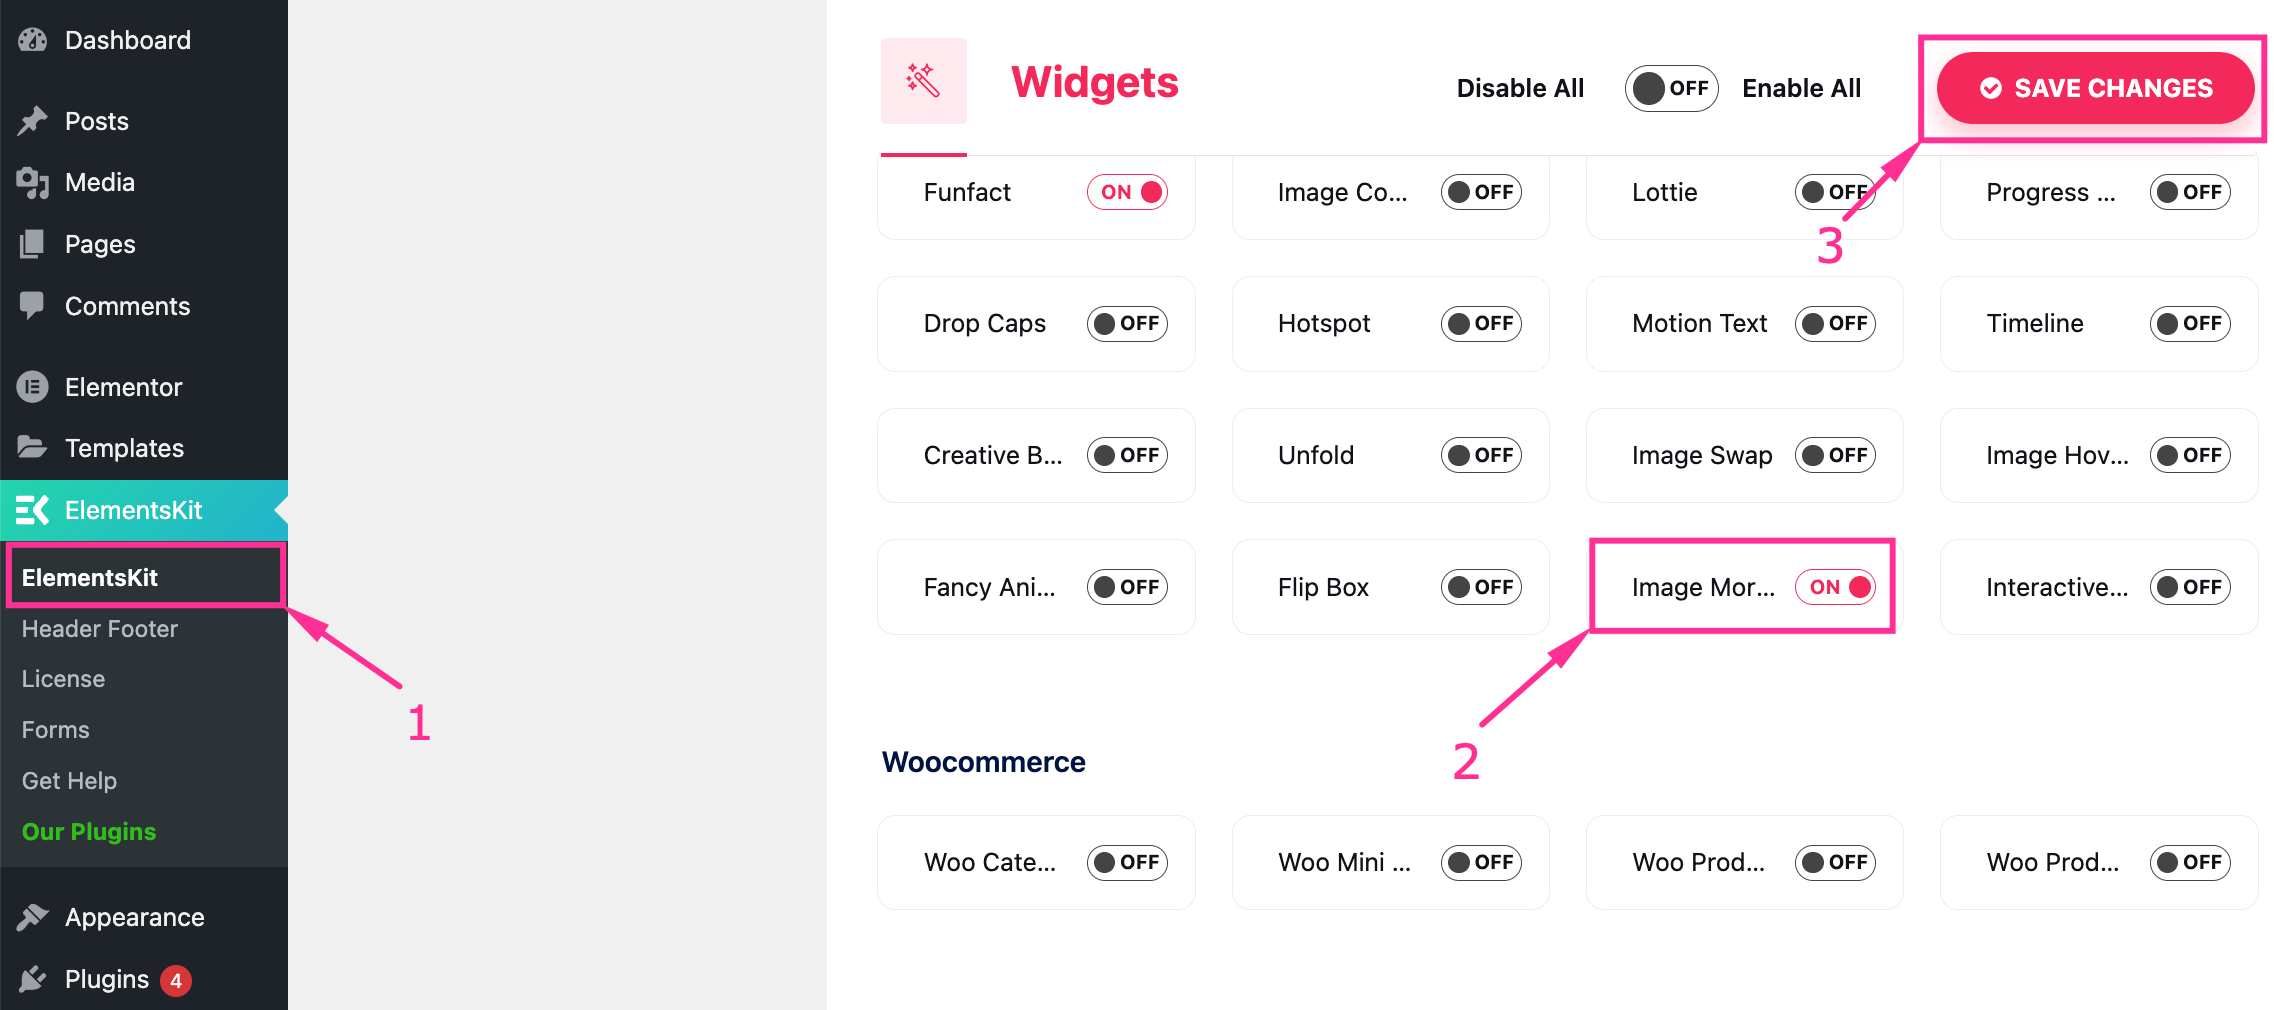
Step 1: Enable the Image Morphing widget.
The prerequisite to enjoy the image morphing feature of ElementsKit, you have to enable the widget first. You will get the option from the ElementsKit’s widget library, where control of widgets is kept under one dashboard.
To enable it, visit ElementsKit >> Widgets, and scroll down to find and ウィジェットを有効にする そして 「変更を保存」を押します button after doing that.
Step 2: Drag-and-drop Image Morphing widget.
In the next step, you can add image morphing feature to a 新しいページ or edit an existing page by clicking the “Edit with Elementor” option. Do whatever you like. Here we’re adding this option to a new page by pressing the “Add New” ボタン。
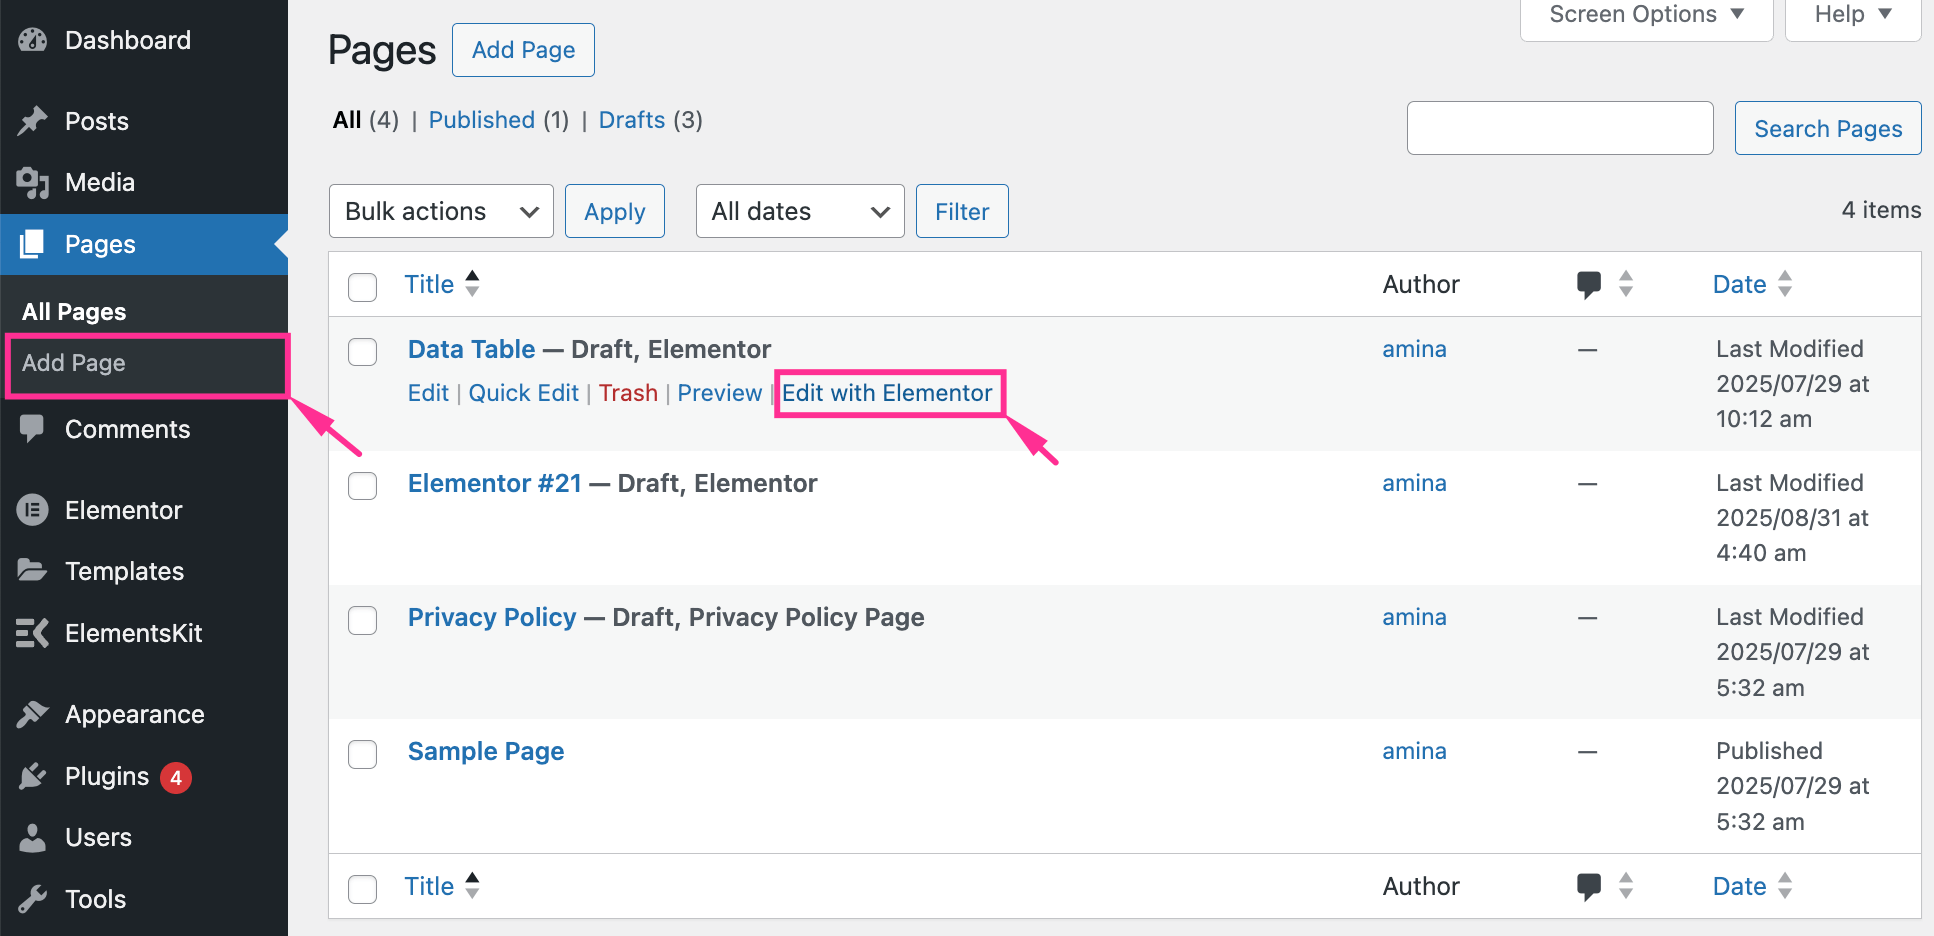
新しいページにリダイレクトした後、 「Elementorで編集」を押します button to integrate image morphing effects to your WP site.

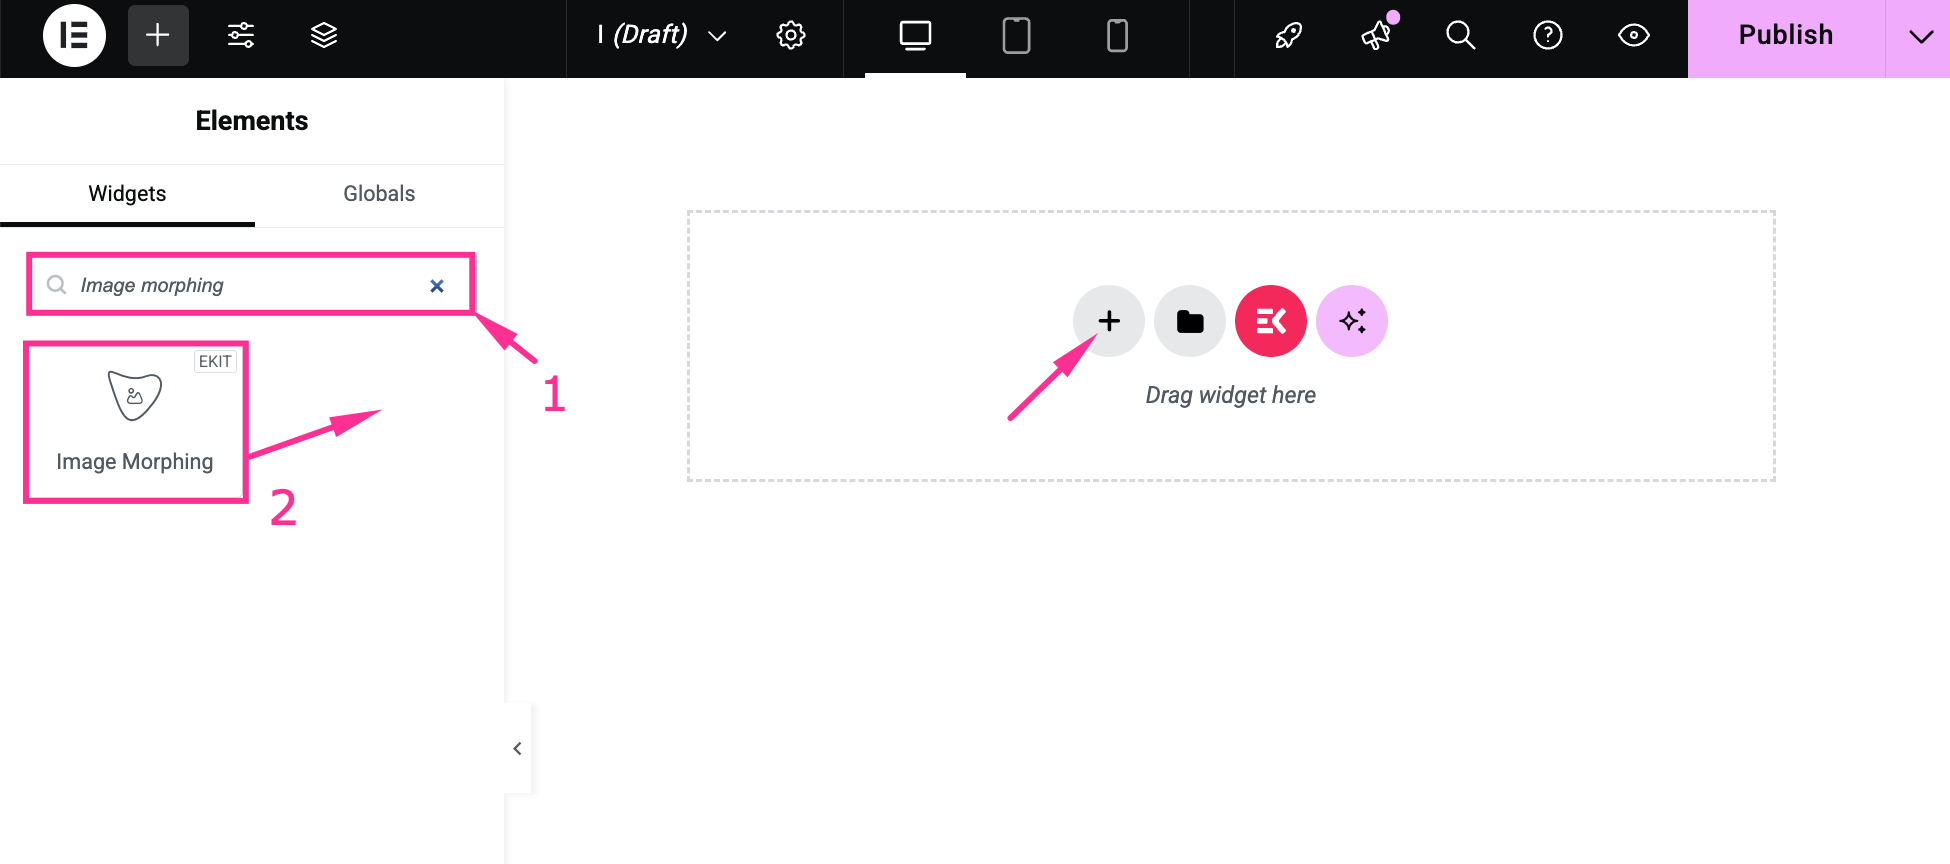
今、 search for the “Image Morphing” ウィジェットと drag-and-drop the widget to the “+” icon on the right side.
Step 3: Customize the image morphing content.
After adding the Image Morphing widget, you have to customize the effects according to your requirements. You will find all the controls of content and style customization on the right side.
Now, navigate to the Content tab and expand the Content field. There, you have to adjust the content by customizing the following fields:
- Select Effect Type: Choose an effect from the dropdown menu. We have selected an image to add a morphing effect to the image.
- 画像を選択してください: Upload or select an image from the media library.
- Image Resolution: Set the resolution for your image.

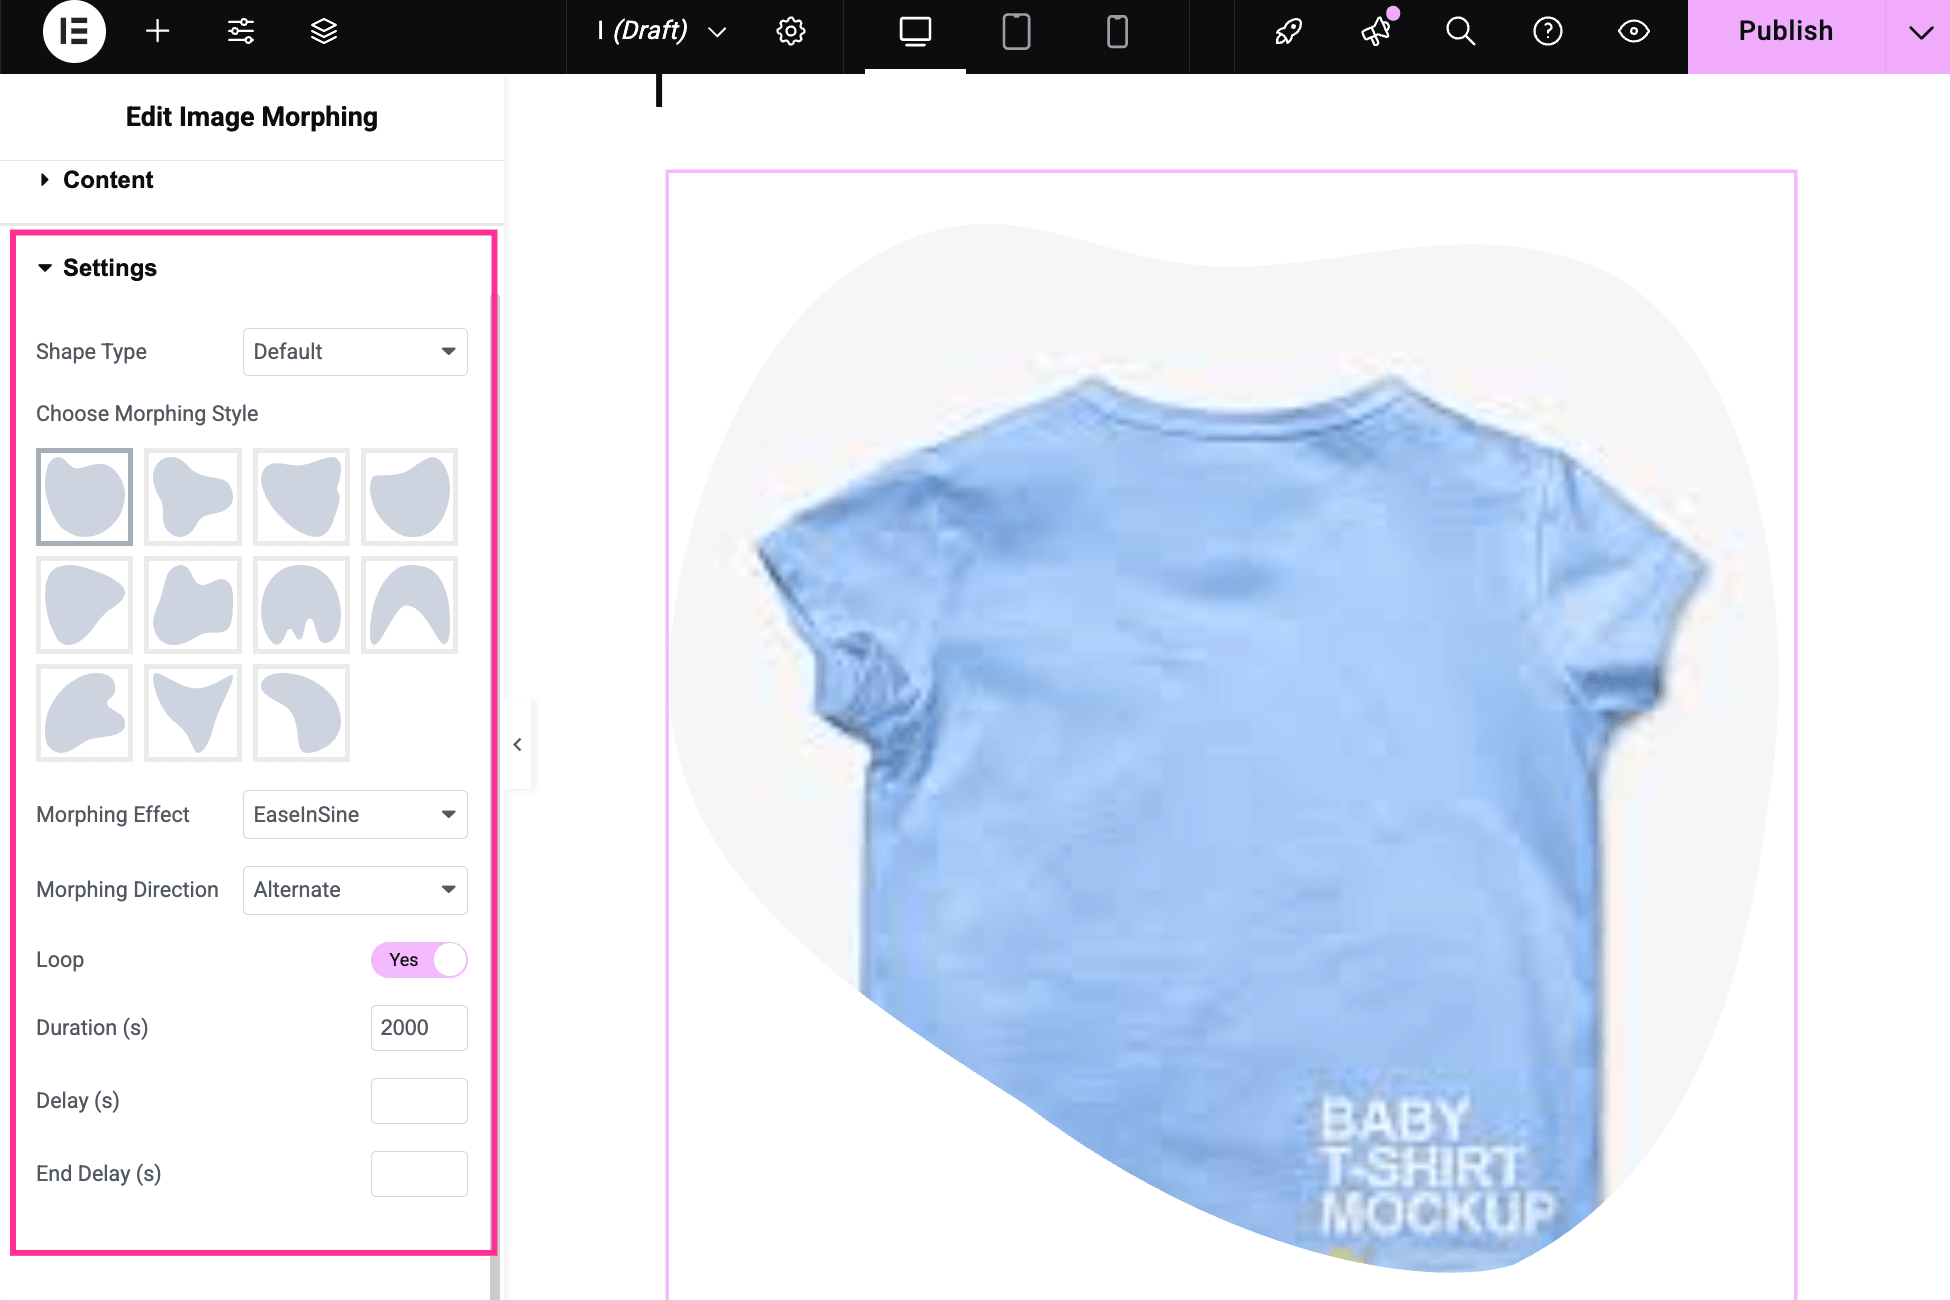
After that, expand the Settings tab and adjust the fields below:
- 形状タイプ: Select the Shape type from default or custom. For custom, you can add a customized morphing shape.
- Choose Morphing Style: This field will be visible only when you select the default shape. All the default styles will be displayed here. Choose a style from here.
- Morphing Effect: Pick a suitable morphing effect.
- Morphing Direction: Add a direction for your morphing effect.
- ループ: Enable this control to display morphing in the loop.
- Duration (s): Set the duration of the animation.
- Delay (s): Add a delay time for your animation.
- End Delay (s): Add ending time for morphing animation.
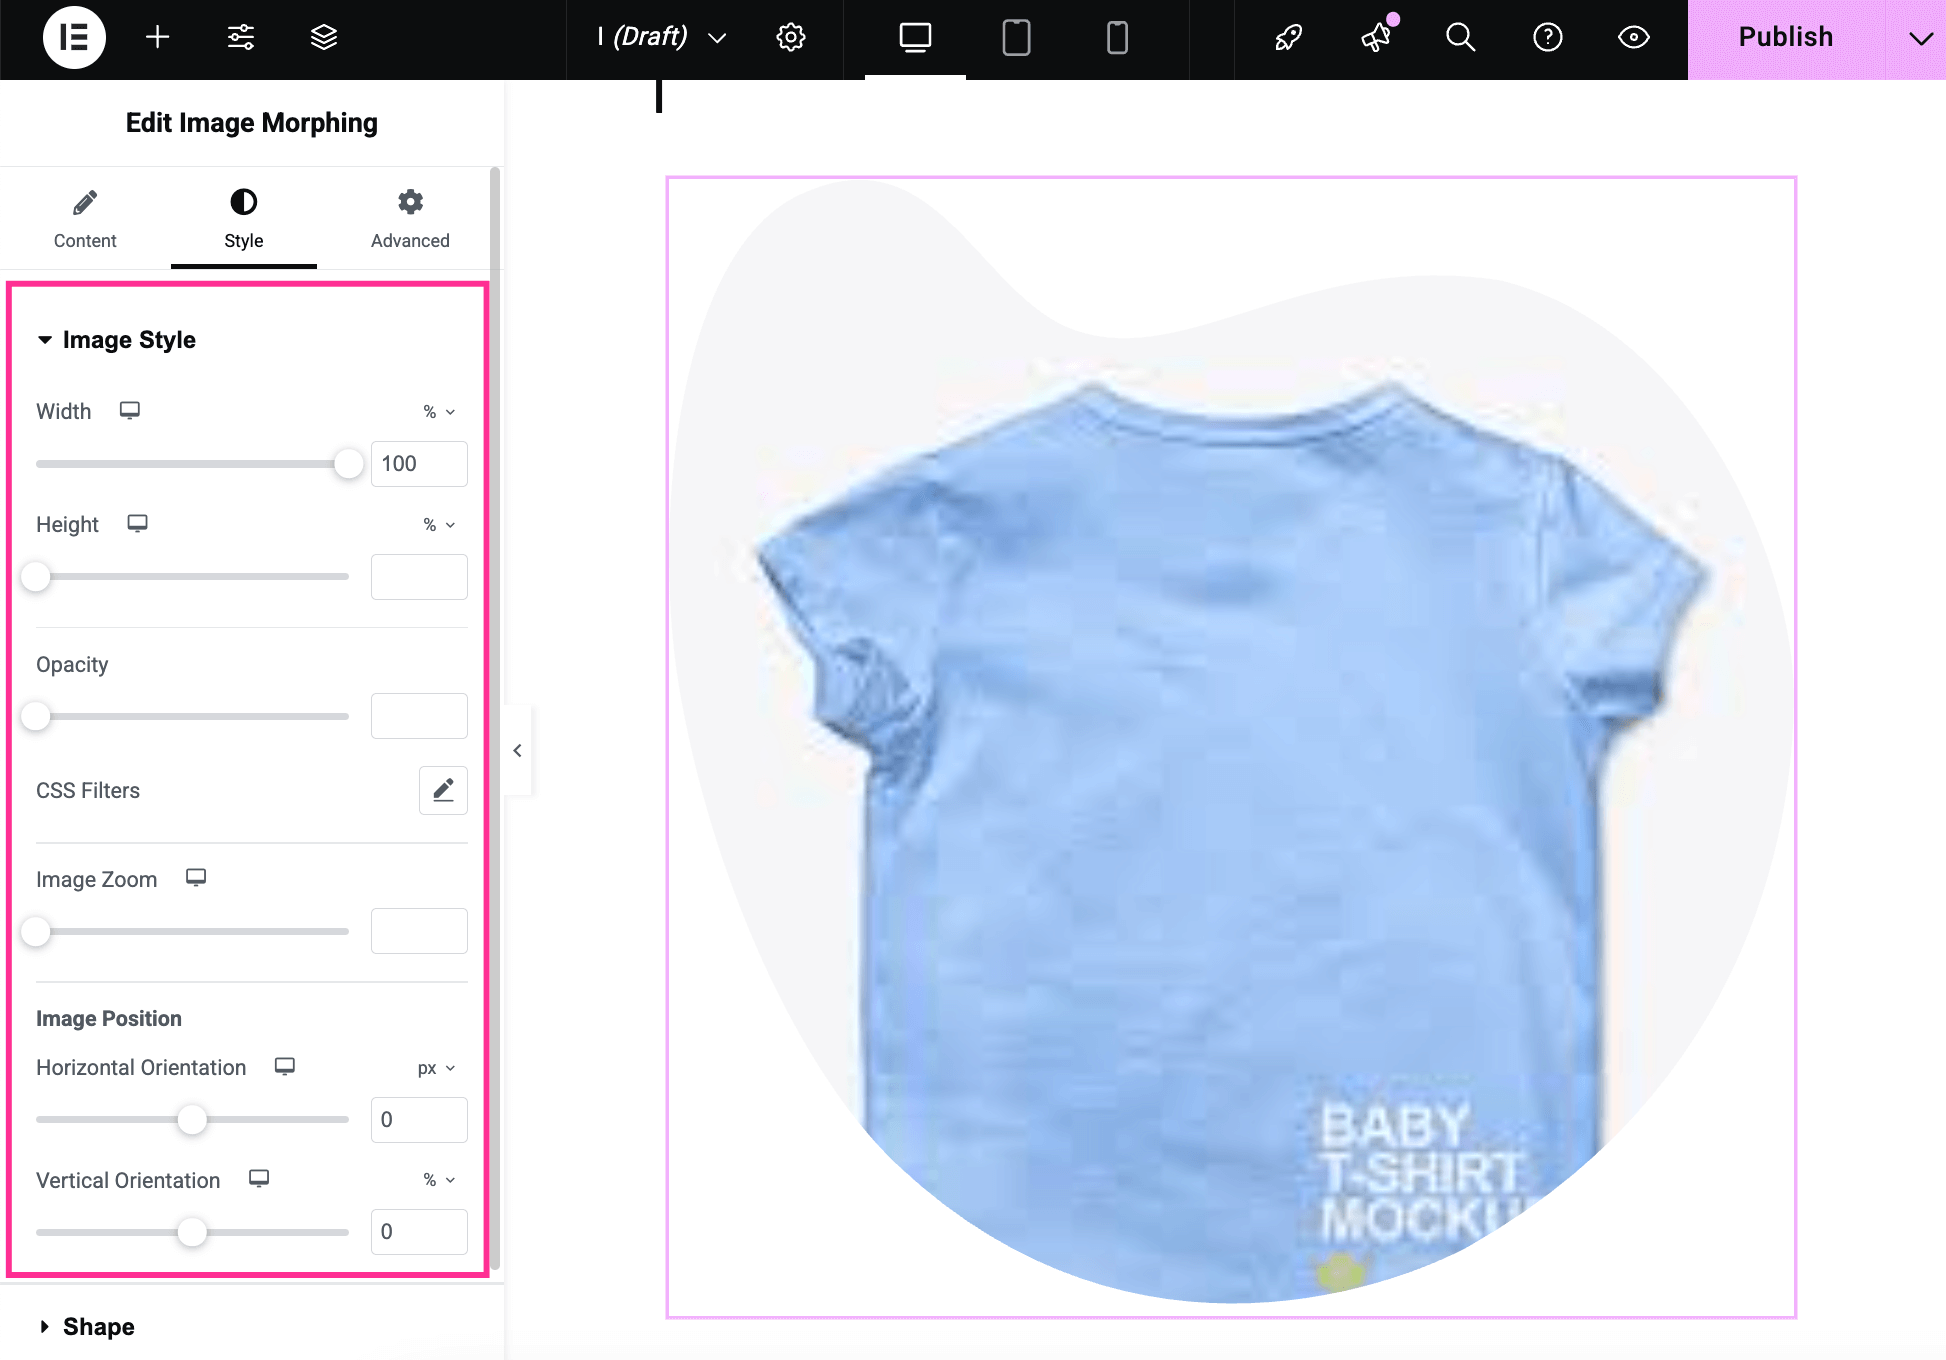
Step 4: Adjust the style of Image morphing.
In the fourth step, you have to set the custom style of your Image Style and Shape. To customize 画像スタイル, adjust Width, 身長, 不透明度, CSS Filters, 画像ズーム、 そして 画像の位置.
それから、 open the Shape タブと カスタマイズ の 幅と高さ of the morphing shape.
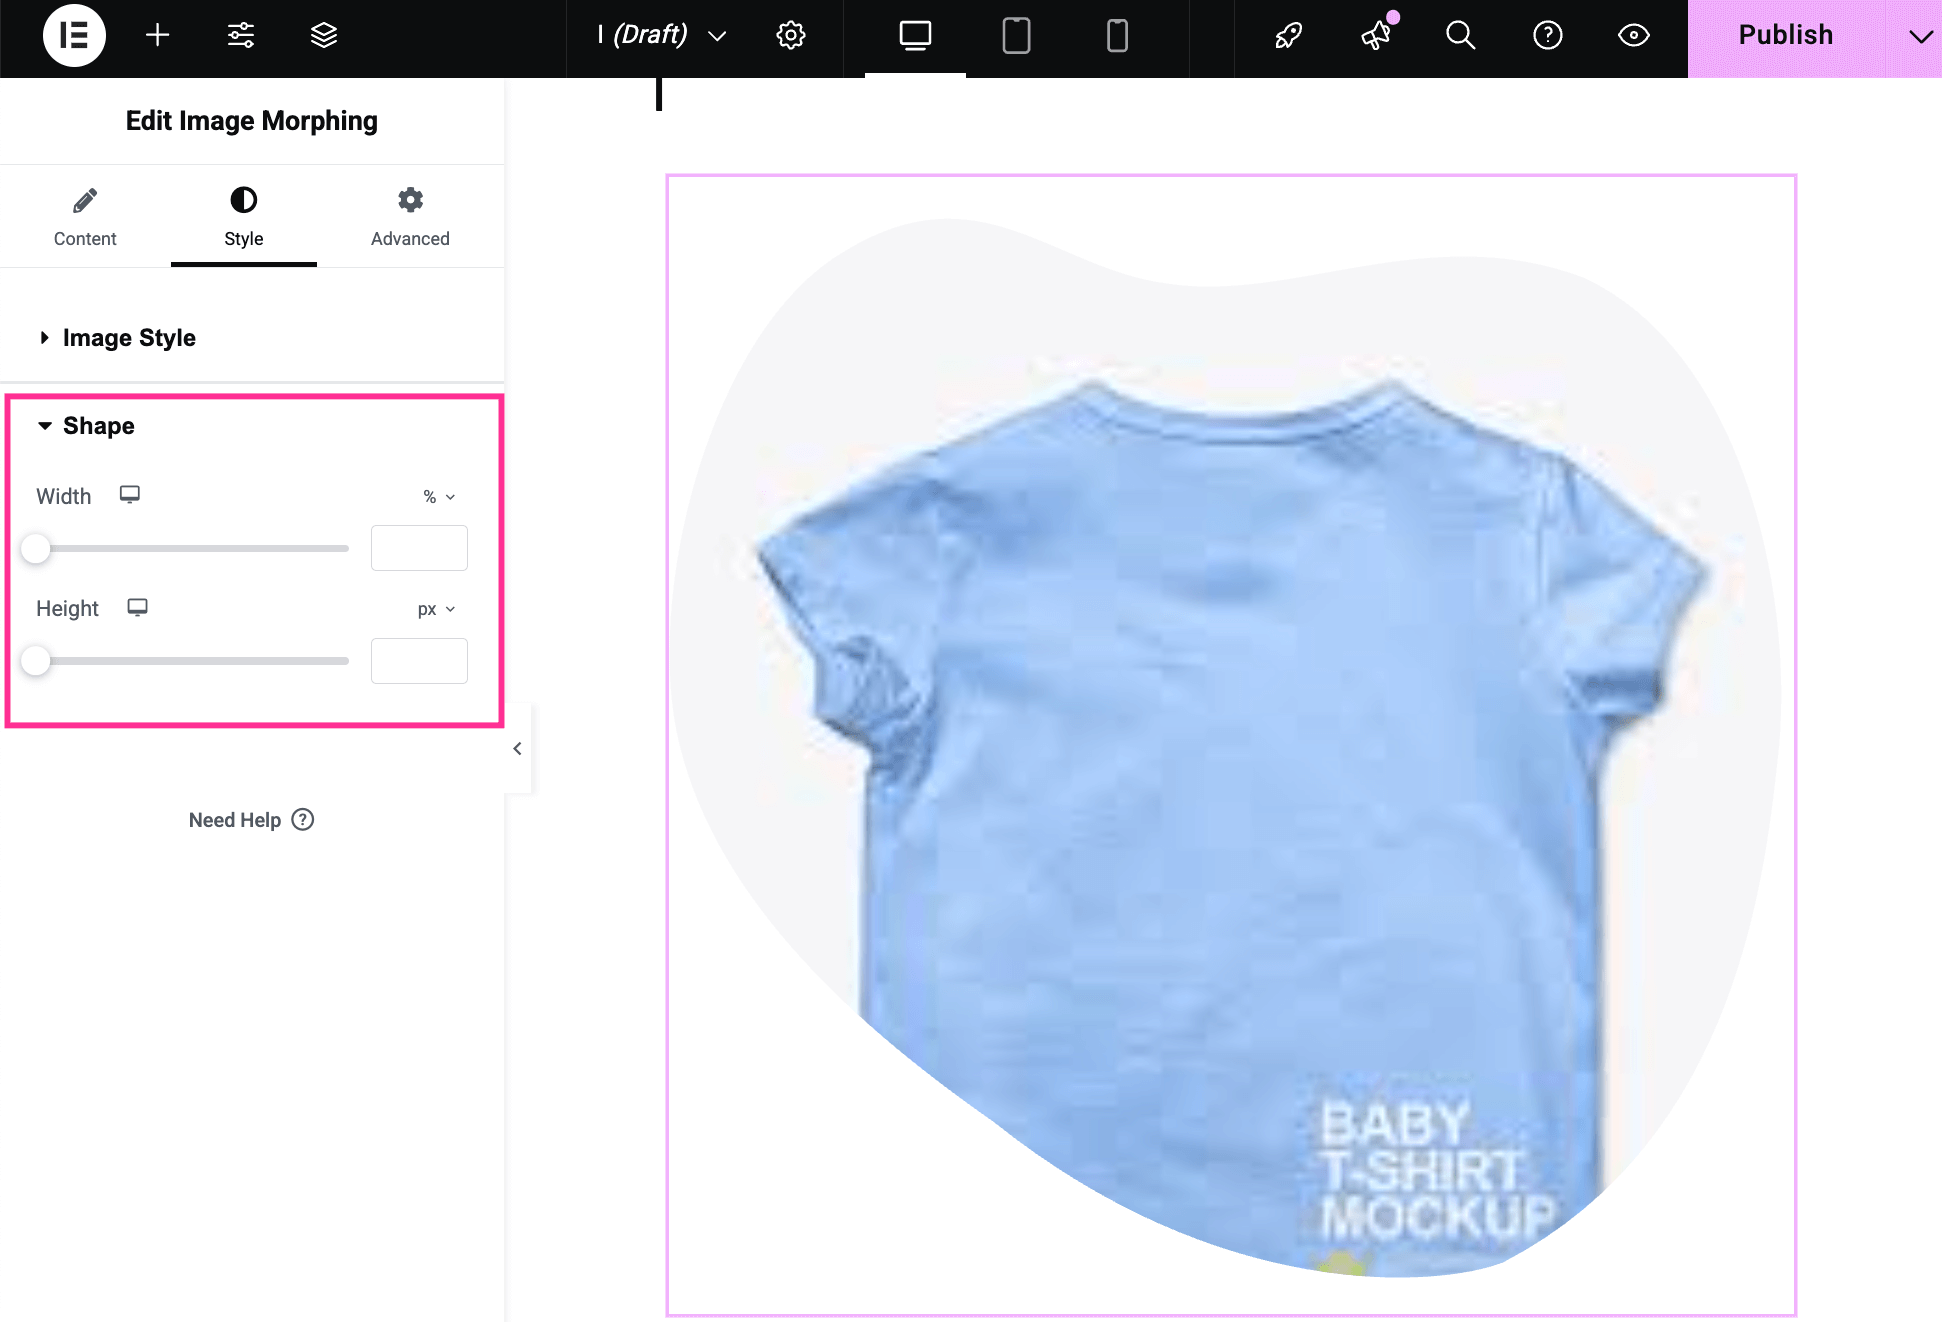
Finally, after completing all adjustments, press the publish button to live your custom image morphing effect on WordPress.

よくある質問
Do you need coding for image morphing effects?
No, you can add custom morphing effects using a codeless solution. For example, ElementsKit lets you add custom morphing effects without coding. You have to select effects and styles to customize morphing according to your needs.
Can you add morphing effect without a plugin?
Yes, if you’re comfortable with coding, then you can add morphing effects with custom CSS and JavaScript. But for non-coders, adding morphing effects with a plugin is the best way. Since these require zero coding skills.
Are morphing effects device responsive?
Yes, the morphing effects created and added with responsive solutions like ElementsKit look good on any screen. You need to just find and pick a responsive and lightly coded plugin.
⭐️ Read to learn how to add image masking in Elementor.
Wrapping
Adding image morphing to your WordPress site is a simple way to make it look more polished and professional. Instead of leaving your images static, you can turn them into something that grabs attention and keeps people engaged. With ElementsKit’s Image Morphing widget, you don’t need coding skills, just drag, drop, and customize the effect to match your style. It’s quick to set up, fun to experiment with, and helps your site stand out from the competition.

コメントを残す