


Connecting PopupKit with Slack allows you to automate your lead tracking by sending real-time submission data directly to your team’s workspace. This integration ensures that every conversion is captured instantly, helping you maintain a fast and responsive communication workflow.
Slack Integration with PopupKit #
前提条件: To enable the Slack integration, you’ll need a PopupKit Pro plan. Choose the Pro plan that best matches your requirements.
STEP 1: Log in to the Slack #
訪問 Slack’s website and log in to the Slack account. If you don’t have an account, open one.
から Admin option click Apps & workflows
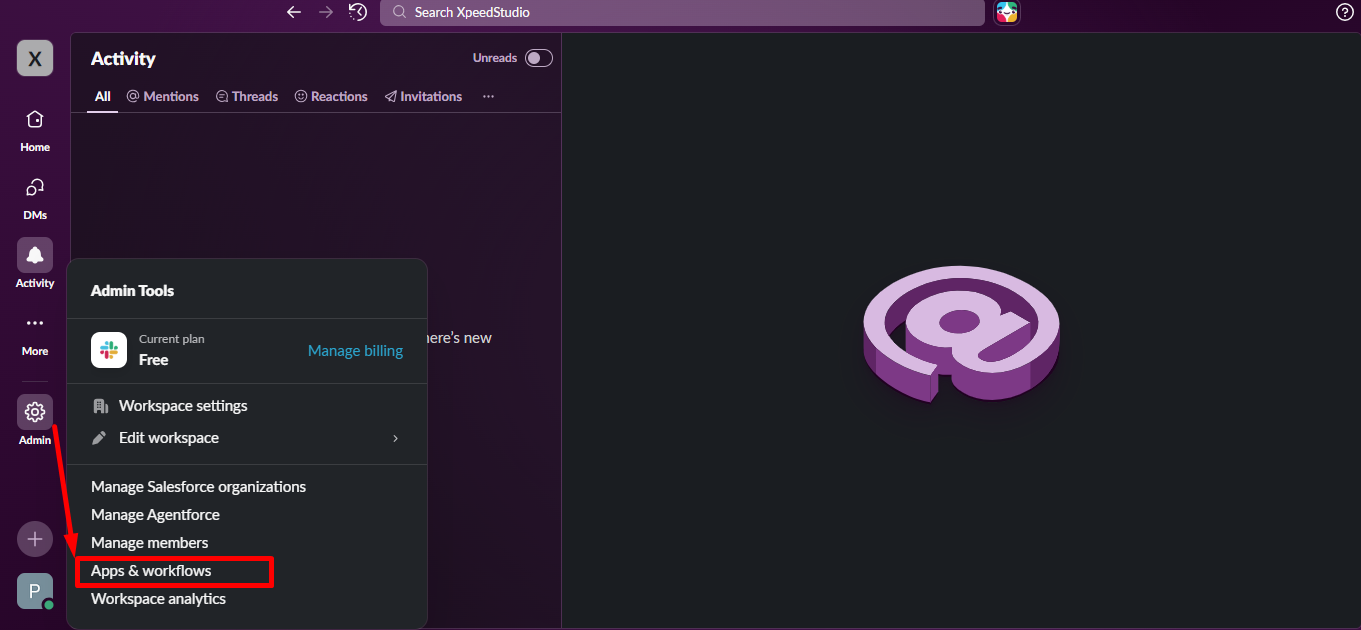
検索する Incoming WebHooks and select it.
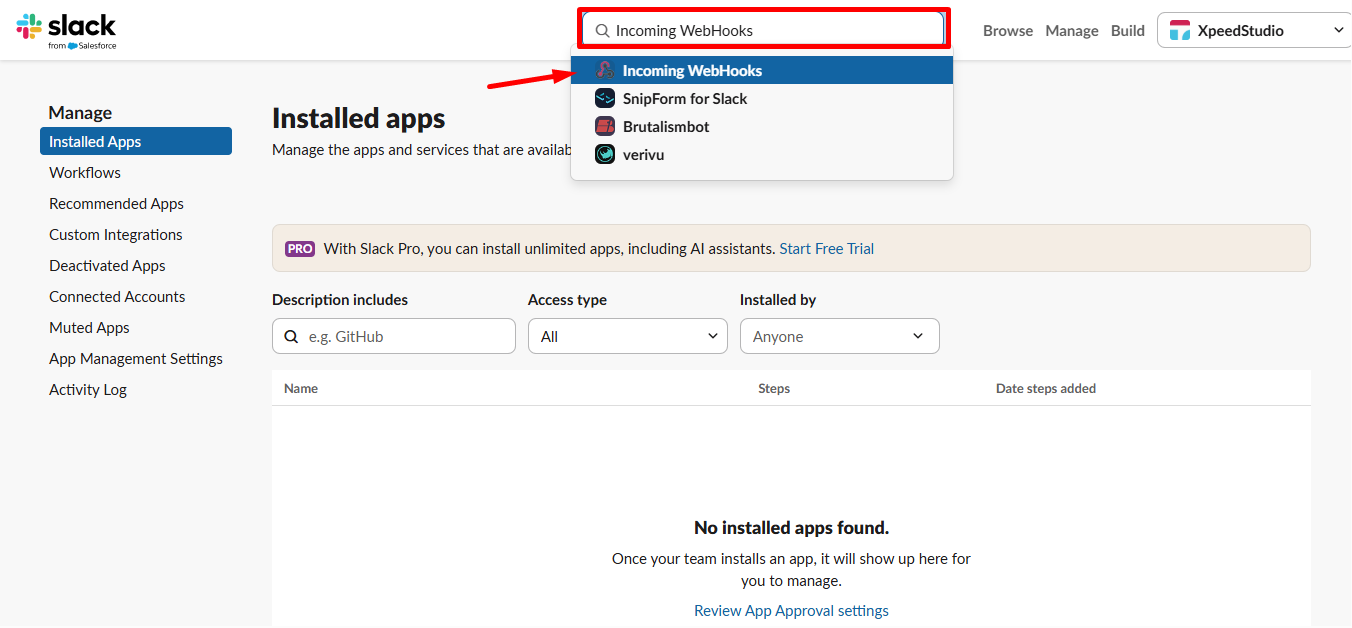
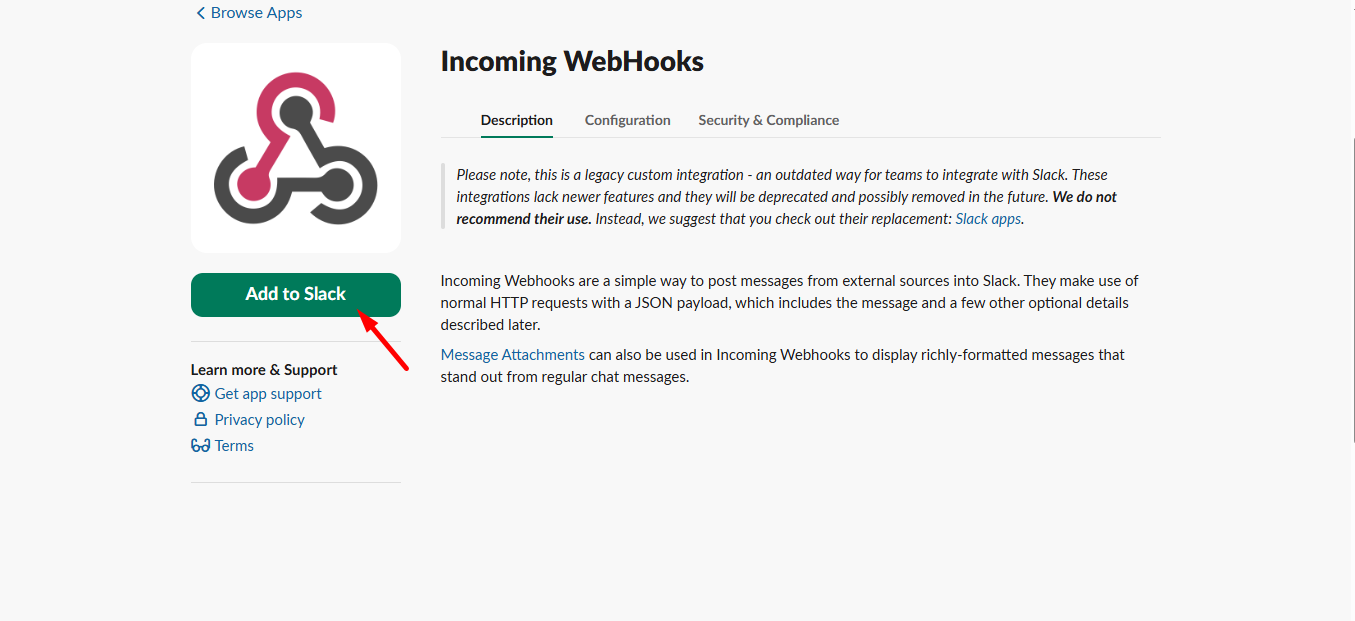
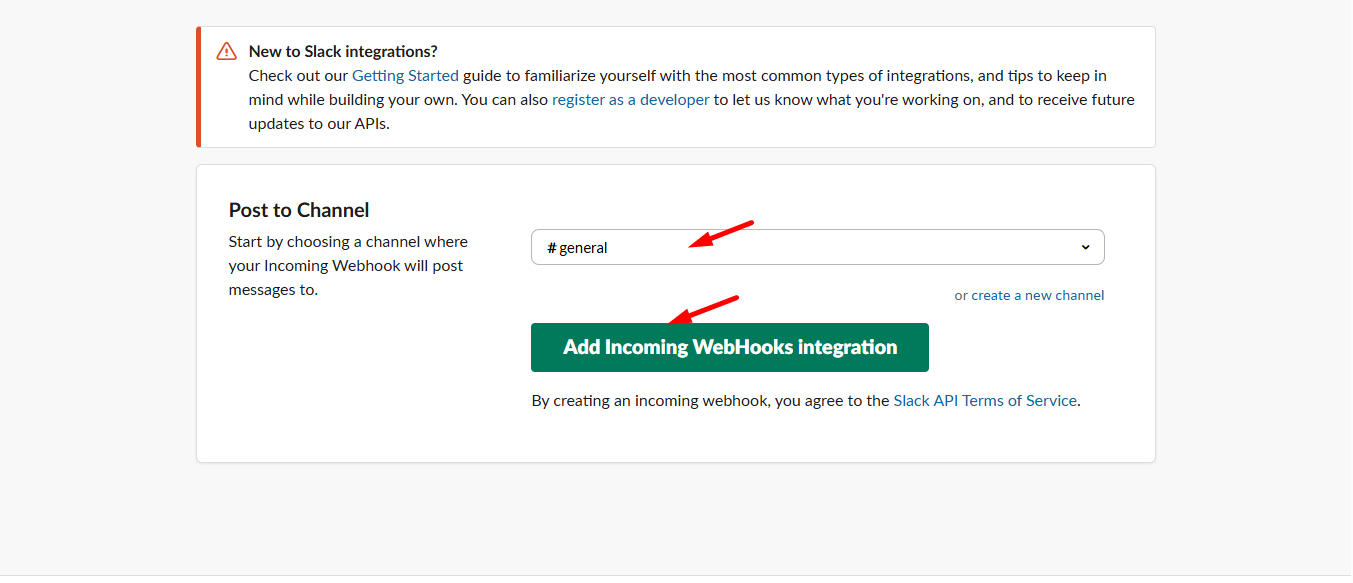
ここで、 Add Incoming WebHooks ボタン。
Next scroll down –
- Select your Channel where you want to get user information
- 追加 Incoming WebHooks integration
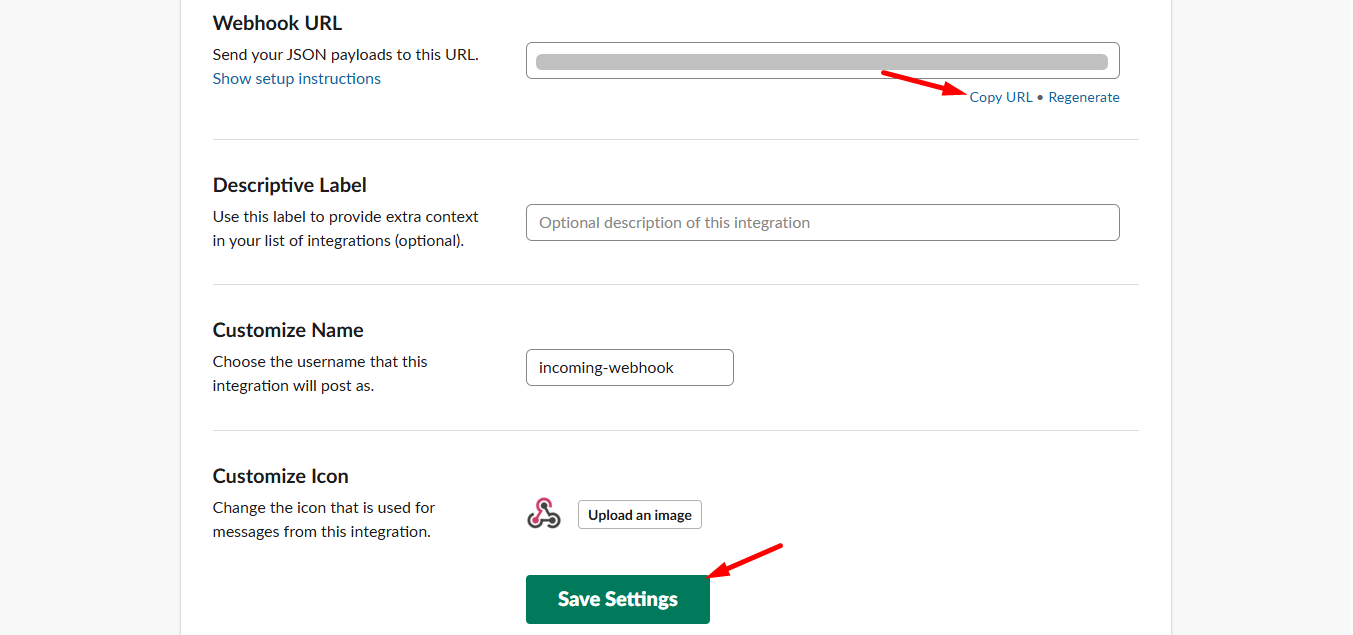
Here, scroll down and you can see the Webhook URL, copy the URL and click Save Settings.
STEP 2: Access your WordPress dashboard #
Now, from your WordPress dashboard, navigate to PopupKit and select the Integrations tab
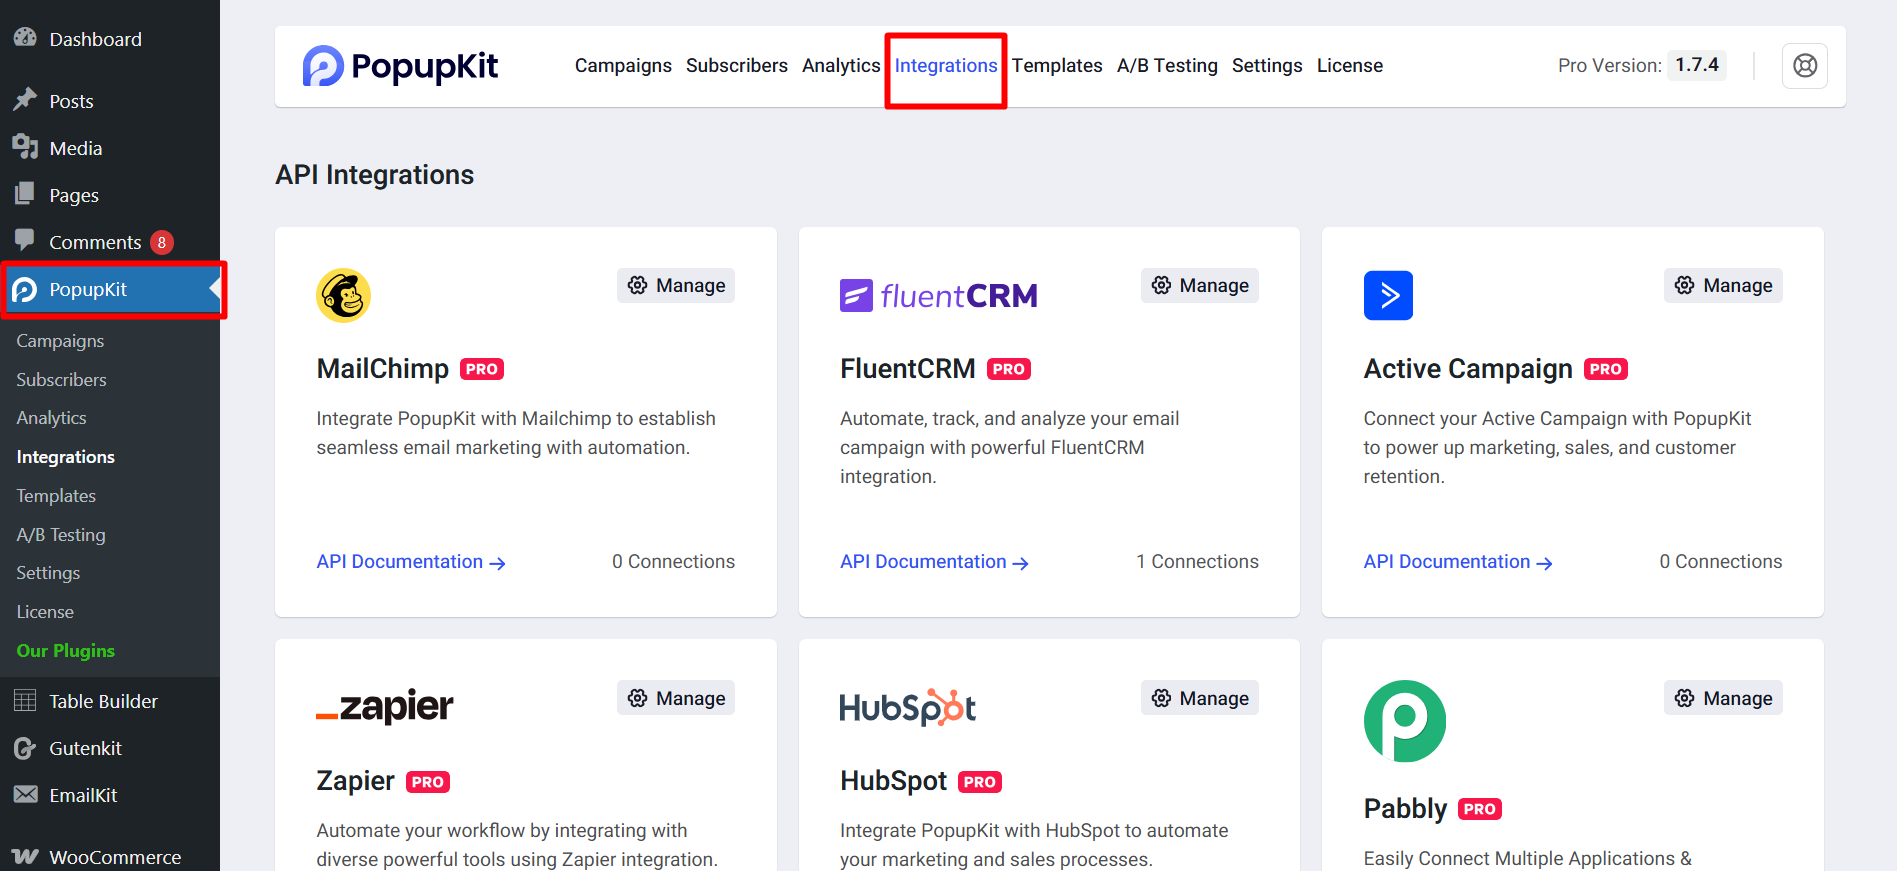
Find Slack and click on the Manage button.

Add Slack integrations details:
- Insert Slack account name
- Slack Hook Url
- Click connect Slack integration
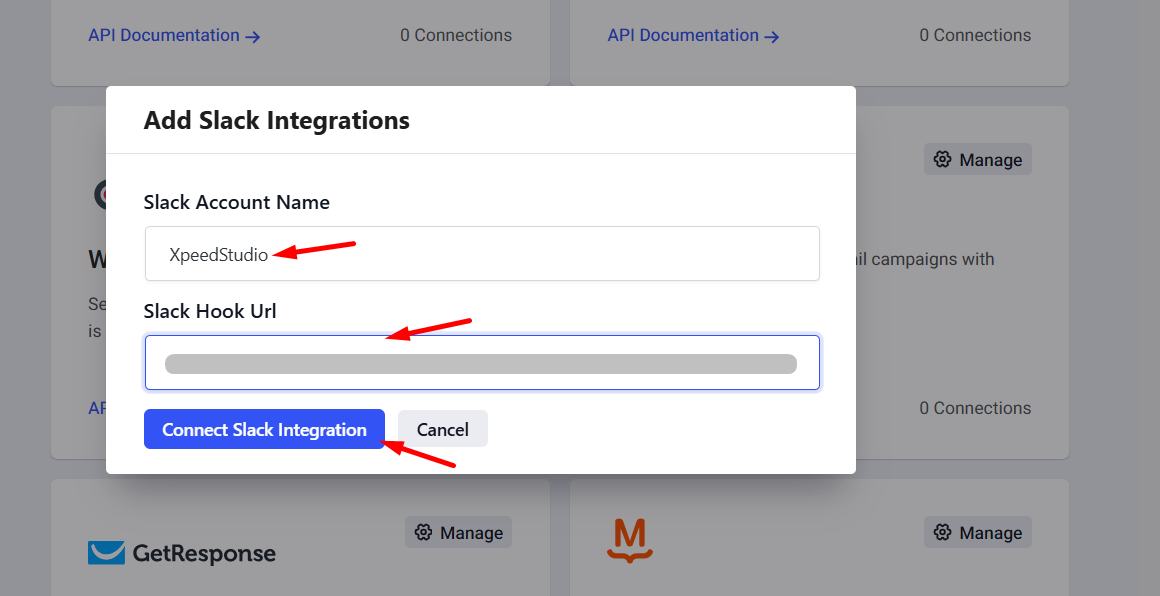
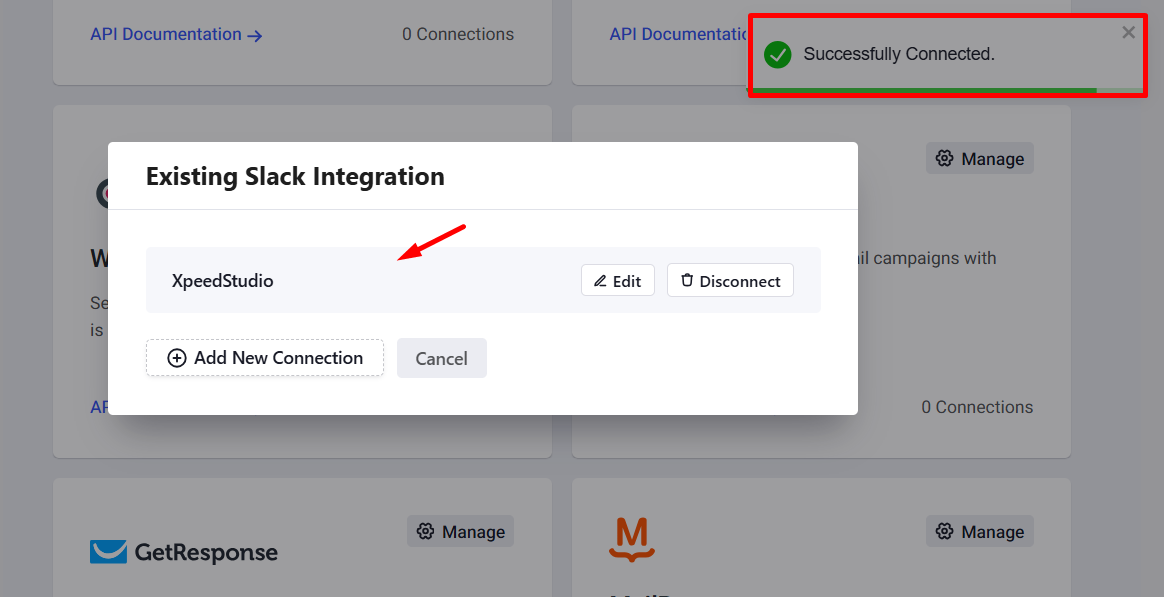
The Slack successfully connected.
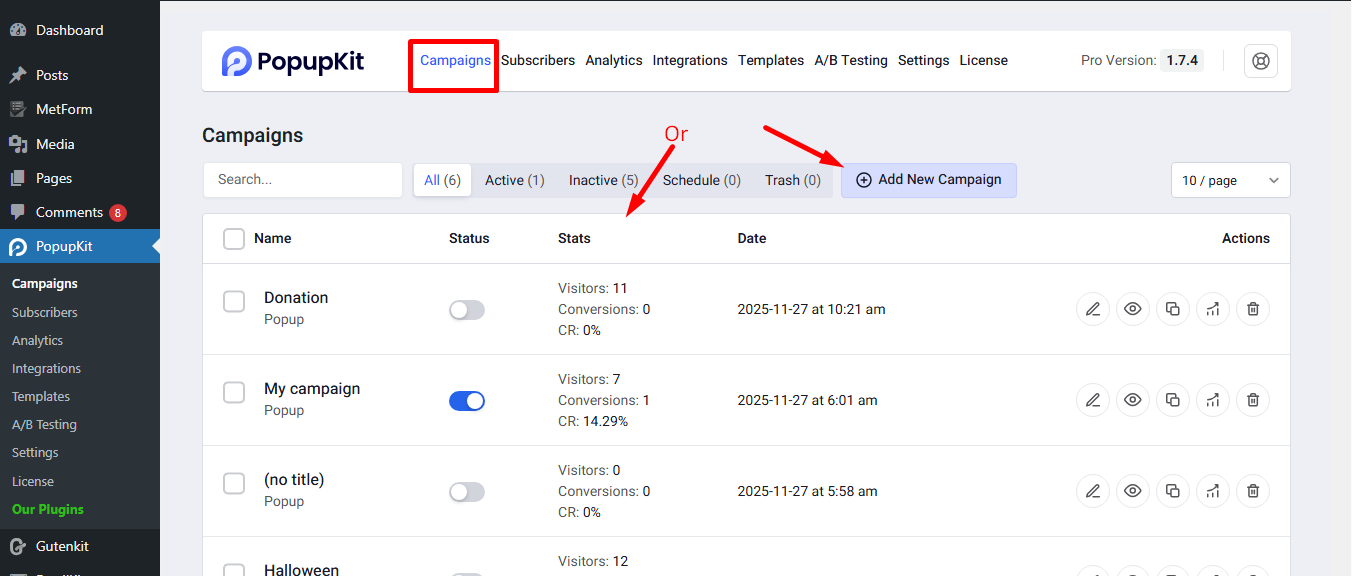
STEP 3: Connect Slack to a Campaign #
Start a new campaign or select an active campaign where you want to integrate Slack.
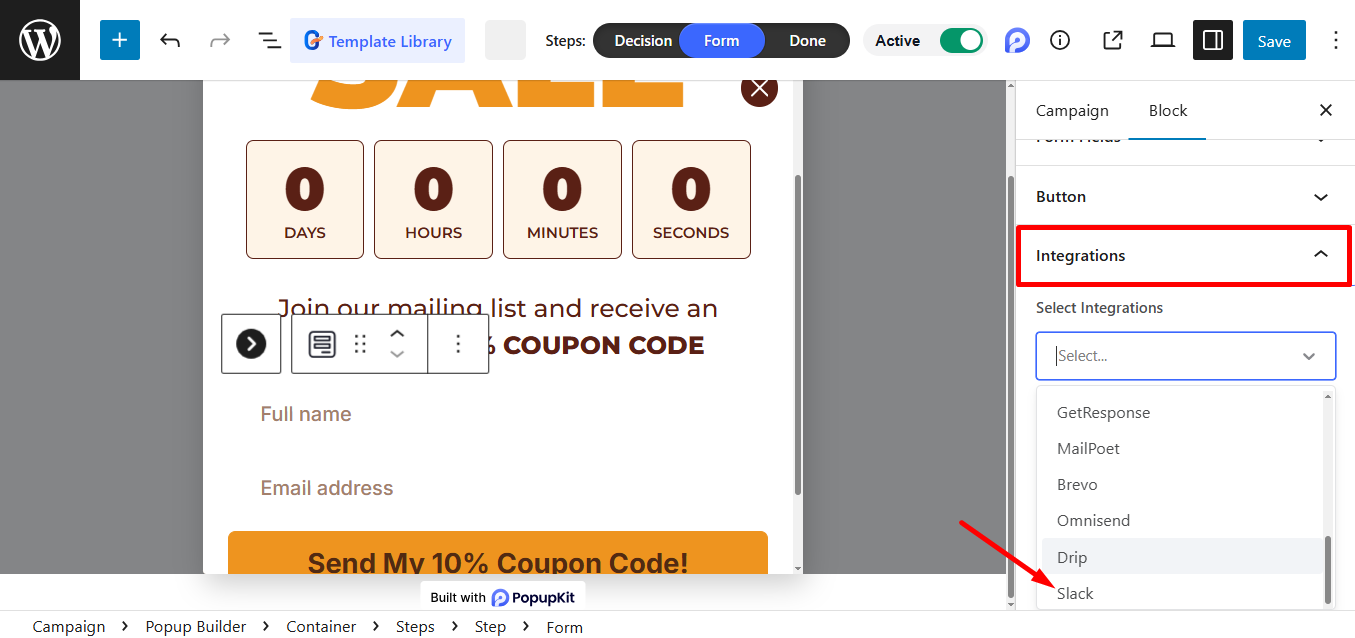
から integrations’ dropdown menu, select Slack.
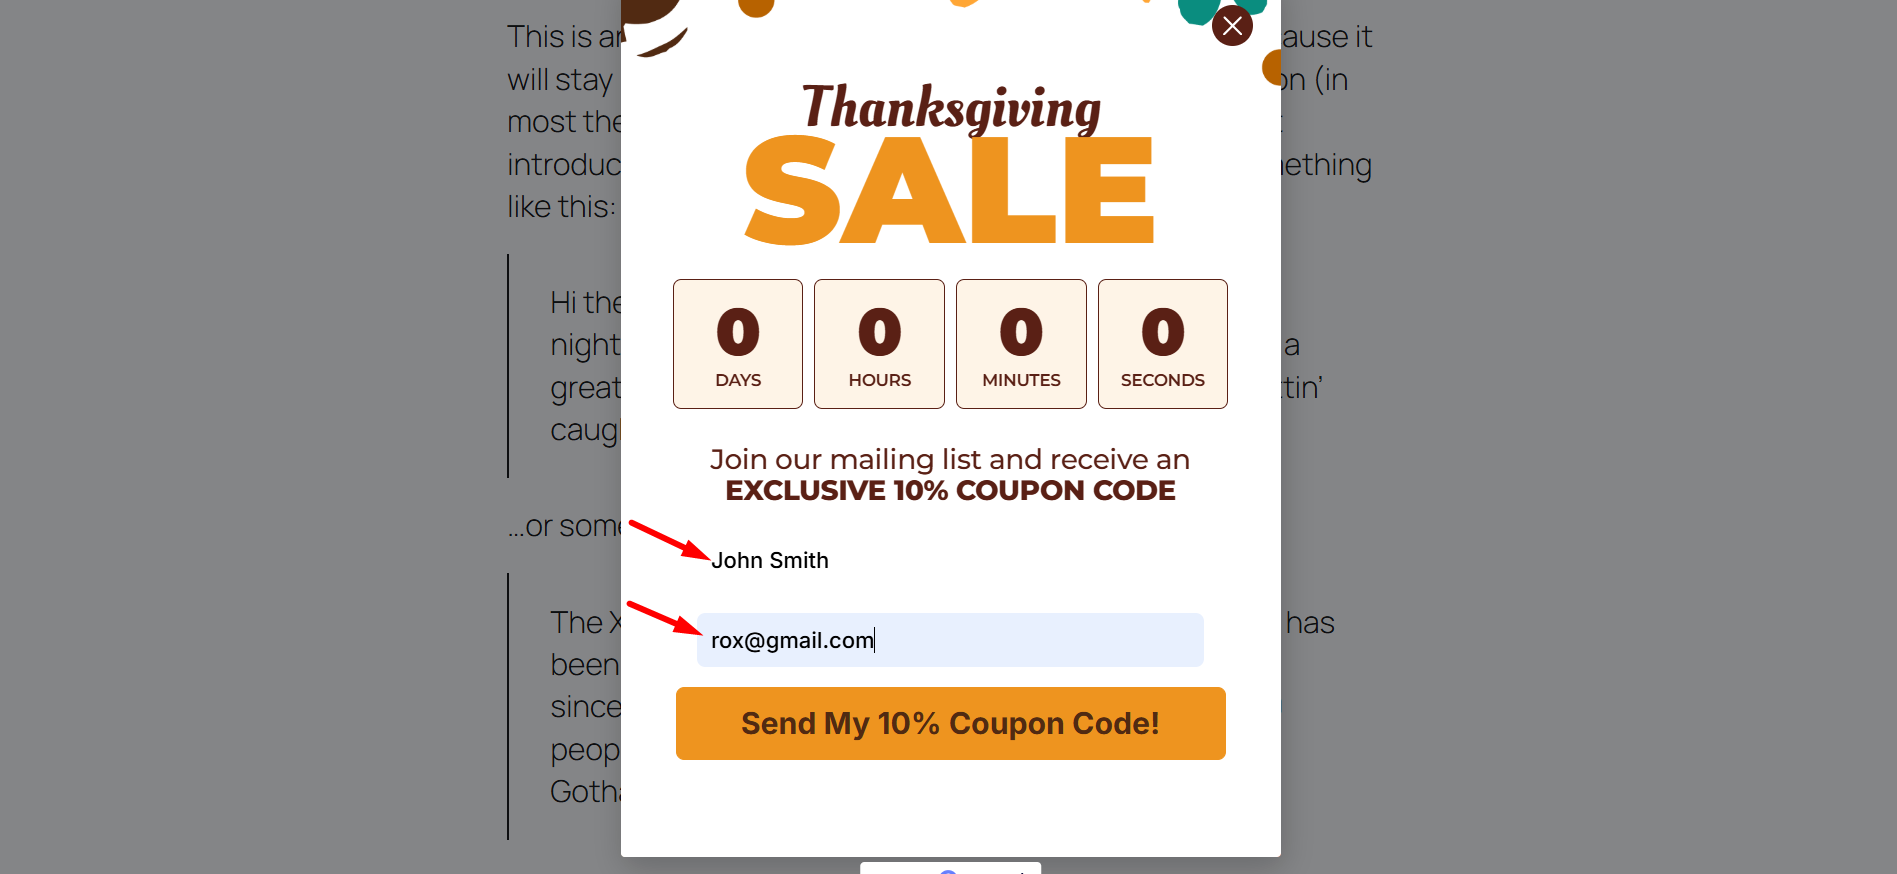
重要な注意点: Make sure your popup includes at least one form field, as this is required to activate the integration.
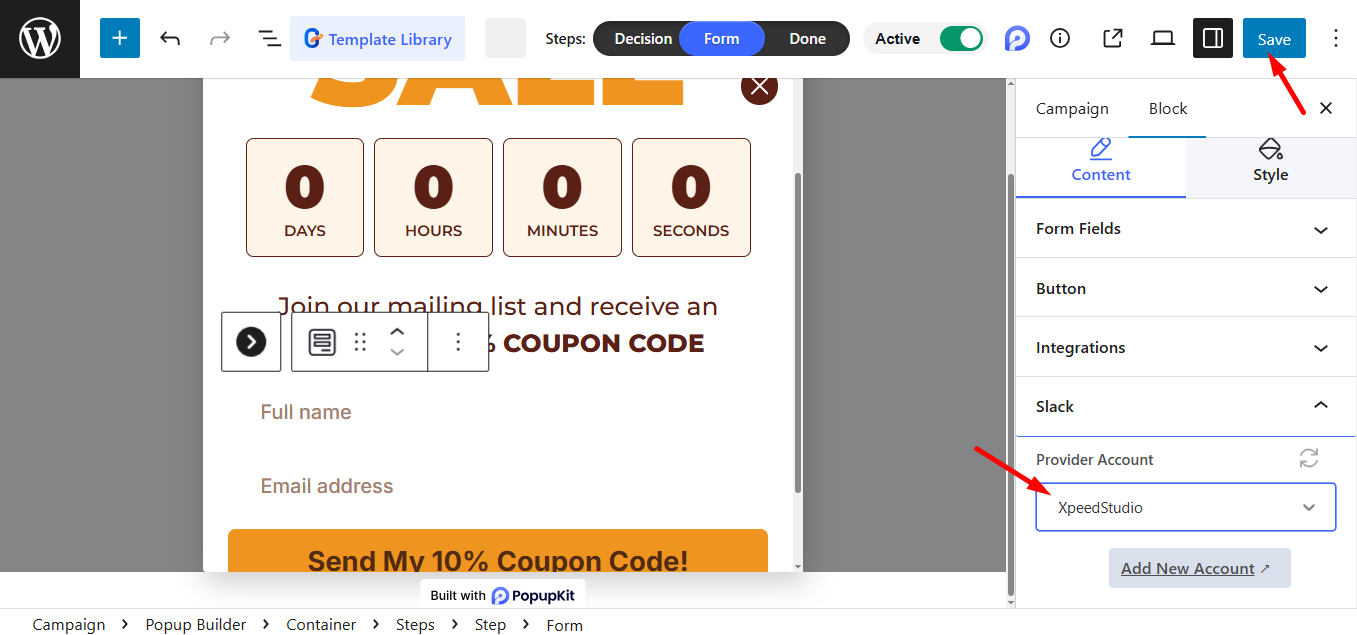
Just choose the Provider Account and click Save to finish the setup.
さて、あなたはしなければなりません get data on Slack. So, view the form, fill it out, and submit.
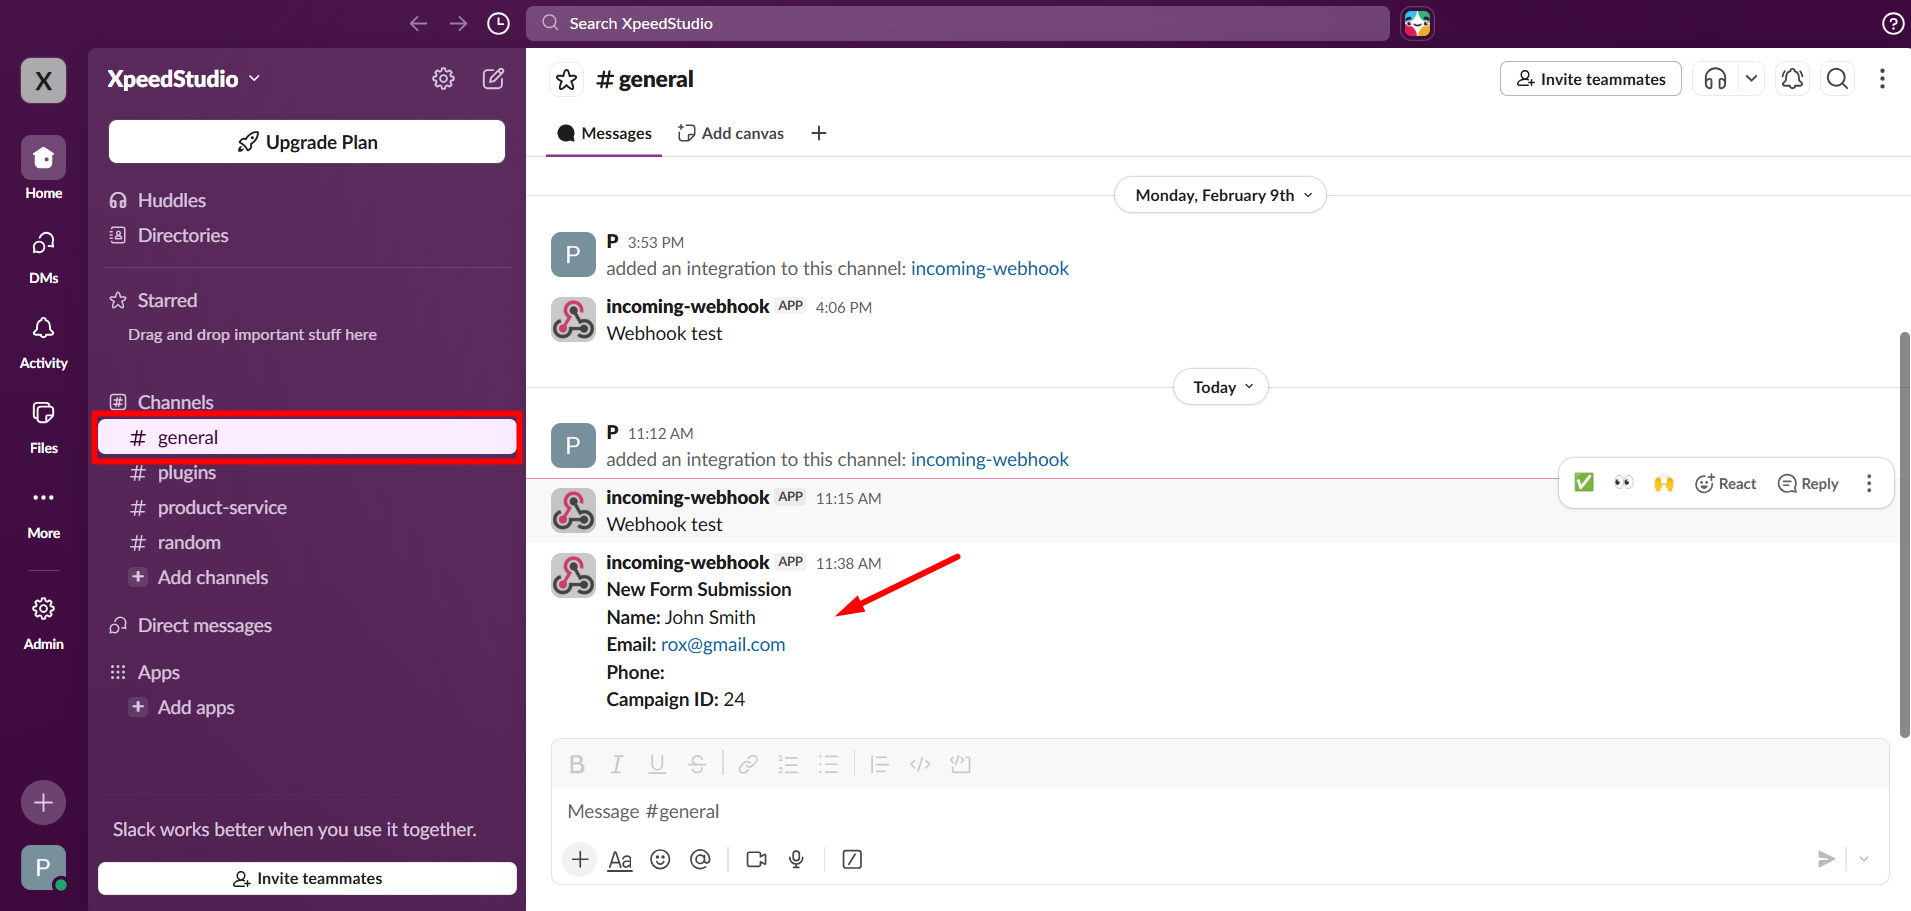
STEP 4: Test the Slack Integration #
- クリックしてください 選択したチャンネル (General)
- フォームに送信されたすべてのデータがここに表示されることがわかります
With your Slack integration now active, your team will receive instant alerts for every new lead, ensuring no conversion goes unnoticed.


