


This guide will show you how to integrate メールポエット と ポップアップキット. Since MailPoet is a WordPress-native email marketing plugin, this integration allows you to capture leads through your popups and instantly add them to your local MailPoet subscriber lists without leaving your dashboard.
前提条件:
Accessing MailerLite integration requires a PopupKit Pro subscription.
How to Integrate PoupKit with MailPoet #
Follow the steps below to connect MailPoet with PopupKit.
Step 1: Ensure MailPoet Plugin Installed and Active #
To connect PopupKit with MailPoet, the MailPoet plugin must be installed on your WordPress site:
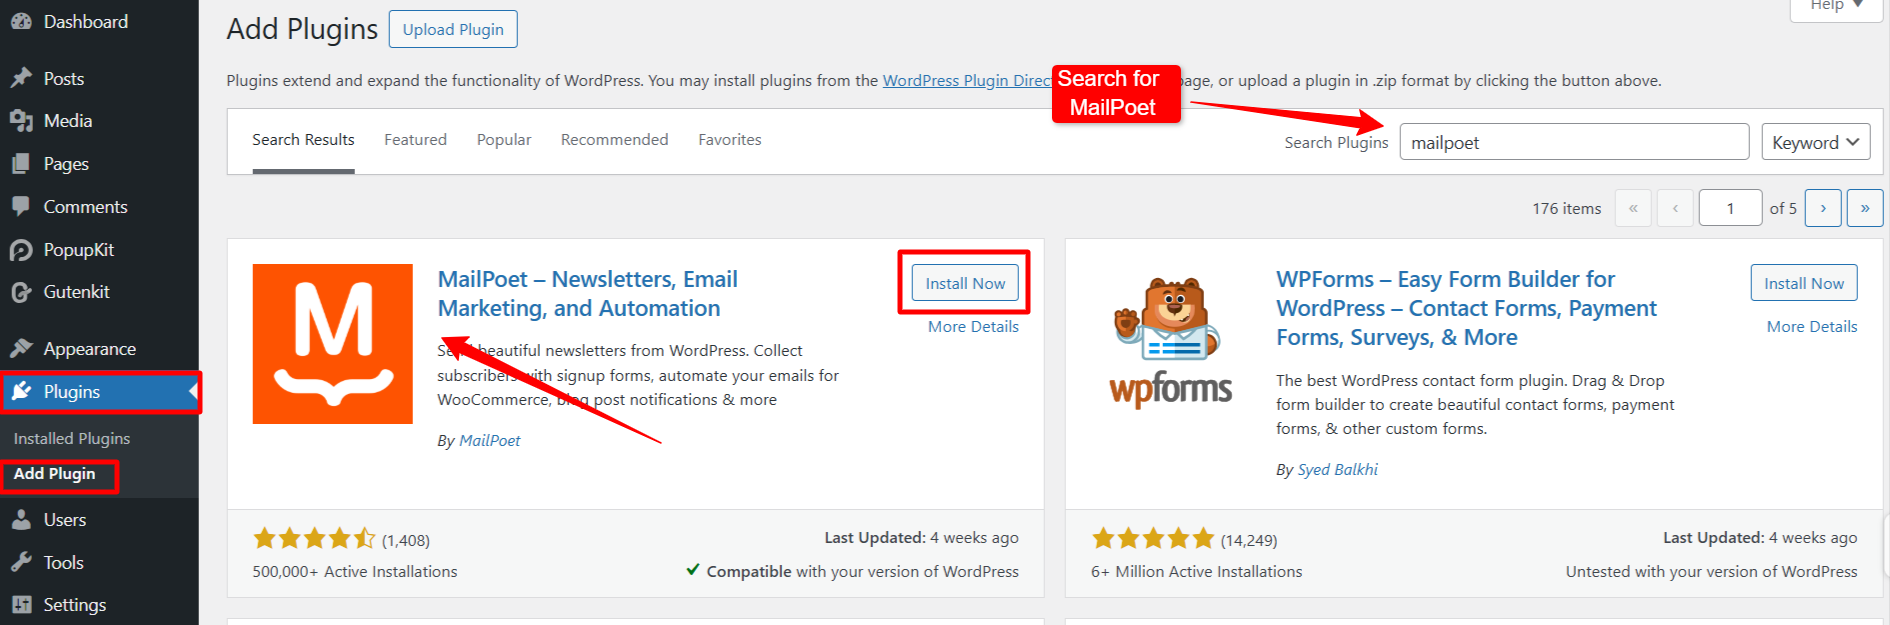
- 案内する Plugins > Add New WordPress ダッシュボードで。
- 検索する メールポエット.
- クリック 今すぐインストール その後 活性化.
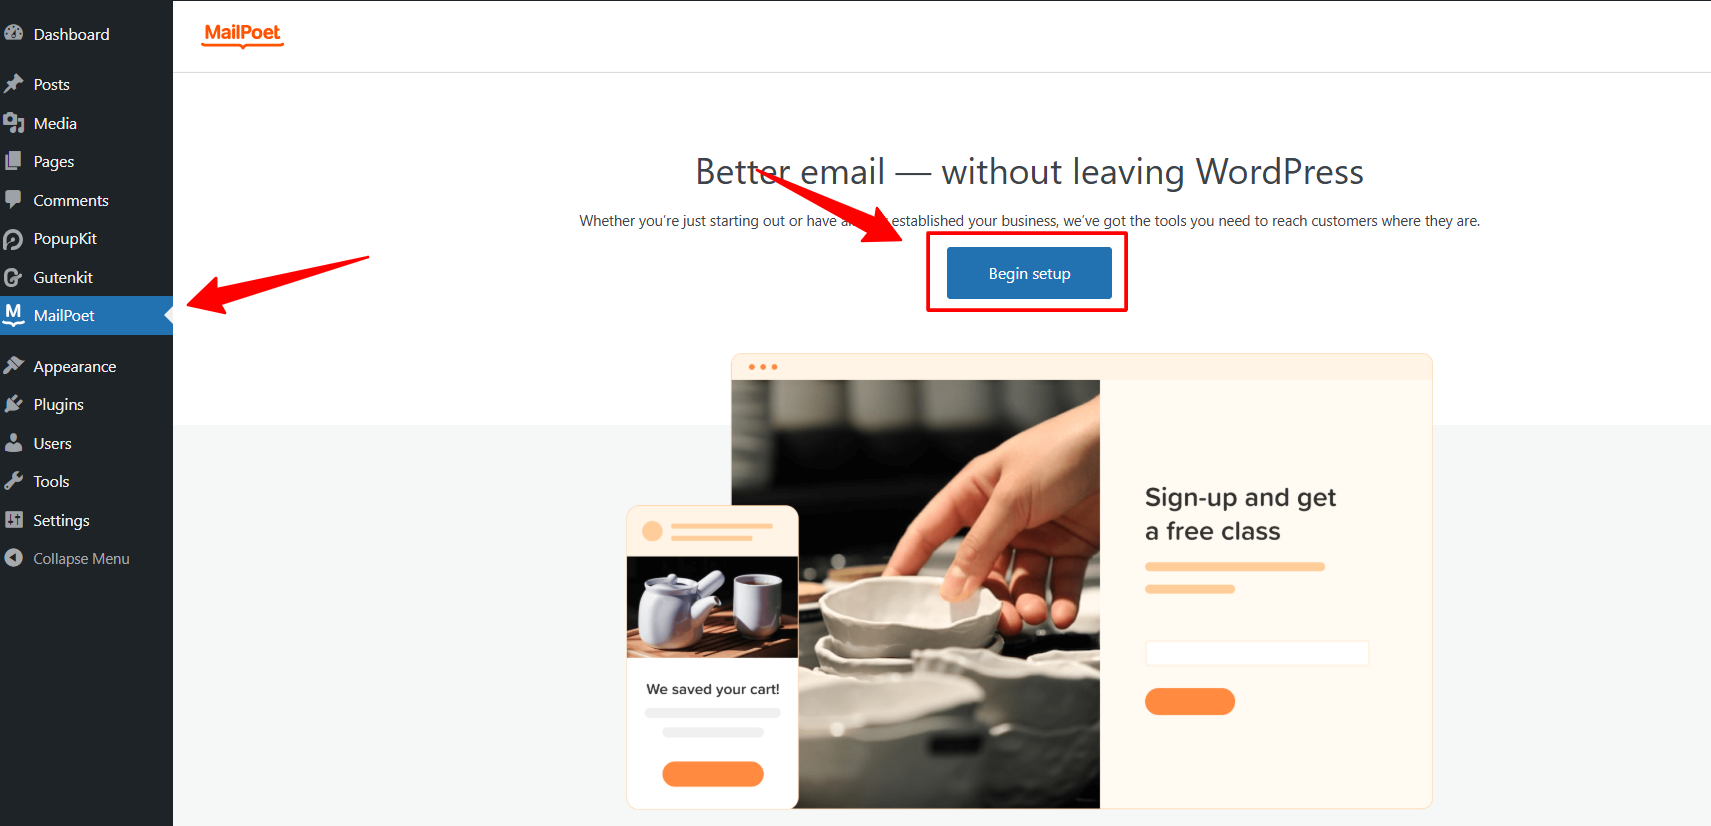
Step 2: Set up & configure MailPoet for API Key #
Once MailPoet is activated in your WordPress site, click on it from the dashboard. And, you’ll see a screen like below: click Begin Setup.
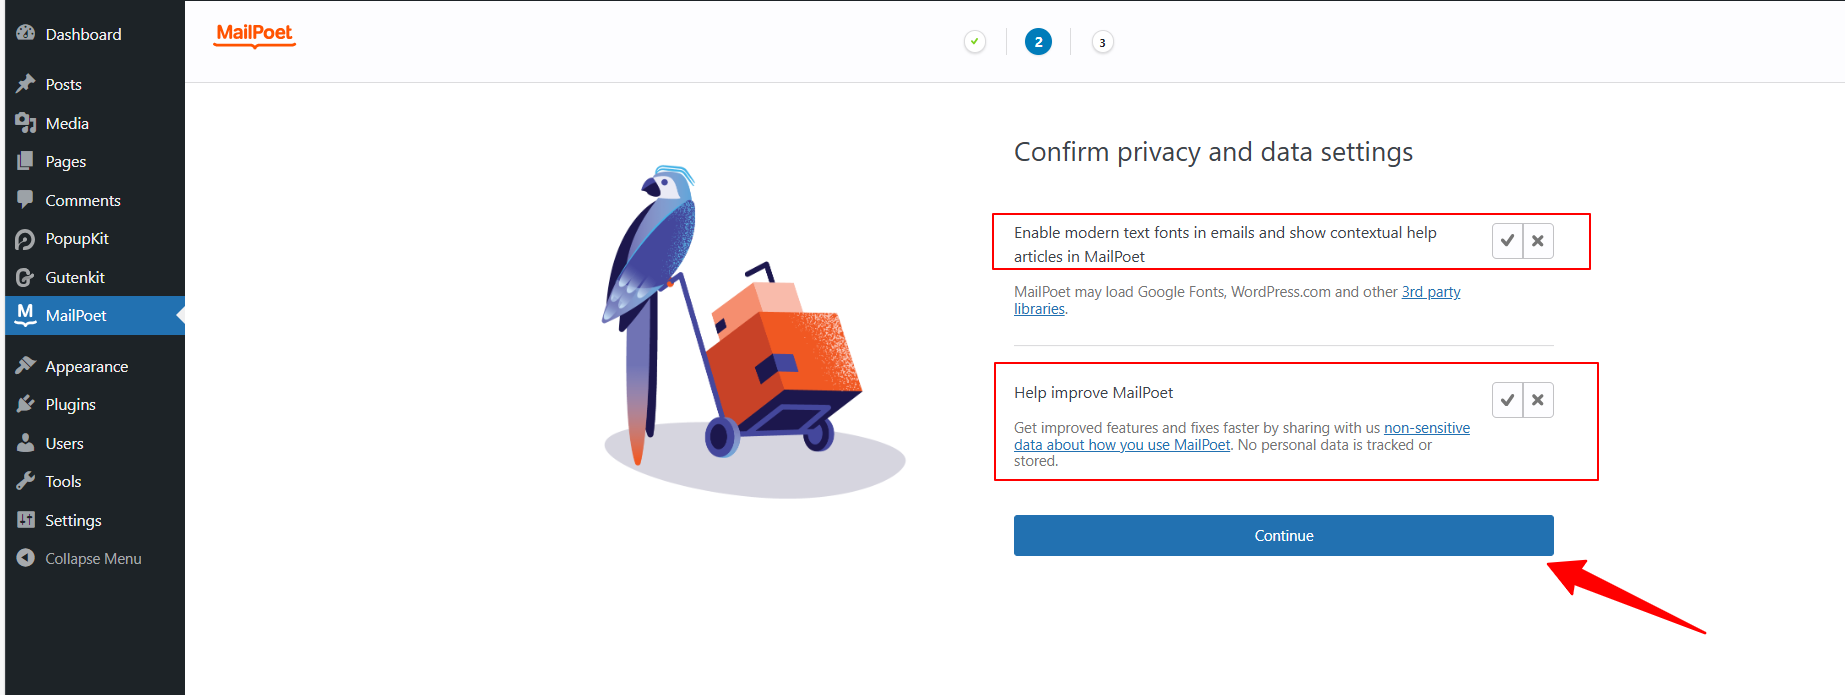
Then, you’ll be moved to the Privacy and Data Settings page, check the policies, and hit the “続く" ボタン。
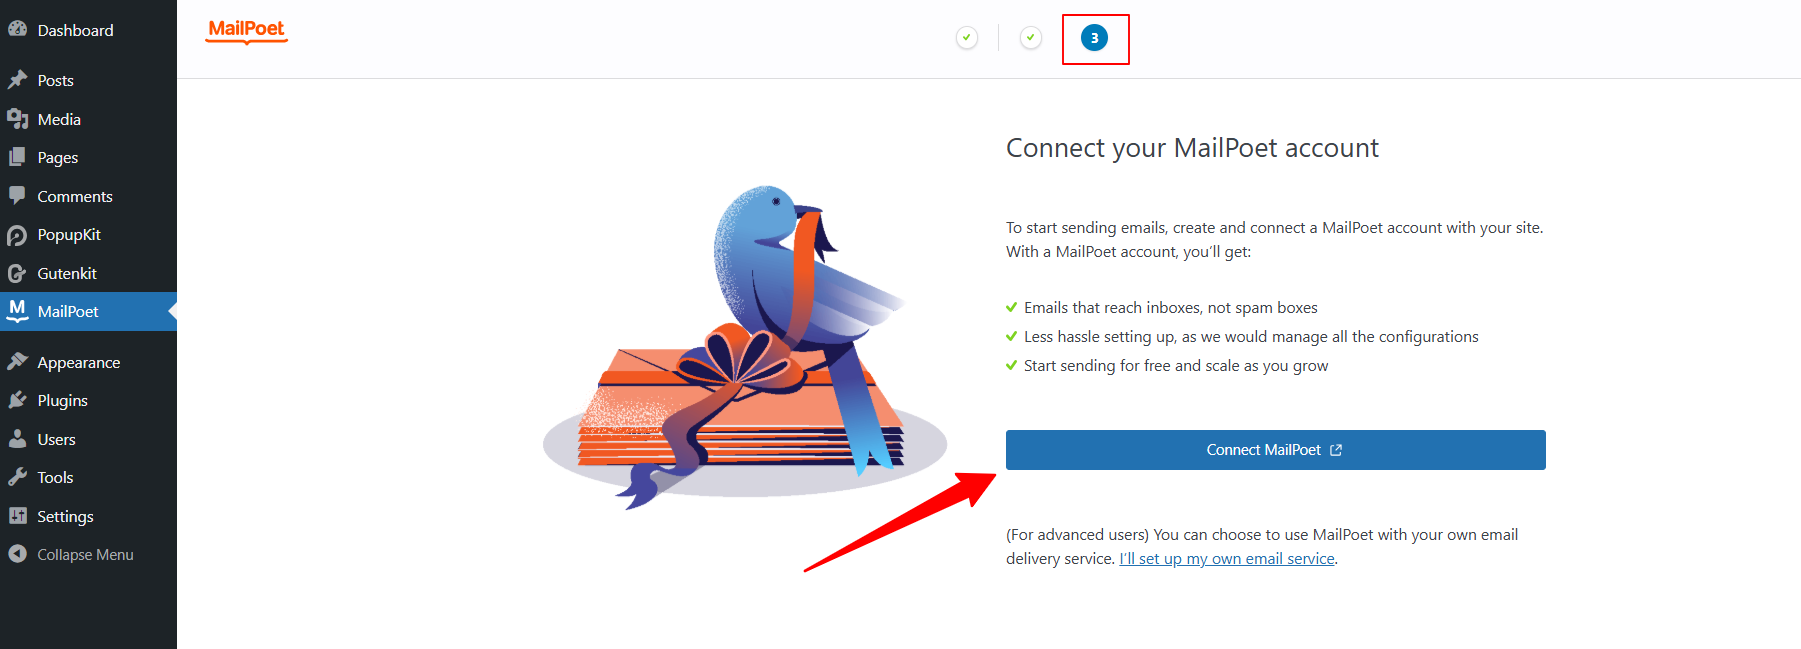
In the third stage, you’ll be asked to connect your MailPoet account. Click on the “Connect MailPoet,” and you’ll be moved to the account setup page. Log in with your credentials or sign up for a new account.
After setting up your MailPoet account, you will receive your API Key, as shown in the image below. Copy it and get back to your WordPress dashboard.
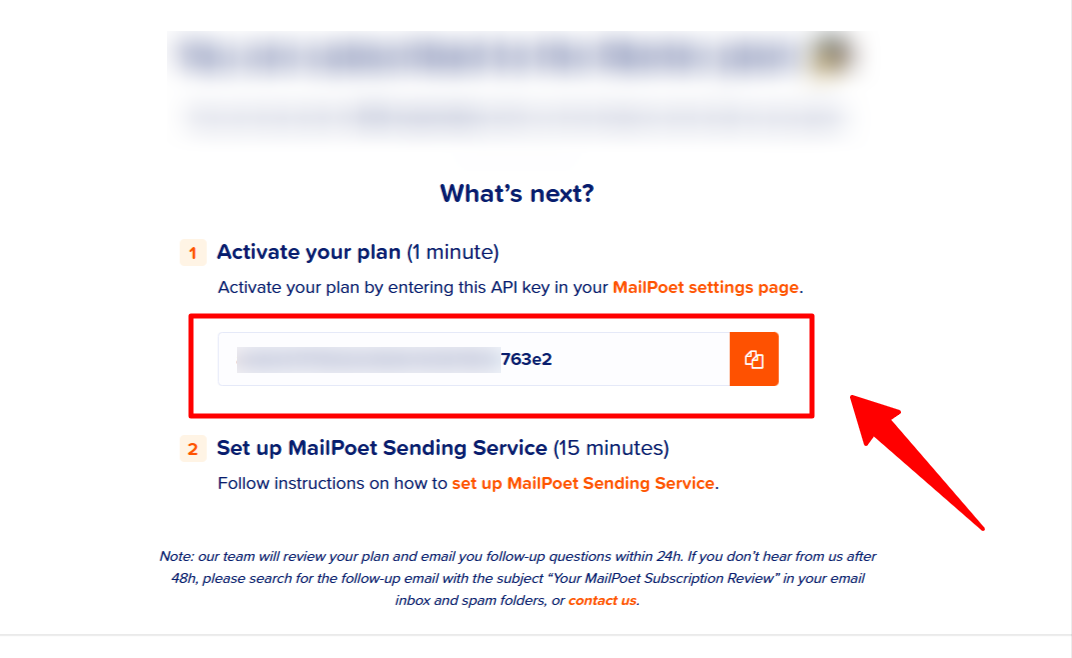
At this point, you need to insert the API Key in the MailPoet plugin settings. Paste your copied API and hit the “Verify Account" ボタン。
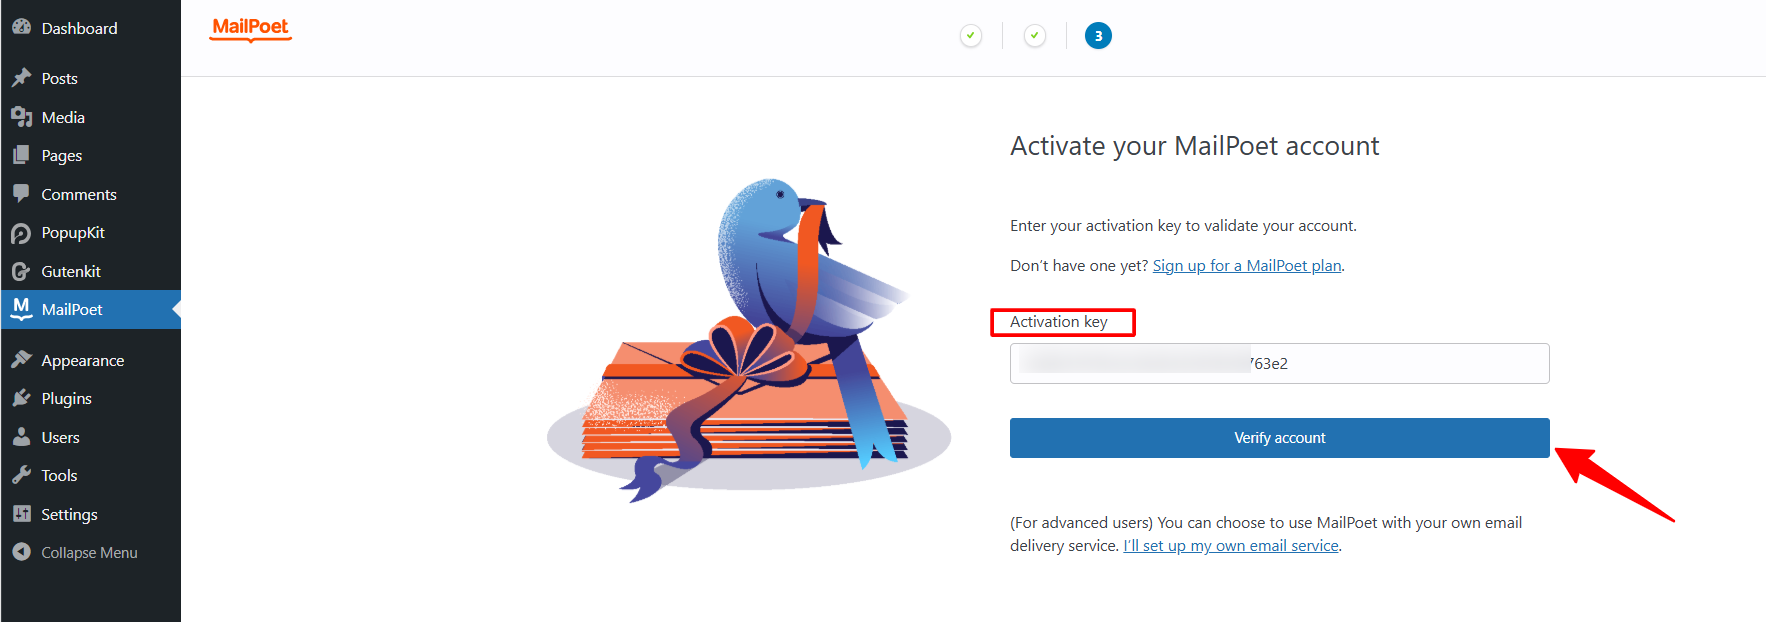
Once successfully verified, you’ll find your MailPoet account ready to run.
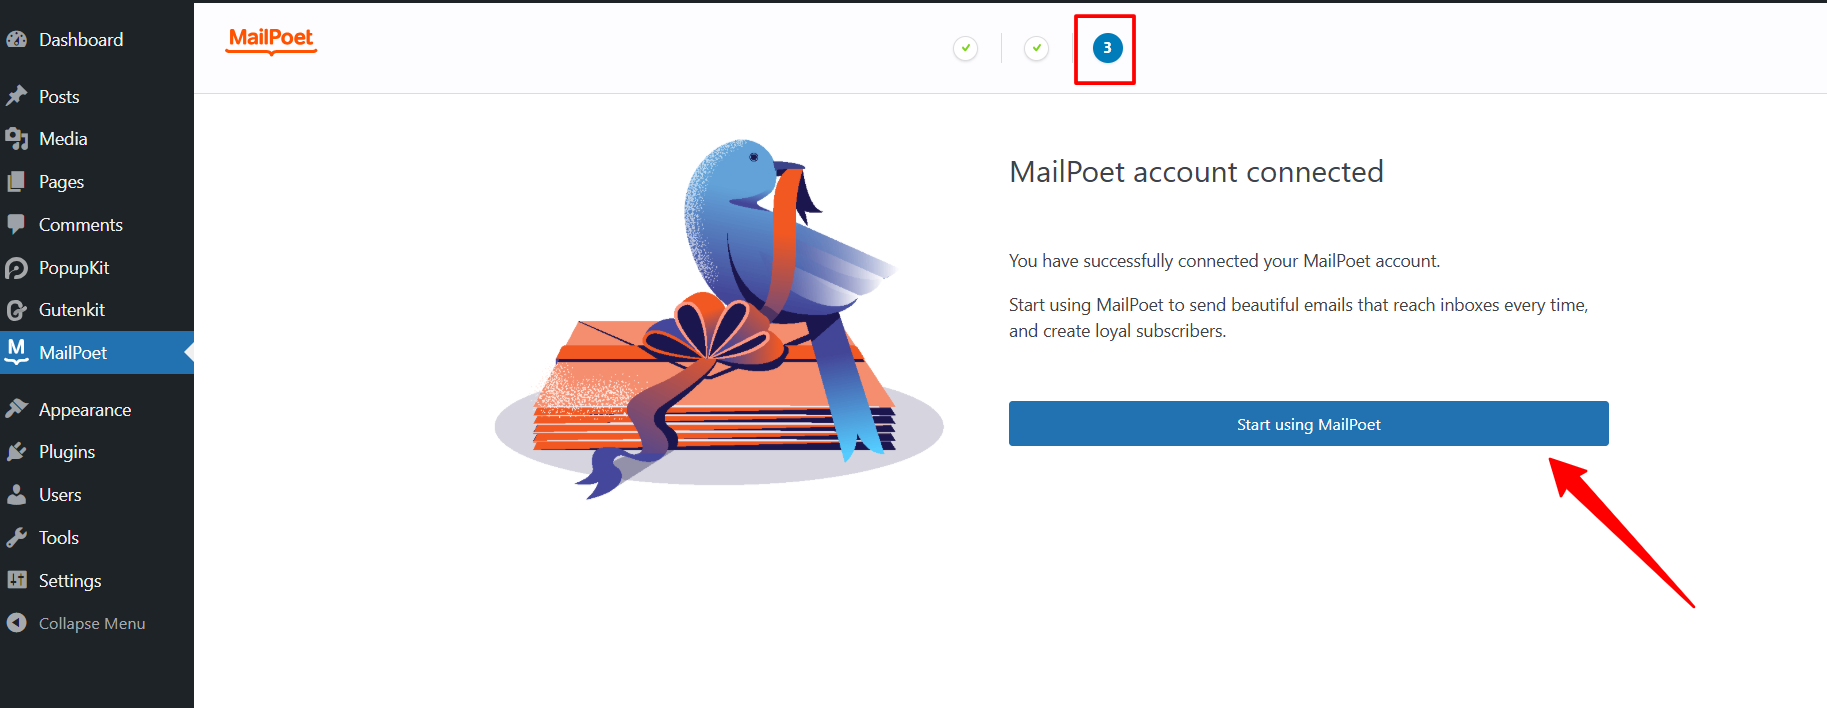
Let’s see how to connect MailPoet in the next step.
Step 3: Enable MailPoet in PopupKit Settings #
Once MailPoet is active, you need to enable it within the PopupKit global settings:
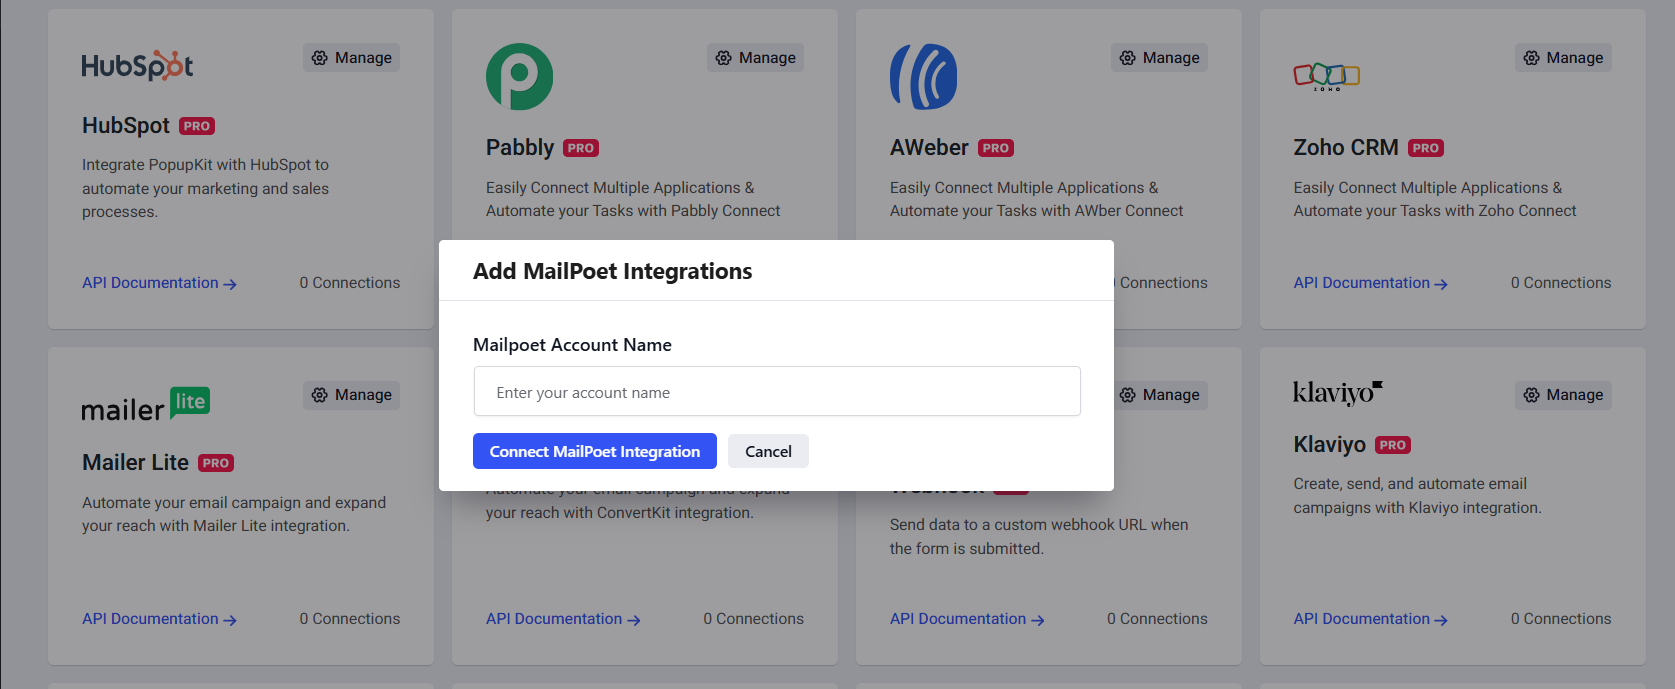
に行く PopupKit Settings in the WordPress dashboard and click on the 統合 tab. Find メールポエット in the list of available integrations. And, click on the “Manage” オプション。

Then, enter your MailPoet Account Name and hit the “Connect MailPoet Integration" ボタン。
Once successfully connected, you’re ready to link your specific popup form to a MailPoet list. Let’s see how in the next step.
Step 4: Configure MailPoet in the PopupKit Editor #
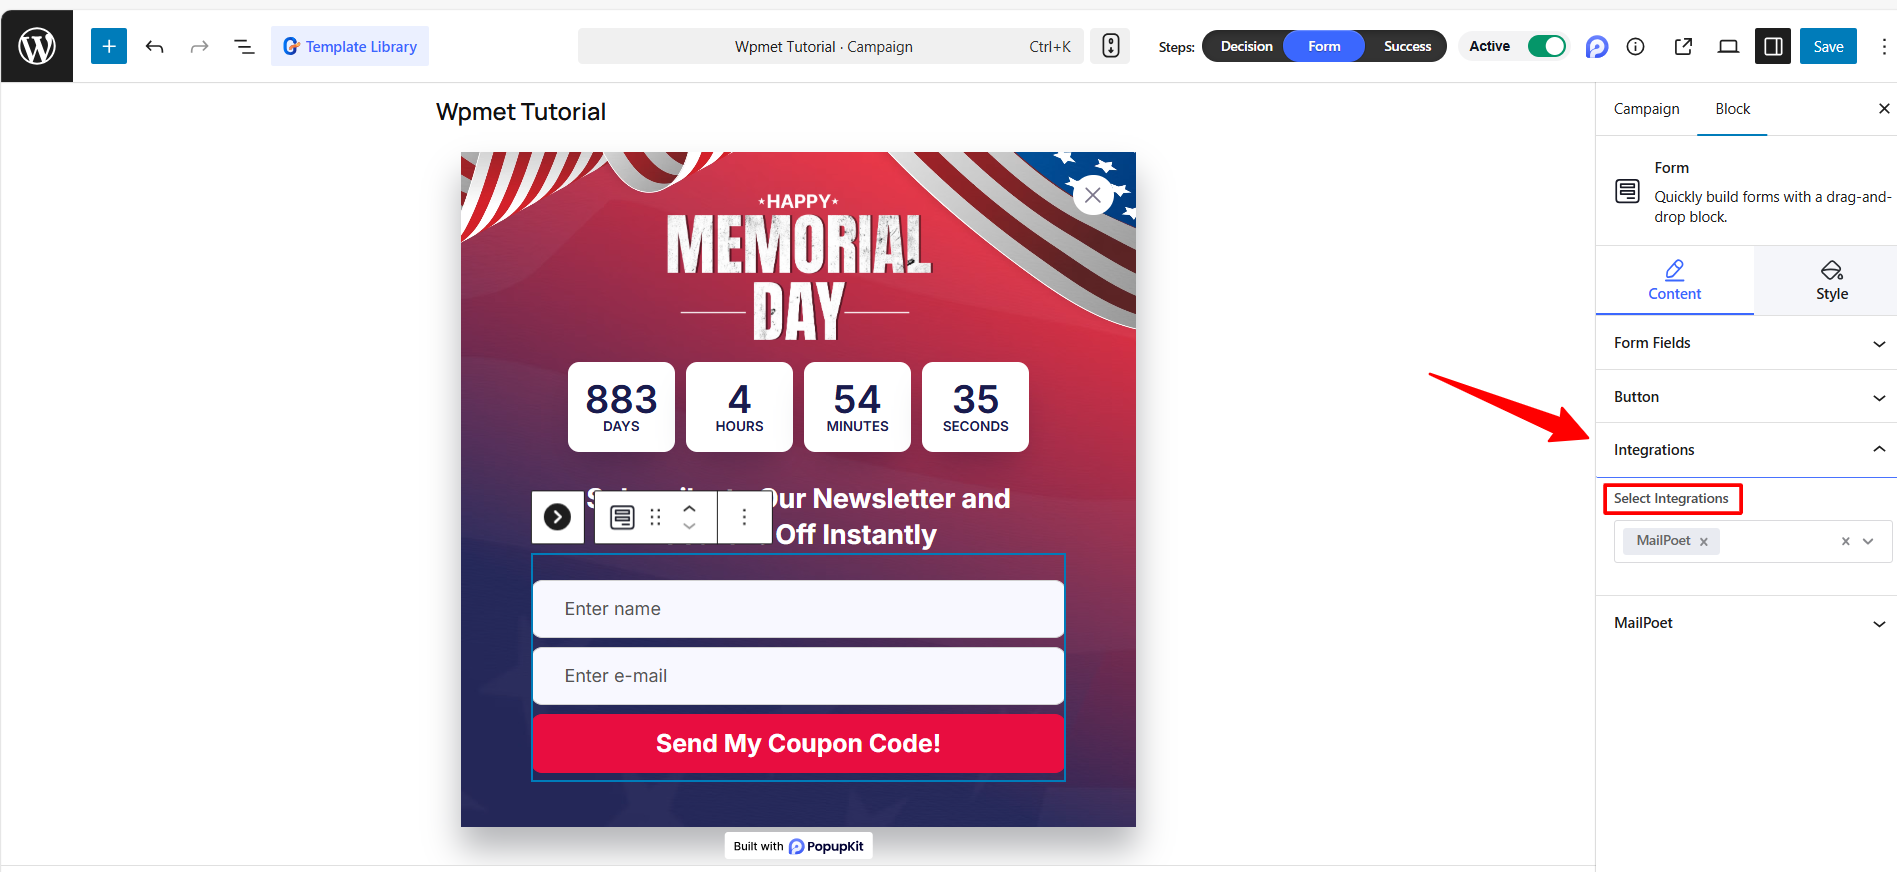
Create a new popup campaign or insert to an existing one with PoupKit. Once you land in the editor canvas, design a popup including a form block. Then, click on the 形状 block and navigate to the 統合 section in the left-hand settings panel.
Next, select メールポエット from the “Select Integrations" 落ちる。
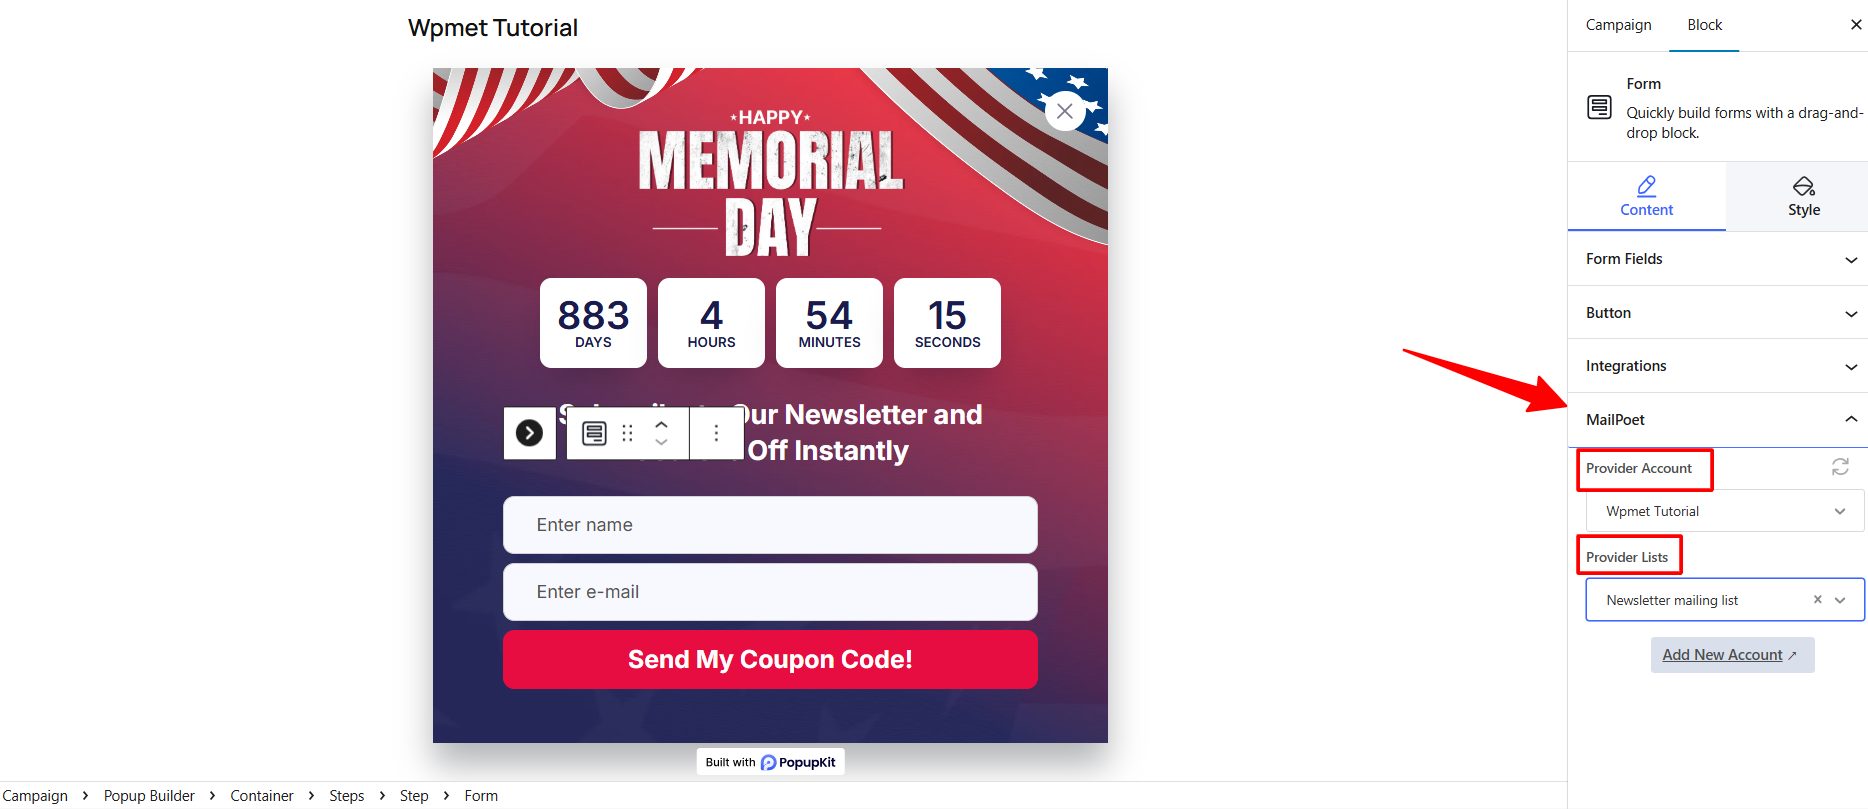
Then, add your provider account and provider list in the MailPoet settings.
When all done, publish your Popup campaign and check your MailChimp dashboard for leads.
Your PopupKit form is now integrated with MailPoet! All new leads will be automatically added to your selected MailPoet list, allowing you to trigger automated welcome emails or newsletters immediately.


